Mmm, can you smell that? The sweet aroma of cookies without ever turning on your oven! Whether you’re craving something chocolatey, nutty, or fruity, these irresistible no-bake treats are here to satisfy your sweet tooth in minutes. Perfect for busy weeknights or last-minute cravings, get ready to discover 21 delicious recipes that’ll become your new go-to favorites. Let’s dive in!
Chocolate Peanut Butter No-Bake Cookies
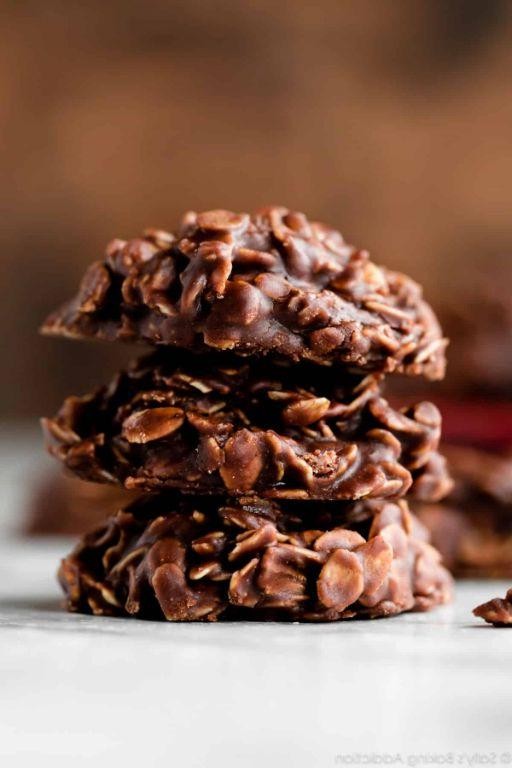
Very few desserts can claim the magical combination of being ridiculously easy to make while tasting like you slaved over a hot stove for hours—but these chocolate peanut butter no-bake cookies are that glorious exception. They’re the ultimate kitchen hack for when your sweet tooth stages a coup and you need instant gratification without turning on the oven. Consider this your permission slip to indulge in fudgy, chewy bliss with minimal effort and maximum deliciousness.
24
cookies10
minutes8
minutesIngredients
- For the base mixture:
- 1/2 cup (1 stick) unsalted butter
- 2 cups granulated sugar
- 1/2 cup whole milk
- 1/4 cup unsweetened cocoa powder
- For the binding and flavor:
- 1/2 cup creamy peanut butter
- 1 teaspoon pure vanilla extract
- 3 cups old-fashioned rolled oats
Instructions
- Line two large baking sheets with parchment paper or silicone baking mats to prevent sticking.
- Combine 1/2 cup butter, 2 cups sugar, 1/2 cup milk, and 1/4 cup cocoa powder in a medium saucepan over medium heat.
- Stir constantly with a wooden spoon until the butter melts completely and the mixture is smooth.
- Bring the mixture to a rolling boil, where bubbles cover the entire surface and don’t settle when stirred.
- Set a timer and boil exactly for 1 minute—this precise timing ensures the sugar dissolves properly for the right texture.
- Remove the saucepan from heat immediately after 1 minute to prevent overcooking.
- Quickly stir in 1/2 cup peanut butter and 1 teaspoon vanilla extract until fully incorporated and glossy.
- Add 3 cups oats all at once and mix vigorously until every oat is coated in the chocolate mixture.
- Drop tablespoon-sized mounds of the mixture onto the prepared baking sheets, spacing them about 1 inch apart.
- Let the cookies sit at room temperature for 30–45 minutes until firm to the touch and no longer sticky.
Unbelievably fudgy with a satisfying chew, these cookies deliver a powerhouse duo of rich chocolate and salty-sweet peanut butter in every bite. For a next-level treat, sandwich a scoop of vanilla ice cream between two cookies, or crumble them over Greek yogurt for a decadent breakfast hack. They’re so dangerously easy, you might just find yourself whipping up another batch before the first one even finishes setting.
Coconut Almond Joy No-Bake Bites
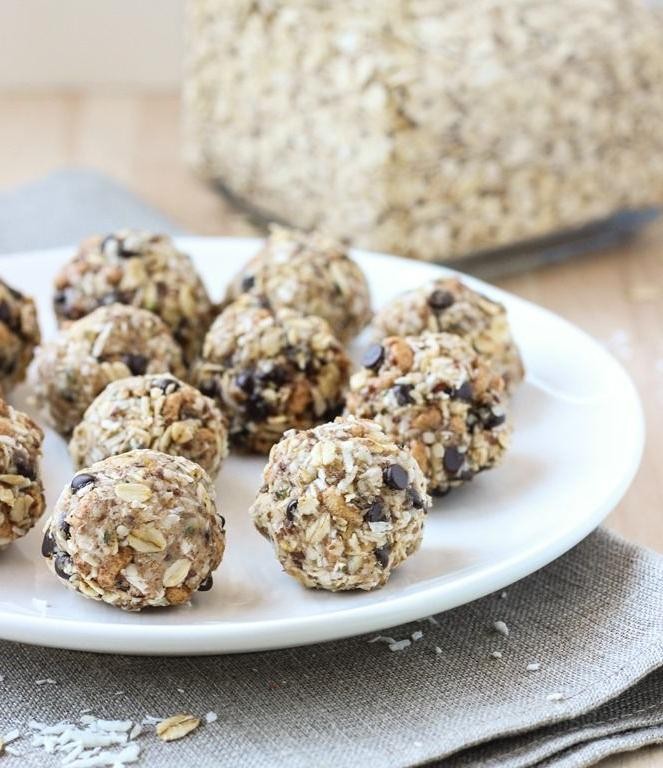
Unbelievably easy and dangerously delicious, these Coconut Almond Joy No-Bake Bites are the snack that will make you question why you ever bothered turning on your oven. With just a few pantry staples and zero baking required, you’re about to become the hero of your own kitchen without breaking a sweat—or turning on a single appliance!
24
bites20
minutesIngredients
For the base mixture:
– 2 cups shredded unsweetened coconut
– 1 cup almond flour
– 1/3 cup pure maple syrup
– 1/4 cup coconut oil, melted
– 1 tsp pure vanilla extract
– 1/4 tsp fine sea salt
For the coating and finishing:
– 1/2 cup dark chocolate chips
– 1 tsp coconut oil
– 1/4 cup whole almonds
Instructions
1. Combine 2 cups shredded unsweetened coconut, 1 cup almond flour, 1/3 cup pure maple syrup, 1/4 cup melted coconut oil, 1 tsp pure vanilla extract, and 1/4 tsp fine sea salt in a medium mixing bowl.
2. Mix thoroughly with a spatula until the ingredients form a cohesive, slightly sticky dough that holds together when pressed.
3. Scoop 1 tablespoon of the mixture and roll between your palms to form 1-inch balls, placing them on a parchment-lined baking sheet. Tip: If the mixture feels too dry, add another teaspoon of maple syrup; if too wet, add 1 tablespoon of almond flour.
4. Press one whole almond firmly into the top of each ball until it’s partially embedded but still visible.
5. Freeze the balls on the baking sheet for 15 minutes to firm up, which prevents crumbling during coating.
6. Melt 1/2 cup dark chocolate chips with 1 tsp coconut oil in a microwave-safe bowl in 30-second intervals, stirring between each, until completely smooth and glossy.
7. Dip the bottom third of each chilled ball into the melted chocolate, allowing excess to drip off. Tip: Use a fork to lift the bites out of the chocolate for minimal mess and even coating.
8. Return the chocolate-dipped bites to the parchment-lined sheet and drizzle remaining chocolate over the tops with a spoon for a decorative finish.
9. Refrigerate the bites for 20 minutes, or until the chocolate is fully set and firm to the touch. Tip: Store in an airtight container in the fridge for up to 1 week—if they last that long!
Bite into these and you’ll experience a chewy coconut center that gives way to crunchy almond goodness, all wrapped in a rich dark chocolate shell. Serve them straight from the fridge for a cool treat, or roll them in extra coconut flakes for added texture that’ll make your taste buds do a happy dance.
Oatmeal Maple Syrup No-Bake Delights
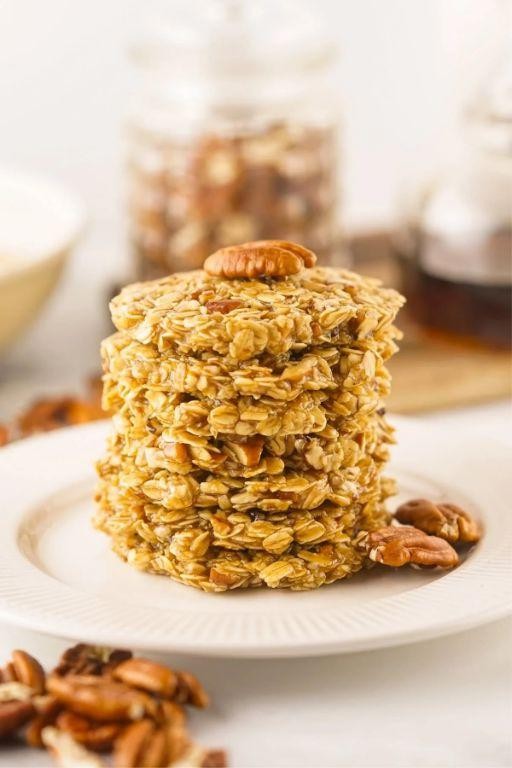
Naturally, we’ve all faced those moments when a sweet craving strikes but turning on the oven feels like a Herculean task—fear not, because these oatmeal maple syrup no-bake delights are here to save the day with minimal effort and maximum deliciousness! They’re the lazy foodie’s dream come true, packed with cozy flavors that’ll make you wonder why you ever bothered with baking in the first place. Trust me, your future self will thank you for whipping up these little gems in a flash.
18
portions15
minutesIngredients
For the base mixture:
- 2 cups old-fashioned rolled oats
- 1/2 cup creamy peanut butter
- 1/3 cup pure maple syrup
- 1/4 cup unsweetened shredded coconut
- 1 tsp vanilla extract
- 1/4 tsp salt
For shaping and coating:
- 1/4 cup mini chocolate chips
- 1 tbsp melted coconut oil
Instructions
- Add 2 cups old-fashioned rolled oats, 1/2 cup creamy peanut butter, 1/3 cup pure maple syrup, 1/4 cup unsweetened shredded coconut, 1 tsp vanilla extract, and 1/4 tsp salt to a large mixing bowl.
- Stir the mixture vigorously with a spatula for about 2–3 minutes until all ingredients are fully combined and no dry spots remain. Tip: If the mixture feels too dry, add an extra tablespoon of maple syrup to help it bind together easily.
- Fold in 1/4 cup mini chocolate chips until they are evenly distributed throughout the mixture.
- Line a baking sheet with parchment paper to prevent sticking.
- Scoop out about 1 tablespoon of the mixture and roll it between your palms to form a firm, round ball. Tip: Lightly dampen your hands with water to keep the mixture from sticking while shaping.
- Place each ball onto the prepared baking sheet, spacing them about 1 inch apart.
- Repeat steps 5–6 until all the mixture is used, making approximately 18–20 balls.
- Drizzle 1 tbsp melted coconut oil evenly over the tops of the balls for a subtle glossy finish. Tip: For extra crunch, sprinkle a pinch of additional shredded coconut over the oil before chilling.
- Transfer the baking sheet to the refrigerator and chill the balls for at least 30 minutes, or until firm to the touch.
These delights boast a chewy, hearty texture from the oats and a rich sweetness from the maple syrup that’s perfectly balanced by the salty peanut butter. Try serving them stacked in a mini tower for a playful dessert or crumbled over yogurt for a breakfast twist—they’re so versatile, you’ll want to keep a batch tucked away for any snack emergency!
Lemon Coconut No-Bake Wonders
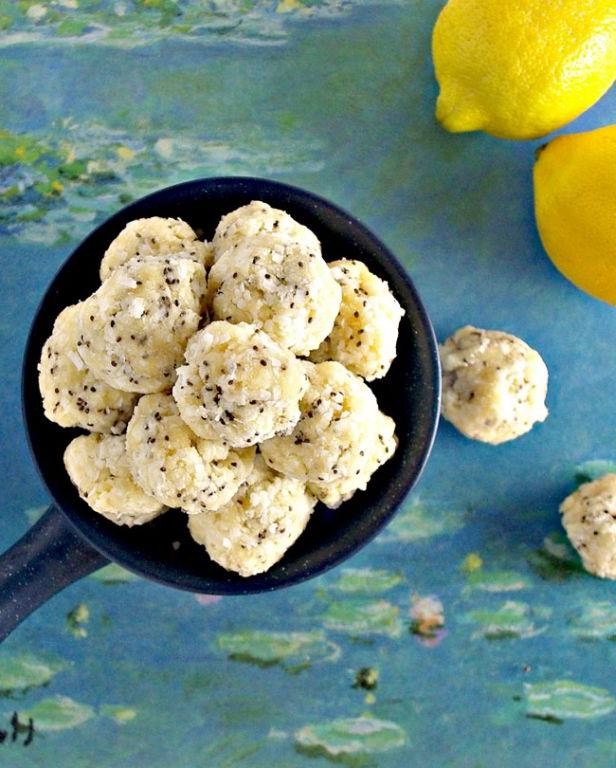
Lemon Coconut No-Bake Wonders are here to rescue you from oven drama and satisfy your sweet tooth without breaking a sweat—because who has time for baking when there’s sunshine to soak up? These zesty, tropical bites are the ultimate cheat code for dessert lovers, blending tangy lemon with creamy coconut in a fuss-free treat that’s ready faster than you can say “more please!” Get ready to whip up magic without even preheating the oven—your taste buds will thank you.
16
portions25
minutesIngredients
For the crust:
– 1 ½ cups graham cracker crumbs
– ½ cup unsalted butter, melted
– 2 tbsp granulated sugar
For the filling:
– 1 (8 oz) package cream cheese, softened to room temperature
– 1 cup powdered sugar
– 1 (13.5 oz) can full-fat coconut milk, chilled overnight
– ¼ cup fresh lemon juice
– 1 tbsp lemon zest
– 1 tsp vanilla extract
For garnish:
– ½ cup shredded coconut, toasted
– Fresh lemon slices (optional)
Instructions
1. Combine 1 ½ cups graham cracker crumbs, ½ cup melted unsalted butter, and 2 tbsp granulated sugar in a medium bowl until the mixture resembles wet sand.
2. Press the crust mixture firmly into the bottom of an 8×8 inch baking pan using the back of a spoon or measuring cup to create an even layer.
3. Chill the crust in the refrigerator for 15 minutes to set while you prepare the filling.
4. In a large mixing bowl, beat 1 (8 oz) package of softened cream cheese with an electric mixer on medium speed for 1–2 minutes until smooth and lump-free.
5. Gradually add 1 cup powdered sugar to the cream cheese, mixing on low speed until fully incorporated and creamy.
6. Scoop the solid coconut cream from the top of 1 (13.5 oz) can of chilled full-fat coconut milk into the bowl, reserving the liquid for another use.
7. Whip the coconut cream with the cream cheese mixture on high speed for 2–3 minutes until light and fluffy.
8. Fold in ¼ cup fresh lemon juice, 1 tbsp lemon zest, and 1 tsp vanilla extract using a spatula until evenly combined.
9. Spread the filling evenly over the chilled crust with a spatula, smoothing the top.
10. Sprinkle ½ cup toasted shredded coconut over the filling for a crunchy garnish.
11. Refrigerate the dessert for at least 4 hours, or until firm to the touch.
12. Slice into 16 squares using a sharp knife wiped clean between cuts for neat edges.
Yes, these no-bake wonders deliver a dreamy contrast of creamy filling and crunchy crust that’ll have you swooning with every bite. Serve them chilled on a platter with extra lemon slices for a pop of color, or crumble them over yogurt for a breakfast treat—because dessert for breakfast is always a win!
Pumpkin Spice No-Bake Balls
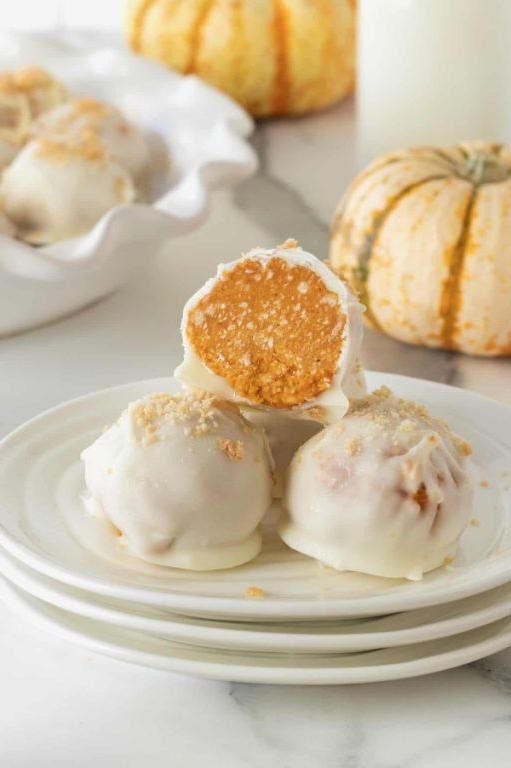
Sick of pumpkin spice taking over your life every fall? These no-bake balls are here to rescue you from basic latte territory and deliver all that cozy flavor straight to your snack drawer—no oven required, just pure autumnal magic in bite-sized form.
12
balls25
minutesIngredients
For the Base Mixture
- 1 cup rolled oats
- 1/2 cup pumpkin puree
- 1/4 cup maple syrup
- 1/4 cup almond butter
- 1 tsp pumpkin pie spice
- 1/2 tsp vanilla extract
- Pinch of salt
For Coating
- 1/4 cup shredded coconut
- 2 tbsp chopped pecans
Instructions
- Combine 1 cup rolled oats, 1/2 cup pumpkin puree, 1/4 cup maple syrup, 1/4 cup almond butter, 1 tsp pumpkin pie spice, 1/2 tsp vanilla extract, and a pinch of salt in a medium bowl.
- Mix vigorously with a spatula for 2 minutes until the ingredients form a thick, uniform dough. Tip: If the mixture feels too wet, add 1 more tablespoon of oats to help it hold shape.
- Refrigerate the dough for 20 minutes to firm it up for easier handling.
- Scoop 1 tablespoon of dough and roll it between your palms to form a smooth, 1-inch ball. Tip: Lightly wet your hands to prevent sticking without altering the flavor.
- Repeat until all dough is used, placing balls on a parchment-lined tray.
- Spread 1/4 cup shredded coconut and 2 tbsp chopped pecans on separate small plates.
- Roll half the balls in shredded coconut until fully coated.
- Roll the remaining balls in chopped pecans until evenly covered. Tip: Gently press coatings to adhere—this ensures they won’t fall off after chilling.
- Arrange all balls in a single layer on the tray and chill for 1 hour in the refrigerator to set.
Zesty with spice and delightfully chewy, these balls pack a pumpkin punch that’s balanced by the nutty crunch of pecans or the tropical hint of coconut. Serve them stacked high on a platter for a party or stashed in a jar for secret snacking—either way, they’re fall’s answer to guilt-free indulgence.
Nutella Hazelnut No-Bake Treats
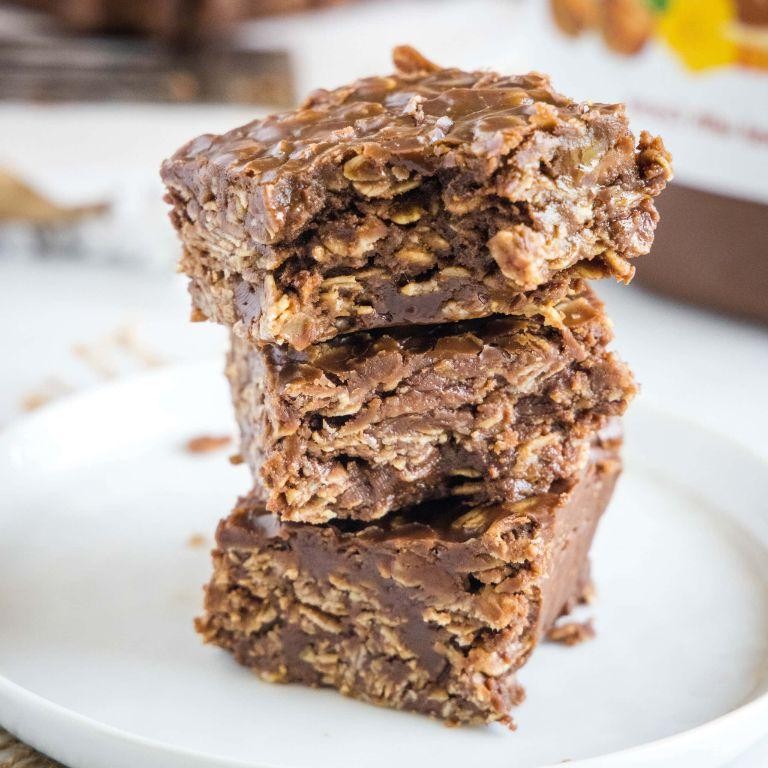
Knead a moment of your precious time for these dangerously addictive Nutella Hazelnut No-Bake Treats that require zero oven time and maximum self-control. Seriously, these little squares of chocolate-hazelnut heaven come together faster than you can decide what to binge-watch next, making them the ultimate lazy-day dessert hero. Just try not to eat all the Nutella straight from the jar before you start—we believe in you!
16
squares30
minutesIngredients
For the crust:
– 2 cups graham cracker crumbs
– 1/2 cup unsalted butter, melted
– 1/4 cup granulated sugar
For the filling:
– 1 cup Nutella
– 8 oz cream cheese, softened to room temperature
– 1 cup powdered sugar
– 1 tsp vanilla extract
For topping:
– 1/2 cup chopped hazelnuts, toasted
Instructions
1. Line an 8×8-inch baking pan with parchment paper, leaving overhang on two sides for easy removal.
2. Combine 2 cups graham cracker crumbs, 1/2 cup melted unsalted butter, and 1/4 cup granulated sugar in a medium bowl until the mixture resembles wet sand.
3. Press the crust mixture firmly into the prepared pan using the bottom of a measuring cup to create an even layer.
4. Chill the crust in the refrigerator for 15 minutes while you prepare the filling.
5. Beat 8 oz softened cream cheese in a large bowl with an electric mixer on medium speed until smooth and creamy, about 2 minutes.
6. Add 1 cup powdered sugar to the cream cheese and beat until fully incorporated and no lumps remain.
7. Mix in 1 cup Nutella and 1 tsp vanilla extract until the filling is uniform in color and texture.
8. Spread the Nutella filling evenly over the chilled crust using an offset spatula.
9. Sprinkle 1/2 cup toasted chopped hazelnuts evenly over the top, gently pressing them into the filling.
10. Refrigerate the treats for at least 4 hours, or until completely firm and sliceable.
11. Use the parchment paper overhang to lift the entire slab out of the pan before cutting into squares.
Miraculously, these treats achieve a perfect contrast between the crunchy graham cracker base and the velvety Nutella filling that melts on your tongue. The toasted hazelnuts add a satisfying crunch that plays beautifully against the creamy texture, making these irresistible straight from the fridge. For extra decadence, try serving them slightly chilled with a drizzle of melted dark chocolate or crumbled over vanilla ice cream for an instant dessert upgrade.
Salted Caramel No-Bake Rounds
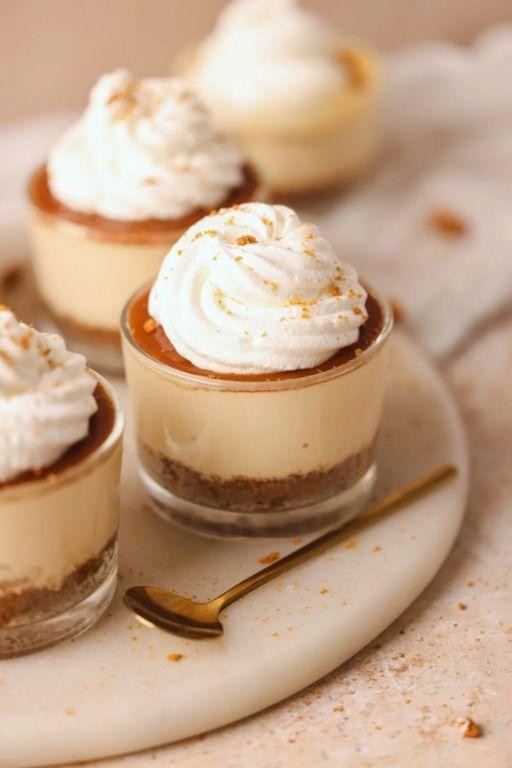
Ready to skip the oven and dive straight into dessert bliss? These salted caramel no-bake rounds are your new best friend for when cravings strike but patience has left the building—think buttery, crunchy, and caramel-kissed magic that comes together faster than you can say “second helping.” Seriously, who needs heat when you’ve got this much cool confidence in a bite-sized treat?
64
rounds25
minutes2
minutesIngredients
For the crust:
– 1 ½ cups graham cracker crumbs
– ½ cup unsalted butter, melted
– 2 tablespoons granulated sugar
For the caramel layer:
– 1 cup store-bought soft caramels, unwrapped
– 2 tablespoons heavy cream
– ½ teaspoon flaky sea salt
For the topping:
– ½ cup semi-sweet chocolate chips
– 1 teaspoon coconut oil
Instructions
1. In a medium bowl, combine the graham cracker crumbs, melted butter, and granulated sugar until the mixture resembles wet sand.
2. Press the crust mixture firmly into the bottom of a parchment-lined 8×8-inch baking pan, using the back of a measuring cup to create an even layer.
3. Chill the crust in the refrigerator for 15 minutes to help it set—this prevents crumbling later!
4. In a microwave-safe bowl, combine the soft caramels and heavy cream.
5. Microwave the caramel mixture on high for 60 seconds, stopping to stir halfway through until completely smooth.
6. Pour the warm caramel evenly over the chilled crust, spreading it with a spatula.
7. Immediately sprinkle the flaky sea salt over the caramel layer for that sweet-salty punch.
8. In another microwave-safe bowl, melt the semi-sweet chocolate chips and coconut oil together in 30-second intervals, stirring between each, until glossy.
9. Drizzle the melted chocolate over the caramel layer in a zigzag pattern using a spoon.
10. Refrigerate the pan for at least 2 hours, or until the layers are firm to the touch.
11. Lift the slab from the pan using the parchment paper and slice into 1-inch rounds with a sharp knife wiped clean between cuts for neat edges.
Unbelievably, these rounds deliver a crunch from the crust, a gooey caramel center, and a chocolate finish that’s pure harmony. Serve them stacked like tiny edible towers or crumbled over vanilla ice cream for a next-level sundae—because why should your dessert play by the rules?
Banana Walnut No-Bake Squares
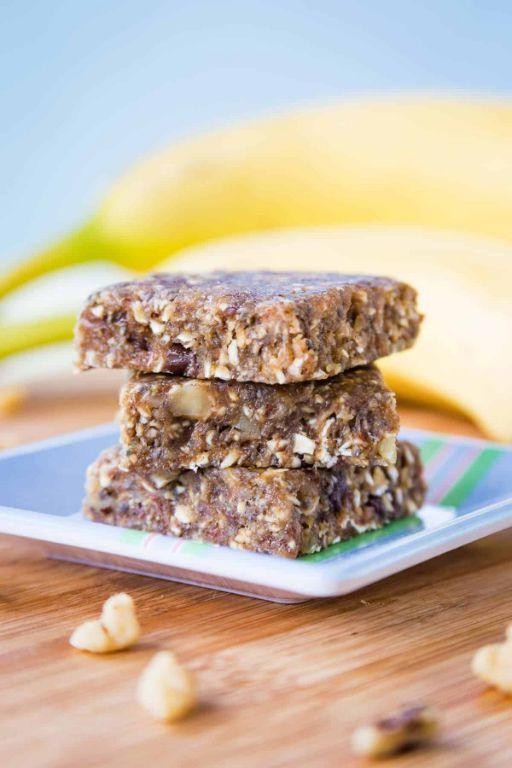
Just when you thought bananas couldn’t get any more exciting outside of banana bread, these no-bake squares crash the party with zero oven drama! Juggling ripe bananas, crunchy walnuts, and a medley of pantry staples, this recipe delivers chewy, nutty bliss in under 30 minutes—perfect for when your sweet tooth stages a coup but your energy levels are on strike.
16
squares15
minutesIngredients
For the Base
- 2 cups old-fashioned rolled oats
- 1 cup walnuts, chopped
- 3 ripe medium bananas, mashed (about 1.5 cups)
- 1/4 cup honey
- 1/4 cup creamy peanut butter
- 1 tsp vanilla extract
- 1/2 tsp ground cinnamon
For the Topping
- 1/4 cup mini chocolate chips
- 2 tbsp walnuts, finely chopped
Instructions
- Line an 8×8-inch baking pan with parchment paper, letting the edges hang over for easy removal later.
- Combine 2 cups old-fashioned rolled oats and 1 cup chopped walnuts in a large mixing bowl.
- In a separate bowl, mash 3 ripe bananas until smooth with only a few small lumps.
- Stir 1/4 cup honey, 1/4 cup creamy peanut butter, 1 tsp vanilla extract, and 1/2 tsp ground cinnamon into the mashed bananas until fully blended.
- Pour the wet banana mixture over the oat-walnut blend and mix thoroughly until every oat is coated.
- Press the mixture firmly and evenly into the prepared pan using the back of a spatula or your hands.
- Sprinkle 1/4 cup mini chocolate chips and 2 tbsp finely chopped walnuts evenly over the top, pressing them gently into the surface.
- Refrigerate the pan for at least 2 hours, or until the squares are firm enough to slice cleanly.
- Lift the slab out using the parchment overhang and cut into 16 squares with a sharp knife.
Now, these squares boast a chewy, almost fudgy texture with pops of walnut crunch and melty chocolate surprises. Naturally sweet from the bananas and honey, they’re ideal for packing in lunchboxes or crumbling over vanilla ice cream for a lazy dessert upgrade.
Cherry Cheesecake No-Bake Bites

C’mon, let’s be real—who has time for oven drama when you can whip up these magical Cherry Cheesecake No-Bake Bites faster than you can say “cheesecake emergency”? These little flavor bombs are here to save your sweet tooth without turning your kitchen into a sauna.
16
portions25
minutesIngredients
For the crust:
– 1 ½ cups graham cracker crumbs
– 6 tbsp unsalted butter, melted
– 2 tbsp granulated sugar
For the filling:
– 16 oz cream cheese, softened to room temperature
– ½ cup powdered sugar
– 1 tsp vanilla extract
– 1 cup heavy whipping cream
For the topping:
– 1 cup cherry pie filling
Instructions
1. Combine 1 ½ cups graham cracker crumbs, 6 tbsp melted butter, and 2 tbsp granulated sugar in a medium bowl.
2. Press the crust mixture firmly into the bottom of a 9×9 inch baking pan using the bottom of a measuring cup.
3. Chill the crust in the refrigerator for 15 minutes while you prepare the filling.
4. Beat 16 oz softened cream cheese with an electric mixer on medium speed for 2 minutes until smooth and creamy.
5. Add ½ cup powdered sugar and 1 tsp vanilla extract to the cream cheese, beating for 1 minute until fully incorporated.
6. In a separate bowl, whip 1 cup heavy whipping cream on high speed for 3-4 minutes until stiff peaks form.
7. Gently fold the whipped cream into the cream cheese mixture using a spatula until no white streaks remain.
8. Spread the filling evenly over the chilled crust using an offset spatula.
9. Spoon 1 cup cherry pie filling over the cream cheese layer, distributing it evenly across the surface.
10. Cover the pan with plastic wrap and refrigerate for at least 4 hours, or until completely set.
11. Cut into 16 equal squares using a sharp knife wiped clean between cuts for neat edges.
Heavenly doesn’t even begin to describe these creamy dreamy bites! The velvety smooth filling practically melts on your tongue while the buttery crust provides the perfect crunch. Try serving them in mini cupcake liners for a party-perfect presentation, or layer them in small jars with extra cherry sauce for an Instagram-worthy dessert parfait.
S’mores No-Bake Cookie Clusters
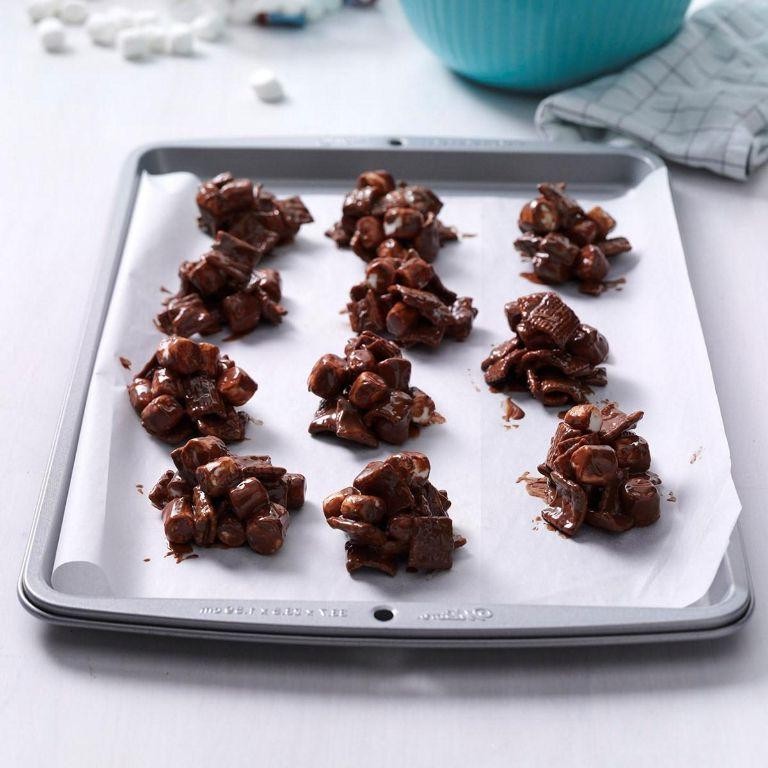
Oh, the struggle of craving s’mores when you’re nowhere near a campfire and your oven is giving you the silent treatment. These no-bake cookie clusters are your deliciously lazy solution—all the gooey, chocolatey, marshmallow-y goodness without any actual cooking required. Get ready to satisfy your sweet tooth in about 15 minutes flat, because patience is overrated.
12
clusters10
minutes1
minutesIngredients
For the chocolate mixture:
– 1 cup semi-sweet chocolate chips
– 1/2 cup creamy peanut butter
For the mix-ins:
– 1 1/2 cups graham cracker pieces (about 8 full sheets, broken)
– 1 cup mini marshmallows
Instructions
1. Line a large baking sheet with parchment paper to prevent sticking later.
2. Combine 1 cup semi-sweet chocolate chips and 1/2 cup creamy peanut butter in a medium microwave-safe bowl.
3. Microwave the mixture on high for 1 minute, then stir vigorously until smooth (if needed, heat in 15-second bursts, stirring between each—overheating makes chocolate seize).
4. Immediately fold in 1 1/2 cups graham cracker pieces and 1 cup mini marshmallows until evenly coated.
5. Drop heaping tablespoonfuls of the mixture onto the prepared baking sheet, spacing them about 1 inch apart.
6. Refrigerate the clusters for at least 30 minutes, or until firm to the touch (don’t skip this—it’s what gives them that satisfying snap).
7. Store any leftovers in an airtight container in the fridge to maintain texture.
Gloriously crunchy from the graham crackers, melty from the chocolate, and delightfully chewy thanks to those mini marshmallows, these clusters are a textural party. Serve them stacked like tiny edible pyramids at your next game night, or crumble them over vanilla ice cream for a next-level sundae situation—because why should campfires have all the fun?
Mint Chocolate Chip No-Bake Discs
Ridiculously easy and dangerously delicious, these mint chocolate chip no-bake discs are the dessert equivalent of finding money in your pocket—pure joy with zero effort required! Forget turning on your oven and embrace the magic of refrigerator alchemy that transforms simple ingredients into cool, creamy treats that’ll make you the hero of any last-minute gathering.
24
discs20
minutesIngredients
For the base:
– 2 cups finely crushed chocolate wafer cookies
– 1/4 cup granulated sugar
– 6 tbsp melted unsalted butter
For the mint filling:
– 8 oz cream cheese, softened to room temperature
– 1/2 cup powdered sugar
– 1 tsp peppermint extract
– 6 drops green food coloring
– 1 cup mini chocolate chips
Instructions
1. Line a baking sheet with parchment paper and set aside.
2. Combine 2 cups finely crushed chocolate wafer cookies, 1/4 cup granulated sugar, and 6 tbsp melted unsalted butter in a medium bowl.
3. Mix thoroughly until the mixture resembles wet sand and holds together when pressed.
4. Press approximately 1 tablespoon of the cookie mixture into flat discs about 2 inches wide on the prepared baking sheet.
5. Use the bottom of a measuring cup to create a slight indentation in the center of each disc.
6. In a separate bowl, beat 8 oz softened cream cheese with an electric mixer on medium speed for 1 minute until smooth.
7. Add 1/2 cup powdered sugar and beat for 30 seconds until fully incorporated.
8. Mix in 1 tsp peppermint extract and 6 drops green food coloring until the filling is uniformly light green.
9. Gently fold in 1 cup mini chocolate chips with a spatula until evenly distributed.
10. Spoon about 1 tablespoon of the mint filling into the indentation of each cookie base.
11. Use the back of a spoon to smooth the filling into an even layer.
12. Refrigerate the discs for at least 2 hours or until completely firm.
Let these cool minty wonders transport you to dessert paradise with their crisp chocolate base giving way to creamy peppermint filling studded with melty chocolate chips. Serve them straight from the fridge for maximum satisfaction, or get fancy by drizzling with melted dark chocolate and crushed candy canes for holiday flair that’ll have everyone begging for your “secret” recipe!
Peanut Butter & Banana No-Bake Bars
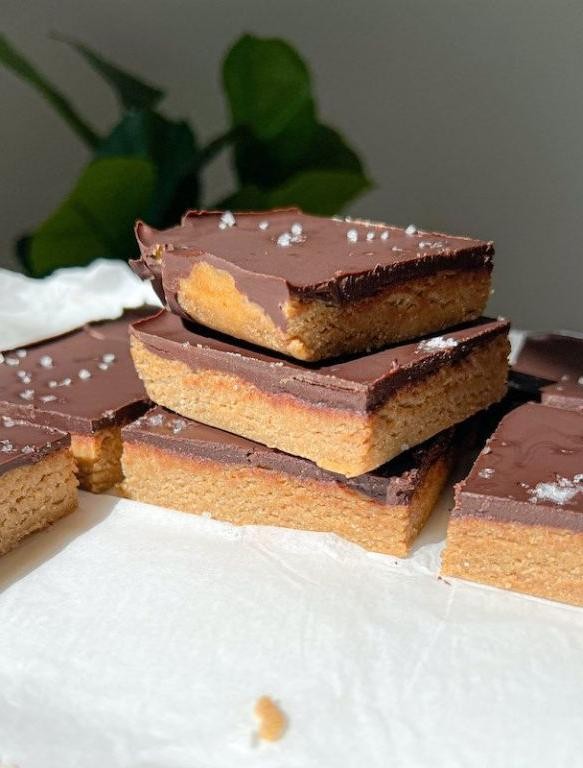
Just when you thought peanut butter and banana couldn’t get any more perfect together, these no-bake bars crash the party like uninvited but thoroughly welcome guests. Seriously, who needs an oven when you’ve got this dynamic duo ready to work their magic in your fridge?
12
bars15
minutesIngredients
For the Base Layer
- 2 cups old-fashioned rolled oats
- 1 cup creamy peanut butter
- 1/2 cup honey
- 1/4 cup melted coconut oil
- 1 teaspoon vanilla extract
- 1/4 teaspoon salt
For the Banana Topping
- 2 medium ripe bananas, mashed
- 1/4 cup chopped peanuts
- 1 tablespoon chia seeds
Instructions
- Line an 8×8-inch baking pan with parchment paper, leaving some overhang on two opposite sides for easy removal later.
- Combine 2 cups old-fashioned rolled oats, 1 cup creamy peanut butter, 1/2 cup honey, 1/4 cup melted coconut oil, 1 teaspoon vanilla extract, and 1/4 teaspoon salt in a large mixing bowl.
- Stir the mixture vigorously for about 2 minutes until all ingredients are fully incorporated and the texture becomes thick and cohesive.
- Press the oat mixture firmly and evenly into the prepared pan using the bottom of a measuring cup or your hands—this prevents crumbling when cutting later.
- In a separate small bowl, mash 2 medium ripe bananas with a fork until smooth with only small lumps remaining.
- Spread the mashed bananas evenly over the oat base layer using a spatula.
- Sprinkle 1/4 cup chopped peanuts and 1 tablespoon chia seeds evenly across the banana layer for added crunch and nutrition.
- Refrigerate the pan for at least 4 hours, or until the bars are firm enough to slice cleanly—overnight chilling yields the best results.
- Use the parchment paper overhang to lift the entire block from the pan onto a cutting board.
- Cut into 12 equal bars using a sharp knife wiped clean between cuts for neat edges.
Expect these bars to deliver a chewy, substantial bite with creamy peanut butter richness that gets beautifully interrupted by the soft banana layer. The chopped peanuts add satisfying crunch while the chia seeds bring subtle texture. Enjoy them straight from the fridge as an energizing breakfast bar or crumble one over vanilla ice cream for an instant dessert upgrade.
Cranberry Pistachio No-Bake Drops
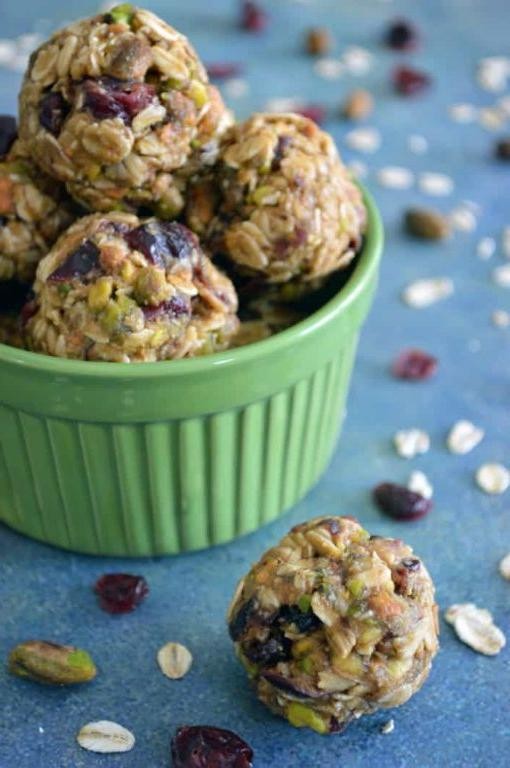
Aren’t you tired of recipes that demand oven preheating and endless baking? These Cranberry Pistachio No-Bake Drops are your sweet escape—they require zero baking, minimal effort, and deliver maximum festive cheer in every chewy, nutty bite.
24
drops15
minutes4
minutesIngredients
For the Base
- 2 cups old-fashioned rolled oats
- 1 cup shelled pistachios, roughly chopped
- 1/2 cup dried cranberries
For the Binding Syrup
- 1/2 cup honey
- 1/4 cup creamy peanut butter
- 1 tsp vanilla extract
- Pinch of salt
Instructions
- Line a baking sheet with parchment paper.
- Combine 2 cups old-fashioned rolled oats, 1 cup chopped pistachios, and 1/2 cup dried cranberries in a large mixing bowl. Tip: Toast the oats in a dry skillet over medium heat for 5 minutes first for a deeper, nuttier flavor.
- In a small saucepan, combine 1/2 cup honey, 1/4 cup peanut butter, 1 tsp vanilla extract, and a pinch of salt.
- Heat the mixture over medium-low heat, stirring constantly with a spatula, until it becomes smooth and bubbly, about 3–4 minutes. Tip: Don’t let it boil vigorously—just a gentle bubble ensures the syrup stays pliable.
- Immediately pour the hot syrup over the dry ingredients in the bowl.
- Stir vigorously with a spatula until every oat and cranberry is fully coated in the sticky syrup.
- Let the mixture cool for 5 minutes until it’s safe to handle but still warm and malleable.
- Scoop 1-tablespoon portions of the mixture and roll them into compact balls between your palms. Tip: Lightly dampen your hands with water to prevent sticking.
- Place each ball on the prepared baking sheet, spacing them about 1 inch apart.
- Refrigerate the drops for at least 30 minutes, or until firm and set.
What you get are delightfully chewy, slightly crunchy morsels with pops of tart cranberry and buttery pistachio. Serve them stacked in a rustic bowl for a holiday gathering, or tuck a few into lunchboxes for a midday energy boost—they’re as versatile as they are irresistible.
Vanilla Brownie Batter No-Bake Balls
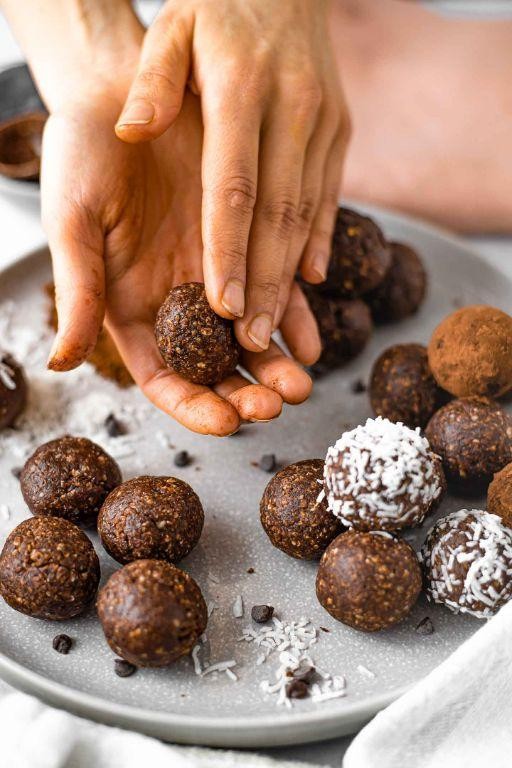
Perfectly portable and dangerously delicious, these vanilla brownie batter no-bake balls are the snack that dreams are made of—no oven required, just pure, unadulterated bliss in every bite. They’re like sneaking a spoonful of brownie batter straight from the bowl, but with zero guilt and maximum flair. Get ready to whip up a batch that’ll disappear faster than you can say “more, please!”
12
balls20
minutesIngredients
- For the base:
- 1 cup almond flour
- 1/2 cup cocoa powder
- 1/4 cup maple syrup
- 2 tbsp melted coconut oil
- 1 tsp vanilla extract
- 1/4 tsp salt
- For coating:
- 1/4 cup powdered sugar
Instructions
- Add 1 cup almond flour, 1/2 cup cocoa powder, and 1/4 tsp salt to a medium mixing bowl.
- Pour in 1/4 cup maple syrup, 2 tbsp melted coconut oil, and 1 tsp vanilla extract.
- Stir vigorously with a spatula until the mixture forms a thick, cohesive dough that holds together when pressed. Tip: If the dough feels too dry, add 1 tsp of water at a time until it reaches the right consistency.
- Scoop 1 tbsp of dough and roll it between your palms to form a smooth, round ball about 1 inch in diameter.
- Repeat with the remaining dough to make 12-14 balls, placing them on a parchment-lined tray as you go.
- Spread 1/4 cup powdered sugar in a shallow bowl.
- Roll each ball in the powdered sugar until lightly coated on all sides. Tip: For a thicker coating, roll the balls twice—once right after shaping and again just before serving.
- Arrange the coated balls in a single layer on the tray.
- Refrigerate the balls for at least 30 minutes, or until firm to the touch. Tip: For best texture, let them chill for 1 hour—they’ll hold their shape better and taste extra fudgy.
- Serve chilled or store in an airtight container in the fridge for up to 1 week.
Decadently fudgy with a melt-in-your-mouth texture, these balls deliver a rich vanilla-kissed brownie flavor that’s impossibly smooth. Roll them in crushed nuts or dip them in melted chocolate for a fancy twist, or just enjoy them straight from the fridge when a sweet craving strikes.
Raspberry White Chocolate No-Bake Bonbons
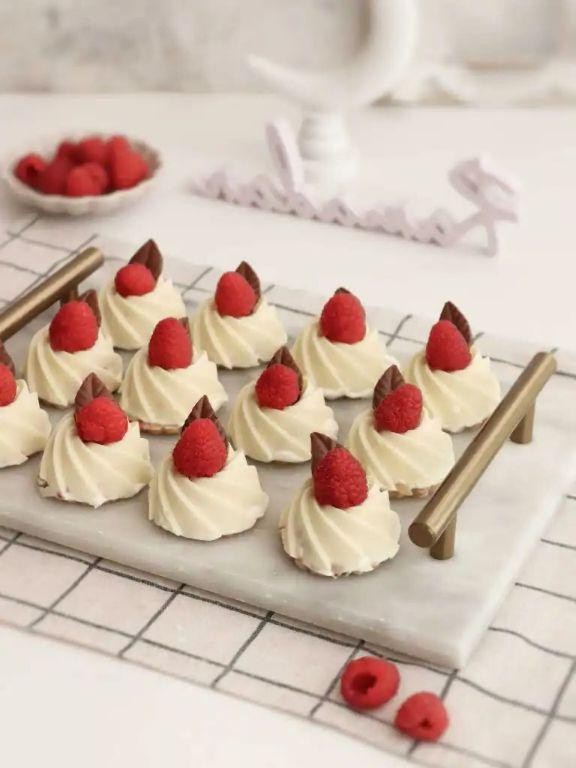
Who says you need an oven to create something magical? These raspberry white chocolate no-bake bonbons are here to prove that the coolest treats come together without breaking a sweat—or turning on your stove. Get ready to impress your friends with these little bites of pure joy that require zero baking skills but deliver maximum deliciousness.
24
bonbons25
minutesIngredients
For the bonbon filling:
- 2 cups graham cracker crumbs
- 1 cup creamy peanut butter
- 1/2 cup unsalted butter, melted
- 1/4 cup powdered sugar
- 1/2 cup freeze-dried raspberries, crushed
For the coating:
- 12 oz white chocolate chips
- 1 tsp coconut oil
Instructions
- Combine 2 cups graham cracker crumbs, 1 cup creamy peanut butter, 1/2 cup melted unsalted butter, and 1/4 cup powdered sugar in a large mixing bowl.
- Stir the mixture until all ingredients are fully incorporated and a thick, cohesive dough forms.
- Fold in 1/2 cup crushed freeze-dried raspberries until evenly distributed throughout the dough. Tip: Crush the raspberries in a sealed bag with a rolling pin for fine, even pieces that won’t create pockets of tartness.
- Scoop 1-tablespoon portions of the dough and roll them into smooth, round balls between your palms.
- Place the shaped balls on a parchment-lined baking sheet, spacing them about 1 inch apart.
- Transfer the baking sheet to the freezer and chill the balls for 30 minutes until firm to the touch.
- Melt 12 oz white chocolate chips and 1 tsp coconut oil in a microwave-safe bowl in 30-second intervals, stirring after each, until completely smooth. Tip: Avoid overheating the chocolate—if it seizes, stir in an extra 1/2 tsp coconut oil to restore silkiness.
- Use a fork to dip each chilled ball into the melted white chocolate, coating it entirely.
- Tap the fork gently against the bowl’s edge to remove excess chocolate.
- Return the coated bonbons to the parchment-lined baking sheet. Tip: For a festive touch, sprinkle a few extra crushed raspberries on top before the chocolate sets.
- Refrigerate the bonbons for 20 minutes until the coating is firm and no longer sticky.
Delightfully creamy with a subtle crunch from the graham cracker base, these bonbons balance sweet white chocolate and tangy raspberry in every bite. Serve them chilled on a platter for parties, or stash a few in the fridge for a sneaky midnight snack—they’re so good, you might need to hide them from yourself!
Conclusion
Craving something sweet without turning on the oven? These 21 irresistible no-bake cookie recipes are your perfect solution for quick, delicious treats. We hope you find some new favorites! Don’t forget to leave a comment telling us which recipe you loved most and share this roundup on Pinterest so other dessert lovers can discover these easy delights too.
