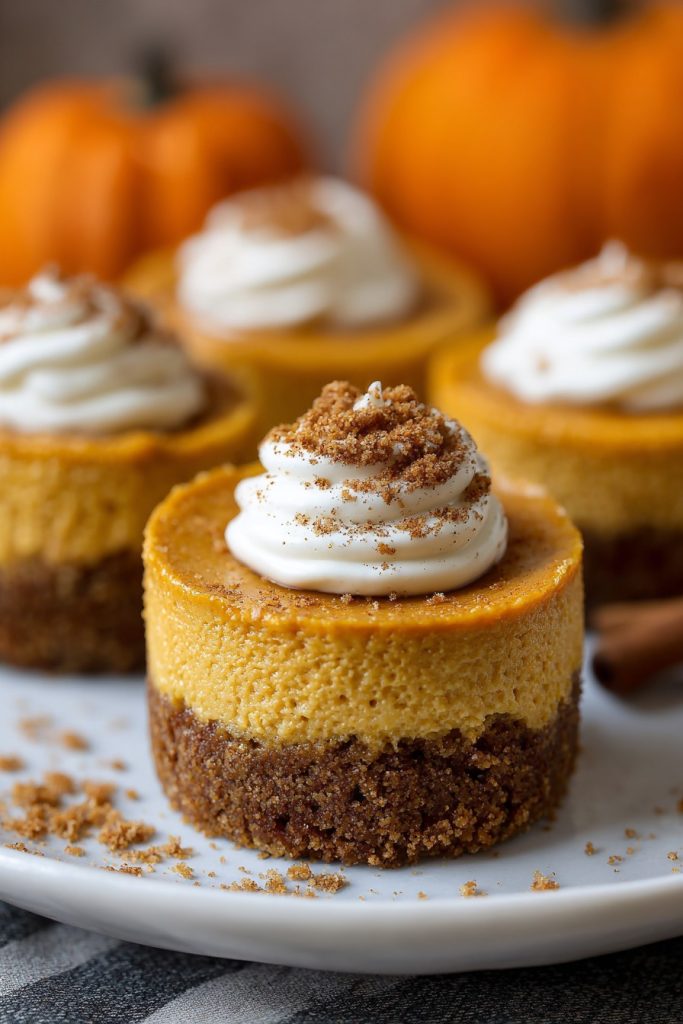
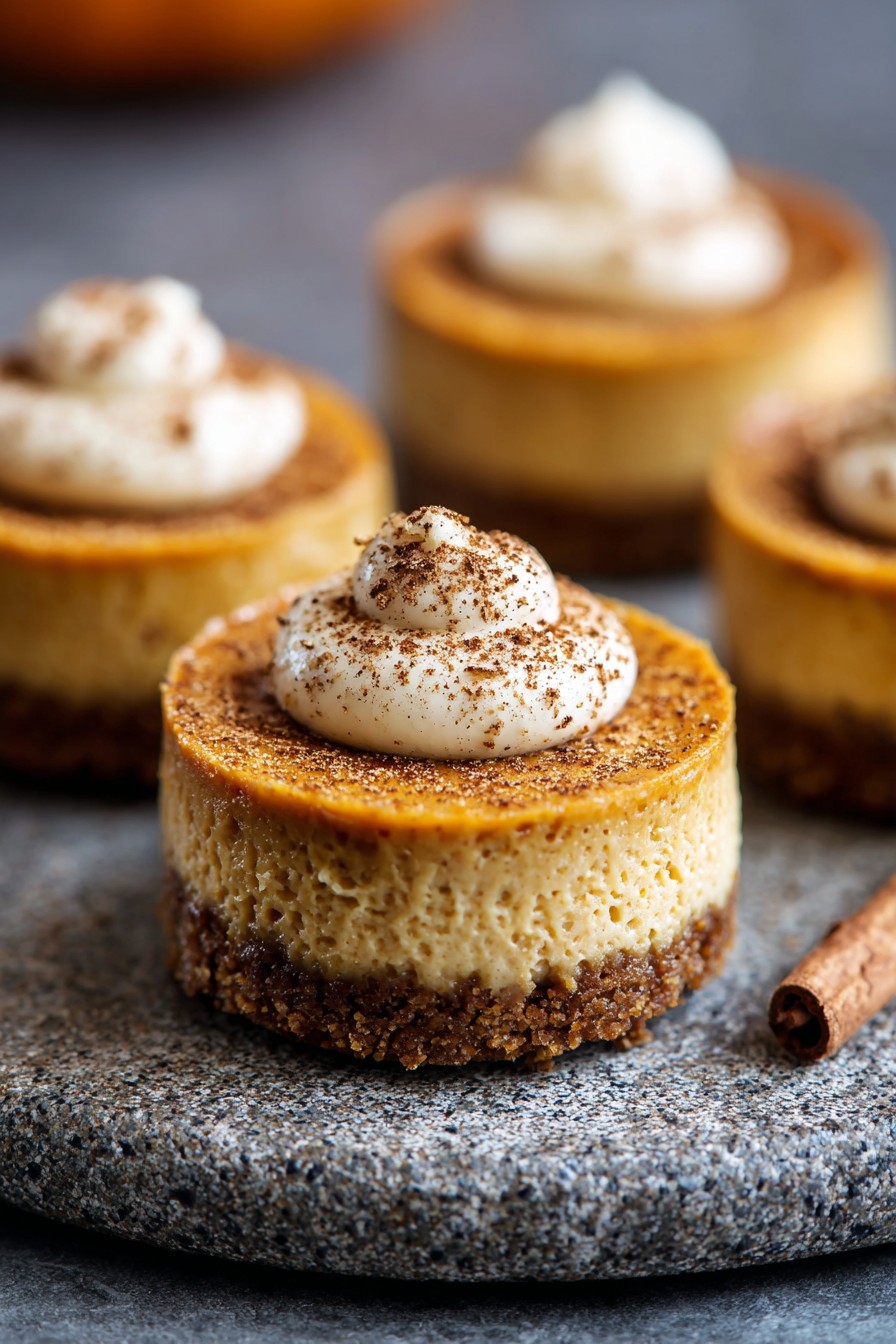
Back when Grandma’s kitchen smelled of cinnamon and nutmeg every October, she’d pull out her favorite ceramic ramekins for these little treasures. Between the crisp autumn air and the wood stove crackling, these mini pumpkin cheesecakes became our family’s most anticipated fall tradition. Baking them always felt like wrapping yourself in a warm flannel blanket while leaves danced outside the window.
Why This Recipe Works
- The graham cracker crust gets its irresistible texture from combining finely crushed crumbs with just enough melted butter to hold everything together without becoming soggy, creating that perfect contrast to the creamy filling that follows
- Using room temperature cream cheese ensures your filling blends smoothly without any lumps, while the addition of pumpkin puree provides natural moisture and that signature autumn flavor that makes these mini cheesecakes so comforting
- The water bath method gently cooks the cheesecakes to prevent cracking and ensures the most velvety texture imaginable, giving you professional-looking results right from your own kitchen with minimal effort
- Chilling overnight allows all the flavors to meld beautifully and gives the cheesecakes time to set properly, making them slice perfectly and taste even better the next day when those spiced notes really shine through
Ingredients
- 1 ½ cups finely crushed graham cracker crumbs
- 5 tablespoons unsalted butter, melted
- 2 tablespoons granulated sugar
- 16 ounces cream cheese, softened to room temperature
- ¾ cup granulated sugar
- 2 large eggs, at room temperature
- 1 cup pure pumpkin puree (not pumpkin pie filling)
- 1 teaspoon pure vanilla extract
- 1 teaspoon ground cinnamon
- ½ teaspoon ground nutmeg
- ¼ teaspoon ground ginger
- ¼ teaspoon ground cloves
- ½ cup sour cream, at room temperature
Equipment Needed
- Standard muffin tin
- 12 cupcake liners
- Mixing bowls
- Electric mixer
- Measuring cups and spoons
- Rubber spatula
- Baking sheet
- Cooling rack
Instructions
Prepare the Graham Cracker Crust
Begin by crushing your graham crackers until you have fine, uniform crumbs that resemble coarse sand—this ensures your crust will hold together beautifully without any large, crunchy pieces. Combine the 1 ½ cups of graham cracker crumbs with 2 tablespoons of granulated sugar in a medium bowl, then pour in the 5 tablespoons of melted unsalted butter. Use a fork to mix everything until the crumbs are evenly moistened and the mixture holds together when you pinch it between your fingers. Line your muffin tin with 12 cupcake liners, then firmly press about 2 tablespoons of the crust mixture into the bottom of each liner, using the bottom of a small glass or measuring cup to create an even, compact layer. This solid foundation will prevent your filling from seeping through and give you that perfect crust-to-filling ratio in every single bite.
Mix the Cream Cheese Base
In a large mixing bowl, beat the 16 ounces of room temperature cream cheese with ¾ cup granulated sugar using an electric mixer on medium speed for about 2-3 minutes until the mixture becomes completely smooth and creamy with no lumps remaining. Scrape down the sides and bottom of the bowl with a rubber spatula to ensure everything incorporates evenly—this attention to detail makes all the difference in achieving that velvety texture we’re after. Add the 2 room temperature eggs one at a time, beating well after each addition until just combined, being careful not to overmix which could incorporate too much air and cause the cheesecakes to puff up then collapse during baking. The mixture should look pale yellow and satiny smooth at this stage, ready to welcome all those warm autumn spices we’ll add next.
Incorporate Pumpkin and Spices
Now for the heart of our autumn creation—gently fold in 1 cup of pure pumpkin puree using your rubber spatula, making sure to scrape from the bottom of the bowl to incorporate everything evenly without deflating the mixture. Add 1 teaspoon of pure vanilla extract, 1 teaspoon of ground cinnamon, ½ teaspoon of ground nutmeg, ¼ teaspoon of ground ginger, and ¼ teaspoon of ground cloves, stirring gently until all those warm spices distribute evenly throughout the batter. Finally, fold in the ½ cup of room temperature sour cream, which will add wonderful tanginess and help create that signature creamy cheesecake texture we all love. The batter should be smooth, slightly thick, and have that beautiful orange hue that promises all the cozy flavors of fall in every spoonful.
Fill and Bake the Cheesecakes
Preheat your oven to 325°F and place a baking sheet on the middle rack—this will catch any potential drips and help distribute heat evenly. Divide the filling evenly among the 12 prepared crusts, filling each about ¾ full and smoothing the tops with the back of a spoon or a small offset spatula. Carefully place the muffin tin on the preheated baking sheet in the oven, then pour about 1 inch of hot water into the baking sheet around the muffin tin to create a water bath. Bake for 20-25 minutes until the edges look set but the centers still have a slight jiggle when you gently shake the pan—this slow, gentle cooking prevents cracks and ensures creamy perfection.
Cool and Chill to Perfection
Turn off the oven and crack the door open slightly, letting the cheesecakes cool gradually in the residual heat for about 30 minutes—this gradual temperature change is crucial for preventing surface cracks from forming. Remove the muffin tin from the oven and transfer it to a wire cooling rack, allowing the cheesecakes to come completely to room temperature, which typically takes about 1-2 hours depending on your kitchen’s temperature. Once cooled, cover the tin loosely with plastic wrap and refrigerate for at least 4 hours, though overnight is ideal for the flavors to fully develop and the texture to set properly. When ready to serve, gently peel away the cupcake liners to reveal your beautiful mini cheesecakes with their golden crusts and creamy pumpkin centers.
Tips and Tricks
For the absolute best results, I cannot emphasize enough the importance of using room temperature ingredients—take your cream cheese, eggs, and sour cream out of the refrigerator at least 1-2 hours before you begin baking. Cold cream cheese will never blend smoothly no matter how long you beat it, leaving you with lumpy batter that bakes unevenly, while room temperature eggs incorporate more easily and help create that silky texture we’re aiming for. When measuring your pumpkin puree, be sure to use pure pumpkin and not pumpkin pie filling—the latter contains added sugars and spices that will throw off the balance of our carefully measured ingredients. If you find your pumpkin puree seems particularly watery, you can spread it on a paper towel-lined plate for 10-15 minutes to absorb excess moisture before measuring. For the graham cracker crust, the key is proper compaction—really press that crust mixture firmly into the liners using something flat like the bottom of a measuring cup or small glass. A loosely packed crust will crumble when you try to remove the liners, while one that’s properly compressed holds its shape beautifully and provides that satisfying textural contrast. When baking, resist the temptation to open the oven door frequently—the sudden temperature changes can cause your cheesecakes to crack. Instead, rely on your oven light and window to check progress during the final few minutes of baking. If you notice the tops starting to brown too quickly, you can loosely tent the muffin tin with aluminum foil. For clean removal from the liners, make sure your cheesecakes are thoroughly chilled—the cold helps them firm up and release more cleanly. If any do stick slightly, you can gently warm the outside of the liner with your hands for a few seconds to help loosen it.
Recipe Variations
- For a delightful gingersnap twist, replace the graham cracker crumbs with an equal amount of finely crushed gingersnap cookies—the spicy warmth of the ginger pairs beautifully with the pumpkin filling and adds an extra layer of autumn flavor that will make your kitchen smell absolutely heavenly
- Create a marbled effect by dividing your finished batter in half and stirring 2 tablespoons of melted chocolate into one portion, then alternately spooning the plain pumpkin and chocolate batters into the crusts and gently swirling with a toothpick for a stunning visual presentation
- Transform these into salted caramel pumpkin cheesecakes by drizzling each finished cheesecake with homemade or high-quality store-bought caramel sauce and sprinkling with a tiny pinch of flaky sea salt just before serving—the sweet and salty combination elevates these treats to restaurant-quality status
- For a festive holiday version, mix ½ cup of finely chopped pecans or walnuts into your graham cracker crust mixture and top each cheesecake with a pecan half and a dusting of cinnamon sugar before baking—the nutty crunch provides wonderful texture contrast
- If you prefer individual servings without the muffin tin, you can layer the crust and filling in 4-ounce mason jars and bake them in a water bath for the same amount of time—these make adorable portable treats perfect for autumn picnics or gift-giving
Frequently Asked Questions
Can I make these mini pumpkin cheesecakes ahead of time?
Absolutely, and they actually taste better when made ahead! These mini cheesecakes need at least 4 hours to chill properly, but I strongly recommend making them the day before you plan to serve them. The overnight refrigeration allows the flavors to meld beautifully and the texture to set perfectly. Once chilled, they will keep beautifully in the refrigerator for up to 5 days when stored in an airtight container. You can also freeze them for up to 3 months—place them in a single layer on a baking sheet until frozen solid, then transfer to a freezer-safe container with parchment between layers. Thaw in the refrigerator overnight before serving.
Why did my cheesecakes crack on top?
Cheesecakes typically crack for three main reasons: overmixing the batter incorporates too much air that expands then collapses during baking, rapid temperature changes cause the surface to contract too quickly, or they were overbaked. To prevent cracking, be careful not to overbeat your batter once the eggs are added—mix just until combined. Use the water bath method as directed, which provides gentle, even heat. Most importantly, remove the cheesecakes from the oven when the edges look set but the centers still have a slight jiggle—they will continue to cook as they cool. If you do get cracks, don’t worry! A dollop of whipped cream covers them beautifully.
Can I use fresh pumpkin instead of canned puree?
You certainly can, but there are important considerations. If using fresh pumpkin, choose sugar pie pumpkins rather than large carving pumpkins—they have sweeter, denser flesh. Roast halved pumpkins at 375°F for about 45-60 minutes until tender, scoop out the flesh, and puree until smooth in a food processor. The crucial step is straining the puree through cheesecloth for several hours or overnight to remove excess moisture—fresh pumpkin contains much more water than canned, which can make your cheesecakes watery if not properly drained. You’ll need about 1 ¼ cups of fresh puree to yield 1 cup after straining.
What’s the purpose of the water bath?
The water bath, also called a bain-marie, serves several important functions in cheesecake baking. It creates a humid environment that prevents the surface from drying out and cracking while the cheesecakes bake. The water moderates the oven temperature, providing gentle, even heat that cooks the eggs slowly and evenly without curdling them—this is what gives cheesecakes their signature velvety texture. Without a water bath, the edges often overcook before the center sets properly, resulting in a dry, grainy texture rather than the creamy perfection we’re aiming for. The steam from the water bath also helps create that beautiful, smooth surface that makes these mini cheesecakes look professionally made.
Summary
These miniature pumpkin cheesecakes capture the very essence of autumn in each perfectly portioned bite, combining a buttery graham cracker crust with velvety spiced pumpkin filling that melts on your tongue. The water bath method ensures crack-free tops and creamy texture, while overnight chilling allows the flavors to develop fully. Whether served plain or with creative variations, they’re guaranteed to become your new fall tradition.