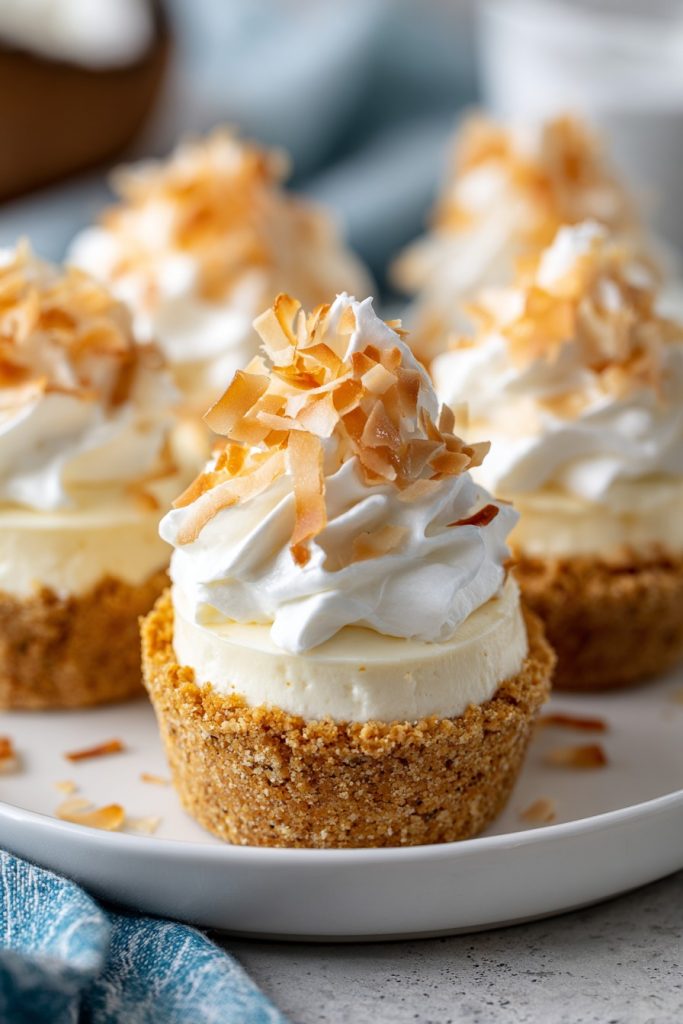
Craving something that will transport you straight to tropical paradise with every single bite? Coconut cream pies have been my absolute obsession lately, but these miniature versions will completely blow your mind with their incredible texture and explosive flavor. Prepare yourself for a dessert experience so divine, so utterly irresistible, that you’ll want to make these stunning little creations again and again!
Why This Recipe Works
- The combination of toasted coconut in the crust and creamy coconut filling creates an unbelievable depth of flavor that will make your taste buds dance with pure joy
- Using both coconut milk and shredded coconut ensures maximum coconut intensity in every single heavenly layer
- The individual serving sizes make these perfect for parties, gatherings, or when you just need that perfect personal treat without the temptation of an entire pie
- Chilling the crust before baking guarantees that flaky, buttery texture that literally melts in your mouth
- The whipped cream topping with toasted coconut garnish provides that stunning visual appeal that will have everyone reaching for their cameras before their forks
Ingredients
- 1 ½ cups graham cracker crumbs
- ½ cup sweetened shredded coconut, toasted
- 6 tablespoons unsalted butter, melted
- ¼ cup granulated sugar
- 2 (13.5 oz) cans full-fat coconut milk, chilled overnight
- ¾ cup granulated sugar
- ¼ cup cornstarch
- ¼ teaspoon salt
- 4 large egg yolks
- 2 tablespoons unsalted butter, cubed
- 1 teaspoon pure vanilla extract
- 1 cup sweetened shredded coconut, divided
- 1 cup heavy whipping cream, chilled
- 2 tablespoons powdered sugar
- ½ teaspoon vanilla extract
Equipment Needed
- 12-cup standard muffin tin
- Medium saucepan
- Whisk
- Mixing bowls
- Electric mixer or stand mixer
- Measuring cups and spoons
- Spatula
- Pastry bag with star tip (optional)
- Cooling rack
Instructions
Create the Toasted Coconut Crust
Begin by preheating your oven to precisely 350°F and generously spraying your muffin tin with non-stick cooking spray. In a medium mixing bowl, combine the graham cracker crumbs with that glorious toasted shredded coconut – the toasting process is absolutely essential here because it unlocks those deep, nutty coconut flavors that will make your crust absolutely unforgettable. Pour in the melted butter and granulated sugar, then mix vigorously until every single crumb is thoroughly coated and the mixture holds together when pressed. Now here’s my secret pro tip: divide this magical mixture evenly among the 12 muffin cups, then use the bottom of a small glass or measuring cup to press it firmly and evenly into the bottom and up the sides. You want to create that perfect little crust cup that will hold all that luscious filling. Bake for exactly 8-10 minutes until the edges are lightly golden and fragrant, then transfer to a wire rack to cool completely before filling. The cooling process is non-negotiable – rushing this step could lead to a soggy crust disaster!
Prepare the Luscious Coconut Filling
Now for the star of the show – that dreamy coconut cream filling that will make you weak in the knees! In a medium saucepan, whisk together the granulated sugar, cornstarch, and salt until thoroughly combined. Slowly whisk in the chilled coconut milk – and here’s where you need to be patient and meticulous. Make sure you’re scraping the thick coconut cream from the top of the cans because that’s where all the rich, creamy magic lives. In a separate bowl, whisk the egg yolks until they’re pale and slightly thickened, then gradually temper them by slowly pouring about 1 cup of the warm coconut milk mixture into the yolks while whisking constantly. This careful tempering process prevents scrambled eggs in your filling – trust me, you don’t want that texture surprise! Return everything to the saucepan and cook over medium heat, whisking constantly, until the mixture thickens dramatically and large bubbles break the surface, which should take about 5-7 minutes.
Finish and Chill the Coconut Cream
Once your filling has reached that perfect pudding-like consistency where it coats the back of a spoon and leaves a clear path when you run your finger through it, immediately remove it from the heat. Stir in the cubed butter, vanilla extract, and ¾ cup of the shredded coconut until the butter is completely melted and incorporated. Now here’s a crucial step that will elevate your pies from good to absolutely extraordinary: press plastic wrap directly onto the surface of the filling to prevent that pesky skin from forming. Chill in the refrigerator for at least 2 hours, but ideally 4 hours or even overnight for the most incredible, firm texture that will hold its shape perfectly when piped or spooned into those waiting crusts. The extended chilling time allows the cornstarch to fully set and the flavors to meld together in coconut heaven.
Whip the Dreamy Topping
While your filling is chilling to perfection, it’s time to create that cloud-like whipped cream topping that will crown your mini masterpieces. Place your mixing bowl and whisk attachment in the freezer for 15-20 minutes – this chilling trick ensures maximum volume and stability in your whipped cream. Pour the heavy whipping cream into the chilled bowl and beat on medium-high speed until soft peaks form, which typically takes about 2-3 minutes. Add the powdered sugar and vanilla extract, then continue beating until stiff peaks form that hold their shape when you lift the whisk. Be careful not to overbeat, or you’ll end up with butter – and while butter is delicious, it’s not what we’re going for here! Gently fold in the remaining ¼ cup of shredded coconut until just combined, being careful not to deflate all that beautiful air you’ve incorporated.
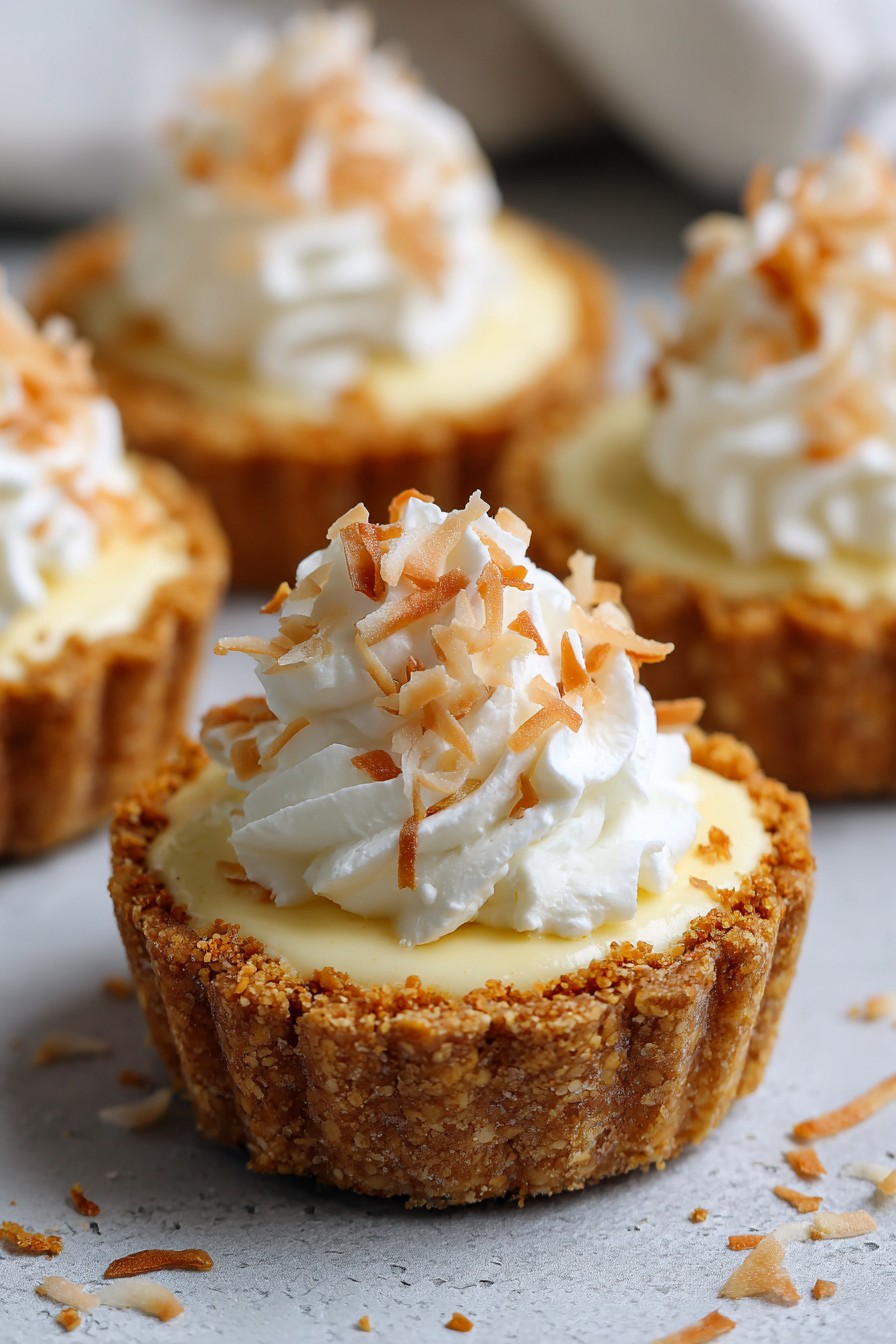
Assemble Your Mini Masterpieces
Now for the most satisfying part – bringing all these incredible components together into the stunning final product! Remove your chilled coconut filling from the refrigerator and give it a good stir to smooth it out. Using a spoon, piping bag, or small cookie scoop, divide the filling evenly among the 12 cooled crusts, filling them nearly to the top but leaving just enough room for that gorgeous whipped cream crown. Top each pie with a generous dollop or beautiful piped swirl of the coconut whipped cream. For that final touch of elegance and crunch, sprinkle with additional toasted coconut. Here’s my presentation pro tip: toast an extra ¼ cup of shredded coconut at 350°F for 3-5 minutes until golden brown specifically for garnishing – the visual contrast and extra toasty flavor will make your pies look professionally bakery-worthy!
Serve and Store Like a Pro
Your mini coconut cream pies are now ready to dazzle and delight! For the absolute best texture and flavor experience, serve them chilled within 2 hours of assembly. If you need to prepare them in advance, you can store the unfilled crusts in an airtight container at room temperature for up to 2 days, the filling separately in the refrigerator for 3 days, and the whipped cream topping in a sealed container in the fridge for up to 24 hours. When assembling ahead of time, these beauties will keep beautifully in the refrigerator for up to 2 days, though the crust may soften slightly – which some people actually prefer! For longer storage, you can freeze the assembled pies for up to 1 month, but thaw them in the refrigerator overnight before serving for the perfect texture.
Tips and Tricks
If you want to take your mini coconut cream pies from absolutely incredible to completely mind-blowing, these professional tips and tricks will transform your baking game forever. First, let’s talk about coconut milk selection – always opt for full-fat coconut milk in cans, not the carton variety meant for drinking. The higher fat content creates that luxuriously creamy texture that will make your filling absolutely divine. When shopping, shake the cans gently; you want to hear minimal sloshing, which indicates more of that precious coconut cream has separated to the top. For the ultimate coconut intensity, consider toasting your shredded coconut for the filling as well as the crust – just spread it on a baking sheet and bake at 350°F for 5-7 minutes, stirring occasionally, until golden brown and fragrant. This extra step deepens the flavor profile exponentially. When working with the crust, if you find it’s too crumbly to press into the muffin cups, add another tablespoon of melted butter until it holds together perfectly. For a stunning presentation variation, try using a variety of piping tips for your whipped cream topping – a large star tip creates those beautiful bakery-style swirls that will have your guests gasping in delight. If you’re making these for a special occasion, consider lining your muffin tin with decorative paper liners after baking and cooling the crusts – this makes for easier serving and adds that extra touch of elegance. For the filling, if you prefer an even richer coconut flavor, you can substitute coconut extract for the vanilla, but use half the amount since coconut extract tends to be more potent. When tempering your egg yolks, work slowly and patiently – rushing this process could result in curdled eggs, and nobody wants that texture in their dreamy coconut filling. If you’re concerned about the filling setting properly, you can do the spoon test: dip a metal spoon into the cooked filling and run your finger through it – if the line holds clearly, your filling is perfectly cooked. For those who love extra texture, consider adding ¼ cup of toasted coconut to the filling itself for little bursts of coconut in every bite. And finally, if you’re transporting these beauties, place the muffin tin in a larger baking pan and surround with ice packs to keep them perfectly chilled during travel.
Recipe Variations
- Chocolate Coconut Dream: Add ½ cup of semi-sweet chocolate chips to the crust mixture or drizzle melted chocolate over the finished pies for that irresistible chocolate-coconut combination that will make you swoon with delight
- Tropical Paradise Twist: Mix ¼ cup of crushed pineapple (well-drained) into the coconut filling and garnish with toasted macadamia nuts for that vacation-in-every-bite experience
- Lemon Coconut Sunshine: Add 2 tablespoons of fresh lemon juice and 1 teaspoon of lemon zest to the filling for a bright, citrusy contrast that cuts through the richness beautifully
- Toasted Almond Joy: Replace ¼ cup of the shredded coconut in the crust with finely chopped toasted almonds and sprinkle sliced almonds over the whipped cream topping
- Vegan Delight: Use vegan butter in the crust, coconut cream instead of heavy whipping cream for the topping, and ensure your sugar is vegan-friendly for a plant-based version that’s equally decadent
- Mocha Coconut Fusion: Dissolve 1 tablespoon of instant espresso powder in the coconut milk before making the filling and add ¼ cup of chocolate chips for coffee lovers’ paradise
Frequently Asked Questions
Can I make these mini coconut cream pies ahead of time for a party?
Absolutely, and they’re actually perfect for making ahead! You can prepare the crusts up to 2 days in advance and store them in an airtight container at room temperature. The coconut filling can be made 3 days ahead and kept tightly covered in the refrigerator. The whipped cream topping is best made the day of serving, but you can prepare it up to 24 hours in advance if stored properly. When assembling, I recommend doing so no more than 4-6 hours before serving to maintain that perfect crust texture. If you need to make them further in advance, consider freezing the assembled pies and thawing overnight in the refrigerator.
What’s the best way to toast coconut for this recipe?
Toasting coconut is simpler than you might think and makes a tremendous difference in flavor! Spread your shredded coconut in a thin, even layer on a baking sheet. Bake at 350°F for 5-8 minutes, stirring every 2 minutes to ensure even toasting. Watch carefully during the last few minutes as coconut can burn quickly. You’re looking for a beautiful golden brown color and that incredible nutty aroma. For extra insurance, you can toast coconut in a dry skillet over medium heat, stirring constantly for 3-5 minutes. Always let it cool completely before using in your recipe.
Can I use light coconut milk instead of full-fat?
While you technically can use light coconut milk, I strongly recommend sticking with full-fat for the most luxurious results. The higher fat content in full-fat coconut milk creates that rich, creamy texture that makes these mini pies so incredibly decadent. Light coconut milk will result in a thinner, less creamy filling that might not set as firmly. If you’re concerned about calories, remember these are mini portions meant for special treats! The flavor difference is noticeable – full-fat coconut milk provides that authentic tropical coconut experience that will transport your taste buds.
How do I prevent my whipped cream topping from deflating?
Keeping your whipped cream stable starts with proper chilling – ensure your bowl, whisk attachment, and cream are all thoroughly chilled before beginning. Use heavy whipping cream with at least 36% milk fat for the best results. When beating, stop as soon as stiff peaks form – overbeating can cause the fat to separate. Some bakers like to add 1 tablespoon of instant vanilla pudding mix to the cream before whipping for extra stability, though this will slightly alter the flavor. If piping, work quickly and keep the finished pies refrigerated until serving.
Can I make these without eggs for dietary restrictions?
Yes, you can create an egg-free version that’s still delicious! Increase the cornstarch to ⅓ cup and omit the egg yolks entirely. The cooking process remains the same – cook until thickened and bubbling. The texture will be slightly different but still wonderfully creamy. For binding in the crust, ensure you’re using enough butter to hold the crumbs together. This modification works beautifully for those with egg allergies or who follow egg-free diets, though the richness will be slightly different from the original version.
Summary
These mini coconut cream pies deliver tropical paradise in every single bite with their toasted coconut crust, luxuriously creamy filling, and cloud-like whipped cream topping. Perfect for parties, special occasions, or when you simply deserve an extraordinary treat that will make your taste buds sing with pure joy and satisfaction!
Mini Coconut Cream Pies
4
servings30
minutes10
minutesIngredients
Instructions
- 1 Preheat oven to 350°F. Spray muffin tin with non-stick spray.
- 2 Mix graham crumbs, toasted coconut, melted butter, and sugar. Press into muffin cups.
- 3 Bake crusts 8-10 minutes until golden. Cool completely.
- 4 Whisk sugar, cornstarch, and salt in saucepan. Whisk in coconut milk.
- 5 Temper egg yolks with warm milk mixture, return to pan.
- 6 Cook over medium heat, whisking constantly, until thickened and bubbling.
- 7 Remove from heat, stir in butter, vanilla, and ¾ cup coconut.
- 8 Press plastic wrap on surface, chill 2-4 hours.
- 9 Whip cream with powdered sugar and vanilla until stiff peaks.
- 10 Fold in remaining ¼ cup coconut.
- 11 Divide filling among crusts, top with whipped cream.
- 12 Garnish with additional toasted coconut. Serve chilled.