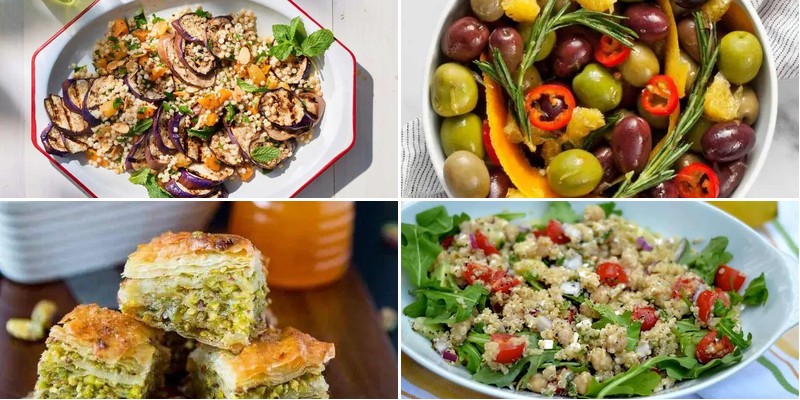
Our Mediterranean recipe collection brings the sun-drenched flavors of coastal villages right to your kitchen! Imagine vibrant, healthy meals that are as delicious as they are nourishing—think zesty lemon-herb chicken, garlicky roasted vegetables, and creamy hummus. Whether you’re craving a quick weeknight dinner or a leisurely weekend feast, these dishes make wholesome eating feel like a celebration. Ready to explore? Let’s dive into these 22 flavorful favorites!
Grilled Eggplant and Couscous Salad
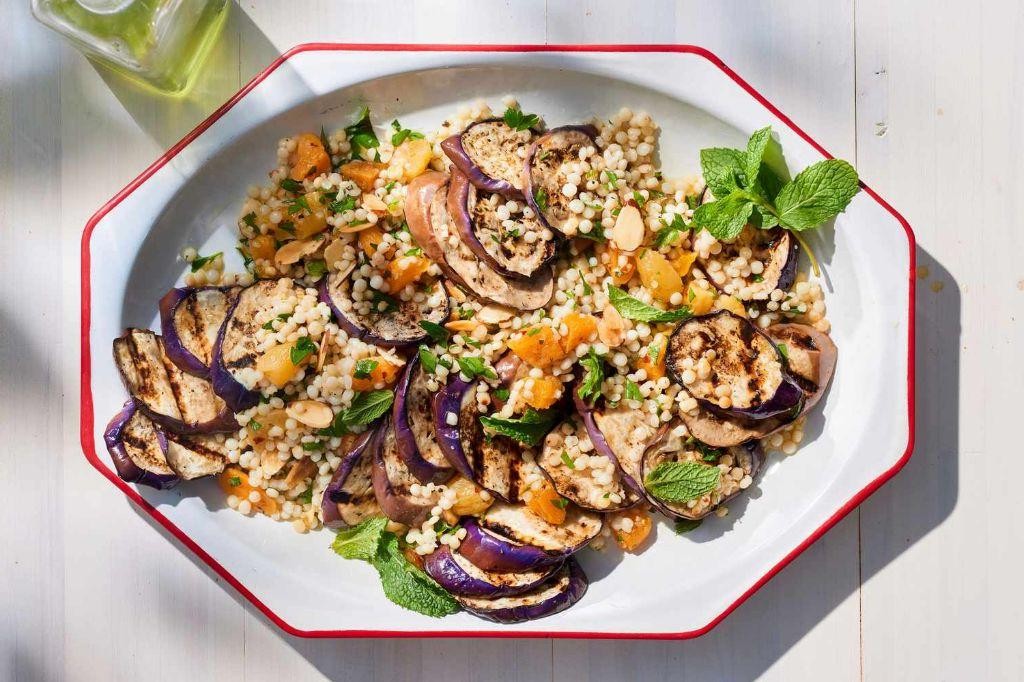
Let’s create a vibrant grilled eggplant and couscous salad that’s perfect for summer gatherings or meal prep. Learning to grill eggplant properly ensures it becomes tender and smoky rather than soggy, while fluffy couscous provides the perfect base for all those Mediterranean flavors. This methodical approach will guide you through each step for guaranteed delicious results.
2
servings15
minutes10
minutesIngredients
– 1 large eggplant, sliced into ½-inch rounds
– 1 cup dry couscous
– 1 ¼ cups boiling water
– 3 tablespoons olive oil, divided
– 2 tablespoons lemon juice
– 1 garlic clove, minced
– A generous pinch of salt
– A couple of fresh mint leaves, chopped
– A handful of cherry tomatoes, halved
– A splash of red wine vinegar
Instructions
1. Preheat your grill to medium-high heat, approximately 400°F.
2. Brush both sides of each eggplant slice with 2 tablespoons of olive oil and sprinkle generously with salt.
3. Place eggplant slices directly on the grill grates and cook for 4-5 minutes per side until you see distinct grill marks and the flesh becomes tender when pierced with a fork.
4. Tip: Salting the eggplant before grating helps draw out excess moisture, preventing sogginess.
5. While eggplant grills, place 1 cup dry couscous in a medium heatproof bowl.
6. Pour 1 ¼ cups boiling water over the couscous, cover the bowl tightly with plastic wrap, and let it steam for 10 minutes until all liquid is absorbed.
7. Fluff the cooked couscous with a fork to separate the grains.
8. In a small bowl, whisk together the remaining 1 tablespoon olive oil, 2 tablespoons lemon juice, minced garlic, and a splash of red wine vinegar to create the dressing.
9. Chop the grilled eggplant into bite-sized cubes.
10. Tip: Let grilled eggplant cool slightly before chopping to maintain its shape better.
11. Combine the fluffed couscous, chopped eggplant, halved cherry tomatoes, and chopped mint in a large mixing bowl.
12. Pour the dressing over the salad mixture and toss gently to combine all ingredients evenly.
13. Tip: For best flavor, let the salad sit for 15 minutes before serving to allow the couscous to absorb the dressing.
14. Taste and adjust seasoning with additional salt if needed.
Just imagine the wonderful contrast in this salad—the smoky, tender eggplant pairs beautifully with the light, fluffy couscous, while the fresh mint and tangy dressing brighten every bite. Juicy cherry tomatoes add bursts of sweetness that complement the savory elements perfectly, making this salad substantial enough for a main course yet elegant enough for potlucks. Try serving it alongside grilled chicken or stuffing it into pita pockets for a complete meal that showcases summer’s best produce.
Lemon Herb Chicken Souvlaki
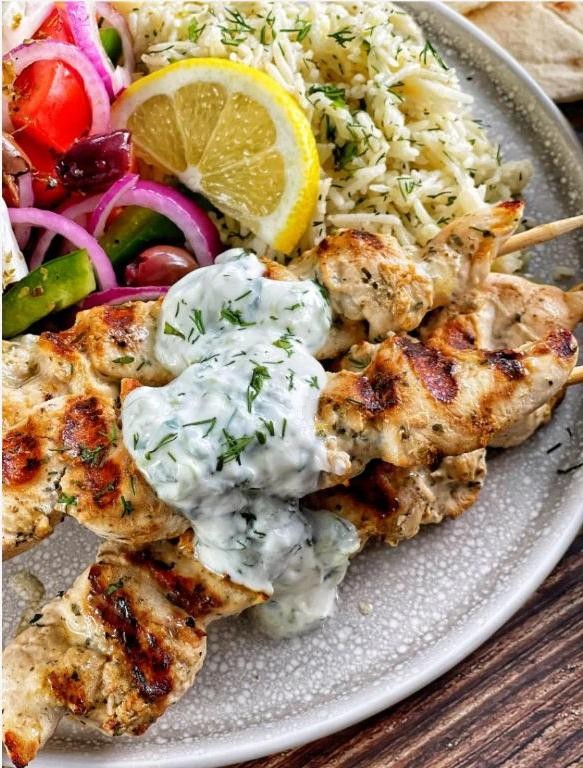
Often overlooked in favor of more complex Mediterranean dishes, this lemon herb chicken souvlaki delivers incredible flavor with surprisingly simple preparation. Our methodical approach will guide you through creating tender, aromatic chicken skewers that taste like they came straight from a Greek taverna.
2
servings20
minutes10
minutesIngredients
– 1.5 pounds of boneless, skinless chicken thighs, cut into 1-inch cubes
– 1/4 cup of extra virgin olive oil
– 1/4 cup of freshly squeezed lemon juice
– 3 cloves of garlic, minced
– 1 tablespoon of dried oregano
– 1 teaspoon of dried thyme
– 1/2 teaspoon of salt
– 1/4 teaspoon of black pepper
– A couple of wooden skewers, soaked in water for 30 minutes
Instructions
1. Place the chicken cubes in a large mixing bowl.
2. Pour the olive oil and lemon juice over the chicken.
3. Add the minced garlic, oregano, thyme, salt, and pepper to the bowl.
4. Use your hands to thoroughly mix everything until each chicken piece is evenly coated with the marinade.
5. Cover the bowl with plastic wrap and refrigerate for at least 2 hours, or up to 8 hours for maximum flavor absorption.
6. While the chicken marinates, soak wooden skewers in water for 30 minutes to prevent burning during cooking.
7. Preheat your grill or grill pan to medium-high heat (about 400°F).
8. Thread 4-5 marinated chicken pieces onto each soaked skewer, leaving small spaces between pieces.
9. Place the skewers on the preheated grill and cook for 4-5 minutes.
10. Flip each skewer using tongs and cook for another 4-5 minutes on the other side.
11. Check for doneness by cutting into the thickest piece of chicken – it should be white throughout with no pink remaining.
12. Remove the skewers from the grill and let them rest for 3 minutes before serving.
Serving these skewers immediately ensures the chicken remains juicy and tender, with the bright lemon and earthy herbs creating a perfect balance. The exterior develops a slight char that contrasts beautifully with the moist interior, making them excellent served over rice, wrapped in warm pita bread, or alongside a crisp Greek salad for a complete Mediterranean meal.
Baked Cod with Tomato and Olive Tapenade
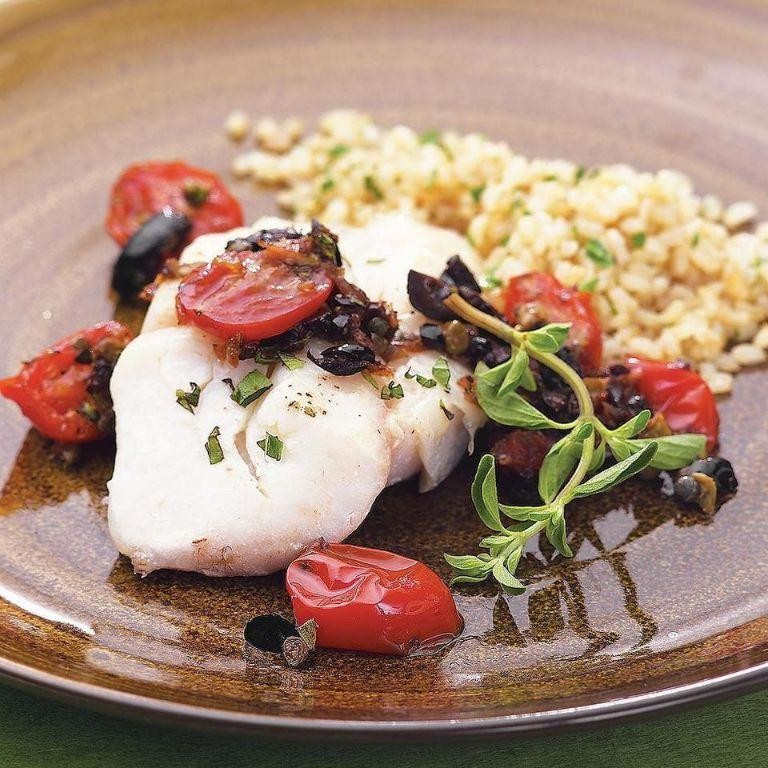
A perfectly baked cod with a vibrant Mediterranean topping makes for an impressive yet surprisingly simple weeknight dinner. This recipe combines flaky white fish with a zesty tomato and olive tapenade that comes together in minutes. You’ll be amazed how these basic ingredients transform into a restaurant-quality dish right in your own kitchen.
2
servings10
minutes15
minutesIngredients
– 4 cod fillets (about 6 ounces each)
– A good glug of olive oil (about 2 tablespoons)
– 2 medium ripe tomatoes, chopped small
– A generous half-cup of pitted Kalamata olives
– A couple of garlic cloves, minced
– A big pinch of dried oregano
– A splash of lemon juice (about 1 tablespoon)
– A sprinkle of salt and a few grinds of black pepper
Instructions
1. Preheat your oven to 400°F and lightly brush a baking dish with some of the olive oil.
2. Pat the cod fillets completely dry with paper towels – this helps them get beautifully golden instead of steaming.
3. Place the dried fillets in the prepared baking dish and season both sides with salt and pepper.
4. In a small bowl, combine the chopped tomatoes, Kalamata olives, minced garlic, remaining olive oil, dried oregano, and lemon juice.
5. Spoon the tomato-olive mixture evenly over the top of each cod fillet, covering them completely.
6. Bake for 12-15 minutes until the fish flakes easily with a fork but is still moist.
7. Check for doneness by inserting a fork at the thickest part – the flesh should be opaque and separate easily.
8. Let the baked cod rest for 2-3 minutes before serving to allow the juices to redistribute. For an extra flavor boost, you can broil for the final minute to lightly char the topping.
Finished cod emerges from the oven with the tapenade creating a savory crust that contrasts beautifully with the tender, flaky fish beneath. The briny olives and sweet tomatoes create a Mediterranean flavor profile that pairs wonderfully with couscous or crusty bread to soak up the delicious juices.
Stuffed Bell Peppers with Quinoa and Feta
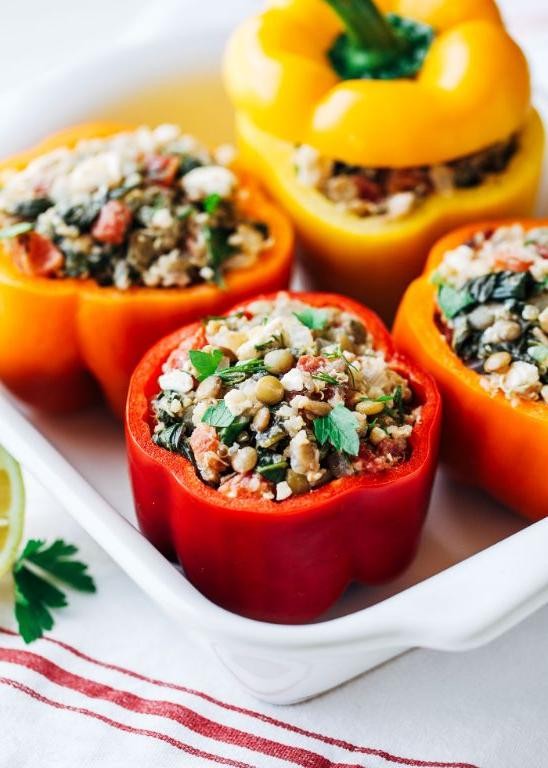
Just imagine coming home to these vibrant bell peppers, stuffed to the brim with fluffy quinoa and tangy feta—they’re the perfect cozy, healthy dinner that feels special but is surprisingly simple to make.
4
portions20
minutes56
minutesIngredients
4 large bell peppers (any color you like), 1 cup of uncooked quinoa, 2 cups of vegetable broth, 1 small yellow onion (diced), 2 cloves of garlic (minced), a couple of tablespoons of olive oil, a 15-ounce can of diced tomatoes (drained), a big handful of fresh spinach, about 4 ounces of crumbled feta cheese, a generous pinch of salt, and a few cracks of black pepper.
Instructions
1. Preheat your oven to 375°F. 2. Slice the tops off the bell peppers and scoop out the seeds and membranes. 3. Place the hollowed peppers upright in a baking dish. 4. Heat a couple of tablespoons of olive oil in a medium saucepan over medium heat. 5. Add the diced onion and cook for about 5 minutes, until it’s soft and translucent. 6. Stir in the minced garlic and cook for 1 more minute, just until fragrant. 7. Tip: Don’t let the garlic brown, or it can turn bitter. 8. Pour in the uncooked quinoa and stir to coat it in the oil. 9. Add the 2 cups of vegetable broth and bring it to a boil. 10. Reduce the heat to low, cover the pan, and simmer for 15 minutes, until the quinoa has absorbed all the liquid. 11. Remove the pan from the heat and let it sit, covered, for 5 minutes. 12. Tip: Fluff the quinoa with a fork to separate the grains and prevent clumping. 13. Stir in the drained diced tomatoes, fresh spinach, crumbled feta, a generous pinch of salt, and a few cracks of black pepper. 14. Mix everything until the spinach wilts slightly and the ingredients are well combined. 15. Spoon the quinoa mixture evenly into the prepared bell peppers, packing it down gently. 16. Cover the baking dish with foil and bake for 25 minutes. 17. Remove the foil and bake for another 10 minutes, until the peppers are tender and the tops are lightly golden. 18. Tip: For extra browning, broil for the last 2–3 minutes, but watch closely to avoid burning. 19. Carefully remove the dish from the oven and let the peppers rest for 5 minutes before serving. During this rest, the flavors meld together beautifully. Definitely serve these peppers hot, perhaps with a simple side salad or crusty bread to soak up any juices—the tender-crisp peppers give way to a savory, fluffy filling with pops of salty feta and fresh tomato.
Spaghetti with Garlic and Olive Oil Sauce
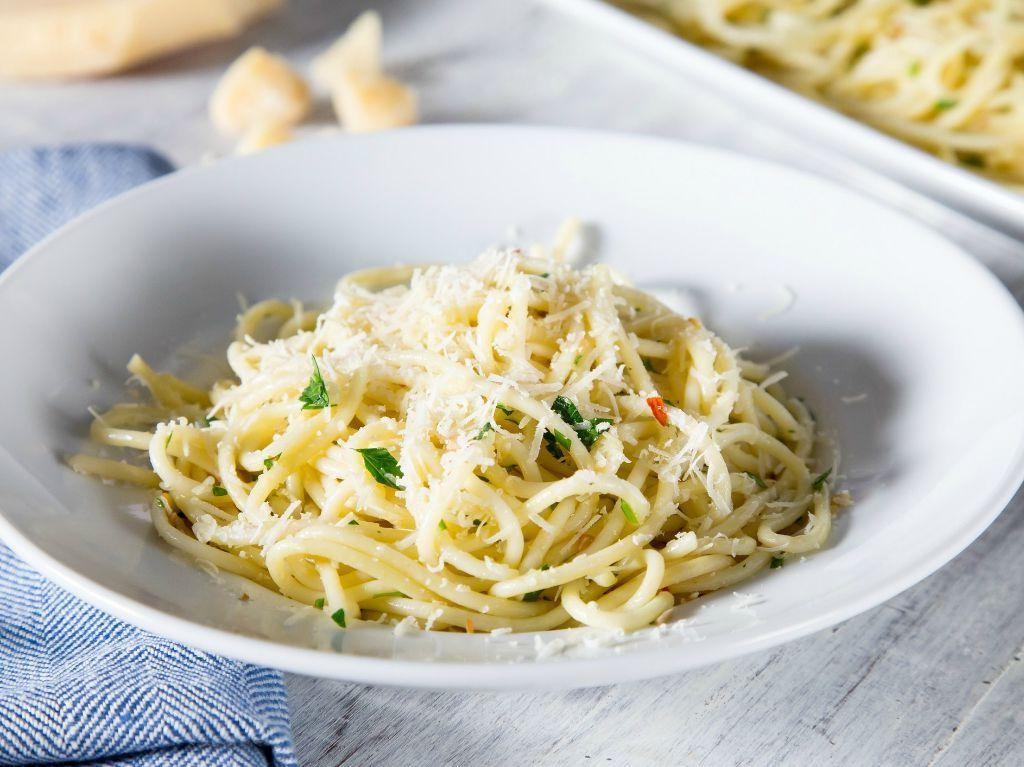
Before we dive into this classic Italian dish, let me assure you that spaghetti with garlic and olive oil sauce is one of those magical recipes that transforms simple pantry staples into something truly spectacular. Building layers of flavor through careful timing makes all the difference between good and great pasta.
5
servings10
minutes15
minutesIngredients
– 1 pound of dried spaghetti
– ½ cup of good quality olive oil
– 6-8 garlic cloves, thinly sliced
– A generous pinch of red pepper flakes
– A big handful of fresh parsley, chopped
– 1 lemon for zesting
– A splash of pasta cooking water
– Salt for seasoning
Instructions
1. Fill a large pot with 4 quarts of water and bring it to a rolling boil over high heat.
2. Add 2 tablespoons of salt to the boiling water – this seasons the pasta from within.
3. Add the spaghetti to the boiling water and cook for exactly 8 minutes, stirring occasionally to prevent sticking.
4. While the pasta cooks, heat the olive oil in a large skillet over medium-low heat for 2 minutes.
5. Add the sliced garlic to the warm oil and cook for 3-4 minutes until fragrant and lightly golden, stirring constantly.
6. Stir in the red pepper flakes and cook for 30 seconds to release their flavor.
7. Reserve 1 cup of the starchy pasta water before draining the spaghetti.
8. Transfer the drained spaghetti directly into the skillet with the garlic oil.
9. Add ¼ cup of the reserved pasta water to the skillet and toss vigorously to emulsify the sauce.
10. Continue tossing for 2 minutes until the sauce clings to every strand of pasta.
11. Remove the skillet from heat and stir in the chopped parsley.
12. Zest the lemon directly over the pasta, using about 1 teaspoon of zest.
13. Season with additional salt if needed and toss one final time to combine.
14. Divide the pasta among warm serving bowls immediately.
During your first bite, you’ll notice how the silky oil coats each strand while the garlic provides gentle warmth rather than sharpness. The starchy pasta water creates a light emulsion that carries the flavors beautifully, and the lemon zest brightens everything up. Try serving this with grilled shrimp or simply enjoy it as is for a quick weeknight dinner that feels anything but ordinary.
Chickpea and Spinach Stew with Fresh Herbs
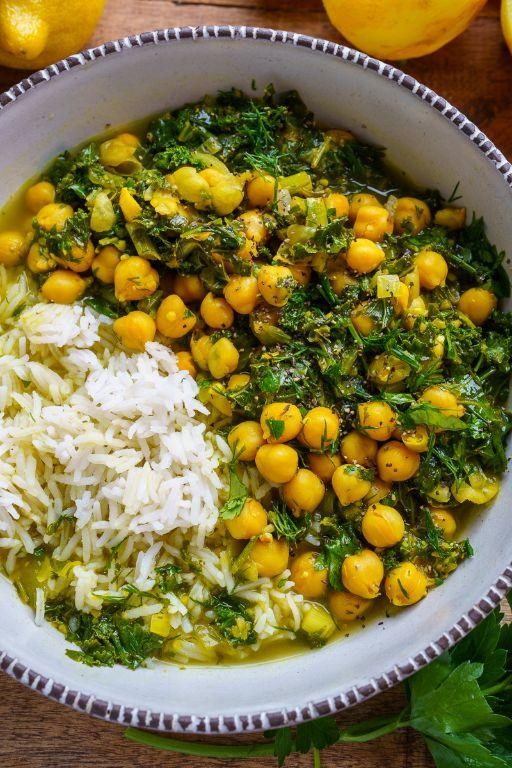
Before diving into this comforting stew, let’s gather our ingredients and approach this methodically. Building layers of flavor step by step will give you a rich, satisfying result that’s perfect for chilly evenings.
4
servings15
minutes28
minutesIngredients
– A couple of tablespoons of olive oil
– One medium yellow onion, chopped
– Three garlic cloves, minced
– A teaspoon of smoked paprika
– Two 15-ounce cans of chickpeas, drained and rinsed
– A 28-ounce can of crushed tomatoes
– Two cups of vegetable broth
– A big handful of fresh spinach
– A generous sprinkle of fresh parsley
– A squeeze of fresh lemon juice
Instructions
1. Heat two tablespoons of olive oil in a large pot over medium heat for 1 minute until shimmering.
2. Add the chopped onion and cook for 5 minutes, stirring occasionally, until translucent.
3. Stir in the minced garlic and cook for 30 seconds until fragrant.
4. Sprinkle in the smoked paprika and stir constantly for 15 seconds to toast the spices.
5. Add the drained chickpeas and stir to coat them in the spice mixture.
6. Pour in the crushed tomatoes and vegetable broth, then bring to a simmer.
7. Reduce heat to low, cover the pot, and simmer for 20 minutes to develop flavors.
8. Stir in the fresh spinach and cook for 2 minutes until wilted.
9. Remove from heat and stir in the fresh parsley and lemon juice.
Here’s what makes this stew special: the chickpeas become wonderfully tender while the spinach adds vibrant color and freshness. Serve it over crusty bread to soak up the flavorful broth, or pair it with quinoa for a heartier meal that will keep you satisfied for hours.
Roasted Red Pepper Hummus
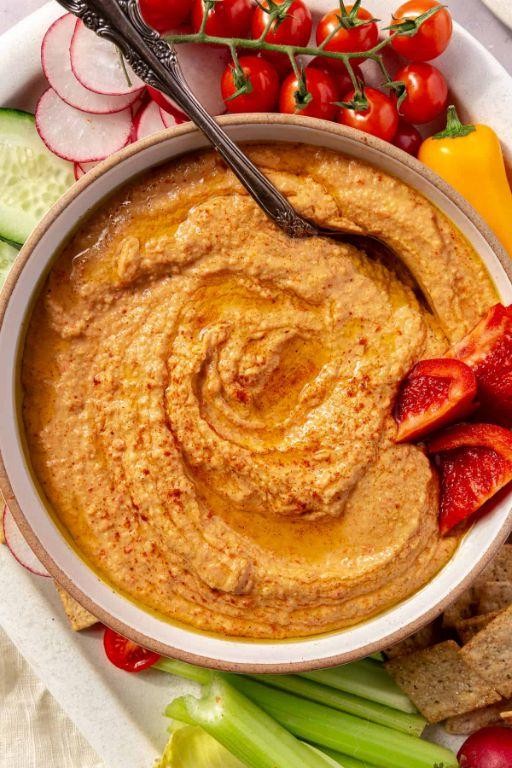
Creating roasted red pepper hummus at home is simpler than you might think, and the vibrant, smoky-sweet result will make you wonder why you ever bought it from the store. Canned chickpeas and jarred roasted peppers make this a quick pantry recipe, perfect for a healthy snack or impressive party dip. Follow these steps carefully for a perfectly smooth, flavorful hummus every time.
3
servings10
minutesIngredients
– A 15-ounce can of chickpeas, drained (but save that liquid!)
– A cup of jarred roasted red peppers, patted dry
– A generous 1/4 cup of tahini
– A couple of tablespoons of fresh lemon juice
– A big glug of extra virgin olive oil (about 2 tablespoons)
– A small clove of garlic
– A good pinch of salt (about 1/2 teaspoon)
– A sprinkle of smoked paprika for serving
Instructions
1. Drain the can of chickpeas into a bowl, reserving the aquafaba (the chickpea liquid).
2. Tip the drained chickpeas into the bowl of a food processor.
3. Add the roasted red peppers, tahini, lemon juice, olive oil, garlic clove, and salt to the food processor.
4. Secure the lid on the food processor and blend the mixture on high speed for 1 full minute.
5. Stop the processor, scrape down the sides with a spatula, and check the consistency.
6. With the processor running on low, slowly stream in 2 tablespoons of the reserved aquafaba through the feed tube. (Tip: The aquafaba is the secret to an unbelievably creamy texture without adding more oil.)
7. Continue to blend for another 2 minutes, until the hummus is completely smooth and pale.
8. Taste the hummus and adjust the salt or lemon juice if needed. (Tip: Always taste and adjust seasoning before serving; the flavors will develop as it sits.)
9. Transfer the hummus to a serving bowl.
10. Use the back of a spoon to create swirls on the surface of the hummus.
11. Drizzle with an extra tablespoon of olive oil and sprinkle with smoked paprika. (Tip: Toasting your own red peppers under a broiler until the skin is blackened and blistered will give you an even deeper, smokier flavor.)
Finally, you’ll have a hummus with a luxuriously smooth, almost whipped texture and a beautiful coral color. The flavor is a perfect balance of nutty tahini, bright lemon, and the sweet, smoky depth of the peppers. For a creative twist, swirl in a spoonful of harissa paste just before serving for a spicy kick that pairs wonderfully with warm pita bread or crisp vegetable sticks.
Marinated Greek Olives with Citrus and Herbs
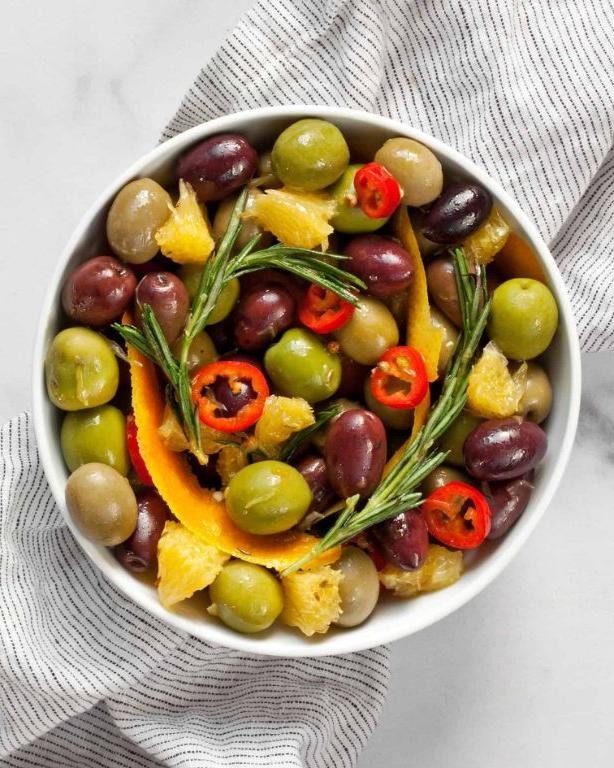
A simple yet sophisticated appetizer, these marinated Greek olives transform basic pantry ingredients into something truly special with just a little patience and minimal effort. As your cooking teacher, I’ll walk you through each step methodically so you can confidently create this vibrant Mediterranean staple that’s perfect for entertaining or elevating your weeknight meals.
3
servings15
minutesIngredients
– 2 cups of mixed Greek olives (the kind with pits)
– A couple of fresh rosemary sprigs
– 3-4 fresh thyme sprigs
– 2 bay leaves (the dried ones from your spice rack work great)
– Zest from one large orange
– Juice from half that same orange
– A generous splash of extra virgin olive oil (about ¼ cup)
– 2 peeled garlic cloves
– A pinch of red pepper flakes
– ½ teaspoon of whole black peppercorns
Instructions
1. Place 2 cups of mixed Greek olives in a medium glass or ceramic bowl.
2. Add 2 peeled garlic cloves to the bowl with the olives.
3. Strip the leaves from 3-4 fresh thyme sprigs and add them to the bowl.
4. Break 2 fresh rosemary sprigs into smaller pieces and add them to the mixture.
5. Add 2 bay leaves to the bowl.
6. Sprinkle in ½ teaspoon of whole black peppercorns.
7. Add a pinch of red pepper flakes for subtle heat.
8. Zest one large orange directly over the bowl to capture the essential oils.
9. Squeeze the juice from half of the zested orange into the bowl.
10. Pour a generous ¼ cup of extra virgin olive oil over all ingredients.
11. Use a spoon to gently toss everything together, ensuring all olives are coated.
12. Cover the bowl tightly with plastic wrap and refrigerate for at least 4 hours, though overnight marinating develops deeper flavors.
13. Remove the marinated olives from refrigerator 30 minutes before serving to allow the olive oil to return to liquid state.
14. Give the olives one final gentle stir before serving.
Serve these olives at room temperature to fully appreciate their complex flavors. The briny olives become wonderfully infused with citrus brightness and herbal notes, while the garlic mellows into a subtle background warmth. Try serving them alongside crusty bread for dipping into the flavorful marinade, or as part of an antipasto platter with cheeses and cured meats for an impressive yet easy entertaining option.
Zucchini and Feta Fritters
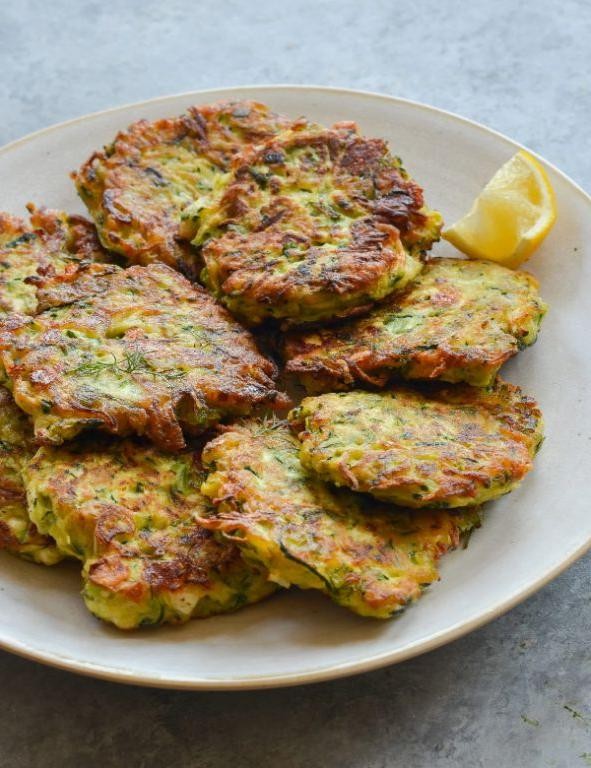
Many home cooks find themselves with extra zucchini during harvest season, and these fritters transform that abundance into something truly special. Mastering this recipe will give you a crispy, savory treat that works equally well as an appetizer or light meal. Let me walk you through each step to ensure perfect results every time.
8
portions15
minutes24
minutesIngredients
– About 2 cups of grated zucchini (from 2 medium ones)
– A generous 1/2 cup of crumbled feta cheese
– A couple of large eggs
– Roughly 1/4 cup of all-purpose flour
– A small handful of chopped fresh dill (about 2 tablespoons)
– A couple of finely chopped green onions
– A good pinch of salt and several cracks of black pepper
– A splash of olive oil for frying (about 1/4 cup)
Instructions
1. Place your grated zucchini in a clean kitchen towel and squeeze firmly over the sink to remove excess moisture—this prevents soggy fritters.
2. Transfer the dried zucchini to a medium mixing bowl and add the crumbled feta cheese, eggs, flour, chopped dill, green onions, salt, and pepper.
3. Use a fork to mix everything together until just combined—be careful not to overmix, as this keeps the texture light.
4. Heat 2 tablespoons of olive oil in a large non-stick skillet over medium heat until it shimmers (about 350°F if you have a thermometer).
5. Drop heaping tablespoons of the zucchini mixture into the hot oil, gently flattening each with the back of your spoon to form 3-inch rounds.
6. Cook for 3-4 minutes until the bottoms are golden brown and crispy around the edges.
7. Carefully flip each fritter using a thin spatula and cook for another 3 minutes on the second side.
8. Transfer the cooked fritters to a paper towel-lined plate to drain excess oil, then repeat with remaining batter, adding more oil as needed.
9. Serve immediately while hot and crispy. Very satisfying with their crisp exterior and tender, cheesy interior, these fritters pair wonderfully with a dollop of Greek yogurt or tzatziki. Try stacking them with sliced tomatoes and fresh herbs for an elegant presentation that belies their simple preparation.
Cumin-Spiced Grilled Lamb Skewers

Savor the aromatic blend of earthy cumin and tender lamb in this straightforward grilled skewer recipe that transforms simple ingredients into an impressive meal. Starting with quality lamb shoulder ensures rich flavor, while the spice rub creates a beautifully caramelized crust when grilled. Follow these methodical steps to achieve perfectly cooked skewers every time, even if you’re new to grilling.
4
servings25
minutes10
minutesIngredients
– About 1.5 pounds of lamb shoulder, cut into 1.5-inch cubes
– A good glug of olive oil, roughly 2 tablespoons
– 2 tablespoons of ground cumin
– 1 tablespoon of smoked paprika
– A couple of minced garlic cloves
– The juice from half a lemon
– A generous pinch of salt, about 1 teaspoon
– A solid wooden or metal skewer set, soaked if wooden
Instructions
1. Place your lamb cubes in a medium mixing bowl and drizzle with the olive oil, tossing to coat evenly.
2. Sprinkle the ground cumin, smoked paprika, minced garlic, lemon juice, and salt over the lamb, then use your hands to massage the spices into the meat until every piece is thoroughly covered. Tip: Let the lamb marinate at room temperature for 20 minutes to allow the flavors to penetrate deeply.
3. While the lamb marinates, if using wooden skewers, submerge them completely in water for at least 15 minutes to prevent burning on the grill.
4. Thread 4-5 lamb cubes onto each skewer, leaving a small space between pieces to ensure even cooking.
5. Preheat your grill to medium-high heat, aiming for a surface temperature of 400°F.
6. Place the skewers directly on the grill grates and cook for 4-5 minutes until you see visible grill marks and the bottom edges begin to brown.
7. Flip each skewer using tongs and grill for another 4-5 minutes until the internal temperature reaches 145°F for medium doneness. Tip: Use an instant-read thermometer inserted into the thickest piece of lamb to check for perfect doneness without guessing.
8. Remove the skewers from the grill and transfer them to a clean plate. Tip: Let the lamb rest for 3-4 minutes before serving to allow the juices to redistribute throughout the meat.
Lamb emerges from the grill with a crisp, spice-crusted exterior that gives way to exceptionally tender, juicy interior meat. The dominant cumin flavor pairs wonderfully with the smokiness from the paprika and grill, creating a robust profile that stands up to cooling sides like tzatziki or a simple cucumber salad. For a complete meal, serve these skewers over fluffy couscous or tucked into warm pita bread with fresh herbs.
Tabbouleh with Mint and Parsley
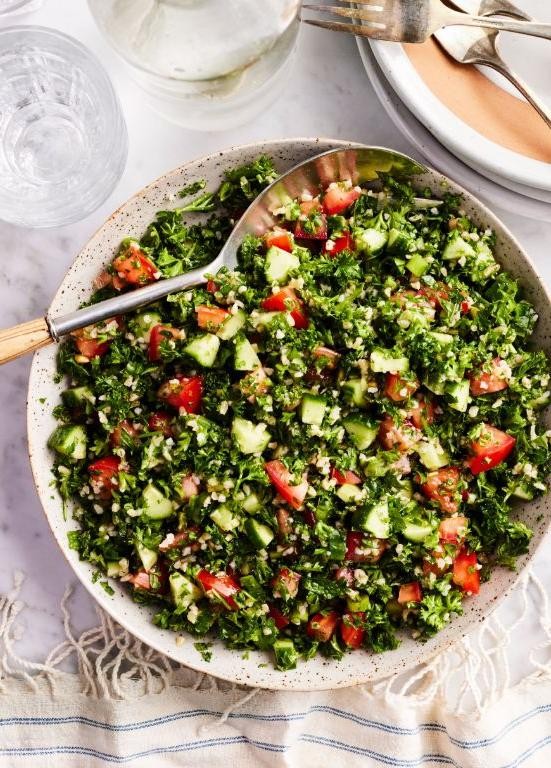
This vibrant Middle Eastern salad brings fresh herbs and bright flavors to your table with minimal effort. Think of it as a refreshing, herb-forward side that’s perfect for warm weather meals or as a light lunch option. The combination of parsley, mint, and lemon creates a truly invigorating dish that feels both healthy and satisfying.
5
servings25
minutesIngredients
– 1 cup of fine bulgur wheat
– A good glug of extra virgin olive oil (about 1/4 cup)
– The juice from 2 medium lemons
– A couple of bunches of fresh flat-leaf parsley (about 2 cups chopped)
– A generous handful of fresh mint leaves (about 1/2 cup chopped)
– 2 medium ripe tomatoes, diced small
– Half of a small red onion, finely minced
– A big pinch of salt
Instructions
1. Place 1 cup of fine bulgur wheat in a medium bowl and cover with hot water, letting it soak for 20 minutes until tender but still slightly chewy.
2. While the bulgur soaks, finely chop 2 cups of fresh flat-leaf parsley leaves and stems, using a sharp knife to prevent bruising the delicate herbs.
3. Chop 1/2 cup of fresh mint leaves, keeping them separate from the parsley to maintain their distinct flavors.
4. Dice 2 medium tomatoes into small, uniform pieces and place them in a large mixing bowl.
5. Finely mince half of a small red onion and add it to the tomatoes in the mixing bowl.
6. Drain the soaked bulgur thoroughly, squeezing out any excess water with your hands or using a fine mesh strainer.
7. Add the drained bulgur to the tomato and onion mixture in the large bowl.
8. Pour 1/4 cup of extra virgin olive oil over the bulgur mixture, tossing gently to coat everything evenly.
9. Squeeze the juice from 2 medium lemons directly into the bowl, catching any seeds with your other hand.
10. Sprinkle a big pinch of salt over the mixture and toss everything together until well combined.
11. Gently fold in the chopped parsley and mint, being careful not to crush the delicate herbs.
12. Let the tabbouleh rest at room temperature for 15 minutes to allow the flavors to meld together.
Fresh from the bowl, this tabbouleh offers a wonderful contrast of textures—the chewy bulgur, crisp herbs, and juicy tomatoes create a lively mouthfeel. The bright lemon and herbal notes make it incredibly refreshing, perfect for scooping up with pita bread or serving alongside grilled meats. For a creative twist, try stuffing it into hollowed-out tomatoes or using it as a bed for seared halloumi cheese.
Tomato Basil Bruschetta

Creating the perfect tomato basil bruschetta is simpler than you might think, and today I’ll walk you through each step to ensure your appetizer turns out vibrant and delicious every single time.
1
loaf15
minutes10
minutesIngredients
– 1 loaf of crusty Italian bread
– 4 medium ripe tomatoes
– A big handful of fresh basil leaves
– 2 cloves of garlic
– A generous glug of extra virgin olive oil (about ¼ cup)
– A splash of balsamic vinegar (1 tablespoon)
– A pinch of salt and a couple of cracks of black pepper
Instructions
1. Preheat your oven to 375°F.
2. Slice the Italian bread into ½-inch thick pieces.
3. Arrange the bread slices in a single layer on a baking sheet.
4. Toast the bread in the oven for 8–10 minutes, until the edges are golden and the surface is crisp.
5. While the bread toasts, dice the tomatoes into ¼-inch pieces. (Tip: For less watery bruschetta, scoop out and discard the tomato seeds before dicing.)
6. Finely chop the fresh basil leaves.
7. Mince the garlic cloves.
8. In a medium bowl, combine the diced tomatoes, chopped basil, and minced garlic.
9. Drizzle in the olive oil and balsamic vinegar.
10. Sprinkle with salt and pepper.
11. Gently toss the mixture until everything is evenly coated. (Tip: Let the mixture sit for 10 minutes to allow the flavors to meld while the bread cools slightly.)
12. Remove the toasted bread from the oven and let it cool for 2–3 minutes until it’s safe to handle.
13. Rub one side of each toasted bread slice with the cut side of a remaining garlic clove for extra flavor. (Tip: Rubbing the garlic while the bread is still warm helps the flavor absorb better.)
14. Spoon the tomato-basil mixture generously onto the garlic-rubbed side of each bread slice.
15. Drizzle any remaining dressing from the bowl over the top.
Just before serving, you’ll love the contrast between the crisp, garlicky toast and the juicy, fresh topping. The bruschetta shines with the sweet acidity of tomatoes and the aromatic punch of basil, making it a perfect starter for summer gatherings. Try serving it alongside a charcuterie board or topping it with a thin slice of fresh mozzarella for a Caprese-inspired twist.
Mediterranean Quinoa Salad with Lemon Vinaigrette

Many of us are looking for healthy, make-ahead meals that actually taste exciting, and this Mediterranean quinoa salad delivers exactly that. Making this dish is straightforward if you follow each step carefully, focusing on proper technique for the best results.
2
servings25
minutes20
minutesIngredients
– 1 cup of quinoa
– 2 cups of water
– A generous pinch of salt
– 1 large cucumber, diced into small pieces
– A couple of handfuls of cherry tomatoes, halved
– A big handful of fresh parsley, chopped
– A small handful of fresh mint, chopped
– 1/4 cup of red onion, finely diced
– 1/2 cup of crumbled feta cheese
– 1/4 cup of extra virgin olive oil
– Juice from 2 lemons
– 1 teaspoon of dried oregano
– A splash of honey
– Freshly ground black pepper
Instructions
1. Rinse 1 cup of quinoa thoroughly under cold running water in a fine-mesh strainer for 1 minute to remove any bitterness.
2. Combine the rinsed quinoa, 2 cups of water, and a generous pinch of salt in a medium saucepan.
3. Bring the mixture to a boil over high heat, then immediately reduce the heat to low and cover the saucepan tightly with a lid.
4. Simmer the quinoa for exactly 15 minutes until all the water is absorbed and you see little spirals separating from the grains.
5. Remove the saucepan from the heat and let the quinoa sit covered for 5 minutes to steam and fluff up.
6. Spread the cooked quinoa in a thin layer on a baking sheet and refrigerate for 20 minutes to cool completely.
7. While the quinoa cools, whisk together 1/4 cup of extra virgin olive oil, juice from 2 lemons, 1 teaspoon of dried oregano, a splash of honey, and freshly ground black pepper in a small bowl until emulsified.
8. Transfer the cooled quinoa to a large mixing bowl.
9. Add 1 large diced cucumber, a couple of handfuls of halved cherry tomatoes, a big handful of chopped fresh parsley, a small handful of chopped fresh mint, 1/4 cup of finely diced red onion, and 1/2 cup of crumbled feta cheese to the quinoa.
10. Pour the lemon vinaigrette over the salad ingredients.
11. Toss everything together gently but thoroughly until all components are evenly coated with the dressing.
12. Serve immediately or cover and refrigerate for up to 2 hours to allow flavors to meld.
So satisfying with its fluffy quinoa, crunchy vegetables, and creamy feta all brought together by that bright lemon dressing. Serve it alongside grilled chicken for a complete meal, or pack it for a next-day lunch where the flavors have deepened even more.
Shrimp Scampi with Garlic and White Wine
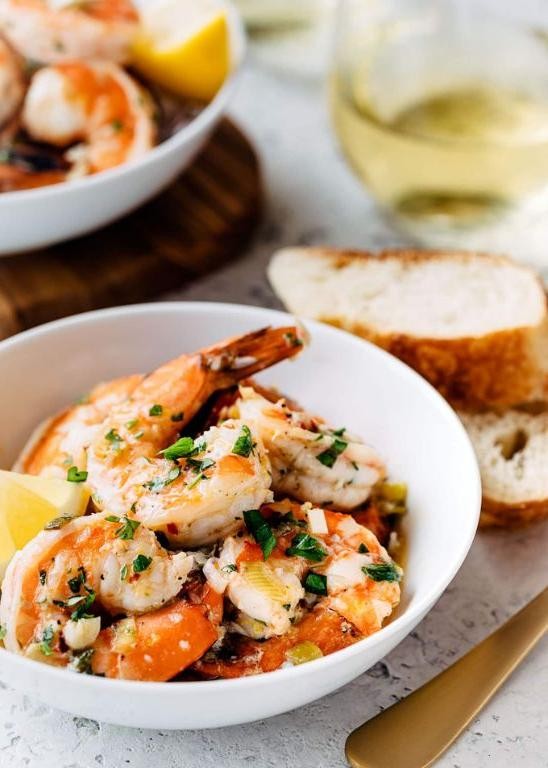
A classic shrimp scampi is easier than you might think, and today we’ll walk through each simple step to create that perfect garlicky, buttery dish you love from restaurants. As your cooking teacher, I’ll guide you through exactly what to do and when, so you can feel confident in your kitchen. Let’s start with gathering our ingredients before we begin cooking.
3
servings15
minutes5
minutesIngredients
– 1 pound of large raw shrimp, peeled and deveined
– 8 cloves of garlic, minced nice and fine
– 1/2 cup of dry white wine
– 1/2 cup of unsalted butter
– 2 tablespoons of olive oil
– A big handful of fresh parsley, chopped
– 1/2 lemon for squeezing
– A pinch of red pepper flakes if you like some heat
– Salt for seasoning
Instructions
1. Pat your shrimp completely dry with paper towels to ensure they sear properly instead of steaming.
2. Season the shrimp lightly with salt on both sides.
3. Heat 2 tablespoons of olive oil in a large skillet over medium-high heat until it shimmers.
4. Add the shrimp in a single layer and cook for exactly 1 minute per side until they turn pink and opaque, then transfer them to a plate.
5. Reduce the heat to medium and melt 1/2 cup of unsalted butter in the same skillet.
6. Add 8 minced garlic cloves and cook for 1 minute until fragrant but not browned.
7. Pour in 1/2 cup of dry white wine and let it bubble for 2 minutes to cook off the alcohol.
8. Return the shrimp to the skillet and toss to coat in the sauce for 30 seconds.
9. Squeeze the juice from half a lemon directly over the shrimp.
10. Stir in a big handful of chopped fresh parsley and a pinch of red pepper flakes if using.
11. Remove from heat immediately to prevent overcooking the shrimp.
Rich, buttery sauce clings to each tender shrimp with a bright kick from lemon and gentle heat from pepper flakes. Serve this scampi over angel hair pasta to soak up every drop of sauce, or with crusty bread for dipping into that glorious garlic-wine butter.
Baklava with Honey and Pistachios
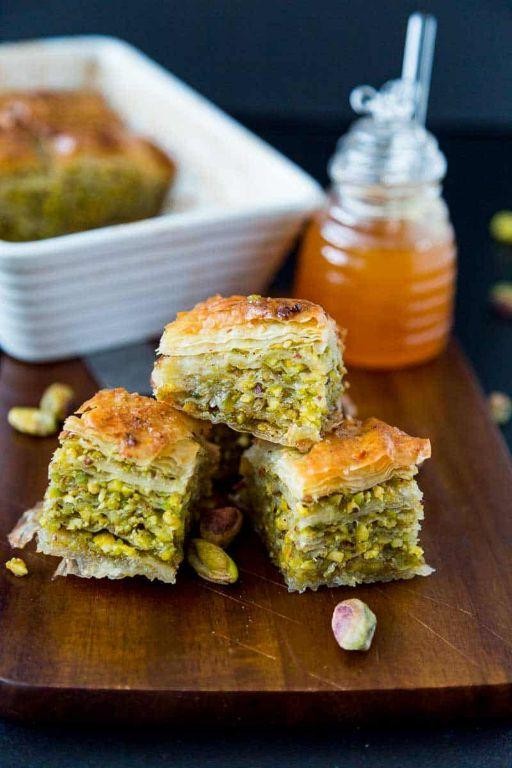
After years of testing various baklava recipes, I’ve perfected this honey-soaked version that balances crispness with just the right amount of sweetness. Assembling the delicate layers might seem intimidating at first, but breaking it down into simple, methodical steps makes the process surprisingly approachable for beginners.
24
portions30
minutes60
minutesIngredients
- 1 package of phyllo dough, thawed overnight in the fridge
- 2 cups of shelled pistachios, roughly chopped
- 1 cup of unsalted butter, melted until golden
- 1 cup of granulated sugar
- 1 cup of water
- 1 cup of honey
- 1 teaspoon of ground cinnamon
- A generous pinch of ground cloves
- A splash of fresh lemon juice
Instructions
- Preheat your oven to 350°F and position a rack in the center.
- Brush a 9×13-inch baking dish with a thin layer of melted butter using a pastry brush.
- Unroll the phyllo dough and cover it with a damp kitchen towel to prevent drying out.
- Place one sheet of phyllo in the baking dish and brush it thoroughly with melted butter.
- Repeat step 4 until you have 8 buttered phyllo layers stacked in the dish.
- Sprinkle half of the chopped pistachios evenly over the phyllo layers.
- Add 4 more buttered phyllo sheets over the pistachio layer.
- Sprinkle the remaining pistachios mixed with cinnamon and cloves over the phyllo.
- Top with the remaining phyllo sheets, brushing each one with butter before adding the next.
- Use a sharp knife to cut the baklava into diamond shapes, cutting through all layers.
- Bake for 45-50 minutes until the top is golden brown and crisp.
- While baking, combine sugar, water, honey, and lemon juice in a saucepan.
- Bring the syrup to a boil over medium heat, then reduce to a simmer for 10 minutes until slightly thickened.
- Remove the baked baklava from the oven and immediately pour the hot syrup evenly over the top.
- Let the baklava cool completely at room temperature for at least 4 hours before serving.
Buttery layers shatter with each bite, revealing the earthy pistachios and warm spices beneath the floral honey glaze. Serve squares slightly warmed to enhance the aromatic cinnamon, or crumble over vanilla ice cream for a decadent dessert twist that highlights the textural contrast between crisp pastry and creamy frozen treat.
Spanakopita with Fresh Spinach and Dill
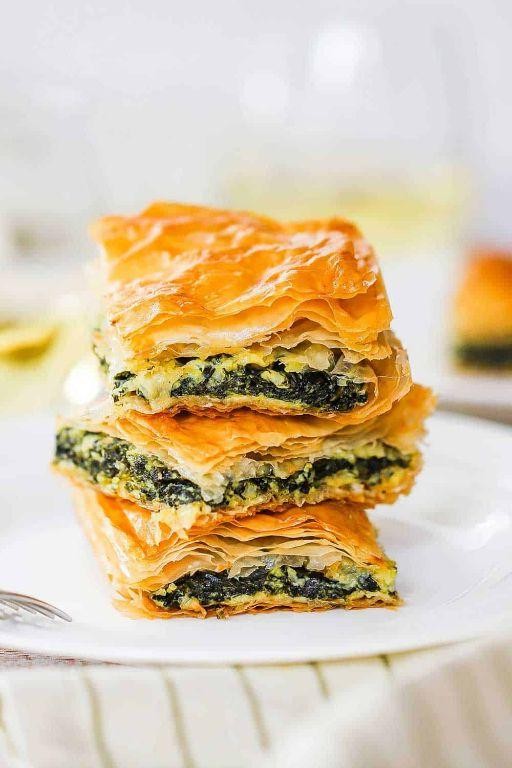
Ready to master a classic Greek favorite? This spanakopita recipe breaks down the flaky, savory spinach pie into simple, manageable steps perfect for first-timers. Remember to thaw your frozen phyllo dough in the refrigerator overnight—it makes handling much easier.
12
portions30
minutes63
minutesIngredients
– A 16-ounce package of frozen phyllo dough, thawed
– 2 pounds of fresh spinach, roughly chopped
– A large yellow onion, finely diced
– A couple of cloves of garlic, minced
– 8 ounces of crumbled feta cheese
– A big handful of fresh dill, chopped
– 2 large eggs, lightly beaten
– A half cup of extra virgin olive oil
– A splash of lemon juice
– A pinch of salt and black pepper
Instructions
1. Preheat your oven to 350°F and lightly brush a 9×13-inch baking dish with olive oil.
2. Heat 2 tablespoons of olive oil in a large skillet over medium heat and sauté the diced onion for 5–7 minutes until translucent.
3. Add the minced garlic and cook for 1 more minute until fragrant.
4. Stir in the chopped spinach in batches, wilting each addition before adding more, about 5–7 minutes total.
5. Transfer the spinach mixture to a colander and press out excess liquid with a spoon—this prevents a soggy filling.
6. In a large bowl, combine the drained spinach, crumbled feta, chopped dill, beaten eggs, a splash of lemon juice, salt, and pepper.
7. Unroll the phyllo dough and cover it with a damp towel to keep it from drying out.
8. Place one sheet of phyllo in the prepared dish, brush lightly with olive oil, and repeat, layering 8 sheets total.
9. Spread the spinach filling evenly over the phyllo layers.
10. Layer 8 more phyllo sheets on top, brushing each with olive oil.
11. Score the top layers into squares with a sharp knife to make serving easier later.
12. Bake for 45–50 minutes until the top is golden brown and crisp.
Buttery, flaky layers give way to a vibrant filling where the tangy feta and fresh dill truly shine. Serve warm with a dollop of Greek yogurt or alongside a simple cucumber salad for a complete Mediterranean meal.
Roasted Vegetable Ratatouille
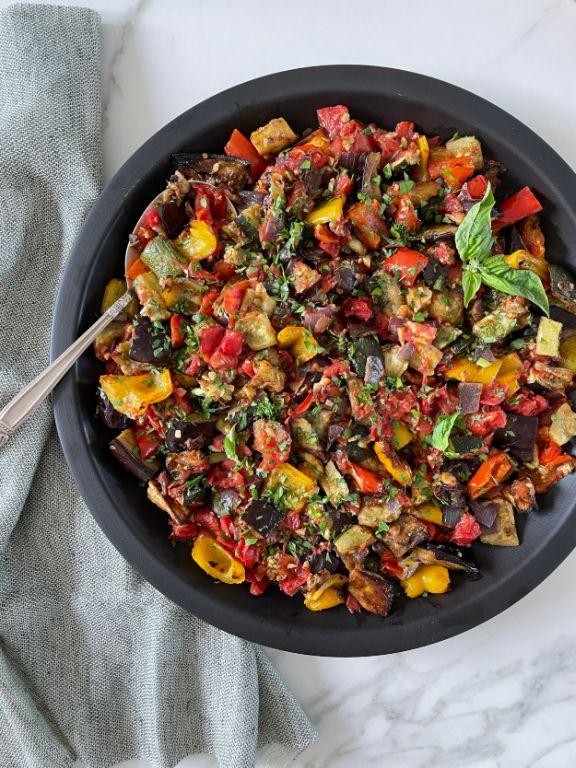
Just imagine transforming humble summer vegetables into a vibrant, caramelized masterpiece that fills your kitchen with the most incredible aromas. This roasted vegetable ratatouille simplifies the classic French dish while delivering deep, concentrated flavors through oven roasting rather than stovetop simmering. You’ll be amazed how roasting brings out the natural sweetness in each vegetable while maintaining their distinct textures.
3
servings15
minutes45
minutesIngredients
– 2 medium eggplants, cut into 1-inch cubes
– 2 medium zucchinis, sliced into ½-inch rounds
– 1 large red bell pepper, chopped into 1-inch pieces
– 1 large yellow onion, roughly chopped
– 4 cloves of garlic, minced
– a generous ¼ cup of olive oil
– a couple of teaspoons of dried herbs de Provence
– a good pinch of kosher salt
– a few grinds of black pepper
– a splash of balsamic vinegar
– a handful of fresh basil leaves for garnish
Instructions
1. Preheat your oven to 425°F and line two large baking sheets with parchment paper.
2. Place the cubed eggplant, sliced zucchini, chopped bell pepper, and chopped onion in a large mixing bowl.
3. Add the minced garlic, olive oil, herbs de Provence, kosher salt, and black pepper to the vegetables.
4. Toss everything together with your hands until all vegetables are evenly coated with oil and seasonings.
5. Spread the vegetables in a single layer across both prepared baking sheets, making sure they don’t overlap.
6. Roast in the preheated oven for 25 minutes, then rotate the pans between racks for even cooking.
7. Continue roasting for another 15-20 minutes until the vegetables are tender with golden-brown edges.
8. Remove the baking sheets from the oven and drizzle the balsamic vinegar over the hot vegetables.
9. Gently toss the roasted vegetables to distribute the vinegar evenly.
10. Transfer the ratatouille to a serving dish and tear fresh basil leaves over the top.
Marvel at how the high-heat roasting transforms these simple ingredients into something extraordinary – the eggplant becomes creamy, the zucchini maintains a slight bite, and the peppers caramelize into sweet perfection. This version makes a stunning side dish for grilled meats, but I love it spooned over creamy polenta or served at room temperature with crusty bread for soaking up the flavorful juices.
Olive Oil and Lemon Polenta
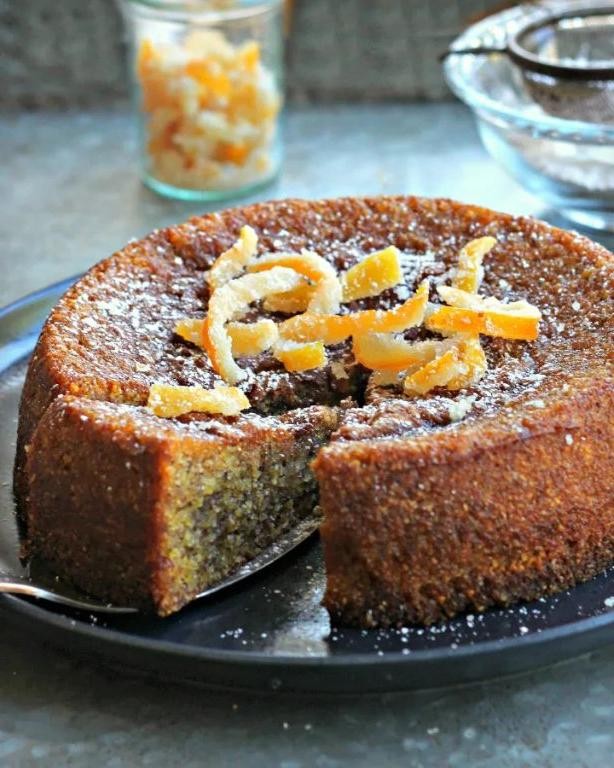
Naturally, this olive oil and lemon polenta is the kind of comforting dish that feels both rustic and elegant. It’s incredibly simple to make, requiring just a handful of pantry staples, and yields a creamy, bright result that pairs beautifully with everything from roasted vegetables to grilled fish. Let’s walk through the steps together so you can master this versatile side.
5
servings5
minutes30
minutesIngredients
– 1 cup of coarse polenta
– 4 cups of water
– A generous glug of extra virgin olive oil (about 3 tablespoons)
– The juice of 1 large lemon
– A couple of pinches of salt
Instructions
1. Pour 4 cups of water into a medium saucepan and bring it to a rolling boil over high heat.
2. Add a couple of pinches of salt to the boiling water.
3. Slowly whisk in 1 cup of coarse polenta in a steady stream to prevent clumps from forming.
4. Reduce the heat to low and continue whisking constantly for 2 minutes until the mixture thickens slightly.
5. Cover the saucepan with a lid and let the polenta simmer on low heat for 25 minutes, stirring every 5 minutes with a wooden spoon to prevent sticking.
6. Remove the lid and check that the polenta has absorbed most of the liquid and is tender.
7. Turn off the heat and stir in a generous glug of extra virgin olive oil until fully incorporated.
8. Squeeze in the juice of 1 large lemon and mix thoroughly to combine.
9. Let the polenta rest off the heat for 3 minutes to allow the flavors to meld.
10. Serve immediately while warm.
Just out of the pot, this polenta boasts a wonderfully creamy texture with a subtle graininess that’s satisfying to the palate. The lemon juice cuts through the richness of the olive oil, giving it a bright, zesty finish that elevates simple ingredients. For a creative twist, try spreading it thickly on a plate and topping with sautéed mushrooms or a drizzle of herb-infused oil.
Conclusion
Vibrant Mediterranean flavors await in these 22 wholesome recipes that make healthy eating deliciously simple. We hope you’ll try a few, share your favorites in the comments, and pin this roundup to your Pinterest boards for easy inspiration. Happy cooking!


