Get ready to experience the most mind-blowing, soul-satisfying, life-altering mac and cheese you’ve ever encountered in your entire existence. Gone are the days of boring pasta dishes—these individual mac and cheese bowls will transport you to a realm of pure cheesy ecstasy that will make you question every mac and cheese you’ve ever eaten before. Prepare yourself for a culinary journey that will leave your taste buds screaming for more and your heart overflowing with cheesy joy.
Why This Recipe Works
- The triple-cheese blend creates an unparalleled flavor symphony that dances across your palate with every single bite, combining sharp cheddar for that classic punch, creamy Monterey Jack for luxurious smoothness, and Parmesan for that irresistible umami depth that will haunt your dreams in the best possible way.
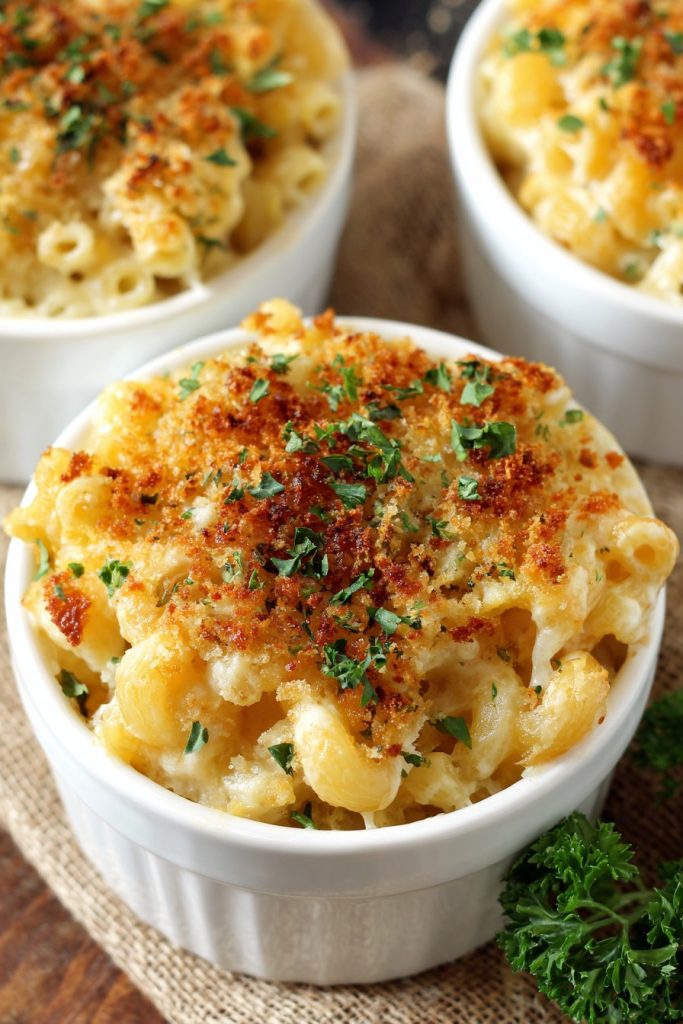
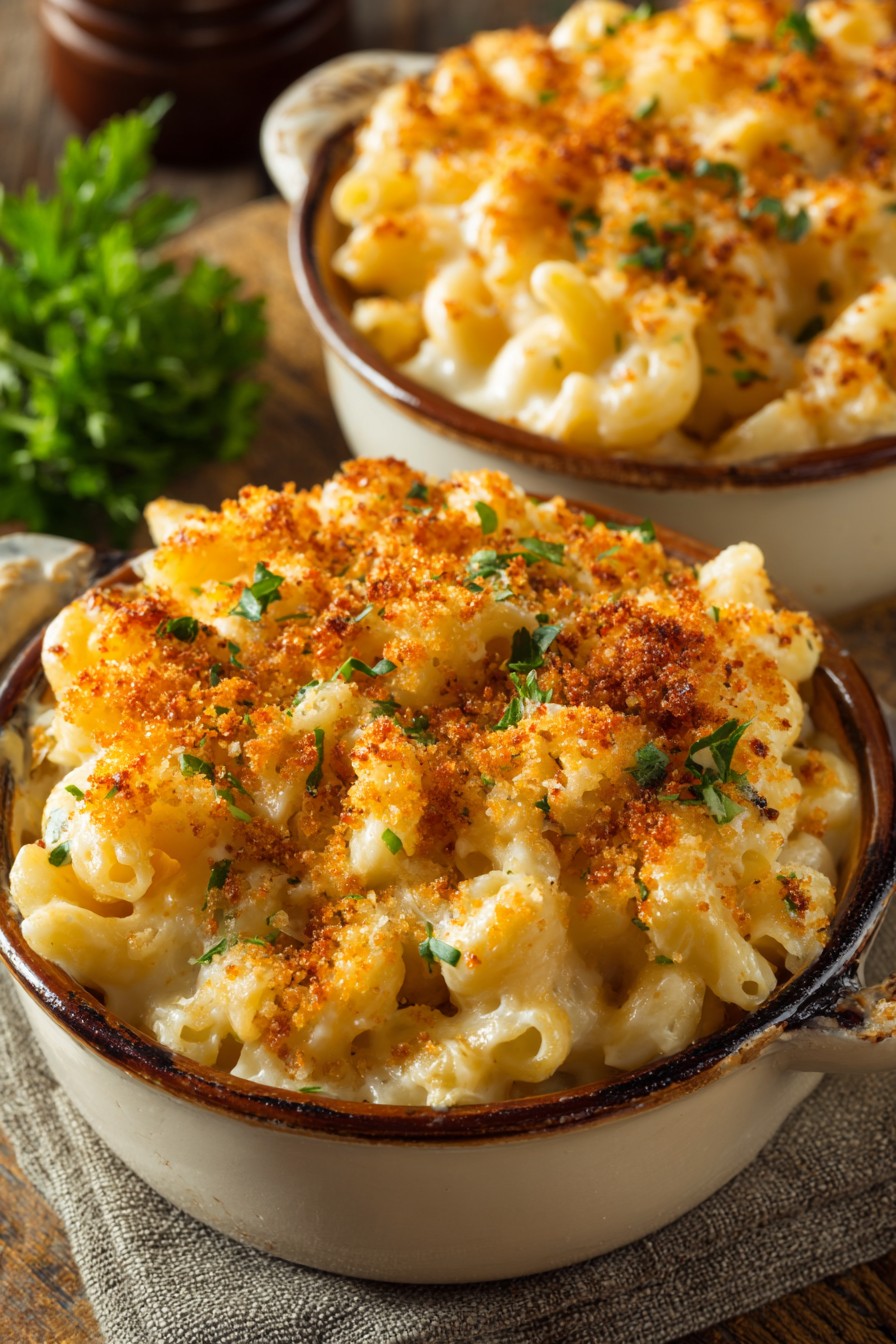
- Baking in individual ramekins creates the most incredible crispy golden-brown crust on top while maintaining that molten, gooey center that will make you weak in the knees with anticipation as you break through that perfect surface with your spoon.
- The secret ingredient of evaporated milk creates a sauce so velvety and stable that it won’t break or separate, giving you that restaurant-quality texture that will make you feel like you’re dining at a five-star establishment right in your own kitchen.
- Perfectly cooked elbow macaroni provides those ideal nooks and crannies to capture every last drop of that heavenly cheese sauce, ensuring maximum flavor delivery in every single mouthful that will leave you breathless with satisfaction.
- The addition of Dijon mustard and Worcestershire sauce adds that subtle complexity that elevates this from ordinary comfort food to an extraordinary culinary masterpiece that will become your new obsession.
Ingredients
- 8 ounces elbow macaroni
- 4 tablespoons unsalted butter
- 3 tablespoons all-purpose flour
- 2 cups whole milk
- 1 cup evaporated milk
- 2 cups shredded sharp cheddar cheese
- 1 cup shredded Monterey Jack cheese
- 1/2 cup grated Parmesan cheese
- 1 teaspoon Dijon mustard
- 1 teaspoon Worcestershire sauce
- 1/2 teaspoon garlic powder
- 1/2 teaspoon onion powder
- 1/4 teaspoon cayenne pepper
- 1/2 teaspoon smoked paprika
- Salt and black pepper to taste
- 1/2 cup panko breadcrumbs
- 2 tablespoons melted butter
- 1 tablespoon chopped fresh parsley
Equipment Needed
- Large pot for boiling pasta
- Medium saucepan for cheese sauce
- Whisk
- Wooden spoon
- 6 individual oven-safe ramekins or bowls
- Baking sheet
- Colander
- Measuring cups and spoons
- Grater (if shredding cheese from blocks)
- Mixing bowls
Instructions
Cook the Pasta to Perfection
Bring a large pot of heavily salted water to a rolling boil—you want it to taste like the ocean, which ensures your pasta will be perfectly seasoned from the inside out. Add the 8 ounces of elbow macaroni and cook for exactly 7-8 minutes, stirring occasionally to prevent sticking, until the pasta is al dente with just the right amount of bite. You’ll know it’s ready when you can cut a piece in half and see a tiny white dot in the center—this is the secret to pasta that won’t turn mushy during baking. Immediately drain the pasta in a colander but DO NOT rinse it—those starchy surfaces are essential for helping the cheese sauce cling to every single noodle. While the pasta drains, quickly toss it with 1 tablespoon of butter to prevent clumping and set it aside while you create the cheese sauce of your dreams.
Create the Ultimate Cheese Sauce Base
Transform into Cheesy Heaven
Reduce the heat to low and begin adding your shredded cheeses one handful at a time, starting with the 2 cups of sharp cheddar and waiting until each addition is completely melted before adding the next—this patience ensures your sauce stays smooth and emulsified rather than breaking into a greasy mess. Once the cheddar is fully incorporated, add the 1 cup of Monterey Jack cheese using the same method, followed by the 1/2 cup of grated Parmesan, stirring gently but consistently with your wooden spoon. Now comes the flavor magic: stir in the 1 teaspoon each of Dijon mustard and Worcestershire sauce, along with the 1/2 teaspoon each of garlic powder and onion powder, 1/4 teaspoon cayenne pepper, and 1/2 teaspoon smoked paprika. Season generously with salt and black pepper to taste—don’t be shy here, as the pasta will absorb some of that seasoning. Your sauce should be luxuriously thick and coat your spoon beautifully at this point.
Combine and Prepare for Baking Brilliance
Gently fold the cooked elbow macaroni into your magnificent cheese sauce until every single piece of pasta is completely enveloped in that glorious cheesy goodness—take your time here to ensure even distribution throughout. In a small bowl, combine the 1/2 cup panko breadcrumbs with the 2 tablespoons of melted butter and 1 tablespoon of chopped fresh parsley, mixing until the breadcrumbs are evenly coated and ready to create that irresistible crunchy topping. Divide the mac and cheese mixture evenly among your 6 prepared ramekins, filling them about 3/4 full to allow room for expansion during baking. Sprinkle the buttered panko mixture evenly over the top of each ramekin, creating a generous layer that will transform into that golden, crispy crust you’ve been dreaming about. Place the filled ramekins on a baking sheet to catch any potential bubbling over and make transferring them in and out of the oven much safer and easier.
Bake to Golden Perfection
Preheat your oven to 375°F and once it reaches temperature, carefully place the baking sheet with your mac and cheese bowls on the center rack. Bake for 20-25 minutes exactly until the tops are beautifully golden brown and the edges are bubbling vigorously—you should see those little cheese bubbles dancing around the perimeter of each ramekin. For that extra restaurant-quality finish, switch your oven to broil for the final 1-2 minutes, watching carefully to achieve that deep golden crust without burning—this step is absolutely transformative for both appearance and texture. Remove from the oven and let the bowls rest for 5-7 minutes before serving—this resting period allows the cheese sauce to thicken slightly and reach the perfect serving temperature without burning anyone’s mouth. The result will be individual portions of pure heaven with that incredible contrast between the crispy topping and the molten, creamy interior that will make you the star of any gathering.
Tips and Tricks
For the absolute creamiest mac and cheese experience of your life, consider shredding your own cheese from blocks rather than using pre-shredded varieties. Those pre-shredded cheeses contain anti-caking agents that can prevent them from melting as smoothly and beautifully as freshly grated cheese. The extra few minutes of effort will reward you with a sauce so velvety and luxurious that it will literally make you sigh with pleasure upon that first heavenly bite. If you’re preparing these ahead of time for a party or gathering, you can assemble the bowls completely up to 24 hours in advance, cover them tightly with plastic wrap, and refrigerate until ready to bake. When baking from refrigerated, you’ll need to add 5-10 minutes to the baking time to ensure they’re heated all the way through to that perfect bubbly state. For those who love extra crispy edges, consider rubbing the inside of your ramekins with a tiny bit of softened butter before adding the mac and cheese mixture—this creates those irresistible caramelized cheese edges that serious mac and cheese enthusiasts absolutely adore. If you find your cheese sauce seems too thick after combining with the pasta, don’t panic! Simply stir in an additional 1-2 tablespoons of warm milk until it reaches your desired consistency. The type of pasta you choose can dramatically affect your final result—while elbow macaroni is classic, cavatappi or shell pasta can create even more surface area for that glorious cheese sauce to cling to. For an extra flavor boost, consider toasting your panko breadcrumbs in a dry skillet for 2-3 minutes before mixing with the butter—this deepens their flavor and creates an even more spectacular crunchy topping. Always taste your cheese sauce before combining with the pasta and adjust seasoning as needed—remember that the pasta will dilute the flavor slightly, so your sauce should taste slightly over-seasoned at this stage for perfect final results.
Recipe Variations
- For the ultimate indulgence, create Bacon Jalapeño Mac and Cheese Bowls by stirring in 1 cup of cooked, crumbled bacon and 2 finely diced jalapeños (seeds removed for milder heat) into the cheese sauce before baking. The smoky bacon and subtle spice from the jalapeños create an incredible flavor contrast that will have your guests begging for your secret. Top with additional bacon crumbles and sliced jalapeños for presentation that will absolutely stun everyone at your table.
- Transform your mac and cheese into Lobster Mac and Cheese Bowls by gently folding in 1 pound of cooked, chopped lobster meat during the final mixing stage. The sweet, tender lobster pairs miraculously with the rich cheese sauce, creating a dish so elegant and sophisticated that it could easily be the star of any special occasion or romantic dinner. Drizzle with a little melted butter and sprinkle with fresh chives before serving for that true restaurant-quality finish.
- For a vegetarian delight that bursts with flavor, create Roasted Vegetable Mac and Cheese Bowls by mixing in 2 cups of roasted vegetables like broccoli florets, cherry tomatoes, and sliced mushrooms. The caramelized edges of the roasted vegetables add incredible depth and texture that will make even the most devoted meat lovers forget there’s no bacon involved. The way the roasted tomatoes burst with flavor against the creamy cheese sauce is nothing short of magical.
- Take your mac and cheese on a global adventure with Buffalo Chicken Mac and Cheese Bowls by stirring in 2 cups of shredded cooked chicken that has been tossed in 1/2 cup of buffalo sauce. The tangy, spicy buffalo flavor cutting through that rich cheese sauce creates a combination so addictive that you’ll find yourself making excuses to prepare this variation again and again. Top with crumbled blue cheese and chopped celery for the full buffalo wing experience in bowl form.
- Create the ultimate breakfast-for-dinner experience with Breakfast Mac and Cheese Bowls by mixing in 1 cup of cooked breakfast sausage crumbles and 4 chopped hard-boiled eggs. The savory sausage and creamy eggs transform this classic comfort food into a meal that works perfectly for brunch, dinner, or even that late-night craving when only the most satisfying combination will do. Serve with hot sauce on the side for those who want an extra kick to start their day or end their night.
Frequently Asked Questions
Can I make these mac and cheese bowls ahead of time and reheat them later?
Absolutely, and this is one of the beautiful things about this recipe! You can assemble the bowls completely up to 24 hours in advance, cover them tightly with plastic wrap, and refrigerate until you’re ready to bake. When baking from refrigerated, you’ll need to add 5-10 minutes to the baking time to ensure they’re heated all the way through to that perfect bubbly state. If you have leftovers (though I can’t imagine you will!), they reheat beautifully in the oven at 350°F for 10-15 minutes or in the microwave for 1-2 minutes, though the oven method will preserve that incredible crispy topping much better. The cheese sauce may appear slightly thicker after refrigeration, but it will return to that glorious creamy consistency once reheated.
What’s the secret to preventing my cheese sauce from becoming grainy or separating?
This is the million-dollar question that haunts many mac and cheese enthusiasts, but I’ve got the solution that will guarantee smooth, velvety perfection every single time! The key is temperature control and gradual incorporation—always add your cheese to a warm but not boiling sauce, and incorporate it gradually rather than dumping it all in at once. Using a combination of cheeses with different melting properties helps maintain emulsion stability, and the evaporated milk in this recipe contains stabilizers that naturally prevent separation. If your sauce does start to look grainy, immediately remove it from heat and whisk in a tablespoon of cold milk or cream—this can often rescue it and bring back that smooth texture you’re craving.
Can I freeze these mac and cheese bowls for later enjoyment?
While you can technically freeze these, I must be honest—the texture will never be quite as spectacular as when freshly baked. The dairy-based sauce can sometimes separate slightly upon thawing, and the pasta may become softer than ideal. If you absolutely must freeze them, I recommend undercooking the pasta by 1-2 minutes and omitting the breadcrumb topping until you’re ready to bake. Freeze the assembled bowls (without topping) for up to 1 month, then thaw overnight in the refrigerator before adding the panko topping and baking as directed, adding a few extra minutes to account for the cold start. The result will still be delicious, but nothing compares to that fresh-from-the-oven perfection.
What’s the purpose of the evaporated milk in this recipe?
The evaporated milk is our secret weapon for creating the most stable, creamy cheese sauce imaginable! Unlike regular milk, evaporated milk has had about 60% of its water content removed, giving it a thicker consistency and higher protein content that helps prevent the cheese sauce from breaking or becoming grainy. The slight caramelization from the evaporation process also adds a subtle sweetness and depth of flavor that regular milk simply can’t provide. This single ingredient is what transforms good mac and cheese into absolutely extraordinary mac and cheese that will have people convinced you’re hiding a professional chef in your kitchen.
Can I use different types of cheese in this recipe?
You absolutely can experiment with different cheeses, but there are some important guidelines to follow for the best results! Always include at least one good melting cheese like cheddar, Monterey Jack, Gruyère, or fontina as your base—these cheeses have the right fat and moisture content to create that smooth, creamy sauce we all crave. You can then supplement with more flavorful but less melty cheeses like blue cheese, feta, or aged gouda, but keep these to about 1/4 of your total cheese volume to maintain that perfect texture. Avoid pre-shredded cheeses with anti-caking agents and super-aged, dry cheeses that don’t melt well—your sauce will thank you with that velvety smoothness that makes this recipe so incredibly special.
Summary
These individual mac and cheese bowls represent the absolute pinnacle of comfort food perfection, combining crispy golden toppings with molten, creamy interiors in a presentation that will dazzle your family and friends. The triple-cheese blend and secret ingredients create a flavor experience so extraordinary that it will instantly become your new go-to recipe for every special occasion and cozy night in. Prepare to fall in love with mac and cheese all over again in the most spectacular way imaginable.
Mac and Cheese Bowls
6
servings15
minutes25
minutesIngredients
Instructions
- 1 Cook elbow macaroni in salted boiling water for 7-8 minutes until al dente, drain without rinsing, and toss with 1 tablespoon butter
- 2 Melt remaining butter in saucepan, whisk in flour and cook for 90 seconds, then gradually whisk in milks until thickened
- 3 Reduce heat to low and gradually add cheeses until melted and smooth, then stir in seasonings and spices
- 4 Combine pasta with cheese sauce, divide among ramekins, and top with buttered panko mixture
- 5 Bake at 375°F for 20-25 minutes until golden and bubbling, then broil for 1-2 minutes for extra crispiness


