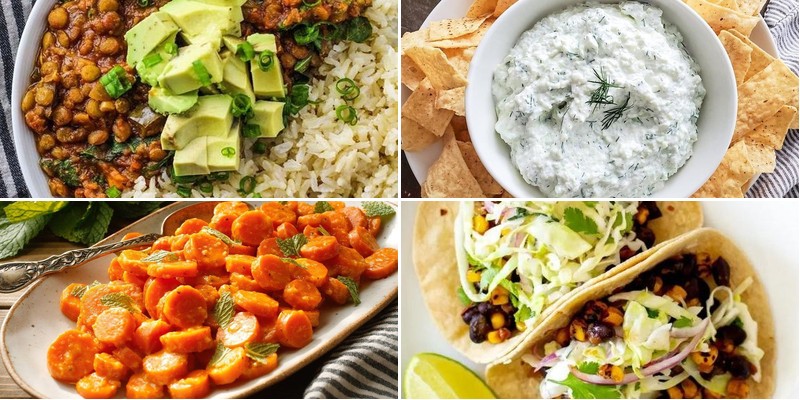
Discovering flavorful meals that are both low in sodium and cholesterol doesn’t mean sacrificing taste or satisfaction. Whether you’re cooking quick weeknight dinners, comforting classics, or fresh seasonal favorites, this collection offers 35 delicious recipes to keep your heart healthy and your taste buds happy. Dive in to find your new go-to dishes that prove eating well can be absolutely delicious!
Herb-Crusted Baked Lemon Chicken
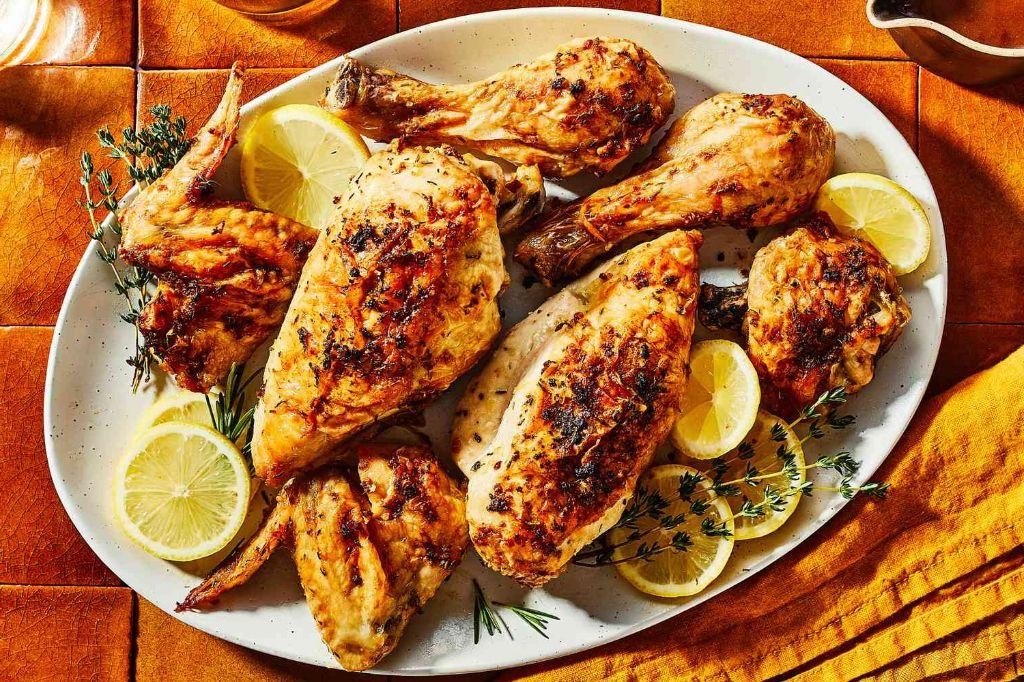
Juggling dinner plans while trying to impress your taste buds? This herb-crusted baked lemon chicken is about to become your new weeknight hero—it’s so flavorful, even your picky eaters might ask for seconds (no promises, but we’re optimistic!).
3
servings15
minutes25
minutesIngredients
– 4 boneless, skinless chicken breasts (about 1.5 lbs total, or thighs if you prefer dark meat)
– 1/4 cup olive oil (or avocado oil for higher heat tolerance)
– 2 lemons, juiced (about 1/4 cup, plus extra slices for garnish if you’re feeling fancy)
– 3 cloves garlic, minced (or 1 tsp pre-minced from a jar, we won’t judge)
– 1/2 cup panko breadcrumbs (or regular breadcrumbs for a finer crust)
– 1/4 cup grated Parmesan cheese (the powdery kind works best for sticking)
– 2 tbsp fresh parsley, chopped (dried works in a pinch, but use 2 tsp)
– 1 tsp dried oregano (crush it between your fingers to wake up the flavor)
– 1/2 tsp salt (adjust if your Parmesan is salty)
– 1/4 tsp black pepper (freshly cracked for extra zing)
Instructions
1. Preheat your oven to 400°F and lightly grease a baking sheet with olive oil or non-stick spray.
2. Pat the chicken breasts dry with paper towels—this helps the crust stick better and promotes even browning.
3. In a shallow bowl, whisk together the olive oil, lemon juice, and minced garlic until well combined.
4. In a separate bowl, mix the panko breadcrumbs, Parmesan cheese, parsley, oregano, salt, and pepper.
5. Dip each chicken breast into the lemon-oil mixture, coating both sides thoroughly.
6. Press the chicken into the breadcrumb mixture, ensuring an even coating on all sides.
7. Place the coated chicken on the prepared baking sheet, leaving space between each piece for air circulation.
8. Bake for 20-25 minutes, or until the internal temperature reaches 165°F and the crust is golden brown.
9. Let the chicken rest for 5 minutes before slicing to allow the juices to redistribute.
10. Serve immediately, garnished with extra lemon slices if desired.
That golden, crunchy crust gives way to tender, lemon-kissed chicken that’s practically begging to be paired with roasted veggies or atop a crisp salad. Try shredding leftovers into tacos or grain bowls—this dish is as versatile as it is delicious!
Savory Quinoa Tabbouleh Salad
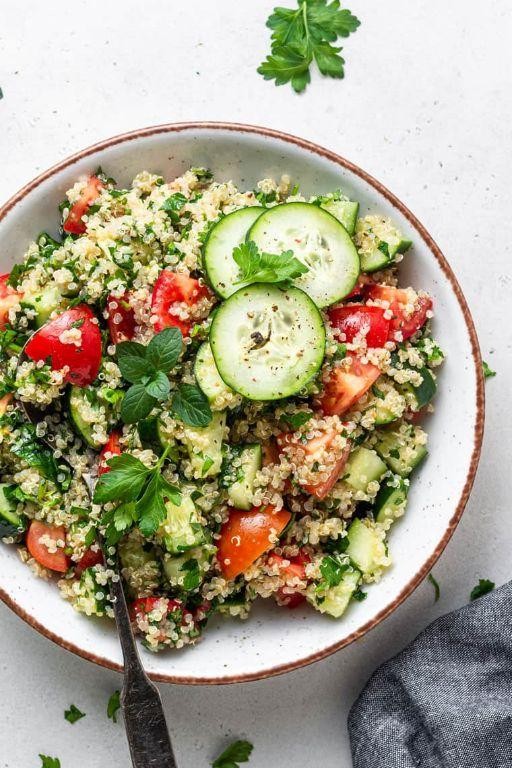
A quinoa tabbouleh so delightfully savory, it might just convince your taste buds to write fan mail. Forget bland grain bowls—this vibrant salad packs a punch with zesty lemon, fresh herbs, and a garlicky kick that’ll have you sneaking bites straight from the mixing bowl. It’s the perfect sidekick for grilled chicken, a stellar potluck show-off, or your new go-to “I’m adulting” lunch.
3
servings25
minutes15
minutesIngredients
– 1 cup quinoa (rinsed well to remove bitterness)
– 2 cups water (for fluffy grains)
– 3 tbsp olive oil (or avocado oil for a lighter vibe)
– ¼ cup fresh lemon juice (about 2 lemons, bottled works in a pinch)
– 2 cloves garlic, minced (or ½ tsp garlic powder if you’re out)
– 1 cup finely chopped parsley (curly or flat-leaf, stems removed)
– ½ cup finely chopped mint leaves (don’t skip—it’s the secret weapon!)
– 1 cup diced cucumber (English or Persian, seeds scooped out)
– 1 cup halved cherry tomatoes (colorful ones add extra pizzazz)
– ½ tsp salt (adjust later after dressing)
– ¼ tsp black pepper (freshly cracked for best flavor)
Instructions
1. Rinse 1 cup quinoa under cold water in a fine-mesh strainer for 1 minute to wash away saponins, which can taste bitter.
2. Combine rinsed quinoa and 2 cups water in a medium saucepan, then bring to a boil over high heat.
3. Once boiling, reduce heat to low, cover the pan, and simmer for 15 minutes until all water is absorbed and quinoa grains are tender with little “tails” visible.
4. Remove quinoa from heat, fluff it with a fork, and let it cool completely to room temperature (about 20–30 minutes) to avoid a soggy salad.
5. In a small bowl, whisk together 3 tbsp olive oil, ¼ cup lemon juice, 2 minced garlic cloves, ½ tsp salt, and ¼ tsp black pepper until emulsified.
6. Tip: Taste the dressing now and adjust salt if needed—it should be bold since quinoa soaks up flavors.
7. In a large mixing bowl, combine cooled quinoa, 1 cup chopped parsley, ½ cup chopped mint, 1 cup diced cucumber, and 1 cup halved cherry tomatoes.
8. Pour the dressing over the quinoa mixture and toss gently but thoroughly to coat every ingredient.
9. Tip: Let the salad sit for 10 minutes before serving to allow flavors to meld—it’s worth the wait!
10. Chill in the refrigerator for at least 15 minutes if you prefer it cold, or serve immediately at room temperature.
11. Tip: For extra crunch, top with toasted pine nuts or sprinkle with feta cheese right before serving.
Zesty, fresh, and satisfyingly textured, this tabbouleh balances fluffy quinoa with crisp cucumbers and juicy tomatoes. Serve it stuffed into pita pockets with grilled halloumi, or heap it alongside smoky lamb kebabs for a Mediterranean feast that’s anything but ordinary.
Zucchini Noodles with Avocado Pesto
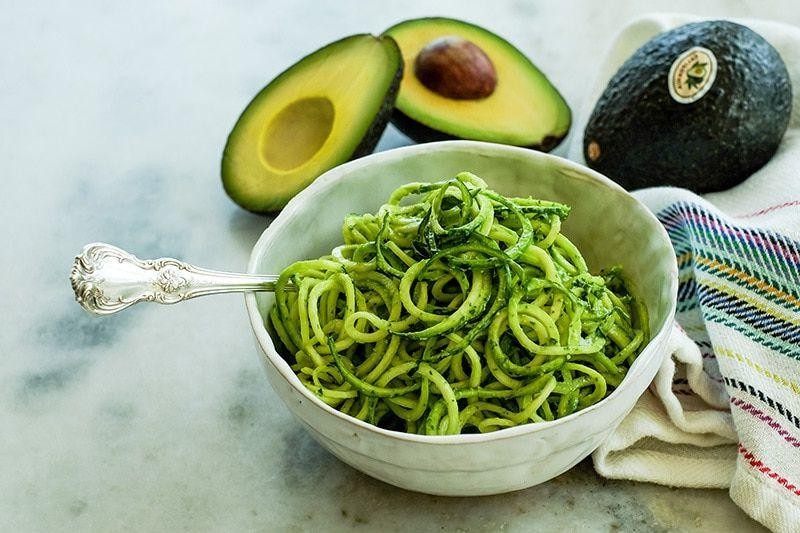
Yikes, another zucchini threatening to take over your garden? Fear not, my friend, because we’re about to turn that green giant into the star of the most refreshing, no-cook dinner that will have you doing a happy dance. This isn’t just a salad; it’s a flavor party in a bowl where creamy avocado pesto meets crisp, cool zucchini noodles.
2
servings15
minutesIngredients
– 4 medium zucchinis, spiralized into noodles
– 1 large ripe avocado, pitted and scooped
– 1/2 cup fresh basil leaves, packed
– 1/4 cup raw pine nuts (or walnuts for a budget-friendly swap)
– 2 cloves garlic, peeled
– 3 tablespoons extra virgin olive oil
– 2 tablespoons fresh lemon juice (about 1 lemon)
– 1/4 teaspoon salt
– 1/4 teaspoon black pepper
– 1/4 cup grated Parmesan cheese (or nutritional yeast for a vegan version)
Instructions
1. Spiralize all 4 zucchinis into noodles using a spiralizer, placing them in a large mixing bowl.
2. In a food processor or high-speed blender, combine the avocado, basil leaves, pine nuts, and garlic cloves.
3. Pulse the ingredients for 15 seconds until roughly chopped and combined.
4. Add the olive oil, lemon juice, salt, and black pepper to the food processor.
5. Blend the mixture on high speed for 30-45 seconds until completely smooth and creamy.
6. Stop the blender and scrape down the sides with a spatula to ensure all ingredients are incorporated.
7. Add the Parmesan cheese to the blender and pulse for 10 more seconds just to combine.
8. Pour the finished avocado pesto directly over the zucchini noodles in the mixing bowl.
9. Use tongs or two large forks to toss the noodles and pesto together for 1-2 minutes, ensuring every strand is coated.
10. Let the dressed noodles sit at room temperature for 5 minutes to allow the flavors to meld.
11. Divide the zucchini noodles evenly between two serving bowls.
Just imagine the cool, crisp zucchini noodles coated in that velvety green sauce—it’s like summer decided to get dressed up for dinner. The texture is wonderfully fresh and light, yet satisfyingly creamy, making it perfect served alongside grilled chicken or piled high in a bowl with some cherry tomatoes for a pop of color.
Spiced Lentil and Vegetable Stew
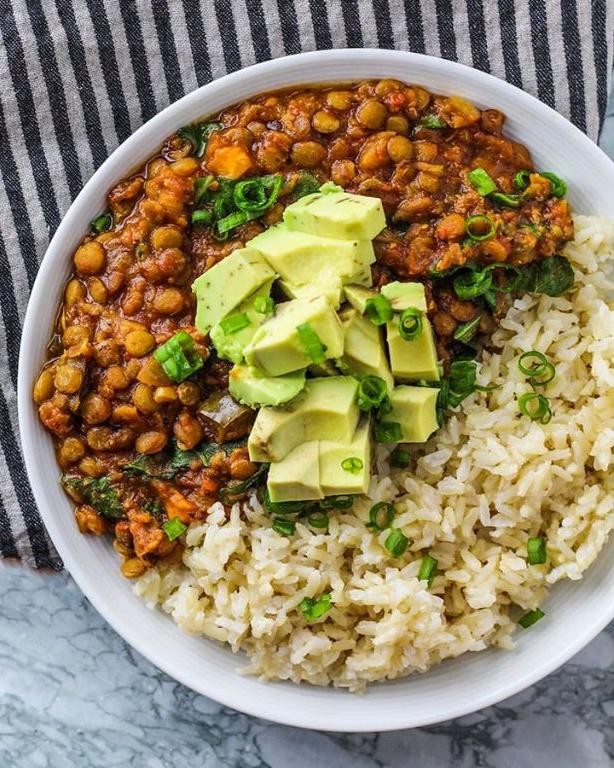
Brace yourselves, comfort food enthusiasts—this isn’t your average lentil situation. We’re talking about a Spiced Lentil and Vegetable Stew that’ll make your taste buds do a happy dance while your kitchen smells like a cozy autumn hug. Get ready to fall in love with legumes all over again!
5
servings15
minutes45
minutesIngredients
– 1 tbsp olive oil (or any neutral oil)
– 1 medium onion, diced
– 2 carrots, chopped into ½-inch pieces
– 2 celery stalks, chopped
– 3 garlic cloves, minced
– 1 tsp ground cumin
– ½ tsp smoked paprika
– ¼ tsp cayenne pepper (adjust to heat preference)
– 1 cup brown lentils, rinsed
– 4 cups vegetable broth
– 1 (14.5 oz) can diced tomatoes, undrained
– 2 cups chopped kale, stems removed
– 1 tbsp lemon juice
– Salt and black pepper to taste
Instructions
1. Heat 1 tbsp olive oil in a large pot over medium heat until shimmering.
2. Add diced onion and cook for 5 minutes, stirring occasionally, until translucent.
3. Add chopped carrots and celery, cooking for 4 more minutes until slightly softened.
4. Stir in minced garlic and cook for 30 seconds until fragrant.
5. Sprinkle in ground cumin, smoked paprika, and cayenne pepper, toasting for 1 minute to bloom the spices.
6. Add 1 cup rinsed brown lentils, stirring to coat with the spice mixture.
7. Pour in 4 cups vegetable broth and the entire can of diced tomatoes with their juices.
8. Bring the mixture to a boil, then reduce heat to low and cover the pot.
9. Simmer for 30 minutes until lentils are tender but not mushy.
10. Stir in 2 cups chopped kale and cook uncovered for 5 minutes until wilted.
11. Remove from heat and stir in 1 tbsp lemon juice.
12. Season with salt and black pepper to taste.
Outrageously comforting, this stew boasts a velvety texture where the lentils melt into the broth while the vegetables maintain just enough bite. The spice blend creates a warm, smoky depth that’s perfectly balanced by the bright kick of lemon—serve it over creamy polenta or with crusty bread for maximum cozy vibes!
Roasted Bell Pepper and Hummus Wraps
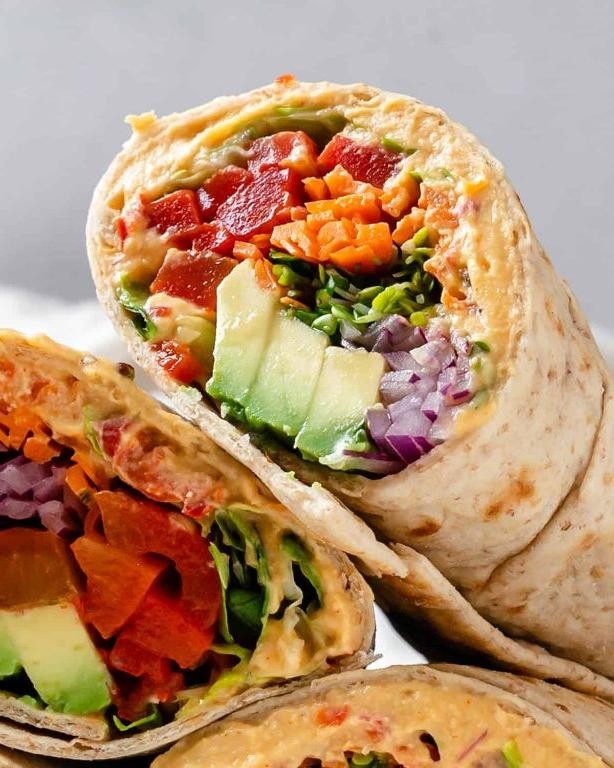
Aren’t you tired of the same old lunch routine? Let’s shake things up with these roasted bell pepper and hummus wraps that are so delicious, they might just become your new weekday obsession. These vibrant wraps pack a flavor punch that’ll make your taste buds do a happy dance while keeping things refreshingly simple.
3
wraps15
minutes25
minutesIngredients
– 2 large bell peppers (any color, but mix them for maximum visual appeal)
– 4 large flour tortillas (10-inch size works perfectly for easy rolling)
– 1 cup store-bought hummus (or homemade if you’re feeling fancy)
– 2 tbsp olive oil (or any neutral oil you have on hand)
– 1/2 tsp salt (adjust based on your hummus’ saltiness)
– 1/4 tsp black pepper (freshly cracked adds extra zing)
– 2 cups fresh spinach leaves (baby spinach works beautifully)
– 1/4 cup sliced red onion (soak in ice water for 5 minutes to mellow the bite)
Instructions
1. Preheat your oven to 425°F and line a baking sheet with parchment paper.
2. Slice the bell peppers into 1/2-inch wide strips, removing seeds and membranes.
3. Toss pepper strips with olive oil, salt, and black pepper until evenly coated.
4. Arrange peppers in a single layer on the prepared baking sheet.
5. Roast for 20-25 minutes until peppers are tender with slightly charred edges.
6. Remove peppers from oven and let cool for 5 minutes (this prevents soggy tortillas).
7. Warm tortillas in a dry skillet over medium heat for 30 seconds per side until pliable.
8. Spread 1/4 cup hummus evenly across each tortilla, leaving a 1-inch border.
9. Layer 1/2 cup spinach leaves over the hummus on each tortilla.
10. Divide roasted peppers evenly among the four tortillas.
11. Scatter sliced red onions over the pepper layer.
12. Fold in the sides of each tortilla about 1 inch, then roll tightly from the bottom up.
13. Cut each wrap diagonally in half for easier eating and better presentation.
Now you’ve got wraps that are bursting with creamy, smoky, and fresh flavors all at once. Nothing beats that satisfying contrast between the warm roasted peppers and cool, crisp spinach—these wraps are basically a party in your mouth that you can take anywhere!
Easy Grilled Mediterranean Veggies
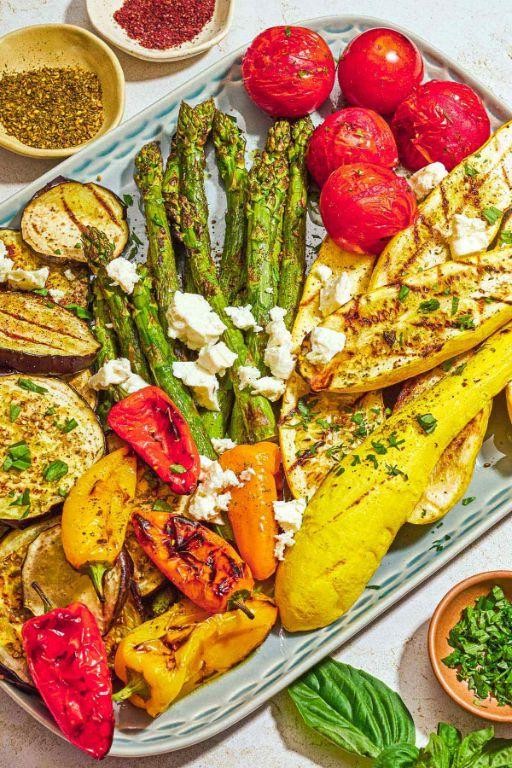
Dazzle your taste buds without breaking a sweat! These Easy Grilled Mediterranean Veggies are basically a vacation for your mouth—no passport required, just a grill and the willingness to pretend you’re dining seaside in Greece while actually standing in your backyard.
5
servings15
minutes9
minutesIngredients
- 2 large zucchinis, sliced into 1/2-inch rounds (don’t go too thin or they’ll turn to mush!)
- 1 large red bell pepper, cut into 1-inch strips (seeds and core removed, obviously)
- 1 large yellow onion, sliced into 1/2-inch rings (keep ’em intact for easier flipping)
- 1 cup cherry tomatoes (or grape tomatoes if you’re feeling fancy)
- 3 tbsp olive oil (or any neutral oil, but olive adds that Mediterranean vibe)
- 1 tbsp balsamic vinegar (the good stuff, not the sad bottle from 2018)
- 1 tsp dried oregano (fresh works too, but double the amount)
- 1/2 tsp garlic powder (or 2 minced garlic cloves if you’re extra)
- 1/2 tsp salt (adjust to taste, but don’t be shy—veggies need love too)
- 1/4 tsp black pepper (freshly ground if you’ve got it)
Instructions
- Preheat your grill to medium-high heat, around 400°F—you want those sexy grill marks, not a veggie inferno.
- In a large bowl, whisk together olive oil, balsamic vinegar, dried oregano, garlic powder, salt, and black pepper until well combined.
- Add zucchini rounds, bell pepper strips, onion rings, and cherry tomatoes to the bowl, then toss everything gently to coat evenly with the marinade. Tip: Use your hands for this—it’s messy but ensures every veggie gets some flavor love.
- Place the veggies directly on the grill grates in a single layer, making sure they aren’t crowded so they cook evenly instead of steaming.
- Grill for 4–5 minutes on the first side, until you see clear grill marks and the zucchini starts to soften.
- Flip each veggie piece carefully with tongs—onion rings might try to escape, so be firm but gentle.
- Grill for another 3–4 minutes on the second side, until peppers are slightly charred at the edges and tomatoes are just beginning to burst. Tip: If tomatoes are stubborn, give them a gentle press with the tongs to help them along.
- Remove all veggies from the grill and transfer to a serving platter immediately to stop the cooking process. Tip: Let them rest for 2–3 minutes before serving—this allows flavors to meld and prevents a steam facial when you dig in.
Now, revel in the smoky-sweet harmony of tender zucchini, char-kissed peppers, and juicy tomatoes that practically melt in your mouth. Serve these beauties piled high on couscous, stuffed into pitas with feta, or just shovel them directly into your face—no judgment here.
Lemon Herb Baked Salmon with Asparagus
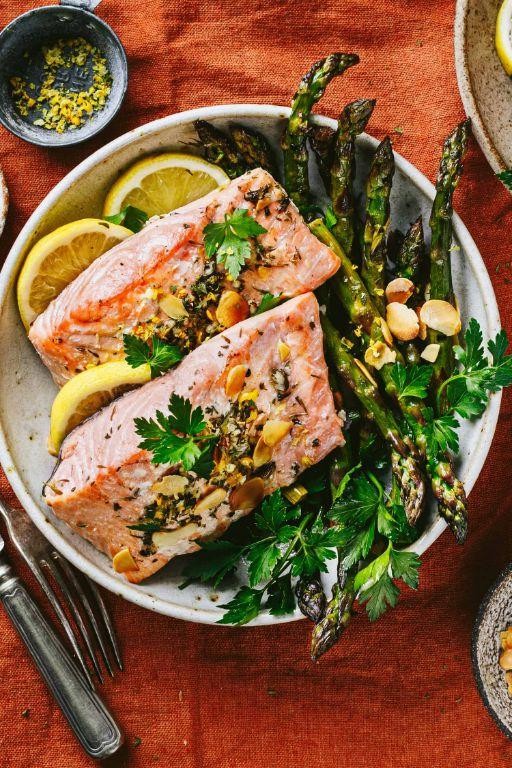
Hallelujah! If you’re tired of the same old dinner routine and want something that screams “fancy” without requiring a culinary degree, you’ve hit the jackpot. This lemon herb baked salmon with asparagus is the weeknight hero you deserve, ready to transform your kitchen into a five-star bistro with minimal effort and maximum flavor payoff.
3
servings15
minutes15
minutesIngredients
– 1.5 lbs salmon fillet, skin-on or skinless (skin adds extra crispiness)
– 1 lb fresh asparagus, ends trimmed (look for bright green, firm stalks)
– 3 tbsp olive oil (or any neutral oil like avocado)
– 2 tbsp fresh lemon juice (about 1 large lemon)
– 3 cloves garlic, minced (jarred minced garlic works in a pinch)
– 1 tsp dried oregano (or 1 tbsp fresh, chopped)
– 1/2 tsp salt (adjust to your preference)
– 1/4 tsp black pepper, freshly ground
– Lemon slices, for garnish (optional but pretty)
Instructions
1. Preheat your oven to 400°F (200°C) and line a large baking sheet with parchment paper for easy cleanup.
2. Pat the 1.5 lbs salmon fillet completely dry with paper towels to ensure a crispy top instead of a steamed texture.
3. In a small bowl, whisk together 3 tbsp olive oil, 2 tbsp fresh lemon juice, 3 cloves minced garlic, 1 tsp dried oregano, 1/2 tsp salt, and 1/4 tsp black pepper to create the marinade.
4. Place the 1 lb trimmed asparagus on the prepared baking sheet in a single layer, drizzle with half of the marinade, and toss to coat evenly.
5. Push the asparagus to the sides of the baking sheet, creating space in the center for the salmon fillet.
6. Place the salmon fillet in the center of the baking sheet, skin-side down if using skin-on.
7. Brush the remaining marinade evenly over the top and sides of the salmon fillet, making sure to cover all surfaces.
8. Arrange lemon slices on top of the salmon for added flavor and presentation, if using.
9. Bake in the preheated 400°F oven for 12-15 minutes, or until the salmon flakes easily with a fork and the internal temperature reaches 145°F.
10. Check the asparagus at the 10-minute mark—it should be tender-crisp and slightly browned at the tips.
11. Remove the baking sheet from the oven and let the salmon rest for 2-3 minutes before serving to allow juices to redistribute.
Voilà! You’re left with flaky, buttery salmon that practically melts in your mouth, paired with asparagus that’s got just the right amount of crunch. The lemon-herb marinade creates a bright, zesty crust that cuts through the richness perfectly—serve it over quinoa for a complete meal, or flake it into tacos for a fun twist that’ll make Tuesday night feel like a celebration.
Garden Fresh Tomato Basil Soup
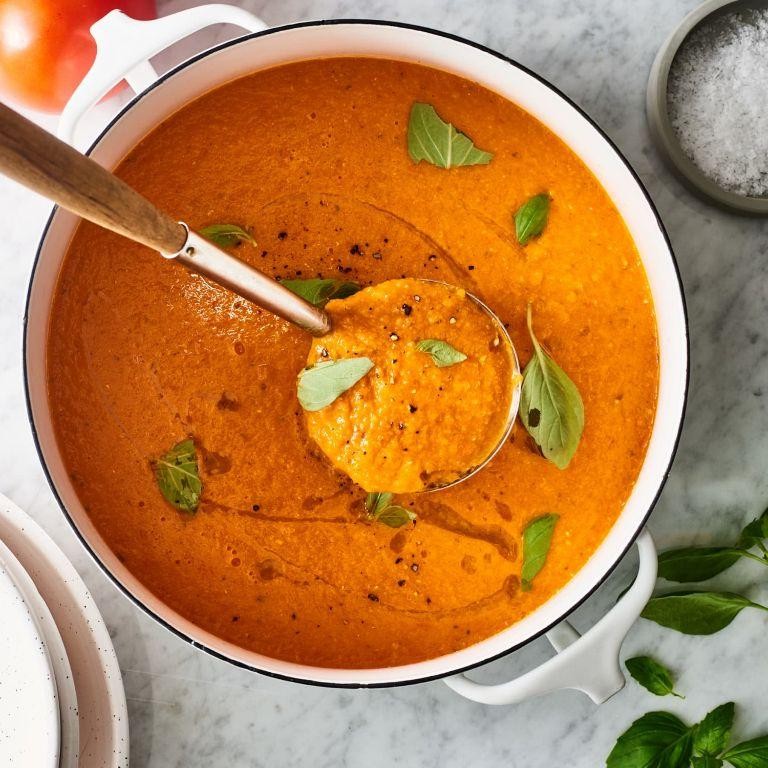
Tired of soups that taste like they’ve been hibernating in a can since last winter? This garden-fresh tomato basil soup is basically summer in a bowl, ready to rescue your taste buds from bland boredom with vibrant, just-picked flavor that’ll make you forget canned soup ever existed.
4
servings15
minutes39
minutesIngredients
– 2 tbsp olive oil (or any neutral oil)
– 1 medium yellow onion, diced
– 3 cloves garlic, minced
– 2 lbs ripe tomatoes, chopped
– 1 cup vegetable broth
– 1/4 cup fresh basil leaves, packed
– 1/2 cup heavy cream
– 1 tsp salt (adjust to taste)
– 1/2 tsp black pepper
Instructions
1. Heat 2 tbsp olive oil in a large pot over medium heat until shimmering.
2. Add diced onion and cook for 5-7 minutes until translucent and fragrant.
3. Stir in minced garlic and cook for 1 minute until golden but not browned.
4. Add chopped tomatoes and cook for 10 minutes until they begin to break down and release juices.
5. Pour in vegetable broth and bring to a gentle boil, then reduce heat to low.
6. Simmer uncovered for 20 minutes until tomatoes are completely soft and liquid has reduced slightly.
7. Remove from heat and stir in fresh basil leaves until wilted.
8. Carefully transfer the mixture to a blender and blend until completely smooth.
9. Return the blended soup to the pot over low heat.
10. Stir in heavy cream until fully incorporated and heated through.
11. Season with salt and black pepper, stirring to combine.
Velvety smooth with a bright tomato tang that dances with the sweet, peppery basil, this soup tastes like sunshine in a spoon. Try serving it with a grilled cheese sandwich for the ultimate comfort food duo, or get fancy with a swirl of cream and extra basil leaves for that restaurant-worthy presentation.
Crispy Chickpea and Quinoa Bowl
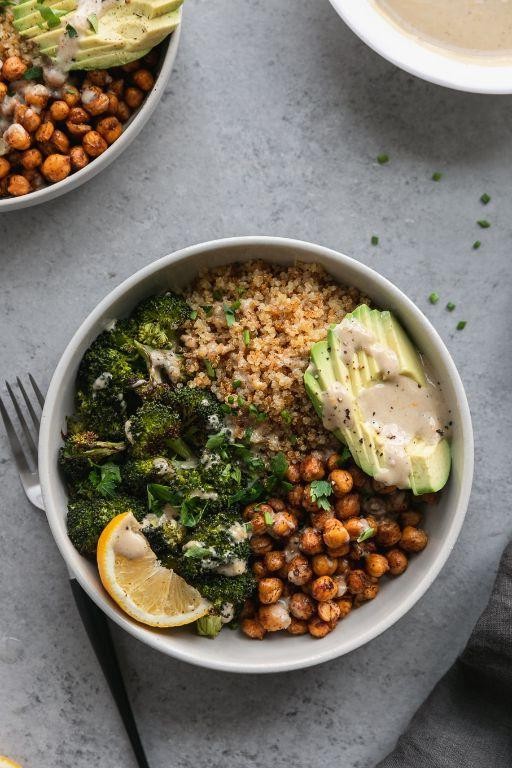
Whoever said healthy eating had to be boring clearly never met this crispy chickpea and quinoa bowl—it’s the culinary equivalent of a high-five for your taste buds, packed with crunch, flavor, and enough pizzazz to make your lunchbox jealous. Whip this up when you’re craving something wholesome yet wildly satisfying, because let’s be real, life’s too short for sad salads. Trust me, your fork will thank you.
2
portions15
minutes40
minutesIngredients
- 1 cup quinoa, rinsed (or swap for couscous for a quicker cook)
- 1 (15 oz) can chickpeas, drained and rinsed (pat ’em dry for extra crispiness)
- 2 tbsp olive oil (or any neutral oil like avocado)
- 1 tsp smoked paprika (adjust to your spice comfort zone)
- 1/2 tsp garlic powder (fresh minced garlic works too, but watch for burning)
- 1/4 tsp salt (sea salt or kosher, your call)
- 1 cup chopped cucumber (English or Persian, for that refreshing crunch)
- 1/2 cup cherry tomatoes, halved (colorful heirlooms add vibrancy)
- 2 tbsp lemon juice (freshly squeezed beats bottled every time)
- 1 tbsp chopped fresh parsley (or cilantro if you’re feeling adventurous)
Instructions
- Preheat your oven to 400°F—this ensures those chickpeas get properly crispy from the start.
- Toss the drained chickpeas with 1 tablespoon of olive oil, smoked paprika, garlic powder, and salt in a medium bowl until evenly coated.
- Spread the chickpeas in a single layer on a baking sheet lined with parchment paper to prevent sticking and promote even browning.
- Roast the chickpeas for 20–25 minutes, shaking the pan halfway through, until they’re golden brown and crisp to the touch.
- While the chickpeas roast, combine the rinsed quinoa with 2 cups of water in a saucepan and bring to a boil over high heat.
- Reduce the heat to low, cover the saucepan, and simmer the quinoa for 15 minutes, or until all the water is absorbed and the grains are fluffy.
- Fluff the cooked quinoa with a fork and let it cool slightly—this helps it hold its texture when mixed with other ingredients.
- In a large bowl, whisk together the remaining 1 tablespoon of olive oil and lemon juice to create a simple, zesty dressing.
- Add the cooled quinoa, roasted chickpeas, chopped cucumber, halved cherry tomatoes, and fresh parsley to the bowl.
- Toss everything gently until well combined, making sure the dressing coats every ingredient evenly.
Crispy, savory chickpeas mingle with fluffy quinoa and fresh veggies for a texture party in every bite. Serve it straight from the bowl, or get fancy by stuffing it into a pita for a portable lunch—either way, it’s a flavor fiesta that’ll have you coming back for more.
Flavorful Black Bean and Corn Tacos
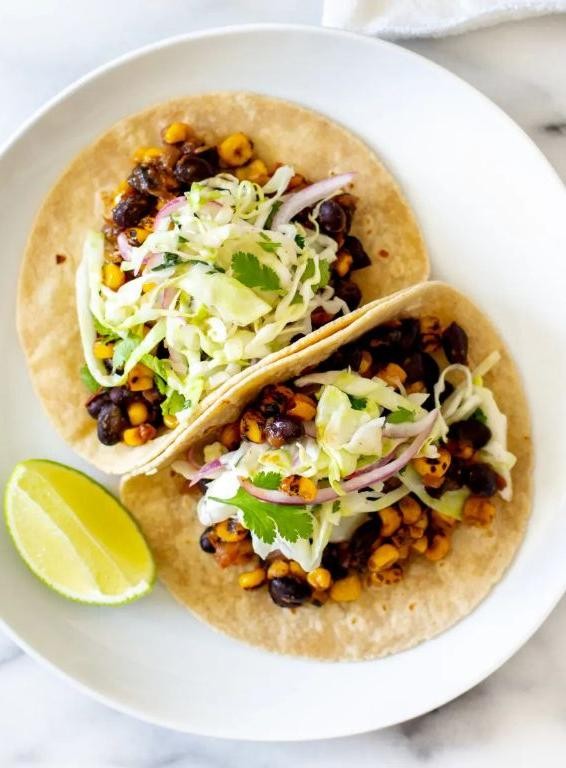
Let’s be real—some days you want dinner to feel like a fiesta without the fuss of a full-blown celebration. These black bean and corn tacos are here to deliver maximum flavor with minimal effort, proving that delicious doesn’t have to be complicated.
8
tacos10
minutes10
minutesIngredients
- 1 tablespoon olive oil (or any neutral oil)
- 1 small yellow onion, diced
- 2 cloves garlic, minced
- 1 teaspoon ground cumin
- 1 teaspoon chili powder
- 1 (15-ounce) can black beans, rinsed and drained
- 1 cup frozen corn, thawed
- 1/2 teaspoon salt
- 8 small corn tortillas
- 1/4 cup chopped fresh cilantro
- 1 lime, cut into wedges
- 1/2 cup crumbled cotija cheese (or queso fresco)
Instructions
- Heat 1 tablespoon olive oil in a large skillet over medium heat until shimmering, about 1 minute.
- Add diced yellow onion and cook until translucent and slightly golden, 4-5 minutes, stirring occasionally.
- Add minced garlic and cook until fragrant, 30 seconds, stirring constantly to prevent burning.
- Sprinkle in ground cumin and chili powder, toasting the spices for 30 seconds until aromatic.
- Add rinsed black beans and thawed corn to the skillet, stirring to coat with spices.
- Season with 1/2 teaspoon salt and cook until beans and corn are heated through, 3-4 minutes, stirring occasionally.
- While filling cooks, warm corn tortillas one at a time in a dry skillet over medium heat for 30 seconds per side until pliable.
- Transfer warmed tortillas to a plate and cover with a clean kitchen towel to keep soft.
- Spoon black bean and corn mixture evenly among the 8 warmed tortillas.
- Top each taco with crumbled cotija cheese and chopped fresh cilantro.
- Serve immediately with lime wedges for squeezing over tacos.
What makes these tacos truly magical is how the creamy black beans play against the sweet pop of corn, all wrapped in a warm, slightly chewy tortilla. Try stacking them high with extra cilantro and a generous squeeze of lime for that perfect tangy finish, or crumble a few tortilla chips on top for an irresistible crunch that’ll have everyone reaching for seconds.
Refreshing Cucumber and Dill Yogurt Dip
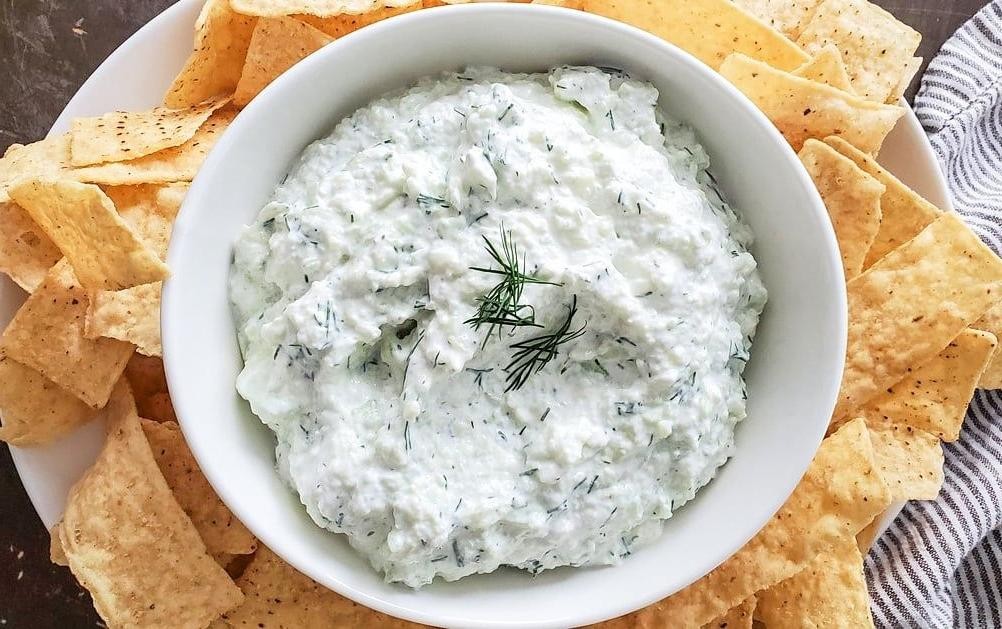
Let’s be real—your party platter is silently judging you for that store-bought dip. Lucky for you, this cucumber and dill yogurt situation is about to become your go-to move for looking fancy with minimal effort. It’s cool, creamy, and basically the edible equivalent of a refreshing splash of water on a hot day.
3
servings20
minutesIngredients
– 2 medium cucumbers, peeled and seeded (about 1.5 cups grated)
– 1.5 cups plain Greek yogurt (full-fat for extra creaminess, or low-fat if you prefer)
– 1/4 cup fresh dill, finely chopped (don’t even think about dried—fresh is key here)
– 2 tablespoons extra virgin olive oil (or any neutral oil if you’re out)
– 1 tablespoon fresh lemon juice (bottled works in a pinch, but fresh is brighter)
– 1 small garlic clove, minced (about 1 teaspoon, adjust if you’re garlic-obsessed)
– 1/2 teaspoon salt (start here, you can add more later)
– 1/4 teaspoon black pepper, freshly ground
Instructions
1. Peel the cucumbers completely, then slice them in half lengthwise and use a spoon to scrape out all the seeds.
2. Grate the cucumbers using the large holes of a box grater directly into a fine-mesh strainer set over a bowl.
3. Sprinkle 1/4 teaspoon of the salt over the grated cucumbers and toss gently to distribute.
4. Let the cucumbers sit for 10 minutes to release excess water, which prevents a watery dip.
5. While the cucumbers drain, combine the Greek yogurt, chopped dill, olive oil, lemon juice, minced garlic, remaining 1/4 teaspoon salt, and black pepper in a medium mixing bowl.
6. Stir the yogurt mixture until all ingredients are fully incorporated and smooth.
7. Press down firmly on the grated cucumbers in the strainer with the back of a spoon to squeeze out as much liquid as possible.
8. Add the squeezed cucumbers to the yogurt mixture and fold gently until evenly distributed.
9. Taste the dip and adjust seasoning if needed, but avoid overmixing to keep it light.
10. Cover the bowl with plastic wrap and refrigerate for at least 30 minutes to allow flavors to meld.
Zesty and impossibly creamy, this dip delivers a cool crunch from the cucumbers and a herby punch from the dill. Serve it with pita chips for classic vibes, or slather it on grilled chicken for a next-level dinner move—it’s basically a flavor party in your mouth.
Light Stuffed Bell Peppers with Quinoa

Crisp bell peppers, meet your destiny! We’re taking these colorful veggie vessels and stuffing them with a quinoa filling so delightfully light, you’ll forget you’re eating something actually good for you. Who said healthy food couldn’t be fun?
5
servings20
minutes55
minutesIngredients
– 4 large bell peppers, any color (pick vibrant ones for maximum visual appeal)
– 1 cup quinoa, rinsed (this removes that bitter coating)
– 2 cups vegetable broth (or water, but broth adds more flavor)
– 1 tbsp olive oil (or any neutral oil)
– 1 small onion, diced (about ½ cup)
– 2 cloves garlic, minced (fresh is best, but 1 tsp jarred works)
– 1 cup canned black beans, rinsed and drained (or kidney beans)
– 1 cup corn kernels, frozen or canned (thaw if frozen)
– 1 tsp cumin (adjust to your spice preference)
– ½ tsp smoked paprika (for that subtle smoky kick)
– ½ cup shredded Monterey Jack cheese (or pepper Jack for extra heat)
– Salt to taste (start with ½ tsp and adjust)
Instructions
1. Preheat your oven to 375°F and lightly grease a baking dish just large enough to hold your peppers upright.
2. Slice the tops off all 4 bell peppers and remove the seeds and membranes, creating hollow pepper cups.
3. Place the hollowed peppers cut-side up in the prepared baking dish.
4. Rinse 1 cup of quinoa thoroughly in a fine-mesh strainer until the water runs clear to remove the natural bitter coating.
5. Heat 1 tablespoon of olive oil in a medium saucepan over medium heat.
6. Add the diced onion and cook for 4-5 minutes until translucent and fragrant.
7. Stir in the minced garlic and cook for 1 more minute until aromatic but not browned.
8. Add the rinsed quinoa to the saucepan and toast for 2 minutes, stirring constantly to bring out its nutty flavor.
9. Pour in 2 cups of vegetable broth and bring the mixture to a rolling boil.
10. Reduce heat to low, cover the saucepan, and simmer for 15 minutes until the quinoa has absorbed all the liquid.
11. Remove the saucepan from heat and let it stand covered for 5 minutes to allow the quinoa to fully fluff up.
12. Fluff the cooked quinoa with a fork, then stir in the black beans, corn, cumin, smoked paprika, and salt.
13. Spoon the quinoa mixture evenly into the hollowed bell peppers, packing it down gently.
14. Sprinkle ½ cup of shredded Monterey Jack cheese evenly over the top of each stuffed pepper.
15. Cover the baking dish with aluminum foil and bake at 375°F for 25 minutes.
16. Remove the foil and bake for another 10-15 minutes until the cheese is bubbly and slightly golden.
17. Let the stuffed peppers rest for 5 minutes before serving to allow the filling to set.
But these peppers aren’t just pretty to look at! The quinoa filling stays wonderfully fluffy while the pepper itself softens to tender-crisp perfection. Serve them with a dollop of cool Greek yogurt or avocado slices for a temperature contrast that’ll make your taste buds do a happy dance.
Orange Ginger Glazed Carrot Stir Fry
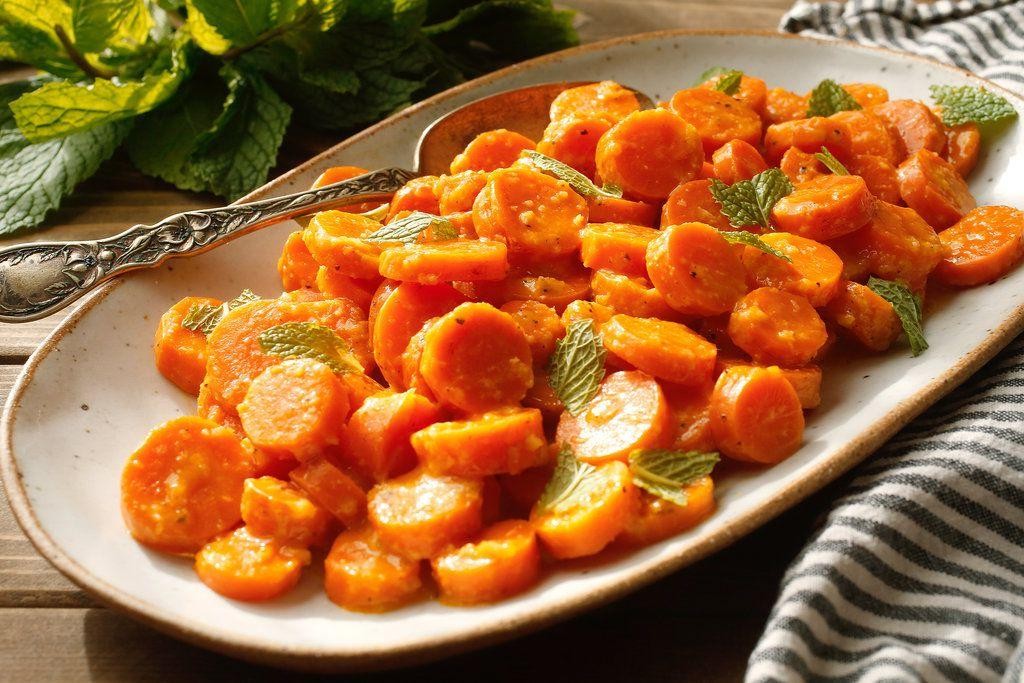
Who knew carrots could have such a dramatic glow-up? This orange ginger glazed situation transforms the humble root vegetable into a sweet, spicy, and downright addictive side dish that might just steal the show from your main course.
2
servings10
minutes11
minutesIngredients
- 1 lb carrots, sliced into ¼-inch coins (uniform thickness ensures even cooking)
- 2 tbsp olive oil (or any neutral oil with high smoke point)
- 2 tbsp orange juice, freshly squeezed preferred
- 1 tbsp honey (maple syrup works for vegan option)
- 1 tsp grated fresh ginger (bottled ginger in a pinch)
- 1 garlic clove, minced
- ½ tsp red pepper flakes (adjust for desired heat level)
- ¼ tsp salt
- 2 tbsp chopped fresh parsley (for garnish)
Instructions
- Heat olive oil in a large skillet or wok over medium-high heat until shimmering, about 1 minute.
- Add carrot coins to the hot oil in a single layer, working in batches if necessary to avoid overcrowding.
- Cook carrots undisturbed for 3 minutes to develop a slight sear on one side.
- Stir carrots and continue cooking for another 4 minutes until they begin to soften but still have some crunch.
- Reduce heat to medium and push carrots to one side of the skillet.
- Add minced garlic and grated ginger to the empty space and cook for 30 seconds until fragrant.
- Pour orange juice and honey into the skillet, stirring to combine with the aromatics.
- Add red pepper flakes and salt to the sauce mixture.
- Bring the sauce to a simmer and cook for 2 minutes until slightly thickened.
- Toss carrots in the glaze until evenly coated and cook for 1 more minute.
- Remove from heat and stir in chopped parsley.
Get ready for carrots that are tender-crisp with edges caramelized in that sticky-sweet glaze. The ginger provides a warm kick that plays beautifully against the citrus notes, making this dish equally fantastic served over quinoa, alongside roasted chicken, or even tossed into grain bowls for lunch tomorrow.
Conclusion
These 35 delicious low sodium and low cholesterol recipes prove that healthy eating can be full of flavor and satisfaction. We hope this collection inspires you to create nourishing meals your whole family will love. Try a few recipes this week, leave a comment with your favorites, and don’t forget to share this article on Pinterest to help others discover heart-healthy cooking!


