Let’s be real—eating healthy doesn’t have to mean sacrificing flavor or spending hours in the kitchen. If you’re looking for delicious meals that are low in salt and sugar but high in satisfaction, you’ve come to the right place. From quick weeknight dinners to comforting classics, these recipes prove that mindful eating can be both easy and incredibly tasty. Ready to get cooking?
Savory Herb-Roasted Chicken with Lemon
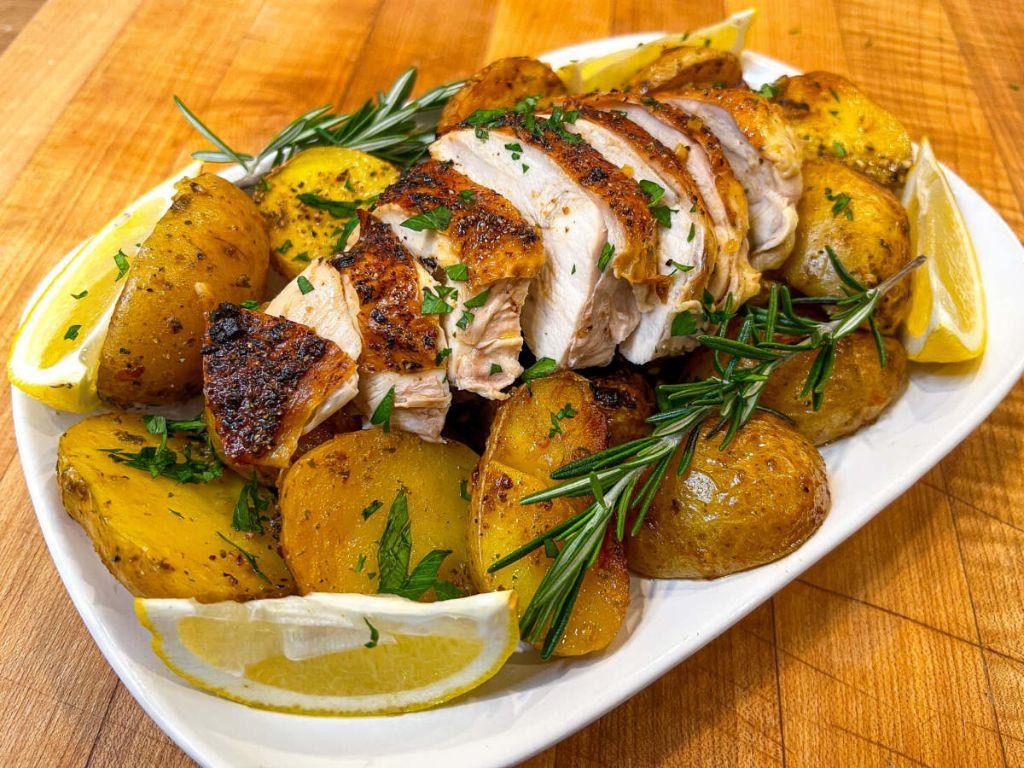
A perfectly roasted chicken with crispy skin and juicy meat is easier than you think with this methodical approach. Let’s walk through each step together to create a beautifully golden bird infused with fresh herbs and bright lemon notes. This recipe breaks down the process into simple, manageable actions for guaranteed success.
5
portions20
minutes85
minutesIngredients
– 1 whole chicken (4-5 pounds)
– 2 tablespoons olive oil
– 1 tablespoon kosher salt
– 1 teaspoon black pepper
– 2 tablespoons fresh rosemary, chopped
– 2 tablespoons fresh thyme, chopped
– 4 garlic cloves, minced
– 1 lemon, quartered
– 1 cup chicken broth
Instructions
1. Preheat your oven to 425°F and position the rack in the center.
2. Pat the chicken completely dry inside and out with paper towels.
3. Rub the olive oil evenly over the entire surface of the chicken.
4. Combine the kosher salt, black pepper, rosemary, thyme, and minced garlic in a small bowl.
5. Sprinkle the herb mixture evenly over the chicken skin and inside the cavity.
6. Place the quartered lemon pieces inside the chicken cavity.
7. Truss the chicken by tying the legs together with kitchen twine.
8. Place the chicken breast-side up in a roasting pan.
9. Pour the chicken broth into the bottom of the roasting pan.
10. Roast the chicken at 425°F for 15 minutes to crisp the skin.
11. Reduce the oven temperature to 375°F and continue roasting for 60-70 minutes.
12. Check for doneness when the internal temperature reaches 165°F in the thickest part of the thigh.
13. Remove the chicken from the oven and transfer it to a cutting board.
14. Let the chicken rest for 15 minutes before carving.
15. Carve the chicken and serve with pan juices. Perfectly roasted chicken yields crispy, golden-brown skin that shatters with each bite while the meat remains incredibly moist and tender. The lemon infuses the entire bird with bright acidity that cuts through the richness, making it wonderful served over creamy polenta or with roasted root vegetables that soak up the herbaceous pan juices.
No-Salt, No-Sugar Tomato Basil Soup

Here’s a simple, wholesome tomato basil soup that skips the salt and sugar without sacrificing flavor. This methodical approach will guide you through creating a naturally sweet and savory soup using fresh ingredients and careful cooking techniques. Homemade vegetable broth and roasted tomatoes build depth, while fresh basil adds a bright finish.
2
servings15
minutes60
minutesIngredients
– 2 pounds ripe Roma tomatoes
– 1 large yellow onion
– 4 cloves garlic
– 2 tablespoons olive oil
– 4 cups low-sodium vegetable broth
– 1/4 cup fresh basil leaves
– 1/2 teaspoon black pepper
– 1/4 teaspoon smoked paprika
Instructions
1. Preheat your oven to 400°F.
2. Cut 2 pounds of Roma tomatoes in half lengthwise and place them cut-side up on a baking sheet.
3. Peel and quarter 1 large yellow onion, then scatter the pieces around the tomatoes.
4. Peel 4 garlic cloves and add them to the baking sheet.
5. Drizzle 2 tablespoons of olive oil evenly over all the vegetables.
6. Roast the vegetables for 35-40 minutes until the tomatoes are collapsed and lightly caramelized at the edges.
7. Transfer the roasted vegetables to a large stockpot.
8. Pour 4 cups of low-sodium vegetable broth into the pot.
9. Bring the mixture to a boil over medium-high heat, then reduce to a simmer.
10. Simmer for 15 minutes to allow the flavors to meld.
11. Carefully blend the soup using an immersion blender until completely smooth.
12. Stir in 1/4 cup of fresh basil leaves, 1/2 teaspoon black pepper, and 1/4 teaspoon smoked paprika.
13. Simmer for 5 more minutes to infuse the basil flavor.
Our soup achieves a velvety texture from the blended roasted vegetables, with natural sweetness from the caramelized tomatoes balancing the savory broth. For a creative twist, swirl in a tablespoon of plain Greek yogurt just before serving, or pair it with whole-grain croutons for added crunch.
Spiced Quinoa and Black Bean Salad
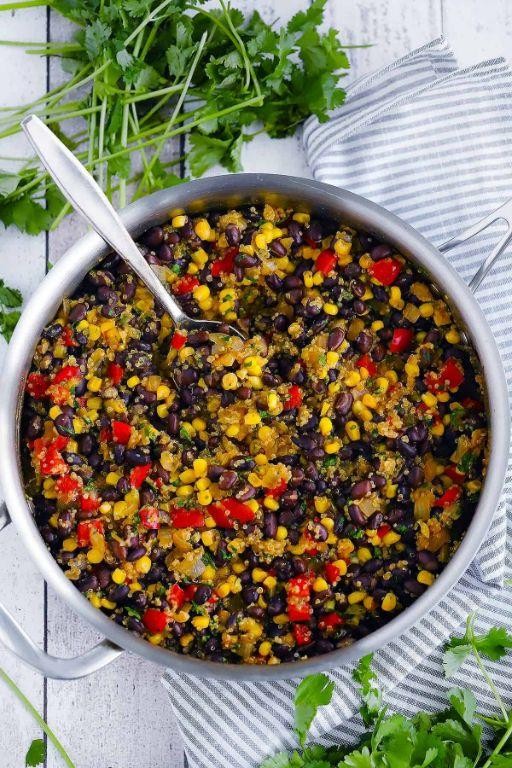
Unleash a vibrant, protein-packed meal with this spiced quinoa and black bean salad that comes together in under 30 minutes. Using simple pantry staples and fresh vegetables, this dish delivers a satisfying crunch and zesty flavor profile perfect for meal prep or a quick lunch. Follow each step carefully to achieve perfectly cooked quinoa and a well-balanced dressing that coats every ingredient evenly.
2
servings10
minutes20
minutesIngredients
– 1 cup quinoa
– 2 cups water
– 1/4 cup olive oil
– 2 tbsp lime juice
– 1 tsp ground cumin
– 1/2 tsp chili powder
– 1/4 tsp salt
– 1 can (15 oz) black beans
– 1 cup corn kernels
– 1/2 cup red onion
– 1/4 cup cilantro
Instructions
1. Rinse 1 cup quinoa under cold running water in a fine-mesh strainer for 1 minute to remove bitterness.
2. Combine rinsed quinoa and 2 cups water in a medium saucepan over high heat.
3. Bring quinoa and water to a rolling boil, then immediately reduce heat to low and cover saucepan.
4. Simmer quinoa for 15 minutes until all water is absorbed and grains show tiny white rings.
5. Remove quinoa from heat and let stand covered for 5 minutes to steam.
6. Fluff quinoa with a fork to separate grains and transfer to a large mixing bowl.
7. Whisk together 1/4 cup olive oil, 2 tbsp lime juice, 1 tsp ground cumin, 1/2 tsp chili powder, and 1/4 tsp salt in a small bowl until emulsified.
8. Drain and rinse 1 can black beans thoroughly under cold water to remove excess sodium.
9. Add drained black beans, 1 cup corn kernels, and 1/2 cup diced red onion to the quinoa bowl.
10. Pour dressing over quinoa mixture and toss gently with a rubber spatula to coat evenly.
11. Fold in 1/4 cup chopped cilantro just before serving to maintain freshness.
Did you notice how the fluffy quinoa absorbs the zesty lime dressing while the black beans and corn provide satisfying texture contrasts? The cumin and chili powder create a warm undertone that complements the fresh cilantro beautifully. For a creative twist, serve this salad in hollowed-out bell peppers or as a filling for whole-wheat tortillas.
Balsamic Glazed Grilled Vegetables
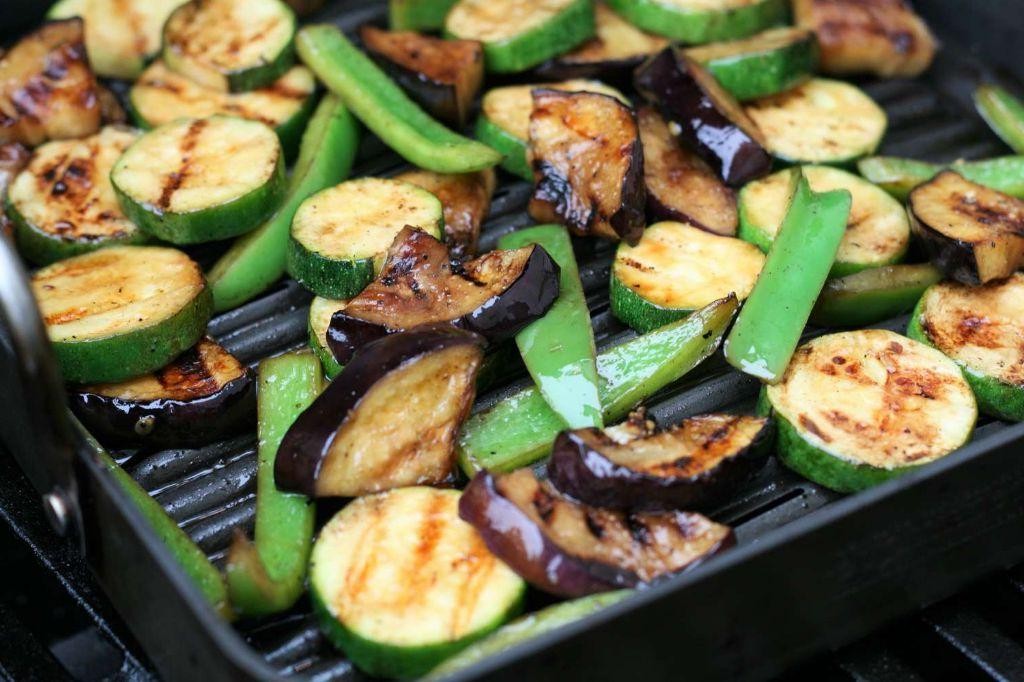
Vibrant, colorful vegetables take center stage in this simple yet elegant dish that transforms ordinary grilled veggies into a caramelized masterpiece. This balsamic glazed version adds a sweet-tangy complexity that will make even vegetable skeptics ask for seconds, while the grilling process creates beautiful char marks and deepens the natural flavors.
3
servings15
minutes30
minutesIngredients
– 2 medium zucchinis
– 1 large red bell pepper
– 1 large yellow bell pepper
– 1 medium red onion
– 8 ounces cremini mushrooms
– 3 tablespoons olive oil
– 1 teaspoon kosher salt
– ½ teaspoon black pepper
– ¼ cup balsamic vinegar
– 2 tablespoons honey
– 1 garlic clove
– 2 tablespoons fresh basil leaves
Instructions
1. Preheat your grill to medium-high heat, approximately 400°F.
2. Slice zucchinis lengthwise into ½-inch thick planks.
3. Cut red and yellow bell peppers into 1-inch wide strips, removing seeds and membranes.
4. Slice red onion into ½-inch thick rounds, keeping the layers intact.
5. Wipe cremini mushrooms clean with a damp paper towel and trim stems.
6. In a large bowl, combine olive oil, kosher salt, and black pepper.
7. Add all prepared vegetables to the bowl and toss until evenly coated with oil mixture.
8. Place vegetables directly on grill grates in a single layer, working in batches if necessary.
9. Grill zucchini and peppers for 4-5 minutes per side until tender with visible grill marks.
10. Grill onion rounds for 6-7 minutes per side until softened and lightly charred.
11. Grill mushrooms for 5-6 minutes total, turning once, until they release their moisture.
12. While vegetables grill, mince the garlic clove finely.
13. In a small saucepan, combine balsamic vinegar, honey, and minced garlic.
14. Bring the mixture to a simmer over medium heat, then reduce heat to low.
15. Cook the glaze for 8-10 minutes, stirring frequently, until it thickens enough to coat the back of a spoon.
16. Transfer grilled vegetables to a serving platter.
17. Drizzle the reduced balsamic glaze evenly over the warm vegetables.
18. Chop fresh basil leaves and sprinkle over the finished dish.
Glazed vegetables emerge with a perfect balance of smoky char from the grill and sweet-tangy notes from the reduction. The zucchini and peppers maintain a slight crispness while the onions become meltingly tender, creating varied textures in every bite. Serve this versatile dish warm as a standout side, or let it cool and toss with mixed greens for a sophisticated salad that showcases summer’s bounty at its finest.
Zucchini Noodles with Garlic Tomato Sauce
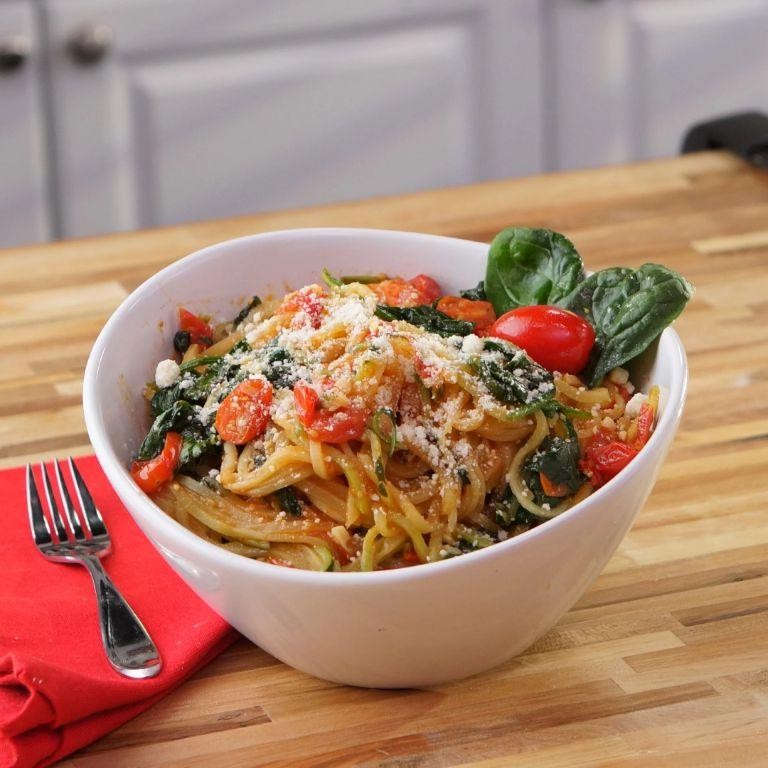
Many home cooks find themselves with an abundance of zucchini during the summer months, and this recipe transforms that humble vegetable into a satisfying, low-carb pasta alternative. Making zucchini noodles with garlic tomato sauce requires just a few simple techniques to achieve the perfect texture and flavor. Follow these steps carefully to create a dish that’s both healthy and delicious.
5
servings20
minutes24
minutesIngredients
- 4 medium zucchini
- 2 tbsp olive oil
- 4 cloves garlic, minced
- 1 (28 oz) can crushed tomatoes
- 1 tsp salt
- 1/2 tsp black pepper
- 1/4 cup fresh basil, chopped
- 1/4 cup grated Parmesan cheese
Instructions
- Wash all 4 zucchini thoroughly under cold running water and pat them completely dry with paper towels.
- Use a spiralizer to create zucchini noodles from all 4 zucchini, making sure to remove the tough ends first.
- Place the zucchini noodles in a colander and sprinkle them evenly with 1 teaspoon of salt to draw out excess moisture.
- Let the salted zucchini noodles sit in the colander for exactly 15 minutes while you prepare the sauce.
- Heat 2 tablespoons of olive oil in a large skillet over medium heat until it shimmers, about 2 minutes.
- Add 4 minced garlic cloves to the hot oil and cook until fragrant and lightly golden, approximately 1 minute, stirring constantly to prevent burning.
- Pour the entire 28-ounce can of crushed tomatoes into the skillet with the garlic.
- Season the sauce with the remaining 1/2 teaspoon of salt and 1/2 teaspoon of black pepper, stirring to combine thoroughly.
- Bring the sauce to a gentle simmer, then reduce the heat to low and cook uncovered for 20 minutes, stirring occasionally.
- While the sauce simmers, use your hands to squeeze the zucchini noodles firmly to remove as much liquid as possible.
- Add the squeezed zucchini noodles to the simmering sauce and cook for exactly 3 minutes, just until they soften slightly but still retain some bite.
- Remove the skillet from heat and stir in 1/4 cup of chopped fresh basil.
- Sprinkle 1/4 cup of grated Parmesan cheese over the finished dish just before serving.
During the final minutes of cooking, the zucchini noodles should maintain a slight crunch while absorbing the rich tomato flavors. The garlic-infused sauce clings beautifully to each noodle, creating a satisfying texture that mimics traditional pasta without the heaviness. For a creative presentation, try serving this dish in individual bowls topped with extra basil leaves and an additional sprinkle of Parmesan cheese for those who want more richness.
Hearty Lentil Stew with Carrots and Potatoes
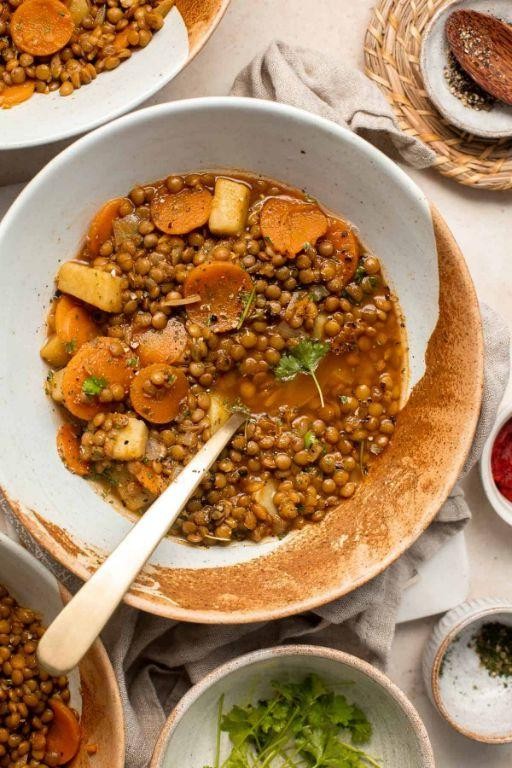
Preparing a comforting lentil stew is simpler than you might think, especially when you follow these clear, methodical steps. This hearty dish combines earthy lentils with sweet carrots and potatoes for a satisfying one-pot meal that’s perfect for chilly evenings. Let’s walk through each stage together to ensure your stew turns out perfectly balanced and delicious.
6
servings15
minutes41
minutesIngredients
- 2 tablespoons olive oil
- 1 medium yellow onion, diced
- 3 cloves garlic, minced
- 4 medium carrots, peeled and sliced into 1/2-inch rounds
- 2 medium potatoes, peeled and cut into 1-inch cubes
- 1 1/2 cups brown lentils, rinsed
- 6 cups vegetable broth
- 1 teaspoon dried thyme
- 1 bay leaf
- 1/2 teaspoon salt
- 1/4 teaspoon black pepper
- 2 tablespoons fresh parsley, chopped
Instructions
- Heat 2 tablespoons olive oil in a large pot over medium heat for 1 minute until shimmering.
- Add 1 diced yellow onion and cook for 5 minutes, stirring occasionally, until translucent.
- Stir in 3 minced garlic cloves and cook for 30 seconds until fragrant.
- Add 4 sliced carrots and 2 cubed potatoes to the pot, stirring to coat with oil.
- Pour in 1 1/2 cups rinsed brown lentils, ensuring they’re evenly distributed among the vegetables.
- Tip: Rinsing lentils removes any debris and helps them cook more evenly.
- Add 6 cups vegetable broth, 1 teaspoon dried thyme, 1 bay leaf, 1/2 teaspoon salt, and 1/4 teaspoon black pepper to the pot.
- Bring the mixture to a boil over high heat, then immediately reduce to a simmer.
- Cover the pot and simmer for 35 minutes, stirring every 10 minutes to prevent sticking.
- Tip: Maintain a gentle simmer with small bubbles breaking the surface—too vigorous boiling can break down the lentils too much.
- After 35 minutes, test a lentil and potato piece—both should be tender when pierced with a fork.
- Remove the pot from heat and discard the bay leaf.
- Stir in 2 tablespoons chopped fresh parsley until evenly distributed.
- Tip: Adding fresh parsley at the end preserves its bright color and fresh flavor.
- Let the stew rest for 5 minutes before serving to allow flavors to meld.
You’ll notice the stew has thickened to a creamy consistency while the potatoes and carrots remain distinct yet tender. The earthy lentils provide a satisfying base that complements the sweet vegetable notes beautifully. Try serving it over crusty bread or with a dollop of plain yogurt for contrasting textures that elevate this comforting classic.
Honey-Lime Grilled Salmon
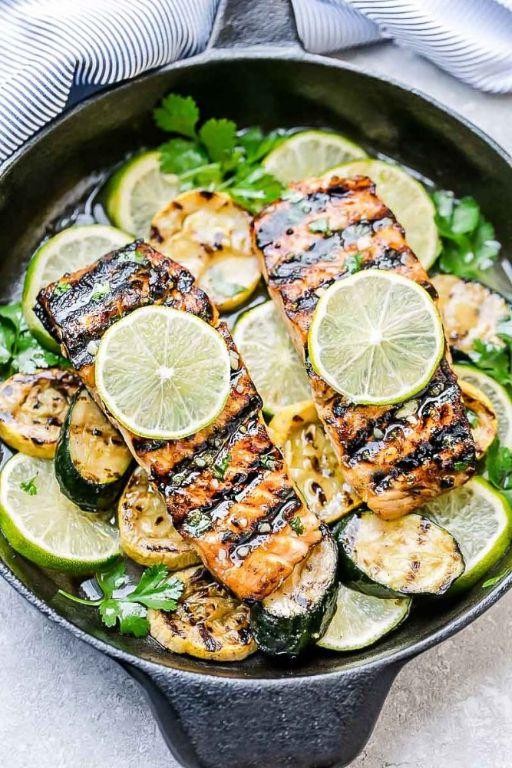
Honey-lime grilled salmon offers a perfect balance of sweet and tangy flavors that come together beautifully on the grill. Here’s how to create this simple yet impressive dish that’s perfect for weeknight dinners or entertaining guests. Let’s walk through each step methodically to ensure your salmon turns out perfectly flaky and flavorful every time.
3
servings10
minutes11
minutesIngredients
– 4 salmon fillets (6 ounces each)
– 1/4 cup honey
– 1/4 cup fresh lime juice
– 2 tablespoons olive oil
– 2 cloves garlic, minced
– 1 teaspoon salt
– 1/2 teaspoon black pepper
– 1/4 teaspoon red pepper flakes
Instructions
1. Preheat your grill to medium-high heat (400°F) and lightly oil the grates with olive oil using a paper towel held with tongs.
2. Pat the salmon fillets completely dry with paper towels to ensure proper searing and prevent sticking.
3. Whisk together honey, lime juice, olive oil, minced garlic, salt, black pepper, and red pepper flakes in a small bowl until fully combined.
4. Brush both sides of each salmon fillet generously with the honey-lime marinade, reserving about 1/4 cup for basting during cooking.
5. Place salmon fillets skin-side down on the preheated grill and close the lid.
6. Grill for 4-6 minutes without moving the fillets to develop nice grill marks.
7. Carefully flip the salmon using a wide spatula and brush the cooked side with reserved marinade.
8. Continue grilling for another 3-5 minutes until the internal temperature reaches 145°F when tested with an instant-read thermometer.
9. Remove salmon from grill and let rest for 2 minutes before serving to allow juices to redistribute.
Buttery and flaky with a caramelized exterior, this salmon boasts vibrant citrus notes that cut through the rich honey glaze. Serve it over a bed of quinoa with grilled asparagus for a complete meal, or flake it into tacos with cabbage slaw for a fun twist that highlights the zesty lime undertones.
Crispy Baked Sweet Potato Fries

Every home cook deserves a foolproof method for achieving perfectly crispy sweet potato fries without the mess of deep frying. Embrace this simple baked approach that transforms humble sweet potatoes into golden, irresistible fries with just a few pantry staples. Follow these precise steps to master oven-baked fries that rival any restaurant version.
2
servings15
minutes30
minutesIngredients
– 2 large sweet potatoes
– 2 tablespoons olive oil
– 1 teaspoon cornstarch
– 1/2 teaspoon garlic powder
– 1/2 teaspoon paprika
– 1/4 teaspoon black pepper
– 3/4 teaspoon salt
Instructions
1. Preheat your oven to 425°F and line a large baking sheet with parchment paper.
2. Scrub 2 large sweet potatoes thoroughly under running water to remove any dirt.
3. Pat the sweet potatoes completely dry with clean kitchen towels.
4. Peel the sweet potatoes using a vegetable peeler, removing all skin.
5. Slice each sweet potato lengthwise into 1/4-inch thick planks.
6. Cut the planks into 1/4-inch wide fry-shaped sticks.
7. Place the cut fries in a large mixing bowl and toss with 2 tablespoons olive oil until evenly coated.
8. Sprinkle 1 teaspoon cornstarch over the fries and toss again to create a light coating. (Tip: The cornstarch helps absorb moisture for extra crispiness.)
9. Add 1/2 teaspoon garlic powder, 1/2 teaspoon paprika, 1/4 teaspoon black pepper, and 3/4 teaspoon salt to the bowl.
10. Toss everything together until the fries are evenly seasoned.
11. Arrange the fries in a single layer on the prepared baking sheet, ensuring they don’t touch. (Tip: Crowding causes steaming instead of crisping.)
12. Bake at 425°F for 15 minutes.
13. Remove the baking sheet from the oven and carefully flip each fry using tongs.
14. Return to the oven and bake for another 10-15 minutes until the edges are deeply browned and crispy.
15. Test for doneness by sampling one fry – it should be tender inside with a crisp exterior. (Tip: Baking times may vary slightly depending on your oven and fry thickness.)
16. Transfer the finished fries to a serving plate immediately.
Just out of the oven, these fries offer a satisfying contrast between their crackly exterior and soft, sweet interior. The subtle smokiness from paprika complements the natural sweetness beautifully, while the garlic powder adds savory depth without overpowering. For an elevated experience, serve them alongside a creamy garlic aioli or sprinkle with fresh chopped parsley right before serving.
Roasted Cauliflower Steaks with Tahini Sauce

Very few vegetables transform as beautifully in the oven as cauliflower, and these roasted cauliflower steaks with creamy tahini sauce demonstrate just how elegant simple ingredients can be. Preparing thick slices roasted until caramelized creates a satisfying main dish that even vegetable skeptics will enjoy, while the nutty tahini sauce adds luxurious richness. Let’s walk through each step methodically to achieve perfectly cooked cauliflower with maximum flavor development.
5
steaks15
minutes45
minutesIngredients
– 1 large head cauliflower
– 3 tablespoons olive oil
– 1 teaspoon salt
– 1/2 teaspoon black pepper
– 1/4 cup tahini
– 2 tablespoons lemon juice
– 1/4 cup water
– 1 small garlic clove
Instructions
1. Preheat your oven to 425°F and line a baking sheet with parchment paper.
2. Remove outer leaves from the cauliflower head while keeping the core intact.
3. Place the cauliflower upright on a cutting board and slice vertically into 1-inch thick steaks.
4. Arrange the cauliflower steaks in a single layer on the prepared baking sheet.
5. Brush both sides of each cauliflower steak evenly with olive oil using a pastry brush.
6. Sprinkle salt and black pepper evenly over both sides of the cauliflower steaks.
7. Roast the cauliflower in the preheated oven for 25 minutes at 425°F.
8. Carefully flip each cauliflower steak using a spatula after 25 minutes of roasting.
9. Continue roasting for another 15-20 minutes until the edges are deeply golden brown and crispy.
10. While the cauliflower roasts, mince the garlic clove finely using a knife or garlic press.
11. Combine tahini, lemon juice, and minced garlic in a small mixing bowl.
12. Whisk the tahini mixture vigorously until it thickens and becomes pale in color.
13. Gradually add water to the tahini mixture while continuing to whisk constantly.
14. Continue whisking until the sauce reaches a smooth, pourable consistency.
15. Remove the roasted cauliflower steaks from the oven when they’re tender when pierced with a fork.
16. Transfer the cauliflower steaks to serving plates using a spatula.
17. Drizzle the prepared tahini sauce generously over the warm cauliflower steaks. Perfectly roasted cauliflower steaks develop a wonderful caramelized crust while maintaining a tender, meaty interior that holds its shape beautifully. The creamy tahini sauce provides a tangy, nutty contrast that complements the sweet roasted flavors, making this dish substantial enough to serve as a vegetarian main course over quinoa or alongside a simple green salad.
Herb-Crusted Cod with Citrus Vinaigrette
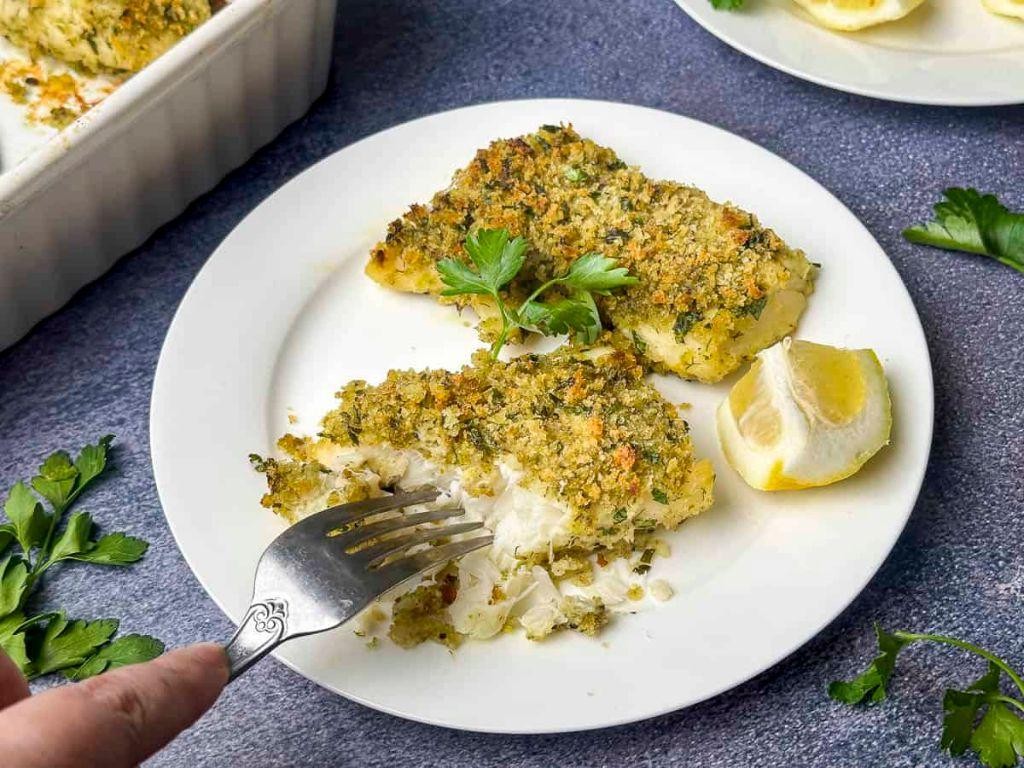
Just imagine biting into perfectly flaky white fish with a golden, aromatic crust, brightened by a zesty citrus dressing. This herb-crusted cod with citrus vinaigrette delivers restaurant-quality elegance with straightforward techniques perfect for weeknight dinners. Follow these methodical steps to create a dish that balances delicate fish with bold, fresh flavors.
3
servings15
minutes15
minutesIngredients
– 4 (6-ounce) cod fillets
– 1/2 cup panko breadcrumbs
– 1/4 cup fresh parsley, finely chopped
– 2 tablespoons fresh dill, finely chopped
– 2 cloves garlic, minced
– 2 tablespoons olive oil
– 1/2 teaspoon salt
– 1/4 teaspoon black pepper
– 1/4 cup orange juice
– 2 tablespoons lemon juice
– 1 tablespoon honey
– 1/4 cup extra virgin olive oil
Instructions
1. Preheat your oven to 400°F and line a baking sheet with parchment paper.
2. Pat the cod fillets completely dry with paper towels to ensure proper crust adhesion.
3. Combine panko breadcrumbs, parsley, dill, minced garlic, 2 tablespoons olive oil, salt, and black pepper in a medium bowl.
4. Press the herb mixture evenly onto the top surface of each cod fillet, creating a uniform 1/4-inch thick layer.
5. Place the coated fillets on the prepared baking sheet, leaving 2 inches between each piece for even cooking.
6. Bake at 400°F for 12-15 minutes until the crust is golden brown and the fish flakes easily with a fork.
7. While the cod bakes, whisk together orange juice, lemon juice, and honey in a small bowl until the honey fully dissolves.
8. Slowly drizzle in 1/4 cup extra virgin olive oil while continuously whisking to create an emulsified vinaigrette.
9. Let the baked cod rest for 3 minutes on the baking sheet before serving to allow juices to redistribute.
10. Drizzle the citrus vinaigrette over the plated herb-crusted cod fillets. The delicate, flaky texture of the cod contrasts beautifully with the crisp herb crust, while the bright vinaigrette cuts through the richness. Try serving it over a bed of quinoa with roasted asparagus for a complete meal that highlights the citrus notes.
Low-Sugar Berry Chia Seed Pudding

Keeping your breakfast both nutritious and delicious doesn’t have to be complicated, especially when you can prepare it the night before. Knowing how many of us struggle with morning routines, I’ll walk you through creating this simple low-sugar berry chia seed pudding that requires minimal effort for maximum flavor. Let’s begin with gathering our ingredients and following each step carefully.
4
servings15
minutesIngredients
– 1/2 cup chia seeds
– 2 cups unsweetened almond milk
– 1 cup mixed fresh berries (strawberries, blueberries, raspberries)
– 2 tablespoons pure maple syrup
– 1 teaspoon vanilla extract
– 1/4 teaspoon ground cinnamon
Instructions
1. Combine 1/2 cup chia seeds and 2 cups unsweetened almond milk in a medium mixing bowl.
2. Add 2 tablespoons pure maple syrup, 1 teaspoon vanilla extract, and 1/4 teaspoon ground cinnamon to the bowl.
3. Whisk the mixture vigorously for 60 seconds to prevent clumping and ensure even distribution.
4. Let the mixture sit undisturbed for 5 minutes, then whisk again for 30 seconds to break up any forming clumps.
5. Cover the bowl tightly with plastic wrap, pressing it directly onto the surface of the mixture to prevent a skin from forming.
6. Refrigerate the covered bowl for at least 8 hours or overnight until the pudding reaches a thick, spoonable consistency.
7. Wash 1 cup mixed fresh berries and pat them completely dry with paper towels.
8. Hull and slice any large strawberries into uniform 1/4-inch pieces for even distribution.
9. Gently fold 3/4 of the prepared berries into the thickened chia pudding using a rubber spatula.
10. Divide the pudding evenly among 4 serving glasses or jars.
11. Top each serving with the remaining fresh berries arranged in an attractive pattern.
12. Serve immediately or refrigerate covered for up to 3 days.
Creating this pudding yields a delightfully thick texture with subtle sweetness that lets the natural berry flavors shine through. Consider layering it with granola for added crunch or swirling in a tablespoon of Greek yogurt for extra creaminess. The chia seeds create a satisfying gel-like consistency that makes each spoonful both refreshing and filling.
Almond Milk Oatmeal with Fresh Berries
A perfectly creamy bowl of oatmeal starts with quality ingredients and proper technique. Almond milk oatmeal with fresh berries is a nutritious breakfast that comes together in minutes, offering a comforting warmth and natural sweetness that will keep you satisfied all morning. This method ensures your oatmeal achieves the ideal texture without becoming gummy or watery.
2
bowls5
minutes8
minutesIngredients
– 1 cup rolled oats
– 2 cups unsweetened almond milk
– 1/4 teaspoon salt
– 1 tablespoon maple syrup
– 1/2 cup mixed fresh berries
– 1/4 cup sliced almonds
Instructions
1. Combine 1 cup rolled oats, 2 cups unsweetened almond milk, and 1/4 teaspoon salt in a medium saucepan.
2. Place the saucepan over medium-high heat and bring the mixture to a gentle boil, stirring occasionally with a wooden spoon.
3. Reduce the heat to low and simmer for 5 minutes, stirring every 60 seconds to prevent sticking to the bottom of the pan.
4. Continue cooking for another 3-5 minutes until the oatmeal has thickened enough to coat the back of your spoon.
5. Remove the saucepan from the heat and stir in 1 tablespoon maple syrup until fully incorporated.
6. Rinse 1/2 cup mixed fresh berries under cool running water and pat them dry with a paper towel.
7. Divide the cooked oatmeal evenly between two serving bowls using a ladle.
8. Top each bowl with equal portions of the fresh berries and 1/4 cup sliced almonds.
Finishing with a sprinkle of cinnamon or a drizzle of honey adds extra warmth and sweetness to this versatile breakfast. The oatmeal maintains a creamy yet substantial texture that contrasts beautifully with the juicy berry bursts and crunchy almonds. For a decorative presentation, arrange the berries in concentric circles and garnish with mint leaves before serving.
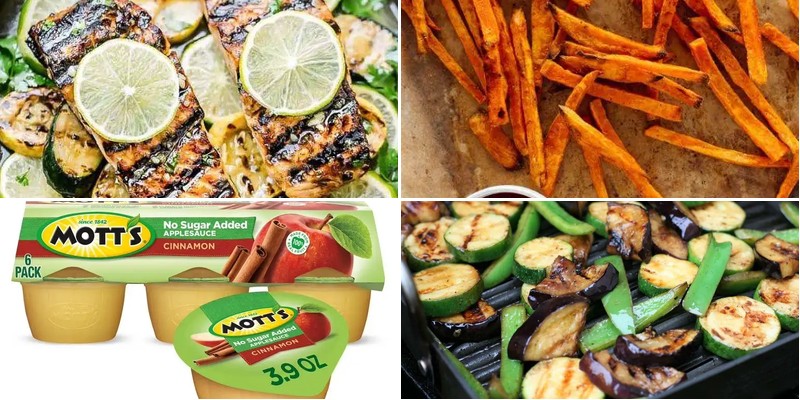
Unsweetened Applesauce with Cinnamon

Here’s a simple, foolproof method for making unsweetened applesauce with cinnamon that delivers consistent results every time. Homemade applesauce is surprisingly straightforward to prepare, requiring just a few basic ingredients and minimal hands-on time. This version skips added sugars, allowing the natural sweetness of the apples to shine through with warm cinnamon notes.
6
servings15
minutes20
minutesIngredients
– 6 medium apples
– 1/2 cup water
– 1 teaspoon ground cinnamon
Instructions
1. Wash all 6 apples thoroughly under cool running water to remove any surface dirt.
2. Use a sharp paring knife to carefully core each apple, removing all seeds and tough center portions.
3. Peel each apple completely using a vegetable peeler or paring knife, discarding the skins.
4. Cut the peeled apples into uniform 1-inch chunks to ensure even cooking.
5. Combine the apple chunks and 1/2 cup water in a medium saucepan over medium heat.
6. Cover the saucepan with a tight-fitting lid and cook the apples for 15-20 minutes, checking occasionally that the water hasn’t evaporated completely.
7. Test the apples for doneness by piercing a chunk with a fork; they should be completely soft and mash easily.
8. Remove the saucepan from heat and stir in 1 teaspoon ground cinnamon until evenly distributed throughout the mixture.
9. Mash the cooked apples with a potato masher until you achieve your preferred consistency, whether chunky or smooth.
10. Let the applesauce cool to room temperature before transferring to an airtight container for storage. Creating this applesauce yields a naturally sweet, slightly chunky texture that pairs beautifully with the warm spice of cinnamon. Consider swirling it into oatmeal, using it as a pancake topping, or serving it alongside roasted pork for a savory-sweet combination that highlights its versatile nature.
Conclusion
Zesty and wholesome, these 33 low-salt, low-sugar recipes prove healthy eating can be deliciously satisfying. We hope this collection inspires your kitchen adventures! Try your favorites, share which ones you love in the comments below, and pin this article on Pinterest to help other health-conscious foodies discover these tasty options. Happy cooking!


