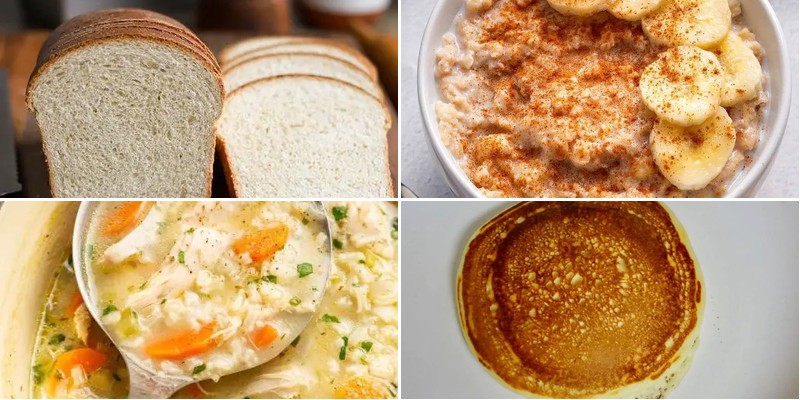
Managing digestive issues doesn’t mean sacrificing flavor or variety in your meals. Many people following a low residue diet struggle to find recipes that are both gentle on the system and satisfying to eat. That’s why we’ve gathered 20 delicious, easy-to-make dishes that will keep your digestion comfortable while delighting your taste buds. Get ready to discover comforting soups, simple mains, and tasty snacks perfect for sensitive stomachs.
Smooth Banana Oatmeal
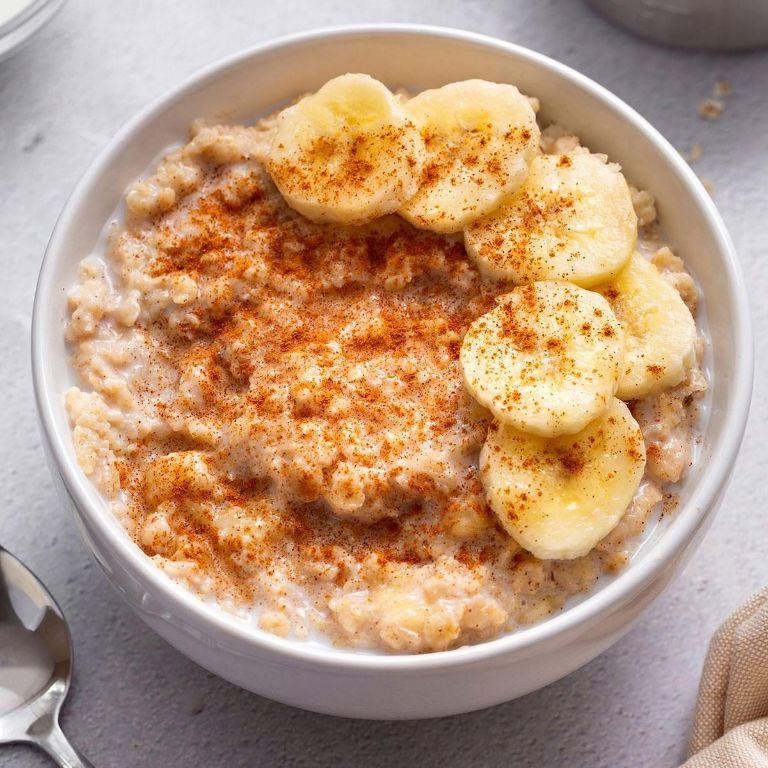
Oatmeal doesn’t need to be boring or time-consuming. This smooth banana oatmeal comes together in minutes and delivers creamy comfort without any lumps. Perfect for busy mornings when you need something satisfying fast.
2
servings5
minutes8
minutesIngredients
– 1 cup old-fashioned rolled oats (not instant)
– 1 very ripe banana, mashed (spotty brown skin works best)
– 2 cups water or milk (dairy or plant-based)
– Pinch of salt (enhances sweetness)
– 1 tbsp maple syrup or honey (optional, adjust to taste)
– ½ tsp cinnamon (or pumpkin pie spice for variation)
Instructions
1. Mash the very ripe banana thoroughly in a medium saucepan until no large chunks remain.
2. Add the old-fashioned rolled oats, water or milk, and pinch of salt to the saucepan.
3. Stir all ingredients together until well combined.
4. Place the saucepan over medium-high heat and bring the mixture to a boil, stirring occasionally.
5. Once boiling, immediately reduce heat to low and simmer for 5 minutes, stirring frequently to prevent sticking.
6. Continue cooking for another 2-3 minutes until the oatmeal reaches your desired thickness.
7. Remove the saucepan from heat and stir in the cinnamon and maple syrup or honey if using.
8. Let the oatmeal rest for 1 minute off heat to thicken slightly before serving.
Creamy with subtle banana sweetness throughout, this oatmeal has a smooth texture that appeals to both kids and adults. The natural fruit eliminates the need for excessive sweeteners while providing comforting warmth. Try topping with toasted walnuts or a drizzle of peanut butter for added protein and crunch.
Creamy Rice Pudding

Years of testing led to this foolproof creamy rice pudding recipe. You’ll get perfectly tender rice in a rich, vanilla-scented custard every time. Skip the boxed versions—this homemade delight comes together with pantry staples.
4
servings5
minutes25
minutesIngredients
– 1 cup short-grain white rice (rinsed until water runs clear)
– 4 cups whole milk (for maximum creaminess)
– 1/2 cup granulated sugar (adjust to taste)
– 1/4 tsp salt
– 1 tsp vanilla extract (add after cooking)
– 1/2 tsp ground cinnamon (optional, for dusting)
Instructions
1. Rinse 1 cup short-grain white rice under cold water until the water runs clear to remove excess starch.
2. Combine rinsed rice, 4 cups whole milk, 1/2 cup sugar, and 1/4 tsp salt in a heavy-bottomed saucepan.
3. Bring the mixture to a simmer over medium heat, stirring constantly with a wooden spoon to prevent scorching.
4. Reduce heat to low and cover the saucepan, leaving the lid slightly ajar to allow steam to escape.
5. Simmer for 25 minutes, stirring every 5 minutes to ensure even cooking and prevent sticking.
6. Check the rice texture—it should be tender with a slight bite, and the milk will have thickened significantly.
7. Remove the saucepan from heat and stir in 1 tsp vanilla extract until fully incorporated.
8. Transfer the pudding to serving bowls and let it cool for 10 minutes at room temperature.
9. Dust with 1/2 tsp ground cinnamon if desired before serving warm, or cover and refrigerate for 2 hours to serve chilled.
Fresh from the stove, this pudding boasts a luxuriously creamy texture with plump, tender rice grains. For a decadent twist, swirl in raspberry jam or top with toasted almonds. It firms up beautifully when chilled, making it perfect for make-ahead desserts.
Tender Baked Chicken Breast

Never settle for dry chicken again. This method guarantees juicy, perfectly cooked chicken every time. Simple ingredients create extraordinary results with minimal effort.
5
servings10
minutes22
minutesIngredients
– 4 boneless, skinless chicken breasts (about 6 oz each)
– 2 tbsp olive oil (or any neutral oil)
– 1 tsp kosher salt
– ½ tsp black pepper, freshly ground
– 1 tsp garlic powder
– ½ tsp paprika (for color)
– 1 tbsp fresh parsley, chopped (optional garnish)
Instructions
1. Preheat your oven to 425°F and position the rack in the center.
2. Pat chicken breasts completely dry with paper towels to ensure proper browning.
3. Drizzle olive oil over both sides of each chicken breast.
4. Combine salt, pepper, garlic powder, and paprika in a small bowl.
5. Rub the seasoning mixture evenly over all surfaces of the chicken.
6. Place chicken breasts in a single layer in a baking dish, not touching.
7. Bake at 425°F for 18-22 minutes, depending on thickness.
8. Check doneness with an instant-read thermometer inserted into the thickest part—it should read 165°F.
9. Remove chicken from oven and transfer to a clean cutting board.
10. Let chicken rest for 5 minutes before slicing to retain juices.
11. Sprinkle with fresh parsley if using.
Butter-knife tender chicken yields to the slightest pressure, with a savory garlic undertone that pairs beautifully with roasted vegetables. Try slicing it thin for salads or keeping whole for dinner plates. The golden-brown exterior gives way to remarkably moist, flavorful meat that will become your new weeknight staple.
Velvety Mashed Potatoes
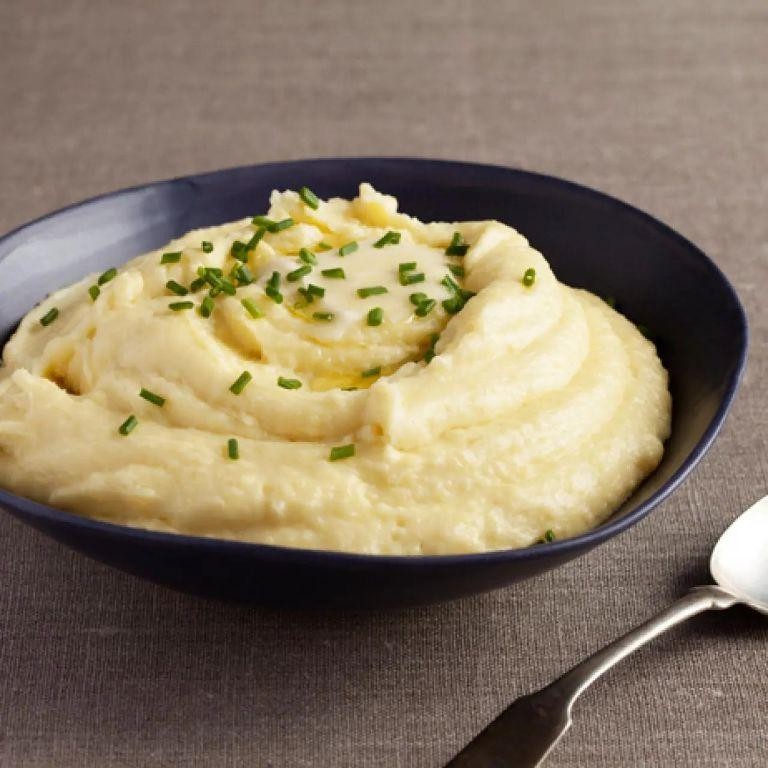
Smooth, creamy, and utterly comforting, these mashed potatoes deliver restaurant-quality texture with simple ingredients. Skip the lumps and embrace the velvety finish that makes this side dish unforgettable. Perfect for holidays or weeknight dinners when you need something special.
2
servings15
minutes25
minutesIngredients
– 2 lbs Yukon Gold potatoes (peeled and quartered, or Russet potatoes)
– 4 tbsp unsalted butter (cut into pieces, or salted butter with salt adjustment)
– 1/2 cup heavy cream (warmed, or whole milk for lighter texture)
– 1 tsp salt (adjust to taste)
– 1/4 tsp black pepper (freshly ground preferred)
Instructions
1. Place peeled and quartered potatoes in a large pot and cover with cold water by 1 inch.
2. Add 1 tsp salt to the water and bring to a boil over high heat.
3. Reduce heat to medium and simmer potatoes for 15-20 minutes until fork-tender.
4. Drain potatoes thoroughly in a colander and return to the hot pot for 1 minute to evaporate excess moisture.
5. Pass potatoes through a ricer or food mill into a large bowl for the smoothest texture.
6. Heat heavy cream in a small saucepan over medium heat until steaming (about 2 minutes).
7. Add butter pieces to the hot potatoes and stir until melted and incorporated.
8. Pour warm cream over potatoes and mix gently until fully combined.
9. Season with black pepper and additional salt if needed, stirring just until uniform.
10. Serve immediately while hot for the creamiest consistency.
Never settle for grainy mashed potatoes again—this version stays silky and rich thanks to the warmed cream and thorough ricing. The Yukon Gold potatoes contribute a buttery flavor that needs minimal enhancement. For a twist, fold in roasted garlic or top with chives and extra butter before serving.
Simple Boiled Carrots

Tender, sweet, and surprisingly versatile, these boiled carrots transform a humble vegetable into a perfect side dish. They require minimal effort but deliver maximum flavor when prepared correctly. This straightforward method ensures perfectly cooked carrots every time.
5
servings10
minutes18
minutesIngredients
– 1 lb fresh carrots, peeled and cut into ½-inch rounds (uniform pieces cook evenly)
– 4 cups water (enough to fully submerge carrots)
– 1 tsp salt (adjust to preference)
– 2 tbsp unsalted butter (or olive oil for dairy-free)
– 1 tbsp fresh parsley, chopped (optional garnish)
Instructions
1. Place peeled and cut carrots in a medium saucepan.
2. Add 4 cups cold water to the saucepan, ensuring carrots are completely submerged.
3. Stir in 1 teaspoon salt until dissolved in the water.
4. Bring water to a rolling boil over high heat, which should take 5-7 minutes.
5. Reduce heat to medium and maintain a gentle boil for 8-10 minutes.
6. Test carrot tenderness by piercing with a fork—they should slide off easily but maintain slight resistance.
7. Drain carrots immediately in a colander to stop the cooking process.
8. Return hot carrots to the empty saucepan off the heat.
9. Add 2 tablespoons butter and toss until carrots are evenly coated and butter melts completely.
10. Sprinkle with 1 tablespoon chopped parsley if using, gently tossing to distribute.
Never underestimate the satisfying crunch-tender texture of properly boiled carrots. Their natural sweetness intensifies during cooking, making them excellent alongside roasted meats or mashed into soups for extra body. Try tossing them with a pinch of smoked paprika or dill for an instant flavor upgrade.
Soft White Bread Toast
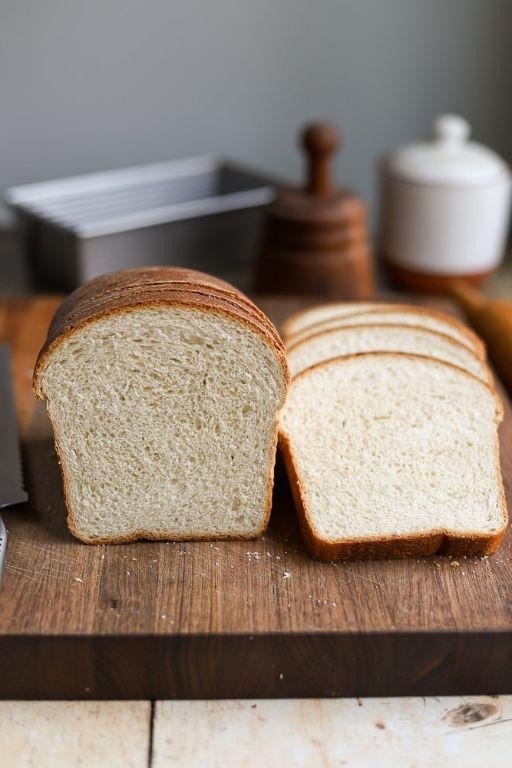
You’ve probably had toast before, but this soft white bread version takes it to another level with its pillowy texture and golden-brown perfection. It’s the simple breakfast staple that never disappoints.
4
slices5
minutes12
minutesIngredients
– 4 slices soft white bread (thick-cut works best)
– 2 tbsp unsalted butter (or margarine for dairy-free)
– 1 tbsp olive oil (or any neutral oil)
– Pinch of salt (optional, enhances flavor)
Instructions
1. Place a large skillet or griddle over medium heat and let it warm for 2 minutes.
2. Spread 1 tablespoon of butter evenly on one side of each bread slice using a butter knife.
3. Drizzle 1 tablespoon of olive oil into the heated skillet and swirl to coat the surface evenly.
4. Carefully place 2 bread slices buttered-side down into the skillet.
5. Cook for 2-3 minutes until the bottom develops deep golden-brown spots and becomes crisp.
6. Flip the bread slices using a spatula and cook for another 2-3 minutes on the other side.
7. Remove the first batch from the skillet and repeat steps 4-6 with the remaining 2 bread slices.
8. Transfer all toast slices to a wire rack to prevent sogginess and maintain crispness.
9. Sprinkle a tiny pinch of salt over the hot toast if desired for enhanced flavor.
Perfectly golden with a crisp exterior that gives way to a soft, fluffy interior. Pair it with jam for sweetness or top with avocado and red pepper flakes for a savory twist.
Gentle Chicken Broth Soup

Unwind with this soothing chicken broth soup that comes together quickly yet delivers deep, comforting flavors. Using simple ingredients creates a nourishing bowl perfect for chilly evenings or when you need gentle comfort. This recipe builds flavor through careful simmering and thoughtful seasoning.
4
servings15
minutes60
minutesIngredients
– 1 lb chicken thighs (bone-in for richer flavor, or boneless for convenience)
– 8 cups cold water (start cold for clearer broth)
– 1 large onion, quartered (skin on adds golden color)
– 3 carrots, chopped into ½-inch rounds (peeled or scrubbed well)
– 3 celery stalks, chopped into ½-inch pieces (include leaves for extra flavor)
– 3 garlic cloves, smashed (remove papery skins first)
– 2 bay leaves (dried or fresh)
– 1 tsp black peppercorns (whole, not ground)
– 1½ tsp kosher salt (adjust at end if needed)
– 2 tbsp fresh parsley, chopped (flat-leaf or curly both work)
Instructions
1. Place chicken thighs in a large stockpot or Dutch oven.
2. Add 8 cups cold water to the pot, ensuring chicken is fully submerged.
3. Bring water to a boil over high heat, then immediately reduce to a gentle simmer.
4. Skim off any foam that rises to the surface during the first 10 minutes of simmering for a clearer broth.
5. Add quartered onion, chopped carrots, chopped celery, smashed garlic, bay leaves, and black peppercorns to the pot.
6. Simmer uncovered for 45 minutes at 190°F, maintaining gentle bubbles.
7. Remove chicken thighs with tongs and transfer to a cutting board to cool slightly.
8. Shred chicken meat from bones using two forks, discarding bones and skin.
9. Return shredded chicken to the broth.
10. Stir in 1½ teaspoons kosher salt and simmer for 5 more minutes.
11. Remove bay leaves and discard them.
12. Stir in chopped fresh parsley just before serving.
13. Ladle soup into bowls while hot.
Don’t underestimate this broth’s simplicity—the slow simmer extracts maximum flavor from humble ingredients. The shredded chicken stays tender while vegetables soften just enough to maintain slight texture. For a creative twist, serve over cooked rice noodles or stir in a spoonful of miso paste at the end for umami depth.
Mild Flavored Fish Fillet

Looking for a simple, crowd-pleasing fish dish that won’t overwhelm picky eaters? Let’s make mild flavored fish fillets that are perfectly tender and subtly seasoned. This recipe delivers consistent results with minimal effort.
5
servings10
minutes15
minutesIngredients
– 1 lb white fish fillets (such as cod or tilapia), patted dry
– 2 tbsp olive oil (or any neutral oil)
– 1 tsp garlic powder
– 1 tsp onion powder
– 1/2 tsp paprika
– 1/2 tsp dried parsley
– 1/4 tsp black pepper
– 1/4 tsp salt (adjust to taste)
– 1 lemon, cut into wedges
Instructions
1. Preheat your oven to 400°F and line a baking sheet with parchment paper.
2. Pat the fish fillets completely dry with paper towels to ensure proper browning.
3. In a small bowl, combine garlic powder, onion powder, paprika, dried parsley, black pepper, and salt.
4. Brush both sides of each fish fillet evenly with olive oil using a pastry brush.
5. Sprinkle the seasoning mixture evenly over both sides of the oiled fillets.
6. Arrange the seasoned fillets in a single layer on the prepared baking sheet, ensuring they don’t touch.
7. Bake at 400°F for 12-15 minutes until the fish flakes easily with a fork and reaches 145°F internally.
8. Remove from oven and squeeze fresh lemon juice over the hot fillets.
Very tender and flaky, these fillets have a subtle savory flavor enhanced by the bright lemon finish. Serve them over rice with steamed vegetables, or flake into tacos with fresh slaw for a quick weeknight meal that satisfies everyone at the table.
Easy Scrambled Eggs

Every home cook needs a foolproof scrambled eggs recipe in their arsenal. This method delivers creamy, tender eggs every single time without any fancy techniques required.
2
servings3
minutes4
minutesIngredients
– 4 large eggs (room temperature for fluffier results)
– 2 tbsp whole milk or heavy cream (for extra creaminess)
– 1 tbsp unsalted butter (or olive oil for dairy-free)
– 1/4 tsp kosher salt (adjust to preference)
– 1/8 tsp black pepper (freshly ground preferred)
Instructions
1. Crack 4 large eggs into a medium bowl.
2. Add 2 tbsp whole milk, 1/4 tsp kosher salt, and 1/8 tsp black pepper to the eggs.
3. Whisk vigorously with a fork for 30 seconds until completely uniform and slightly frothy.
4. Place a nonstick skillet over medium-low heat and let it warm for 1 minute.
5. Add 1 tbsp unsalted butter to the skillet and swirl until melted and foamy.
6. Pour the egg mixture into the center of the skillet.
7. Let the eggs sit undisturbed for 20 seconds until edges begin to set.
8. Use a rubber spatula to push cooked edges toward the center, tilting the pan to distribute uncooked eggs.
9. Continue this gentle pushing motion every 15-20 seconds for 2-3 minutes total.
10. Remove the skillet from heat when eggs are mostly set but still slightly wet-looking.
11. Let residual heat finish cooking for 30 seconds off the burner.
12. Transfer immediately to a plate to stop the cooking process.
Never underestimate the power of properly cooked scrambled eggs. They should be soft, moist curds with a delicate texture that melts in your mouth. Serve them over buttered toast, folded into breakfast tacos, or alongside crispy bacon for the ultimate morning satisfaction.
Plain Spaghetti with Olive Oil

Sometimes the simplest dishes are the most satisfying. Spaghetti tossed with olive oil creates a comforting meal that comes together in minutes. This minimalist approach lets quality ingredients shine through.
2
servings10
minutes15
minutesIngredients
– 1 lb spaghetti
– 1/3 cup extra virgin olive oil, plus more for drizzling
– 4 cloves garlic, thinly sliced
– 1 tsp red pepper flakes, adjust to heat preference
– 1/2 cup fresh parsley, chopped
– 1/2 cup grated Parmesan cheese, plus more for serving
– Salt for pasta water and seasoning
Instructions
1. Bring a large pot of salted water to a rolling boil over high heat.
2. Add spaghetti to boiling water and cook for 8-10 minutes until al dente, stirring occasionally to prevent sticking.
3. While pasta cooks, heat olive oil in a large skillet over medium-low heat for 2 minutes.
4. Add garlic slices to the oil and cook for 1-2 minutes until fragrant but not browned.
5. Stir in red pepper flakes and cook for 30 seconds to infuse the oil.
6. Reserve 1 cup of pasta water before draining the spaghetti.
7. Transfer drained spaghetti directly to the skillet with the infused oil.
8. Toss pasta with the oil mixture until thoroughly coated.
9. Add 1/4 cup of reserved pasta water to the skillet and toss vigorously to create a light emulsion.
10. Remove skillet from heat and stir in chopped parsley.
11. Sprinkle grated Parmesan cheese over the pasta and toss to combine.
12. Season with additional salt if needed and serve immediately. Perfectly cooked spaghetti should have a slight chew while the infused olive oil creates a silky coating. The garlic provides subtle aroma without overpowering, making this versatile enough for simple dinners or elegant occasions.
Smooth Cottage Cheese Bowl
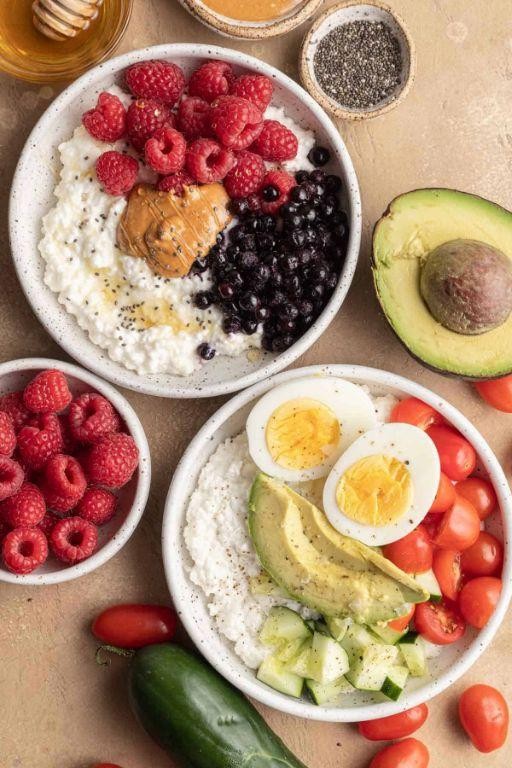
Many mornings call for something quick yet satisfying. Make this smooth cottage cheese bowl in minutes for a protein-packed start. Minimal ingredients deliver maximum flavor and texture.
1
bowl5
minutesIngredients
– 1 cup full-fat cottage cheese (for creamier texture)
– 1 tbsp honey (or maple syrup for vegan option)
– 1/2 tsp vanilla extract (use pure for best flavor)
– 1/4 cup fresh berries (frozen work if thawed)
– 2 tbsp chopped nuts (almonds or walnuts recommended)
Instructions
1. Place cottage cheese in a medium bowl.
2. Add honey and vanilla extract directly to the cottage cheese.
3. Whisk vigorously for 60 seconds until completely smooth and creamy. (Tip: A small whisk works better than a spoon for eliminating lumps.)
4. Let the mixture rest for 2 minutes to allow flavors to meld.
5. Rinse fresh berries under cold water and pat dry with paper towels.
6. Chop nuts into small, bite-sized pieces using a sharp knife.
7. Pour the smooth cottage cheese mixture into your serving bowl.
8. Arrange berries evenly over the surface of the cottage cheese.
9. Sprinkle chopped nuts over the berries in an even layer. (Tip: Toast nuts at 350°F for 5 minutes first for deeper flavor.)
10. Serve immediately or refrigerate for up to 2 hours. (Tip: Add granola just before eating to maintain crunch.)
This bowl delivers a creamy base with sweet honey notes and vanilla warmth. The fresh berries provide juicy bursts against the smooth texture, while nuts add essential crunch. Try layering it in a glass with granola for a parfait-style presentation that looks as good as it tastes.
Mellow Rice and Chicken Dish
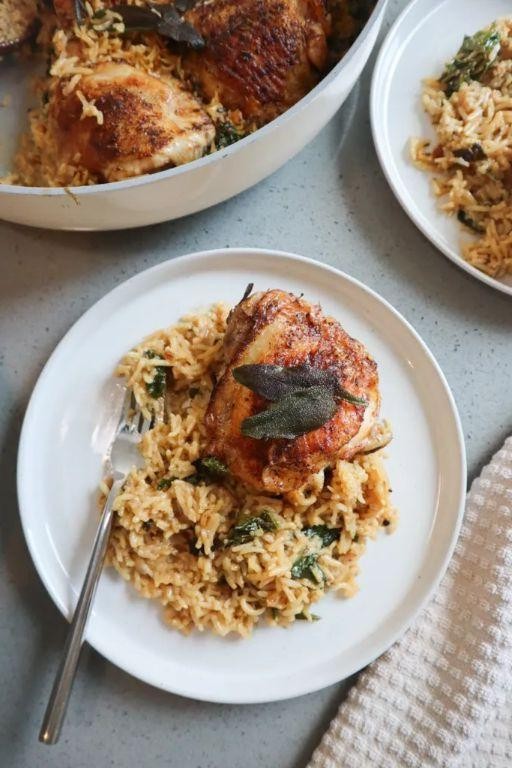
Brimming with comfort, this one-pot wonder combines tender chicken and fluffy rice in perfect harmony. It’s the ultimate weeknight solution when you crave something satisfying without the fuss. Simple ingredients transform into a meal that feels both nourishing and deeply familiar.
3
servings15
minutes35
minutesIngredients
– 1 lb boneless, skinless chicken thighs, cut into 1-inch pieces (or breasts for leaner option)
– 1 cup long-grain white rice, rinsed until water runs clear (for fluffier results)
– 1 medium yellow onion, finely diced (about 1 cup)
– 2 cloves garlic, minced
– 2 cups low-sodium chicken broth
– 2 tbsp olive oil (or any neutral oil)
– 1 tsp paprika
– 1/2 tsp dried thyme
– 1/2 tsp salt (adjust to taste)
– 1/4 tsp black pepper
– 2 tbsp fresh parsley, chopped (for garnish)
Instructions
1. Heat olive oil in a large skillet or Dutch oven over medium-high heat until shimmering.
2. Add chicken pieces in a single layer and cook for 4-5 minutes until browned on all sides. Tip: Don’t overcrowd the pan to ensure proper browning.
3. Transfer chicken to a clean plate using a slotted spoon, leaving drippings in the pan.
4. Add diced onion to the same pan and cook for 3-4 minutes until softened and translucent.
5. Stir in minced garlic and cook for 30 seconds until fragrant. Tip: Garlic burns quickly, so keep the heat moderate.
6. Add rinsed rice, paprika, thyme, salt, and pepper to the pan, stirring to coat grains evenly with oil and spices.
7. Pour in chicken broth and scrape any browned bits from the bottom of the pan. Tip: Deglazing enhances the overall flavor depth.
8. Return chicken and any accumulated juices to the pan, nestling pieces into the rice mixture.
9. Bring liquid to a boil, then immediately reduce heat to low and cover tightly with a lid.
10. Simmer for 18-20 minutes without lifting the lid until rice is tender and liquid is fully absorbed.
11. Remove from heat and let stand covered for 5 minutes to allow rice to steam and firm up.
12. Fluff rice gently with a fork and stir in chopped parsley before serving. Soft grains soak up the savory chicken essence while maintaining distinct texture. Serve alongside roasted vegetables or spoon over a bed of fresh greens for a contrasting crunch.
Low-Residue Pancakes

Years of digestive issues led me to create these gentle pancakes. You won’t miss the fiber with this simple, satisfying recipe. They’re perfect for sensitive stomachs without sacrificing flavor.
8
pancakes10
minutes20
minutesIngredients
– 1 cup all-purpose flour (sifted for lighter texture)
– 2 tbsp granulated sugar (adjust sweetness as needed)
– 1 tsp baking powder (ensure it’s fresh for best rise)
– 1/4 tsp salt
– 1 cup whole milk (room temperature works best)
– 1 large egg (lightly beaten before adding)
– 2 tbsp unsalted butter, melted (plus extra for cooking)
– 1 tsp vanilla extract (optional, for enhanced flavor)
Instructions
1. Whisk flour, sugar, baking powder, and salt in a large bowl until fully combined.
2. Pour milk, egg, melted butter, and vanilla into the dry ingredients.
3. Mix gently with a spatula until just combined—small lumps are fine.
4. Let batter rest for 5 minutes to activate the baking powder.
5. Heat a non-stick skillet over medium heat (350°F surface temperature).
6. Melt 1 tsp butter in the skillet, swirling to coat the surface evenly.
7. Pour 1/4 cup batter per pancake, spacing them 2 inches apart.
8. Cook for 2–3 minutes until bubbles form on the surface and edges look set.
9. Flip pancakes carefully using a thin spatula.
10. Cook for another 1–2 minutes until golden brown on both sides.
11. Transfer to a plate and repeat with remaining batter, adding butter as needed.
12. Serve immediately or keep warm in a 200°F oven. Resting the batter ensures fluffy pancakes, while medium heat prevents burning. A thin spatula makes flipping easier without tearing. Real comfort comes from these tender, golden pancakes with a subtle sweetness. Their soft texture pairs wonderfully with maple syrup or fruit compote. Try stacking them with a dollop of whipped cream for an extra treat.
Zucchini and Cheese Casserole

Savor this simple, satisfying zucchini and cheese casserole that transforms humble ingredients into a comforting, crowd-pleasing dish. It’s perfect for using up summer zucchini and requires minimal prep for maximum flavor. You’ll love the creamy, cheesy layers baked to golden perfection.
4
servings15
minutes32
minutesIngredients
– 4 medium zucchinis, sliced into 1/4-inch rounds (about 6 cups)
– 1 tbsp olive oil (or any neutral oil)
– 1 medium yellow onion, diced
– 2 cloves garlic, minced
– 1 cup shredded cheddar cheese (or a blend of mozzarella and Parmesan)
– 1/2 cup heavy cream (or half-and-half for a lighter option)
– 1/2 tsp salt (adjust to taste)
– 1/4 tsp black pepper
– 1/4 tsp paprika (optional, for a smoky hint)
Instructions
1. Preheat your oven to 375°F and lightly grease an 8×8-inch baking dish.
2. Heat olive oil in a large skillet over medium heat until shimmering, about 1 minute.
3. Add diced onion and cook, stirring occasionally, until softened and translucent, about 5 minutes.
4. Stir in minced garlic and cook for 30 seconds until fragrant.
5. Add zucchini rounds, salt, and pepper, and cook for 5–7 minutes, stirring occasionally, until zucchini is slightly tender but not mushy.
6. Tip: Sautéing the zucchini first removes excess moisture, preventing a watery casserole.
7. Transfer the zucchini mixture to the prepared baking dish, spreading it evenly.
8. Pour heavy cream evenly over the zucchini layer.
9. Sprinkle shredded cheddar cheese on top, covering the surface completely.
10. Dust with paprika if using for added color and flavor.
11. Tip: For a crispier top, place the dish on the middle oven rack.
12. Bake at 375°F for 20–25 minutes, until the cheese is bubbly and golden brown.
13. Tip: Let it rest for 5 minutes after baking to set the layers for easier slicing.
14. Remove from the oven and let cool for 5 minutes before serving.
Golden and bubbly straight from the oven, this casserole boasts tender zucchini enveloped in a rich, cheesy sauce. The edges crisp up beautifully, offering a delightful contrast to the creamy center. Serve it alongside grilled chicken or as a standalone vegetarian main for a comforting meal that’s sure to become a repeat favorite.
Gentle Cream of Wheat

Just the thing for chilly mornings, this creamy porridge comes together in minutes. Joyful simplicity meets comforting warmth in every spoonful.
3
servings5
minutes5
minutesIngredients
– 4 cups whole milk (or any milk of choice, for richness)
– 1 cup cream of wheat cereal
– 1/4 cup granulated sugar (adjust to preferred sweetness)
– 1/2 tsp salt
– 2 tbsp unsalted butter (for finishing)
– 1 tsp vanilla extract (optional, for flavor enhancement)
Instructions
1. Pour 4 cups whole milk into a medium saucepan.
2. Heat milk over medium heat until it reaches a gentle simmer (about 180°F).
3. Gradually whisk in 1 cup cream of wheat cereal to prevent lumps.
4. Reduce heat to low and cook for 2 minutes, stirring constantly with a wooden spoon.
5. Stir in 1/4 cup granulated sugar and 1/2 tsp salt until fully dissolved.
6. Continue cooking for 3 more minutes, stirring frequently to prevent sticking.
7. Remove saucepan from heat immediately when porridge thickens to a creamy consistency.
8. Stir in 2 tbsp unsalted butter until melted and fully incorporated.
9. Mix in 1 tsp vanilla extract if using for enhanced flavor.
10. Let stand for 1 minute before serving to allow final thickening.
Gently spoon the warm porridge into bowls for immediate enjoyment. Golden butter swirls through the velvety texture, while subtle sweetness balances the creamy grains. Top with fresh berries or a drizzle of maple syrup for a breakfast that feels both nostalgic and new.
Buttery Mashed Sweet Potatoes

Mashed sweet potatoes bring creamy comfort to any table with minimal effort. Their natural sweetness pairs perfectly with savory mains or stands alone as a satisfying side. This version keeps things simple but rich with butter and a hint of warmth.
5
servings10
minutes20
minutesIngredients
– 2 lbs sweet potatoes, peeled and cubed (about 4 medium potatoes)
– 4 tbsp unsalted butter, cubed (or salted butter, reduce salt later)
– 1/4 cup heavy cream, warmed (or whole milk for lighter texture)
– 1/2 tsp salt, or to taste
– 1/4 tsp black pepper, freshly ground preferred
– 1/8 tsp ground nutmeg, optional for warmth
Instructions
1. Place peeled, cubed sweet potatoes in a large pot and cover with cold water by 1 inch.
2. Bring water to a boil over high heat, then reduce heat to maintain a steady simmer.
3. Simmer potatoes for 15–20 minutes until fork-tender; a fork should slide in easily without resistance.
4. Drain potatoes thoroughly in a colander, shaking gently to remove excess water.
5. Return hot potatoes to the warm pot or a large mixing bowl.
6. Add cubed butter and mash potatoes with a potato masher until butter melts and incorporates.
7. Pour in warmed heavy cream and continue mashing until smooth but slightly textured.
8. Stir in salt, black pepper, and nutmeg if using, mixing evenly with a spoon or spatula.
9. Taste and adjust seasoning if needed, adding more salt or pepper gradually.
10. Serve immediately while hot. Leftovers can be stored in an airtight container in the refrigerator for up to 3 days. Leftovers reheat beautifully with a splash of cream to restore creaminess. The final mash is velvety with a subtle sweetness balanced by savory butter and pepper. Layer it under roasted chicken or top with crispy fried onions for extra crunch.
Simple Chicken and Rice Soup

Hearty chicken and rice soup brings comfort in a bowl. This straightforward version delivers classic flavor with minimal effort. You’ll have dinner ready in under an hour.
3
servings15
minutes43
minutesIngredients
– 1 tbsp olive oil (or any neutral oil)
– 1 medium onion, diced
– 2 carrots, sliced
– 2 celery stalks, chopped
– 2 cloves garlic, minced
– 1 lb boneless chicken thighs (or breasts)
– 6 cups chicken broth
– 1 cup long-grain white rice
– 1 tsp dried thyme
– 1 bay leaf
– Salt and black pepper
– 2 tbsp fresh parsley, chopped (optional garnish)
Instructions
1. Heat olive oil in a large pot over medium heat until shimmering.
2. Add diced onion, sliced carrots, and chopped celery to the pot.
3. Cook vegetables for 5-7 minutes until softened but not browned.
4. Stir in minced garlic and cook for 30 seconds until fragrant.
5. Add chicken thighs to the pot in a single layer.
6. Pour in chicken broth, ensuring chicken is fully submerged.
7. Bring liquid to a boil, then immediately reduce to a simmer.
8. Cover pot and simmer chicken for 15 minutes until cooked through.
9. Remove chicken from pot using tongs and transfer to a cutting board.
10. Add rice, dried thyme, and bay leaf to the simmering broth.
11. Cook rice uncovered for 15 minutes, stirring occasionally to prevent sticking.
12. While rice cooks, shred chicken using two forks.
13. Return shredded chicken to the pot after rice has cooked for 15 minutes.
14. Season soup with salt and black pepper, starting with 1 tsp salt and ½ tsp pepper.
15. Simmer for 5 more minutes to combine flavors.
16. Remove bay leaf and discard.
17. Stir in fresh parsley just before serving.
You’ll notice the rice absorbs just enough broth to create a satisfying texture without becoming mushy. The shredded chicken stays tender while the vegetables provide subtle sweetness. For a fresh twist, squeeze lemon juice over individual bowls or serve with crusty bread for dipping.
Soft Cooked Apple Slices
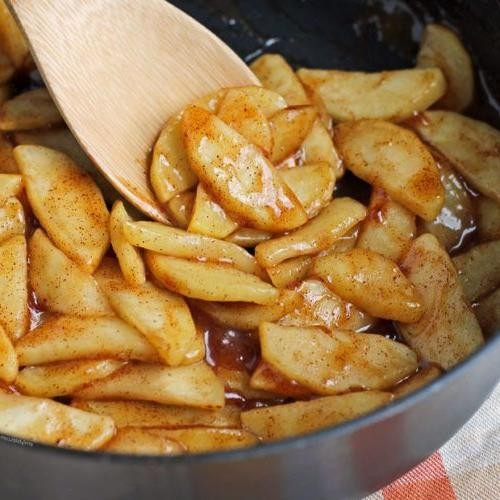
Crisp autumn apples transform into tender, sweet slices with minimal effort. This simple stovetop method preserves their natural flavor while creating a versatile side dish or dessert topping. You’ll need just four ingredients and about 15 minutes from start to finish.
3
servings5
minutes10
minutesIngredients
– 4 medium apples, peeled and cored (use firm varieties like Granny Smith or Honeycrisp for best texture)
– 2 tbsp unsalted butter (or coconut oil for dairy-free)
– 2 tbsp brown sugar (adjust to preferred sweetness)
– 1/4 tsp ground cinnamon (add more for stronger spice flavor)
Instructions
1. Cut peeled and cored apples into 1/4-inch thick slices using a sharp knife.
2. Melt butter in a large skillet over medium heat until foaming subsides.
3. Add apple slices to the skillet in a single layer, working in batches if necessary.
4. Sprinkle brown sugar evenly over the apples, then add cinnamon.
5. Cook apples for 3 minutes without stirring to develop light caramelization on one side.
6. Flip each apple slice using tongs and cook for another 3 minutes until both sides have golden spots.
7. Reduce heat to low, cover skillet, and cook for 4-5 minutes until apples are tender when pierced with a fork but still hold their shape.
8. Remove from heat and let rest uncovered for 2 minutes before serving.
Final thoughts: Fork-tender apples develop a lovely caramelized exterior while maintaining their structural integrity. The gentle cinnamon spice complements the natural sweetness without overwhelming it. Serve warm over oatmeal, alongside pork chops, or as a simple dessert with vanilla ice cream.
Conclusion
Great news for your gut health! These 20 low residue recipes make eating well delicious and digestible. I hope you find some new favorites to add to your meal rotation. Give them a try and let me know which ones you love in the comments below. If this roundup helped you, please share it on Pinterest to help other home cooks find digestive-friendly inspiration!


