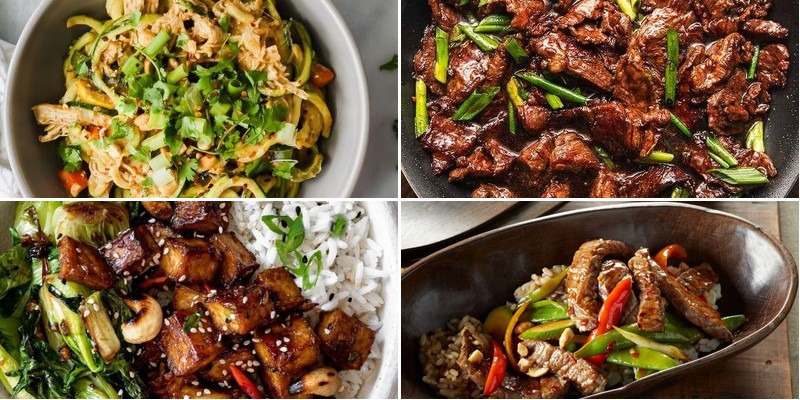
Are you craving the vibrant flavors of Asian cuisine but want to keep your meals low carb? You’re in the right place! We’ve gathered 35 delicious recipes that bring all the excitement of Asian cooking to your healthy eating journey. From quick stir-fries to comforting soups, these dishes prove you don’t have to sacrifice flavor for nutrition. Get ready to discover your new favorite weeknight meals!
Cauliflower Fried Rice with Shrimp
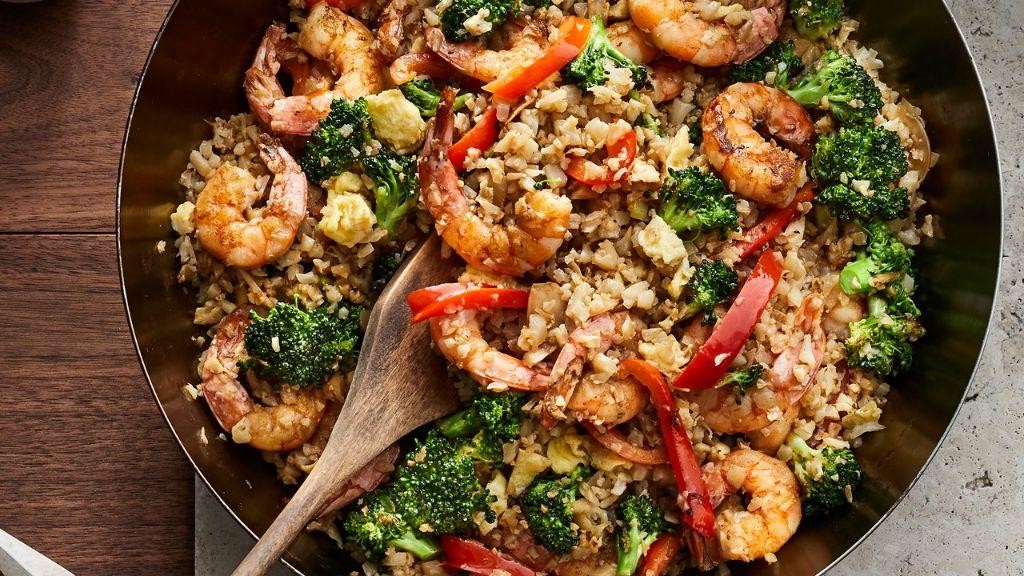
Wandering through the farmers market this morning, I found myself drawn to the pale, cloud-like heads of cauliflower, imagining how they might transform into something comforting yet light. Sometimes the simplest ingredients hold the most potential for quiet nourishment. This cauliflower fried rice with shrimp feels like a gentle reset, a meal that satisfies without weighing you down.
3
servings15
minutes15
minutesIngredients
– 1 large head of cauliflower, riced (about 4 cups)
– 1 pound of raw shrimp, peeled and deveined
– 2 tablespoons of olive oil
– 2 cloves of garlic, minced
– 1/2 cup of frozen peas
– 2 large eggs, lightly beaten
– 3 tablespoons of soy sauce
– a splash of sesame oil
– a couple of green onions, sliced
Instructions
1. Heat 1 tablespoon of olive oil in a large skillet or wok over medium-high heat until it shimmers.
2. Add the shrimp in a single layer and cook for 2 minutes per side, until they turn pink and opaque.
3. Transfer the cooked shrimp to a clean plate and set aside.
4. Reduce the heat to medium and add the remaining 1 tablespoon of olive oil to the same skillet.
5. Sauté the minced garlic for 30 seconds, until fragrant but not browned.
6. Add the riced cauliflower and frozen peas, stirring to combine everything evenly.
7. Cook the cauliflower mixture for 5–7 minutes, stirring occasionally, until the cauliflower is tender but still has a slight bite.
8. Push the cauliflower mixture to one side of the skillet to create an empty space.
9. Pour the beaten eggs into the empty space and scramble them for 1–2 minutes, until fully cooked and broken into small pieces.
10. Stir the scrambled eggs into the cauliflower mixture until evenly distributed.
11. Return the cooked shrimp to the skillet, gently folding them in to avoid breaking them.
12. Drizzle the soy sauce and sesame oil over the mixture, stirring to coat everything evenly.
13. Cook for another 1–2 minutes, allowing the flavors to meld together.
14. Remove the skillet from the heat and stir in the sliced green onions.
Just spoon this into bowls while it’s still warm, noticing how the cauliflower holds its texture while soaking up the savory notes. The shrimp stay tender against the slight crunch of vegetables, and a squeeze of lime or sprinkle of red pepper flakes can brighten it up if you’re feeling adventurous.
Zucchini Noodle Pad Thai
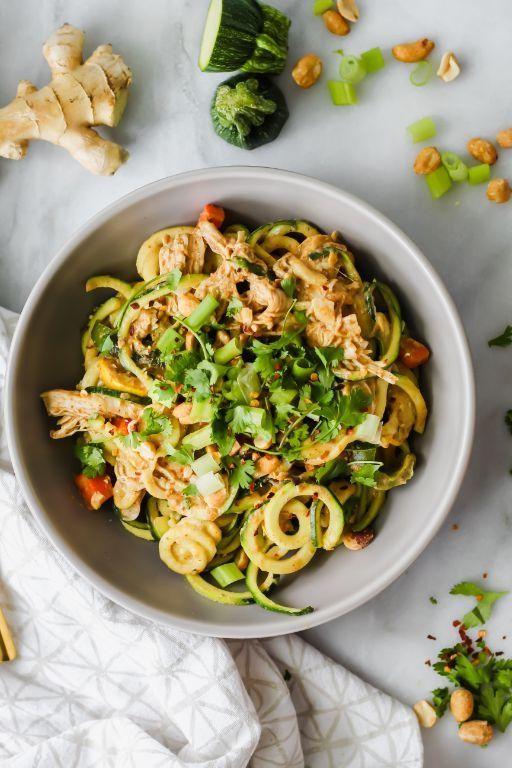
Perhaps it’s the gentle spiral of zucchini noodles that caught my eye today, or maybe it’s the memory of that first bite—tangy, nutty, with just enough crunch to make a quiet evening feel special. This zucchini noodle pad thai feels like a soft whisper in the kitchen, a way to cradle comfort without weighing down the soul.
2
servings15
minutes7
minutesIngredients
– 2 medium zucchinis, spiralized into noodles
– a couple of tablespoons of avocado oil
– 2 cloves of garlic, minced
– a small handful of shredded carrots
– a splash of tamari or coconut aminos
– a generous squeeze of lime juice
– a spoonful of creamy peanut butter
– a pinch of red pepper flakes
– a handful of chopped green onions
– a sprinkle of crushed peanuts
Instructions
1. Spiralize 2 medium zucchinis into noodles, then spread them on a clean kitchen towel and gently press to remove excess moisture—this keeps your pad thai from getting watery.
2. Heat a couple of tablespoons of avocado oil in a large skillet over medium heat until it shimmers lightly.
3. Add 2 cloves of minced garlic and sauté for about 1 minute, until fragrant but not browned.
4. Toss in a small handful of shredded carrots and cook for 2 minutes, stirring occasionally, until they soften slightly.
5. Push the garlic and carrots to one side of the skillet, then add the zucchini noodles in an even layer.
6. Cook the zucchini noodles for 3–4 minutes, turning them gently with tongs, until they’re tender but still have a bit of bite—overcooking makes them mushy.
7. In a small bowl, whisk together a splash of tamari, a generous squeeze of lime juice, a spoonful of creamy peanut butter, and a pinch of red pepper flakes until smooth.
8. Pour the sauce over the zucchini noodles and toss everything together until evenly coated, heating for just 1 minute more to warm through.
9. Remove the skillet from the heat and fold in a handful of chopped green onions and a sprinkle of crushed peanuts for freshness and crunch.
10. Serve immediately, garnished with extra lime wedges if you like.
What I love most is how the zucchini noodles hold their delicate structure, mingling with the creamy, tangy sauce and the subtle heat from the pepper flakes. Try piling it high in a shallow bowl with extra peanuts on top, or tuck it into lettuce cups for a light, handheld twist—each bite feels like a quiet celebration.
Spicy Szechuan Beef Stir-Fry
Gently, as autumn leaves begin to turn, I find myself craving the kind of warmth that settles deep in the bones—a stir-fry that hums with quiet energy and fills the kitchen with the earthy scent of Szechuan peppercorns. It’s a simple, almost meditative dish to prepare, one that lets the mind wander while the wok sizzles softly. This Spicy Szechuan Beef Stir-Fry is my go-to when I need a moment of calm, fiery comfort.
5
servings15
minutes10
minutesIngredients
– a pound of thinly sliced beef sirloin
– a couple of tablespoons of vegetable oil
– a big handful of sliced bell peppers
– a splash of soy sauce
– a teaspoon of crushed Szechuan peppercorns
– a pinch of red pepper flakes
– a clove of minced garlic
– half a cup of sliced scallions
Instructions
1. Heat a large wok or skillet over medium-high heat until a drop of water sizzles and evaporates on contact, about 2 minutes.
2. Add a couple of tablespoons of vegetable oil and swirl to coat the surface evenly.
3. Place the thinly sliced beef sirloin in a single layer and sear for 1 minute per side until lightly browned but not fully cooked through.
4. Remove the beef from the wok and set it aside on a plate to prevent overcooking.
5. Tip in the sliced bell peppers and stir-fry for 3–4 minutes until they soften slightly and develop charred spots.
6. Sprinkle in the minced garlic and cook for 30 seconds until fragrant but not browned.
7. Return the beef to the wok along with any accumulated juices.
8. Pour in a splash of soy sauce, stirring quickly to coat everything evenly.
9. Add the crushed Szechuan peppercorns and a pinch of red pepper flakes, toasting them for 20 seconds to release their oils.
10. Toss in the sliced scallions and cook for 1 final minute until just wilted.
11. Remove from heat and let rest for 2 minutes to allow the flavors to meld.
Now, as you lift a forkful, notice how the beef stays tender against the crisp peppers, while the Szechuan peppercorns leave a tingling warmth that lingers like a soft echo. I love serving this over a bed of jasmine rice to soak up the savory sauce, or tucked into lettuce cups for a lighter, crunchier bite on quiet evenings.
Ginger Garlic Chicken Lettuce Wraps

As I stand here at the counter, the afternoon light softening across the cutting board, I’m reminded how some of the most comforting meals come together with just a handful of simple, honest ingredients. This ginger garlic chicken feels like that quiet moment of gathering—both in preparation and in the gentle folding of warm filling into crisp lettuce cups.
8
portions15
minutes17
minutesIngredients
– 1 pound of ground chicken
– a couple of tablespoons of soy sauce
– a tablespoon of sesame oil
– 2 cloves of garlic, minced
– a thumb-sized piece of fresh ginger, grated
– 1 small onion, finely diced
– a splash of rice vinegar
– 8–10 large butter lettuce leaves, washed and patted dry
Instructions
1. Heat a large skillet over medium heat for about 2 minutes until the surface feels warm when you hover your hand above it.
2. Add the tablespoon of sesame oil to the heated skillet and swirl to coat the bottom evenly.
3. Sauté the diced onion for 4–5 minutes, stirring occasionally, until it turns translucent and soft.
4. Add the minced garlic and grated ginger to the skillet, and cook for 1 minute until fragrant but not browned.
5. Crumble in the ground chicken, using a wooden spoon to break it into small pieces as it cooks.
6. Cook the chicken for 6–8 minutes, stirring frequently, until it is fully white with no pink spots remaining.
7. Pour in the couple of tablespoons of soy sauce and the splash of rice vinegar, stirring to combine everything thoroughly.
8. Continue cooking for another 2–3 minutes, allowing the liquid to reduce slightly and coat the chicken mixture.
9. Remove the skillet from the heat and let the filling cool for 5 minutes—this helps keep the lettuce leaves crisp when assembling.
10. Spoon about 2–3 tablespoons of the warm chicken mixture into the center of each butter lettuce leaf.
Spooning the warm, savory chicken into those cool, cupped leaves feels like tucking a little secret into each one. The texture is a lovely contrast—the tender, ginger-kissed chicken against the crisp, refreshing lettuce, with the garlic and sesame weaving through every bite. Sometimes I’ll set out extra toppings like chopped scallions or a drizzle of chili oil for those who want to build their wraps with a bit more personality.
Tofu and Bok Choy Stir-Fry
Zigzagging through my thoughts tonight, I find myself craving something both comforting and clean, something that feels like a quiet exhale after a long day. This simple stir-fry, with its soft tofu and crisp greens, always brings that gentle satisfaction, a humble meal that feels like a small, personal ceremony.
2
servings25
minutes13
minutesIngredients
– A 14-ounce block of firm tofu, pressed
– A couple of heads of baby bok choy
– 2 cloves of garlic, minced
– A 1-inch piece of fresh ginger, grated
– 2 tablespoons of vegetable oil
– A quarter cup of soy sauce
– A tablespoon of rice vinegar
– A teaspoon of sesame oil
– A splash of water
Instructions
1. Press the block of firm tofu for 20 minutes between paper towels with a heavy plate on top to remove excess water, which helps it crisp up better later.
2. Cut the pressed tofu into 1-inch cubes.
3. Separate the bok choy leaves from the stems, then slice the stems into 1-inch pieces and roughly chop the leaves.
4. Heat 2 tablespoons of vegetable oil in a large skillet or wok over medium-high heat until it shimmers, about 2 minutes.
5. Add the tofu cubes to the hot oil and cook for 5–7 minutes, turning occasionally, until golden brown on all sides.
6. Push the tofu to one side of the skillet and add the minced garlic and grated ginger to the empty space, stirring for 30 seconds until fragrant to prevent burning.
7. Add the chopped bok choy stems to the skillet and stir-fry for 2 minutes until they begin to soften.
8. Add the bok choy leaves and a splash of water, then cover the skillet and steam for 1 minute to wilt the leaves gently.
9. Pour in a quarter cup of soy sauce, a tablespoon of rice vinegar, and a teaspoon of sesame oil, stirring everything together to coat evenly.
10. Cook for another 2 minutes, uncovered, until the sauce thickens slightly and clings to the tofu and vegetables.
Vividly tender and savory, the tofu soaks up the ginger and soy while the bok choy offers a fresh, crisp contrast. I love serving it over a bowl of steamed jasmine rice, letting the sauce pool at the bottom for a comforting, simple finish.
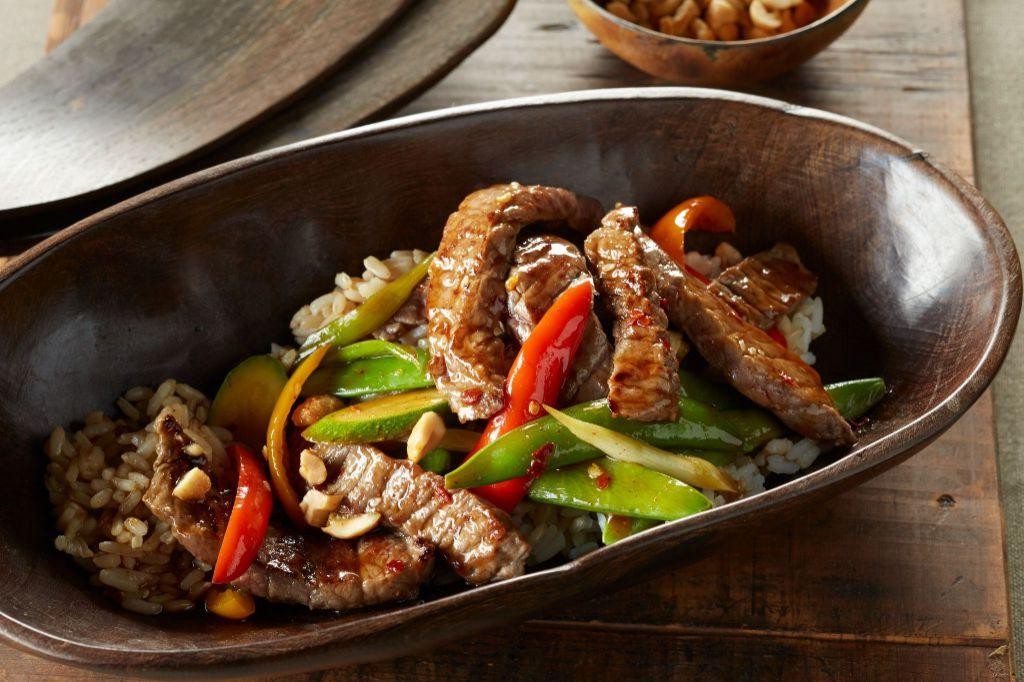
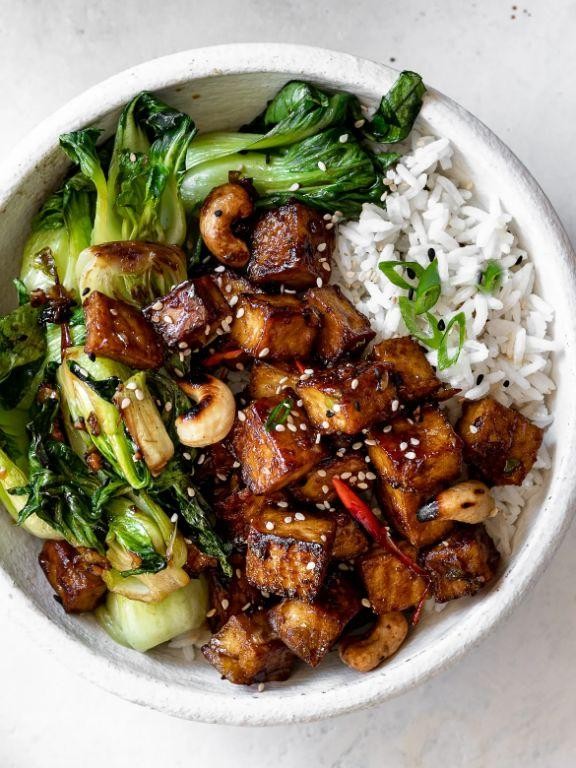
Keto Mongolian Beef

Venturing into the quiet kitchen this evening, I found myself craving something deeply savory yet light, something that would wrap around me like a warm blanket without weighing me down. This keto Mongolian beef came to mind—a gentle stir-fry that feels both familiar and new, like revisiting an old favorite with fresh eyes.
2
servings10
minutes10
minutesIngredients
– about 1 pound of thinly sliced flank steak
– a couple of tablespoons of avocado oil
– a good splash of soy sauce (or tamari for gluten-free)
– a drizzle of toasted sesame oil
– a spoonful of minced garlic
– a pinch of erythritol or your favorite keto-friendly sweetener
– a handful of sliced green onions
– a sprinkle of red pepper flakes, if you like a little warmth
Instructions
1. Pat the flank steak completely dry with paper towels—this helps it sear beautifully instead of steaming.
2. Heat a large skillet over medium-high heat and add the avocado oil, letting it shimmer for about 30 seconds.
3. Carefully place the steak in a single layer, working in batches if needed to avoid crowding the pan, and sear for 2–3 minutes per side until browned.
4. Remove the steak from the skillet and set it aside on a plate.
5. Reduce the heat to medium and add the minced garlic to the same skillet, stirring for just 30 seconds until fragrant to prevent burning.
6. Pour in the soy sauce, sesame oil, and erythritol, stirring gently to combine and letting it bubble for 1 minute to thicken slightly.
7. Return the steak to the skillet, tossing to coat evenly in the sauce, and cook for another 1–2 minutes to warm through.
8. Stir in the green onions and red pepper flakes, if using, and cook for 30 seconds more until the onions soften.
9. Remove from heat and let it rest for a minute—this allows the flavors to meld together. Really, the beef becomes tender and glossy, with a savory-sweet sauce that clings to every slice. I love serving it over cauliflower rice or tucked into crisp lettuce cups for a refreshing crunch.
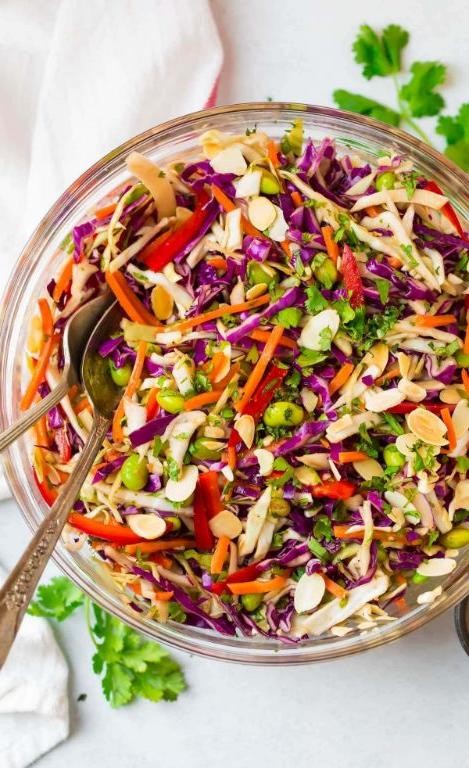
Asian Cabbage Salad with Peanut Dressing
Now, as the afternoon light softens outside my kitchen window, I find myself craving something crisp and bright—the kind of dish that feels like a quiet reset after a long day. This Asian cabbage salad, with its creamy peanut dressing, is what I often turn to when I need a moment of calm nourishment, a gentle crunch that soothes as much as it satisfies.
Ingredients
- Half a head of green cabbage, thinly sliced
- A couple of carrots, peeled and grated
- A handful of chopped cilantro
- A quarter cup of smooth peanut butter
- A couple of tablespoons of soy sauce
- A splash of rice vinegar
- A teaspoon of sesame oil
- A pinch of red pepper flakes
- A tablespoon of honey
- A clove of garlic, minced
Instructions
- Slice the half head of green cabbage into thin, ribbon-like strips, aiming for pieces about 1/8-inch thick to ensure a delicate texture.
- Peel and grate the carrots using the large holes of a box grater, which helps them blend evenly with the cabbage without becoming mushy.
- Chop a handful of cilantro leaves and stems roughly, as the stems add a bright, herbal note that complements the salad.
- In a small bowl, whisk together the quarter cup of peanut butter, two tablespoons of soy sauce, a splash of rice vinegar (about one tablespoon), and one teaspoon of sesame oil until smooth and creamy.
- Stir in one tablespoon of honey, the minced garlic clove, and a pinch of red pepper flakes, mixing for about 30 seconds to fully incorporate the flavors.
- If the dressing seems too thick, add a teaspoon of warm water at a time, whisking after each addition, until it reaches a pourable consistency—this prevents it from clumping on the salad.
- In a large bowl, combine the sliced cabbage, grated carrots, and chopped cilantro, tossing gently with your hands to distribute everything evenly.
- Pour the peanut dressing over the salad and toss thoroughly for about one minute, making sure every strand is lightly coated for maximum flavor in each bite.
- Let the salad sit at room temperature for 5–10 minutes to allow the cabbage to soften slightly and absorb the dressing, which enhances the overall texture.
Fresh from the bowl, this salad offers a satisfying crunch from the cabbage, balanced by the creamy, slightly spicy peanut dressing that clings to every bite. For a creative twist, try serving it alongside grilled chicken or spooned into lettuce cups for a light, handheld meal that feels both comforting and invigorating.
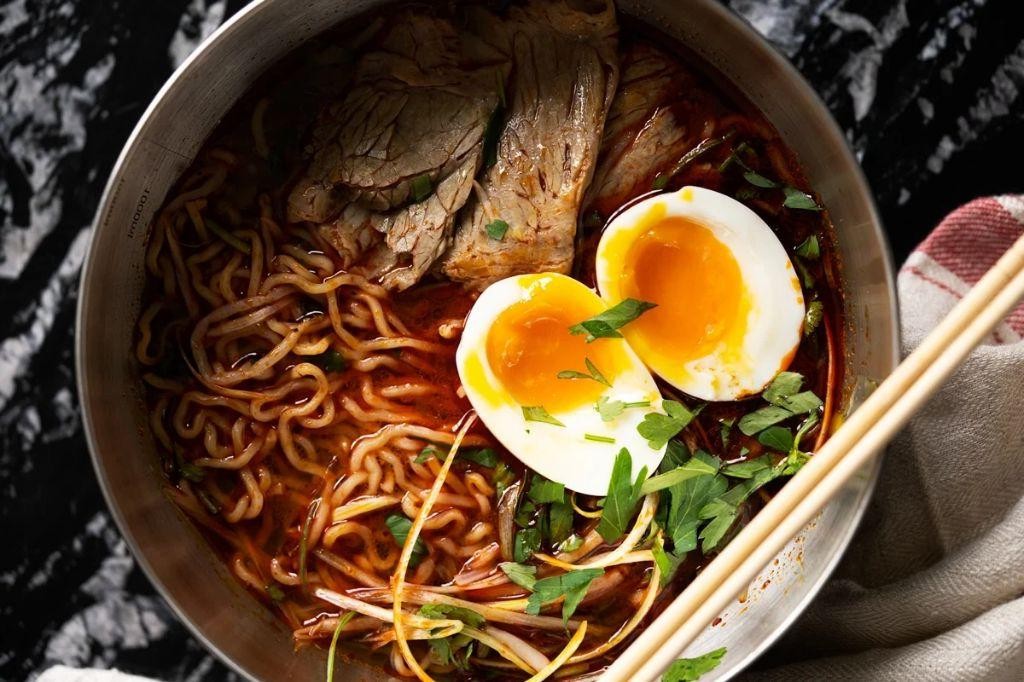
Low Carb Japanese Ramen with Shirataki Noodles
Unwinding after a long day, I find myself craving the comfort of ramen but wanting something lighter—this low-carb version with shirataki noodles has become my quiet kitchen companion, offering all the soulful warmth without the heaviness.
1
servings10
minutes15
minutesIngredients
– A 7-ounce package of shirataki noodles
– 4 cups of chicken broth
– 2 tablespoons of soy sauce
– 1 tablespoon of sesame oil
– A couple of cloves of garlic, minced
– A thumb-sized piece of ginger, grated
– 1 soft-boiled egg
– A handful of spinach
– A splash of rice vinegar
– A sprinkle of sliced green onions
Instructions
1. Rinse the shirataki noodles under cold running water for 1 full minute to remove any earthy aroma, then drain them thoroughly in a colander. Tip: Pat the noodles dry with a paper towel to help them absorb the broth better later.
2. Heat 1 tablespoon of sesame oil in a medium pot over medium heat until it shimmers, about 30 seconds.
3. Add the minced garlic and grated ginger to the pot, and sauté for exactly 1 minute until fragrant but not browned.
4. Pour in 4 cups of chicken broth and 2 tablespoons of soy sauce, then bring the mixture to a gentle boil over high heat.
5. Reduce the heat to low, cover the pot, and let the broth simmer for 10 minutes to allow the flavors to meld.
6. Add the rinsed shirataki noodles to the broth, and simmer uncovered for 3 minutes until the noodles are heated through.
7. Stir in a handful of spinach and a splash of rice vinegar, cooking for just 1 more minute until the spinach wilts slightly. Tip: Don’t overcook the spinach—it should remain vibrant green for the best texture.
8. Ladle the ramen into a bowl, then top it with the soft-boiled egg (halved) and a sprinkle of sliced green onions. Tip: For extra richness, gently break the egg yolk into the broth just before eating.
Gently, the noodles offer a satisfying chew against the silky broth, with ginger and garlic weaving through each sip. I love serving this with a drizzle of chili oil for a subtle heat, or topping it with thinly sliced mushrooms sautéed in sesame oil for an earthy twist.
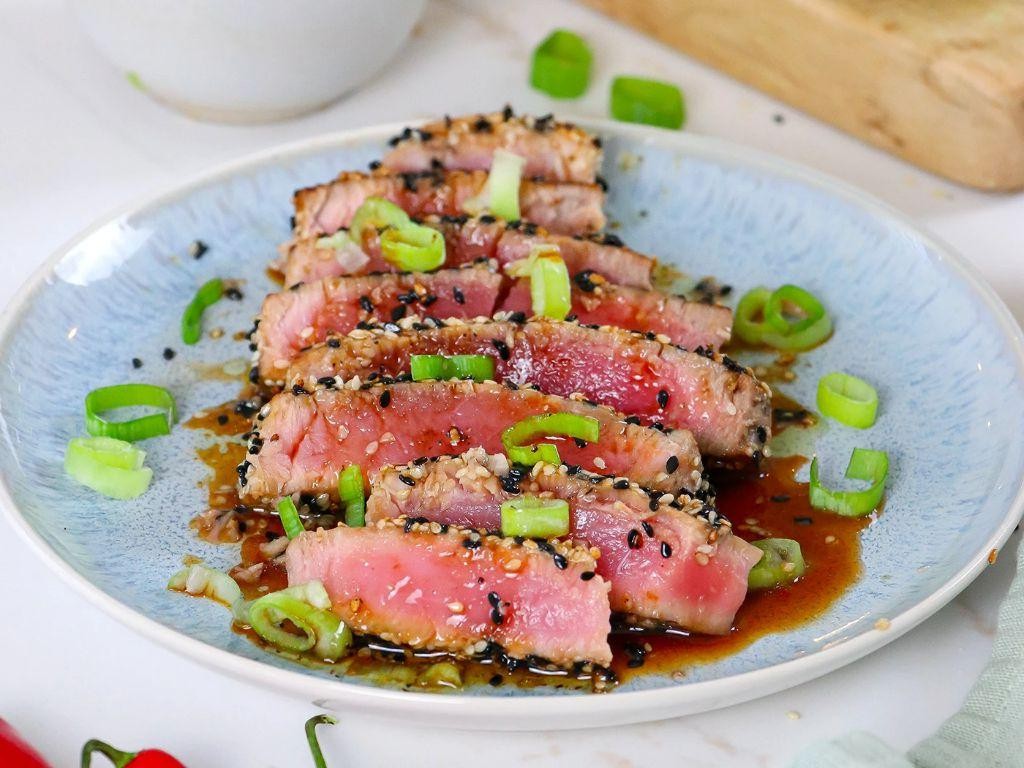
Sesame-Crusted Ahi Tuna
Now and then, I find myself craving something that feels both elegant and effortless—a dish that honors simplicity while delivering profound satisfaction. Sesame-crusted ahi tuna has become my quiet answer to those moments, a recipe that requires little fuss but rewards with every delicate bite.
2
servings10
minutes3
minutesIngredients
– 2 ahi tuna steaks, about 6 ounces each
– A generous ½ cup of white and black sesame seeds, mixed together
– A couple of tablespoons of soy sauce
– A splash of toasted sesame oil
– A drizzle of olive oil, just enough to coat the pan
– A pinch of flaky sea salt for finishing
Instructions
1. Pat the ahi tuna steaks completely dry with paper towels to ensure the sesame seeds adhere properly.
2. Pour the mixed white and black sesame seeds onto a plate, spreading them into an even layer.
3. Brush both sides of each tuna steak lightly with soy sauce and a splash of toasted sesame oil.
4. Press each tuna steak firmly into the sesame seeds, coating all sides evenly.
5. Heat a drizzle of olive oil in a non-stick skillet over medium-high heat until it shimmers, about 2 minutes.
6. Carefully place the sesame-crusted tuna steaks in the hot skillet.
7. Sear for exactly 90 seconds on the first side until the sesame seeds turn golden brown.
8. Flip the tuna steaks using tongs and sear for another 60 seconds on the second side for rare doneness.
9. Remove the tuna from the skillet and let it rest on a cutting board for 3 minutes to allow the juices to redistribute.
10. Slice the tuna against the grain into ½-inch thick pieces using a sharp knife.
11. Sprinkle the sliced tuna with a pinch of flaky sea salt just before serving.
Let the contrast between the crisp sesame crust and the cool, ruby center transport you somewhere peaceful. I love serving these slices fanned over a bed of greens with a squeeze of lime, or tucked into nori wraps with avocado for a handheld treat that feels both refined and utterly simple.
Thai Coconut Curry Soup

Sometimes the rain taps gently against the window, and I find myself craving something that warms from the inside out, a bowl of Thai coconut curry soup that feels like a quiet, comforting embrace.
3
servings15
minutes22
minutesIngredients
– A tablespoon of coconut oil
– One small yellow onion, finely chopped
– A couple of cloves of garlic, minced
– A tablespoon of fresh ginger, grated
– A tablespoon of red curry paste
– One 13.5-ounce can of full-fat coconut milk
– Two cups of vegetable broth
– One tablespoon of fish sauce
– One tablespoon of brown sugar
– One cup of sliced mushrooms
– Half a red bell pepper, thinly sliced
– A splash of lime juice from one lime
– A handful of fresh cilantro, chopped
Instructions
1. Heat a tablespoon of coconut oil in a large pot over medium heat for about 1 minute until it shimmers.
2. Add one small finely chopped yellow onion and cook for 5 minutes, stirring occasionally, until it turns translucent and soft.
3. Stir in a couple of minced garlic cloves and a tablespoon of grated fresh ginger, cooking for 1 minute until fragrant to release their oils.
4. Mix in a tablespoon of red curry paste and cook for 30 seconds, stirring constantly to deepen its flavor without burning.
5. Pour in one 13.5-ounce can of full-fat coconut milk and two cups of vegetable broth, scraping the bottom of the pot to incorporate any browned bits.
6. Bring the mixture to a gentle boil over medium-high heat, then reduce the heat to low and let it simmer uncovered for 10 minutes to allow the flavors to meld.
7. Add one tablespoon of fish sauce and one tablespoon of brown sugar, stirring until the sugar dissolves completely into the broth.
8. Drop in one cup of sliced mushrooms and half a thinly sliced red bell pepper, simmering for 5 minutes until the vegetables are tender but still slightly crisp.
9. Turn off the heat and stir in a splash of lime juice from one lime, which brightens the soup and balances the richness.
10. Garnish with a handful of chopped fresh cilantro just before serving. Perhaps you’ll notice how the creamy coconut broth clings to the tender vegetables, with a gentle heat that lingers on the tongue—it’s lovely served over a bed of jasmine rice or with a side of crusty bread for dipping.
Grilled Miso Salmon
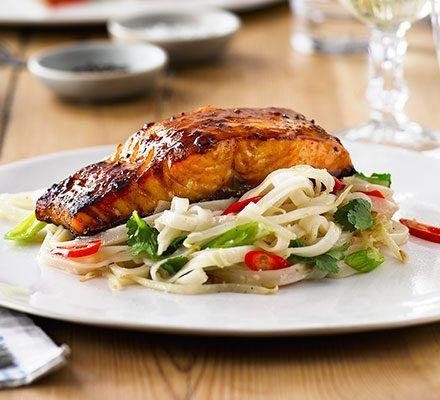
Wandering through the market today, I found myself drawn to the glistening salmon fillets, their pearlescent skin reminding me of quiet evenings where simple ingredients transform into something deeply comforting. There’s something about the way miso caramelizes on the grill that feels like autumn itself settling into your kitchen.
3
servings20
minutes8
minutesIngredients
– 4 salmon fillets (about 6 ounces each), skin on
– 1/4 cup of white miso paste
– 2 tablespoons of mirin
– 1 tablespoon of soy sauce
– 1 teaspoon of grated fresh ginger
– 1 clove of garlic, minced
– A drizzle of sesame oil
– A pinch of red pepper flakes
Instructions
1. Pat the salmon fillets completely dry with paper towels.
2. Whisk together the white miso paste, mirin, soy sauce, grated ginger, minced garlic, sesame oil, and red pepper flakes in a small bowl until smooth.
3. Brush the miso mixture evenly over both sides of each salmon fillet, reserving about 2 tablespoons for basting.
4. Let the salmon marinate at room temperature for 15 minutes while you preheat the grill.
5. Preheat your grill to medium-high heat (about 400°F) and lightly oil the grates.
6. Place the salmon skin-side up on the grill and close the lid.
7. Grill for 4 minutes until you see grill marks forming on the flesh side.
8. Carefully flip the salmon using a thin spatula and brush with the reserved miso glaze.
9. Grill for another 3-4 minutes with the lid closed until the salmon flakes easily with a fork but still appears slightly translucent in the center.
10. Remove the salmon from the grill and let it rest for 2 minutes before serving.
Even the flakiest parts of the salmon hold onto that sweet-savory crust, creating little pockets of umami that dissolve on your tongue. I love serving it over a bed of jasmine rice to catch every last drop of the caramelized glaze, or flaking it into a grain bowl with quick-pickled vegetables for tomorrow’s lunch.
Lemongrass Chicken Skewers
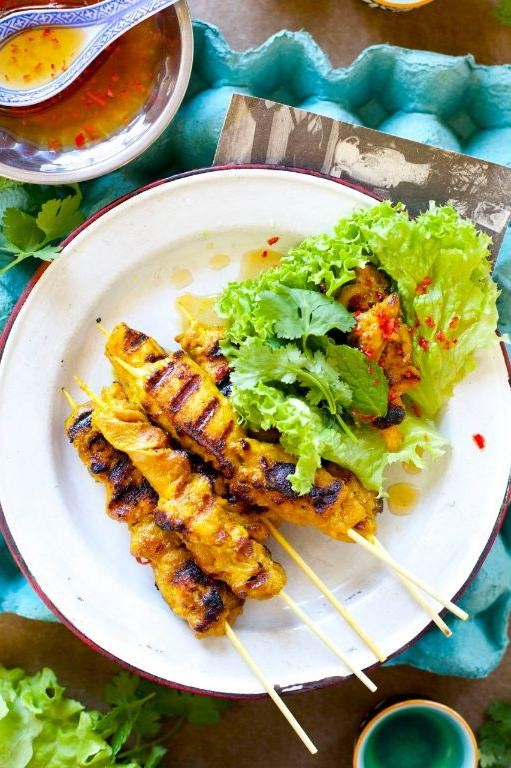
Beneath the quiet hum of the afternoon, there’s something deeply comforting about the ritual of preparing these skewers, each one a small promise of fragrant, savory warmth. It’s a simple act that slows the world down, turning a few humble ingredients into a meal that feels both grounding and gently celebratory. Let’s gather what we need and begin.
10
skewers95
minutes12
minutesIngredients
– About 1.5 pounds of boneless, skinless chicken thighs, cut into 1-inch pieces
– A couple of fresh lemongrass stalks, tender inner parts only, finely minced
– 3 cloves of garlic, minced
– A thumb-sized piece of fresh ginger, grated
– 2 tablespoons of soy sauce
– 1 tablespoon of fish sauce
– 1 tablespoon of honey
– A splash of neutral oil, like avocado or vegetable oil
– A pinch of salt and a few cracks of black pepper
– Bamboo skewers, soaked in water for at least 30 minutes
Instructions
1. Soak 10-12 bamboo skewers in cold water for at least 30 minutes to prevent burning during grilling.
2. In a medium bowl, combine the minced lemongrass, minced garlic, grated ginger, soy sauce, fish sauce, honey, oil, salt, and black pepper.
3. Add the chicken pieces to the marinade, tossing gently to coat each piece evenly.
4. Cover the bowl and refrigerate for at least 1 hour, or up to 4 hours for deeper flavor.
5. Preheat your grill or grill pan to medium-high heat, about 400°F.
6. Thread 4-5 marinated chicken pieces onto each soaked skewer, leaving a small space between pieces for even cooking.
7. Place the skewers on the preheated grill and cook for 5-6 minutes.
8. Flip the skewers using tongs and grill for another 5-6 minutes, until the chicken is opaque and reaches an internal temperature of 165°F.
9. Remove the skewers from the grill and let them rest for 3 minutes before serving. Resting allows the juices to redistribute, keeping the chicken tender and moist.
Remarkably tender, each bite releases a bright, citrusy aroma from the lemongrass, balanced by the savory depth of garlic and ginger. The edges caramelize slightly on the grill, adding a subtle smokiness that makes these skewers perfect tucked into lettuce cups with fresh herbs, or simply enjoyed straight from the stick, still warm from the fire.
Conclusion
Perfect for anyone seeking flavorful, healthy Asian meals without the carbs! These 35 recipes make low-carb eating exciting and delicious. We hope you find new favorites to add to your rotation. Try them out, then leave a comment telling us which dish you loved most—and don’t forget to share this roundup on Pinterest to inspire fellow food lovers!


