A warm kitchen filled with the scent of roasting peanuts and melting sugar always takes me back to my grandmother’s farmhouse kitchen. As a child, I’d stand on my tiptoes watching her strong hands work that familiar blue Kraft jar into the most magical cookie dough, creating treats that tasted like pure love and childhood memories wrapped in crisscross patterns. These cookies weren’t just dessert—they were the edible embodiment of Sunday afternoons, family gatherings, and the simple joy of watching something transform from basic ingredients into golden-brown perfection.
Why This Recipe Works
- The classic combination of Kraft peanut butter with its perfect salt-to-sweet ratio creates that nostalgic flavor profile we all remember from childhood bake sales and after-school snacks, delivering that unmistakable creamy texture that melts in your mouth while maintaining just enough structure to hold those beautiful fork marks.
- Using simple pantry staples means you can whip up these comforting cookies anytime the craving strikes, making them perfect for last-minute playdates, unexpected guests, or those rainy afternoons when you need a little taste of home to brighten your day and fill your kitchen with warmth.
- The dough comes together in minutes without requiring chilling time, which means you’re just thirty minutes away from warm cookies fresh from the oven—ideal for impatient little helpers who can’t wait to taste-test their creations and experience that magical moment when raw dough transforms into golden perfection.
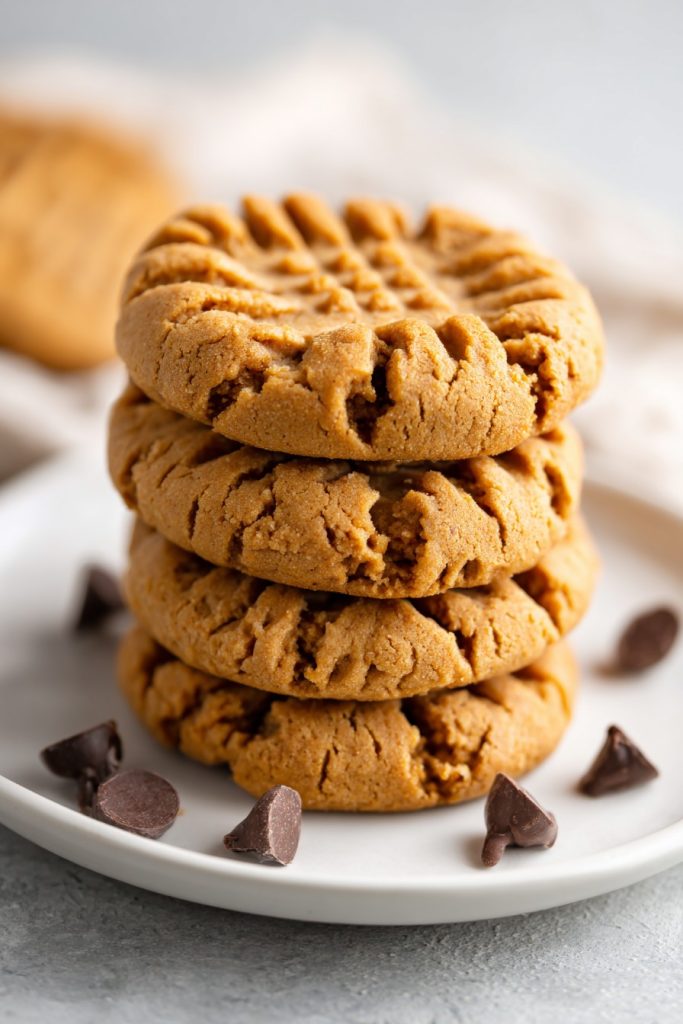
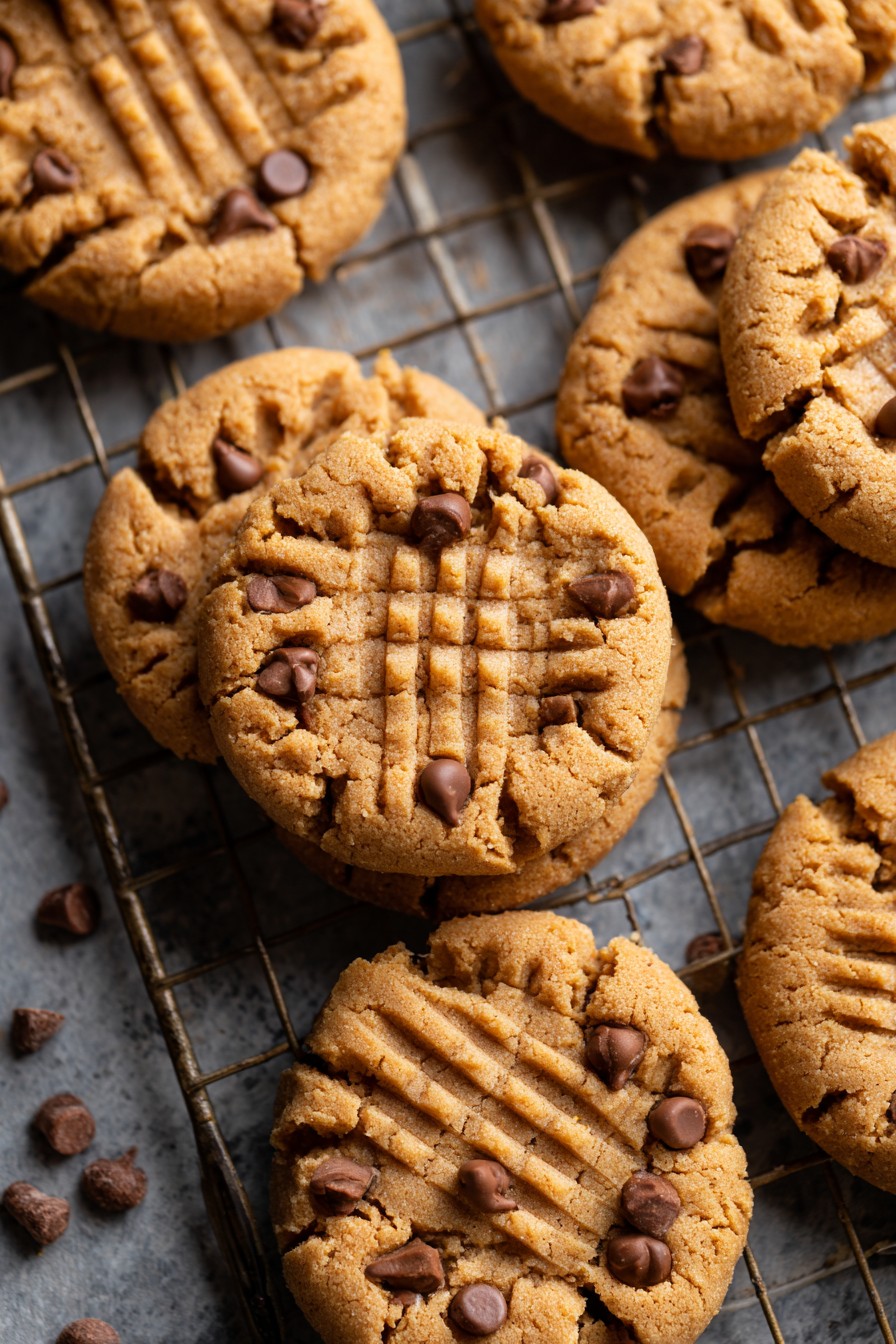
- That signature crisscross pattern isn’t just for looks—it ensures even baking and creates those delightful crispy edges contrasting with the soft, chewy centers that make these cookies impossible to resist, especially when they’re still slightly warm and the chocolate chips are just beginning to melt into gooey pockets of sweetness.
Ingredients
- 1 cup Kraft creamy peanut butter
- 1 cup granulated sugar
- 1 large egg
- 1 teaspoon vanilla extract
- ½ teaspoon baking soda
- ¼ teaspoon salt
- Optional: ½ cup semi-sweet chocolate chips
Equipment Needed
- Mixing bowl
- Electric mixer or wooden spoon
- Measuring cups and spoons
- Baking sheets
- Parchment paper
- Cooling rack
- Fork for crisscross pattern
- Cookie scoop or tablespoon
Instructions
Preparing Your Cookie Dough
Begin by preheating your oven to 350°F and lining your baking sheets with parchment paper, that familiar crinkling sound taking me back to watching my mother prepare her weekly baking sessions. In your mixing bowl, combine that iconic blue-jar Kraft peanut butter with the granulated sugar, the creamy texture blending beautifully with the crystalline sweetness as you mix them together until perfectly incorporated. Crack in that single large egg, watching the golden yolk break and mingle with the other ingredients, then add the vanilla extract—that magical liquid that always reminds me of my grandmother’s perfume and holiday baking marathons. Finally, sprinkle in the baking soda and salt, those humble ingredients that will work their chemical magic to give your cookies just the right amount of lift and flavor balance, creating that perfect texture we all crave in a classic peanut butter cookie. Mix everything together until you have a cohesive, slightly sticky dough that holds together when pressed, the aroma of roasted peanuts filling your kitchen with that unmistakable scent of childhood memories and family traditions coming to life once again.
Shaping and Creating the Signature Pattern
Using a cookie scoop or tablespoon, portion out heaping tablespoons of dough and roll them between your palms into smooth, round balls about 1 inch in diameter—this tactile process always reminds me of helping my grandmother shape countless cookies for church socials and family reunions. Place these dough balls about 2 inches apart on your prepared baking sheets, giving them plenty of room to spread and bake evenly without merging into one giant cookie mass. Now comes the most nostalgic part: take a standard dinner fork and dip it into a small bowl of granulated sugar, then press it gently but firmly into the first dough ball, creating that classic crisscross pattern that defines these traditional cookies. Rotate the fork 90 degrees and press again to complete the crosshatch design, being careful not to press too hard and flatten the cookie completely—you want to maintain some thickness for that perfect chewy texture. Repeat this process with all your dough balls, the rhythmic motion taking me back to standing at my grandmother’s elbow, watching her create row after row of perfectly patterned cookies that would soon fill her kitchen with their warm, nutty fragrance.
Baking to Golden Perfection
Slide your prepared baking sheets into the preheated 350°F oven and set your timer for exactly 10-12 minutes, that waiting period always filled with anticipation as the magical transformation begins. Watch through the oven window as the cookies gradually spread and their surfaces develop tiny cracks while the edges begin turning that beautiful golden-brown color that signals they’re nearly ready. The perfect doneness occurs when the edges are clearly browned but the centers still appear slightly soft and puffed—they’ll continue cooking on the hot baking sheet after removal, so resist the temptation to overbake them to crispness. You’ll know they’re ready when your kitchen fills with that intoxicating aroma of roasted peanuts and caramelized sugar, a scent that instantly transports me back to childhood afternoons spent waiting impatiently for the timer to ding. Remove the cookies from the oven when they’ve achieved that perfect balance of crispy edges and soft centers, remembering how my grandmother would always test one cookie first to ensure they met her exacting standards before serving them to family and friends.
Cooling and Setting Properly
Allow the cookies to rest on the hot baking sheet for exactly 5 minutes before transferring them to a cooling rack—this crucial waiting period allows them to finish cooking through residual heat while firming up enough to handle without breaking. As they cool, you’ll notice their texture transforming from soft and fragile to that perfect chewy consistency that makes these cookies so irresistible, with the crisscross patterns becoming more defined as they set. The cooling process always tests my patience, much like it did when I was a child hovering near the cooling rack, hoping for that first warm cookie straight from the batch. After about 15 minutes on the cooling rack, they’ll have reached the ideal texture—firm enough to hold their shape but still tender and chewy in the center, ready to be stacked in your grandmother’s vintage cookie tin or served immediately with a tall glass of cold milk. This patient waiting reminds me of my mother’s wisdom that “good things come to those who wait,” though we both knew she was just as eager as I was to taste that first perfect cookie.
Storing for Maximum Freshness
Once completely cooled to room temperature—which typically takes about 30 minutes—transfer your beautiful creations to an airtight container, layering them between sheets of parchment paper to prevent sticking and preserve their delicate texture. Store them at room temperature for up to one week, though in my experience they rarely last that long before being devoured by eager family members and surprise visitors. For longer storage, you can freeze these cookies for up to three months in freezer-safe containers, allowing you to recreate that fresh-baked magic anytime nostalgia strikes or unexpected guests arrive. When freezing, I always separate layers with wax paper and date the container, much like my grandmother taught me during our holiday baking marathons when we’d prepare dozens of batches to share with neighbors and relatives. Thaw frozen cookies at room temperature for about an hour, or warm them briefly in a 300°F oven for 3-4 minutes to restore that just-baked texture and fill your kitchen once again with those comforting aromas of family traditions and cherished memories.
Tips and Tricks
For the absolute best results with these nostalgic Kraft peanut butter cookies, I’ve gathered wisdom passed down through generations of family bakers combined with my own kitchen discoveries. First, always use room temperature ingredients—particularly the egg—as this ensures proper emulsification and creates that perfect cookie texture we all remember from childhood. If you’ve forgotten to take your egg out ahead of time, simply place it in a bowl of warm (not hot) water for 5-10 minutes while you gather your other ingredients, much like my mother would do during her impromptu baking sessions. When measuring your peanut butter, I recommend using the spoon-and-level method rather than scooping directly from the jar with your measuring cup—this prevents compacting and ensures accurate measurement for perfect cookie consistency every single time. If your dough seems too sticky to handle comfortably, you can chill it for 15-20 minutes, though the classic recipe doesn’t require chilling, making it ideal for those spontaneous baking moments when comfort is needed immediately. For that picture-perfect crisscross pattern, keep a small bowl of granulated sugar nearby and dip your fork before each press, rotating the fork between the two impressions to create those beautiful, defined lines that make these cookies so visually distinctive. When baking multiple sheets at once, rotate them halfway through the baking time and switch racks to ensure even browning, remembering how my grandmother would carefully track each batch in her well-worn recipe notebook. If you prefer crispier cookies, bake them for the full 12 minutes until golden brown throughout, while those who love chewier textures should remove them at 10 minutes when the centers still appear slightly underdone—they’ll firm up perfectly during cooling. For added flavor complexity, you can toast your peanut butter gently before using by spreading it in a thin layer on a baking sheet and heating at 300°F for 5-7 minutes, then cooling slightly before incorporating into your dough. Always allow your baking sheets to cool completely between batches or use fresh cool sheets, as placing dough on hot pans will cause them to spread too quickly and bake unevenly, losing that perfect texture we cherish. Finally, don’t overlook the power of proper storage—these cookies maintain their perfect texture best when stored in airtight containers with a slice of bread, which helps regulate moisture and keeps them delightfully chewy for days, just like my grandmother’s famous cookie jar always promised.
Recipe Variations
- For chocolate lovers, fold in ½ cup of semi-sweet chocolate chips or chunks into the dough before shaping—the melted chocolate creates delightful pockets of richness that complement the peanut butter beautifully, much like my aunt’s famous “double trouble” cookies that were always the first to disappear at family gatherings. You could also drizzle melted chocolate over the cooled cookies in elegant patterns or create sandwich cookies with a chocolate ganache filling for an extra-indulgent treat that still maintains that nostalgic peanut butter foundation.
- Create delightful thumbprint cookies by pressing your thumb into the center of each dough ball before baking and filling the indentation with your favorite jam or preserves after they come out of the oven—the combination of sweet fruit and salty peanut butter always reminds me of my grandmother’s creative baking experiments during summer canning season. Raspberry or apricot preserves work particularly well, creating beautiful color contrast and flavor complexity that elevates this simple recipe while maintaining its comforting, homemade character.
- For a crunchy texture variation, mix in ¼ cup of chopped roasted peanuts or pecans to the dough, adding wonderful nutty complexity and satisfying crunch that contrasts beautifully with the soft cookie base. You could also roll the dough balls in crushed peanuts before baking for extra texture and visual appeal, creating cookies that look as impressive as they taste while still delivering that familiar Kraft peanut butter flavor we all know and love.
- Transform these into festive holiday cookies by pressing a Hershey’s kiss into the center of each warm cookie immediately after baking or decorating with colored sugars for special occasions—this simple adaptation makes them perfect for cookie exchanges, classroom parties, or creating new family traditions around holidays and celebrations. The melted chocolate center creates a delightful surprise that children especially adore, much like the Christmas cookies my mother would carefully prepare each December, each one representing a different family memory or tradition.
Frequently Asked Questions
Can I use crunchy peanut butter instead of creamy?
Absolutely, and many family bakers actually prefer the textural contrast that crunchy peanut butter provides in these classic cookies. The additional peanut pieces create delightful bursts of flavor and crunch throughout each bite, adding another dimension to the eating experience while maintaining that essential Kraft peanut butter foundation. My own father always insisted on crunchy peanut butter in his cookies, claiming the extra texture made them more satisfying with his afternoon coffee. Just be aware that the dough may be slightly more difficult to shape smoothly, and your crisscross pattern might not appear as defined due to the peanut pieces interrupting the smooth surface. The baking time and temperature remain exactly the same, and you’ll still achieve that perfect combination of crispy edges and chewy centers that makes these cookies so beloved across generations of family bakers.
Why do my cookies spread too much during baking?
Several factors can cause excessive spreading, but the most common culprit is using baking sheets that haven’t cooled completely between batches. When you place dough on a warm baking sheet, the butter in the peanut butter begins melting immediately, causing the cookies to spread before the structure has time to set properly. This was a lesson my grandmother taught me during my first solo baking attempt—she emphasized the importance of patience and proper preparation in achieving perfect results. Other potential causes include measuring ingredients inaccurately, particularly using too much sugar or not enough peanut butter, or your oven temperature running lower than indicated. For troubleshooting, try chilling your dough for 20-30 minutes before baking and always ensure your baking sheets are completely cool, using multiple sheets if you’re making large batches to maintain consistent results throughout your baking session.
Can I make these cookies without eggs for dietary restrictions?
Yes, you can successfully adapt this recipe for egg-free baking, though the texture will be slightly different from the traditional version. The most effective egg substitute for these cookies is a “flax egg” made by combining 1 tablespoon of ground flaxseed with 3 tablespoons of water and letting it thicken for 5-10 minutes before adding to your dough. This creates binding properties similar to eggs while adding a subtle nutty flavor that complements the peanut butter beautifully. Another option is using ¼ cup of applesauce, which adds moisture and binding capability while keeping the cookies soft and chewy. My cousin’s family has used these adaptations for years due to egg allergies, and they’ve created their own cherished version of this family recipe that maintains the nostalgic spirit while accommodating their dietary needs. The baking time may need slight adjustment, so keep a close eye on your first batch to determine the perfect timing for your specific adaptation.
How can I tell when the cookies are perfectly baked?
Determining the perfect doneness requires watching for specific visual cues that experienced bakers recognize instinctively. The edges should be clearly golden brown and set, while the centers still appear slightly soft and puffed rather than completely flat—they’ll continue cooking from residual heat after removal from the oven. Look for the surface to develop those characteristic tiny cracks across the crisscross pattern, indicating the cookies have expanded properly and developed the right texture. Another reliable test is gently touching the edge of a cookie; it should feel firm but not hard, with the center offering slight resistance rather than feeling liquid or overly soft. My grandmother had a saying: “Golden edges, soft middle, and a kitchen that smells like heaven”—that’s when you know they’re perfectly baked. Remember that cookies continue firming up during cooling, so it’s better to slightly underbake than overbake them, as you can always return them to the oven for another minute if needed, but you can’t reverse overbaking once it’s occurred.
Summary
These Kraft peanut butter cookies represent more than just a recipe—they’re edible memories that connect generations through the simple magic of peanut butter, sugar, and love. With their signature crisscross pattern and unforgettable aroma, they capture the essence of family traditions and comforting homemade goodness that transcends time and trends.
Kraft Peanut Butter Cookies
4
servings10
minutes12
minutesIngredients
Instructions
- 1 Preheat oven to 350°F and line baking sheets with parchment paper
- 2 Combine peanut butter, sugar, egg, vanilla, baking soda, and salt in mixing bowl
- 3 Mix until smooth dough forms, then portion into 1-inch balls
- 4 Place on baking sheets and create crisscross pattern with sugar-dipped fork
- 5 Bake for 10-12 minutes until edges are golden brown
- 6 Cool on baking sheet for 5 minutes before transferring to cooling rack


