Just because your family avoids dairy doesn’t mean dinner has to be dull! We’ve gathered 23 delicious, kid-approved meals that are full of flavor and easy to make. From cozy pastas to fun taco nights, these recipes prove that dairy-free dinners can be the highlight of your week. Get ready to find some new family favorites—let’s dive in!
Creamy Dairy-Free Mac and Cheese

Whip up a comforting classic without dairy. This creamy mac and cheese uses cashews and nutritional yeast for a rich, cheesy flavor. It’s a simple, satisfying dish ready in under an hour.
Serving: 6 | Pre Time: 15 minutes | Cooking Time: 25 minutes
Ingredients
For the pasta:
– 1 pound elbow macaroni
– 1 tablespoon salt
For the sauce:
– 1 ½ cups raw cashews, soaked for 4 hours
– 1 ¼ cups unsweetened almond milk
– ½ cup nutritional yeast
– 2 tablespoons lemon juice
– 1 teaspoon garlic powder
– 1 teaspoon onion powder
– ½ teaspoon smoked paprika
– ½ teaspoon turmeric
– 1 teaspoon salt
– ½ teaspoon black pepper
For the topping (optional):
– ½ cup panko breadcrumbs
– 2 tablespoons olive oil
Instructions
1. Bring a large pot of water to a rolling boil over high heat.
2. Add 1 tablespoon of salt and 1 pound of elbow macaroni to the boiling water.
3. Cook the pasta for 7-9 minutes, stirring occasionally, until al dente.
4. Drain the pasta in a colander and set it aside. Tip: Do not rinse the pasta; the starch helps the sauce cling.
5. Preheat your oven to 375°F.
6. Drain the 1 ½ cups of soaked cashews and add them to a high-speed blender.
7. Add 1 ¼ cups almond milk, ½ cup nutritional yeast, 2 tablespoons lemon juice, 1 teaspoon garlic powder, 1 teaspoon onion powder, ½ teaspoon smoked paprika, ½ teaspoon turmeric, 1 teaspoon salt, and ½ teaspoon black pepper to the blender.
8. Blend the mixture on high for 1-2 minutes until completely smooth and creamy. Tip: Scrape down the sides once to ensure no chunks remain.
9. Pour the blended sauce into the large pot used for the pasta.
10. Add the drained pasta back to the pot with the sauce.
11. Stir the pasta and sauce together over low heat for 2-3 minutes until fully combined and warmed through.
12. Transfer the mac and cheese to a 9×13 inch baking dish.
13. In a small bowl, mix ½ cup panko breadcrumbs with 2 tablespoons olive oil.
14. Sprinkle the breadcrumb mixture evenly over the top of the pasta. Tip: For extra crunch, toast the panko in a dry skillet for 2 minutes before mixing with oil.
15. Bake the dish in the preheated oven at 375°F for 15-20 minutes, until the top is golden brown and the edges are bubbly.
16. Remove the dish from the oven and let it rest for 5 minutes before serving.
Silky smooth sauce coats every noodle for a decadent, velvety texture. The nutritional yeast and smoked paprika create a deep, savory, cheesy flavor without any dairy. Try mixing in steamed broccoli or topping it with crispy breaded tofu for a complete meal.
Dairy-Free Chicken Tenders with Honey Mustard

Ready for a crispy, dairy-free twist on a classic? These chicken tenders swap buttermilk for a simple almond milk brine and use panko for extra crunch. Pair them with a tangy honey mustard sauce for a crowd-pleasing meal that’s easy to make.
Serving: 4 | Pre Time: 20 minutes | Cooking Time: 15 minutes
Ingredients
For the chicken:
– 1.5 lbs chicken tenders
– 1 cup unsweetened almond milk
– 1 tbsp lemon juice
– 1 cup all-purpose flour
– 2 tsp garlic powder
– 1 tsp paprika
– 1 tsp salt
– 1/2 tsp black pepper
– 2 large eggs
– 2 cups panko breadcrumbs
– 1/2 cup avocado oil
For the honey mustard sauce:
– 1/2 cup Dijon mustard
– 1/4 cup honey
– 2 tbsp mayonnaise
– 1 tbsp apple cider vinegar
Instructions
1. In a bowl, combine 1 cup almond milk and 1 tbsp lemon juice; let sit for 5 minutes to create a buttermilk substitute.
2. Add 1.5 lbs chicken tenders to the almond milk mixture, ensuring they are fully submerged; refrigerate for 15 minutes.
3. In a shallow dish, mix 1 cup flour, 2 tsp garlic powder, 1 tsp paprika, 1 tsp salt, and 1/2 tsp black pepper.
4. In another shallow dish, whisk 2 large eggs until smooth.
5. Place 2 cups panko breadcrumbs in a third shallow dish.
6. Remove chicken from the brine, letting excess liquid drip off.
7. Dredge each tender in the flour mixture, shaking off any excess.
8. Dip the floured tender into the beaten eggs, coating it completely.
9. Press the tender into the panko breadcrumbs, ensuring an even, thick coating.
10. Place the coated tenders on a wire rack; let rest for 5 minutes to help the coating adhere.
11. Heat 1/2 cup avocado oil in a large skillet over medium-high heat until it shimmers, about 350°F.
12. Fry tenders in batches for 3-4 minutes per side, until golden brown and internal temperature reaches 165°F.
13. Transfer cooked tenders to a paper towel-lined plate to drain excess oil.
14. In a small bowl, whisk together 1/2 cup Dijon mustard, 1/4 cup honey, 2 tbsp mayonnaise, and 1 tbsp apple cider vinegar until smooth.
15. Serve the tenders immediately with the honey mustard sauce on the side.
Buttery-crisp on the outside and juicy inside, these tenders deliver a satisfying crunch without dairy. The honey mustard sauce adds a sweet-tangy kick that balances the savory chicken perfectly. For a fun twist, chop them into bite-sized pieces and toss over a fresh green salad or stuff into warm pita bread with crisp lettuce.
Vegetable Stir-Fry with Teriyaki Sauce
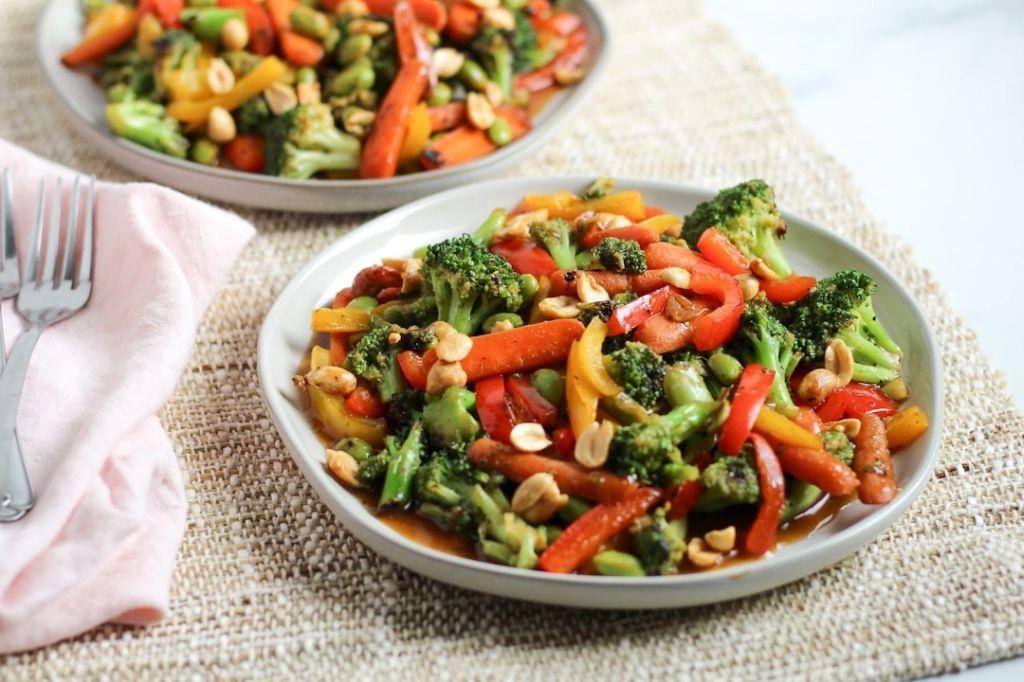
Whip up this quick vegetable stir-fry with teriyaki sauce for a flavorful, healthy meal in under 30 minutes. It’s perfect for busy weeknights when you need something satisfying but don’t want to spend hours in the kitchen. Customize it with your favorite veggies or whatever you have on hand.
Serving: 4 | Pre Time: 15 minutes | Cooking Time: 10 minutes
Ingredients
For the sauce:
– 1/4 cup low-sodium soy sauce
– 2 tbsp honey
– 1 tbsp rice vinegar
– 1 tsp grated fresh ginger
– 1 tsp minced garlic
– 1 tbsp cornstarch
– 2 tbsp water
For the stir-fry:
– 2 tbsp vegetable oil, divided
– 1 medium onion, sliced into 1/2-inch strips
– 1 red bell pepper, sliced into 1/4-inch strips
– 2 cups broccoli florets
– 1 cup sliced carrots (1/4-inch thick)
– 1 cup snap peas, trimmed
Instructions
1. In a small bowl, whisk together soy sauce, honey, rice vinegar, ginger, and garlic until smooth.
2. In a separate small bowl, mix cornstarch and water to create a slurry.
3. Heat 1 tbsp vegetable oil in a large skillet or wok over medium-high heat until shimmering, about 1 minute.
4. Add onion and bell pepper to the skillet; stir-fry for 3 minutes until slightly softened.
5. Add broccoli and carrots; stir-fry for 4 minutes until vegetables are crisp-tender.
6. Add snap peas; stir-fry for 1 minute until bright green.
7. Transfer all vegetables to a clean plate.
8. Reduce heat to medium and add remaining 1 tbsp vegetable oil to the skillet.
9. Pour the sauce mixture into the skillet and bring to a simmer, stirring constantly.
10. Whisk in the cornstarch slurry and cook for 1-2 minutes until sauce thickens to a glaze consistency.
11. Return all vegetables to the skillet and toss to coat evenly in the sauce for 1 minute.
12. Remove from heat and serve immediately.
Serve this stir-fry over steamed rice or noodles for a complete meal. The vegetables retain a satisfying crunch while the glossy teriyaki sauce adds a perfect balance of sweet and savory flavors. For extra protein, add cooked chicken, tofu, or shrimp in step 11.
Dairy-Free Mini Turkey Meatloafs

Ready for a family-friendly dinner that skips dairy but keeps flavor? These mini turkey meatloafs are moist, savory, and perfect for portion control. They bake up quickly for a weeknight meal everyone will love.
Serving: 6 | Pre Time: 15 minutes | Cooking Time: 25 minutes
Ingredients
– For the meatloaf mixture:
– 1.5 lbs ground turkey (93% lean)
– 1 cup finely chopped yellow onion
– 2 cloves garlic, minced
– 1/2 cup rolled oats
– 1/4 cup unsweetened almond milk
– 1 large egg
– 2 tbsp Worcestershire sauce
– 1 tsp dried thyme
– 1 tsp salt
– 1/2 tsp black pepper
– For the glaze:
– 1/4 cup ketchup
– 1 tbsp maple syrup
– 1 tsp apple cider vinegar
Instructions
1. Preheat oven to 375°F and lightly grease a 12-cup muffin tin with olive oil spray.
2. In a large bowl, combine ground turkey, chopped onion, minced garlic, rolled oats, almond milk, egg, Worcestershire sauce, dried thyme, salt, and black pepper.
3. Mix with your hands just until combined—overmixing can make the meatloafs tough.
4. Divide the mixture evenly among the 12 muffin cups, pressing gently to fill each cup.
5. In a small bowl, whisk together ketchup, maple syrup, and apple cider vinegar for the glaze.
6. Spoon about 1 teaspoon of glaze over the top of each meatloaf, spreading it evenly.
7. Bake at 375°F for 22–25 minutes, until the internal temperature reaches 165°F and the tops are lightly browned.
8. Let the meatloafs rest in the tin for 5 minutes before removing with a spoon to prevent sticking.
9. Serve warm directly from the muffin tin for easy cleanup.
Savory and tender, these mini meatloafs have a hint of sweetness from the glaze and a satisfying texture from the oats. They hold their shape well, making them ideal for meal prep or packing into lunchboxes. Try serving them over mashed cauliflower or with a side of roasted vegetables for a complete dairy-free dinner.
Dairy-Free Eggplant Parmesan
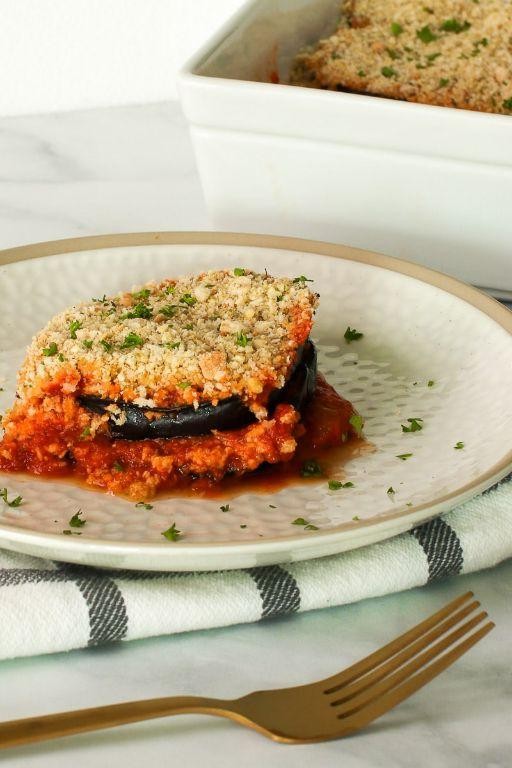
Bypass the dairy without sacrificing flavor in this hearty, plant-based twist on a classic. Crispy eggplant slices are layered with a robust tomato sauce and a savory, nutty topping. It’s a satisfying main dish that proves comfort food can be allergen-friendly.
Serving: 4 | Pre Time: 20 minutes | Cooking Time: 45 minutes
Ingredients
For the eggplant:
– 2 large eggplants, sliced into 1/2-inch rounds
– 1 cup unsweetened almond milk
– 1 cup all-purpose flour
– 1 cup panko breadcrumbs
– 1/2 cup nutritional yeast
– 1 tsp garlic powder
– 1 tsp dried oregano
– 1/2 tsp salt
– 1/4 tsp black pepper
– 1/4 cup olive oil
For the sauce:
– 2 tbsp olive oil
– 3 garlic cloves, minced
– 1 (28-oz) can crushed tomatoes
– 1 tsp dried basil
– 1/2 tsp salt
Instructions
1. Preheat your oven to 400°F. Line two large baking sheets with parchment paper.
2. Place the flour in a shallow bowl. Pour the almond milk into a second shallow bowl.
3. In a third bowl, combine the panko, nutritional yeast, garlic powder, oregano, salt, and pepper.
4. Dredge each eggplant slice in the flour, shaking off any excess.
5. Dip the floured slice into the almond milk, letting the excess drip off.
6. Press the slice firmly into the panko mixture, coating both sides evenly. Tip: Pressing ensures a crispier crust that won’t fall off.
7. Arrange the coated slices in a single layer on the prepared baking sheets. Drizzle with 1/4 cup of olive oil.
8. Bake for 25 minutes, flipping the slices halfway through, until golden brown and crisp.
9. While the eggplant bakes, heat 2 tbsp of olive oil in a saucepan over medium heat.
10. Add the minced garlic and cook for 1 minute, just until fragrant. Tip: Do not let the garlic brown, or it will turn bitter.
11. Pour in the crushed tomatoes. Stir in the dried basil and 1/2 tsp salt.
12. Bring the sauce to a simmer, then reduce the heat to low. Let it cook uncovered for 15 minutes, stirring occasionally.
13. Spread 1/2 cup of the tomato sauce in the bottom of a 9×13 inch baking dish.
14. Arrange half of the baked eggplant slices in a single layer over the sauce.
15. Spoon half of the remaining sauce over the eggplant layer.
16. Repeat with the remaining eggplant and sauce. Tip: For extra crunch, sprinkle any leftover panko mixture on the top layer before baking.
17. Bake the assembled dish at 400°F for 20 minutes, until the sauce is bubbling at the edges.
18. Let the dish rest for 10 minutes before serving to allow the layers to set.
Savory and substantial, the eggplant offers a tender bite beneath its golden, crunchy crust. The rich, garlicky tomato sauce melds perfectly with the nutty, cheesy flavor from the nutritional yeast. Serve it over a bed of zucchini noodles for a lighter meal or with a side of garlic bread to soak up every last drop of sauce.
Dairy-Free Cheesy Pizza Roll-Ups

Pizza night just got a dairy-free upgrade with these easy, handheld roll-ups. Perfect for busy weeknights or game-day snacks, they deliver all the cheesy, savory flavor without the dairy. You’ll need just a few simple ingredients and about 30 minutes from start to finish.
Serving: 4 | Pre Time: 15 minutes | Cooking Time: 15 minutes
Ingredients
For the roll-ups:
– 1 (16-ounce) package refrigerated pizza dough
– 1 cup dairy-free mozzarella shreds
– 1/2 cup dairy-free pepperoni slices, chopped
– 1/4 cup dairy-free parmesan shreds
For the sauce:
– 1/2 cup marinara sauce
– 1 tbsp olive oil
– 1 tsp dried oregano
For baking:
– 1 tbsp olive oil
Instructions
1. Preheat your oven to 425°F and line a baking sheet with parchment paper.
2. Lightly flour a clean surface and roll the pizza dough into a 12×10-inch rectangle.
3. Spread the 1/2 cup marinara sauce evenly over the dough, leaving a 1/2-inch border.
4. Sprinkle the 1 cup dairy-free mozzarella shreds evenly over the sauce.
5. Scatter the 1/2 cup chopped dairy-free pepperoni over the cheese.
6. Starting from a long side, tightly roll the dough into a log, pinching the seam to seal.
7. Use a sharp knife to slice the log into 8 equal pieces, wiping the blade between cuts for clean slices.
8. Place the rolls cut-side up on the prepared baking sheet, spacing them 2 inches apart.
9. Brush the tops of the rolls with 1 tbsp olive oil.
10. Sprinkle the 1/4 cup dairy-free parmesan shreds and 1 tsp dried oregano over the rolls.
11. Bake for 12-15 minutes, or until the rolls are golden brown and the cheese is bubbly.
12. While baking, combine the remaining 1 tbsp olive oil with the remaining marinara sauce in a small bowl for dipping.
13. Remove from oven and let cool for 5 minutes on the baking sheet before serving.
Soft, pull-apart bread gives way to a savory, melty filling with a satisfying crunch from the baked edges. Serve them warm with the extra marinara for dipping, or pack them cold for a lunchbox treat that travels well.
Dairy-Free Sloppy Joes
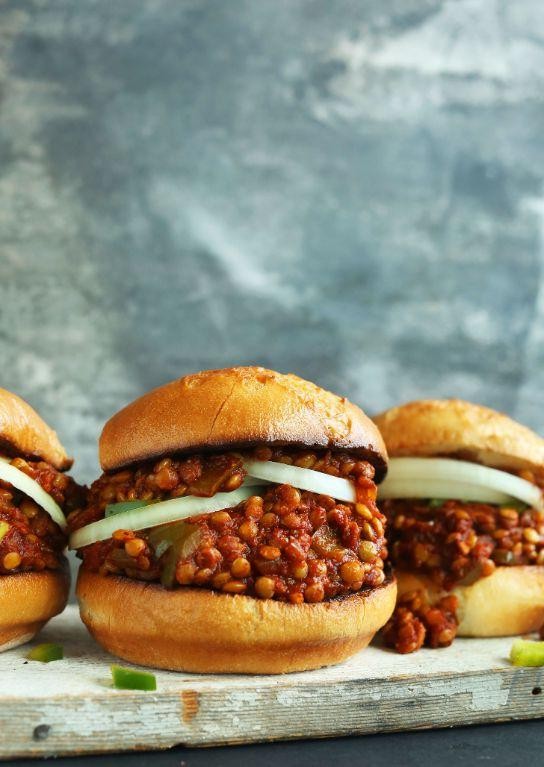
Omit the dairy but keep the comfort with these hearty, plant-based sloppy joes. They’re a quick, satisfying weeknight meal that everyone will love. This version uses simple pantry staples for a classic flavor.
Serving: 4 | Pre Time: 10 minutes | Cooking Time: 20 minutes
Ingredients
For the filling:
– 1 tbsp olive oil
– 1 lb plant-based ground (like Beyond Meat or lentils)
– 1 small yellow onion, finely diced
– 1 green bell pepper, finely diced
– 2 cloves garlic, minced
For the sauce:
– 1 cup tomato sauce
– 2 tbsp tomato paste
– 1 tbsp yellow mustard
– 1 tbsp Worcestershire sauce (check for vegan)
– 1 tbsp apple cider vinegar
– 1 tbsp brown sugar
– 1 tsp smoked paprika
– ½ tsp salt
– ¼ tsp black pepper
For serving:
– 4 hamburger buns
Instructions
1. Heat olive oil in a large skillet over medium-high heat until shimmering, about 1 minute.
2. Add plant-based ground and cook, breaking it up with a spoon, for 5 minutes until browned.
3. Add diced onion and bell pepper, cooking for 5 more minutes until softened.
4. Stir in minced garlic and cook for 30 seconds until fragrant.
5. Reduce heat to medium and add tomato sauce, tomato paste, mustard, Worcestershire sauce, vinegar, brown sugar, smoked paprika, salt, and black pepper.
6. Stir all ingredients until fully combined.
7. Simmer the mixture uncovered for 10 minutes, stirring occasionally, until thickened to a sloppy consistency.
8. While simmering, lightly toast the hamburger buns in a toaster or under a broiler for 2-3 minutes until golden.
9. Spoon the hot filling generously onto the bottom halves of the toasted buns.
10. Top with the other bun halves and serve immediately.
What you get is a saucy, savory filling with a perfect balance of tangy and sweet notes, clinging deliciously to the soft, toasted bun. For a fun twist, try serving it over baked potatoes or with a side of crispy sweet potato fries for extra texture.
Dairy-Free Veggie Tacos

Let’s make dairy-free veggie tacos that are quick, satisfying, and packed with flavor. Load them with seasoned vegetables and a creamy avocado sauce for a fresh, plant-based meal. Perfect for busy weeknights or casual gatherings.
Serving: 4 | Pre Time: 15 minutes | Cooking Time: 20 minutes
Ingredients
For the filling:
– 2 tbsp olive oil
– 1 medium onion, diced
– 2 bell peppers (any color), sliced
– 1 zucchini, diced
– 1 cup corn kernels (fresh or frozen)
– 1 tbsp chili powder
– 1 tsp ground cumin
– 1/2 tsp smoked paprika
– Salt to taste
For the avocado sauce:
– 2 ripe avocados
– 1/4 cup lime juice
– 1/4 cup water
– 1/4 cup fresh cilantro, chopped
– Salt to taste
For serving:
– 8 corn tortillas
– 1 cup shredded lettuce
– 1/2 cup diced tomatoes
Instructions
1. Heat olive oil in a large skillet over medium-high heat until shimmering.
2. Add diced onion and cook for 3 minutes, stirring occasionally, until translucent.
3. Add bell peppers and zucchini, cooking for 5 minutes until slightly softened.
4. Stir in corn kernels, chili powder, cumin, smoked paprika, and salt.
5. Cook the vegetable mixture for 7-10 minutes, stirring frequently, until all vegetables are tender and lightly browned. Tip: Don’t overcrowd the pan to ensure even browning.
6. While vegetables cook, prepare the avocado sauce by scooping avocado flesh into a blender.
7. Add lime juice, water, cilantro, and salt to the blender.
8. Blend on high speed for 30 seconds until completely smooth and creamy. Tip: Adjust water by tablespoons if needed for desired consistency.
9. Warm corn tortillas in a dry skillet over medium heat for 30 seconds per side until pliable.
10. Assemble tacos by placing warmed tortillas on plates.
11. Divide vegetable filling evenly among tortillas.
12. Drizzle each taco generously with avocado sauce.
13. Top with shredded lettuce and diced tomatoes. Tip: For extra crunch, add a sprinkle of toasted pumpkin seeds.
The tacos offer a satisfying contrast of tender, spiced vegetables against the cool, creamy avocado sauce. Serve them immediately with extra lime wedges for a bright, tangy finish that complements the smoky paprika notes.
Dairy-Free Fettuccine Alfredo
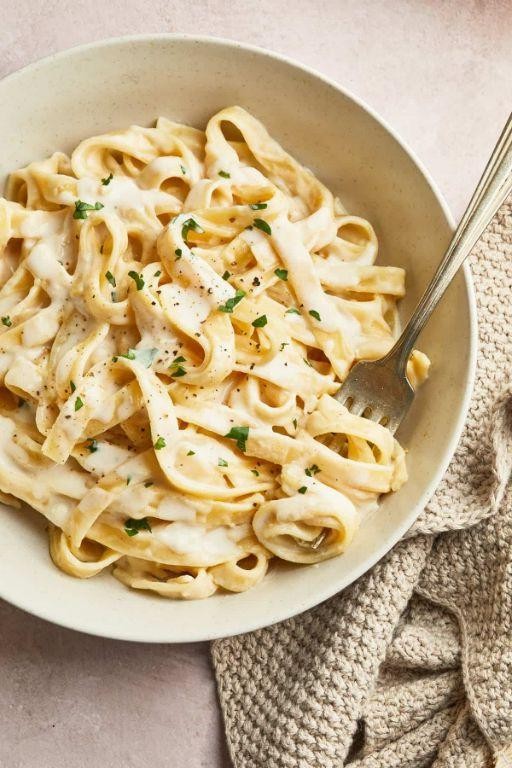
Zesty and creamy without dairy, this fettuccine Alfredo swaps cashews and nutritional yeast for traditional cheese and cream. It’s a rich, satisfying pasta that’s surprisingly simple to make. You’ll have a comforting bowl ready in under 30 minutes.
Serving: 4 | Pre Time: 10 minutes | Cooking Time: 15 minutes
Ingredients
For the pasta:
– 12 oz fettuccine
– 1 tbsp salt
For the sauce:
– 1 cup raw cashews, soaked in hot water for 10 minutes
– 1 cup unsweetened almond milk
– ¼ cup nutritional yeast
– 2 tbsp lemon juice
– 2 cloves garlic
– ½ tsp salt
– ¼ tsp black pepper
For finishing:
– 2 tbsp olive oil
– Fresh parsley, chopped (for garnish)
Instructions
1. Bring a large pot of water to a boil over high heat.
2. Add 1 tbsp salt and 12 oz fettuccine to the boiling water.
3. Cook the pasta for 10–12 minutes, stirring occasionally, until al dente.
4. Drain the pasta in a colander, reserving ½ cup of pasta water.
5. While the pasta cooks, drain the soaked cashews.
6. Combine 1 cup soaked cashews, 1 cup almond milk, ¼ cup nutritional yeast, 2 tbsp lemon juice, 2 cloves garlic, ½ tsp salt, and ¼ tsp black pepper in a blender.
7. Blend the mixture on high speed for 2–3 minutes until completely smooth and creamy.
8. Heat 2 tbsp olive oil in a large skillet over medium heat.
9. Pour the blended sauce into the skillet.
10. Cook the sauce for 3–4 minutes, stirring constantly, until it thickens slightly and bubbles gently.
11. Add the drained pasta to the skillet with the sauce.
12. Toss the pasta and sauce together, adding reserved pasta water 1 tbsp at a time if needed to reach a silky consistency.
13. Remove the skillet from the heat.
14. Divide the pasta among four bowls.
15. Garnish each serving with chopped fresh parsley.
Mildly nutty from the cashews and savory from the nutritional yeast, this sauce clings perfectly to each strand of pasta. Serve it immediately for the creamiest texture, or top with roasted vegetables for a heartier meal.
Dairy-Free Chicken Quesadillas

Everyone needs a quick, satisfying meal that doesn’t require dairy. These quesadillas deliver crispy tortillas and flavorful chicken, perfect for a busy weeknight. They’re simple to make and packed with protein.
Serving: 4 | Pre Time: 15 minutes | Cooking Time: 20 minutes
Ingredients
For the Chicken Filling:
– 1 lb boneless, skinless chicken breasts, cut into 1/2-inch strips
– 1 tbsp olive oil
– 1 tsp chili powder
– 1/2 tsp ground cumin
– 1/4 tsp garlic powder
– 1/4 tsp salt
For the Quesadillas:
– 8 (8-inch) flour tortillas
– 1 cup dairy-free shredded cheese alternative
– 1/2 cup salsa
– 1/4 cup chopped fresh cilantro
Instructions
1. Heat olive oil in a large skillet over medium-high heat until shimmering, about 2 minutes.
2. Add chicken strips to the skillet in a single layer. Cook for 5-7 minutes, turning once, until no longer pink and internal temperature reaches 165°F.
3. Sprinkle chili powder, cumin, garlic powder, and salt over the chicken. Stir to coat evenly and cook for 1 more minute. Remove skillet from heat.
4. Place one tortilla flat on a clean work surface. Sprinkle 2 tbsp dairy-free cheese evenly over half of the tortilla.
5. Spoon 1/4 of the cooked chicken mixture over the cheese. Top with 2 tbsp salsa and 1 tbsp cilantro.
6. Fold the tortilla over the filling to create a half-moon shape, pressing gently.
7. Heat a separate large skillet or griddle over medium heat. Place the folded quesadilla in the dry skillet.
8. Cook for 2-3 minutes per side, pressing down lightly with a spatula, until golden brown and crispy. Tip: For extra crispness, cook in a dry skillet without oil.
9. Transfer to a cutting board and let rest for 1 minute before slicing into wedges. Repeat steps 4-8 with remaining tortillas and filling.
10. Tip: Keep cooked quesadillas warm in a 200°F oven on a baking sheet while preparing the rest.
11. Serve immediately. Tip: For easier flipping, use a wide spatula and cook one quesadilla at a time if your skillet is small.
Finally, these quesadillas offer a satisfying crunch with tender, spiced chicken inside. The dairy-free cheese melts nicely for a creamy texture without dairy. For a creative twist, serve with extra salsa for dipping or add sliced avocado on the side.
Dairy-Free Shepherd’s Pie
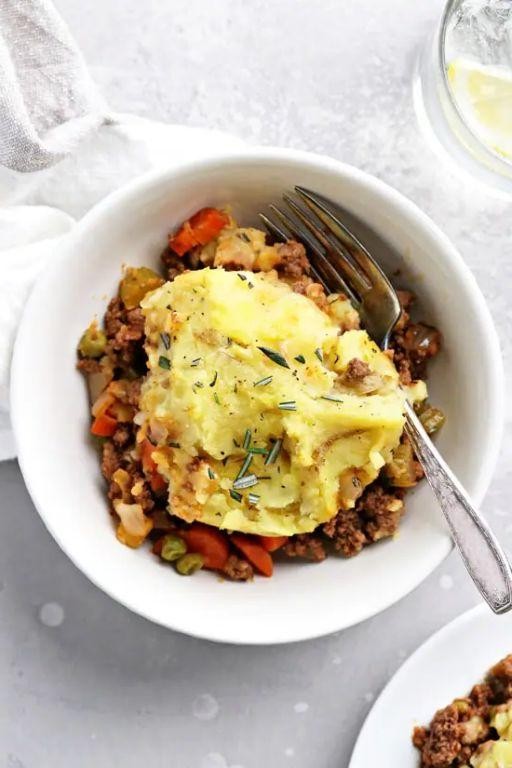
Dairy-free shepherd’s pie swaps traditional butter and cream for plant-based alternatives, creating a hearty, comforting meal that’s just as satisfying. This version layers savory lentils and vegetables under a creamy mashed potato topping, all baked to golden perfection. It’s ideal for weeknight dinners or cozy gatherings, offering rich flavor without any dairy.
Serving: 6 | Pre Time: 25 minutes | Cooking Time: 45 minutes
Ingredients
For the filling:
– 1 tablespoon olive oil
– 1 large onion, diced
– 2 carrots, diced
– 2 celery stalks, diced
– 3 cloves garlic, minced
– 1 pound ground beef or plant-based crumbles
– 1 cup cooked brown or green lentils
– 1 tablespoon tomato paste
– 1 cup vegetable broth
– 1 teaspoon dried thyme
– Salt and black pepper to taste
For the topping:
– 2 pounds russet potatoes, peeled and cubed
– 1/4 cup unsweetened almond milk
– 2 tablespoons dairy-free butter
– Salt to taste
Instructions
1. Preheat the oven to 400°F.
2. Heat olive oil in a large skillet over medium heat for 1 minute.
3. Add onion, carrots, and celery; sauté for 8 minutes until softened.
4. Stir in garlic and cook for 1 minute until fragrant.
5. Add ground beef or crumbles; cook for 10 minutes, breaking it apart with a spoon until browned.
6. Mix in cooked lentils, tomato paste, vegetable broth, thyme, salt, and pepper.
7. Simmer the filling for 15 minutes until thickened, stirring occasionally.
8. While the filling simmers, place potatoes in a pot, cover with water, and bring to a boil.
9. Boil potatoes for 15 minutes until fork-tender, then drain completely.
10. Mash potatoes with almond milk, dairy-free butter, and salt until smooth and creamy.
11. Transfer the filling to a 9×13-inch baking dish, spreading it evenly.
12. Spoon the mashed potatoes over the filling, spreading to cover completely.
13. Bake for 25 minutes until the topping is golden and the edges are bubbly.
14. Let cool for 10 minutes before serving.
Comforting and hearty, this dairy-free shepherd’s pie features a savory lentil-and-vegetable filling with a creamy, golden potato crust. The texture is rich and satisfying, with the potatoes providing a smooth contrast to the chunky filling. For a creative twist, try topping individual servings with a sprinkle of fresh herbs or serving it alongside a crisp green salad.
Dairy-Free Baked Ziti
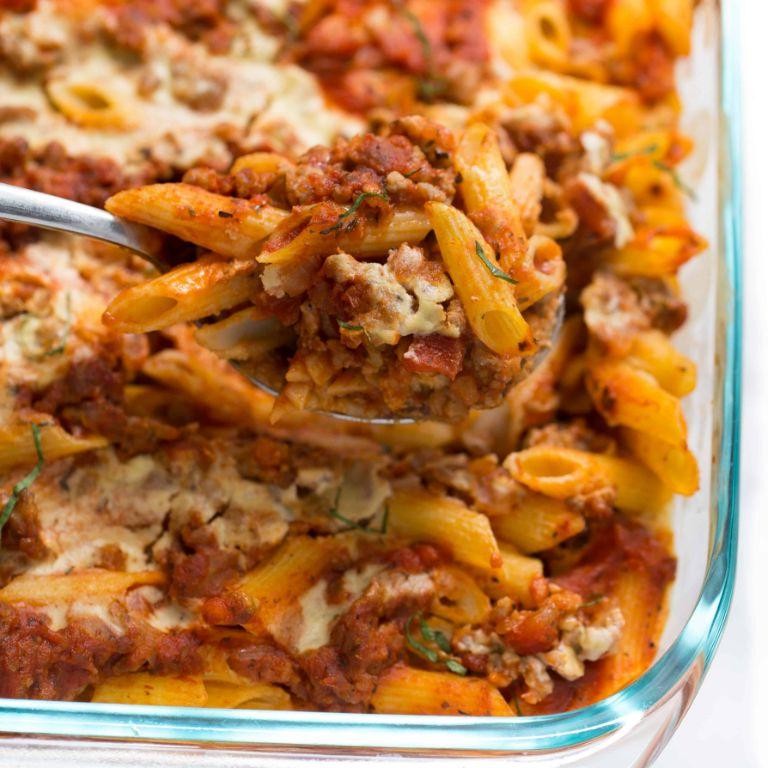
Vegan baked ziti delivers classic comfort without dairy, using cashew cream and nutritional yeast for a rich, cheesy flavor. This one-dish wonder is perfect for weeknights or feeding a crowd, with a bubbly, golden top that’s irresistible. Prep is straightforward, and the result is a hearty, satisfying meal everyone will love.
Serving: 6 | Pre Time: 20 minutes | Cooking Time: 45 minutes
Ingredients
For the sauce and filling:
– 1 lb ziti pasta
– 2 tbsp olive oil
– 1 medium onion, diced
– 3 cloves garlic, minced
– 28 oz can crushed tomatoes
– 1 tsp dried oregano
– 1 tsp salt
– ½ tsp black pepper
For the dairy-free cheese sauce:
– 1 cup raw cashews, soaked in hot water for 15 minutes
– 1 cup water
– ¼ cup nutritional yeast
– 2 tbsp lemon juice
– ½ tsp salt
Instructions
1. Preheat oven to 375°F. Bring a large pot of salted water to a boil.
2. Cook ziti according to package directions until al dente, about 9 minutes, then drain and set aside.
3. Heat olive oil in a large skillet over medium heat. Add diced onion and cook for 5 minutes until softened.
4. Add minced garlic and cook for 1 minute until fragrant.
5. Stir in crushed tomatoes, oregano, salt, and black pepper. Simmer for 10 minutes, stirring occasionally.
6. Drain soaked cashews and blend with water, nutritional yeast, lemon juice, and salt until smooth and creamy.
7. In a large bowl, combine cooked ziti, tomato sauce, and half of the cashew cheese sauce, mixing well.
8. Transfer the mixture to a 9×13-inch baking dish, spreading it evenly.
9. Pour the remaining cashew cheese sauce over the top, covering the pasta completely.
10. Bake at 375°F for 25 minutes until the top is golden and bubbly.
11. Let the baked ziti rest for 10 minutes before serving to allow it to set.
Layers of tender pasta soak up the tangy tomato sauce, while the cashew cream topping browns into a savory, slightly nutty crust. Serve it straight from the dish with a side salad for a complete meal, or scoop leftovers into bowls for easy reheating—the flavors deepen overnight, making it even better the next day.
Dairy-Free BBQ Pulled Jackfruit Sandwiches
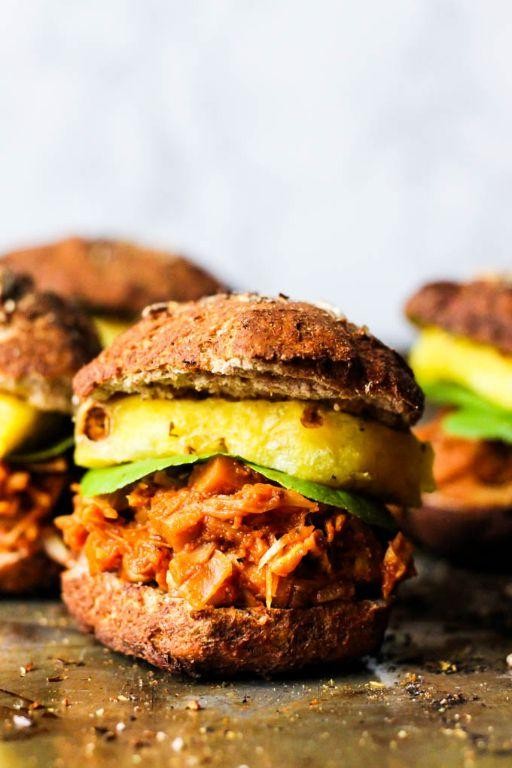
Forget meat—these smoky, tangy sandwiches prove jackfruit is the ultimate plant-based BBQ star. They’re surprisingly simple to make and perfect for feeding a crowd. You’ll love the satisfying texture and bold flavor.
Serving: 6 | Pre Time: 15 minutes | Cooking Time: 25 minutes
Ingredients
– For the jackfruit:
– 2 (20-ounce) cans young green jackfruit in brine, drained and rinsed
– 1 tablespoon olive oil
– 1 teaspoon smoked paprika
– 1/2 teaspoon garlic powder
– 1/2 teaspoon onion powder
– 1/4 teaspoon black pepper
– For the BBQ sauce:
– 1 cup ketchup
– 1/4 cup apple cider vinegar
– 2 tablespoons maple syrup
– 1 tablespoon Dijon mustard
– 1 teaspoon liquid smoke
– 1/2 teaspoon chili powder
– For serving:
– 6 hamburger buns
– 1 cup coleslaw (optional)
Instructions
1. Preheat a large skillet over medium-high heat.
2. Add 1 tablespoon olive oil to the hot skillet.
3. Shred the drained jackfruit with your hands or two forks, discarding any hard core pieces.
4. Add the shredded jackfruit to the skillet.
5. Cook the jackfruit for 8-10 minutes, stirring occasionally, until it starts to brown and dry out slightly.
6. Sprinkle 1 teaspoon smoked paprika, 1/2 teaspoon garlic powder, 1/2 teaspoon onion powder, and 1/4 teaspoon black pepper over the jackfruit.
7. Stir to coat the jackfruit evenly with the spices and cook for 1 more minute.
8. In a medium bowl, whisk together 1 cup ketchup, 1/4 cup apple cider vinegar, 2 tablespoons maple syrup, 1 tablespoon Dijon mustard, 1 teaspoon liquid smoke, and 1/2 teaspoon chili powder.
9. Pour the BBQ sauce mixture over the jackfruit in the skillet.
10. Reduce the heat to low and simmer the jackfruit in the sauce for 10-12 minutes, stirring occasionally, until the sauce thickens and clings to the jackfruit.
11. While the jackfruit simmers, toast the 6 hamburger buns if desired.
12. Spoon the hot BBQ pulled jackfruit onto the bottom halves of the buns.
13. Top each sandwich with about 2-3 tablespoons of coleslaw, if using.
14. Place the top bun on each sandwich.
15. Serve immediately.
Perfectly shredded jackfruit mimics pulled pork’s fibrous texture, while the homemade sauce delivers a sticky, sweet, and smoky punch. Pile it high on toasted buns with cool coleslaw for crunch, or try it as a loaded nacho topping for a fun twist.
Dairy-Free Lentil Soup

Brace yourself for a hearty, dairy-free lentil soup that’s both nourishing and deeply satisfying. This simple recipe delivers rich flavor without any cream or butter, making it perfect for chilly evenings or meal prep. You’ll need just a handful of pantry staples to get started.
Serving: 4 | Pre Time: 10 minutes | Cooking Time: 35 minutes
Ingredients
For the base:
– 1 tbsp olive oil
– 1 medium yellow onion, diced
– 2 carrots, peeled and diced
– 2 celery stalks, diced
– 3 garlic cloves, minced
For the soup:
– 1 cup brown lentils, rinsed
– 4 cups vegetable broth
– 1 (14.5 oz) can diced tomatoes
– 1 tsp dried thyme
– ½ tsp smoked paprika
– ¼ tsp black pepper
– 1 bay leaf
For finishing:
– 2 tbsp fresh lemon juice
– ¼ cup chopped fresh parsley
Instructions
1. Heat 1 tbsp olive oil in a large pot over medium heat for 1 minute.
2. Add 1 diced onion, 2 diced carrots, and 2 diced celery stalks to the pot.
3. Sauté the vegetables for 8 minutes, stirring occasionally, until they soften and the onion turns translucent.
4. Stir in 3 minced garlic cloves and cook for 1 minute until fragrant.
5. Add 1 cup rinsed brown lentils, 4 cups vegetable broth, 1 can diced tomatoes, 1 tsp dried thyme, ½ tsp smoked paprika, ¼ tsp black pepper, and 1 bay leaf to the pot.
6. Bring the mixture to a boil over high heat, then reduce the heat to low.
7. Cover the pot and simmer the soup for 25 minutes, stirring once halfway through.
8. Remove the pot from the heat and discard the bay leaf.
9. Stir in 2 tbsp fresh lemon juice and ¼ cup chopped fresh parsley.
Nourishing and robust, this soup has a thick, velvety texture from the softened lentils. The smoked paprika adds a subtle smokiness that complements the bright acidity from the lemon. For a creative twist, top it with crispy roasted chickpeas or serve alongside a slice of crusty sourdough bread.
Dairy-Free Stuffed Bell Peppers
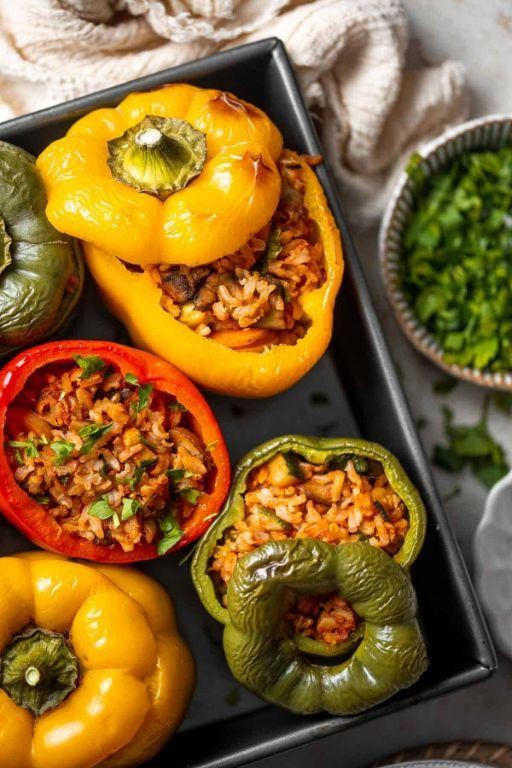
Omit dairy without sacrificing flavor with these hearty stuffed bell peppers. They’re a satisfying one-dish meal packed with protein and vegetables. Perfect for a quick weeknight dinner or meal prep.
Serving: 4 | Pre Time: 15 minutes | Cooking Time: 45 minutes
Ingredients
– For the filling:
– 1 lb ground turkey
– 1 cup uncooked quinoa
– 1 medium yellow onion, diced
– 3 cloves garlic, minced
– 1 (15 oz) can black beans, rinsed and drained
– 1 (14.5 oz) can diced tomatoes, undrained
– 1 tbsp olive oil
– 1 tsp ground cumin
– 1 tsp chili powder
– 1/2 tsp salt
– For assembly:
– 4 large bell peppers (any color)
– 1 cup vegetable broth
Instructions
1. Preheat your oven to 375°F.
2. Rinse 1 cup of quinoa thoroughly in a fine-mesh strainer to remove its bitter coating.
3. Heat 1 tbsp of olive oil in a large skillet over medium-high heat for 1 minute.
4. Add 1 diced yellow onion to the skillet and cook for 5 minutes, stirring occasionally, until translucent.
5. Add 3 minced garlic cloves and cook for 1 minute until fragrant.
6. Add 1 lb of ground turkey to the skillet, breaking it apart with a spoon, and cook for 7 minutes until no pink remains.
7. Stir in 1 tsp cumin, 1 tsp chili powder, and 1/2 tsp salt.
8. Add the rinsed quinoa, 1 can of undrained diced tomatoes, 1 can of rinsed black beans, and 1 cup of vegetable broth to the skillet.
9. Bring the mixture to a boil, then reduce heat to low, cover, and simmer for 15 minutes until the quinoa is tender and liquid is absorbed.
10. While the filling cooks, slice the tops off 4 bell peppers and remove all seeds and membranes.
11. Place the hollowed peppers upright in a baking dish just large enough to hold them snugly.
12. Once the filling is cooked, spoon it evenly into the prepared bell peppers, packing it down lightly.
13. Pour 1/2 cup of water into the bottom of the baking dish around the peppers.
14. Cover the dish tightly with aluminum foil and bake at 375°F for 30 minutes.
15. Remove the foil and bake for an additional 15 minutes until the pepper edges are slightly charred and tender.
16. Let the stuffed peppers rest for 5 minutes before serving.
You’ll love the tender-crisp bell pepper shell contrasting with the fluffy, savory quinoa and turkey filling. The spices create a warm, smoky flavor without any heat. Try serving them over a bed of fresh spinach or with a side of avocado slices for extra creaminess.
Conclusion
Zesty, nutritious, and sure to please even the pickiest eaters, these dairy-free dinners make family meals a breeze. We hope this collection inspires your kitchen adventures! Give a recipe a try, then drop a comment to tell us your family’s favorite. If you loved this roundup, please share it on Pinterest to help other home cooks discover these delightful ideas. Happy cooking!


