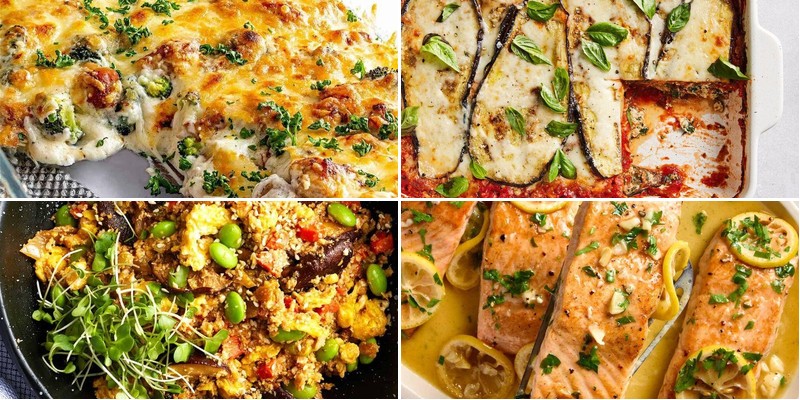
Unleash your inner chef with these 32 delicious keto diet recipes that make healthy eating a breeze! Whether you’re craving quick dinners, comforting classics, or fresh seasonal favorites, this roundup has something for every home cook. Get ready to transform your meals with simple, satisfying dishes that keep you on track without sacrificing flavor. Dive in and discover your new go-to recipes!
Creamy Garlic Shrimp

Gently, as the evening light softens outside my kitchen window, I find myself drawn to this simple comfort—creamy garlic shrimp, a dish that feels like a quiet conversation with the past, each ingredient a whispered memory. It’s the kind of meal that slows time, where the sizzle of garlic in butter becomes a meditation, and the cream swirls into something deeply nourishing. I make this when I need to pause, to savor not just the food, but the stillness it brings.
5
servings10
minutes10
minutesIngredients
– 1 lb large raw shrimp, peeled and deveined (I like to pat them dry with a paper towel for a better sear)
– 4 tbsp unsalted butter (I always use unsalted to control the saltiness myself)
– 6 cloves garlic, minced (freshly minced garlic makes all the difference here)
– 1 cup heavy cream, at room temperature (it blends smoother when not cold)
– 1/2 cup grated Parmesan cheese (the real stuff, not pre-shaken, for that nutty depth)
– 2 tbsp fresh parsley, chopped (I snip it right from my little herb garden)
– 1/2 tsp paprika (just a pinch for warmth, not heat)
– Salt and black pepper, to season (I start with 1/4 tsp salt and adjust later)
Instructions
1. Pat the shrimp dry with paper towels, then season both sides evenly with salt, black pepper, and paprika.
2. Melt the unsalted butter in a large skillet over medium heat until it foams lightly, about 1 minute.
3. Add the minced garlic and sauté for 30–45 seconds, stirring constantly, until fragrant but not browned.
4. Increase the heat to medium-high and add the shrimp in a single layer, cooking for 1–2 minutes per side until they turn pink and opaque.
5. Remove the shrimp from the skillet and set them aside on a plate to prevent overcooking.
6. Reduce the heat to low and pour the heavy cream into the skillet, scraping up any browned bits from the bottom.
7. Simmer the cream gently for 2–3 minutes, stirring occasionally, until it thickens slightly and coats the back of a spoon.
8. Stir in the grated Parmesan cheese until fully melted and the sauce is smooth, about 1 minute.
9. Return the shrimp to the skillet, tossing gently to coat them in the creamy sauce.
10. Sprinkle the chopped fresh parsley over the top and stir to combine.
Perhaps what I love most is the way the cream clings to each shrimp, rich and velvety, with the garlic lending a gentle warmth that doesn’t overpower. Serve it over a bed of angel hair pasta to catch every drop of sauce, or with crusty bread for dipping—it’s a dish that feels both elegant and utterly comforting, like a hug in a bowl.
Zucchini Noodles with Pesto
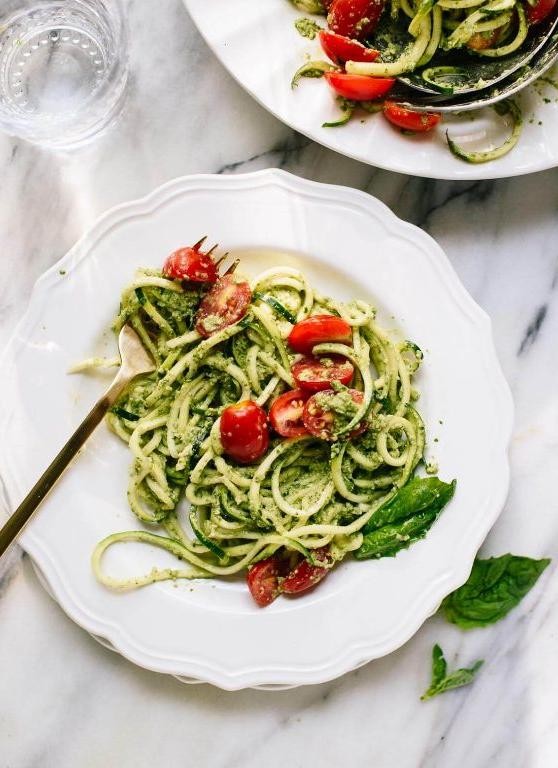
Sometimes, when the evening light slants just so through the kitchen window, I find myself craving something that feels both nourishing and gentle. Spiralizing zucchini into delicate noodles has become my quiet ritual, a way to transform the humble squash into a meal that feels like a fresh start. Tonight, it’s these tender strands tossed with a vibrant, homemade pesto that I’m leaning into.
5
servings15
minutes4
minutesIngredients
– 4 medium zucchinis, ends trimmed (I look for firm ones, about 6-7 inches long, for the best spiralizing)
– 2 cups fresh basil leaves, packed (from my little windowsill herb garden, if I’m lucky)
– 1/2 cup extra virgin olive oil, my go-to for its fruity depth
– 1/3 cup pine nuts, lightly toasted for that warm, nutty aroma
– 2 cloves garlic, peeled (I sometimes use one if I want it milder)
– 1/2 cup grated Parmesan cheese, the kind I keep chilled for sprinkling
– 1/4 tsp salt, just a pinch to balance the flavors
– 1/4 tsp black pepper, freshly ground if I have the energy
Instructions
1. Spiralize all 4 zucchinis using a spiralizer fitted with the medium blade, catching the noodles in a large bowl.
2. Sprinkle the zucchini noodles with 1/4 tsp salt and let them sit for 10 minutes to draw out excess moisture.
3. While the noodles rest, toast 1/3 cup pine nuts in a dry skillet over medium heat for 3-4 minutes, shaking the pan frequently, until they’re golden and fragrant.
4. Combine the toasted pine nuts, 2 cups basil leaves, 2 cloves garlic, 1/2 cup Parmesan cheese, 1/4 tsp black pepper, and the remaining 1/4 tsp salt in a food processor.
5. Pulse the mixture 5-6 times until it’s coarsely chopped, then scrape down the sides with a spatula.
6. With the food processor running on low, slowly drizzle in 1/2 cup extra virgin olive oil through the feed tube until the pesto is smooth and emulsified.
7. Gently squeeze the zucchini noodles with your hands over the sink to remove the released liquid.
8. Toss the dried zucchini noodles with the prepared pesto in the large bowl until every strand is evenly coated.
9. Let the dish sit for 5 minutes to allow the flavors to meld before serving.
The zucchini noodles stay satisfyingly al dente, with the pesto clinging to each curl in a way that’s both creamy and bright. I love how the Parmesan adds a salty sharpness against the fresh basil, and sometimes I’ll top it with a handful of cherry tomatoes for a burst of color.
Keto Chicken Alfredo

Remembering how my grandmother’s creamy pasta used to comfort me on rainy afternoons, I’ve been quietly working on this keto version that wraps you in the same warmth without the carbs. It’s a gentle, slow-simmered Alfredo that feels like a hug in a bowl, perfect for those evenings when you just need something simple and soothing.
5
servings15
minutes20
minutesIngredients
– 1.5 lbs boneless, skinless chicken thighs, sliced into strips (I find thighs stay juicier than breasts)
– 2 tbsp extra virgin olive oil, my go-to for its fruity notes
– 3 cloves garlic, minced (freshly crushed releases the best aroma)
– 1 cup heavy cream, brought to room temp so it blends smoothly
– 1/2 cup grated Parmesan cheese, the real stuff melts so much better
– 2 tbsp unsalted butter, for that rich, velvety finish
– 1/4 tsp sea salt, to enhance all the flavors without overpowering
– 1/4 tsp black pepper, freshly ground if you have it
– 2 cups spiralized zucchini noodles, patted dry to keep the sauce from watering down
Instructions
1. Heat 2 tbsp olive oil in a large skillet over medium heat until it shimmers, about 2 minutes.
2. Add 1.5 lbs chicken strips and cook for 6–7 minutes, flipping once, until golden brown and internal temperature reaches 165°F.
3. Remove chicken from skillet and set aside on a plate, covering loosely to keep warm.
4. Reduce heat to low and add 2 tbsp butter to the same skillet, letting it melt fully.
5. Stir in 3 cloves minced garlic and sauté for 1 minute, just until fragrant but not browned.
6. Pour in 1 cup heavy cream and whisk continuously to combine with the butter and garlic.
7. Simmer the cream mixture on low heat for 4–5 minutes, stirring often, until it thickens slightly and coats the back of a spoon.
8. Gradually sprinkle in 1/2 cup Parmesan cheese, whisking constantly until melted and smooth.
9. Season the sauce with 1/4 tsp sea salt and 1/4 tsp black pepper, stirring to incorporate evenly.
10. Return the cooked chicken to the skillet, tossing gently to coat with the Alfredo sauce.
11. Add 2 cups zucchini noodles and toss for 1–2 minutes, just until warmed through but still crisp.
12. Remove from heat and let rest for 1 minute to allow flavors to meld. Perhaps the silky sauce clings to each zucchini ribbon, offering a subtle richness that balances the tender chicken. Pair it with a simple side salad or enjoy it as is, letting each bite remind you that comfort food can be both nourishing and light.
Cheesy Cauliflower Mash
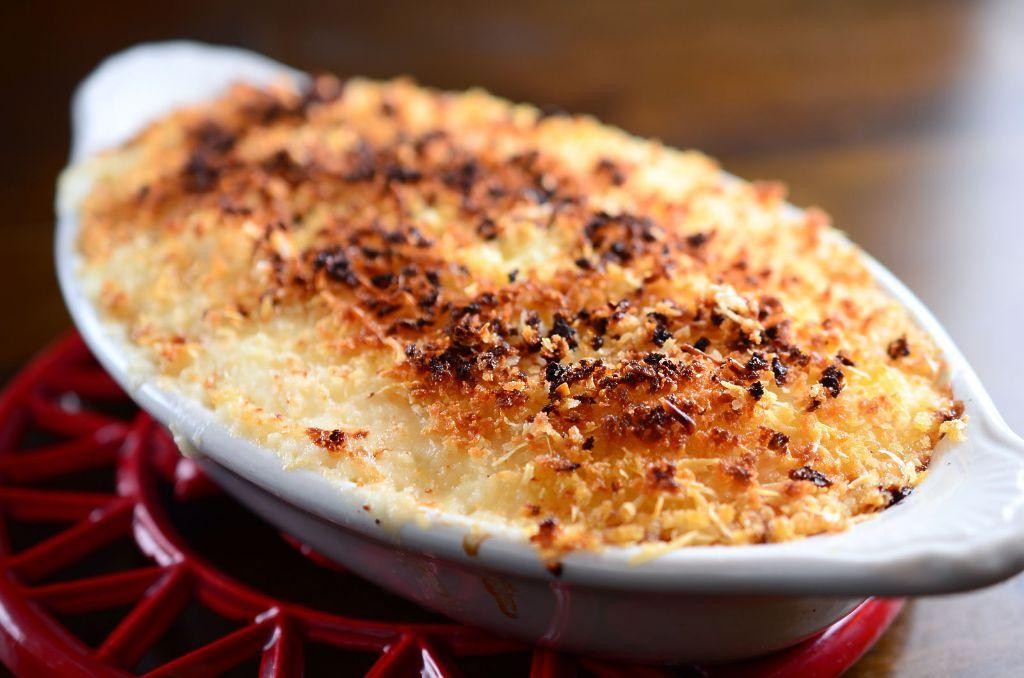
Vividly, I remember the first time I swapped potatoes for cauliflower—how the steam rose in soft clouds from the pot, carrying a promise of comfort without the heaviness. It’s become my quiet autumn ritual, this simple mash that feels like a warm hug on a cool evening, creamy and forgiving in its simplicity.
2
servings15
minutes17
minutesIngredients
– 1 large head of cauliflower, cut into florets (I leave the smaller stems for extra texture)
– 1/2 cup heavy cream, warmed gently—it blends smoother this way
– 4 tablespoons unsalted butter, cubed and chilled (cold butter emulsifies beautifully)
– 1/2 cup shredded sharp cheddar cheese, plus extra for topping (I grate it fresh for the best melt)
– 1/4 teaspoon garlic powder, just a whisper to enhance without overpowering
– 1/4 teaspoon fine sea salt, adjusted to your preference but start here for balance
Instructions
1. Fill a large pot with 1 inch of water and bring it to a rolling boil over high heat.
2. Place the cauliflower florets into a steamer basket and set it over the boiling water.
3. Cover the pot tightly and steam the cauliflower for 10–12 minutes, until the florets are fork-tender and easily pierced.
4. Drain the cauliflower thoroughly in a colander, pressing gently with a spoon to remove excess moisture—this prevents a watery mash.
5. Transfer the drained cauliflower to a food processor or high-speed blender.
6. Add the warmed heavy cream, chilled butter cubes, shredded cheddar, garlic powder, and sea salt to the processor.
7. Pulse the mixture 5–7 times on low speed, then blend on high for 1–2 minutes until completely smooth and creamy, scraping down the sides once midway.
8. Taste and adjust seasoning if needed, but avoid over-blending to keep it light.
9. Serve immediately or transfer to an oven-safe dish, top with extra cheddar, and broil at 450°F for 2–3 minutes until golden and bubbly. Creamy and velvety, this mash holds a subtle nuttiness from the cauliflower, balanced by the sharp cheddar’s tang. I love scooping it into a bowl and topping it with crispy roasted chickpeas or serving it alongside a hearty stew—it soaks up flavors beautifully while standing firm on its own.
Low-Carb Meatloaf
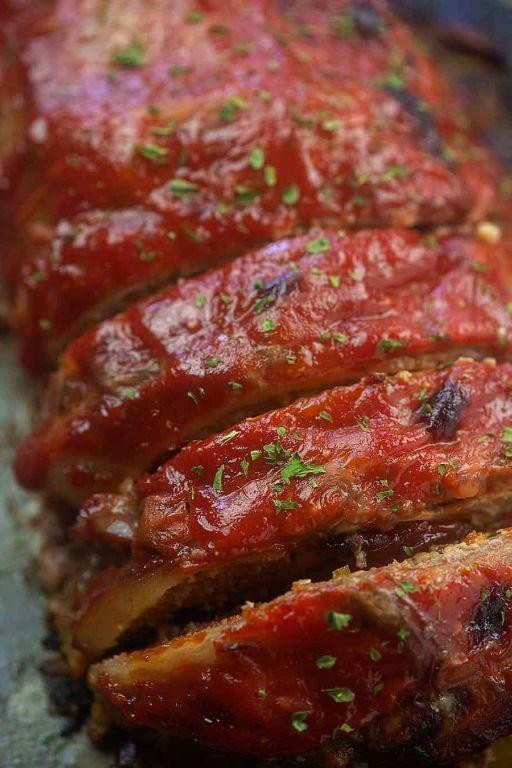
Under the soft glow of the kitchen light, I find myself returning to this low-carb meatloaf, a recipe born from quiet evenings and the gentle desire for something comforting yet mindful. It’s a dish that feels like a warm embrace, simple in its making but rich in the way it fills both the home and heart. Using almond flour and a few thoughtful swaps, it becomes a cozy staple without the heaviness of traditional versions.
8
portions20
minutes57
minutesIngredients
– 1.5 pounds ground beef (I like 85/15 for a bit of richness)
– 1 cup almond flour (blanched works best for a finer texture)
– 1 large egg, at room temperature—it blends more smoothly with the meat
– 1/2 cup finely chopped yellow onion (I always sauté it first for sweetness)
– 1/4 cup unsweetened ketchup (my secret for a tangy glaze)
– 2 tbsp Worcestershire sauce (a dash more if you love that umami depth)
– 1 tsp garlic powder (I prefer it over fresh for even distribution)
– 1 tsp dried oregano (crushed between my palms to wake up the oils)
– 1/2 tsp black pepper, freshly ground
– 1/2 tsp salt (I use fine sea salt for even seasoning)
Instructions
1. Preheat your oven to 375°F and lightly grease a 9×5-inch loaf pan with olive oil or non-stick spray.
2. Heat a small skillet over medium heat and sauté the chopped yellow onion for 5–7 minutes, until soft and translucent, to deepen its flavor.
3. In a large mixing bowl, combine the ground beef, almond flour, room temperature egg, sautéed onion, Worcestershire sauce, garlic powder, dried oregano, black pepper, and salt.
4. Use your hands to gently mix everything until just combined; overmixing can make the meatloaf dense, so stop as soon as no streaks of almond flour remain.
5. Transfer the mixture to the prepared loaf pan and press it evenly, smoothing the top with the back of a spoon.
6. Spread the unsweetened ketchup evenly over the top of the meatloaf to create a glossy, caramelized crust as it bakes.
7. Place the pan in the preheated oven and bake for 45–50 minutes, until the internal temperature reaches 160°F on an instant-read thermometer.
8. Let the meatloaf rest in the pan for 10 minutes before slicing; this allows the juices to redistribute, keeping it moist and tender.
9. Carefully remove the meatloaf from the pan using a spatula, slice into 1-inch thick portions, and serve warm.
Keeping this meatloaf simple lets its savory, herb-kissed flavors shine, with a texture that’s firm yet tender, almost crumbling at the touch of a fork. I love serving it alongside roasted asparagus or a crisp salad, where the contrast highlights its comforting warmth. Leftovers, if there are any, make for the most satisfying next-day sandwich, tucked between lettuce leaves for a low-carb twist.
Eggplant Lasagna
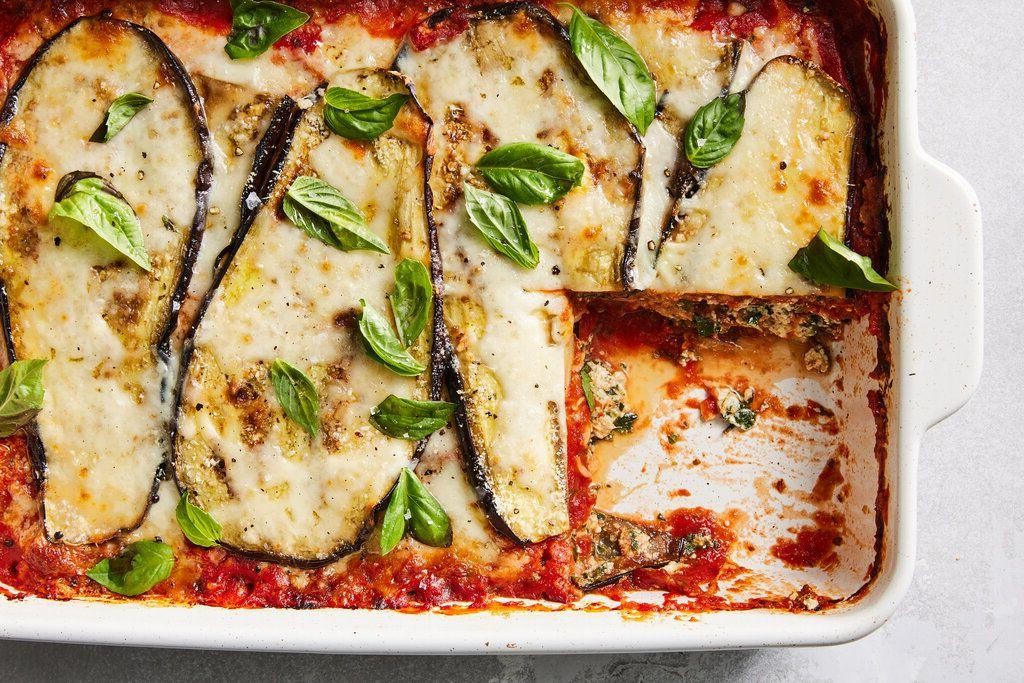
As the evening light softens outside my kitchen window, I find myself drawn to this comforting layered dish that feels like a warm embrace after a long day. Eggplant lasagna has become my go-to when I crave something nourishing yet deeply satisfying, with its rich layers and earthy flavors that seem to slow time itself.
8
portions45
minutes60
minutesIngredients
– 2 large eggplants, sliced lengthwise into ¼-inch thick planks (I look for firm, glossy ones that feel heavy for their size)
– 1 tablespoon kosher salt for sweating the eggplant (coarse grains work best here)
– 2 cups whole milk ricotta cheese (the creamy, fresh kind that tastes like sunshine)
– 1 large egg, lightly beaten (I always let mine come to room temperature first)
– ½ cup grated Parmesan cheese (the real stuff that smells like aged perfection)
– 2 cups shredded mozzarella cheese (I prefer the low-moisture kind that melts into perfect pools)
– 3 cups marinara sauce (my grandmother’s recipe, simmered for hours)
– 2 tablespoons extra virgin olive oil (the good bottle I save for special dishes)
– 1 teaspoon dried oregano (crushed between my palms to release its fragrance)
– ½ teaspoon freshly ground black pepper (from my favorite wooden grinder)
Instructions
1. Arrange eggplant slices in a single layer on a baking sheet lined with paper towels.
2. Sprinkle both sides of eggplant slices evenly with kosher salt and let rest for 30 minutes to draw out excess moisture.
3. Pat eggplant slices completely dry with fresh paper towels to remove the extracted liquid and salt residue.
4. Preheat your oven to 375°F and lightly grease a 9×13-inch baking dish with olive oil.
5. Brush both sides of each eggplant slice with the 2 tablespoons of extra virgin olive oil.
6. Arrange oiled eggplant slices in a single layer on a clean baking sheet.
7. Roast eggplant slices in the preheated oven for 15 minutes until they become pliable and lightly golden around the edges.
8. While eggplant roasts, combine the 2 cups ricotta cheese, beaten egg, ¼ cup Parmesan cheese, dried oregano, and black pepper in a medium bowl.
9. Mix the ricotta mixture thoroughly until all ingredients are fully incorporated and creamy.
10. Spread ½ cup marinara sauce evenly across the bottom of the prepared baking dish.
11. Arrange a single layer of roasted eggplant slices over the sauce, slightly overlapping if necessary.
12. Spread half of the ricotta mixture evenly over the eggplant layer using a spatula.
13. Sprinkle ½ cup mozzarella cheese over the ricotta layer.
14. Repeat the layering process with another ½ cup marinara sauce, remaining eggplant slices, remaining ricotta mixture, and another ½ cup mozzarella cheese.
15. Top the final layer with the remaining 2 cups marinara sauce, spreading it evenly to cover completely.
16. Sprinkle the remaining 1 cup mozzarella cheese and ¼ cup Parmesan cheese over the top sauce layer.
17. Cover the baking dish tightly with aluminum foil and bake at 375°F for 30 minutes.
18. Remove the foil and continue baking for another 15 minutes until the cheese becomes bubbly and develops golden brown spots.
19. Remove the lasagna from the oven and let it rest undisturbed for 15 minutes before slicing.
You’ll notice how the resting time allows the layers to settle, creating clean slices that hold their shape beautifully. The eggplant becomes almost silken against the creamy ricotta, while the cheeses form a delicate crust that crackles when cut. Sometimes I serve it with a simple arugula salad dressed in lemon juice, the peppery greens providing a lovely contrast to the rich, comforting layers.
Bacon-Wrapped Asparagus

Vaguely remembering the first time I made this dish, it was one of those quiet Sunday evenings where the kitchen felt more like a sanctuary than a workspace, the simple act of wrapping asparagus in bacon becoming a meditative ritual. There’s something deeply comforting in how these humble ingredients transform together, the sizzle and scent filling the room with a warmth that feels like a gentle embrace. It’s a recipe that never fails to bring a moment of calm, perfect for when you need a little solace or a side dish that feels special without the fuss.
8
bundles10
minutes22
minutesIngredients
– 1 pound fresh asparagus spears, trimmed (I look for ones with tight, vibrant green tips—they snap so satisfyingly when fresh)
– 8 slices thick-cut bacon (the smoky, applewood-smoked kind is my favorite for that extra depth)
– 2 tablespoons extra virgin olive oil (my go-to for its fruity notes that complement the bacon)
– 1/2 teaspoon freshly ground black pepper (I always grind it coarse for a bit of texture)
– 1/4 teaspoon fine sea salt (a light sprinkle lets the natural flavors shine)
Instructions
1. Preheat your oven to 400°F (200°C) and line a baking sheet with parchment paper for easy cleanup.
2. Trim the tough ends from the asparagus spears by holding each spear at both ends and bending it until it snaps naturally at the woody part.
3. Drizzle the olive oil evenly over the asparagus spears, using your hands to coat them thoroughly for even roasting.
4. Sprinkle the salt and black pepper over the asparagus, tossing gently to distribute the seasonings.
5. Divide the asparagus into 8 small bundles, each with 4-5 spears depending on their thickness.
6. Wrap one slice of bacon snugly around the middle of each asparagus bundle, overlapping the ends slightly to secure it.
7. Arrange the bacon-wrapped bundles in a single layer on the prepared baking sheet, ensuring they don’t touch to allow for crispiness.
8. Place the baking sheet in the preheated oven and bake for 18-22 minutes, or until the bacon is crispy and golden brown and the asparagus is tender when pierced with a fork.
9. Rotate the baking sheet halfway through cooking to ensure even browning, especially if your oven has hot spots.
10. Remove the baking sheet from the oven and let the bundles rest for 2-3 minutes before serving to let the flavors meld. You’ll know they’re ready when the bacon renders its fat and the asparagus tips are lightly charred at the edges.
Years later, I still love how the crisp, salty bacon gives way to tender, slightly sweet asparagus beneath, the textures playing off each other in every bite. Serve them alongside a simple roast chicken or as an appetizer with a drizzle of balsamic glaze for a touch of acidity that cuts through the richness beautifully.
Avocado Egg Salad
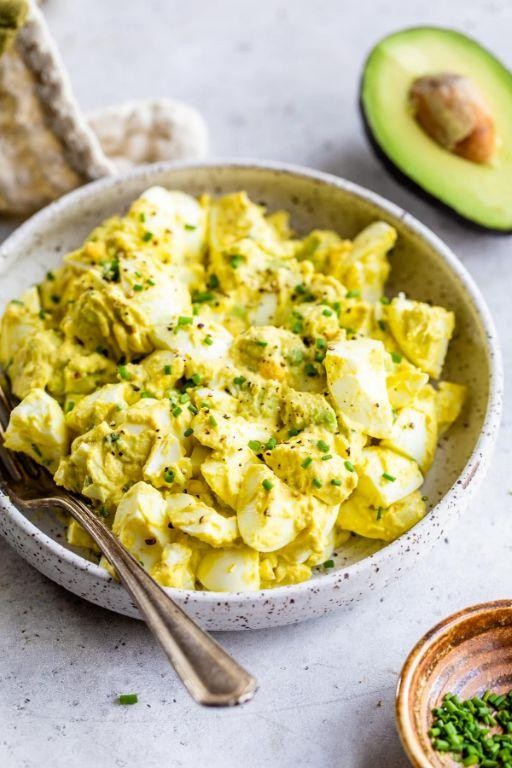
Kind of like rediscovering an old friend, this avocado egg salad came to me on a quiet afternoon when the kitchen felt particularly still. There’s something comforting about the creamy texture meeting the subtle richness that makes it feel both nourishing and deeply satisfying.
2
servings15
minutes17
minutesIngredients
– 4 large eggs (I prefer room temperature eggs here—they peel so much easier)
– 2 ripe avocados (look for ones that yield gently to pressure)
– 2 tablespoons mayonnaise (Duke’s is my Southern go-to for that tang)
– 1 tablespoon fresh lemon juice (just squeezed, never bottled)
– 1/4 cup finely chopped red onion (I like the mild bite it adds)
– Salt and black pepper (freshly cracked pepper makes all the difference)
Instructions
1. Place 4 large eggs in a single layer in a medium saucepan.
2. Add enough cold water to cover the eggs by 1 inch.
3. Bring the water to a rolling boil over high heat.
4. Once boiling, immediately cover the pan and remove it from heat.
5. Let the eggs sit in the hot water for exactly 12 minutes.
6. Transfer the eggs to a bowl of ice water and let cool for 5 minutes.
7. Gently tap each egg on the counter and peel under running cool water.
8. Chop the peeled eggs into 1/4-inch pieces.
9. Cut 2 ripe avocados in half lengthwise and remove the pits.
10. Scoop the avocado flesh into a medium mixing bowl.
11. Mash the avocado with a fork until slightly chunky.
12. Add 2 tablespoons mayonnaise and 1 tablespoon fresh lemon juice to the bowl.
13. Stir gently until just combined.
14. Fold in the chopped eggs and 1/4 cup finely chopped red onion.
15. Season with salt and freshly cracked black pepper, mixing lightly.
This creates such a wonderfully creamy yet substantial texture that holds its shape beautifully. The subtle richness from the avocado pairs so well with the tender eggs, making it perfect scooped onto toasted sourdough or served in crisp lettuce cups for a lighter meal.
Stuffed Bell Peppers

Beneath the quiet hum of the evening kitchen, there’s something deeply comforting about hollowing out bell peppers and filling them with warmth. It feels like preparing little edible vessels, each one holding the promise of a satisfying, hands-off meal. I love how their vibrant colors brighten the countertop, a small joy before they even reach the oven.
4
servings20
minutes65
minutesIngredients
– 4 large bell peppers, any color you love—I often mix red and yellow for their sweetness
– 1 lb lean ground beef, 90/10 is my preference for a richer flavor without too much grease
– 1 cup long-grain white rice, rinsed well to remove excess starch
– 1 small yellow onion, finely diced—the smaller pieces melt right into the filling
– 2 cloves garlic, minced; I press them fresh for the most aromatic punch
– 1 (15 oz) can tomato sauce, no salt added so I can control the seasoning
– 1 cup shredded mozzarella cheese, divided; I save a little extra for a golden top
– 2 tbsp extra virgin olive oil, my go-to for sautéing
– 1 tsp dried oregano, rubbed between my palms to wake up the oils
– ½ tsp salt, fine sea salt for even distribution
– ¼ tsp black pepper, freshly ground
Instructions
1. Preheat your oven to 375°F and lightly grease a 9×13-inch baking dish with olive oil.
2. Slice the tops off the bell peppers, remove the seeds and membranes, and place them upright in the dish.
3. In a large skillet, heat 2 tablespoons of olive oil over medium heat until it shimmers.
4. Add the diced onion and cook for 4-5 minutes, stirring occasionally, until translucent and fragrant.
5. Stir in the minced garlic and cook for 1 minute more, just until golden—be careful not to burn it.
6. Add the ground beef, breaking it up with a wooden spoon, and cook for 6-7 minutes until no pink remains.
7. Drain any excess fat from the skillet for a lighter filling.
8. Mix in the rinsed rice, tomato sauce, oregano, salt, and black pepper until fully combined.
9. Spoon the beef and rice mixture evenly into the bell peppers, packing it gently but not too tightly.
10. Pour ½ cup of water into the bottom of the baking dish around the peppers to create steam.
11. Cover the dish tightly with aluminum foil and bake for 45 minutes.
12. Remove the foil, sprinkle the reserved mozzarella cheese over the peppers, and bake uncovered for 10-12 minutes until the cheese is bubbly and lightly browned.
13. Let the peppers rest for 5 minutes before serving—they’ll be easier to handle and the flavors will settle. From the tender, slightly crisp pepper walls to the savory, rice-studded filling, each bite feels like a cozy embrace. For a fresh twist, I sometimes serve them alongside a simple arugula salad tossed in lemon vinaigrette, the peppery greens cutting through the richness beautifully.
Parmesan-Crusted Pork Chops
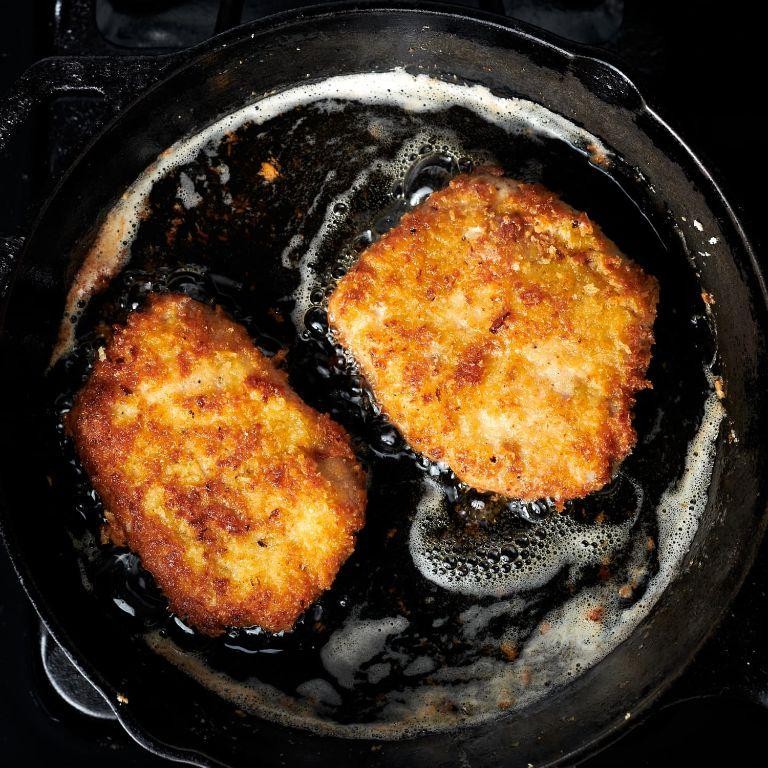
Evenings like this call for something comforting yet elegant, the kind of meal that fills the kitchen with warmth and the promise of a quiet, satisfying dinner. Parmesan-crusted pork chops have become my go-to for these moments, offering a crispy, golden exterior that gives way to tender, juicy meat with every bite.
3
servings15
minutes18
minutesIngredients
– 4 boneless pork chops, about 1-inch thick (I find this thickness gives the best balance of crust to meat)
– 1 cup grated Parmesan cheese, freshly grated if you can—it melts so much better
– 1/2 cup all-purpose flour (I like to use unbleached for a lighter crust)
– 2 large eggs, lightly beaten (room temperature eggs help the coating stick evenly)
– 1/2 cup panko breadcrumbs for that extra crunch I adore
– 1 teaspoon garlic powder, because a little garlic makes everything better
– 1/2 teaspoon paprika for a subtle warmth and color
– 1/4 cup olive oil, extra virgin is my go-to for its fruity notes
– Salt and black pepper, to season the pork chops generously
Instructions
1. Preheat your oven to 400°F and line a baking sheet with parchment paper for easy cleanup.
2. Pat the pork chops completely dry with paper towels—this helps the coating adhere better and prevents steaming.
3. Season both sides of the pork chops evenly with salt and black pepper.
4. Place the flour in a shallow dish and dredge each pork chop, shaking off any excess.
5. Dip the floured pork chops into the beaten eggs, ensuring they’re fully coated.
6. In another shallow dish, mix the Parmesan cheese, panko breadcrumbs, garlic powder, and paprika.
7. Press each pork chop firmly into the Parmesan mixture, coating both sides thoroughly for a even crust.
8. Heat the olive oil in a large oven-safe skillet over medium-high heat until it shimmers, about 2 minutes.
9. Carefully place the pork chops in the skillet and sear for 3 minutes until the bottom is golden brown.
10. Flip the pork chops and sear the other side for another 3 minutes until equally golden.
11. Transfer the skillet to the preheated oven and bake for 10–12 minutes, until the internal temperature reaches 145°F.
12. Remove the pork chops from the oven and let them rest on a cutting board for 5 minutes to allow the juices to redistribute.
Hearty and satisfying, these pork chops emerge with a crackling Parmesan crust that contrasts beautifully with the succulent interior. Serve them alongside a simple arugula salad to cut through the richness, or slice them over creamy polenta for a cozy, complete meal that feels both rustic and refined.
Lemon Butter Salmon

Years from now, I imagine I’ll still remember this quiet Tuesday evening, the way the lemon scent filled my kitchen while golden light slanted through the window. There’s something profoundly comforting about this simple salmon—how it transforms from raw to radiant with just a few humble ingredients. It feels less like cooking and more like a gentle ritual.
2
servings10
minutes12
minutesIngredients
– 1 lb salmon fillet, skin-on (I find the skin keeps it wonderfully moist)
– 3 tbsp unsalted butter (I always use European-style for its richer flavor)
– 1 lemon, thinly sliced (Meyer lemons are my favorite when in season)
– 2 cloves garlic, minced (freshly minced makes all the difference)
– 1 tbsp olive oil (extra virgin is my go-to for its fruity notes)
– 1/4 tsp sea salt (I prefer flaky Maldon salt here)
– 1/4 tsp black pepper, freshly ground
– 2 tbsp fresh parsley, chopped (from my little windowsill herb garden)
Instructions
1. Preheat your oven to 400°F and line a baking sheet with parchment paper.
2. Pat the salmon fillet completely dry with paper towels—this helps achieve a beautiful sear.
3. Rub the salmon evenly with olive oil, then season both sides with sea salt and black pepper.
4. Heat an oven-safe skillet over medium-high heat for 2 minutes until properly hot.
5. Place the salmon skin-side up in the hot skillet and sear for 3 minutes until a golden crust forms.
6. Flip the salmon carefully using a thin spatula to keep the sear intact.
7. Arrange the thin lemon slices over the top of the salmon in a single layer.
8. Add the butter and minced garlic to the skillet around the salmon.
9. Baste the salmon continuously with the melted butter for 1 minute using a spoon.
10. Transfer the skillet to the preheated oven and bake for 8 minutes.
11. Check for doneness—the salmon should flake easily with a fork but remain moist.
12. Remove from oven and let rest for 3 minutes to allow juices to redistribute.
13. Sprinkle with fresh chopped parsley just before serving.
Keeping it simple lets the salmon shine—the flesh stays remarkably tender while the edges crisp slightly. That butter-lemon sauce clinging to each flake makes every bite both rich and bright. Sometimes I’ll serve it over creamy polenta or alongside roasted asparagus, letting that golden sauce pool around everything.
Keto Cheeseburger Casserole
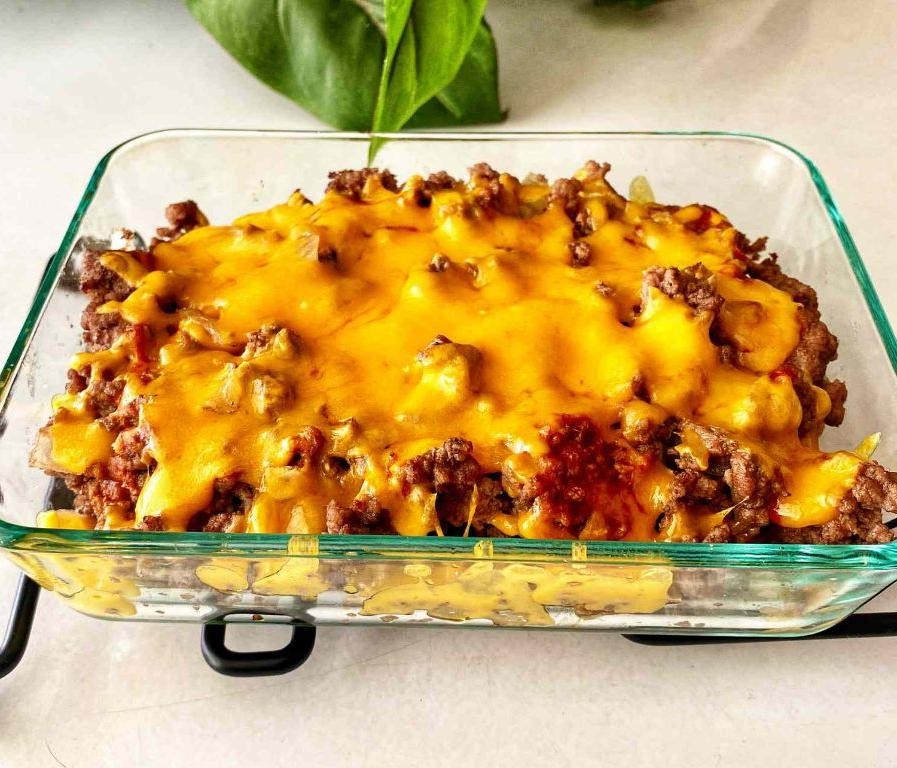
Dusk settles outside my kitchen window as I prepare this comforting dish, the kind that fills the house with warmth and memories. There’s something deeply satisfying about transforming classic burger flavors into a cozy casserole that nourishes both body and soul. This keto version lets me indulge without guilt, each layer telling a story of comfort and care.
6
portions20
minutes45
minutesIngredients
– 1 lb ground beef (I like 80/20 for richer flavor)
– 1 medium yellow onion, finely diced (the sweet variety is my favorite here)
– 2 cloves garlic, minced (freshly crushed releases the most aroma)
– 1 cup sugar-free tomato sauce (I prefer the brand with no added herbs)
– 1 tbsp yellow mustard (the classic ballpark style works perfectly)
– 8 oz cream cheese, softened (room temperature blends so much smoother)
– 1 cup heavy cream (the high-fat content creates wonderful richness)
– 2 cups shredded cheddar cheese (I always buy blocks and shred my own for better melting)
– 6 slices sugar-free bacon, cooked and crumbled (baked until crispy is my method)
– 1 tsp smoked paprika (this adds that beautiful grill-like flavor)
– ½ tsp black pepper (freshly ground makes all the difference)
– ¼ tsp sea salt (I use fine grain for even distribution)
Instructions
1. Preheat your oven to 375°F and grease a 9×13 inch baking dish with butter or cooking spray.
2. Brown 1 lb ground beef in a large skillet over medium-high heat for 8-10 minutes, breaking it into small crumbles with a wooden spoon.
3. Add 1 diced yellow onion and cook for 5 minutes until translucent and fragrant.
4. Stir in 2 minced garlic cloves and cook for exactly 1 minute until aromatic but not browned.
5. Drain any excess grease from the skillet, leaving about 1 tablespoon for flavor.
6. Add 1 cup sugar-free tomato sauce and 1 tbsp yellow mustard, stirring until fully incorporated.
7. In a separate bowl, whisk together 8 oz softened cream cheese and 1 cup heavy cream until completely smooth with no lumps.
8. Spread the meat mixture evenly in the prepared baking dish.
9. Pour the cream cheese mixture over the meat, spreading gently to cover completely.
10. Sprinkle 2 cups shredded cheddar cheese evenly over the entire surface.
11. Top with 6 crumbled bacon slices and 1 tsp smoked paprika for that smoky depth.
12. Bake at 375°F for 25-30 minutes until the cheese is golden and bubbly around the edges.
13. Let rest for 10 minutes before serving to allow the layers to set properly.
14. Season with ½ tsp black pepper and ¼ tsp sea salt just before serving. The creamy cheese sauce melds beautifully with the savory beef, creating layers of texture that comfort with every bite. Try serving it alongside crisp lettuce cups for a fun, hands-on meal that brings everyone to the table smiling.
Spinach and Feta Stuffed Chicken
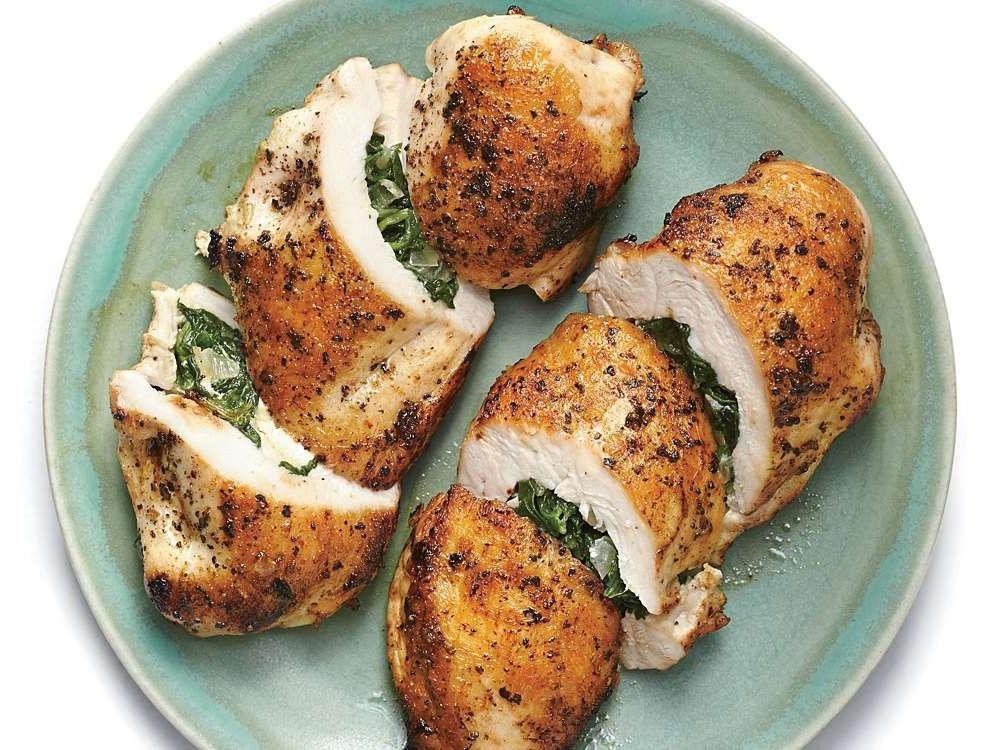
Looking back at my kitchen notebook, I remember the first time I tried stuffing chicken—how the simple act of filling, rolling, and baking transformed ordinary ingredients into something quietly spectacular. Last Tuesday’s drizzle outside made this spinach and feta version feel especially comforting, like a warm hug from the oven.
3
portions20
minutes35
minutesIngredients
– 4 boneless, skinless chicken breasts (I like to pick ones of even thickness for uniform cooking)
– 10 oz fresh spinach (those vibrant green leaves wilt down so much—don’t be shy!)
– 1 cup crumbled feta cheese (I always grab the block and crumble it myself for better texture)
– 2 cloves garlic, minced (freshly minced makes all the difference here)
– 1 tbsp extra virgin olive oil (my go-to for its gentle fruity notes)
– 1 tsp dried oregano
– ½ tsp black pepper
– ½ tsp salt (I use fine sea salt for even distribution)
– ¼ cup all-purpose flour (just enough for a light, golden coating)
Instructions
1. Preheat your oven to 375°F and lightly grease a baking dish with olive oil.
2. Heat 1 tablespoon of olive oil in a large skillet over medium heat until it shimmers.
3. Add the minced garlic and sauté for 1 minute until fragrant but not browned.
4. Add all the fresh spinach and cook, stirring frequently, for 3–4 minutes until fully wilted.
5. Transfer the spinach mixture to a colander and press out excess liquid with a spoon (this prevents a soggy filling).
6. In a medium bowl, combine the wilted spinach, crumbled feta, dried oregano, black pepper, and salt.
7. Place one chicken breast between two pieces of plastic wrap and pound with a rolling pin to ¼-inch thickness.
8. Repeat with all chicken breasts, keeping them evenly thin for consistent rolling.
9. Spoon ¼ of the spinach-feta mixture onto the center of each pounded chicken breast.
10. Roll each breast tightly around the filling, tucking in the sides as you go to seal it.
11. Secure each roll with 2–3 toothpicks inserted diagonally to hold its shape.
12. Dredge each stuffed chicken roll in all-purpose flour, coating lightly on all sides.
13. Place the rolls seam-side down in the prepared baking dish.
14. Bake for 25–30 minutes until the internal temperature reaches 165°F on an instant-read thermometer.
15. Let the chicken rest for 5 minutes before carefully removing the toothpicks.
Remember resting the chicken allows juices to redistribute, keeping it moist. Rolling tightly ensures the filling stays enclosed, and checking the temperature guarantees perfect doneness. Really, the tender chicken gives way to that creamy, garlicky filling in the most satisfying way—serve it sliced over lemony orzo or with roasted cherry tomatoes for a burst of color.
Cauliflower Fried Rice

Folding the rice-like cauliflower florets between my palms, I remember how this humble vegetable transforms under careful hands. Sometimes the simplest shifts in preparation reveal the most comforting meals, especially on quiet evenings when the kitchen becomes a sanctuary. This version feels like a warm embrace after long days, with each ingredient chosen for both flavor and the gentle rhythm of cooking.
15
minutes12
minutesIngredients
– 1 large head cauliflower, riced (I find the texture is best when pulsed briefly in the food processor, leaving some tiny florets for variety)
– 2 tablespoons sesame oil (toasted sesame oil adds a wonderful nutty depth that regular oil misses)
– 2 large eggs, lightly beaten (I let mine sit at room temperature for about 10 minutes—they blend more smoothly into the pan)
– 1 cup frozen peas and carrots mix (no need to thaw; the frozen bits help cool the pan at just the right moment)
– 3 tablespoons soy sauce (I reach for reduced-sodium soy sauce to better control the saltiness)
– 2 green onions, thinly sliced (saving the vibrant green tops for garnish makes the dish look as lovely as it tastes)
Instructions
1. Heat a large skillet or wok over medium-high heat until a drop of water sizzles and evaporates within 2 seconds.
2. Pour 2 tablespoons of sesame oil into the hot skillet, swirling to coat the surface evenly.
3. Add the beaten eggs to the skillet and cook for 45 seconds without stirring to let them set into a thin sheet.
4. Use a spatula to scramble the cooked eggs into small, fluffy curds, then transfer them to a clean plate.
5. Place the frozen peas and carrots mix directly into the same skillet and stir continuously for 3 minutes until they are bright in color and no longer icy.
6. Add the riced cauliflower to the skillet and cook for 5 minutes, stirring frequently, until it becomes tender and slightly golden at the edges.
7. Drizzle 3 tablespoons of soy sauce over the cauliflower mixture, stirring to distribute it uniformly.
8. Return the scrambled eggs to the skillet and gently fold them into the cauliflower and vegetables.
9. Sprinkle the sliced green onions over the top and cook for 1 final minute to warm them through.
10. Remove the skillet from the heat and let the fried rice rest for 2 minutes before serving to allow the flavors to meld. Knowing this dish holds a delicate balance between the cauliflower’s gentle crunch and the savory soy sauce makes each bite a small revelation. I love serving it in shallow bowls with a sprinkle of extra green onions, or sometimes folding in leftover roasted chicken for a heartier meal that still feels light and nourishing.
Coconut Curry Chicken

Years of autumn evenings have taught me that some dishes cradle you more than others, wrapping the kitchen in warmth that settles deep in the bones. This coconut curry chicken is one of those gentle comforts, simmering patiently until the flavors melt into something quietly profound.
4
servings15
minutes44
minutesIngredients
– 1.5 lbs boneless, skinless chicken thighs (I find thighs stay juicier than breasts in long simmers)
– 1 tbsp coconut oil (the unrefined kind with that subtle tropical scent)
– 1 yellow onion, diced (sweet varieties like Vidalia balance the spice so well)
– 3 garlic cloves, minced (freshly crushed releases the most aromatic oils)
– 1 tbsp freshly grated ginger (I keep a knob in the freezer for easy grating)
– 2 tbsp red curry paste (check the heat level—this brand gives a slow warmth)
– 1 (13.5 oz) can full-fat coconut milk (shaken well before opening)
– 1 cup chicken broth (homestock if you have it, but low-sodium works beautifully)
– 1 tbsp fish sauce (that funky saltiness is essential, don’t skip it)
– 1 tbsp brown sugar (just enough to round the edges without sweetness)
– 1 red bell pepper, sliced into thin strips (for color and a crisp-tender bite)
– 1 lime, juiced (freshly squeezed right at the end brightens everything)
– ¼ cup fresh cilantro, chopped (stems and all for extra herbal depth)
Instructions
1. Pat the chicken thighs completely dry with paper towels.
2. Cut the chicken into 1-inch cubes, trimming away any excess fat.
3. Heat the coconut oil in a large Dutch oven over medium heat for 90 seconds.
4. Add the chicken in a single layer, working in batches if needed to avoid crowding.
5. Sear the chicken for 3 minutes per side until golden brown but not cooked through.
6. Transfer the chicken to a clean plate using tongs.
7. Add the diced onion to the same pot, scraping up any browned bits from the bottom.
8. Sauté the onion for 5 minutes until translucent and fragrant.
9. Stir in the minced garlic and grated ginger, cooking for 60 seconds until aromatic.
10. Add the red curry paste, stirring constantly for 2 minutes to toast the spices.
11. Pour in the coconut milk, using a whisk to fully incorporate the curry paste.
12. Add the chicken broth, fish sauce, and brown sugar, stirring to combine.
13. Return the seared chicken and any accumulated juices to the pot.
14. Bring the curry to a gentle simmer, then reduce heat to low.
15. Cover the pot and simmer for 25 minutes, stirring once halfway through.
16. Add the sliced bell pepper, submerging it in the sauce.
17. Simmer uncovered for 8 minutes until the pepper is tender-crisp.
18. Remove the pot from heat and stir in the fresh lime juice.
19. Fold in the chopped cilantro just before serving.
Velvety coconut milk hugs each tender piece of chicken, while the peppers offer little bursts of freshness against the deep, spiced broth. I love ladling it over jasmine rice so the grains drink up the golden sauce, or spooning it into shallow bowls with naan for dipping into every last drop.
Zoodle Chicken Soup

Dusk settles outside my kitchen window, the steam from the pot fogging the glass as I stir this simple soup that feels like a warm hug on chilly evenings. There’s something deeply comforting about transforming zucchini into tender noodles that cradle the chicken and vegetables in each spoonful. Gently ladling this soup into bowls, I’m always struck by how the zucchini noodles maintain just enough bite while soaking up the savory broth, creating a texture that’s both substantial and delicate. The subtle sweetness from the carrots and celery balances beautifully with the rich chicken flavor, making this feel like a lighter version of the classic comfort food—perfect for serving in deep bowls with a sprinkle of fresh parsley or even with a crusty piece of sourdough for dipping into that golden broth.
Garlic Butter Steak Bites
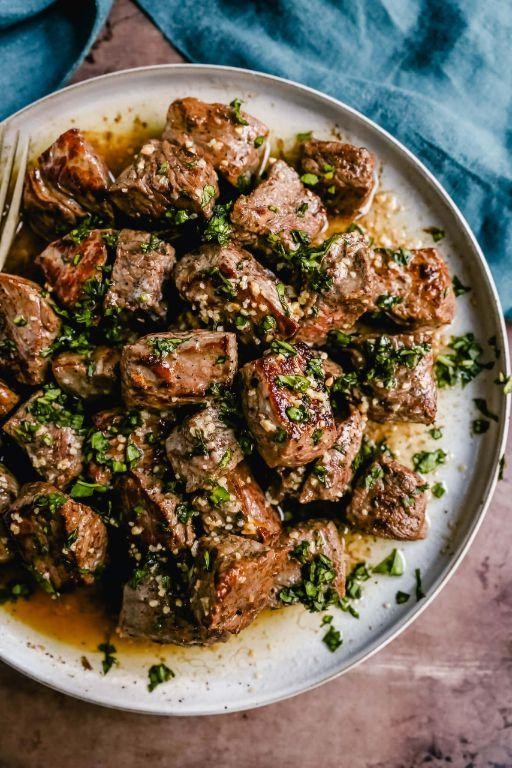
Zestful evenings call for simple comforts, the kind that fill the kitchen with warmth and the heart with quiet satisfaction. Tonight, I find myself drawn to the straightforward pleasure of preparing garlic butter steak bites, a dish that feels both indulgent and deeply grounding.
3
servings10
minutes8
minutesIngredients
– 1.5 lbs sirloin steak, cut into 1-inch cubes (I find sirloin offers the perfect balance of flavor and tenderness for this)
– 4 tbsp unsalted butter (I always keep mine cold until the very moment it hits the pan)
– 4 cloves garlic, minced (freshly minced garlic makes all the difference here)
– 2 tbsp extra virgin olive oil (my go-to for its fruity notes)
– 1 tsp kosher salt (I prefer its clean, less salty punch compared to table salt)
– 1/2 tsp freshly ground black pepper (freshly cracked pepper releases so much more aroma)
– 2 tbsp fresh parsley, chopped (the bright green flecks make the final dish sing)
Instructions
1. Pat the cubed steak completely dry using paper towels.
2. Season the dried steak cubes evenly on all sides with the kosher salt and freshly ground black pepper.
3. Place a large skillet over medium-high heat and add the 2 tablespoons of extra virgin olive oil.
4. Heat the oil for 90 seconds, until it shimmers visibly across the surface of the pan.
5. Carefully add the seasoned steak cubes to the hot skillet in a single layer, ensuring they aren’t crowded.
6. Sear the steak bites without moving them for 2 minutes to develop a deep brown crust on the first side.
7. Flip each steak bite using tongs and sear the opposite side for another 2 minutes.
8. Reduce the heat to medium-low and push the seared steak bites to one side of the skillet.
9. Add the 4 tablespoons of cold, unsalted butter to the empty side of the skillet.
10. Once the butter melts and begins to foam, add the 4 cloves of minced garlic to the butter.
11. Cook the garlic in the butter for exactly 60 seconds, stirring constantly, until fragrant but not browned.
12. Toss the steak bites in the garlic butter sauce to coat them thoroughly.
13. Remove the skillet from the heat and stir in the 2 tablespoons of chopped fresh parsley.
14. Let the steak bites rest in the skillet for 3 minutes before serving to allow the juices to redistribute.
What emerges are tender, juicy morsels with a beautifully seared crust that gives way to a garlic-infused, buttery interior. I love serving these straight from the skillet with crusty bread to soak up every last drop of that glorious sauce, or scattered over a simple bed of arugula for a quick, elegant supper.
Buffalo Cauliflower Bites

Perhaps there’s something quietly comforting about transforming humble vegetables into something that feels indulgent, a small kitchen alchemy that turns cauliflower into these spicy, craveable bites.
3
servings15
minutes32
minutesIngredients
- 1 large head cauliflower, cut into bite-sized florets (I find the smaller pieces get wonderfully crispy)
- 3/4 cup all-purpose flour (I sometimes use half whole wheat for a nuttier flavor)
- 3/4 cup water, cold from the tap
- 1 tsp garlic powder
- 1/2 tsp smoked paprika, my secret for that subtle depth
- 1/2 cup buffalo sauce, Frank’s RedHot is my nostalgic favorite
- 2 tbsp unsalted butter, melted (it helps the sauce cling beautifully)
- 1 tbsp olive oil, for brushing the baking sheet
Instructions
- Preheat your oven to 450°F and position one rack in the center.
- Brush a large baking sheet evenly with 1 tablespoon of olive oil, making sure to coat the entire surface to prevent sticking.
- In a medium bowl, whisk together 3/4 cup all-purpose flour, 3/4 cup cold water, 1 teaspoon garlic powder, and 1/2 teaspoon smoked paprika until a smooth batter forms with no dry spots.
- Dip each cauliflower floret into the batter, letting excess drip back into the bowl before placing them in a single layer on the prepared baking sheet.
- Bake for 15 minutes at 450°F until the batter coating looks dry and matte. Tip: Rotate the pan halfway through for even browning.
- While the cauliflower bakes, whisk together 1/2 cup buffalo sauce and 2 tablespoons melted butter in a large bowl until fully combined.
- Remove the cauliflower from the oven and carefully flip each piece using tongs.
- Return to the oven and bake for another 10 minutes at 450°F until the edges begin turning golden brown.
- Transfer the hot cauliflower directly into the buffalo sauce mixture and gently toss until every piece is evenly coated. Tip: Work quickly while the cauliflower is hot so the sauce adheres properly.
- Spread the sauced cauliflower back onto the baking sheet in a single layer.
- Bake for 5-7 minutes at 450°F until the sauce appears set and slightly sticky. Tip: Watch closely during this final stage as the sauce can go from perfect to overdone quickly.
My favorite thing about these is how the crisp-tender cauliflower gives way to that sharp, vinegary heat. They’re wonderful piled high with celery sticks and creamy blue cheese dressing for dipping, though I’ve been known to tuck them into wraps with cool shredded lettuce when I want something more substantial.
Conclusion
Whether you’re new to keto or a seasoned pro, these 32 delicious recipes make low-carb eating simple and satisfying. We hope you’ll find some new favorites to add to your meal rotation! Don’t forget to leave a comment sharing which recipes you loved most and pin this article to your Pinterest boards for easy reference later. Happy cooking!


