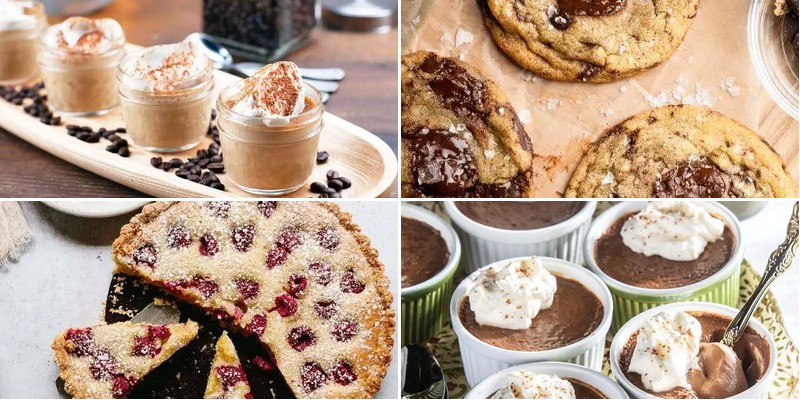
Finally, you can satisfy your sweet tooth without derailing your keto lifestyle! We’ve gathered 30 irresistible dessert recipes that prove low-carb living doesn’t mean sacrificing indulgence. From creamy cheesecakes to rich chocolate treats, these easy-to-make delights will become your new favorites. Get ready to discover delicious desserts that keep you on track while feeling completely decadent—your sweet cravings are about to be happily met!
Chocolate Avocado Mousse
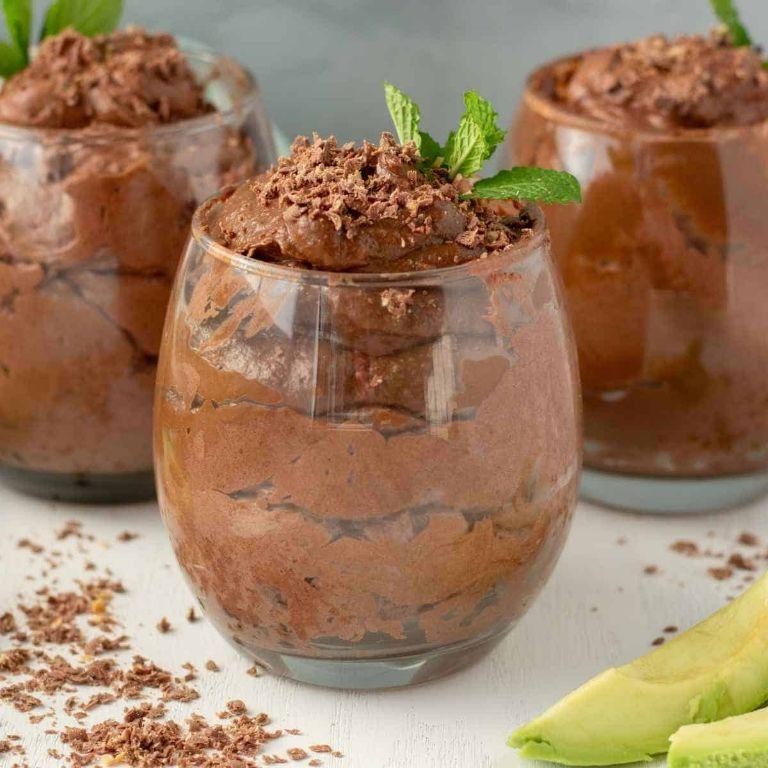
Finally, after years of experimenting with healthier dessert alternatives, I stumbled upon this chocolate avocado mousse that even my most skeptical friends now request at gatherings. I first tried it during a weekend baking marathon when I’d run out of heavy cream but had a bowl of perfectly ripe avocados staring back at me. The result was so surprisingly decadent that it’s become my go-to dinner party trick when I want something impressive but secretly simple.
5
servings15
minutesIngredients
– 2 large ripe Hass avocados, chilled
– 1/2 cup high-quality Dutch-process cocoa powder
– 1/3 cup pure maple syrup, grade A dark amber
– 1/4 cup full-fat coconut cream, chilled
– 2 teaspoons pure vanilla extract
– 1/4 teaspoon fine sea salt
– 1/4 cup dark chocolate chips, 70% cacao, melted and cooled
Instructions
1. Halve and pit both chilled avocados, then scoop the flesh into a high-speed blender.
2. Add Dutch-process cocoa powder, dark amber maple syrup, chilled coconut cream, pure vanilla extract, and fine sea salt to the blender.
3. Blend on medium speed for 30 seconds until ingredients begin to combine, then scrape down the sides with a spatula.
4. Increase blender speed to high and process for exactly 60 seconds until completely smooth and no avocado flecks remain.
5. Drizzle in the cooled melted dark chocolate chips while blender is running on low speed.
6. Continue blending for another 30 seconds until chocolate is fully incorporated and mixture appears glossy.
7. Divide the mousse evenly among four 6-ounce serving glasses using a piping bag for professional presentation.
8. Cover glasses tightly with plastic wrap, ensuring the wrap touches the mousse surface to prevent oxidation.
9. Refrigerate for at least 2 hours, or until the mousse reaches a firm, spoonable consistency.
10. Garnish with chocolate shavings or fresh berries immediately before serving.
Outrageously creamy with a velvety mouthfeel that belies its healthy ingredients, this mousse delivers deep chocolate intensity balanced by subtle earthy notes from the avocado. The texture remains perfectly stable for hours, making it ideal for preparing ahead when entertaining. I love serving it in elegant coupe glasses with a sprinkle of flaky sea salt for that perfect sweet-salty contrast that keeps everyone guessing about the secret ingredient.
Almond Flour Brownies
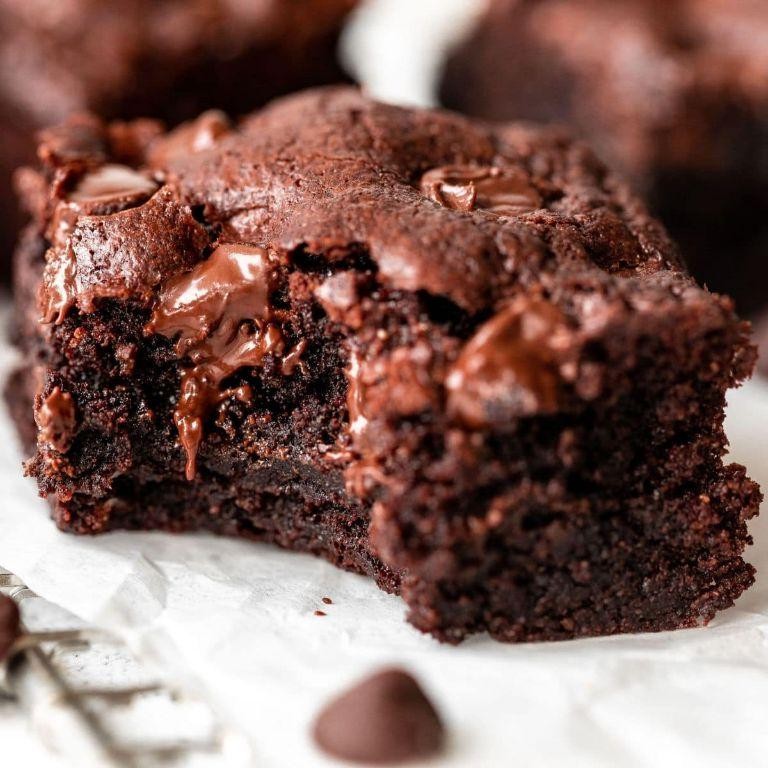
Haven’t we all been there? Standing in the kitchen, craving something decadently chocolatey but wanting to keep things a bit healthier—that’s exactly where I found myself last weekend after my gluten-free sister came to visit. These almond flour brownies have become my go-to solution for satisfying those intense chocolate cravings while keeping things nourishing and delicious.
16
portions15
minutes25
minutesIngredients
- 1 cup blanched almond flour
- 3/4 cup Dutch-process cocoa powder
- 1/2 cup clarified butter, melted and cooled
- 3 pasture-raised eggs, lightly beaten
- 3/4 cup coconut sugar
- 1 teaspoon pure vanilla extract
- 1/2 teaspoon fine sea salt
- 1/2 cup dark chocolate chunks (70% cacao)
Instructions
- Preheat your oven to 350°F and line an 8×8-inch baking pan with parchment paper, leaving overhang on two sides for easy removal.
- Whisk together the blanched almond flour, Dutch-process cocoa powder, and fine sea salt in a medium bowl until fully combined and no lumps remain.
- In a separate large bowl, vigorously whisk the pasture-raised eggs and coconut sugar for exactly 2 minutes until the mixture becomes pale and slightly thickened.
- Stream in the cooled clarified butter while continuously whisking to create an emulsion.
- Stir in the pure vanilla extract until just incorporated.
- Gently fold the dry ingredients into the wet mixture using a spatula, being careful not to overmix—stop when just combined.
- Fold in the dark chocolate chunks, reserving 2 tablespoons for sprinkling on top.
- Transfer the batter to your prepared pan and spread evenly with an offset spatula.
- Sprinkle the reserved chocolate chunks across the surface for visual appeal.
- Bake for 22-25 minutes until the edges are set but the center still appears slightly underdone when tested with a toothpick.
- Cool completely in the pan on a wire rack for at least 1 hour before slicing.
Keep these brownies stored in an airtight container—they actually improve in texture after 24 hours as the flavors meld together. The combination of almond flour and clarified butter creates an incredibly fudgy, moist crumb that melts on your tongue, while the dark chocolate chunks provide satisfying pockets of intense flavor. I love serving these slightly warmed with a dollop of coconut whipped cream for an elegant dessert, or cutting them into small squares for afternoon tea.
Coconut Keto Macaroons

After my third attempt at creating the perfect keto-friendly dessert that actually satisfies my sweet tooth, I finally nailed these coconut macaroons that taste just like the bakery version but without the sugar crash. As someone who’s always experimenting in the kitchen, I love how these come together with minimal fuss but deliver maximum flavor impact.
12
portions15
minutes22
minutesIngredients
- 3 cups unsweetened shredded coconut
- 4 large pasture-raised eggs, lightly beaten
- 1/2 cup erythritol sweetener
- 1/4 cup coconut cream, chilled
- 2 teaspoons pure vanilla extract
- 1/4 teaspoon fine sea salt
- 4 ounces sugar-free dark chocolate, chopped
- 1 tablespoon coconut oil
Instructions
- Preheat your oven to 325°F and line a baking sheet with parchment paper.
- Combine the unsweetened shredded coconut, erythritol sweetener, and fine sea salt in a large mixing bowl.
- In a separate bowl, whisk together the lightly beaten pasture-raised eggs, chilled coconut cream, and pure vanilla extract until fully incorporated.
- Pour the wet ingredients into the dry ingredients and mix thoroughly until the coconut is evenly coated and the mixture holds together when pressed. Tip: The mixture should be moist but not wet; if it’s too dry, add another tablespoon of coconut cream.
- Using a 2-tablespoon cookie scoop, portion the mixture onto the prepared baking sheet, spacing them 2 inches apart.
- Bake for 18-22 minutes until the edges are golden brown and the tops are lightly toasted. Tip: Rotate the baking sheet halfway through baking for even browning.
- Transfer the macaroons to a wire rack and cool completely for 30 minutes.
- While cooling, create a double boiler by placing a heatproof bowl over a saucepan with 1 inch of simmering water.
- Melt the chopped sugar-free dark chocolate and coconut oil in the double boiler, stirring constantly until smooth and glossy.
- Dip the base of each cooled macaroon into the melted chocolate, allowing excess to drip off. Tip: For clean dipping, tilt the bowl and use the edge to scrape off excess chocolate.
- Return the dipped macaroons to the parchment-lined sheet and refrigerate for 15 minutes until the chocolate sets.
You’ll love how these macaroons achieve that perfect crisp exterior while remaining wonderfully chewy inside. The dark chocolate drizzle adds a sophisticated bitterness that balances the natural coconut sweetness beautifully. Try serving them slightly chilled with your afternoon coffee for an elegant treat that feels indulgent yet stays perfectly keto-friendly.
No-Bake Peanut Butter Cheesecake
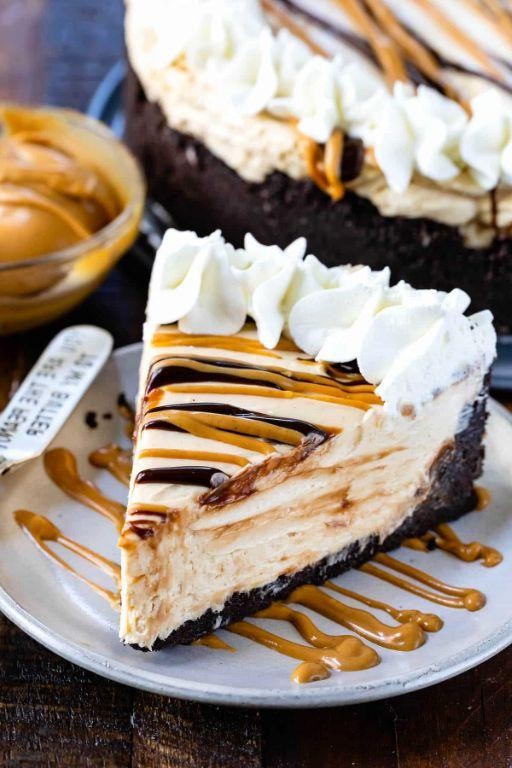
Zesty and utterly irresistible, this no-bake peanut butter cheesecake has become my go-to dessert for those sweltering summer days when turning on the oven feels like a crime against comfort. I first whipped this up during a heatwave last July when my air conditioning decided to take an unscheduled vacation, and now it’s the most requested recipe at every family gathering. There’s something magical about how the creamy peanut butter filling contrasts with that crisp graham cracker crust that keeps everyone coming back for just one more sliver.
8
servings30
minutesIngredients
- 1 ½ cups graham cracker crumbs, finely processed
- 6 tablespoons unsalted European-style butter, melted
- ¼ cup granulated cane sugar
- 16 ounces full-fat cream cheese, at room temperature
- 1 cup smooth natural peanut butter
- 1 cup confectioners’ sugar, sifted
- 1 teaspoon pure vanilla extract
- 1 ½ cups heavy whipping cream, chilled
- ¼ cup roasted salted peanuts, roughly chopped
Instructions
- Combine graham cracker crumbs, melted European-style butter, and granulated cane sugar in a medium mixing bowl until the mixture resembles wet sand.
- Firmly press the crumb mixture into the bottom of a 9-inch springform pan using the flat bottom of a measuring cup to create an even, compact layer.
- Chill the crust in the refrigerator for exactly 20 minutes to set while preparing the filling.
- In the bowl of a stand mixer fitted with the paddle attachment, beat the room-temperature cream cheese on medium speed for 2 minutes until completely smooth and free of lumps.
- Add the smooth natural peanut butter and continue beating for 1 additional minute until fully incorporated.
- Gradually add the sifted confectioners’ sugar in three additions, scraping down the bowl with a rubber spatula between each addition to ensure thorough mixing.
- Mix in the pure vanilla extract until just combined, being careful not to overmix.
- Transfer the peanut butter mixture to a separate bowl and set aside.
- Thoroughly clean and dry the stand mixer bowl, then attach the whisk attachment.
- Pour the chilled heavy whipping cream into the clean bowl and whip on high speed until stiff peaks form, which should take approximately 3-4 minutes.
- Gently fold one-third of the whipped cream into the peanut butter mixture using a folding motion to lighten the base.
- Carefully fold in the remaining whipped cream until no white streaks remain, being mindful to maintain as much air as possible.
- Pour the filling over the chilled crust and smooth the top with an offset spatula.
- Cover the springform pan tightly with plastic wrap and refrigerate for a minimum of 6 hours, though overnight chilling yields the best texture.
- Just before serving, run a thin knife around the edge of the pan and carefully release the springform mechanism.
- Sprinkle the roughly chopped roasted salted peanuts evenly over the top as garnish.
Nothing compares to that first bite where the velvety peanut butter filling practically dissolves on your tongue while the salty peanuts provide the perfect textural counterpoint. For an elegant twist, I sometimes drizzle each slice with warm chocolate ganache or serve it alongside fresh raspberry coulis to cut through the richness. This cheesecake’s beauty lies in its versatility—it’s equally stunning at a casual backyard barbecue as it is at a formal dinner party, always earning compliments with its sophisticated flavor profile and impossibly creamy texture.
Lemon Cream Cheese Bars

Every time I catch a whiff of bright citrus, I’m transported back to my grandmother’s sun-drenched kitchen, where she’d bake these lemon cream cheese bars that somehow managed to be both decadent and refreshing. It’s the kind of recipe that feels like a warm hug but tastes like sunshine—perfect for when you want to impress at a potluck or simply treat yourself after a long day.
16
squares25
minutes45
minutesIngredients
- 1 ½ cups all-purpose flour
- ½ cup European-style unsalted butter, chilled and cubed
- ¼ cup granulated sugar
- 8 ounces full-fat cream cheese, at room temperature
- ¾ cup superfine sugar
- 2 pasture-raised eggs, lightly beaten
- ⅓ cup freshly squeezed lemon juice
- 1 tablespoon finely grated lemon zest
- ½ teaspoon pure vanilla extract
- ¼ teaspoon fine sea salt
- Powdered sugar for dusting
Instructions
- Preheat your oven to 350°F and line an 8×8-inch baking pan with parchment paper, allowing overhang on two sides.
- Combine 1 ½ cups all-purpose flour, ¼ cup granulated sugar, and ¼ teaspoon fine sea salt in a food processor.
- Add ½ cup chilled, cubed European-style unsalted butter and pulse until the mixture resembles coarse crumbs.
- Tip: For a flakier crust, ensure your butter is very cold and work quickly to prevent melting.
- Press the crust mixture firmly into the prepared pan, creating an even layer about ¼-inch thick.
- Par-bake the crust for 15 minutes at 350°F until lightly golden around the edges.
- While the crust bakes, beat 8 ounces room-temperature cream cheese and ¾ cup superfine sugar with an electric mixer on medium speed until completely smooth.
- Tip: Using room-temperature cream cheese prevents lumps in your filling—take it out about an hour before baking.
- Gradually add 2 lightly beaten pasture-raised eggs to the cream cheese mixture, mixing just until incorporated.
- Stir in ⅓ cup freshly squeezed lemon juice, 1 tablespoon finely grated lemon zest, and ½ teaspoon pure vanilla extract until fully combined.
- Pour the lemon-cream cheese filling over the warm crust and spread evenly with an offset spatula.
- Bake at 350°F for 25-30 minutes until the edges are set but the center still has a slight jiggle.
- Tip: The carryover heat will continue cooking the center—removing while slightly underdone prevents cracking.
- Cool completely in the pan on a wire rack, then refrigerate for at least 4 hours until thoroughly chilled.
- Lift the bars from the pan using the parchment overhang and dust generously with powdered sugar.
- Cut into 16 squares using a sharp knife wiped clean between cuts for neat edges.
Velvety cream cheese filling melts against the crisp shortbread base, while that vibrant lemon zest cuts through the richness with each tangy bite. I love serving these chilled with fresh raspberries or a dollop of lightly sweetened crème fraîche—the contrast between cool, creamy layers and buttery crust makes them utterly irresistible.
Vanilla Chia Seed Pudding
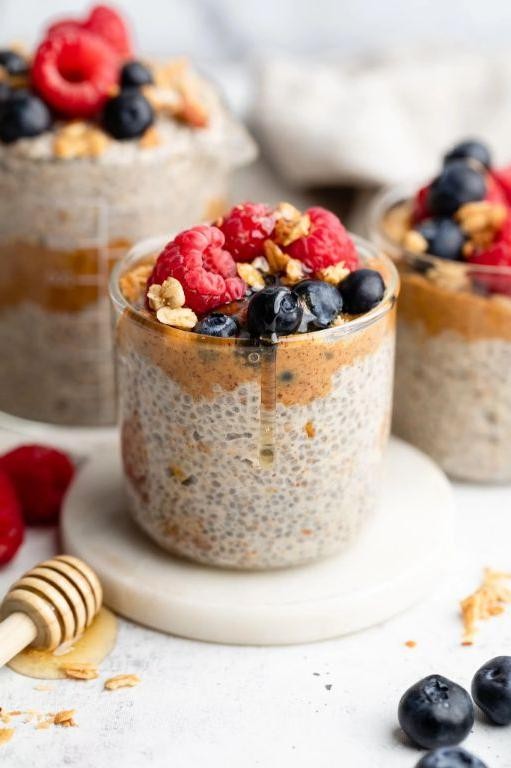
Vividly simple yet endlessly customizable, this vanilla chia seed pudding has become my go-to breakfast prep that never fails to impress. I first discovered this magical combination during a busy workweek when I needed something I could make ahead that would actually excite my taste buds in the morning—no more sad desk breakfasts for this food blogger!
2
servings5
minutesIngredients
– ½ cup organic white chia seeds
– 2 cups cold whole milk
– 2 tablespoons pure maple syrup
– 1 teaspoon vanilla bean paste
– Pinch of fine sea salt
Instructions
1. Combine ½ cup organic white chia seeds and 2 cups cold whole milk in a medium glass mixing bowl.
2. Whisk vigorously for 30 seconds to prevent clumping and ensure even distribution.
3. Add 2 tablespoons pure maple syrup while continuing to whisk.
4. Incorporate 1 teaspoon vanilla bean paste and a pinch of fine sea salt.
5. Continue whisking for another 45 seconds until the mixture appears homogeneous.
6. Cover the bowl tightly with plastic wrap, pressing it directly against the pudding surface.
7. Refrigerate for exactly 8 hours to achieve optimal gel formation.
8. Remove from refrigerator and whisk vigorously for 60 seconds to break up any remaining clumps.
9. Divide the pudding evenly among four 8-ounce serving jars.
10. Serve immediately or refrigerate covered for up to 5 days.
Gloriously creamy with a delicate tapioca-like texture, this pudding develops deeper vanilla notes as it rests. The tiny black specks from the vanilla bean paste create beautiful visual interest against the pale background. For an elegant presentation, I love layering it with fresh berries and toasted coconut flakes, or swirling in a tablespoon of fruit preserves just before serving.
Keto Snickerdoodle Cookies
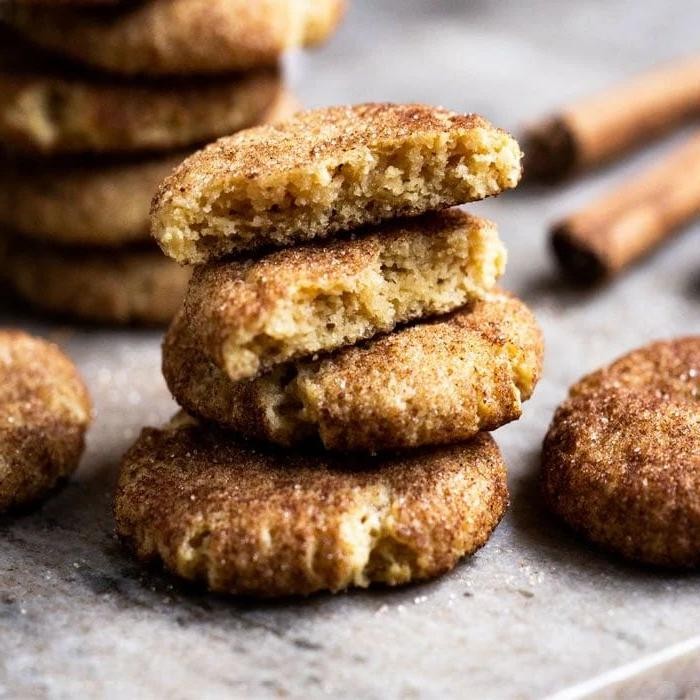
Oftentimes, when I’m craving something sweet but want to stick to my low-carb lifestyle, these keto snickerdoodles become my go-to treat—they remind me of baking with my grandmother, though she’d probably raise an eyebrow at my almond flour substitution! There’s something magical about that classic cinnamon-sugar flavor that feels both nostalgic and perfectly satisfying.
24
cookies15
minutes12
minutesIngredients
– 2 cups blanched almond flour
– 1/3 cup granulated erythritol
– 1/4 cup unsalted butter, clarified and cooled to room temperature
– 1 large pasture-raised egg, lightly beaten
– 1 teaspoon pure vanilla extract
– 1/2 teaspoon cream of tartar
– 1/4 teaspoon baking soda
– 1/4 teaspoon fine sea salt
– 1 tablespoon ground cinnamon
– 2 tablespoons powdered erythritol
Instructions
1. Preheat your oven to 350°F and line a baking sheet with parchment paper.
2. In a medium mixing bowl, whisk together 2 cups blanched almond flour, 1/3 cup granulated erythritol, 1/2 teaspoon cream of tartar, 1/4 teaspoon baking soda, and 1/4 teaspoon fine sea salt until thoroughly combined.
3. Add 1/4 cup clarified unsalted butter, 1 lightly beaten pasture-raised egg, and 1 teaspoon pure vanilla extract to the dry ingredients.
4. Mix with a spatula until a cohesive dough forms, being careful not to overwork the mixture.
5. In a small separate bowl, combine 1 tablespoon ground cinnamon with 2 tablespoons powdered erythritol for the coating.
6. Scoop 1 tablespoon portions of dough and roll between your palms to form smooth balls.
7. Roll each dough ball in the cinnamon-erythritol mixture until evenly coated.
8. Place the coated dough balls 2 inches apart on the prepared baking sheet.
9. Use the bottom of a glass to gently flatten each cookie to 1/4-inch thickness.
10. Bake at 350°F for 10-12 minutes until the edges are lightly golden and the centers appear set.
11. Remove from oven and let cool on the baking sheet for 5 minutes to firm up.
12. Transfer cookies to a wire rack to cool completely, about 20 minutes.
Heavenly when warm, these cookies develop a delicate crispness at the edges while maintaining a wonderfully soft, chewy center. The combination of almond flour and erythritol creates that classic snickerdoodle texture without the graininess some keto baked goods can have. For an extra special treat, I sometimes sandwich a dollop of keto-friendly vanilla ice cream between two cookies for the ultimate low-carb ice cream sandwich.
Sugar-Free Chocolate Bark
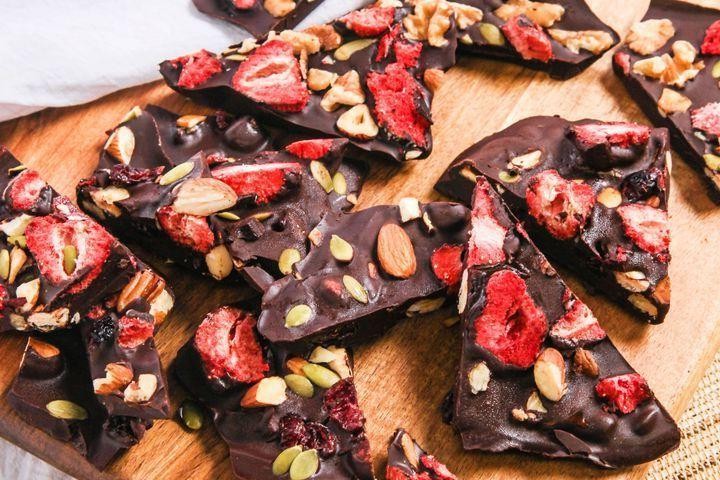
Finally, after years of trying to satisfy my chocolate cravings without the sugar crash, I’ve perfected this sugar-free chocolate bark that actually tastes indulgent. I first experimented with this recipe during last year’s holiday season when my diabetic aunt visited, and now it’s become my go-to healthy treat for movie nights and lunchbox surprises.
1
bark10
minutes5
minutesIngredients
– 2 cups sugar-free dark chocolate chips
– 1/2 cup roasted almonds, roughly chopped
– 1/4 cup unsweetened coconut flakes
– 1/4 cup raw pumpkin seeds
– 1 teaspoon pure vanilla extract
– 1/2 teaspoon Maldon sea salt flakes
Instructions
1. Line a standard baking sheet with parchment paper, ensuring the paper extends slightly beyond the edges for easy removal.
2. Create a double boiler by placing a heatproof bowl over a saucepan filled with 2 inches of simmering water, making sure the bowl doesn’t touch the water.
3. Add 2 cups of sugar-free dark chocolate chips to the bowl and melt them slowly over medium-low heat, stirring constantly with a silicone spatula for exactly 4-5 minutes until completely smooth and glossy.
4. Remove the bowl from heat and immediately stir in 1 teaspoon of pure vanilla extract using a folding motion to incorporate evenly without deflating the chocolate’s sheen.
5. Pour the melted chocolate onto the prepared parchment paper and spread into an even 1/4-inch thick layer using an offset spatula, working quickly before the chocolate begins to set.
6. Evenly sprinkle 1/2 cup of roughly chopped roasted almonds across the chocolate surface, followed by 1/4 cup of unsweetened coconut flakes and 1/4 cup of raw pumpkin seeds.
7. Gently press the toppings into the chocolate using the flat side of your spatula to ensure they adhere properly during setting.
8. Finish by scattering 1/2 teaspoon of Maldon sea salt flakes across the surface, creating small clusters for bursts of salinity.
9. Transfer the baking sheet to the refrigerator and chill for exactly 45 minutes until the bark is completely firm and snaps cleanly when broken.
10. Remove the chilled bark from the refrigerator and break it into irregular shards using your hands for a rustic appearance. Absolutely divine in its simplicity, this bark delivers satisfying snaps between your teeth while the roasted almonds provide crunch against the creamy chocolate base. I love serving these shards alongside fresh berries for contrast or crumbling them over Greek yogurt for breakfast – the salt flakes make each bite surprisingly sophisticated.
Raspberry Almond Tarts
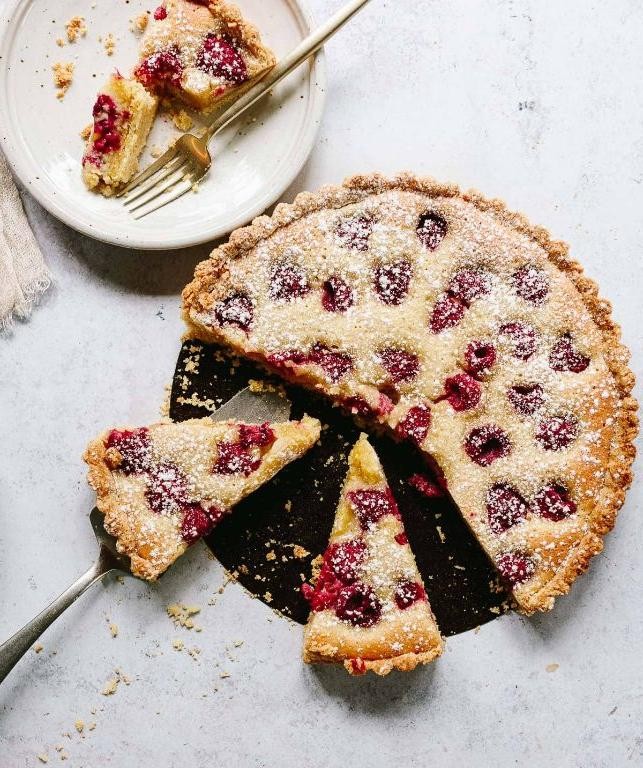
Dazzlingly simple yet elegant, these raspberry almond tarts have become my go-to dessert for impromptu gatherings. I first discovered this combination when my neighbor brought over a basket of freshly picked raspberries, and the nutty aroma of toasted almonds filled my kitchen. Now I always keep extra almond flour in my pantry for these spontaneous baking sessions.
6
portions30
minutes25
minutesIngredients
– 1 ½ cups all-purpose flour
– ½ cup European-style unsalted butter, chilled and cubed
– 3 tablespoons granulated sugar
– 1 large pasture-raised egg, lightly beaten
– 1 cup almond flour
– ½ cup confectioners’ sugar
– 6 tablespoons clarified butter
– 2 teaspoons pure almond extract
– 1 ½ cups fresh raspberries
– 1 tablespoon turbinado sugar for sprinkling
Instructions
1. Combine 1 ½ cups all-purpose flour, ½ cup chilled cubed butter, and 3 tablespoons granulated sugar in a food processor and pulse until mixture resembles coarse crumbs.
2. Add 1 lightly beaten pasture-raised egg and pulse just until dough comes together into a ball.
3. Divide dough into 6 equal portions and press each into individual 4-inch tart pans, ensuring even thickness across bottom and sides.
4. Chill tart shells in refrigerator for exactly 30 minutes to prevent shrinkage during baking.
5. Preheat oven to 375°F and place baking sheet on middle rack to preheat simultaneously.
6. Whisk together 1 cup almond flour, ½ cup confectioners’ sugar, 6 tablespoons clarified butter, and 2 teaspoons pure almond extract until smooth paste forms.
7. Remove chilled tart shells from refrigerator and prick bottoms thoroughly with fork to prevent bubbling.
8. Spread almond filling evenly among tart shells, filling each three-quarters full.
9. Arrange 1 ½ cups fresh raspberries in concentric circles over almond filling, gently pressing berries halfway into mixture.
10. Sprinkle 1 tablespoon turbinado sugar evenly over raspberries to create caramelized crust.
11. Place tarts on preheated baking sheet and bake at 375°F for 22-25 minutes until crust is golden brown and filling is set.
12. Cool tarts completely on wire rack before removing from pans to maintain structural integrity.
Creating these tarts always reminds me why I love textural contrasts in desserts. The crisp, buttery crust gives way to the dense, marzipan-like almond filling, while the raspberries provide bright acidity that cuts through the richness. Consider serving them slightly warm with a dollop of crème fraîche to highlight the tart berry notes against the sweet almond background.
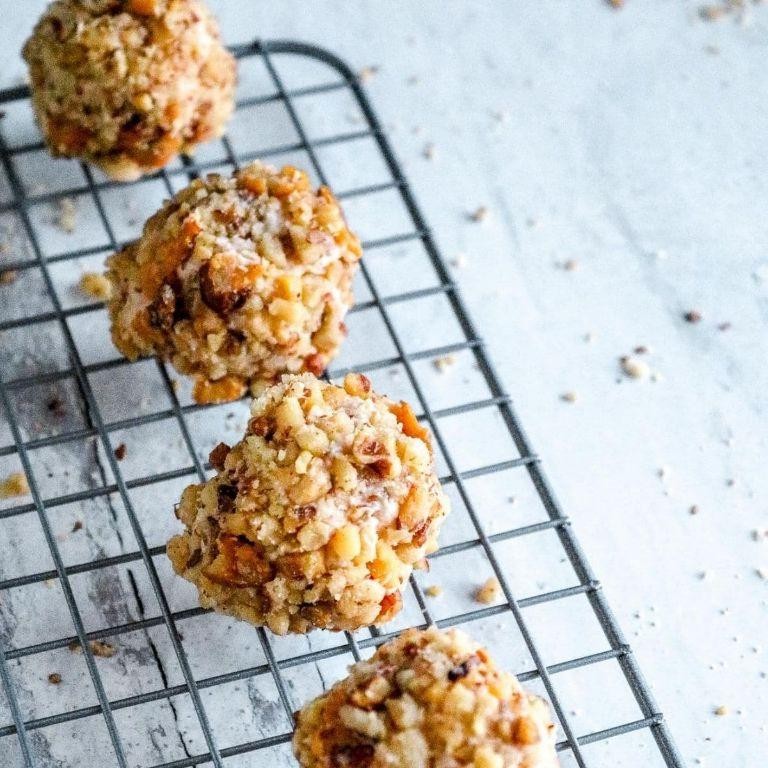
Pecan Pie Fat Bombs
Unbelievably, my quest for the perfect low-carb holiday treat led me to create these little gems after my third failed attempt at traditional pecan pie left my kitchen smelling like burnt sugar and regret. I’ve always believed that the best recipes come from kitchen disasters, and these fat bombs prove that sometimes the most delicious solutions are born from frustration.
12
fat bombs10
minutes4
minutesIngredients
- 1 cup raw pecans, finely chopped
- 1/2 cup coconut oil, refined
- 1/4 cup pure maple syrup
- 2 tbsp grass-fed butter, unsalted
- 1 tsp pure vanilla extract
- 1/2 tsp ground cinnamon
- 1/4 tsp sea salt, fine
- 1/4 cup coconut flour
Instructions
- Line a standard muffin tin with 12 silicone baking cups.
- Combine finely chopped pecans, refined coconut oil, pure maple syrup, and unsalted grass-fed butter in a medium saucepan over low heat.
- Stir constantly with a silicone spatula until the mixture becomes completely homogeneous and glossy, approximately 3-4 minutes.
- Remove the saucepan from heat and immediately whisk in pure vanilla extract, ground cinnamon, and fine sea salt until fully incorporated.
- Gradually fold in coconut flour using a folding motion until no dry spots remain and the mixture thickens noticeably.
- Divide the mixture evenly among the 12 prepared baking cups using a 1-tablespoon cookie scoop.
- Refrigerate the filled muffin tin for exactly 45 minutes until the fat bombs are firm to the touch and release cleanly from the cups.
- Transfer the chilled fat bombs to an airtight container, separating layers with parchment paper.
Surprisingly creamy with a satisfying crunch from the pecans, these little bombs deliver that classic pecan pie flavor without the sugar crash. I love serving them slightly chilled alongside black coffee for breakfast or crumbling them over Greek yogurt for an indulgent yet healthy dessert.
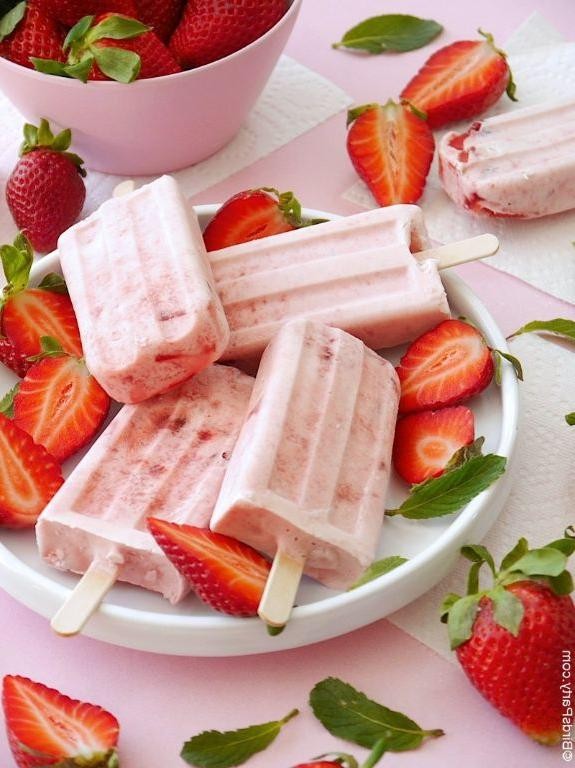
Strawberry Cream Popsicles
Huddled over my kitchen counter last summer, I discovered the magic that happens when peak-season strawberries meet rich cream—a revelation that inspired these dreamy popsicles. As someone who always buys too many berries at the farmer’s market, this became my go-to solution for transforming fleeting summer bounty into frozen perfection that captures sunshine in every bite.
8
popsicles25
minutes10
minutesIngredients
– 2 cups fresh ripe strawberries, hulled and quartered
– 1 cup heavy cream
– 1/2 cup granulated sugar
– 1/4 cup full-fat Greek yogurt
– 1 tablespoon freshly squeezed lemon juice
– 1 teaspoon pure vanilla extract
– 1/8 teaspoon fine sea salt
Instructions
1. Combine 2 cups quartered strawberries, 1/2 cup granulated sugar, and 1 tablespoon lemon juice in a medium saucepan.
2. Cook the strawberry mixture over medium heat for 8-10 minutes, stirring frequently until the berries break down and release their juices.
3. Remove the saucepan from heat and let the strawberry compote cool to room temperature, about 20 minutes.
4. Transfer the cooled strawberry mixture to a high-speed blender and puree until completely smooth, about 45 seconds.
5. Pour the strawberry puree through a fine-mesh sieve into a large mixing bowl, pressing with a spatula to extract maximum flavor while removing seeds.
6. Whisk in 1 cup heavy cream, 1/4 cup Greek yogurt, 1 teaspoon vanilla extract, and 1/8 teaspoon sea salt until fully incorporated and the mixture appears homogenous.
7. Divide the strawberry cream mixture evenly among 8 standard popsicle molds, leaving 1/4-inch headspace for expansion.
8. Insert popsicle sticks and freeze for at least 6 hours, or preferably overnight, until completely solid.
9. To unmold, run warm water over the exterior of the molds for 15-20 seconds, then gently pull the popsicles free.
Amazingly creamy with bright berry notes, these popsicles offer the perfect balance between rich dairy and vibrant fruit. The texture remains remarkably smooth without icy crystallization, making them feel like frozen strawberry cheesecake on a stick. For an elegant presentation, roll the unmolded popsicles in crushed freeze-dried strawberries before serving to guests.
Coffee Custard with Whipped Cream
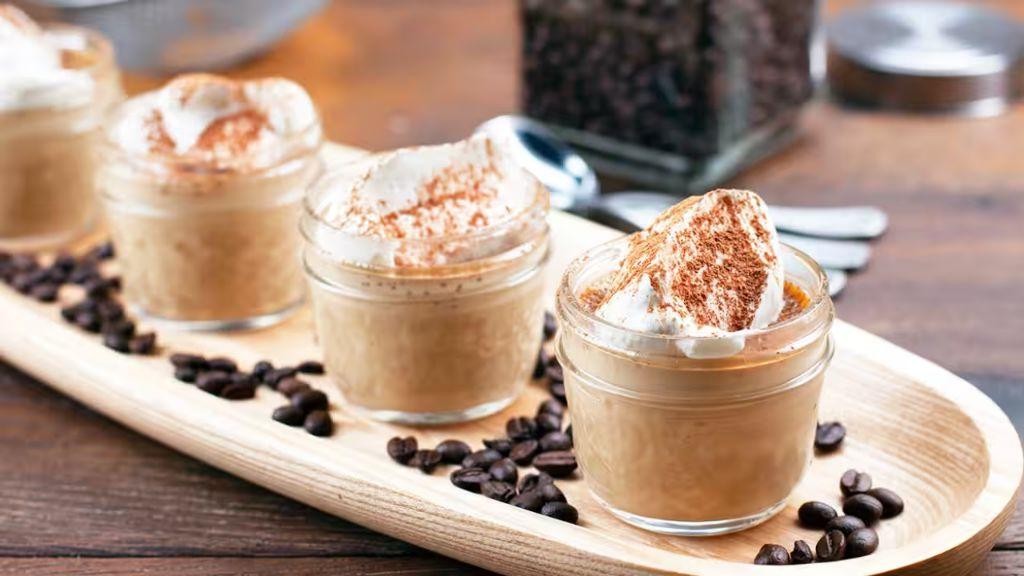
Waking up to the rich aroma of coffee brewing is one of life’s simple pleasures, but I’ve found a way to transform that morning ritual into an elegant dessert. After experimenting with various custard recipes in my tiny apartment kitchen, I discovered that adding freshly brewed espresso creates the most luxurious treat that satisfies both coffee cravings and sweet tooth desires. This coffee custard has become my go-to dinner party finale, especially when I want to impress guests without spending hours in the kitchen.
Ingredients
– 2 cups heavy cream, divided
– 1 cup whole milk
– ½ cup granulated sugar
– ¼ cup freshly brewed espresso, cooled to room temperature
– 6 large pasture-raised egg yolks
– 1 teaspoon pure vanilla extract
– ¼ teaspoon fine sea salt
Instructions
1. Preheat your oven to 325°F and position six 4-ounce ramekins in a large baking dish.
2. Combine 1½ cups heavy cream, whole milk, and granulated sugar in a heavy-bottomed saucepan over medium heat.
3. Heat the mixture until small bubbles form around the edges and the temperature reaches 170°F on an instant-read thermometer, stirring occasionally with a silicone spatula.
4. Whisk pasture-raised egg yolks in a separate bowl until pale yellow and slightly thickened.
5. Temper the egg yolks by slowly pouring ½ cup of the hot cream mixture into the yolks while whisking constantly to prevent curdling.
6. Pour the tempered yolk mixture back into the saucepan with the remaining cream mixture, whisking continuously.
7. Stir in the cooled espresso, pure vanilla extract, and fine sea salt until fully incorporated.
8. Strain the custard through a fine-mesh sieve into a large measuring cup to remove any cooked egg particles.
9. Divide the strained custard evenly among the six prepared ramekins.
10. Create a water bath by pouring hot water into the baking dish until it reaches halfway up the sides of the ramekins.
11. Bake for 35-40 minutes until the edges are set but the centers still jiggle slightly when gently shaken.
12. Remove the ramekins from the water bath using kitchen tongs and transfer to a wire rack to cool completely.
13. Cover each ramekin with plastic wrap and refrigerate for at least 4 hours or overnight until fully chilled and set.
14. Whip the remaining ½ cup heavy cream until soft peaks form just before serving.
15. Top each chilled custard with a generous dollop of whipped cream.
Exquisitely smooth and sophisticated, this custard delivers a perfect balance between rich coffee flavor and creamy sweetness. The silky texture melts on your tongue while the espresso provides a delightful bitterness that cuts through the richness. I love serving these in clear glasses to showcase the beautiful layers, sometimes garnishing with chocolate shavings or a dusting of cocoa powder for an extra touch of elegance.
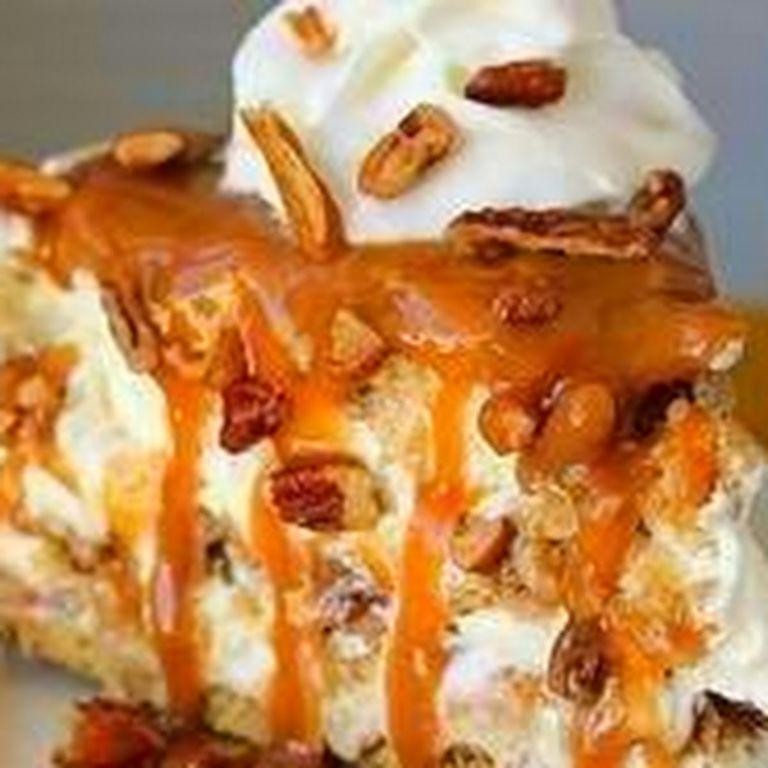
Caramel Pecan Delight
Venturing into my kitchen on this crisp autumn afternoon, I’m reminded why Caramel Pecan Delight has become my go-to dessert for impromptu gatherings—it’s the perfect balance of sophisticated flavors and comforting nostalgia that always earns compliments. Having perfected this recipe through countless family potlucks, I’ve learned that the secret lies in toasting the pecans just until their oils release, creating that unforgettable aroma that fills your entire home.
Ingredients
– 1 cup raw pecan halves
– ¾ cup granulated sugar
– ¼ cup unsalted European-style butter, cubed
– ½ cup heavy whipping cream, warmed to 110°F
– 1 teaspoon pure vanilla extract
– ¼ teaspoon fleur de sel
– 8 ounces cream cheese, softened to room temperature
– 1 cup powdered sugar, sifted
– 1 cup chilled heavy cream
– 1 pre-made graham cracker crust
Instructions
1. Preheat your oven to 350°F and arrange the raw pecan halves in a single layer on a parchment-lined baking sheet.
2. Toast the pecans for 7-9 minutes until fragrant and lightly golden, watching carefully to prevent burning.
3. Transfer the toasted pecans to a cutting board and roughly chop them into quarter-inch pieces.
4. Combine granulated sugar and 2 tablespoons of water in a heavy-bottomed saucepan over medium heat, stirring constantly until sugar dissolves completely.
5. Stop stirring and cook the sugar syrup until it reaches a deep amber color at 340°F on a candy thermometer.
6. Immediately remove the saucepan from heat and whisk in the cubed European-style butter until fully incorporated and smooth.
7. Gradually pour in the warmed heavy whipping cream while whisking continuously to prevent seizing.
8. Return the saucepan to low heat and simmer the caramel for 2 minutes until thickened to a coating consistency.
9. Stir in the pure vanilla extract and fleur de sel, then fold in three-quarters of the chopped toasted pecans.
10. Pour the pecan caramel mixture into the pre-made graham cracker crust, spreading it evenly with an offset spatula.
11. Refrigerate the caramel layer uncovered for 45 minutes until completely set and firm to the touch.
12. In a stand mixer fitted with the whisk attachment, beat the softened cream cheese and sifted powdered sugar at medium speed for 3 minutes until light and fluffy.
13. Switch to the chilled heavy cream and whip on high speed for 4-5 minutes until stiff peaks form that hold their shape.
14. Spread the cream cheese mixture over the chilled caramel layer using a piping bag fitted with a star tip for decorative swirls.
15. Garnish with the remaining chopped toasted pecans, pressing them gently into the cream cheese layer.
16. Chill the assembled dessert for at least 2 hours before serving to allow the flavors to meld completely.
Yielding to that first spoonful reveals why this dessert deserves its name—the crisp graham cracker base gives way to the silken cream cheese layer, which perfectly contrasts with the deeply complex caramel that carries just enough salt to highlight the pecans’ buttery richness. For an elegant presentation, I sometimes drizzle extra warm caramel over individual slices right before serving, or pair it with a dark roast coffee to cut through the sweetness.
Cinnamon Roll Mug Cake
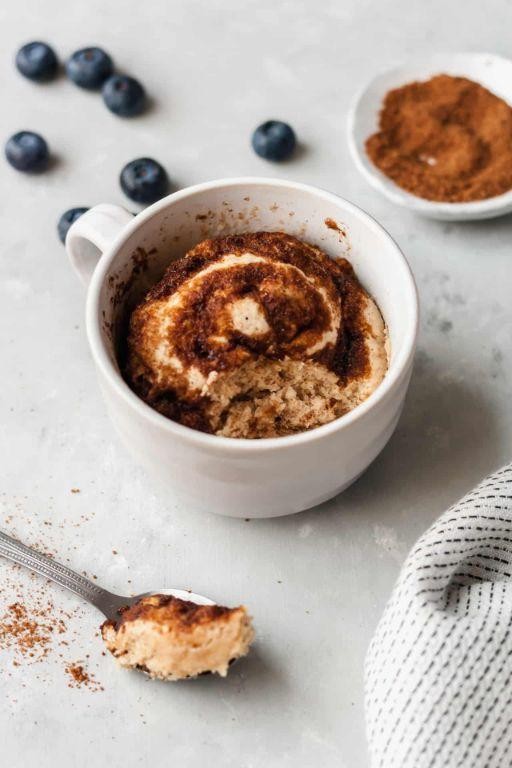
Nothing beats that moment when cinnamon roll cravings hit at 10 PM and the bakery’s long closed. I’ve perfected this mug cake over many late-night kitchen experiments—it’s become my go-to when I need that warm, spiced comfort without the wait. Now my family expects these little treats whenever we’re watching movies together.
1
servings5
minutes2
minutesIngredients
– ¼ cup all-purpose flour
– 2 tablespoons granulated cane sugar
– ¼ teaspoon baking powder
– ¼ teaspoon ground cinnamon
– Pinch of fine sea salt
– 3 tablespoons whole milk
– 1 tablespoon unsalted clarified butter, melted
– ¼ teaspoon pure vanilla extract
– 1 tablespoon cream cheese, softened
– 2 teaspoons confectioners’ sugar
– ½ teaspoon whole milk
Instructions
1. Combine ¼ cup all-purpose flour, 2 tablespoons granulated cane sugar, ¼ teaspoon baking powder, ¼ teaspoon ground cinnamon, and pinch of fine sea salt in a standard 12-ounce microwave-safe mug, whisking with a small fork until no visible lumps remain.
2. Pour 3 tablespoons whole milk, 1 tablespoon melted unsalted clarified butter, and ¼ teaspoon pure vanilla extract into the dry mixture, stirring vigorously for 45 seconds until a smooth, thick batter forms with no dry pockets.
3. Microwave the mug on high power for 90 seconds exactly, watching until the cake rises fully and the surface appears matte with small holes. Tip: Position the mug in the microwave’s center for even heating.
4. Let the cake rest in the mug for 2 minutes undisturbed while preparing the glaze.
5. Whisk 1 tablespoon softened cream cheese, 2 teaspoons confectioners’ sugar, and ½ teaspoon whole milk in a separate small bowl for 60 seconds until achieving a drizzle-consistency glaze. Tip: Soften refrigerated cream cheese by microwaving for 8 seconds.
6. Drizzle the cream cheese glaze over the warm cake in a spiral pattern using a teaspoon.
7. Serve immediately directly from the mug. Tip: Insert a toothpick into the cake’s center—it should emerge cleanly without wet batter.
Warm from the microwave, this cake delivers that signature cinnamon roll pull-apart texture with pockets of steam releasing aromatic spice. The cream cheese glaze melts into the tender crumb, creating ribbons of tangy sweetness that balance the warm cinnamon notes perfectly. For an extra treat, I sometimes sprinkle toasted pecans over the glaze or serve it alongside cold brew coffee to cut through the richness.
Gingerbread Spice Bars
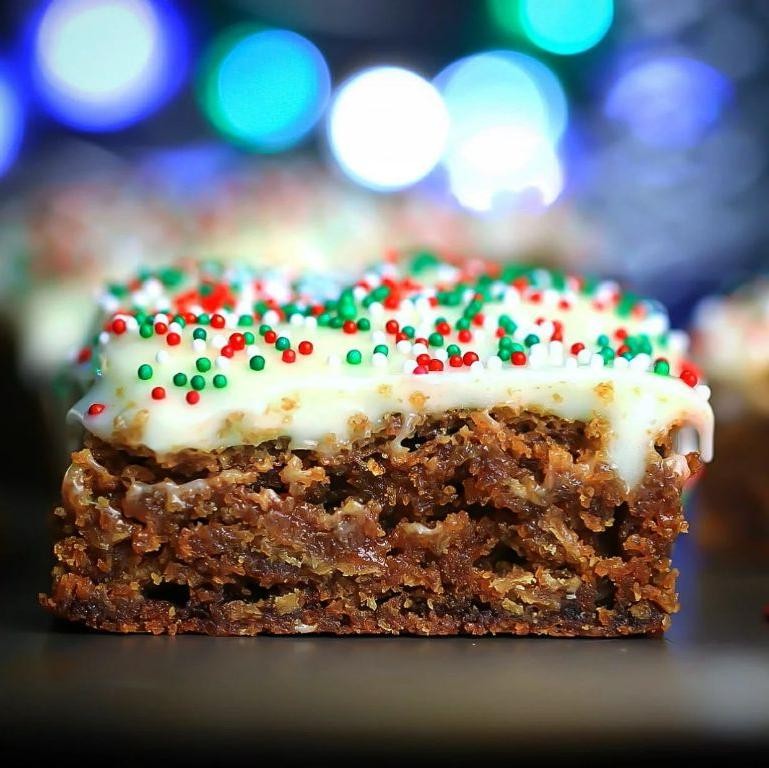
Vivid memories of my grandmother’s kitchen during the holiday season inspired these gingerbread spice bars, which I’ve perfected over years of testing to achieve that perfect balance of warmth and spice. There’s something magical about how the aroma of molasses and ginger transforms a simple afternoon into a festive occasion, making these bars my go-to when I want to fill the house with comforting scents while creating something deliciously shareable.
16
bars15
minutes28
minutesIngredients
- 1 ½ cups all-purpose flour, sifted
- 1 teaspoon baking soda
- 2 teaspoons ground ginger
- 1 teaspoon ground cinnamon
- ½ teaspoon ground cloves
- ¼ teaspoon freshly grated nutmeg
- ½ cup unsalted butter, softened to room temperature
- ¾ cup dark brown sugar, packed
- 1 large pasture-raised egg, lightly beaten
- ½ cup robust molasses
- ½ cup hot water
- 1 teaspoon pure vanilla extract
- ¼ cup turbinado sugar for dusting
Instructions
- Preheat your oven to 350°F and line an 8×8-inch baking pan with parchment paper, allowing overhang on two sides for easy removal.
- In a medium bowl, whisk together the sifted all-purpose flour, baking soda, ground ginger, cinnamon, cloves, and freshly grated nutmeg until fully incorporated.
- Using a stand mixer fitted with the paddle attachment, cream the softened unsalted butter and packed dark brown sugar on medium-high speed for exactly 3 minutes until pale and fluffy.
- Add the lightly beaten pasture-raised egg to the butter mixture and mix on medium speed for 1 minute until fully emulsified.
- Pour in the robust molasses and pure vanilla extract, then mix on low speed until the mixture appears smooth and homogeneous.
- Gradually add the dry ingredients to the wet mixture in three additions, mixing on low speed just until the flour disappears after each addition.
- Slowly stream in the hot water while mixing on low speed until the batter becomes smooth and pourable.
- Pour the batter into the prepared pan and use an offset spatula to spread it evenly into all corners.
- Sprinkle the turbinado sugar evenly across the entire surface of the batter.
- Bake for 25-28 minutes until the edges pull away from the pan and a toothpick inserted in the center comes out with moist crumbs attached.
- Transfer the pan to a wire rack and cool completely for 2 hours before slicing into 16 bars.
Remarkably moist and tender with a crackly sugar crust, these bars deliver deep molasses warmth punctuated by ginger’s sharp bite. The chewy texture holds up beautifully when layered with vanilla bean ice cream for an elegant dessert, or simply enjoy them alongside your afternoon coffee for that perfect spicy-sweet balance.
Chewy Chocolate Chip Cookies
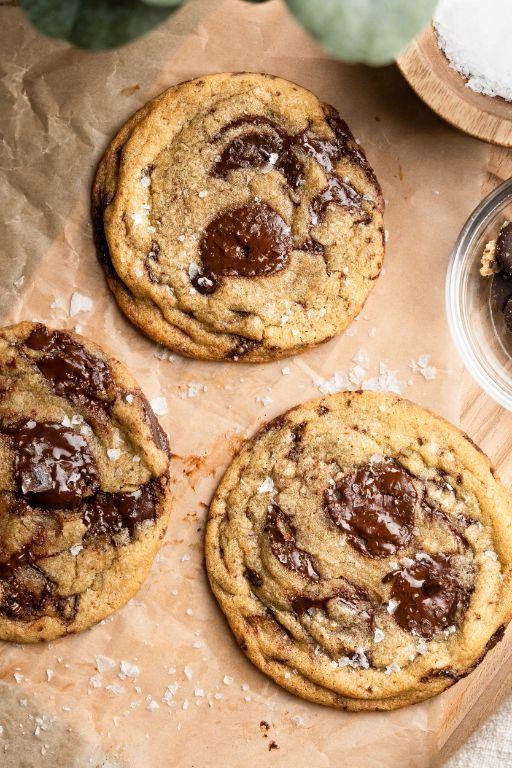
Finally, after years of testing and tweaking, I’ve landed on what I believe is the ultimate chocolate chip cookie recipe—the kind that makes your kitchen smell like a bakery and brings everyone running. I developed this version after my third batch in one weekend, determined to achieve that perfect balance of crispy edges and soft, chewy centers that keeps you reaching for just one more. There’s something magical about that moment when you pull them from the oven, the chocolate still glistening and molten.
24
cookies25
minutes12
minutesIngredients
– 2¼ cups bread flour
– 1 teaspoon baking soda
– 1 teaspoon fine sea salt
– 1 cup European-style unsalted butter, at room temperature
– ¾ cup granulated sugar
– ¾ cup dark brown sugar, firmly packed
– 2 large pasture-raised eggs, lightly beaten
– 2 teaspoons pure vanilla extract
– 2 cups high-quality dark chocolate chunks (70% cacao)
– Flaky sea salt for finishing
Instructions
1. Preheat your oven to 375°F and line two baking sheets with parchment paper.
2. Whisk together the bread flour, baking soda, and fine sea salt in a medium bowl until fully incorporated.
3. Cream the European-style unsalted butter with granulated sugar and dark brown sugar in a stand mixer fitted with paddle attachment on medium-high speed for exactly 3 minutes until pale and fluffy.
4. Tip: Scrape down the bowl sides halfway through creaming to ensure even mixing.
5. Add the lightly beaten pasture-raised eggs one at a time, mixing for 30 seconds after each addition until fully emulsified.
6. Mix in the pure vanilla extract until just combined.
7. Reduce mixer speed to low and gradually add the dry ingredients, mixing only until no flour streaks remain.
8. Fold in the dark chocolate chunks using a spatula until evenly distributed.
9. Tip: Chill the dough for 30 minutes before baking to prevent excessive spreading.
10. Scoop 2-tablespoon portions of dough onto prepared baking sheets, spacing them 3 inches apart.
11. Bake for 10-12 minutes until edges are golden brown but centers still appear slightly underdone.
12. Tip: Rotate baking sheets halfway through baking for even browning.
13. Immediately sprinkle with flaky sea salt upon removal from oven.
14. Cool cookies on baking sheets for 5 minutes before transferring to wire racks.
Virtually perfect in their texture, these cookies emerge with crisp golden edges that give way to wonderfully soft, almost fudgy centers. The high-quality dark chocolate chunks create rich pockets of molten goodness that contrast beautifully with the occasional crunch of flaky salt. Try serving them warm with a scoop of vanilla bean ice cream for an elevated take on the classic ice cream sandwich.
Mocha Pots de Crème
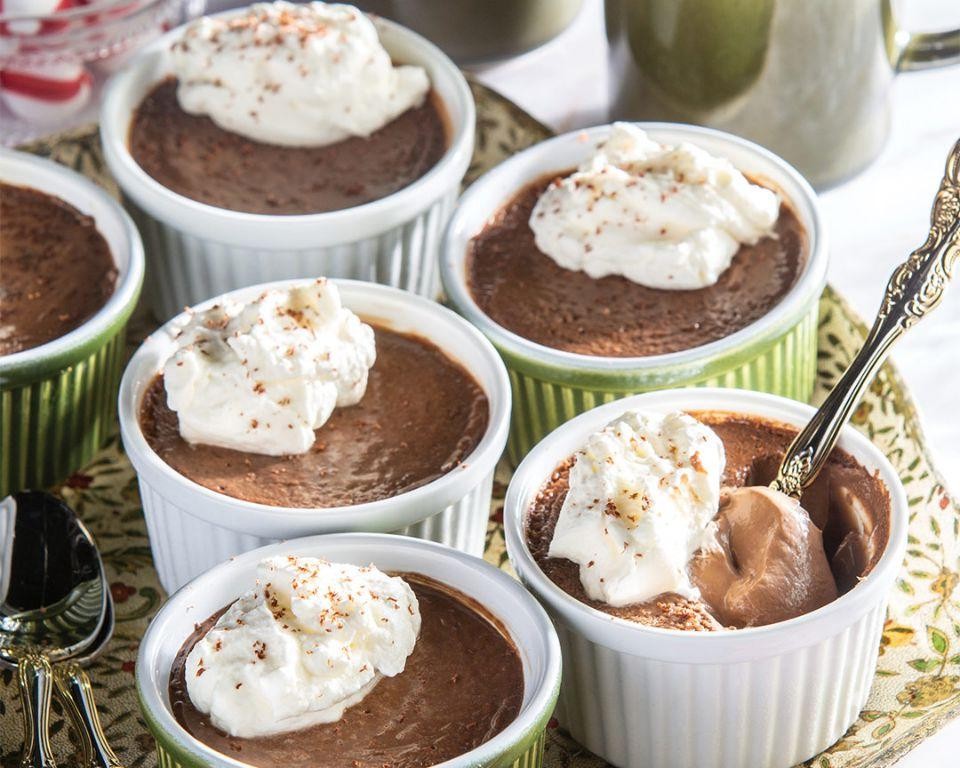
Perfectly rich and decadent, these mocha pots de crème have become my go-to dessert for dinner parties—they always impress without requiring last-minute fuss. I first fell for this dessert at a tiny Parisian café years ago, and after countless kitchen experiments, I’ve perfected a version that balances deep chocolate notes with just enough coffee bitterness to keep things interesting.
6
portions20
minutes40
minutesIngredients
- 8 ounces high-quality dark chocolate (70% cacao), finely chopped
- 1 ½ cups heavy cream
- ½ cup whole milk
- 4 large pasture-raised egg yolks
- ¼ cup granulated sugar
- 1 tablespoon finely ground espresso beans
- 1 teaspoon pure vanilla extract
- ¼ teaspoon fine sea salt
- Whipped cream for garnish
- Chocolate shavings for garnish
Instructions
- Preheat your oven to 325°F and arrange six 4-ounce ramekins in a deep baking dish.
- Combine the heavy cream, whole milk, and finely ground espresso beans in a medium saucepan over medium heat.
- Heat the cream mixture until small bubbles form around the edges and steam rises, reaching 180°F on an instant-read thermometer.
- Remove the saucepan from heat and immediately add the finely chopped dark chocolate, whisking continuously until completely smooth and glossy.
- In a separate bowl, whisk together the pasture-raised egg yolks, granulated sugar, pure vanilla extract, and fine sea salt until pale and slightly thickened.
- Slowly pour the warm chocolate mixture into the egg mixture while whisking constantly to temper the eggs.
- Strain the combined custard through a fine-mesh sieve into a large measuring cup or bowl with a spout to ensure ultimate smoothness.
- Divide the custard evenly among the six prepared ramekins, filling each about ¾ full.
- Carefully pour hot water into the baking dish around the ramekins until it reaches halfway up their sides to create a water bath.
- Cover the entire baking dish tightly with aluminum foil and bake for 35-40 minutes, until the edges are set but the centers still jiggle slightly when gently shaken.
- Remove the ramekins from the water bath using kitchen tongs and transfer them to a wire rack to cool completely, about 1 hour.
- Cover each ramekin with plastic wrap and refrigerate for at least 4 hours, or preferably overnight, to fully set.
Beyond silky, the texture of these pots de crème is what dreams are made of—each spoonful melts on your tongue with layers of bitter espresso and luxurious chocolate. I love serving them chilled with a dollop of freshly whipped cream and delicate chocolate shavings for contrast, though a sprinkle of flaky sea salt also elevates the flavor beautifully.
Zesty Lime Olive Oil Cake

Yesterday, while organizing my pantry, I discovered a forgotten bag of vibrant Persian limes that instantly transported me back to my grandmother’s sun-drenched California kitchen. This zesty lime olive oil cake became my spontaneous tribute to those memories, blending citrus brightness with rich olive oil in a way that feels both nostalgic and refreshingly modern.
8
servings15
minutes50
minutesIngredients
– 1¾ cups all-purpose flour, sifted
– 1½ cups granulated sugar
– ¾ cup extra-virgin olive oil
– 3 pasture-raised eggs, lightly beaten
– ½ cup whole milk, at room temperature
– ¼ cup freshly squeezed lime juice
– 2 tablespoons finely grated lime zest
– 2 teaspoons baking powder
– ½ teaspoon kosher salt
– ¼ cup confectioners’ sugar for dusting
Instructions
1. Preheat your oven to 350°F and generously grease a 9-inch round cake pan with olive oil, then line the bottom with parchment paper.
2. In a large mixing bowl, whisk together the sifted all-purpose flour, baking powder, and kosher salt until thoroughly combined.
3. In a separate bowl, vigorously whisk the granulated sugar and extra-virgin olive oil for exactly 2 minutes until the mixture becomes pale and slightly thickened.
4. Gradually incorporate the lightly beaten pasture-raised eggs into the sugar-oil mixture, whisking continuously until fully emulsified.
5. Alternate adding the dry ingredients and whole milk to the wet mixture in three additions, beginning and ending with the dry ingredients, mixing just until combined after each addition.
6. Fold in the freshly squeezed lime juice and finely grated lime zest using a rubber spatula, being careful not to overmix the batter.
7. Pour the completed batter into the prepared cake pan and use an offset spatula to smooth the surface evenly.
8. Bake at 350°F for 45-50 minutes until the cake is golden brown and a toothpick inserted into the center comes out completely clean.
9. Transfer the cake pan to a wire rack and allow it to cool in the pan for precisely 15 minutes before inverting onto the rack.
10. Once completely cooled to room temperature, dust the top evenly with confectioners’ sugar using a fine-mesh sieve.
What makes this cake truly special is its delicate crumb that practically melts in your mouth, balanced by the assertive citrus notes that cut through the richness of the olive oil. I love serving thick slices slightly warmed with a dollop of lemon curd or alongside fresh berries for a dessert that feels both elegant and comforting.
Conclusion
Deliciously satisfying without the guilt, these keto desserts prove healthy eating can still be sweet. We hope you found some new favorites to try in your kitchen! Don’t forget to leave a comment sharing which recipe you loved most and pin this article to your Pinterest boards so you can easily find these treats again.