Ridiculously simple, yet somehow mystifying—Japanese rice has been the downfall of many aspiring home cooks who end up with either gluey mush or crunchy disappointment. Ready to transform from rice rookie to grain guru? This method will have you creating pearly, separate grains so perfect they might just demand their own tiny thrones. Remember, we’re not making wallpaper paste here—we’re crafting edible clouds.
Why This Recipe Works
- The precise water-to-rice ratio is like finding the perfect partner—too much and you’re drowning, too little and things get tense. We’ve nailed the 1:1.1 ratio that gives each grain just enough hydration to plump up without turning into a starchy swimming pool.
- That 30-minute soak isn’t just rice spa time—it’s the secret handshake that allows water to penetrate to the grain’s core, ensuring even cooking from the inside out. Think of it as the rice equivalent of hydrating before running a marathon.
- The post-cooking steam session is the rice’s beauty rest period where the grains finish their transformation from hard little pebbles to fluffy perfection. This is where the magic happens, turning good rice into ‘I-can’t-believe-I-made-this’ rice.
- Using the right rice variety is like casting the lead role in a Broadway show—short-grain Japanese rice contains just the right amount of starch to create that signature slight stickiness without crossing over into paste territory.
Ingredients
- 2 cups Japanese short-grain rice (the star of our show)
- 2 1/4 cups cold water (not from your tap’s hot side, please)
- 1/2 teaspoon salt (the subtle background singer)
Equipment Needed
- Medium saucepan with tight-fitting lid (no peeking!)
- Fine-mesh strainer (for our rice spa treatment)
- Measuring cups (precision is key, folks)
- Rice paddle or wooden spoon (metal is the enemy here)
- Kitchen timer (because guessing leads to sadness)
Instructions

The Rice Spa Treatment: Washing and Soaking
First things first—we need to give our rice the celebrity treatment it deserves. Measure out 2 cups of Japanese short-grain rice into your fine-mesh strainer and place it in a large bowl. Now comes the therapeutic part: gently massage those grains under cold running water while swirling them around like you’re panning for gold. The water will start out cloudy white—that’s the surface starch waving goodbye. Continue this aquatic massage until the water runs mostly clear, which typically takes 3-4 water changes. Don’t be aggressive here; we’re giving a gentle spa treatment, not performing CPR. Once your rice is sufficiently pampered, transfer it to your saucepan and add exactly 2 1/4 cups of cold water. Set your timer for 30 minutes and walk away—this soaking period is non-negotiable. It’s like marinating for flavor, but for texture!
The Simmer Symphony: Bringing to a Boil
After your rice has completed its hydration therapy, it’s showtime! Place your saucepan over high heat and add that 1/2 teaspoon of salt—think of it as the rice’s personal trainer, bringing out its best qualities. Now, here’s where patience becomes your kitchen superpower: watch for those first bubbles to appear around the edges, then small volcanoes erupting across the surface. This should take about 5-7 minutes depending on your stove. The moment you see a proper rolling boil with bubbles dancing across the entire surface, immediately reduce the heat to the lowest possible setting and cover with that tight-fitting lid. No peeking allowed—we’re creating a mini sauna in there, and every lid lift releases precious steam. Set your timer for 15 minutes and resist the temptation to check on your culinary masterpiece.
The Steam Finale: Resting to Perfection
When your timer bravely announces that 15 minutes have passed, turn off the heat completely but DO NOT remove the lid. I repeat: hands off the lid! This is the most crucial step that separates the rice amateurs from the grain masters. Let the rice sit, covered and undisturbed, for another 15 minutes. During this steam session, the residual heat works its magic, evenly distributing moisture and allowing any remaining hard centers to soften. Think of this as the rice’s beauty sleep—it’s transforming from merely cooked to magnificently fluffy. Meanwhile, the bottom develops that perfect slight crust without burning. After this final waiting period, you can finally unveil your creation.
The Fluffening: Gentle Grain Separation
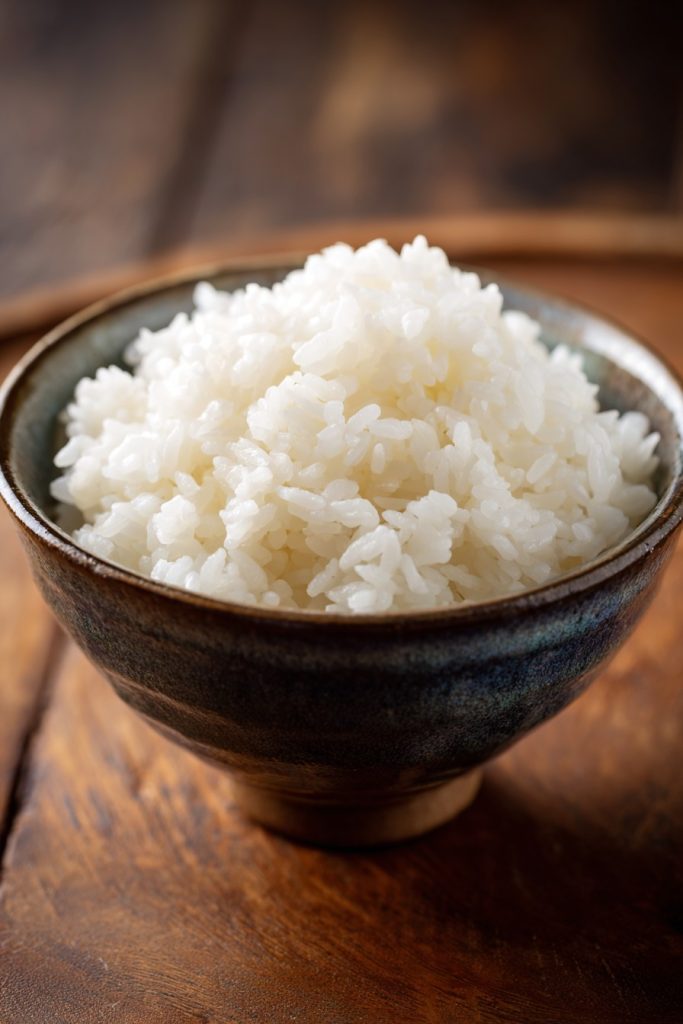
The moment of truth has arrived! Remove the lid (finally!) and behold your pearly masterpiece. Take your rice paddle or wooden spoon and gently fluff the rice by slicing through it vertically and turning sections over, working from the edges toward the center. Be gentle—you’re not mixing concrete here. The goal is to separate the grains and release excess steam without smashing them into submission. Notice how each grain maintains its individuality while still clinging slightly to its neighbors? That’s the Japanese rice sweet spot! If you find some rice sticking to the bottom, that’s actually considered a delicacy in some households. Fluff for about 1-2 minutes until the rice looks evenly textured throughout.
The Serving Ceremony: Timing and Temperature
Japanese rice is like Cinderella—it has a limited window of perfection. Serve it immediately after fluffing while it’s still warm and at peak texture. The ideal serving temperature is warm enough to melt a pat of butter but cool enough not to burn your mouth. If you must wait, keep the lid on to retain moisture, but know that rice starts its gradual texture decline after about 20 minutes. For the authentic experience, serve in individual bowls and enjoy as the star of your meal rather than a side character. Properly cooked Japanese rice should be slightly sweet, pleasantly chewy, and the perfect companion to everything from grilled fish to vegetable stir-fries.
Tips and Tricks
If you thought making perfect Japanese rice was just about following steps, prepare to have your mind gently blown by these next-level techniques. First, let’s talk about water quality—if your tap water tastes like a swimming pool, your rice will too. Use filtered water for truly neutral flavor that lets the rice’s natural sweetness shine through. For those who want to elevate their rice from great to ‘is-this-from-a-Michelin-star-restaurant’ status, try replacing 1/4 cup of water with sake or adding a 2-inch piece of kombu seaweed to the soaking water, removing it before cooking. The kombu adds subtle umami that makes your rice taste like it has secret superpowers. Storage wisdom: never refrigerate freshly cooked rice immediately—the rapid cooling creates hard, unpleasant grains. Instead, let it cool to room temperature first, then refrigerate in an airtight container. When reheating, sprinkle a tablespoon of water over the rice and cover loosely before microwaving to restore moisture. For rice that’s destined for fried rice applications, cook it a day ahead and refrigerate—the slight drying makes it perfect for absorbing sauces without turning mushy. And here’s a pro move: if you consistently make rice, invest in a proper donabe (clay pot) or Japanese rice cooker—they distribute heat more evenly than standard pots. Finally, remember that rice continues to cook from residual heat even after turning off the stove, so if you’re unsure about doneness, err on the side of slightly underdone rather than overdone.
Recipe Variations
- Garlic Butter Rice: After fluffing, stir in 2 tablespoons of melted butter mixed with 2 minced garlic cloves and 1 tablespoon of chopped parsley. This transforms your rice into a fragrant side dish that might upstage your main course—consider yourself warned.
- Green Tea Rice: Replace 1/4 cup of water with strongly brewed green tea and add 1/2 teaspoon of matcha powder to the soaking water. You’ll get beautiful pale green rice with subtle earthy notes that pairs wonderfully with seafood.
- Coconut Rice: Substitute 1 cup of water with coconut milk and add 1 tablespoon of sugar for a tropical twist that makes your kitchen smell like a beach vacation. Perfect with spicy Asian curries.
- Mushroom Rice: Sauté 1 cup of sliced shiitake mushrooms with 1 minced shallot before adding your rinsed rice to the pot, toasting slightly before adding water. The mushrooms infuse their earthy essence throughout every grain.
- Seasoned Sushi Rice: After cooking, gently fold in a mixture of 3 tablespoons rice vinegar, 1 tablespoon sugar, and 1/2 teaspoon salt while the rice is still warm. This is your gateway to homemade sushi nights.
Frequently Asked Questions
Can I use long-grain rice instead of Japanese short-grain?
Technically yes, but it’s like using a tennis ball when the recipe calls for a baseball—similar concept but completely different execution. Japanese short-grain rice contains more amylopectin starch, which gives it that characteristic slight stickiness and chewy texture. Long-grain varieties like basmati or jasmine remain separate and fluffy when cooked, missing the cohesive quality that makes Japanese rice perfect for eating with chopsticks or forming into rice balls. If you absolutely must substitute, adjust the water ratio to 1:1.5 and expect a different texture experience entirely.
Why does my rice sometimes come out mushy or undercooked?
Mushiness typically occurs from too much water, insufficient rinsing (leaving excess surface starch), or disturbing the rice during the cooking process by removing the lid. Undercooked rice usually means not enough water, insufficient soaking time, or heat that’s too high, causing water to evaporate before the grains fully hydrate. The key is treating rice cooking like a science experiment with precise measurements and timing. If you consistently have issues, consider that altitude, humidity, and even your pot material can affect cooking times—you might need to adjust water by tablespoons until you find your personal sweet spot.
How should I store leftover cooked rice?
Leftover rice requires immediate attention because it’s basically a bacterial party waiting to happen if left at room temperature. Cool your rice to room temperature within 2 hours of cooking (spread it thin on a baking sheet to speed this up), then transfer to airtight containers and refrigerate for up to 5 days. For longer storage, portion into freezer bags, remove excess air, and freeze for up to 3 months. When reheating, always add a tablespoon of water per cup of rice and cover to restore moisture. Never reheat rice more than once, and if it smells funky at all, just let it go—your stomach will thank you.
What’s the difference between rinsing and washing rice?
Rinsing is the gentle process of running water through rice to remove surface starch and any dust or debris—it’s like giving your rice a quick shower. Washing involves more vigorous rubbing between your hands and is typically done for certain dishes where maximum starch removal is desired. For standard Japanese rice, gentle rinsing until the water runs mostly clear is sufficient. The vigorous washing method is better reserved for dishes like biryani where completely separate grains are the goal. Think of rinsing as maintenance and washing as deep cleaning—you don’t need to deep clean every time unless you’re preparing for something special.
Summary
Mastering Japanese rice requires precision, patience, and understanding its three-phase transformation: proper washing removes excess starch, controlled cooking develops texture, and steam finishing perfects fluffiness. The result is worth every minute—pearly grains that cling together just enough without becoming sticky. This fundamental skill opens doors to countless Japanese dishes and will make you the star of family meals.
Perfect Japanese Rice
5
servings35
minutes20
minutesIngredients
Instructions
- 1 Rinse rice in fine-mesh strainer under cold water until water runs mostly clear
- 2 Combine rinsed rice, water, and salt in saucepan and soak for 30 minutes
- 3 Bring to boil over high heat, then immediately reduce to lowest heat and cover
- 4 Simmer covered for 15 minutes, then turn off heat and let steam for 15 minutes
- 5 Remove lid and fluff gently with rice paddle before serving


