Whether you’re a spice enthusiast or just looking to add some zing to your meals, these 31 jalapeño canned recipes will transform your pantry staples into flavorful dishes. From quick weeknight dinners to crowd-pleasing appetizers, get ready to spice up your cooking routine with these easy and delicious ideas that make the most of that beloved fiery kick!
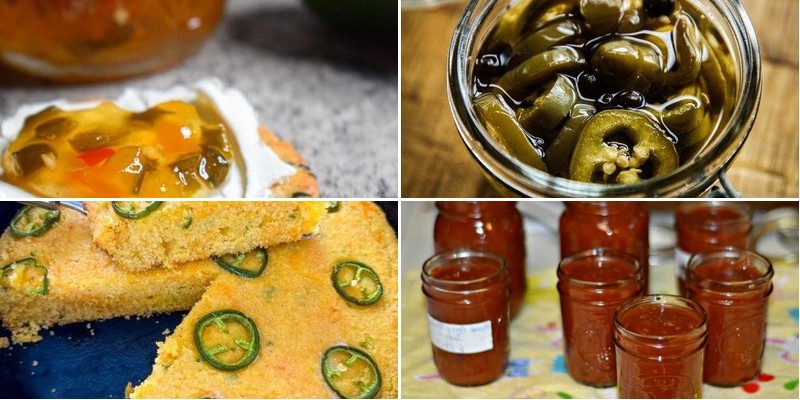
Spicy Jalapeno Canned Salsa
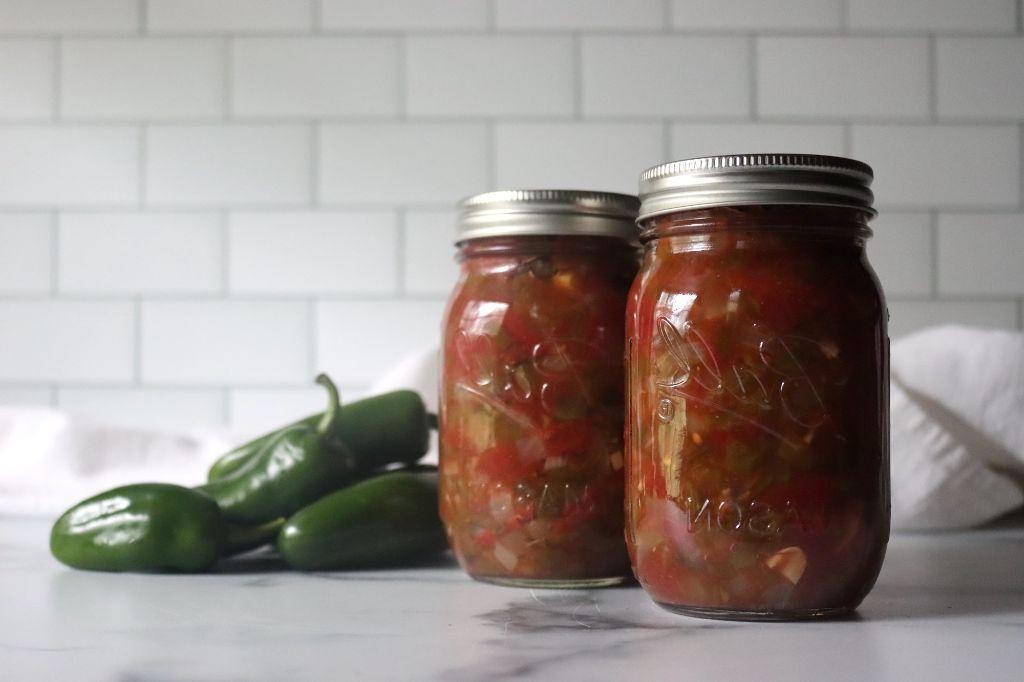
Daring to defy the notion that canned salsa must be a bland, lifeless affair, this fiery concoction will make your taste buds do a happy dance while questioning all your previous jarred-salsa life choices. Get ready to transform ordinary canned tomatoes into an extraordinary flavor explosion that’ll have you dipping everything from chips to questionable life decisions. This isn’t your abuela’s salsa—unless your abuela happens to be a spicy food enthusiast with a penchant for culinary rebellion.
5
servings15
minutesIngredients
– 2 (14.5 oz) cans fire-roasted diced tomatoes, thoroughly drained
– 3 fresh jalapeño peppers, seeds intact for maximum heat
– 1/2 cup finely diced sweet yellow onion
– 1/4 cup freshly squeezed lime juice
– 2 tablespoons extra virgin olive oil
– 1 teaspoon fine sea salt
– 1/2 teaspoon freshly cracked black pepper
– 1/4 cup fresh cilantro leaves, roughly chopped
Instructions
1. Drain both cans of fire-roasted diced tomatoes in a fine-mesh strainer for exactly 5 minutes to remove excess liquid.
2. Wearing disposable gloves, finely dice 3 fresh jalapeño peppers, keeping all seeds for optimal spiciness.
3. Combine the drained tomatoes and diced jalapeños in a medium stainless steel mixing bowl.
4. Add 1/2 cup of finely diced sweet yellow onion to the tomato mixture.
5. Pour 1/4 cup of freshly squeezed lime juice over the ingredients.
6. Drizzle 2 tablespoons of extra virgin olive oil into the bowl.
7. Sprinkle 1 teaspoon of fine sea salt evenly across the mixture.
8. Add 1/2 teaspoon of freshly cracked black pepper.
9. Gently fold all ingredients together with a silicone spatula until just combined—avoid overmixing to maintain texture.
10. Fold in 1/4 cup of roughly chopped fresh cilantro leaves.
11. Transfer the salsa to an airtight glass container and refrigerate for at least 2 hours to allow flavors to meld.
Now that you’ve created this vibrant condiment, notice how the crisp jalapeño chunks provide satisfying texture against the softened tomatoes, while the lime juice cuts through the richness with bright acidity. Try serving it alongside grilled skirt steak tacos or as a bold topping for breakfast huevos rancheros—this salsa brings the party wherever it goes.
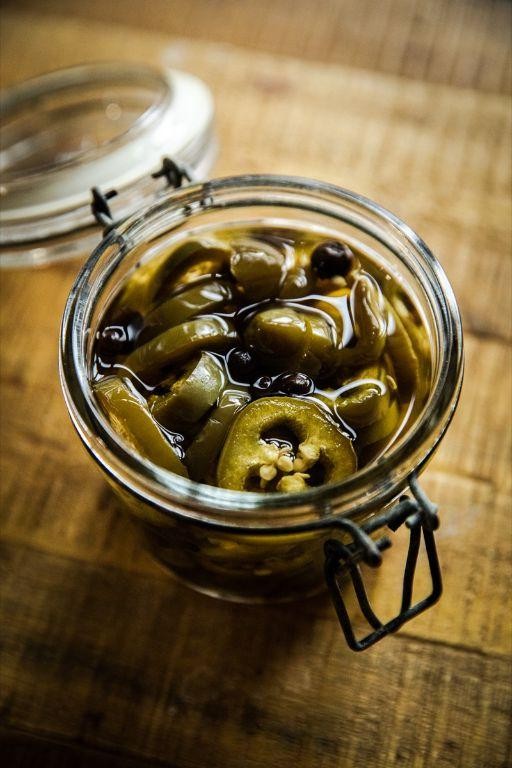
Zesty Jalapeno Canned Pickles
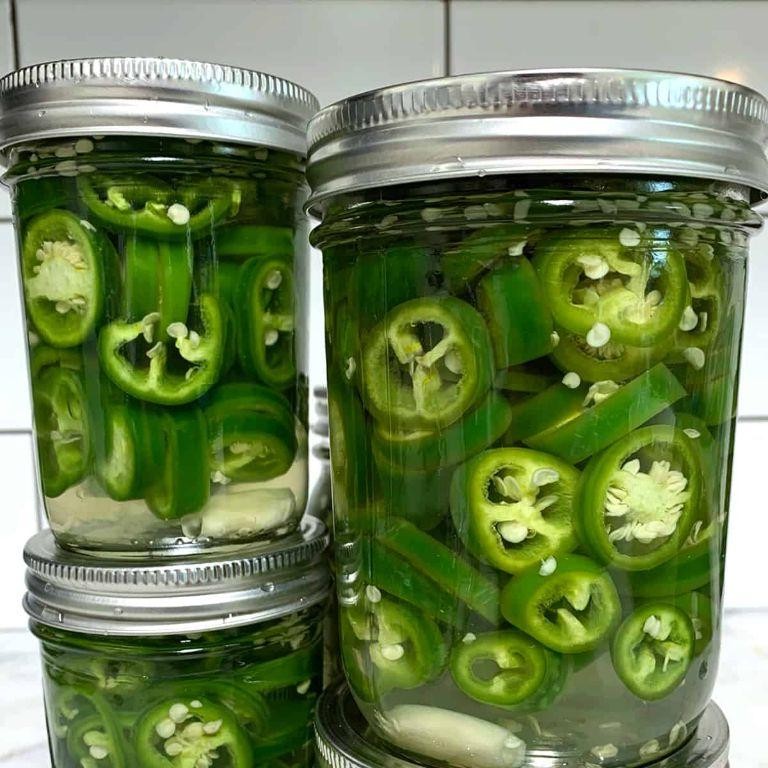
Crisp, zesty, and packing just enough heat to make your taste buds do a happy dance—these jalapeño pickles are about to become your new fridge obsession. Forget those bland store-bought versions; we’re taking canned pickles from basic to brilliant with a spicy twist that’ll have you reaching for just one more… and then another five.
2
jars25
minutes13
minutesIngredients
- 2 pounds fresh Kirby cucumbers, sliced into ¼-inch rounds
- 6 medium jalapeño peppers, thinly sliced into rings
- 4 large garlic cloves, thinly sliced
- 2 cups distilled white vinegar (5% acidity)
- 2 cups filtered water
- ¼ cup granulated cane sugar
- 2 tablespoons kosher salt
- 1 tablespoon whole black peppercorns
- 1 teaspoon coriander seeds
- 1 teaspoon yellow mustard seeds
- ½ teaspoon celery seeds
Instructions
- Sterilize two 1-quart glass canning jars and their lids by submerging them in boiling water for 10 minutes, then carefully remove with jar tongs and air-dry completely.
- Thoroughly wash the Kirby cucumbers under cold running water and pat dry with clean kitchen towels.
- Using a mandoline or sharp chef’s knife, slice the cucumbers into uniform ¼-inch rounds.
- Wearing disposable gloves, slice the jalapeño peppers into thin rings, keeping the seeds intact for maximum heat.
- Thinly slice the garlic cloves into paper-thin pieces using a sharp paring knife.
- In a medium stainless steel saucepan, combine the distilled white vinegar, filtered water, granulated cane sugar, kosher salt, whole black peppercorns, coriander seeds, yellow mustard seeds, and celery seeds.
- Bring the brine mixture to a rolling boil over high heat, stirring occasionally with a wooden spoon until the sugar and salt fully dissolve.
- Reduce heat to medium and maintain a gentle simmer for exactly 3 minutes to allow the spices to infuse.
- Meanwhile, tightly pack the cucumber rounds, jalapeño rings, and garlic slices into the sterilized jars, alternating layers for even distribution.
- Carefully pour the hot brine over the vegetable mixture, leaving ½-inch headspace at the top of each jar.
- Using a bubble remover tool, gently release any trapped air bubbles by running it along the inside edges of the jars.
- Wipe the jar rims with a clean, damp cloth to ensure proper sealing.
- Place the sterilized lids on the jars and screw on the bands until fingertip-tight.
- Process the jars in a boiling water bath for 10 minutes, ensuring they remain completely submerged.
- Remove the jars from the water bath using jar tongs and place them on a wire rack to cool completely for 12-24 hours.
- Check that all lids have sealed by pressing the centers—they should not flex or pop back.
Heavenly crisp with a perfect balance of tangy vinegar and controlled heat, these pickles develop deeper flavor complexity after 48 hours of refrigeration. The jalapeño’s subtle warmth builds gradually rather than overwhelming the palate, making them spectacular chopped into chicken salad or served alongside smoky grilled meats. That satisfying crunch will have you sneaking them straight from the jar—we won’t tell!
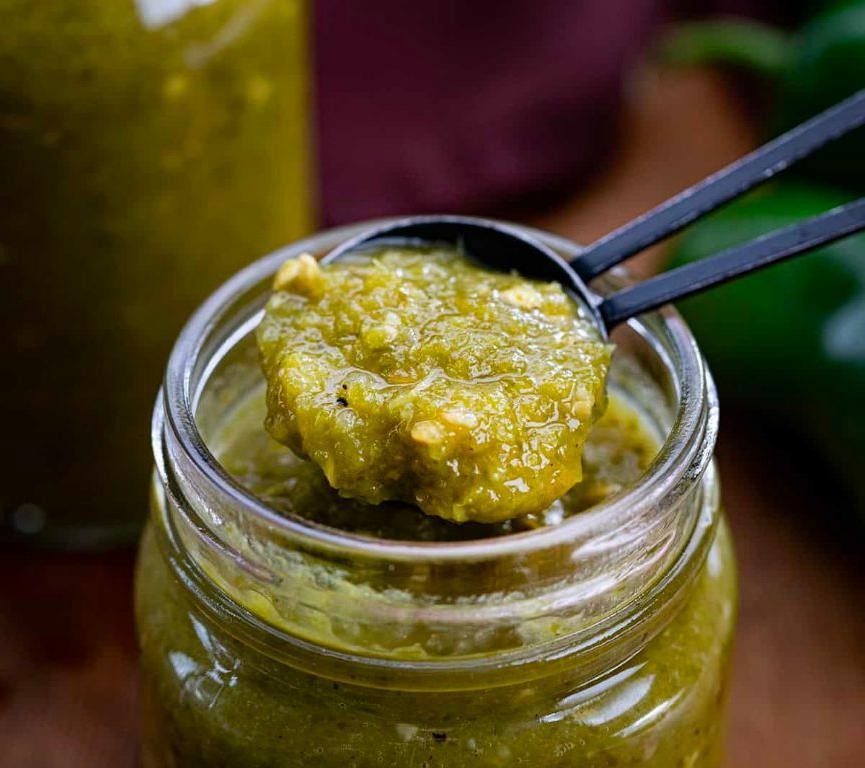
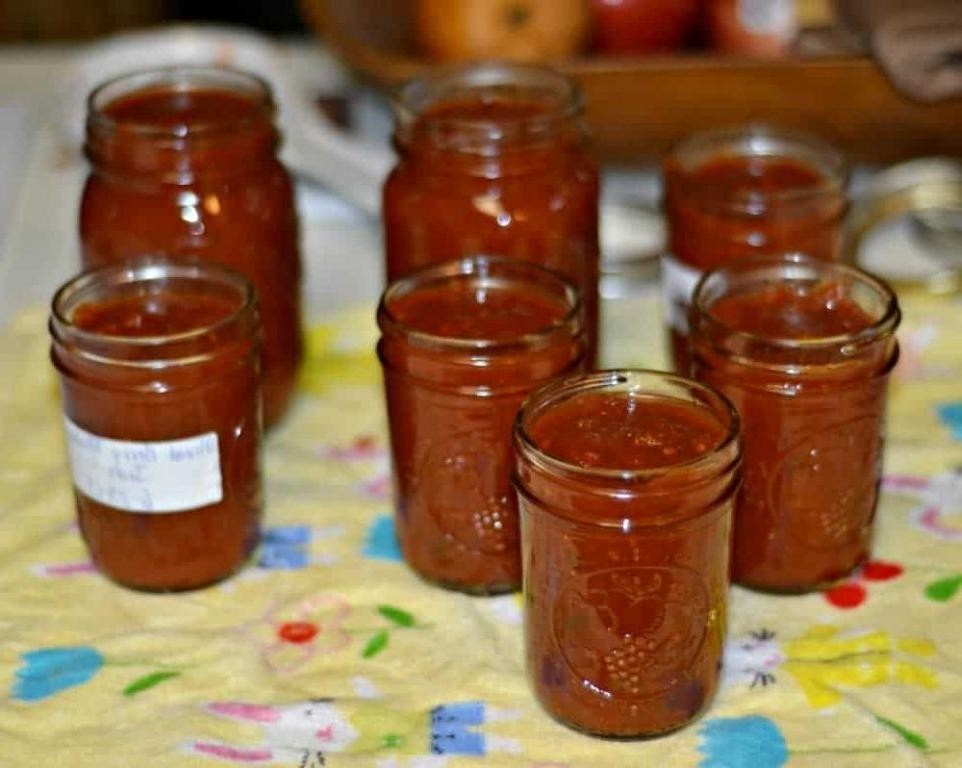
Tangy Jalapeno Canned Relish
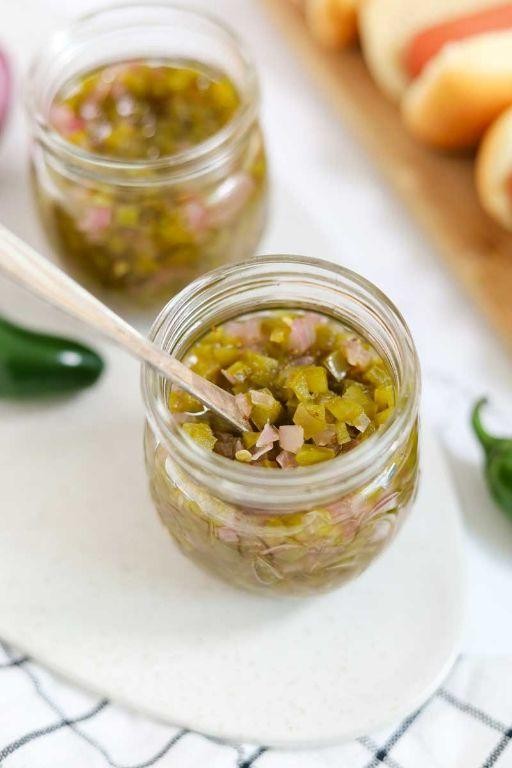
Canned jalapeño relish? More like your taste buds’ new favorite frenemy—this tangy, spicy condiment brings the heat and the sweet in a jarred masterpiece that’ll make your burgers weep with joy and your hot dogs stand at attention. It’s the kind of homemade magic that turns basic meals into “did you make this?” moments, with a zesty kick that says, “I’m fun, but I mean business.”
4
jars15
minutes35
minutesIngredients
– 1 pound fresh jalapeño peppers, stems removed and finely diced
– 1 cup granulated sugar
– 1 cup apple cider vinegar
– 1/2 cup finely diced yellow onion
– 1 tablespoon kosher salt
– 1 teaspoon mustard seeds
– 1/2 teaspoon celery seeds
Instructions
1. Combine the diced jalapeño peppers, diced yellow onion, granulated sugar, apple cider vinegar, kosher salt, mustard seeds, and celery seeds in a non-reactive saucepan.
2. Bring the mixture to a boil over medium-high heat, stirring continuously with a wooden spoon until the sugar fully dissolves, about 3–4 minutes.
3. Reduce the heat to medium-low and simmer the relish uncovered for 20–25 minutes, stirring occasionally, until the liquid reduces by half and the peppers soften but retain a slight crunch.
4. Carefully ladle the hot relish into sterilized half-pint canning jars, leaving 1/4 inch of headspace at the top of each jar.
5. Wipe the jar rims clean with a damp cloth to ensure a proper seal, then place sterilized lids and bands on the jars, tightening them fingertip-tight.
6. Process the jars in a boiling water bath for 10 minutes, ensuring the water covers the jars by at least 1 inch.
7. Remove the jars from the water bath using canning tongs and let them cool undisturbed on a towel-lined counter for 12–24 hours.
8. Check that the jar lids have sealed by pressing the center of each lid; if it doesn’t flex, the seal is secure.
But this relish isn’t just a one-trick pony—its vibrant, chunky texture and bold sweet-heat balance make it a star on grilled sausages, stirred into creamy dips, or even swirled into potato salad for a zesty upgrade that’ll have you reaching for the jar again and again.
Smoky Jalapeno Canned Chili
Mmm, get ready to can your way to chili nirvana—this smoky jalapeno number is about to become your pantry’s new MVP, bringing the heat and the heartiness in one beautifully sealed jar that basically screams “emergency dinner solved” with a spicy wink.
6
servings20
minutes70
minutesIngredients
- 2 lbs grass-fed beef chuck, finely diced
- 1 large yellow onion, finely minced
- 4 cloves garlic, microplaned
- 3 fresh jalapeños, seeds retained, finely diced
- 2 tbsp smoked paprika
- 1 tbsp ground cumin
- 1 tsp chipotle powder
- 28 oz canned fire-roasted tomatoes, crushed
- 15 oz canned kidney beans, rinsed and drained
- 15 oz canned pinto beans, rinsed and drained
- 2 cups beef bone broth
- 2 tbsp tomato paste
- 1 tbsp Worcestershire sauce
- 2 tbsp avocado oil
- 1 tsp fine sea salt
- 1/2 tsp freshly cracked black pepper
Instructions
- Heat avocado oil in a heavy-bottomed Dutch oven over medium-high heat until it shimmers, about 2 minutes.
- Add finely diced grass-fed beef chuck and sear until deeply browned on all sides, approximately 8–10 minutes, breaking up any large clumps with a wooden spoon.
- Stir in finely minced yellow onion and sauté until translucent and fragrant, about 5 minutes.
- Add microplaned garlic and finely diced jalapeños (with seeds) and cook for 1 minute until aromatic.
- Sprinkle in smoked paprika, ground cumin, and chipotle powder, toasting the spices for 30 seconds to unlock their smoky depth.
- Stir in tomato paste and cook for 1 minute until it darkens slightly, coating the beef mixture evenly.
- Pour in beef bone broth, using a wooden spoon to scrape up any fond from the bottom of the pot—this builds a rich, layered flavor base.
- Add crushed fire-roasted tomatoes, Worcestershire sauce, fine sea salt, and freshly cracked black pepper, stirring to combine.
- Bring the chili to a boil, then reduce heat to low, cover, and simmer for 45 minutes to meld the flavors and tenderize the beef.
- Gently fold in rinsed and drained kidney beans and pinto beans, simmering uncovered for an additional 15 minutes to heat through.
- Ladle the hot chili into sterilized canning jars, leaving 1 inch of headspace, and process in a water bath canner for 90 minutes at a steady boil to ensure shelf stability.
Keep this chili stashed for those “what’s for dinner?” panics—its velvety beans and tender beef swim in a smoky, jalapeño-kissed broth that’s bold enough to stand alone or play supporting actor to a pile of cornbread crumbles.
Savory Jalapeno Canned Cornbread

Let’s be real—most cornbread is about as exciting as watching paint dry, but this jalapeño-spiked version will have your taste buds doing the cha-cha. Loaded with fiery peppers and sweet corn straight from the can, it’s the rebellious cousin of your grandma’s classic recipe. Prepare for a flavor fiesta that’ll make your boring dinner rolls weep with jealousy.
8
portions15
minutes25
minutesIngredients
– 1 ½ cups stone-ground yellow cornmeal
– 1 cup all-purpose flour
– 2 teaspoons baking powder
– ½ teaspoon baking soda
– 1 teaspoon fine sea salt
– 2 pasture-raised eggs, lightly beaten
– 1 cup buttermilk
– ¼ cup clarified butter, melted
– 2 tablespoons raw honey
– 1 (15-ounce) can sweet corn kernels, drained
– 3 fresh jalapeños, finely diced (seeds included for maximum heat)
– ½ cup sharp cheddar cheese, freshly grated
Instructions
1. Preheat your oven to 375°F and position the rack in the center.
2. Generously grease a 9-inch cast-iron skillet with clarified butter and place it in the oven to heat for 10 minutes.
3. Whisk together the cornmeal, flour, baking powder, baking soda, and sea salt in a large mixing bowl until fully incorporated.
4. In a separate bowl, combine the beaten eggs, buttermilk, melted clarified butter, and raw honey, whisking until the mixture is smooth and emulsified.
5. Pour the wet ingredients into the dry ingredients and fold gently with a spatula until just combined—do not overmix.
6. Fold in the drained corn kernels, diced jalapeños, and grated cheddar cheese until evenly distributed throughout the batter.
7. Carefully remove the hot skillet from the oven and immediately pour in the batter, spreading it evenly with the spatula.
8. Bake for 22–25 minutes, or until the top is golden brown and a toothpick inserted into the center comes out clean.
9. Transfer the skillet to a wire rack and let the cornbread cool for 10 minutes before slicing.
Buttery, crumbly, and punctuated with pops of sweet corn and spicy jalapeño, this cornbread walks the line between comforting and thrilling. Serve it warm with a drizzle of honey for a sweet-heat contrast, or crumble it over chili for a textural masterpiece that’ll steal the spotlight.
Creamy Jalapeno Canned Dip
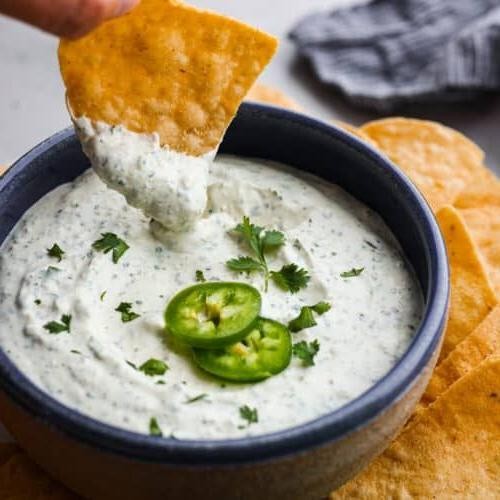
Get ready to spice up your snack game with this dangerously addictive Creamy Jalapeño Canned Dip! This fiery concoction proves that the best things in life come from cans—and a serious love for heat. Your taste buds won’t know what hit them, but they’ll definitely ask for seconds.
8
servings15
minutes25
minutesIngredients
- 2 (4-ounce) cans diced green chilies, thoroughly drained
- 1 (4-ounce) can diced jalapeños, thoroughly drained
- 8 ounces full-fat cream cheese, softened to room temperature
- 1 cup high-quality mayonnaise
- 1 cup freshly grated sharp cheddar cheese
- 1 teaspoon granulated garlic powder
- 1/2 teaspoon smoked paprika
- 1/4 teaspoon freshly ground black pepper
- 1/4 cup finely chopped fresh cilantro leaves
- 1 tablespoon freshly squeezed lime juice
Instructions
- Preheat your oven to 350°F and lightly grease a 1-quart baking dish with non-stick cooking spray.
- Combine the softened cream cheese and mayonnaise in a large mixing bowl, whisking vigorously until completely smooth and no lumps remain.
- Fold in the drained diced green chilies and drained diced jalapeños until evenly distributed throughout the creamy base.
- Incorporate the freshly grated sharp cheddar cheese, granulated garlic powder, smoked paprika, and freshly ground black pepper, mixing until all ingredients are fully integrated.
- Transfer the mixture to the prepared baking dish, spreading it into an even layer with a spatula. Tip: For extra crispy edges, leave the surface slightly textured rather than perfectly smooth.
- Bake at 350°F for 22-25 minutes, or until the edges are bubbling vigorously and the center appears set when gently jiggled.
- Remove from oven and immediately sprinkle with finely chopped fresh cilantro leaves. Tip: Adding cilantro post-baking preserves its bright, fresh flavor and vibrant green color.
- Drizzle the freshly squeezed lime juice evenly over the hot dip. Tip: The acidity from the lime juice cuts through the richness and enhances the jalapeño heat.
- Let the dip rest for 5-7 minutes to allow the flavors to meld and the temperature to become dippable.
Keep this dip warm in a mini slow cooker for parties, where its creamy texture becomes even more luxurious as it slowly bubbles. The initial creaminess gives way to a subtle kick that builds with each bite, making it dangerously addictive. Consider serving it alongside crispy tortilla chips, fresh vegetable crudités, or even as a bold spread for breakfast sandwiches—because why should dinner have all the fun?
Fiery Jalapeno Canned Hot Sauce
Tired of store-bought hot sauces that promise fire but deliver a sad flicker? This Fiery Jalapeno Canned Hot Sauce is about to become your pantry’s MVP—a vibrant, tongue-tingling concoction that packs more punch than a Monday morning espresso. Trust me, your tacos, eggs, and even that questionable leftover pizza will thank you.
2
jars20
minutes35
minutesIngredients
- 2 pounds fresh jalapeno peppers, stems removed and halved lengthwise
- 4 large garlic cloves, peeled and smashed
- 1 cup distilled white vinegar (5% acidity)
- 1/2 cup filtered water
- 1 tablespoon fine sea salt
- 1 teaspoon raw cane sugar
Instructions
- Sterilize two 8-ounce canning jars and their lids by submerging them in boiling water for 10 minutes, then carefully remove with jar lifters and air-dry completely.
- Combine the halved jalapeno peppers, smashed garlic cloves, distilled white vinegar, filtered water, fine sea salt, and raw cane sugar in a non-reactive stainless steel saucepan.
- Bring the mixture to a rolling boil over high heat, then immediately reduce to a gentle simmer and cook for 12 minutes, stirring occasionally with a wooden spoon.
- Transfer the cooked pepper mixture to a high-speed blender and puree on high for 90 seconds until completely smooth and emulsified. (Tip: For extra heat, include the jalapeno seeds; for milder sauce, scrape them out before blending.)
- Return the pureed sauce to the saucepan and simmer over medium-low heat for 8 minutes, stirring constantly with a heat-resistant spatula until slightly thickened.
- Ladle the hot sauce into the sterilized jars, leaving 1/4-inch headspace, and wipe the rims clean with a damp cloth.
- Seal the jars with the sterilized lids and process in a boiling water bath for 15 minutes to ensure a vacuum seal. (Tip: Always check that jars are fully submerged with at least 1 inch of water covering them during processing.)
- Remove the jars from the water bath using jar lifters and place them on a towel-lined counter to cool completely for 12 hours.
- Test the seals by pressing the center of each lid; if it doesn’t flex, the seal is secure. (Tip: Store any unsealed jars in the refrigerator and use within 3 weeks.)
After cooling, this sauce develops a glossy, pourable consistency with visible flecks of jalapeno skin. A bold, upfront vinegar tang mellows into a slow-building heat that lingers pleasantly on the palate. Drizzle it over grilled street corn or swirl into bloody marys for an instant flavor upgrade that’s anything but basic.
Jalapeno Canned Cheddar Biscuits

Alright, folks, are you ready to transform your kitchen into a flavor fiesta with minimal effort? These Jalapeño Canned Cheddar Biscuits are the ultimate hack for when you crave something gloriously cheesy, delightfully spicy, and absurdly easy—no one will believe they started in a can!
8
biscuits10
minutes15
minutesIngredients
- 1 can (16.3 oz) refrigerated buttermilk biscuit dough
- 1 cup sharp cheddar cheese, freshly grated
- 2 medium jalapeños, seeds removed and finely minced
- 3 tablespoons unsalted butter, melted
- 1/4 teaspoon garlic powder
- 1 tablespoon fresh chives, finely chopped
Instructions
- Preheat your oven to 375°F and line a baking sheet with parchment paper.
- Separate the refrigerated buttermilk biscuit dough into 8 individual biscuits and arrange them on the prepared baking sheet, leaving about 2 inches between each for expansion.
- In a medium bowl, combine the freshly grated sharp cheddar cheese, finely minced jalapeños (seeds removed for milder heat), and garlic powder, tossing gently to distribute the ingredients evenly. Tip: Grating your own cheese from a block ensures superior meltability and flavor compared to pre-shredded varieties, which often contain anti-caking agents.
- Generously top each biscuit with the cheese and jalapeño mixture, pressing lightly to adhere.
- Place the baking sheet in the preheated oven and bake for 12-15 minutes, or until the biscuits are golden brown and the cheese is bubbly and slightly crisp at the edges.
- While the biscuits bake, combine the melted unsalted butter and finely chopped fresh chives in a small bowl.
- Remove the biscuits from the oven and immediately brush the tops with the chive-infused butter mixture. Tip: Brushing with butter right out of the oven allows the biscuits to absorb the flavor fully, creating a more tender crumb and glossy finish.
- Let the biscuits rest on the baking sheet for 5 minutes before serving to allow the structure to set. Tip: This brief resting period prevents the biscuits from becoming gummy when pulled apart and ensures the cheese layer firms up slightly for easier handling.
Devour these warm for the ultimate experience—the fluffy, pull-apart texture gives way to a sharp cheddar kick and a gentle jalapeño warmth that lingers just enough. Dynamically versatile, try splitting one and stuffing it with a fried egg for a next-level breakfast sandwich, or serve alongside a bowl of chili for a cozy, cheesy dunking situation.
Jalapeno Canned Pepper Jelly
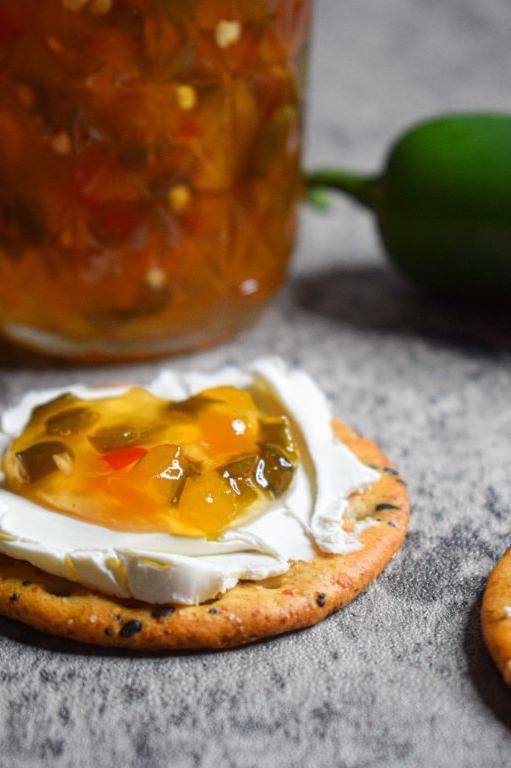
Let’s be honest—most condiments are wallflowers at the party, but this jalapeño canned pepper jelly? It’s the life of the fiesta, bringing sweet heat and sass to everything from cheese boards to morning toast. Liven up your pantry with this vibrant, jewel-toned jelly that packs a punch without blowing out your taste buds.
8
jars15
minutes20
minutesIngredients
- 1 pound fresh jalapeño peppers, stems removed and finely diced
- 1 cup apple cider vinegar with 5% acidity
- 4 cups granulated sugar
- 2 pouches (3 ounces each) liquid pectin
- 1/2 teaspoon unsalted butter
- Sterilized half-pint canning jars with new lids and bands
Instructions
- Combine diced jalapeño peppers, apple cider vinegar, and granulated sugar in a 6-quart heavy-bottomed stainless steel pot.
- Place the pot over medium-high heat and stir continuously with a heat-resistant silicone spatula until the sugar fully dissolves, about 4–5 minutes.
- Bring the mixture to a rolling boil that cannot be stirred down, then add the unsalted butter to reduce foaming.
- Boil vigorously for exactly 1 minute, then immediately remove the pot from heat.
- Stir in both pouches of liquid pectin until fully incorporated, skimming off any surface foam with a slotted spoon.
- Ladle the hot jelly into sterilized half-pint jars, leaving 1/4 inch of headspace at the top of each jar.
- Wipe the jar rims with a clean, damp cloth to ensure proper sealing, then place new lids and screw bands on fingertip-tight.
- Process the filled jars in a boiling water canner for 10 minutes, ensuring they are fully submerged by at least 1 inch of water.
- Remove the jars from the canner using a jar lifter and place them on a towel-lined counter to cool completely for 12–24 hours.
- Check that all lids have sealed by pressing the centers—they should not flex up or down when properly sealed.
Remarkably glossy with a jewel-like clarity, this jelly delivers an addictive sweet-heat balance that clings beautifully to crackers or grilled meats. Try it drizzled over cream cheese-stuffed mini peppers for an instant appetizer upgrade, or stir a spoonful into pan sauces for a sweet-and-spicy glaze that’ll make weeknight chicken dinners feel downright celebratory.
Jalapeno Canned BBQ Glaze
Daring to defy the notion that canned goods can’t be gourmet, this jalapeño BBQ glaze transforms humble pantry staples into a spicy-sweet revelation that’ll make your taste buds do a happy dance. Forget boring barbecue—this zesty concoction brings the heat and the sweet in perfect harmony, proving that sometimes the most exciting flavors come from the most unexpected places.
1
batch10
minutes30
minutesIngredients
- 1 cup canned tomato purée
- ½ cup apple cider vinegar
- ⅓ cup dark brown sugar, firmly packed
- 2 tablespoons Worcestershire sauce
- 1 tablespoon Dijon mustard
- 2 medium jalapeños, finely minced (seeds included for maximum heat)
- 2 cloves garlic, microplaned
- 1 teaspoon smoked paprika
- ½ teaspoon freshly cracked black pepper
- ¼ teaspoon fine sea salt
Instructions
- Combine tomato purée, apple cider vinegar, dark brown sugar, Worcestershire sauce, and Dijon mustard in a heavy-bottomed saucepan over medium heat.
- Whisk continuously for 2 minutes until the sugar fully dissolves and the mixture becomes homogeneous.
- Add minced jalapeños, microplaned garlic, smoked paprika, black pepper, and sea salt to the saucepan.
- Reduce heat to low and simmer uncovered for 25-30 minutes, stirring every 5 minutes to prevent scorching on the bottom.
- Monitor the glaze’s consistency—it should coat the back of a spoon thickly without dripping when ready. Tip: For deeper flavor development, don’t rush the simmering process.
- Check for desired thickness at the 25-minute mark; continue cooking if a thicker consistency is preferred.
- Remove from heat and let cool to room temperature, about 45 minutes, before transferring to an airtight container. Tip: The glaze will continue to thicken as it cools, so account for this when determining final consistency.
- Store refrigerated for up to 2 weeks, allowing flavors to meld for at least 4 hours before use. Tip: For optimal flavor integration, prepare the glaze at least one day ahead of serving.
Remarkably versatile, this glaze develops a glossy, lacquer-like finish that clings beautifully to grilled meats while delivering an addictive balance of sweet heat. The initial tang of vinegar gives way to smoky paprika notes before the jalapeño’s slow-building warmth takes center stage—try brushing it on chicken wings during the last 5 minutes of grilling or using it as a dipping sauce for sweet potato fries.
Jalapeno Canned Pasta Sauce
A fiery twist on pantry staples that’ll make your taste buds do the cha-cha! This jalapeño canned pasta sauce transforms ordinary ingredients into an extraordinary flavor fiesta, proving that spice and convenience can absolutely coexist in delicious harmony.
5
servings15
minutes40
minutesIngredients
– 2 tablespoons extra virgin olive oil
– 1 medium yellow onion, finely diced
– 3 garlic cloves, minced
– 4 fresh jalapeño peppers, seeded and finely chopped
– 1 (28-ounce) can San Marzano tomatoes, crushed
– 1/4 cup dry white wine
– 1 teaspoon granulated sugar
– 1/2 teaspoon fine sea salt
– 1/4 teaspoon freshly cracked black pepper
– 1/4 cup fresh basil leaves, chiffonade-cut
Instructions
1. Heat 2 tablespoons extra virgin olive oil in a heavy-bottomed saucepan over medium heat until shimmering.
2. Add 1 medium finely diced yellow onion and sauté for 5-7 minutes until translucent and fragrant.
3. Stir in 3 minced garlic cloves and cook for 1 minute until aromatic but not browned.
4. Incorporate 4 finely chopped seeded jalapeño peppers and cook for 3 minutes until slightly softened.
5. Deglaze the pan with 1/4 cup dry white wine, scraping any browned bits from the bottom.
6. Simmer the wine mixture for 2 minutes until reduced by half.
7. Pour in 1 (28-ounce) can crushed San Marzano tomatoes, stirring to combine.
8. Add 1 teaspoon granulated sugar, 1/2 teaspoon fine sea salt, and 1/4 teaspoon freshly cracked black pepper.
9. Bring the sauce to a gentle boil, then immediately reduce heat to low.
10. Simmer uncovered for 25-30 minutes, stirring occasionally, until thickened and deepened in color.
11. Remove from heat and stir in 1/4 cup chiffonade-cut fresh basil leaves.
12. Let the sauce rest for 5 minutes to allow flavors to meld before serving.
Miraculously smooth with just enough texture from the jalapeños, this sauce delivers a vibrant heat that builds gradually rather than overwhelming the palate. The bright acidity of the tomatoes balances beautifully with the pepper’s vegetal notes, creating a complex flavor profile that elevates simple pasta to restaurant-quality status. Try it tossed with cheesy tortellini or as a zesty base for homemade pizza—either way, your dinner game just leveled up significantly.
Conclusion
Packed with fiery flavor and kitchen convenience, these 31 jalapeño recipes prove that canned peppers can transform everyday meals into extraordinary dishes. We hope you’ll try a few favorites, share your spicy creations in the comments below, and pin this collection to your Pinterest boards for future cooking inspiration!


