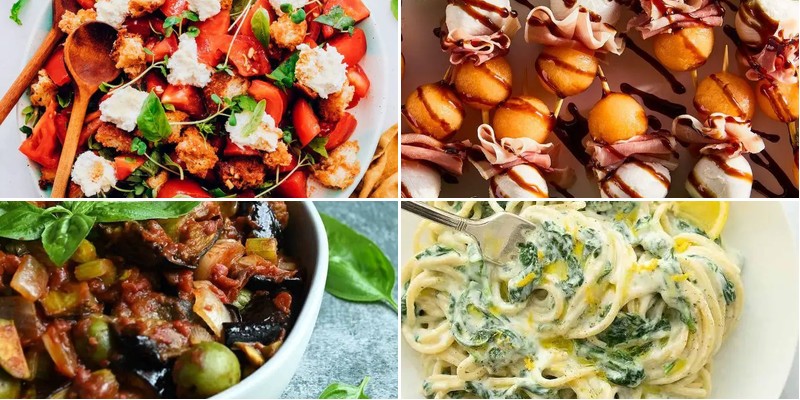
You know those perfect summer days when you crave something light, fresh, and bursting with flavor? Italy has mastered the art of warm-weather cooking, and we’ve gathered 19 of the most refreshing recipes to bring that sunshine to your table. From no-cook pastas to vibrant salads, these dishes are your ticket to delicious, breezy meals all season long. Let’s dive into these Italian summer favorites!
Caprese Salad with Fresh Basil
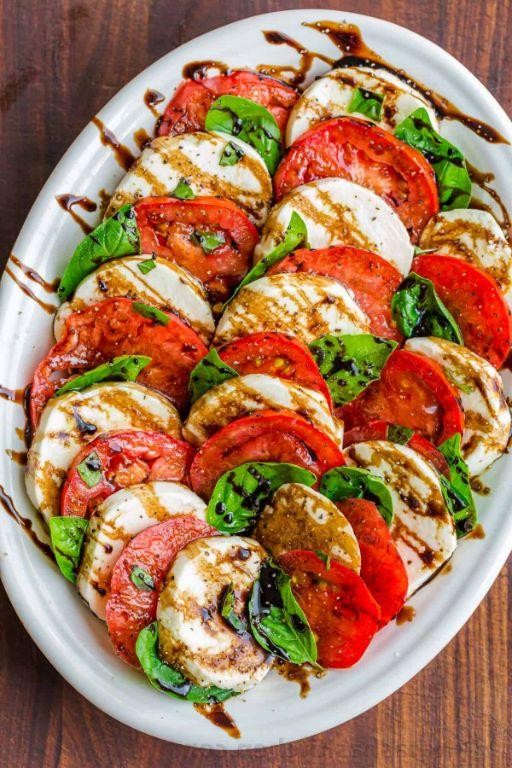
Often, the simplest moments in the kitchen become the most cherished—like today, when the afternoon light spills across the counter and I find myself reaching for just a few ingredients to make something quietly beautiful. This Caprese salad feels less like a recipe and more like a gentle pause, a way to honor the season’s purest flavors without hurry or fuss.
4
servings15
minutesIngredients
Tomatoes – 4 medium
Fresh mozzarella – 8 oz
Fresh basil – ¼ cup
Extra virgin olive oil – 2 tbsp
Balsamic vinegar – 1 tbsp
Salt – ½ tsp
Black pepper – ¼ tsp
Instructions
1. Rinse 4 medium tomatoes under cool running water and pat them completely dry with a clean kitchen towel.
2. Slice each tomato into ¼-inch thick rounds using a sharp serrated knife to prevent crushing the flesh.
3. Drain 8 oz of fresh mozzarella from its packaging liquid and slice it into ¼-inch thick rounds matching the tomato slices.
4. Pick ¼ cup of fresh basil leaves from their stems, gently rinsing them if needed and patting them thoroughly dry to prevent wilting.
5. Arrange the tomato and mozzarella slices in an alternating, overlapping pattern on a large serving platter.
6. Tuck the fresh basil leaves evenly between the tomato and mozzarella layers.
7. Drizzle 2 tbsp of extra virgin olive oil evenly over the arranged salad.
8. Drizzle 1 tbsp of balsamic vinegar in a thin stream across the salad.
9. Sprinkle ½ tsp of salt uniformly over the entire dish.
10. Grind ¼ tsp of black pepper evenly across the salad using a pepper mill.
11. Let the assembled salad rest at room temperature for 10 minutes before serving to allow the flavors to meld.
Perhaps what I love most is how the creamy mozzarella yields to the juicy tomatoes, while the basil lends its peppery sweetness to every bite. Drizzle any remaining dressing from the platter over crusty bread, or serve it alongside grilled chicken for a simple, satisfying meal that feels both elegant and effortless.
Panzanella with Heirloom Tomatoes

Floating through the kitchen this quiet afternoon, I find myself drawn to the simple alchemy of bread and tomatoes, that timeless dance between crisp and juicy that feels like summer preserved in a bowl. There’s something deeply comforting about tearing bread with your hands, about letting ingredients speak for themselves without much fuss or complication.
2
servings20
minutes12
minutesIngredients
Bread – 4 cups
Heirloom tomatoes – 2 lbs
Red onion – ½ cup
Basil – ¼ cup
Olive oil – ⅓ cup
Red wine vinegar – 2 tbsp
Salt – 1 tsp
Black pepper – ½ tsp
Instructions
1. Preheat your oven to 375°F.
2. Tear the bread into 1-inch pieces with your hands.
3. Spread the bread pieces in a single layer on a baking sheet.
4. Bake the bread for 12 minutes until golden brown and completely crisp.
5. Remove the baking sheet from the oven and let the bread cool completely for 15 minutes.
6. Cut the heirloom tomatoes into 1-inch chunks while the bread cools.
7. Thinly slice the red onion into half-moons.
8. Chop the basil leaves roughly with a sharp knife.
9. Combine the toasted bread, tomatoes, red onion, and basil in a large mixing bowl.
10. Whisk together the olive oil, red wine vinegar, salt, and black pepper in a small bowl until emulsified.
11. Pour the dressing over the bread and tomato mixture.
12. Gently toss everything together with your hands until evenly coated.
13. Let the salad sit undisturbed at room temperature for 30 minutes to allow the bread to absorb the dressing and tomato juices.
14. Taste one piece of bread to check if it has softened properly but still maintains some texture.
15. Transfer the salad to a serving platter using a slotted spoon if excess liquid has accumulated.
When the bread finally softens, it creates this wonderful contrast with the still-firm tomato chunks, each bite bursting with sweet acidity against the herbal notes of basil. The beauty of this salad lies in its patience—the way it improves as it sits, making it perfect for preparing ahead for a lazy dinner where you can simply scoop it straight from the bowl with a piece of crusty bread on the side.
Italian Grilled Vegetable Antipasto

Remembering how the late summer sun warmed my grandmother’s garden, I find myself drawn to this simple preparation that honors each vegetable’s quiet character, letting them speak for themselves over glowing coals.
4
servings15
minutes20
minutesIngredients
– Zucchini – 2 medium
– Bell peppers – 3 mixed colors
– Eggplant – 1 large
– Olive oil – ¼ cup
– Salt – 1 tsp
– Black pepper – ½ tsp
– Fresh basil – ¼ cup chopped
Instructions
1. Preheat your grill to medium-high heat, approximately 400°F.
2. Slice zucchini lengthwise into ¼-inch thick planks.
3. Cut bell peppers in half and remove seeds and stems.
4. Slice eggplant into ½-inch thick rounds.
5. Brush all vegetable surfaces lightly with olive oil using a pastry brush.
6. Sprinkle salt and black pepper evenly over oiled vegetables.
7. Place vegetables directly on grill grates in a single layer without crowding.
8. Grill zucchini for 3-4 minutes per side until grill marks appear and flesh softens.
9. Grill bell peppers skin-side down for 5-6 minutes until skins blister and blacken in spots.
10. Grill eggplant for 4-5 minutes per side until tender and lightly charred.
11. Transfer grilled vegetables to a clean cutting board and let rest for 2 minutes.
12. Chop basil leaves finely with a sharp knife.
13. Arrange grilled vegetables on a serving platter in overlapping layers.
14. Drizzle remaining olive oil over the arranged vegetables.
15. Sprinkle chopped basil evenly across the platter.
But these smoky, tender slices carry the memory of fire in their softened edges, their sweetness intensified by heat. I love serving them slightly warm with crusty bread to soak up the herb-infused oil, or layered over ricotta toast for a simple lunch that feels like abundance.
Lemon Ricotta Pasta with Spinach
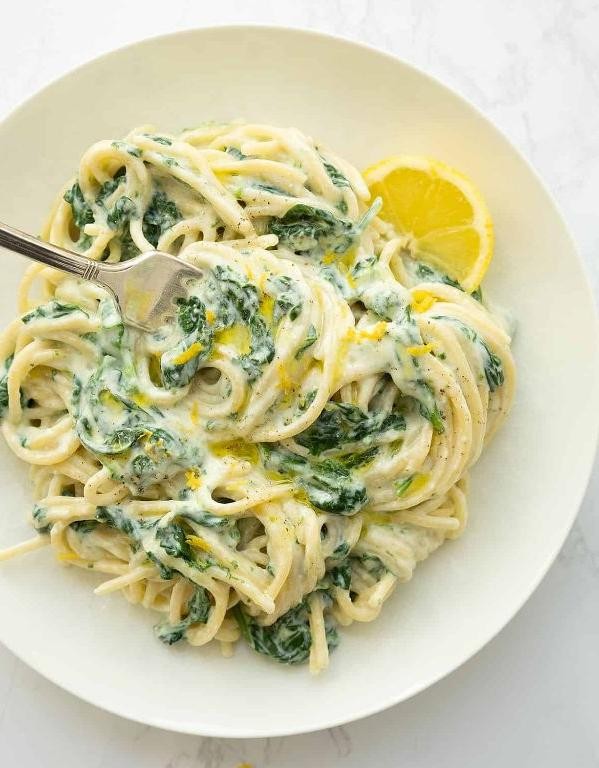
Mellow afternoons like this one call for simple comforts, the kind that require little effort but reward generously with each tender bite, reminding me why I keep returning to this lemon-kissed pasta when the world feels too loud.
4
servings15
minutes12
minutesIngredients
Pasta – 8 oz
Ricotta cheese – 1 cup
Lemon – 1
Spinach – 4 cups
Garlic – 2 cloves
Olive oil – 2 tbsp
Salt – 1 tsp
Black pepper – ½ tsp
Instructions
1. Bring 4 quarts of water to a rolling boil in a large pot.
2. Add 1 tablespoon of salt to the boiling water.
3. Add 8 oz of pasta and cook for 9 minutes, stirring occasionally to prevent sticking.
4. While pasta cooks, finely mince 2 cloves of garlic.
5. Zest the entire lemon using a microplane, then juice it to yield 3 tablespoons.
6. Heat 2 tablespoons of olive oil in a large skillet over medium-low heat.
7. Add minced garlic and sauté for 1 minute until fragrant but not browned.
8. Add 4 cups of spinach to the skillet and cook for 2 minutes until just wilted.
9. Reserve ½ cup of pasta water before draining the cooked pasta.
10. Transfer drained pasta directly into the skillet with spinach.
11. Add 1 cup of ricotta cheese, 3 tablespoons of lemon juice, and all the lemon zest to the skillet.
12. Toss everything together, adding reserved pasta water 2 tablespoons at a time until the sauce coats the pasta evenly.
13. Season with 1 teaspoon of salt and ½ teaspoon of black pepper, tossing once more to combine.
14. Remove from heat and let rest for 1 minute before serving. Only now does the true harmony reveal itself—the ricotta melting into creamy pockets against the bright lemon, the spinach lending earthy softness to each forkful. I sometimes finish it with extra black pepper or serve it alongside roasted cherry tomatoes for a burst of sweetness.
Prosciutto-Wrapped Melon Skewers

Evenings like these call for something simple, something that lets the ingredients speak for themselves while my thoughts drift like the summer breeze outside. There’s a quiet elegance in preparing these skewers, each one a tiny composition of sweet and salty, crisp and tender that requires little more than careful assembly and a moment’s patience.
8
skewers20
minutesIngredients
- Cantaloupe – 1 medium
- Prosciutto – 8 thin slices
- Fresh mint leaves – 12
- Balsamic glaze – 2 tbsp
- Black pepper – ¼ tsp
Instructions
- Cut the cantaloupe in half lengthwise using a sharp chef’s knife.
- Scoop out and discard all seeds and stringy pulp with a spoon.
- Slice each cantaloupe half into 1-inch thick wedges.
- Remove the rind from each wedge by sliding your knife between the flesh and green skin.
- Cut the cantaloupe flesh into 24 equal cubes, approximately 1-inch each.
- Lay prosciutto slices flat on a cutting board and cut each slice into thirds lengthwise.
- Wrap one prosciutto strip around the center of each cantaloupe cube, slightly overlapping the ends.
- Thread 3 wrapped cantaloupe cubes onto each 8-inch wooden skewer, leaving small spaces between cubes.
- Tuck one fresh mint leaf between each cantaloupe cube on the skewer.
- Arrange completed skewers on a serving platter in a single layer.
- Drizzle balsamic glaze in a zigzag pattern across all skewers.
- Sprinkle freshly ground black pepper evenly over the assembled skewers.
These skewers offer the most delightful contrast when served immediately—the cool, juicy melon against the salty, delicate prosciutto creates a dance of textures that feels both rustic and refined. That final whisper of mint and the sweet-tart balsamic pull everything together in a way that makes even the simplest gathering feel special.
Tuscan White Bean and Tuna Salad
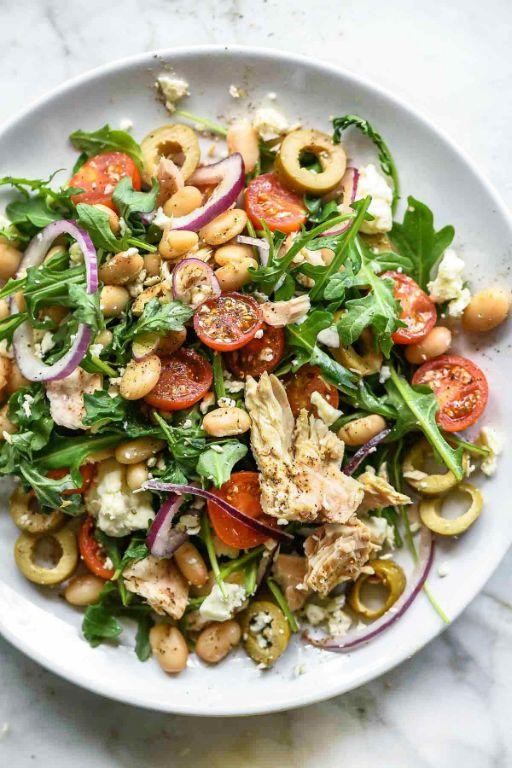
Gently, I find myself returning to this simple bowl, the way one might revisit a favorite quiet corner. There’s something deeply comforting in the soft textures and bright, clean flavors that come together with so little effort, a small gift on a busy afternoon.
2
servings15
minutesIngredients
– Canned white beans – 1 (15-oz) can
– Canned tuna in olive oil – 1 (5-oz) can
– Lemon – 1
– Extra virgin olive oil – 2 tbsp
– Red onion – ¼ cup, thinly sliced
– Fresh parsley – 2 tbsp, chopped
– Salt – ½ tsp
– Black pepper – ¼ tsp
Instructions
1. Drain and rinse the canned white beans in a colander under cool running water for 30 seconds to remove excess sodium.
2. Place the rinsed white beans into a medium mixing bowl.
3. Open the can of tuna and drain the olive oil into a small bowl, reserving it.
4. Flake the tuna with a fork directly into the bowl with the white beans.
5. Cut the lemon in half and squeeze the juice from both halves through a fine-mesh strainer into the bowl to catch seeds.
6. Add the reserved tuna oil and 2 tbsp of extra virgin olive oil to the bowl.
7. Thinly slice the red onion until you have ¼ cup and add it to the bowl.
8. Chop fresh parsley until you have 2 tbsp and add it to the bowl.
9. Sprinkle ½ tsp salt and ¼ tsp black pepper over the ingredients.
10. Gently fold all ingredients together with a rubber spatula until just combined, being careful not to mash the beans.
11. Let the salad sit at room temperature for 10 minutes to allow the flavors to meld. Now, the salad holds a lovely balance—creamy beans against the firm flakes of tuna, brightened by lemon and the gentle bite of onion. Nestle it into butter lettuce cups for a light lunch, or spoon it over toasted sourdough for something more substantial.
Zucchini and Parmesan Risotto

Often I find myself craving something that feels both comforting and light, a dish that bridges the gap between summer’s bounty and autumn’s coziness. On days like today, when the light slants just so through the kitchen window, I turn to this simple risotto, letting the rhythm of stirring become a kind of meditation.
5
servings15
minutes35
minutesIngredients
Arborio rice – 1 cup
Chicken broth – 4 cups, kept warm
Zucchini – 1 medium, diced
Yellow onion – ½ cup, finely chopped
Garlic – 2 cloves, minced
Dry white wine – ½ cup
Parmesan cheese – ½ cup, freshly grated
Unsalted butter – 2 tbsp
Olive oil – 1 tbsp
Salt – 1 tsp
Black pepper – ½ tsp
Instructions
1. Heat the olive oil in a large, heavy-bottomed pot over medium heat for 1 minute.
2. Add the finely chopped onion and cook for 5 minutes, stirring occasionally, until the onion becomes translucent and soft.
3. Stir in the minced garlic and cook for 1 more minute, just until fragrant.
4. Add the Arborio rice to the pot and toast it for 2 minutes, stirring constantly, until the edges of the grains look slightly translucent.
5. Pour in the dry white wine and cook, stirring continuously, until the liquid is fully absorbed, which should take about 2-3 minutes.
6. Add ½ cup of the warm chicken broth to the rice and stir continuously until the liquid is completely absorbed.
7. Continue adding the warm broth ½ cup at a time, stirring after each addition until absorbed before adding the next; this process should take about 20-25 minutes total.
8. After adding the third portion of broth, stir in the diced zucchini.
9. Continue adding the remaining broth and stirring until the rice is tender but still slightly firm to the bite and the mixture is creamy.
10. Remove the pot from the heat and let it rest for 1 minute.
11. Stir in the grated Parmesan cheese, unsalted butter, 1 teaspoon of salt, and ½ teaspoon of black pepper until fully incorporated and creamy.
Just as the last bit of cheese melts into the creamy rice, you’re met with a dish that feels both substantial and delicate. The zucchini softens into almost silken ribbons, offering little bursts of sweet freshness against the rich, savory depth of Parmesan. I love serving this in shallow bowls, perhaps with a simple green salad on the side, letting its comforting warmth be the main event of a quiet evening.
Sicilian Eggplant Caponata
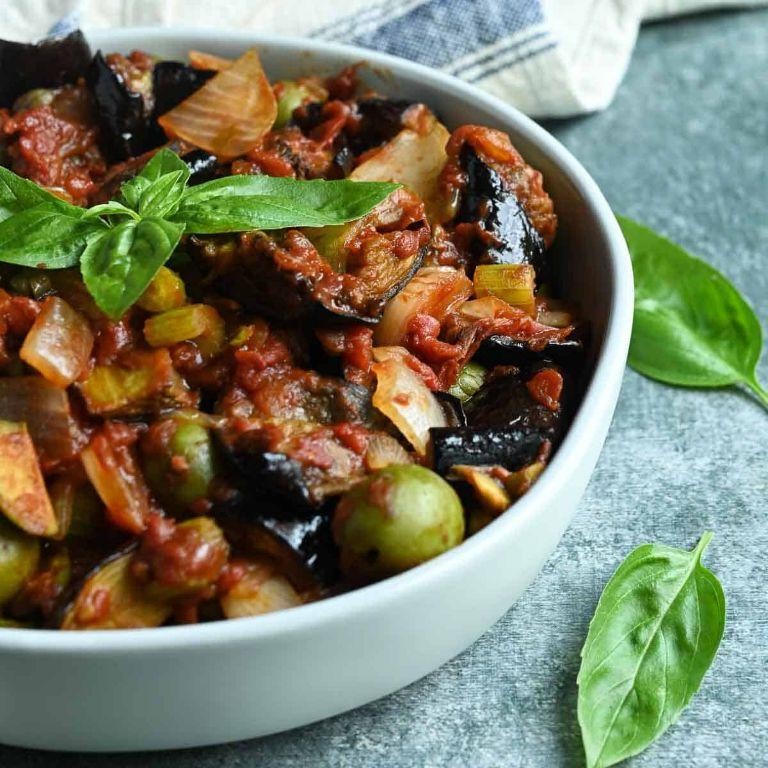
Gently, as autumn leaves begin their slow descent, I find myself drawn back to this humble dish that carries the warmth of Sicilian kitchens in every savory-sweet bite. There’s something profoundly comforting about the way eggplant transforms through patient cooking, becoming tender vessels for memories and flavors that linger long after the meal is finished.
4
servings45
minutes48
minutesIngredients
Eggplant – 1 large
Olive oil – ¼ cup
Onion – 1 medium
Celery – 2 stalks
Tomatoes – 3 medium
Red wine vinegar – 2 tbsp
Sugar – 1 tsp
Salt – 1 tsp
Capers – 2 tbsp
Instructions
1. Cut the eggplant into 1-inch cubes and place them in a colander.
2. Sprinkle ½ teaspoon of salt over the eggplant cubes and let them drain for 30 minutes to remove excess moisture.
3. Pat the eggplant cubes completely dry with paper towels to ensure proper browning.
4. Heat 2 tablespoons of olive oil in a large skillet over medium heat until it shimmers.
5. Add the eggplant cubes in a single layer and cook for 8-10 minutes until golden brown on all sides.
6. Remove the browned eggplant from the skillet and set aside.
7. Dice the onion and celery into ¼-inch pieces.
8. Add the remaining olive oil to the same skillet over medium heat.
9. Cook the onion and celery for 5-7 minutes until softened but not browned.
10. Chop the tomatoes into small pieces, keeping their juices.
11. Add the tomatoes to the skillet and cook for 3 minutes until they begin to break down.
12. Return the eggplant to the skillet and stir to combine.
13. Add the red wine vinegar, sugar, and remaining salt.
14. Reduce heat to low and simmer uncovered for 25 minutes, stirring occasionally.
15. Stir in the capers during the last 5 minutes of cooking.
16. Remove from heat and let cool to room temperature before serving.
Even after cooling, the caponata maintains a wonderful contrast between the silky eggplant and the bright pops of briny capers. This versatile relish shines when spooned over crusty bread or served alongside grilled fish, its complex sweet-and-sour profile deepening beautifully when made a day ahead.
Rosemary Focaccia with Sea Salt
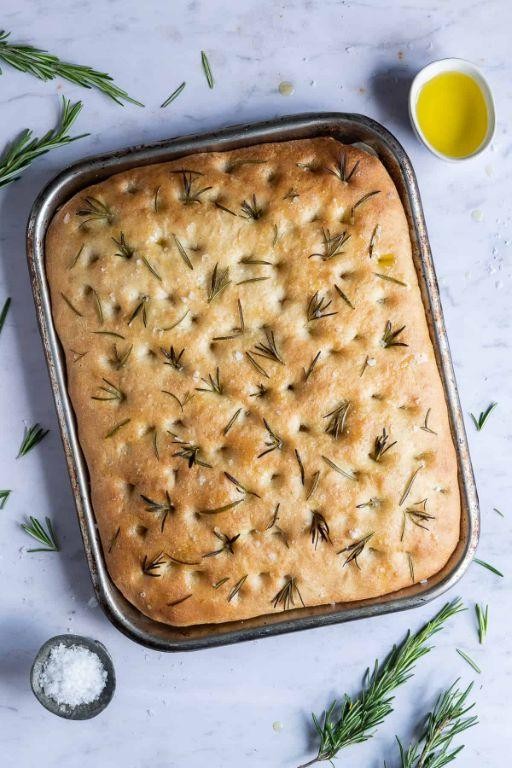
Lately, I’ve found myself drawn back to the quiet rhythm of bread-making, the way rosemary’s earthy scent fills the kitchen and sea salt crystals catch the light like tiny jewels on a golden canvas. There’s something deeply comforting in shaping this humble dough, a slow, mindful pause in a hurried world. Let’s begin.
8
servings30
minutes22
minutesIngredients
– Flour – 3 ½ cups
– Water – 1 ½ cups, 110°F
– Olive oil – ¼ cup
– Active dry yeast – 2 ¼ tsp
– Sugar – 1 tsp
– Salt – 1 tsp
– Fresh rosemary – 2 tbsp, chopped
– Sea salt flakes – 1 tsp
Instructions
1. Combine water, yeast, and sugar in a large bowl and let sit for 10 minutes until foamy.
2. Stir in 3 cups of flour, 2 tbsp olive oil, and salt until a shaggy dough forms.
3. Knead on a floured surface for 8–10 minutes, adding remaining flour as needed, until smooth and elastic.
4. Place dough in an oiled bowl, cover with a damp cloth, and let rise in a warm spot for 1 hour or until doubled.
5. Press dough into a greased 9×13-inch baking sheet, dimpling it deeply with your fingertips.
6. Drizzle with remaining olive oil, sprinkle rosemary and sea salt evenly, and let rest for 20 minutes.
7. Preheat oven to 425°F and bake for 18–22 minutes until golden brown with a crisp bottom.
8. Cool on a wire rack for 10 minutes before slicing.
Each slice reveals an airy crumb with a delicate chew, the rosemary’s pine-like warmth balanced by bursts of saline crunch. Tear it warm alongside a bowl of olive oil swirled with balsamic, or layer it with prosciutto and fig jam for a simple, elegant sandwich.
Limoncello Sorbetto

Beneath the afternoon light, I find myself craving something that tastes like sunshine captured in a spoon—a simple, bright limoncello sorbetto that clears the mind with each cool bite. It’s the kind of dessert that feels both indulgent and refreshing, a quiet treat for moments when you need to pause and savor. Making it requires little more than patience and a few good lemons, but the result is pure magic.
3
servings15
minutes4
minutesIngredients
– Water – 1 cup
– Sugar – ¾ cup
– Limoncello – ½ cup
– Lemon juice – ½ cup
Instructions
1. Combine 1 cup of water and ¾ cup of sugar in a small saucepan over medium heat.
2. Stir the mixture continuously until the sugar fully dissolves, which should take about 3–4 minutes.
3. Remove the saucepan from the heat and let the syrup cool to room temperature, approximately 20–25 minutes.
4. Pour ½ cup of limoncello and ½ cup of lemon juice into the cooled syrup, stirring gently to combine evenly.
5. Strain the mixture through a fine-mesh sieve into a clean bowl to remove any pulp or seeds.
6. Pour the strained liquid into an ice cream maker and churn according to the manufacturer’s instructions, typically 20–25 minutes, until it reaches a soft-serve consistency.
7. Transfer the sorbetto to a freezer-safe container and freeze for at least 4 hours, or until firm.
8. Scoop the sorbetto into chilled bowls or glasses just before serving. Only the zest of unwaxed lemons should be used if adding extra flavor, as wax can impart a bitter taste. For a smoother texture, avoid over-churning; stop once it thickens but is still spreadable. If the sorbetto freezes too hard, let it sit at room temperature for 5–10 minutes to soften slightly for easier scooping. Once frozen, the sorbetto emerges with a crystalline, almost snowy texture that melts delicately on the tongue, leaving behind the bright, zesty kick of limoncello and the clean acidity of fresh lemons. I love serving it in hollowed-out lemon halves for a playful, sun-drenched presentation, or pairing it with a drizzle of honey for a touch of warmth against the cool, vibrant flavors.
Grilled Balsamic Chicken with Cherry Tomatoes

Gently, the late afternoon sun casts long shadows across the kitchen counter, where simple ingredients wait to become something quietly extraordinary. There’s a certain peace in preparing a meal that feels both grounding and gently celebratory, a slow unfolding of flavors that mirrors the easy rhythm of these fading summer days.
2
servings15
minutes20
minutesIngredients
Chicken breasts – 2 (6 oz each)
Balsamic vinegar – ¼ cup
Olive oil – 2 tbsp
Cherry tomatoes – 1 pint
Salt – 1 tsp
Black pepper – ½ tsp
Garlic – 2 cloves, minced
Instructions
1. Place chicken breasts between two sheets of plastic wrap and pound to an even ½-inch thickness using a meat mallet or rolling pin.
2. Whisk together balsamic vinegar, olive oil, minced garlic, ½ teaspoon salt, and ¼ teaspoon black pepper in a medium bowl until fully combined.
3. Add chicken breasts to the marinade, turning to coat all surfaces, then cover and refrigerate for exactly 30 minutes.
4. Preheat grill to medium-high heat (400°F) while chicken marinates, brushing grates lightly with oil to prevent sticking.
5. Remove chicken from marinade, letting excess drip off, and reserve the remaining marinade in the bowl.
6. Place chicken on the preheated grill and cook for 5-6 minutes until grill marks form and edges turn opaque.
7. Flip chicken using tongs and cook another 5-6 minutes until internal temperature reaches 165°F when tested with an instant-read thermometer.
8. Add cherry tomatoes to the reserved marinade, tossing to coat evenly.
9. Transfer tomatoes to the grill in a single layer using a slotted spoon or grill basket, cooking for 3-4 minutes until skins blister and split open.
10. Remove chicken and tomatoes from grill, arranging on a platter and sprinkling with remaining salt and pepper.
The chicken emerges tender with a caramelized glaze, while the tomatoes burst with sweet-tart juice that pools around each slice. Serve it over creamy polenta or alongside crusty bread to soak up every last bit of the vibrant pan sauce, letting the simple perfection of summer speak for itself.
Peach and Burrata Salad
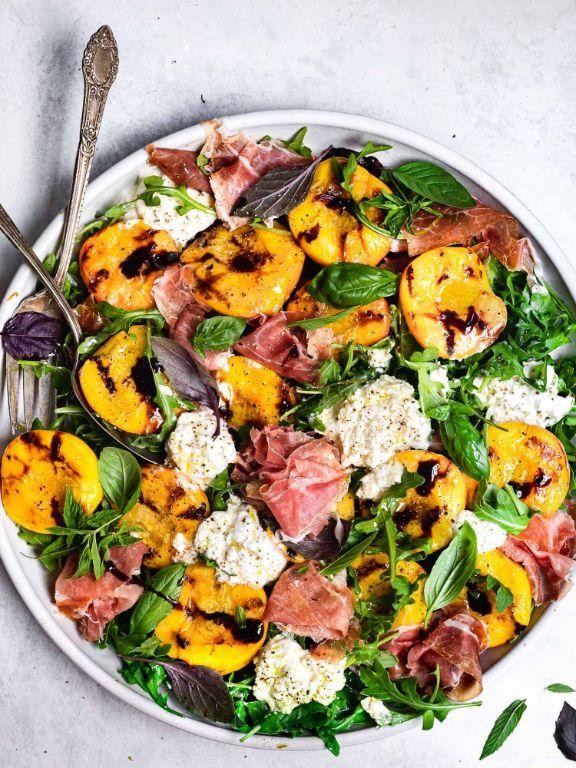
When the afternoon light slants through the kitchen window, I find myself craving something that feels both simple and luxurious, a dish that honors the last warm days of the season. This peach and burrata salad is exactly that—a quiet celebration of soft textures and sweet, sun-ripened flavors that requires little more than gentle assembly.
2
servings10
minutesIngredients
– Ripe peaches – 2
– Burrata cheese – 8 oz ball
– Fresh basil leaves – ¼ cup, packed
– Extra virgin olive oil – 2 tbsp
– Flaky sea salt – ½ tsp
– Freshly cracked black pepper – ¼ tsp
Instructions
1. Wash the peaches under cool running water and pat them completely dry with a clean kitchen towel. 2. Slice each peach in half along the seam, twist the halves apart, and remove the pit. 3. Cut each peach half into ¼-inch thick slices, arranging them in a single layer on a large serving platter. 4. Tear the burrata ball open with your hands over the center of the platter, allowing the creamy interior to spill out onto the peaches. 5. Drizzle the extra virgin olive oil evenly over the peaches and burrata. 6. Sprinkle the flaky sea salt and freshly cracked black pepper evenly across the entire salad. 7. Gently tear the fresh basil leaves with your fingers and scatter them over the top. Serve immediately. The creamy, cool burrata melts into the sweet, juicy peach slices, while the basil and pepper add little bursts of fragrance and heat. I love serving this on a large wooden board with crusty bread for scooping up every last bit of the creamy, fruity dressing that forms at the bottom of the platter.
Linguine with Clams and Cherry Tomatoes
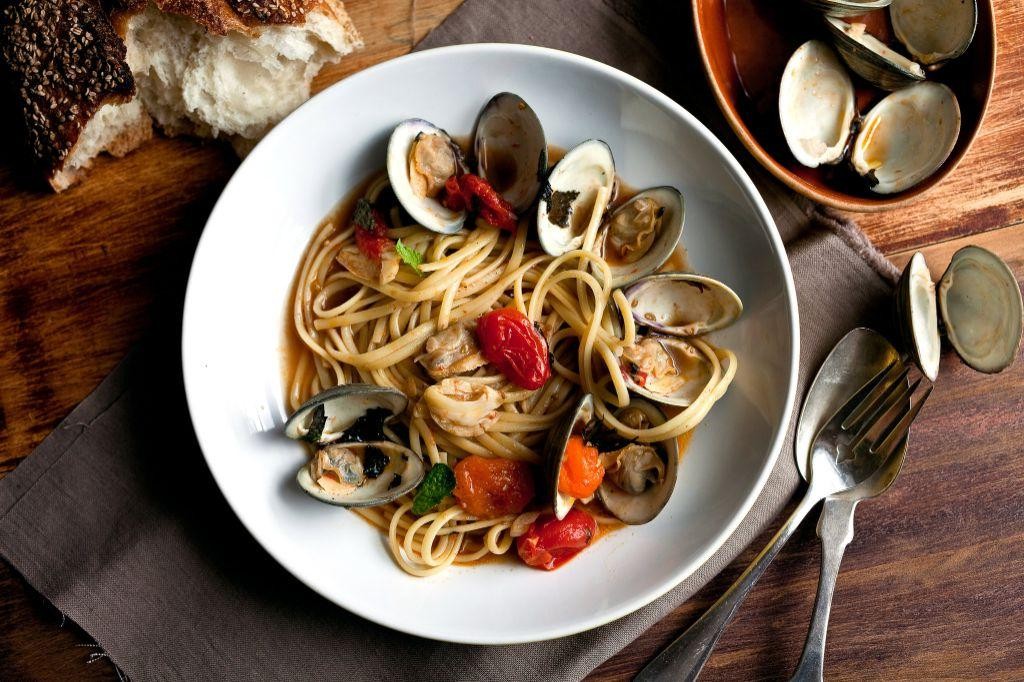
Nostalgia washes over me whenever I prepare this dish, the gentle rhythm of chopping and simmering creating a quiet kitchen meditation. There’s something profoundly comforting about the way briny clams mingle with sweet cherry tomatoes, a simple harmony that feels both elegant and deeply nourishing. This linguine captures that fleeting moment when summer’s bounty meets autumn’s reflection.
2
servings15
minutes18
minutesIngredients
- Linguine – 12 oz
- Fresh clams – 2 lbs
- Cherry tomatoes – 1 pint
- Garlic – 4 cloves
- Dry white wine – ½ cup
- Extra virgin olive oil – 3 tbsp
- Fresh parsley – ¼ cup
- Red pepper flakes – ½ tsp
- Salt – 1 tsp
Instructions
- Bring 6 quarts of salted water to a rolling boil in a large pot.
- Add linguine and cook for 9 minutes, stirring occasionally to prevent sticking.
- While pasta cooks, scrub clams thoroughly under cold running water, discarding any that remain open when tapped.
- Heat olive oil in a large skillet over medium heat until it shimmers.
- Add thinly sliced garlic and red pepper flakes, cooking for 1 minute until fragrant but not browned.
- Halve cherry tomatoes and add to the skillet, cooking for 3 minutes until they begin to soften and release juices.
- Pour in white wine, scraping any browned bits from the pan bottom.
- Add cleaned clams to the skillet, cover, and steam for 6-8 minutes until shells open fully.
- Reserve 1 cup of pasta water before draining linguine.
- Transfer drained linguine directly into the skillet with the clam mixture.
- Toss pasta with the sauce, adding reserved pasta water 2 tablespoons at a time until the sauce lightly coats the noodles.
- Stir in chopped parsley just before serving.
Just before serving, the al dente linguine glistens with a light, briny sauce that clings perfectly to each strand. Juicy cherry tomatoes burst with sweetness against the tender clams, while a subtle heat from the pepper flakes lingers pleasantly. For a beautiful presentation, serve family-style in a large shallow bowl with crusty bread for soaking up every last drop of the fragrant broth.
Conclusion
Delightful as these 19 Italian summer recipes are, they’re even better when shared! From vibrant salads to cool desserts, each dish brings a taste of sunshine to your table. We’d love to hear which ones become your favorites—drop a comment below and pin this roundup to your Pinterest boards for your next sunny day feast. Happy cooking!


