Hey there, ice cream enthusiasts! Have you ever dreamed of creating creamy, dreamy frozen treats right in your own kitchen? With an ice cream maker, you can whip up everything from classic vanilla to adventurous flavor combinations that will wow your family and friends. Get ready to discover 22 irresistible recipes that will transform your dessert game and make every scoop a celebration!
Classic Vanilla Bean Ice Cream
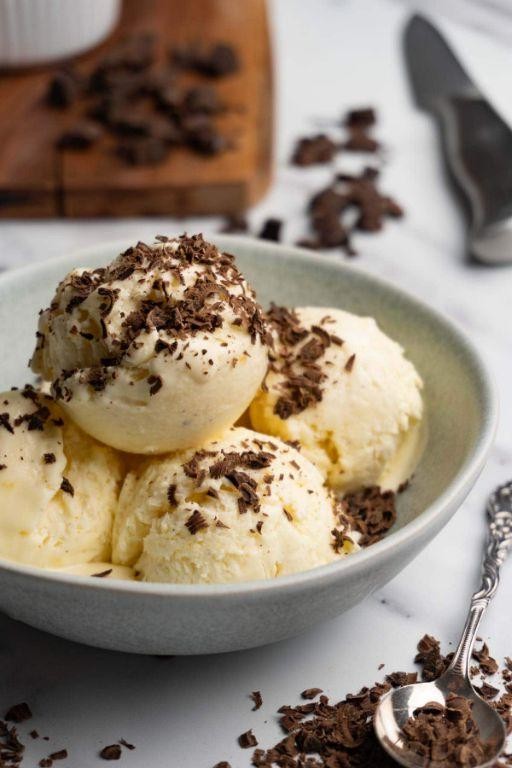
Perfectly creamy and timeless, this vanilla bean ice cream delivers rich flavor with just a few quality ingredients. Pure vanilla bean seeds create those beautiful speckles throughout the custard base. Prepare for the smoothest homemade ice cream you’ve ever tasted.
8
servings25
minutes30
minutesIngredients
– 2 cups heavy cream
– 1 cup whole milk
– 3/4 cup granulated sugar
– 6 large egg yolks
– 1 vanilla bean
– 1/4 teaspoon kosher salt
Instructions
1. Split the vanilla bean lengthwise and scrape out the seeds with the back of your knife.
2. Combine the heavy cream, milk, vanilla bean seeds, and empty pod in a medium saucepan.
3. Heat the mixture over medium heat until it reaches 170°F, stirring occasionally to prevent scorching.
4. While the cream heats, whisk the egg yolks and sugar together in a separate bowl until pale and thick.
5. Temper the eggs by slowly pouring 1 cup of the hot cream mixture into the egg yolks while whisking constantly.
6. Pour the tempered egg mixture back into the saucepan with the remaining cream.
7. Cook over medium-low heat, stirring constantly with a wooden spoon, until the custard thickens and coats the back of the spoon (about 175-180°F).
8. Immediately strain the custard through a fine-mesh sieve into a clean bowl to remove any cooked egg bits.
9. Stir in the kosher salt until fully dissolved.
10. Cool the custard to room temperature, then cover and refrigerate for at least 4 hours or until completely chilled.
11. Pour the chilled custard into your ice cream maker and churn according to manufacturer’s instructions until thick and creamy (about 20-25 minutes).
12. Transfer the ice cream to an airtight container and freeze for 4-6 hours until firm.
Velvety smooth with intense vanilla flavor, this ice cream has that perfect scoopable texture straight from the freezer. The real vanilla bean creates tiny black specks that promise authentic flavor in every bite. Serve it alongside warm apple pie or crumble for a classic dessert combination that never disappoints.
Rich Chocolate Fudge Ice Cream
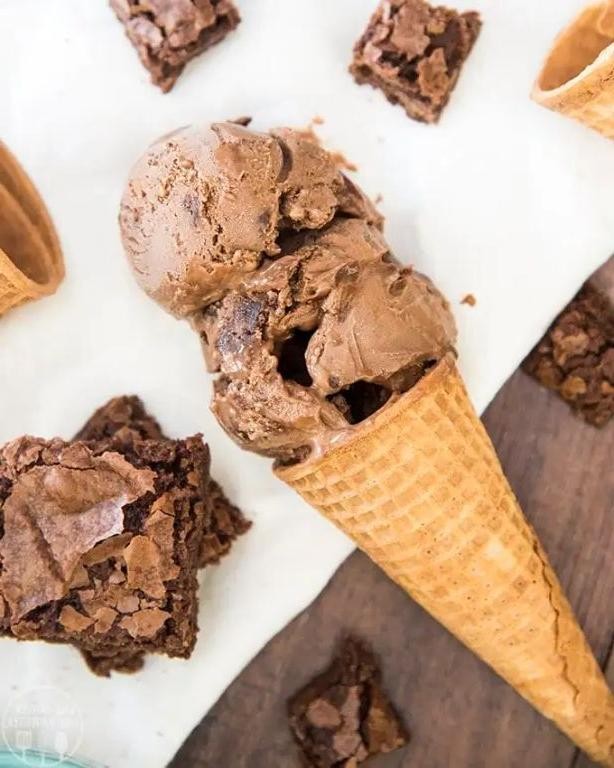
Smooth, decadent, and intensely chocolatey, this homemade fudge ice cream delivers rich flavor without an ice cream maker. Simply freeze and enjoy creamy perfection straight from your freezer.
8
servings15
minutesIngredients
– 2 cups heavy cream
– 1 can (14 oz) sweetened condensed milk
– 1/2 cup unsweetened cocoa powder
– 1/2 cup semi-sweet chocolate chips
– 1 tsp vanilla extract
– 1/4 tsp salt
Instructions
1. Pour 2 cups heavy cream into a large mixing bowl.
2. Whip the cream on high speed with an electric mixer until stiff peaks form, about 3-4 minutes.
3. In a separate bowl, combine 1 can sweetened condensed milk, 1/2 cup unsweetened cocoa powder, 1 tsp vanilla extract, and 1/4 tsp salt.
4. Whisk the condensed milk mixture until completely smooth and no cocoa lumps remain.
5. Gently fold the whipped cream into the chocolate mixture using a spatula until fully incorporated.
6. Melt 1/2 cup semi-sweet chocolate chips in a microwave-safe bowl in 30-second intervals, stirring between each, until smooth.
7. Drizzle the melted chocolate over the ice cream base and swirl gently with a knife.
8. Transfer the mixture to a 9×5-inch loaf pan lined with parchment paper.
9. Cover the pan tightly with plastic wrap, pressing it directly onto the surface of the ice cream.
10. Freeze for at least 6 hours or until firm.
Ultra-creamy with deep chocolate intensity, this ice cream boasts a fudge-like texture that melts luxuriously on the tongue. Serve scoops over warm brownies for an indulgent dessert or crumble chocolate cookies between layers for added crunch.
Creamy Strawberry Swirl Ice Cream
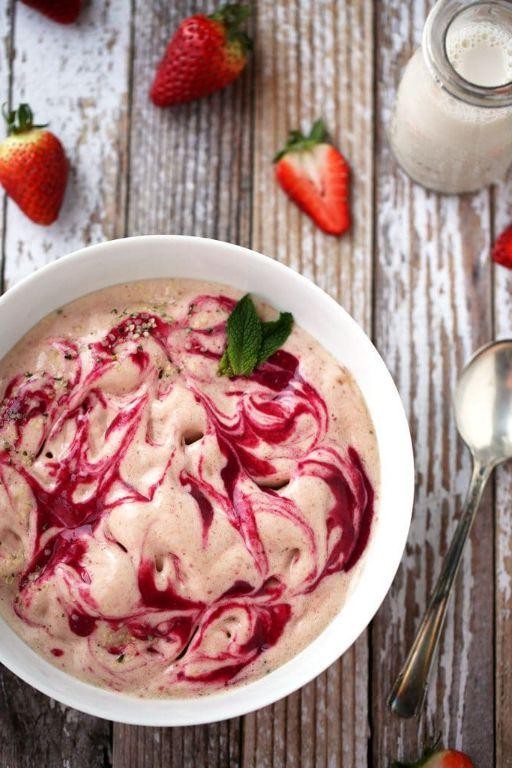
Frozen treats don’t get more dreamy than this homemade strawberry swirl ice cream. Fresh berries and rich cream create the perfect summer indulgence. Skip the store-bought versions and make this creamy delight in your own kitchen.
8
servings20
minutesIngredients
– 2 cups heavy cream
– 1 cup whole milk
– 3/4 cup granulated sugar
– 1 teaspoon vanilla extract
– 1/4 teaspoon salt
– 1 pound fresh strawberries
– 1/4 cup powdered sugar
Instructions
1. Wash and hull 1 pound of fresh strawberries, then pat them completely dry with paper towels.
2. Combine strawberries and 1/4 cup powdered sugar in a blender, then pulse until smooth with small chunks remaining.
3. Transfer strawberry mixture to a sealed container and refrigerate for at least 2 hours to develop flavor.
4. Whisk together 2 cups heavy cream, 1 cup whole milk, 3/4 cup granulated sugar, 1 teaspoon vanilla extract, and 1/4 teaspoon salt in a large bowl until sugar fully dissolves.
5. Pour cream mixture into your ice cream maker and churn according to manufacturer’s instructions, about 25-30 minutes until thick and creamy.
6. Spread one-third of the churned ice cream into a 9×5-inch loaf pan using a spatula.
7. Drizzle one-third of the chilled strawberry mixture over the ice cream layer in zigzag patterns.
8. Repeat layering process twice more with remaining ice cream and strawberry mixture.
9. Use a knife to gently swirl the layers together, making 3-4 passes through the pan without overmixing.
10. Cover the pan tightly with plastic wrap pressed directly against the ice cream surface to prevent ice crystals.
11. Freeze for at least 4 hours or until firm enough to scoop.
12. Serve scoops in chilled bowls or cones immediately after removing from freezer. Perfectly creamy with vibrant strawberry ribbons throughout each scoop, this ice cream delivers fresh berry flavor in every bite. Try sandwiching it between homemade shortbread cookies or crumbling graham crackers over the top for extra texture.
Refreshing Mint Chocolate Chip Ice Cream
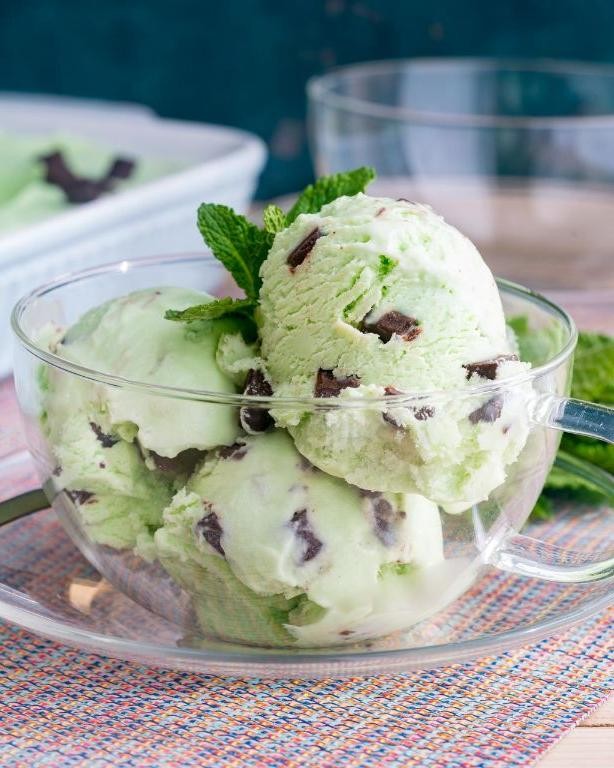
Dazzlingly cool and creamy, this homemade mint chocolate chip ice cream delivers that nostalgic flavor without artificial colors. Dark chocolate chunks provide satisfying texture against the smooth mint base. Perfect for beating the summer heat or satisfying late-night cravings.
8
servings25
minutes20
minutesIngredients
– 2 cups heavy cream
– 1 cup whole milk
– 3/4 cup granulated sugar
– 1/4 teaspoon salt
– 2 teaspoons peppermint extract
– 4 large egg yolks
– 1/2 cup finely chopped dark chocolate
– 2 drops green food coloring (optional)
Instructions
1. Combine 2 cups heavy cream, 1 cup whole milk, 3/4 cup granulated sugar, and 1/4 teaspoon salt in a medium saucepan.
2. Heat the mixture over medium heat until it reaches 170°F, stirring occasionally to dissolve the sugar.
3. Whisk 4 large egg yolks in a separate bowl until pale yellow.
4. Slowly pour 1 cup of the hot cream mixture into the egg yolks while whisking constantly to temper them.
5. Pour the tempered egg mixture back into the saucepan with the remaining cream mixture.
6. Cook over medium-low heat, stirring constantly with a wooden spoon, until the custard thickens and coats the back of the spoon (about 175°F).
7. Immediately strain the custard through a fine-mesh sieve into a clean bowl to remove any cooked egg bits.
8. Stir in 2 teaspoons peppermint extract and 2 drops green food coloring if using.
9. Chill the custard in the refrigerator for at least 4 hours or until it reaches 40°F.
10. Pour the chilled custard into your ice cream maker and churn according to manufacturer’s instructions until it reaches soft-serve consistency.
11. Add 1/2 cup finely chopped dark chocolate during the last 2 minutes of churning.
12. Transfer the ice cream to an airtight container and freeze for at least 4 hours or until firm.
Unbelievably smooth with just the right amount of crunch from the dark chocolate shards. The vibrant green hue makes it visually striking when scooped into waffle cones. For an elevated dessert, sandwich between chocolate chip cookies or crumble over brownie sundaes.
Decadent Salted Caramel Ice Cream
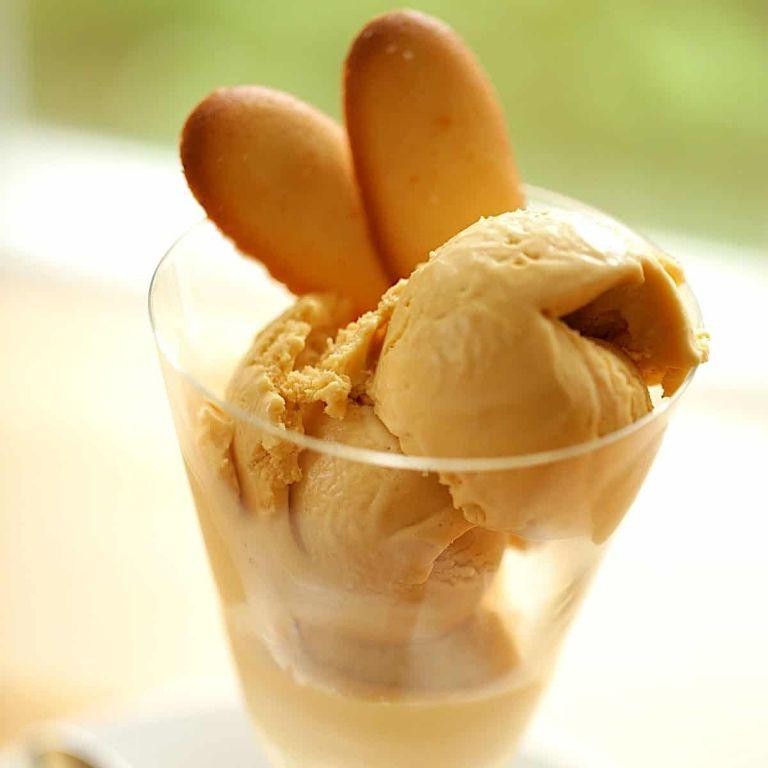
Nothing beats homemade ice cream, especially when it features rich salted caramel. Now you can create this decadent frozen dessert in your own kitchen with minimal effort. Follow these precise steps for perfect results every time.
20
minutes25
minutesIngredients
– 2 cups heavy cream
– 1 cup whole milk
– 3/4 cup granulated sugar
– 4 large egg yolks
– 1/2 cup salted caramel sauce
– 1 tsp vanilla extract
– 1/2 tsp sea salt
Instructions
1. Combine 1/2 cup sugar with 2 tablespoons water in a heavy-bottomed saucepan over medium heat.
2. Cook sugar mixture without stirring until it turns deep amber, about 8-10 minutes.
3. Carefully whisk in 1/2 cup heavy cream (the mixture will bubble vigorously).
4. Remove from heat and stir in sea salt until fully dissolved.
5. Transfer caramel to a bowl and cool completely to room temperature.
6. Whisk egg yolks with remaining 1/4 cup sugar in a separate bowl until pale and thick.
7. Heat remaining heavy cream and whole milk in a saucepan to 170°F.
8. Temper egg mixture by slowly pouring half the hot cream into yolks while whisking constantly.
9. Return tempered mixture to saucepan and cook over medium-low heat until it coats the back of a spoon, about 3-4 minutes.
10. Strain custard through a fine-mesh sieve into a clean bowl.
11. Stir in vanilla extract and cooled caramel sauce until fully incorporated.
12. Chill custard mixture in refrigerator for at least 4 hours or until completely cold.
13. Pour chilled mixture into ice cream maker and churn according to manufacturer’s instructions, about 25-30 minutes.
14. Transfer churned ice cream to an airtight container and freeze for 4-6 hours until firm.
Decadent swirls of salted caramel create beautiful ribbons throughout the creamy base. The perfect balance of sweet and salty makes this ice cream dangerously addictive. Try serving it warm brownie sundaes or crumbling shortbread cookies over the top for extra texture.
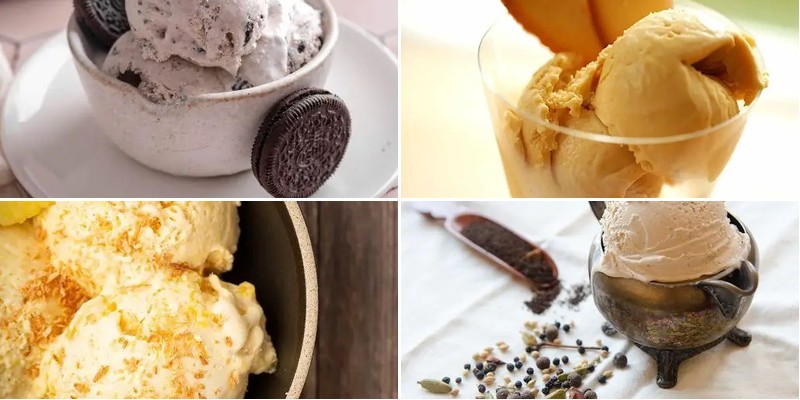
Luscious Cookies and Cream Ice Cream
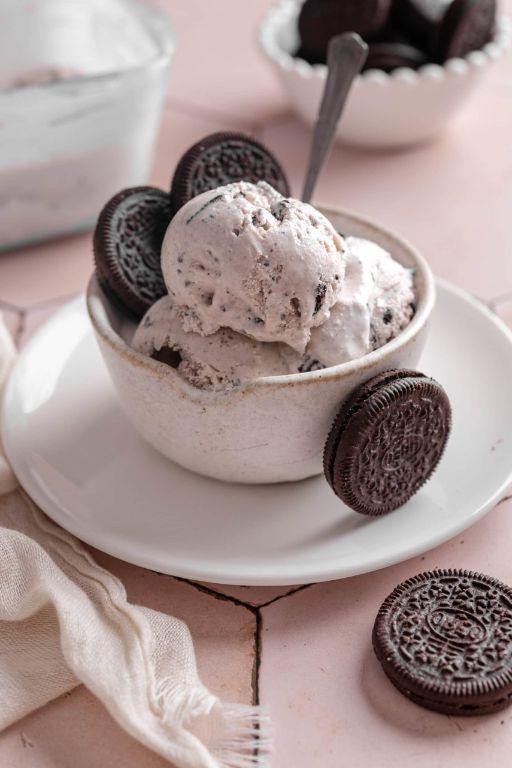
Whip up this decadent ice cream that transforms classic cookies into a frozen masterpiece. With just five simple ingredients, you’ll create an ultra-creamy dessert that rivals premium store-bought brands. The crushed Oreos provide satisfying texture throughout every spoonful.
8
servings10
minutesIngredients
– 2 cups heavy cream
– 1 cup whole milk
– 3/4 cup granulated sugar
– 1 tsp vanilla extract
– 15 Oreo cookies
Instructions
1. Chill your ice cream maker bowl for at least 24 hours at 0°F.
2. Place 12 Oreo cookies in a zip-top bag and crush them into small chunks using a rolling pin.
3. Combine heavy cream, whole milk, and granulated sugar in a large mixing bowl.
4. Whisk the mixture vigorously for 2 minutes until the sugar completely dissolves.
5. Stir in vanilla extract until fully incorporated.
6. Pour the ice cream base into your pre-chilled ice cream maker.
7. Churn the mixture for 25 minutes until it reaches soft-serve consistency.
8. Add the crushed Oreo cookies during the final 2 minutes of churning.
9. Transfer the ice cream to an airtight container, layering with remaining 3 crushed Oreos.
10. Freeze the ice cream for at least 4 hours at -10°F until firm.
Fantastically creamy with satisfying cookie crunch in every bite, this ice cream delivers perfect texture balance. The rich vanilla base complements the chocolate cookies beautifully. For an elevated presentation, serve scoops in chilled bowls garnished with extra cookie crumbles.
Tropical Mango Passion Fruit Ice Cream
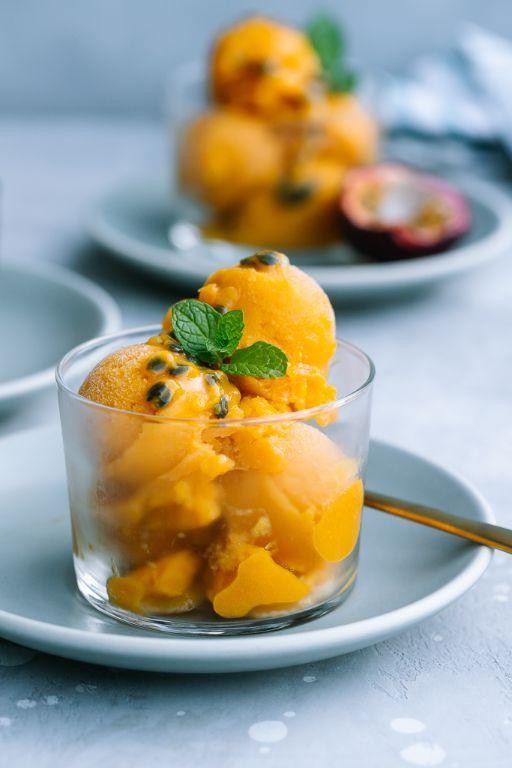
Just when you thought ice cream couldn’t get more refreshing, this tropical blend delivers pure paradise. Juicy mango and tart passion fruit create the ultimate frozen treat that’s surprisingly simple to make at home. Your ice cream maker will finally earn its counter space with this vibrant dessert.
8
servings15
minutesIngredients
– 2 cups ripe mango puree
– 1/2 cup passion fruit pulp
– 1 cup granulated sugar
– 2 cups heavy cream
– 1 cup whole milk
– 1/4 teaspoon salt
– 1 tablespoon fresh lime juice
Instructions
1. Combine mango puree, passion fruit pulp, and sugar in a blender.
2. Blend on high speed for 45 seconds until completely smooth.
3. Pour the fruit mixture through a fine-mesh strainer into a large bowl to remove any fibrous bits.
4. Whisk in heavy cream, whole milk, and salt until fully incorporated.
5. Stir in fresh lime juice to balance the sweetness.
6. Cover the bowl tightly with plastic wrap and chill in refrigerator for 4 hours until mixture reaches 40°F.
7. Pour the chilled base into your ice cream maker.
8. Churn according to manufacturer’s instructions for 25-30 minutes until thickened.
9. Transfer the soft ice cream to an airtight container.
10. Press parchment paper directly onto the surface to prevent ice crystals.
11. Freeze for at least 6 hours or until firm at 0°F.
Scoop reveals a creamy texture with vibrant orange-yellow swirls throughout. The tropical flavors burst with each spoonful—sweet mango perfectly balanced by passion fruit’s tangy notes. Serve in chilled bowls garnished with fresh mint or alongside coconut macaroons for an island-inspired dessert experience.
Indulgent Peanut Butter Cup Ice Cream
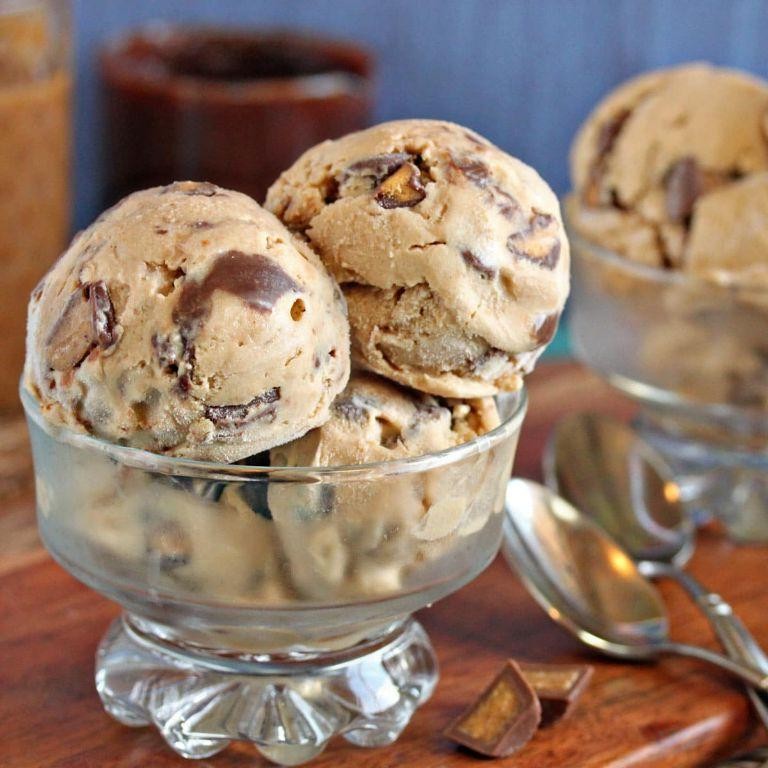
TThis peanut butter cup ice cream delivers rich, creamy indulgence without an ice cream maker. You get chocolate-swirled peanut butter perfection in every scoop. Make it ahead for effortless summer entertaining.
8
servings20
minutesIngredients
– 2 cups heavy cream
– 1 (14 ounce) can sweetened condensed milk
– 1/2 cup creamy peanut butter
– 1 teaspoon vanilla extract
– 1/4 teaspoon salt
– 1 cup chopped peanut butter cups
– 1/2 cup chocolate sauce
Instructions
1. Pour 2 cups heavy cream into a large mixing bowl.
2. Whip the cream on high speed until stiff peaks form, about 3-4 minutes.
3. Gently fold in 1 can sweetened condensed milk using a spatula until just combined.
4. Add 1/2 cup creamy peanut butter, 1 teaspoon vanilla extract, and 1/4 teaspoon salt to the mixture.
5. Fold all ingredients together until fully incorporated and smooth.
6. Pour half of the ice cream base into a 9×5-inch loaf pan.
7. Drizzle 1/4 cup chocolate sauce over the first layer in zigzag patterns.
8. Sprinkle 1/2 cup chopped peanut butter cups evenly across the surface.
9. Pour remaining ice cream base over the toppings.
10. Repeat the chocolate sauce drizzle with remaining 1/4 cup sauce.
11. Top with remaining 1/2 cup chopped peanut butter cups.
12. Use a knife to gently swirl the layers together in figure-eight motions.
13. Cover the pan tightly with plastic wrap, pressing it directly against the ice cream surface.
14. Freeze for at least 6 hours or until firm throughout.
15. Remove from freezer 10 minutes before serving for easier scooping.
Ribboned with chocolate and studded with peanut butter cups, this ice cream stays remarkably scoopable straight from the freezer. The creamy peanut butter base balances perfectly against the crunchy candy pieces. Try serving it sandwiched between chocolate chip cookies or crumbled over warm brownies for an extra-decadent treat.
Zesty Lemon Basil Sorbet
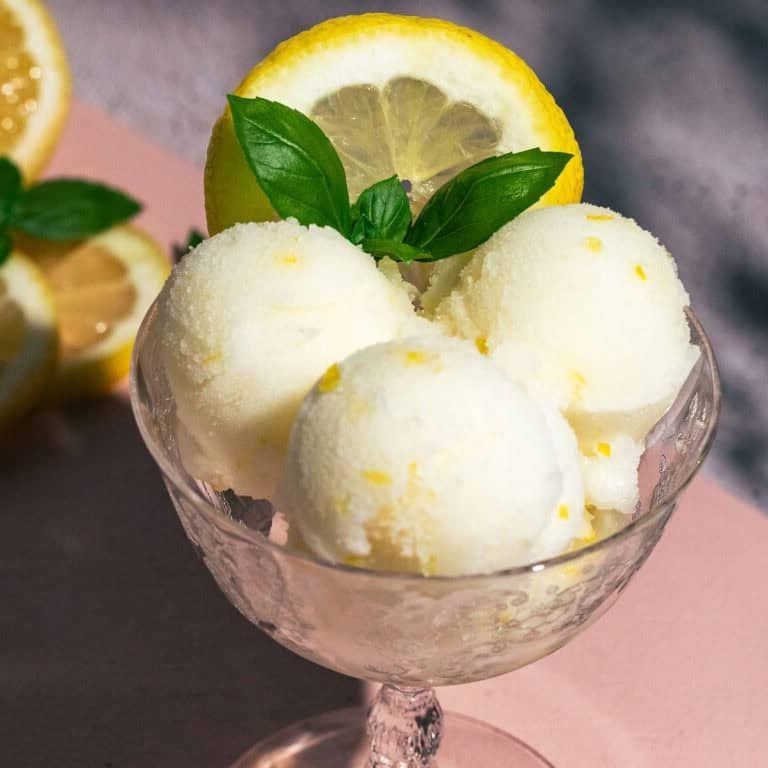
Melt away summer heat with this vibrant, palate-cleansing sorbet. Made with just four ingredients, it delivers a perfect balance of sweet and tart. Fresh basil adds an herbal twist that elevates the classic lemon flavor.
5
servings30
minutes4
minutesIngredients
– 1 cup granulated sugar
– 1 cup water
– 1 cup freshly squeezed lemon juice
– 1/4 cup fresh basil leaves
Instructions
1. Combine 1 cup granulated sugar and 1 cup water in a small saucepan.
2. Heat the mixture over medium heat, stirring constantly until sugar completely dissolves, about 3-4 minutes.
3. Remove simple syrup from heat and let it cool to room temperature, approximately 20 minutes.
4. While syrup cools, juice enough lemons to yield 1 cup of fresh lemon juice, straining out any seeds.
5. Finely chop 1/4 cup fresh basil leaves to release their oils.
6. Combine cooled simple syrup, 1 cup lemon juice, and chopped basil in a blender.
7. Blend on high speed for 30 seconds until basil is fully incorporated and mixture turns pale green.
8. Strain the mixture through a fine-mesh sieve into a shallow container to remove basil bits.
9. Cover the container tightly with plastic wrap, pressing it directly onto the sorbet surface to prevent ice crystals.
10. Freeze for 4 hours or until firm around the edges but still slushy in the center.
11. Transfer partially frozen sorbet to a food processor and pulse until smooth and creamy.
12. Return sorbet to container and freeze for another 2 hours until completely firm.
13. Scoop into chilled bowls and serve immediately.
Enjoy the crystalline texture that shatters delicately on your tongue. Each spoonful bursts with bright citrus notes followed by subtle herbal undertones. Experiment by serving it between courses or as a refreshing palate cleanser during spicy meals.
Velvety Espresso Coffee Ice Cream
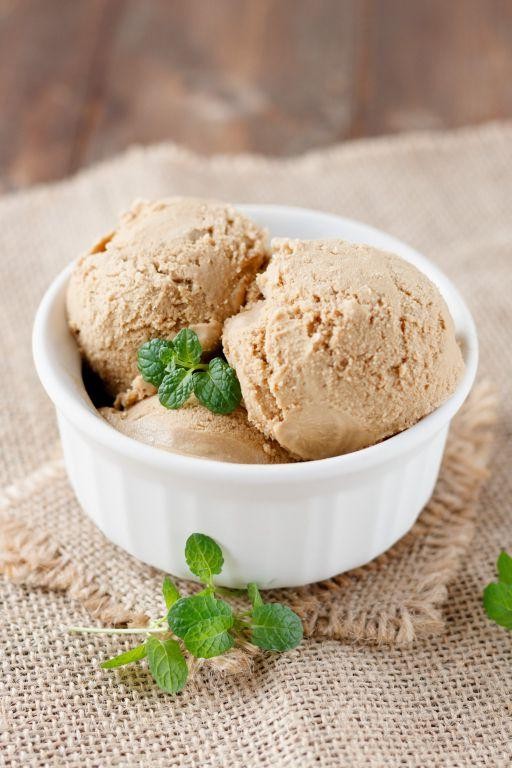
Nothing beats homemade coffee ice cream, especially when it’s rich and velvety. Now you can make this decadent dessert right in your kitchen with real espresso. Follow these precise steps for perfect results every time.
8
servings25
minutes15
minutesIngredients
– 2 cups heavy cream
– 1 cup whole milk
– 3/4 cup granulated sugar
– 1/4 cup light corn syrup
– 5 large egg yolks
– 2 tbsp instant espresso powder
– 1 tsp vanilla extract
– 1/4 tsp kosher salt
Instructions
1. Combine 1 cup heavy cream, whole milk, 1/2 cup sugar, and corn syrup in a medium saucepan.
2. Heat the mixture over medium heat until it reaches 170°F, stirring occasionally with a whisk.
3. Whisk egg yolks with remaining 1/4 cup sugar in a separate bowl until pale yellow.
4. Temper the eggs by slowly pouring 1/2 cup of the hot cream mixture into the yolks while whisking constantly.
5. Pour the tempered yolk mixture back into the saucepan with the remaining cream mixture.
6. Cook over medium-low heat, stirring constantly with a spatula, until the custard thickens and coats the back of a spoon (about 175°F).
7. Immediately strain the custard through a fine-mesh sieve into a clean bowl.
8. Whisk in espresso powder, vanilla extract, and kosher salt until fully dissolved.
9. Stir in remaining 1 cup heavy cream until fully incorporated.
10. Cover the bowl with plastic wrap, pressing it directly onto the custard surface to prevent skin formation.
11. Refrigerate the custard for at least 4 hours or until completely chilled (40°F or below).
12. Pour the chilled custard into your ice cream maker and churn according to manufacturer’s instructions until thick and creamy (about 25-30 minutes).
13. Transfer the ice cream to an airtight container and freeze for at least 4 hours until firm.
Keep this espresso ice cream stored in your freezer for up to 2 weeks. The velvety texture comes from the perfect custard base, while the intense coffee flavor shines through without bitterness. Serve it sandwiched between chocolate wafer cookies or crumbled over warm brownies for an elevated dessert experience.
Spiced Chai Tea Ice Cream

Bold chai spices transform classic ice cream into something extraordinary. This frozen treat captures all the warmth of masala chai in creamy, scoopable form. You’ll need an ice cream maker for the perfect texture.
8
servings20
minutes25
minutesIngredients
– 2 cups heavy cream
– 1 cup whole milk
– 3/4 cup granulated sugar
– 6 chai tea bags
– 1 tsp ground cinnamon
– 1/2 tsp ground cardamom
– 1/4 tsp ground ginger
– 1/8 tsp ground cloves
– 1/8 tsp black pepper
– 1/4 tsp salt
– 4 large egg yolks
Instructions
1. Combine 1 cup heavy cream, milk, sugar, tea bags, cinnamon, cardamom, ginger, cloves, pepper, and salt in a medium saucepan.
2. Heat the mixture over medium heat until it reaches 170°F, stirring occasionally to dissolve sugar.
3. Remove from heat and let steep for 15 minutes to develop chai flavor.
4. Squeeze tea bags against the side of the pan to extract maximum flavor before discarding them.
5. Whisk egg yolks in a separate bowl until pale yellow.
6. Slowly pour 1/2 cup of the warm cream mixture into the egg yolks while whisking constantly to temper them.
7. Pour the tempered egg mixture back into the saucepan with the remaining cream mixture.
8. Cook over medium-low heat, stirring constantly with a wooden spoon, until the custard thickens and coats the back of the spoon (about 175°F).
9. Strain the custard through a fine-mesh sieve into a clean bowl to remove any cooked egg bits.
10. Stir in the remaining 1 cup heavy cream.
11. Cover the bowl with plastic wrap, pressing it directly against the custard surface to prevent skin formation.
12. Refrigerate for at least 4 hours or until completely chilled to 40°F.
13. Pour the chilled custard into your ice cream maker and churn according to manufacturer’s instructions until thick and creamy (about 25-30 minutes).
14. Transfer the soft ice cream to an airtight container.
15. Freeze for at least 4 hours or until firm enough to scoop.
Now you have perfectly spiced ice cream with subtle warmth from black pepper and ginger. The creamy texture melts smoothly while delivering complex chai flavors. Serve it alongside warm apple pie or crumble for a stunning temperature contrast.
Coconut Pineapple Dream Ice Cream
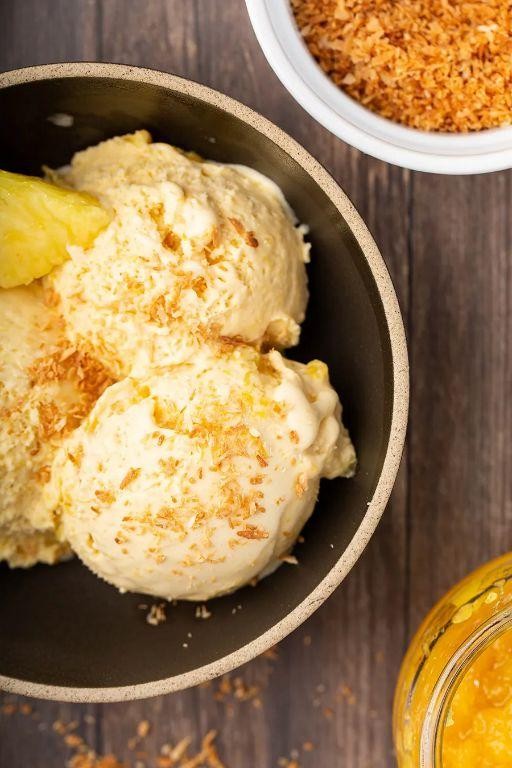
You’ve been craving something tropical and creamy, but store-bought options just don’t hit the spot. This homemade coconut pineapple dream ice cream delivers that perfect balance of sweet and tangy without any artificial flavors. Your dessert game is about to level up significantly.
8
servings15
minutes10
minutesIngredients
– 2 cups heavy cream
– 1 cup whole milk
– 3/4 cup granulated sugar
– 1 cup canned coconut milk
– 1 cup crushed pineapple, drained
– 1/2 cup sweetened shredded coconut
– 1 teaspoon vanilla extract
– 1/4 teaspoon salt
Instructions
1. Combine 2 cups heavy cream, 1 cup whole milk, 3/4 cup granulated sugar, 1 cup canned coconut milk, and 1/4 teaspoon salt in a medium saucepan.
2. Heat the mixture over medium heat, stirring constantly, until the sugar completely dissolves and the temperature reaches 170°F on a kitchen thermometer.
3. Remove the saucepan from heat and stir in 1 teaspoon vanilla extract.
4. Pour the mixture through a fine-mesh strainer into a large bowl to ensure smooth texture.
5. Chill the mixture in the refrigerator for at least 4 hours or until it reaches 40°F, covering the bowl tightly with plastic wrap.
6. Pour the chilled base into your ice cream maker and churn according to manufacturer’s instructions, typically 20-25 minutes.
7. Add 1 cup crushed pineapple and 1/2 cup sweetened shredded coconut during the last 2 minutes of churning.
8. Transfer the ice cream to an airtight container and freeze for at least 4 hours or until firm.
9. Scoop and serve immediately, or store in freezer for up to 2 weeks. Smooth, creamy coconut base gets bright bursts of pineapple throughout each scoop. Serve it in hollowed-out pineapple halves for a stunning tropical presentation that’ll transport you straight to the islands.
Pistachio Rose Water Ice Cream
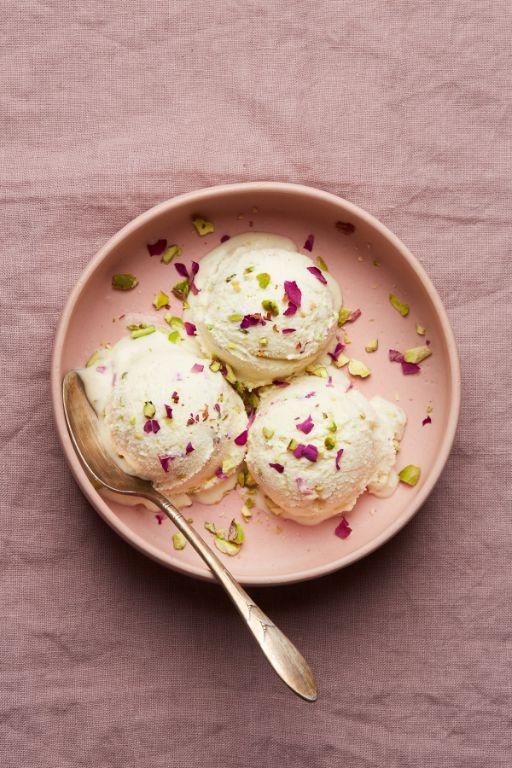
Mellow pistachio flavor meets delicate floral notes in this elegant frozen dessert. This ice cream requires no churning and sets up with a perfectly creamy texture. Make it ahead for effortless entertaining.
8
servings20
minutesIngredients
– 2 cups heavy cream
– 1 (14 oz) can sweetened condensed milk
– 1/2 cup shelled pistachios
– 2 tbsp rose water
– 1/4 tsp salt
Instructions
1. Place pistachios in a food processor and pulse until finely ground but not pasty.
2. Pour heavy cream into a large mixing bowl and whip with an electric mixer on medium-high speed until stiff peaks form.
3. Gently fold sweetened condensed milk into the whipped cream using a spatula until fully incorporated.
4. Add ground pistachios, rose water, and salt to the cream mixture, folding gently to distribute evenly.
5. Pour the mixture into a 9×5-inch loaf pan lined with parchment paper for easy removal.
6. Cover the pan tightly with plastic wrap, pressing it directly onto the surface of the ice cream to prevent ice crystals.
7. Freeze for at least 6 hours or until completely firm throughout.
8. Remove from freezer 10 minutes before serving to soften slightly for easier scooping.
Velvety smooth with subtle crunch from the pistachios, this ice cream delivers sophisticated flavor without overwhelming sweetness. The rose water provides a fragrant counterpoint to the rich cream base. Serve topped with crushed pistachios and edible rose petals for an elegant presentation.
Berrylicious Mixed Berry Ice Cream
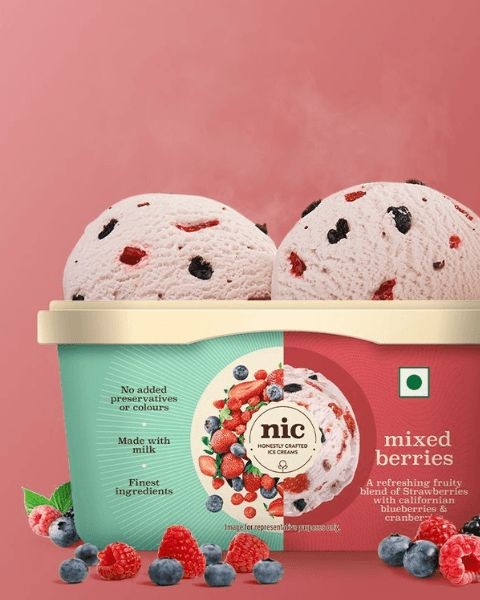
Naturally sweet and bursting with summer flavor, this mixed berry ice cream requires no special equipment. Nothing beats homemade ice cream when berries are at their peak. You’ll be scooping this vibrant dessert in just a few hours.
8
servings30
minutes20
minutesIngredients
– 2 cups heavy cream
– 1 cup whole milk
– 3/4 cup granulated sugar
– 1/4 teaspoon salt
– 1 teaspoon vanilla extract
– 2 cups mixed berries (fresh or frozen)
– 1 tablespoon lemon juice
Instructions
1. Combine 2 cups heavy cream, 1 cup whole milk, 3/4 cup granulated sugar, and 1/4 teaspoon salt in a medium saucepan.
2. Heat the mixture over medium heat until it reaches 170°F, stirring constantly to dissolve the sugar completely.
3. Remove from heat and stir in 1 teaspoon vanilla extract.
4. Transfer the mixture to a bowl and chill in refrigerator for at least 4 hours or until completely cold.
5. While base chills, combine 2 cups mixed berries and 1 tablespoon lemon juice in a separate saucepan.
6. Cook berries over medium heat for 8-10 minutes until they break down and release their juices.
7. Press berry mixture through a fine-mesh sieve to remove seeds, then chill the puree completely.
8. Stir chilled berry puree into the cold ice cream base until fully incorporated.
9. Pour mixture into ice cream maker and churn according to manufacturer’s instructions, about 20-25 minutes.
10. Transfer churned ice cream to an airtight container and freeze for 4-6 hours until firm.
Last scoop reveals a beautifully creamy texture with vibrant purple swirls throughout. The tart berry flavor balances perfectly with the rich cream base. Try serving it sandwiched between homemade shortbread cookies for an extra special treat.
Conclusion
Vast possibilities await in these 22 ice cream recipes! From classic vanilla to creative flavors, there’s something for every sweet tooth. We hope you’ll whip up a batch, share your favorites in the comments below, and pin this roundup to your Pinterest boards for future dessert inspiration. Happy churning!