Bring on the party vibes! Whether you’re hosting a casual get-together or a fancy soirée, these 33 irresistible hors d’oeuvres will have your guests raving. From quick bites to elegant appetizers, we’ve gathered the perfect mix of classic favorites and creative twists to make entertaining effortless. Get ready to impress—your next gathering is about to become unforgettable!
Mini Caprese Skewers with Balsamic Glaze
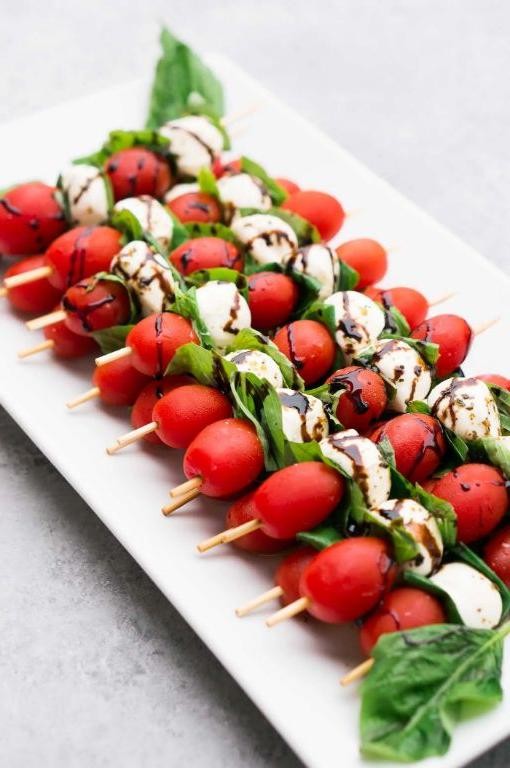
Pulling together a last-minute appetizer for my book club last week, I remembered how these mini Caprese skewers always save the day—they’re elegant, effortless, and disappear in minutes. Plus, that sweet-tangy balsamic glaze makes them feel fancy without any fuss. I love how they let the fresh ingredients shine, especially when tomatoes are at their peak.
8
skewers15
minutes7
minutesIngredients
Cherry tomatoes – 1 pint
Fresh mozzarella balls – 8 oz
Fresh basil leaves – ½ cup
Balsamic vinegar – ¼ cup
Olive oil – 1 tbsp
Salt – ¼ tsp
Black pepper – ⅛ tsp
Instructions
1. Rinse the cherry tomatoes under cold water and pat them completely dry with paper towels.
2. Drain the fresh mozzarella balls from their liquid and pat them dry with a separate paper towel to prevent skewers from getting soggy.
3. Pour ¼ cup balsamic vinegar into a small saucepan and bring it to a boil over medium-high heat.
4. Reduce the heat to low and simmer the vinegar for 5–7 minutes, stirring occasionally, until it thickens enough to coat the back of a spoon.
5. Remove the balsamic glaze from the heat and let it cool to room temperature, which takes about 10 minutes.
6. Thread one cherry tomato, one fresh basil leaf, and one mozzarella ball onto each skewer, repeating until all ingredients are used.
7. Arrange the assembled skewers on a serving platter in a single layer.
8. Drizzle 1 tbsp olive oil evenly over the skewers.
9. Sprinkle ¼ tsp salt and ⅛ tsp black pepper uniformly across the skewers.
10. Drizzle the cooled balsamic glaze over the skewers just before serving to maintain its glossy texture.
The juicy tomatoes and creamy mozzarella create a lovely contrast, while the basil adds a fresh punch that’s balanced by the rich glaze. For a fun twist, I sometimes sprinkle these with a pinch of red pepper flakes or serve them alongside grilled bread for a heartier bite.
Stuffed Mushrooms with Herbed Cream Cheese

My love for stuffed mushrooms began at a cozy holiday party years ago, where I discovered these bite-sized delights disappearing faster than the champagne. Now I make them for every gathering, and this herbed cream cheese version has become my signature appetizer that always earns recipe requests.
16
portions15
minutes25
minutesIngredients
Mushrooms – 16 oz
Cream cheese – 8 oz
Garlic – 2 cloves
Parsley – 2 tbsp
Thyme – 1 tsp
Breadcrumbs – ½ cup
Parmesan cheese – ¼ cup
Olive oil – 2 tbsp
Salt – ½ tsp
Black pepper – ¼ tsp
Instructions
1. Preheat your oven to 375°F and line a baking sheet with parchment paper.
2. Wipe 16 oz of mushrooms clean with a damp paper towel—never soak them, as they’ll absorb too much water and become soggy.
3. Carefully twist and remove the mushroom stems, setting the caps aside.
4. Finely chop the mushroom stems and 2 cloves of garlic.
5. Heat 2 tbsp of olive oil in a skillet over medium heat for 30 seconds.
6. Add the chopped mushroom stems and garlic to the skillet.
7. Sauté for 5 minutes until the mushrooms release their liquid and the garlic becomes fragrant.
8. Transfer the mushroom-garlic mixture to a medium bowl and let it cool for 5 minutes.
9. Add 8 oz of cream cheese, 2 tbsp of parsley, 1 tsp of thyme, ½ tsp of salt, and ¼ tsp of black pepper to the bowl.
10. Mix all ingredients thoroughly until well combined.
11. Spoon the cream cheese mixture into each mushroom cap, mounding it slightly.
12. Combine ½ cup of breadcrumbs with ¼ cup of Parmesan cheese in a small bowl.
13. Sprinkle the breadcrumb mixture evenly over each stuffed mushroom.
14. Arrange the stuffed mushrooms on the prepared baking sheet, spacing them about 1 inch apart.
15. Bake at 375°F for 18-20 minutes until the tops are golden brown and the mushrooms are tender.
16. Let the mushrooms rest for 3 minutes before serving—this allows the filling to set properly.
Really, the magic happens when you bite into these—the earthy mushrooms give way to that creamy, herbed filling with a satisfying crunch from the golden topping. I love serving these on a rustic wooden board with a sprinkle of fresh parsley, and they’re equally fantastic alongside a crisp white wine or as part of a larger antipasto spread.
Prosciutto-Wrapped Asparagus Spears

Every spring, when those first slender asparagus spears appear at the farmers market, I know it’s time for my favorite quick appetizer that never fails to impress. I actually started making these prosciutto-wrapped beauties after a friend brought them to a potluck years ago, and now they’re my go-to for everything from casual gatherings to holiday parties. There’s something magical about how the salty prosciutto crisps up around the tender asparagus that keeps people coming back for more.
8
spears10
minutes15
minutesIngredients
- Asparagus – 1 lb
- Prosciutto – 8 slices
- Olive oil – 1 tbsp
- Black pepper – ½ tsp
Instructions
- Preheat your oven to 400°F and line a baking sheet with parchment paper.
- Trim the tough ends from the asparagus by snapping each spear where it naturally breaks – this ensures you remove only the woody part.
- Pat the asparagus completely dry with paper towels to help the prosciutto stick properly.
- Cut each prosciutto slice in half lengthwise to create 16 thinner strips.
- Wrap one prosciutto strip around each asparagus spear in a spiral pattern, starting about 1 inch from the tip.
- Arrange the wrapped spears in a single layer on the prepared baking sheet, making sure they don’t touch.
- Drizzle olive oil evenly over all the spears, using a pastry brush to coat them thoroughly if needed.
- Sprinkle black pepper evenly across all the wrapped asparagus.
- Bake for 12-15 minutes until the prosciutto is crispy and the asparagus is tender when pierced with a fork.
- Transfer the baked spears to a serving platter using tongs, being careful as they’ll be hot.
That irresistible combination of crisp, salty prosciutto and tender, slightly sweet asparagus makes these spears disappear within minutes at any gathering. Try serving them alongside a creamy dip or arranging them in a circular pattern on a platter for an elegant presentation – they’re perfect for dipping into a lemony aioli or herbed yogurt sauce.
Smoked Salmon and Dill Tea Sandwiches
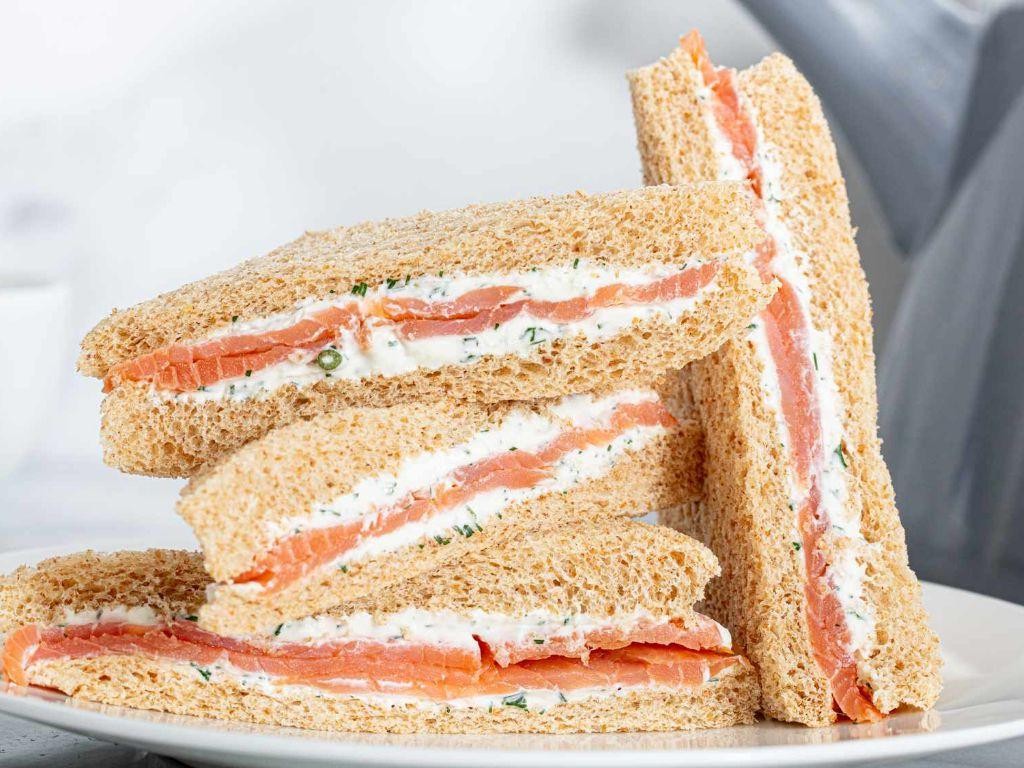
Keeping things simple in the kitchen is my motto, especially when hosting friends for afternoon tea. These smoked salmon and dill tea sandwiches are my go-to—they come together in minutes but always impress with their elegant flavor. I love how the creamy filling pairs with a hot cup of Earl Grey on a lazy weekend.
3
sandwiches15
minutesIngredients
White bread – 8 slices
Cream cheese – 4 oz
Smoked salmon – 4 oz
Fresh dill – 2 tbsp
Lemon juice – 1 tsp
Black pepper – ¼ tsp
Instructions
1. Place 8 slices of white bread on a clean cutting board.
2. Spread 4 oz of cream cheese evenly over all bread slices using a butter knife.
3. Chop 4 oz of smoked salmon into small, bite-sized pieces.
4. Finely chop 2 tbsp of fresh dill leaves, discarding the stems.
5. In a medium bowl, combine the smoked salmon, dill, 1 tsp lemon juice, and ¼ tsp black pepper.
6. Divide the salmon mixture evenly over 4 slices of bread, spreading it to the edges.
7. Top each with the remaining bread slices, cream cheese-side down.
8. Trim the crusts from all sandwiches using a serrated knife for clean edges.
9. Cut each sandwich diagonally into 4 small triangles.
10. Arrange the tea sandwiches on a platter and serve immediately.
Serve these sandwiches chilled or at room temperature—they’re perfect for picnics or bridal showers. The creamy texture melts with the smoky salmon, while the dill adds a fresh, herby kick that keeps you reaching for more.
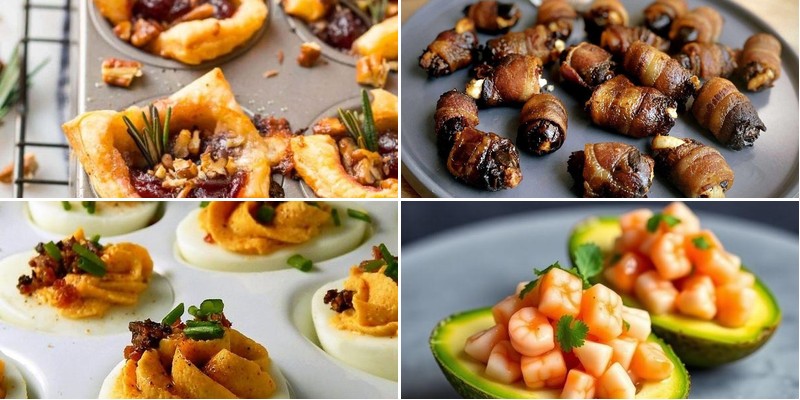
Cranberry Brie Bites with Puff Pastry

Just last week, I was scrambling for a last-minute appetizer when my neighbor dropped by unexpectedly—these cranberry brie bites saved the day and have become my go-to party staple ever since.
24
bites15
minutes15
minutesIngredients
Puff pastry – 1 sheet
Brie cheese – 8 oz
Cranberry sauce – ½ cup
Fresh rosemary – 1 tbsp, chopped
Egg – 1
Water – 1 tbsp
Instructions
1. Preheat your oven to 400°F and line a baking sheet with parchment paper.
2. Unfold the puff pastry sheet on a lightly floured surface, rolling it out slightly if needed to smooth any creases.
3. Cut the puff pastry into 24 equal squares using a sharp knife or pizza cutter.
4. Press each pastry square into the cups of a mini muffin tin, ensuring the corners point upward.
5. Cut the brie cheese into 24 small cubes, about ½-inch each, removing any thick rind for smoother melting.
6. Place one brie cube into each pastry-lined muffin cup.
7. Spoon 1 teaspoon of cranberry sauce over the brie in each cup, avoiding overflow.
8. Sprinkle a pinch of chopped fresh rosemary evenly over the cranberry sauce in each bite.
9. Whisk the egg with 1 tablespoon of water in a small bowl to create an egg wash.
10. Brush the edges of the exposed pastry lightly with the egg wash using a pastry brush for golden browning.
11. Bake in the preheated oven for 12–15 minutes, until the pastry is puffed and golden brown.
12. Remove the bites from the oven and let them cool in the pan for 5 minutes before transferring to a wire rack. You’ll love how the flaky pastry shatters with each bite, giving way to the gooey brie and tangy cranberry—try serving them warm on a wooden board with a drizzle of honey for an extra touch of sweetness.
Savory Puff Pastry Pinwheels with Spinach and Feta
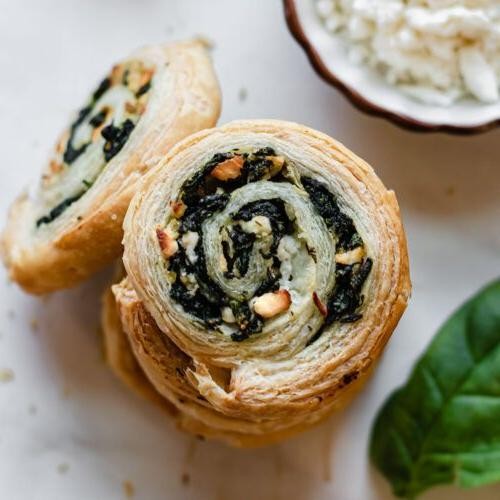
Every time I host friends for game night, I find myself scrambling for that perfect appetizer that looks impressive but comes together in minutes. That’s when I discovered these puff pastry pinwheels—they’re my go-to because they always disappear faster than I can refill the platter, and honestly, the flaky layers with that spinach-feta combo? Pure magic.
12
pinwheels20
minutes22
minutesIngredients
- Frozen puff pastry – 1 sheet
- Fresh spinach – 2 cups
- Feta cheese – ½ cup
- Garlic – 1 clove
- Olive oil – 1 tbsp
- Egg – 1
Instructions
- Thaw the frozen puff pastry sheet at room temperature for 40 minutes, or until pliable but still cool to the touch—this prevents it from getting too sticky.
- Preheat your oven to 400°F and line a baking sheet with parchment paper.
- Heat olive oil in a skillet over medium heat, then add minced garlic and sauté for 1 minute until fragrant.
- Add fresh spinach to the skillet and cook for 3–4 minutes, stirring constantly, until wilted and any liquid has evaporated.
- Transfer the spinach mixture to a bowl, let it cool for 5 minutes, then crumble in feta cheese and mix gently.
- Unfold the thawed puff pastry sheet on a lightly floured surface, rolling it out slightly to smooth any seams.
- Spread the spinach and feta mixture evenly over the pastry, leaving a ½-inch border around the edges.
- Starting from one long side, tightly roll the pastry into a log, pressing gently to seal the edge.
- Beat the egg with 1 tablespoon of water to make an egg wash, then brush it over the pastry log—this gives it a golden, glossy finish.
- Use a sharp knife to slice the log into 1-inch thick rounds, placing them cut-side up on the prepared baking sheet.
- Bake for 15–18 minutes, or until the pinwheels are puffed and golden brown.
- Let them cool on the baking sheet for 5 minutes before serving to allow the layers to set.
Here’s why I adore these: the flaky, buttery pastry shatters with each bite, while the spinach and feta meld into a savory, slightly tangy filling that’s irresistible. Honestly, I love serving them warm with a drizzle of hot honey for a sweet-spicy kick that keeps everyone coming back for more.
Caprese Avocado Toast Points

Now, I have to share this brilliant twist on avocado toast that saved me during last week’s frantic lunch rush when I had friends dropping by unexpectedly. Nothing beats the classic combination of creamy avocado and fresh mozzarella, especially when you’re short on time but want something that looks impressively put together.
2
portions15
minutes8
minutesIngredients
– Bread – 4 slices
– Avocado – 1 large
– Mozzarella cheese – 4 oz
– Cherry tomatoes – 1 cup
– Basil leaves – ¼ cup
– Balsamic glaze – 2 tbsp
– Olive oil – 1 tbsp
– Salt – ½ tsp
– Black pepper – ¼ tsp
Instructions
1. Preheat your oven to 400°F.
2. Arrange 4 bread slices on a baking sheet in a single layer.
3. Toast the bread in the oven for 8 minutes until edges are golden and crisp.
4. Cut 1 large avocado in half lengthwise and remove the pit.
5. Scoop the avocado flesh into a small bowl using a spoon.
6. Mash the avocado with a fork until slightly chunky, not completely smooth.
7. Stir ½ tsp salt and ¼ tsp black pepper into the mashed avocado.
8. Slice 4 oz mozzarella cheese into ¼-inch thick pieces.
9. Halve 1 cup cherry tomatoes crosswise.
10. Spread the mashed avocado evenly over each toasted bread slice.
11. Layer mozzarella slices on top of the avocado on each toast.
12. Arrange tomato halves cut-side up over the mozzarella.
13. Drizzle 1 tbsp olive oil evenly over all four toast points.
14. Tear ¼ cup basil leaves by hand and scatter over the toasts.
15. Finish by drizzling 2 tbsp balsamic glaze in zigzag patterns across each toast. The crisp toast base provides a satisfying crunch against the creamy avocado and soft mozzarella, while the balsamic adds a sweet-tangy contrast that makes each bite exciting. I love serving these arranged on a wooden board for sharing, or cutting them into smaller triangles for an elegant appetizer that always disappears quickly.
Spicy Shrimp Cups with Avocado Crema

Oh my goodness, you guys—I first made these spicy shrimp cups for a last-minute girls’ night, and they disappeared in minutes! I love how they’re fancy enough for entertaining but easy enough for a quick weeknight treat when I’m craving something with a kick.
12
cups15
minutes20
minutesIngredients
Wonton wrappers – 12
Olive oil – 2 tbsp
Shrimp – 1 lb, peeled and deveined
Chili powder – 1 tsp
Garlic powder – ½ tsp
Salt – ½ tsp
Avocado – 1, pitted and peeled
Lime juice – 2 tbsp
Sour cream – ¼ cup
Cilantro – 2 tbsp, chopped
Instructions
1. Preheat your oven to 375°F.
2. Brush each wonton wrapper lightly with olive oil using a pastry brush.
3. Press each wrapper into a mini muffin tin cup to form a small cup shape.
4. Bake the wonton cups for 8–10 minutes, or until golden brown and crisp.
5. Remove the wonton cups from the oven and let them cool in the tin for 5 minutes.
6. Pat the shrimp dry with paper towels to ensure they sear properly.
7. Heat the remaining olive oil in a skillet over medium-high heat.
8. Add the shrimp to the skillet in a single layer.
9. Sprinkle the shrimp evenly with chili powder, garlic powder, and salt.
10. Cook the shrimp for 2–3 minutes per side, until opaque and lightly browned.
11. Transfer the cooked shrimp to a cutting board and chop them into small pieces.
12. Combine the avocado, lime juice, sour cream, and cilantro in a blender.
13. Blend the mixture on high speed for 30–45 seconds, until completely smooth and creamy.
14. Spoon about 1 tablespoon of the avocado crema into each baked wonton cup.
15. Top the crema with a heaping teaspoon of the chopped spicy shrimp.
16. Garnish with extra cilantro leaves if desired. So, the crisp wonton cups give a satisfying crunch against the creamy avocado, while the spicy shrimp adds a zesty punch that’s balanced by the cool crema. I love serving these on a platter with extra lime wedges for squeezing—they’re perfect for passing around at parties or enjoying as a handheld appetizer with a cold drink.
Bacon-Wrapped Dates with Blue Cheese
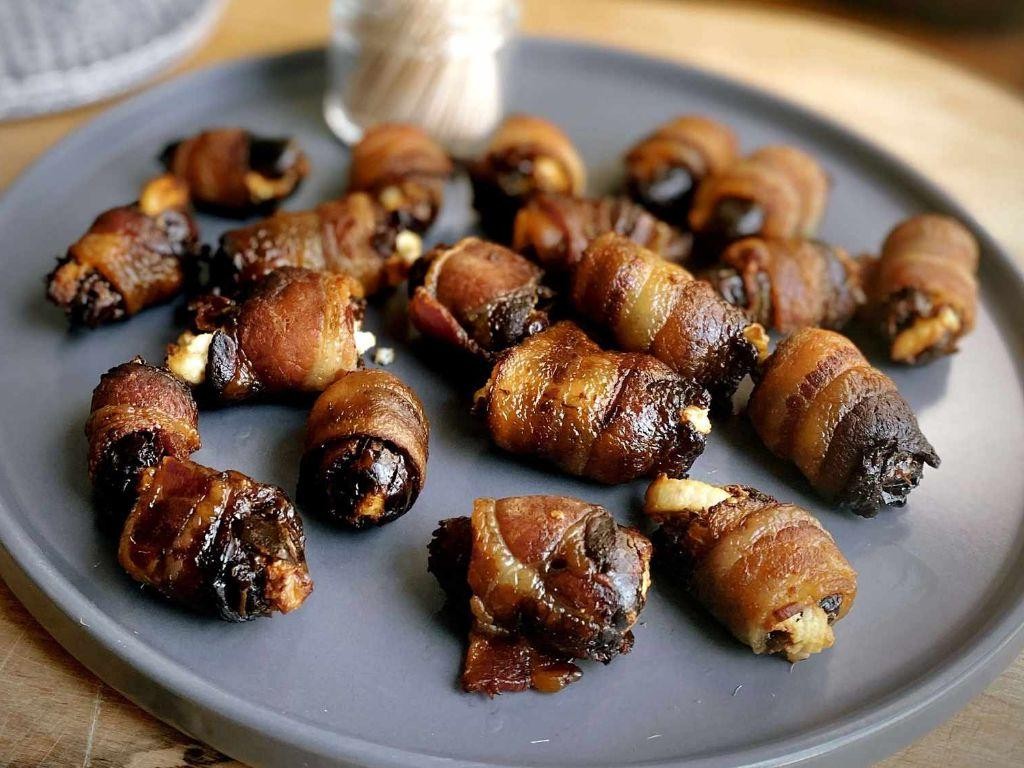
Zesty and sweet, these bacon-wrapped dates stuffed with blue cheese have become my go-to party appetizer ever since I first tried them at a friend’s potluck last fall—they disappeared in minutes, and I’ve been perfecting my version ever since. There’s something magical about how the salty bacon, creamy cheese, and caramelized dates come together in each bite. I love making these on lazy Sunday afternoons while sipping wine, and they always make me feel like a fancy hostess with minimal effort.
12
dates15
minutes22
minutesIngredients
Medjool Dates – 12
Bacon – 6 slices
Blue Cheese – ¼ cup, crumbled
Instructions
1. Preheat your oven to 375°F and line a baking sheet with parchment paper. 2. Slice each date lengthwise and remove the pit, creating a small pocket. 3. Stuff each date with about 1 teaspoon of blue cheese, pressing gently to fill the cavity. 4. Cut each bacon slice in half crosswise to create 12 shorter strips. 5. Wrap one bacon strip tightly around each stuffed date, securing the ends with a toothpick. 6. Arrange the wrapped dates seam-side down on the prepared baking sheet, spacing them about 1 inch apart. 7. Bake for 18–22 minutes, flipping halfway through, until the bacon is crispy and golden brown. 8. Transfer the dates to a paper towel-lined plate to drain excess grease for 2 minutes before serving. Keep an eye on them during the last few minutes of baking—bacon can go from perfectly crispy to burnt quickly. For extra crispiness, pat the bacon dry with paper towels before wrapping. If your dates seem dry, soak them in warm water for 10 minutes first to plump them up. Kind of incredible how these transform from simple ingredients into elegant bites, with the dates turning jammy and the bacon adding a smoky crunch. I love serving them drizzled with a touch of honey for extra sweetness or alongside a crisp arugula salad to balance the richness.
Deviled Eggs with Smoked Paprika

My grandmother always said the best recipes are the ones that bring people together, and these deviled eggs have been the star of every family gathering since I can remember. Making them always reminds me of those warm summer afternoons in her kitchen, where the scent of paprika filled the air and laughter echoed through the house. There’s something magical about how such simple ingredients can create such memorable bites.
12
portions20
minutes12
minutesIngredients
- Eggs – 6
- Mayonnaise – ¼ cup
- Dijon mustard – 1 tbsp
- Smoked paprika – 1 tsp
- Salt – ¼ tsp
- Black pepper – ⅛ tsp
Instructions
- Place 6 eggs in a single layer at the bottom of a medium saucepan.
- Cover the eggs completely with cold water, ensuring there’s at least 1 inch of water above them.
- Bring the water to a rolling boil over high heat, then immediately remove the pan from heat.
- Cover the pan with a tight-fitting lid and let the eggs sit for 12 minutes exactly.
- Transfer the cooked eggs to a bowl of ice water and let them cool for 15 minutes until completely chilled.
- Gently tap each egg on the counter and roll it between your palms to crack the shell evenly.
- Peel the eggs under cool running water, which helps separate the membrane from the egg white.
- Slice each peeled egg in half lengthwise using a sharp knife.
- Scoop out the yolks carefully with a small spoon and place them in a medium bowl.
- Arrange the empty egg white halves on a serving platter.
- Mash the egg yolks with a fork until they form fine crumbs.
- Add ¼ cup mayonnaise, 1 tbsp Dijon mustard, ¼ tsp salt, and ⅛ tsp black pepper to the yolks.
- Mix thoroughly until the filling becomes smooth and creamy.
- Spoon or pipe the yolk mixture evenly into the egg white halves.
- Sprinkle 1 tsp smoked paprika evenly over the filled deviled eggs.
What makes these deviled eggs truly special is the creamy, velvety texture of the filling that contrasts beautifully with the firm egg whites. The smoked paprika adds a subtle smokiness that elevates the traditional flavor profile, making each bite more complex than the last. For an elegant presentation, try serving them on a bed of fresh microgreens or alongside crisp cucumber slices for a refreshing crunch.
Goat Cheese and Fig Crostini

There’s something magical about the combination of sweet figs and tangy goat cheese that always feels both elegant and comforting. I first fell in love with this pairing at a friend’s autumn gathering, where these crostini disappeared faster than the conversation. Now, it’s my go-to appetizer when I want something impressive but surprisingly simple to pull together.
8
crostini15
minutes10
minutesIngredients
Baguette – 1 loaf
Olive oil – 2 tbsp
Fresh figs – 8
Goat cheese – 4 oz
Honey – 2 tbsp
Fresh thyme – 1 tbsp
Instructions
1. Preheat your oven to 375°F.
2. Slice the baguette into ½-inch thick pieces using a serrated knife for clean cuts.
3. Arrange the bread slices in a single layer on a baking sheet.
4. Brush both sides of each bread slice lightly with olive oil using a pastry brush.
5. Bake the bread slices for 8-10 minutes until golden brown and crisp around the edges.
6. Remove the baking sheet from the oven and let the crostini cool for 5 minutes.
7. Slice each fig into ¼-inch thick rounds while the bread cools.
8. Spread approximately 1 teaspoon of goat cheese evenly onto each cooled crostini.
9. Place 2-3 fig slices overlapping on top of the goat cheese on each crostini.
10. Drizzle honey in a zigzag pattern over the assembled crostini using a spoon.
11. Sprinkle fresh thyme leaves evenly over all the crostini.
12. Serve immediately on a platter.
Unbelievably creamy goat cheese melts slightly into the warm, crunchy bread while the figs provide juicy sweetness that plays beautifully against the herbal thyme notes. The honey drizzle adds just enough sticky sweetness to tie everything together, making these perfect for passing around at parties or enjoying as a sophisticated snack with your favorite white wine.
Mini Quiche Lorraines with Gruyère

Dazzling little bites that always disappear first at my brunch gatherings, these Mini Quiche Lorraines with Gruyère are my go-to when I want something elegant yet surprisingly simple to whip up. I love how the rich, savory filling bakes into the flaky crust—it’s the kind of recipe that feels fancy but is totally doable on a lazy Sunday morning, especially if you prep the crust the night before like I often do. Trust me, once you try these, you’ll understand why they’re a staple in my kitchen!
24
mini quiches20
minutes20
minutesIngredients
– Refrigerated pie crust – 1 (14.1 oz) package
– Eggs – 3 large
– Heavy cream – ½ cup
– Cooked bacon – 4 slices, crumbled
– Gruyère cheese – ½ cup, shredded
– Salt – ¼ tsp
– Black pepper – ⅛ tsp
– Nutmeg – ⅛ tsp
Instructions
1. Preheat your oven to 375°F (190°C) and lightly grease a 24-cup mini muffin tin.
2. Unroll the refrigerated pie crust and use a 2.5-inch round cutter to cut out 24 circles, re-rolling scraps as needed.
3. Press each pie crust circle into the muffin tin cups, ensuring they reach the bottom and sides evenly.
4. In a medium bowl, whisk together the eggs, heavy cream, salt, black pepper, and nutmeg until fully combined and slightly frothy.
5. Divide the crumbled bacon and shredded Gruyère cheese evenly among the pie crust-lined muffin cups.
6. Pour the egg mixture over the bacon and cheese in each cup, filling them about ¾ full to prevent overflow.
7. Bake at 375°F for 18–20 minutes, or until the quiche centers are set and the crust edges are golden brown.
8. Let the quiches cool in the tin for 5 minutes before transferring them to a wire rack.
9. Serve warm or at room temperature.
Heavenly golden and irresistibly flaky, these mini quiches boast a creamy, savory filling that melts in your mouth with every bite. I love pairing them with a crisp arugula salad for a light lunch or stacking them on a platter with fresh herbs for a stunning party appetizer—they’re so versatile, you might just find yourself making a double batch!
Conclusion
Looking for impressive appetizers? This collection offers 33 delicious hors d’oeuvres perfect for any gathering. From elegant bites to crowd-pleasing favorites, you’ll find something for every occasion. Try these recipes at your next party and let us know which ones become your go-tos in the comments below! Don’t forget to pin your favorites to share with friends.


