Every evening holds the promise of connection, and this honey-glazed ham recipe transforms that promise into a tender reality. Envision the golden hour light filtering through your kitchen window as the sweet aroma of honey and spices fills the air, creating an atmosphere where time slows and hearts open. This isn’t merely dinner preparation—it’s an intimate ritual where each brush of glaze becomes a love letter written in caramelized sweetness.
Why This Recipe Works
- The slow-roasting method at 325°F allows the ham’s natural juices to redistribute evenly throughout the meat, resulting in exceptionally moist and tender slices that practically melt on your tongue
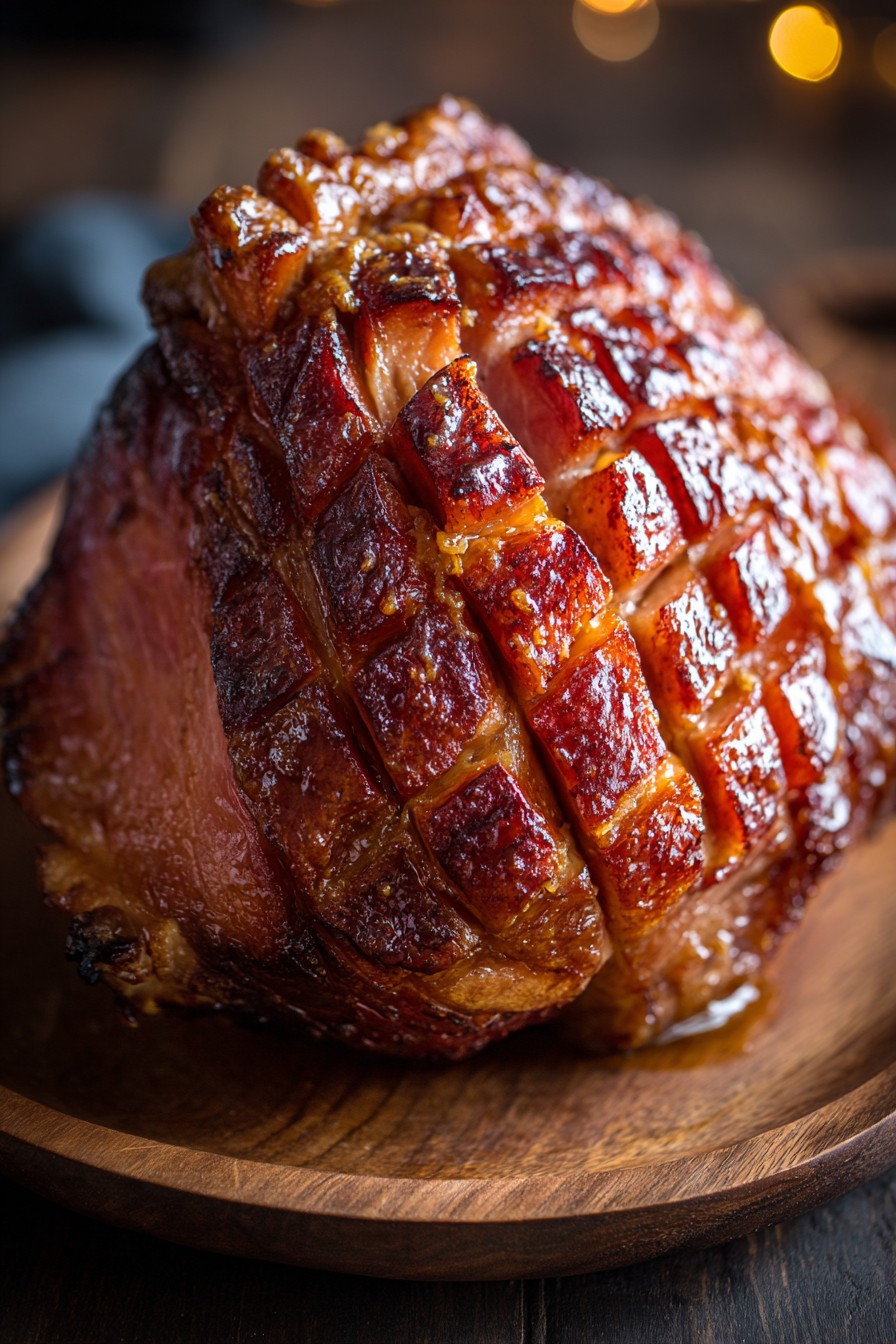
- Our three-stage glazing process creates a beautifully lacquered crust with complex flavor layers—the first application penetrates deep into the scoring, the second builds body, and the final application gives that stunning glass-like finish
- Using both Dijon mustard and apple cider vinegar in the glaze provides the perfect balance to the honey’s sweetness, creating a sophisticated flavor profile that dances between sweet, tangy, and subtly spicy notes
- Resting the ham for twenty minutes after roasting allows the fibers to relax and reabsorb their juices, ensuring every slice remains succulent rather than drying out when carved
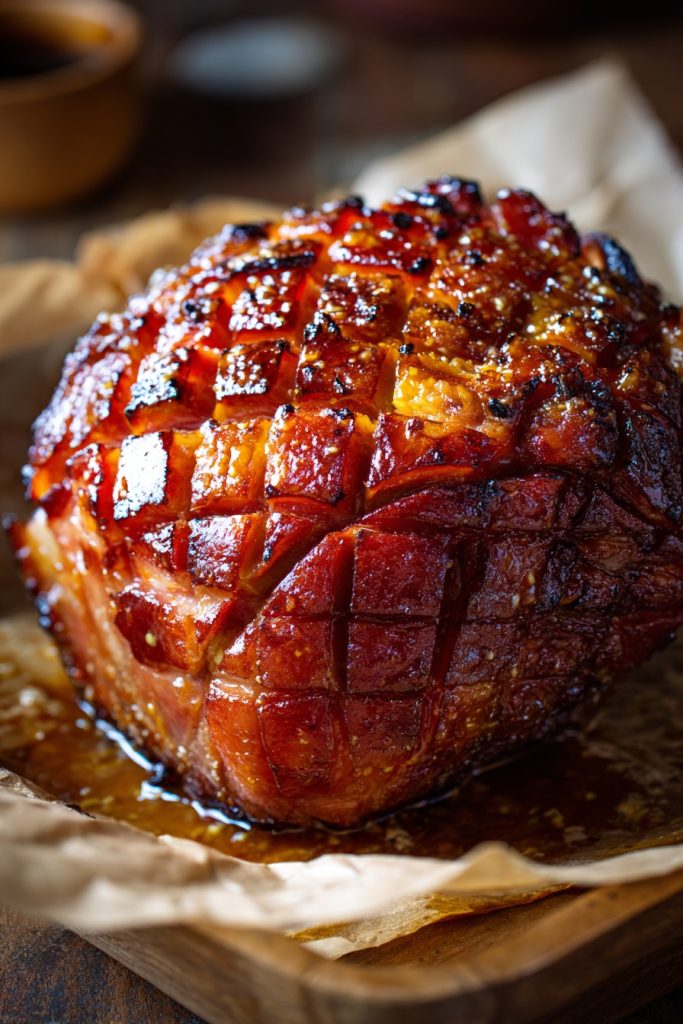
- The shallow scoring technique not only creates beautiful diamond patterns but also provides channels for the glaze to seep deep into the meat, flavoring it from the inside out
Ingredients
- 1 (5-6 pound) fully cooked bone-in ham
- 1 cup honey
- 1/4 cup Dijon mustard
- 2 tablespoons apple cider vinegar
- 1/4 cup brown sugar, packed
- 1 teaspoon ground cloves
- 1/2 teaspoon ground cinnamon
- 1/4 teaspoon freshly ground black pepper
- 1/4 cup unsalted butter
- 1/2 cup pineapple juice
Equipment Needed
- Roasting pan with rack
- Meat thermometer
- Small saucepan
- Pastry brush
- Sharp carving knife
- Cutting board
- Measuring cups and spoons
- Mixing bowl
Instructions
Preparing Your Canvas
Begin by removing your ham from refrigeration about two hours before cooking, allowing it to gradually reach room temperature—this simple act of patience ensures even cooking from edge to center. As it rests, preheat your oven to 325°F and position the rack in the lower third of the oven. Take your sharp carving knife and gently score the ham’s surface in a diamond pattern, making shallow cuts about 1/4-inch deep and 1-inch apart, being careful not to cut into the meat itself. This scoring isn’t merely decorative; it creates tiny channels that will welcome the glaze deep into the ham’s surface, much like how we create space in our hearts for love to penetrate beyond the surface. Place the ham cut-side down on the rack in your roasting pan, then pour the pineapple juice into the bottom of the pan—this will create steam that keeps the ham beautifully moist while adding a subtle fruity note to the background. Tip: When scoring, angle your knife at 45 degrees rather than cutting straight down—this exposes more surface area to the glaze while maintaining the ham’s structural integrity.
Crafting the Golden Elixir
In your small saucepan over medium-low heat, combine the honey, Dijon mustard, apple cider vinegar, brown sugar, ground cloves, cinnamon, and black pepper. Whisk these ingredients together as they warm, watching the transformation as individual components become one harmonious mixture. The honey will thin and become more fluid, the brown sugar will dissolve into the liquid, and the spices will release their essential oils, filling your kitchen with an aroma that speaks of comfort and connection. Cut the unsalted butter into small pieces and add them to the saucepan one at a time, whisking constantly until each piece melts completely before adding the next—this gradual incorporation creates an emulsion that gives the glaze its luxurious, velvety texture. Continue heating and whisking for about 5-7 minutes until the mixture thickens slightly and coats the back of a spoon. Remove from heat and set aside one-third of the glaze for the final application—this foresight ensures you’ll have plenty of glaze for that beautiful finishing touch.
The First Embrace of Heat
Place your prepared ham in the preheated oven and roast uncovered for approximately 1 hour and 15 minutes, or until the internal temperature reaches 110°F when measured with your meat thermometer inserted into the thickest part without touching bone. During this initial roasting phase, the ham’s surface will become warm and receptive, the scoring lines will open slightly, and the exterior will develop a pale golden hue. The pineapple juice in the bottom of the pan will steam and reduce, creating a humid environment that prevents the ham from drying out while infusing it with subtle tropical notes. About halfway through this initial roasting time, baste the ham with some of the pan juices using your pastry brush—this early basting begins the process of building layers of flavor and moisture. The kitchen will begin to fill with the comforting scent of roasting pork, a fragrance that speaks of home and heart.
The Glazing Transformation
Remove the ham from the oven and increase the oven temperature to 375°F. Using your pastry brush, apply about half of your remaining glaze evenly over the entire surface of the ham, paying special attention to working it into the scored lines you created earlier. The warmth of the ham will cause the glaze to thin and seep into those channels, carrying flavor deep into the meat. Return the ham to the now-hotter oven and roast for another 20-25 minutes, until the glaze begins to bubble and caramelize at the edges. Remove the ham once more and apply the remaining glaze (except for that reserved final portion), then return to the oven for another 15-20 minutes. During this stage, watch carefully as the sugar in the glaze caramelizes—you’re looking for a deep amber color with some bubbly, almost glass-like patches forming across the surface. Tip: Rotate your roasting pan halfway through each glazing stage to ensure even browning and caramelization.
The Final Flourish and Rest
Remove the ham from the oven for the final time and brush on the reserved glaze you set aside earlier—this final application gives that stunning lacquered finish while adding one last layer of flavor. Insert your meat thermometer to ensure the internal temperature has reached 140°F in the thickest part, then transfer the ham to your cutting board. Now comes the most crucial step—allowing the ham to rest for exactly 20 minutes before carving. During this resting period, the muscle fibers relax and reabsorb the juices that have been driven toward the center by the heat, ensuring every slice will be succulent rather than dry. The carryover cooking will bring the final temperature to the perfect 145°F for serving. As it rests, the glaze will set into a beautiful, shiny coating that crackles slightly when sliced. Tip: Tent the ham very loosely with foil during resting—not tightly, or the glaze will soften and lose its beautiful crisp texture.
Carving with Intention
After the resting period, position your ham with the bone side facing toward you for stability. Using your sharp carving knife, make your first vertical cut about 3 inches from the shank end, cutting straight down until you feel the bone. Then make a horizontal cut along the bone to release this first beautiful slice—observe how the glaze has penetrated the scoring lines, creating flavor channels throughout the meat. Continue slicing parallel to your initial cut, working your way around the ham and adjusting your angle as needed to follow the contour of the bone. Each slice should be about 1/4 to 1/2-inch thick—thin enough to be elegant but substantial enough to maintain its juiciness. As you arrange the slices on your serving platter, notice how the glazed exterior contrasts with the moist, pink interior, creating a visual representation of the depth you’ve achieved through your careful preparation.
Tips and Tricks
For those seeking to elevate this already magnificent dish to even greater heights, consider these intimate secrets that transform good cooking into memorable artistry. When selecting your ham, look for one with a good fat cap—about 1/4 to 1/2-inch thick—as this layer will baste the meat from the outside while providing the perfect canvas for your glaze to adhere to and caramelize upon. If you find your glaze is thickening too much as it cools between applications, simply place the saucepan over low heat for a minute or two while whisking constantly to restore its brushable consistency. For an extra dimension of flavor, consider adding a tablespoon of bourbon or dark rum to your glaze—the alcohol will cook off while leaving behind complex notes that complement the honey’s sweetness beautifully. When testing for doneness, always insert your meat thermometer into the thickest part of the ham while avoiding the bone, as touching bone can give you a false reading that might lead to overcooking. If you notice certain areas of your ham browning too quickly during the final glazing stages, create small foil shields to cover just those spots while allowing the rest to continue caramelizing. For the most beautiful presentation, consider garnishing your serving platter with fresh rosemary sprigs and orange slices that have been lightly caramelized in the same oven—this not only adds visual appeal but continues the aromatic story you’ve been crafting. Leftover ham should be stored in an airtight container in the refrigerator for up to four days, and the bone can be frozen for later use in soups or beans, ensuring nothing goes to waste. When reheating slices, do so gently in a 300°F oven with a splash of water or broth in the pan to maintain moisture, rather than using the microwave which can make the meat tough and rubbery. For special occasions, you might consider studding the ham with whole cloves at the intersections of your scoring lines before roasting—this traditional touch adds visual interest and another layer of warm spice flavor that permeates the meat during cooking.
Recipe Variations
- For a citrus-kissed variation that brings sunshine to your table, replace the apple cider vinegar with fresh orange juice and add the zest of one orange to your glaze mixture. The bright, sunny notes of citrus will cut through the richness of the ham while complementing the honey’s floral qualities. Consider adding a teaspoon of grated fresh ginger to this version for a subtle warmth that dances on the palate, creating a more complex flavor profile that feels both comforting and exciting.
- Transform your ham into a spicy-sweet masterpiece by adding two tablespoons of bourbon and one teaspoon of crushed red pepper flakes to your glaze ingredients. The bourbon adds smoky depth while the pepper flakes provide a gentle heat that builds gradually with each bite. This variation pairs beautifully with creamy sides like scalloped potatoes or macaroni and cheese, as the richness helps temper the spice while allowing the honey’s sweetness to shine through the complexity.
- Create an herb-infused glaze by adding two tablespoons of finely chopped fresh rosemary and one tablespoon of fresh thyme leaves to your standard glaze mixture. The earthy, pine-like quality of rosemary combines magically with the sweetness of honey, while thyme adds a subtle lemony note that brightens the overall flavor profile. For this version, consider using maple syrup instead of brown sugar to enhance the woodsy, autumnal feeling that the herbs evoke.
- For a tropical escape right in your dining room, replace the pineapple juice in the roasting pan with coconut water and add 1/4 cup of crushed pineapple to your glaze. The coconut water will steam and infuse the ham with subtle tropical notes, while the crushed pineapple adds texture and bright acidity to the glaze. A tablespoon of dark rum added to the glaze will complete this Caribbean-inspired variation, transporting you to warmer climates with every tender bite.
Frequently Asked Questions
Can I use a spiral-cut ham for this recipe?
While you can certainly use a spiral-cut ham, the results will differ slightly from using a traditional unscored ham. The pre-cut slices mean the glaze will penetrate more deeply between the slices, which can be wonderful for flavor but may cause the ham to become slightly more fragile when serving. Reduce your initial roasting time by about 15-20 minutes since the pre-slicing allows heat to penetrate more quickly. When glazing, be especially gentle with your pastry brush to avoid separating the slices, and consider placing the ham cut-side down to help it hold its shape during cooking. The finished product will have glaze throughout every slice rather than just on the surface, creating a different but equally delicious eating experience.
How far in advance can I prepare the glaze?
The honey glaze can be prepared up to three days in advance and stored in an airtight container in the refrigerator. When ready to use, gently reheat it in a saucepan over low heat, whisking constantly until it returns to a smooth, brushable consistency. You may need to add a teaspoon of warm water if it has thickened too much during storage. Preparing the glaze ahead not only saves time on cooking day but actually allows the flavors to meld and deepen, resulting in a more complex and harmonious final product. Just be sure to give it a good whisk before using to reincorporate any ingredients that may have separated during storage.
What’s the purpose of the pineapple juice in the roasting pan?
The pineapple juice serves multiple beautiful purposes in this recipe. Primarily, it creates steam in the oven environment that helps keep the ham moist and succulent throughout the long cooking process. Additionally, the natural sugars in the pineapple juice caramelize in the bottom of the pan, creating delicious drippings that can be used to baste the ham during the initial roasting phase. The mild acidity of the pineapple juice also helps balance the richness of the ham while adding a subtle fruity note that complements the honey glaze beautifully. As the juice reduces, it forms a light syrup that can be brushed onto the ham before the first glaze application, creating another layer of flavor complexity.
Can I make this recipe with a boneless ham?
Absolutely, though the cooking time will need adjustment since boneless hams typically cook more quickly than their bone-in counterparts. Reduce the initial roasting time by approximately 15-20 minutes and check the internal temperature earlier than the recipe indicates. The bone in a traditional ham adds flavor and helps conduct heat evenly, so without it, you’ll want to be extra vigilant about monitoring temperature to prevent drying out. Boneless hams also tend to be more uniform in shape, which can make carving easier but may result in slightly less dramatic presentation. The glaze and method remain exactly the same, and the finished dish will still be wonderfully delicious, just with these minor timing adjustments.
What are the best side dishes to serve with honey glazed ham?
Honey glazed ham pairs beautifully with sides that complement its sweet and savory profile while providing contrasting textures. Creamy scalloped potatoes or rich macaroni and cheese offer a luxurious counterpoint to the ham’s sweet exterior. Buttery green beans almondine or roasted asparagus provide freshness and crunch that cleanse the palate between bites. For starch options, consider sweet potato casserole with pecan streusel or cornbread dressing that can soak up the delicious glaze. A simple arugula salad with citrus vinaigrette cuts through the richness while adding brightness. Remember that the ham itself is quite flavorful, so sides should enhance rather than compete with its beautiful honey-kissed character.
Summary
This honey glazed ham transforms simple ingredients into an intimate dining experience, where slow roasting and careful glazing create succulent, flavor-infused slices perfect for cozy evenings. The balance of sweet honey, tangy mustard, and warm spices caramelizes into a beautiful crust that crackles with each tender bite, making ordinary moments extraordinary through the alchemy of patient cooking and shared enjoyment.
Honey Glazed Ham
5
servings20
minutes2
minutesIngredients
Instructions
- 1 Preheat oven to 325°F. Score ham surface in diamond pattern. Place cut-side down on rack in roasting pan with pineapple juice in bottom.
- 2 Combine honey, mustard, vinegar, brown sugar, spices, and butter in saucepan. Heat until thickened, whisking constantly. Reserve 1/3 of glaze.
- 3 Roast ham for 1 hour 15 minutes or until internal temperature reaches 110°F, basting occasionally with pan juices.
- 4 Increase oven to 375°F. Brush ham with half of remaining glaze. Roast 20-25 minutes until bubbling.
- 5 Brush with remaining glaze (except reserved). Roast 15-20 minutes until deeply caramelized and internal temperature reaches 140°F.
- 6 Brush with reserved glaze. Rest 20 minutes before carving to internal temperature of 145°F.


