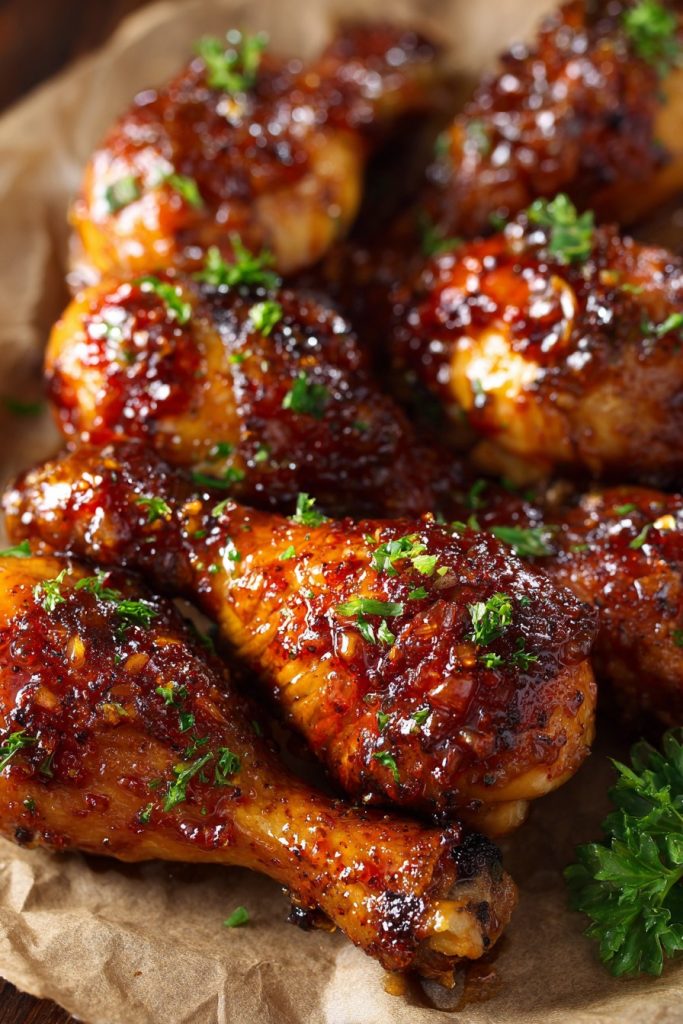
Overwhelmed by the dinner rush? This honey garlic chicken drumsticks recipe is about to become your go-to solution for those chaotic evenings when everyone’s hungry and you’re running on empty. One pan, minimal prep, and maximum flavor make this the perfect rescue meal for busy families trying to get food on the table without the stress.
Why This Recipe Works
- One-pan wonder means you’re only dealing with a single baking sheet for both cooking and serving, dramatically cutting down on cleanup time and making post-dinner recovery much more manageable
- Simple pantry ingredients that you likely already have on hand eliminate the need for special grocery store trips, saving both time and money while reducing food waste
- The hands-off baking approach gives you 40 minutes to help with homework, fold laundry, or simply take a breather while dinner practically cooks itself
- Drumsticks are naturally family-friendly and budget-conscious, offering built-in portion control and being significantly more affordable than boneless chicken options
- The sweet and savory glaze appeals to both kids and adults alike, eliminating the need to prepare separate meals for different taste preferences in your household
Ingredients
- 8 chicken drumsticks (about 2 pounds total), patted dry with paper towels
- 1/4 cup honey
- 4 cloves garlic, minced
- 2 tablespoons soy sauce
- 1 tablespoon olive oil
- 1 teaspoon paprika
- 1/2 teaspoon black pepper
- 1/4 teaspoon salt
- 1 tablespoon chopped fresh parsley for garnish (optional)
Equipment Needed
- Rimmed baking sheet
- Aluminum foil or parchment paper
- Small mixing bowl
- Whisk or fork
- Measuring cups and spoons
- Tongs
- Basting brush (optional but helpful)
Instructions
Preheat and Prepare Your Baking Sheet
Start by preheating your oven to 400°F and lining a rimmed baking sheet with aluminum foil or parchment paper. This simple step is your secret weapon against tough cleanup later – the foil creates a non-stick surface that catches all the drippings and sticky glaze, meaning you can literally just ball it up and toss it when dinner’s done. No scrubbing baked-on honey from your baking sheets, no soaking pans for hours, just easy cleanup that gives you back precious evening time. Make sure your baking sheet has sides to contain any juices that might escape during cooking, and if you’re using foil, give it a quick spritz of cooking spray to ensure nothing sticks.
Mix the Honey Garlic Glaze
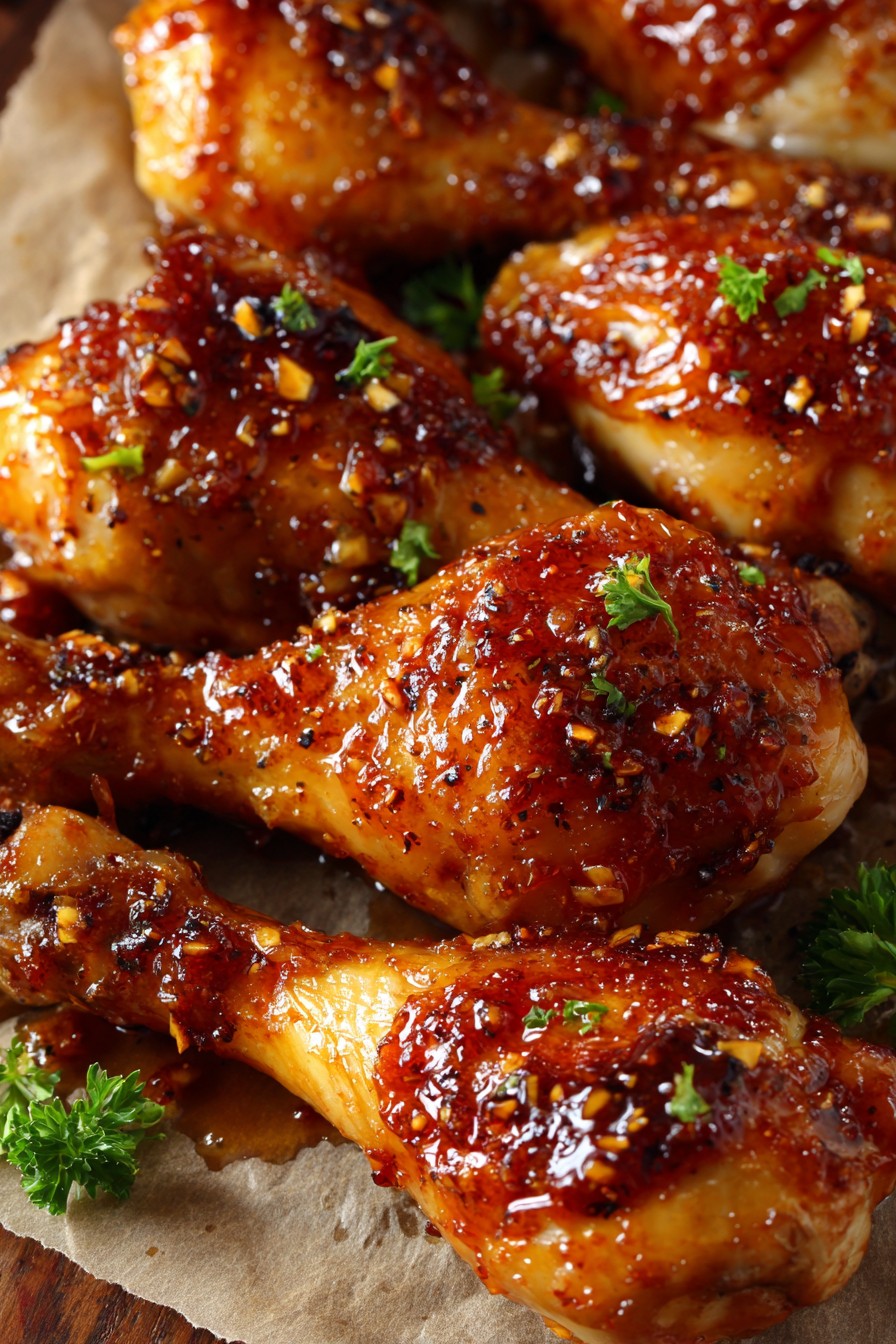
In a small bowl, combine 1/4 cup honey, 4 minced garlic cloves, 2 tablespoons soy sauce, 1 tablespoon olive oil, 1 teaspoon paprika, 1/2 teaspoon black pepper, and 1/4 teaspoon salt. Whisk everything together until the honey has dissolved and the ingredients are fully incorporated. The olive oil helps the glaze adhere to the chicken while adding moisture, and the soy sauce provides that savory umami balance to counter the honey’s sweetness. If your honey is particularly thick or crystallized, you can microwave the bowl for 15-20 seconds to make mixing easier. Pro tip: mix your glaze in a liquid measuring cup instead of a bowl – the spout makes drizzling over the chicken much cleaner and more controlled.
Arrange and Season the Drumsticks
Place your 8 patted-dry drumsticks on the prepared baking sheet in a single layer, making sure they aren’t touching each other. This spacing is crucial for proper browning and even cooking – crowded chicken steams instead of bakes, resulting in pale, less crispy skin. Patting the drumsticks dry with paper towels before seasoning helps the skin crisp up beautifully in the oven. If you have time, you can let the chicken sit at room temperature for 15-20 minutes before cooking, which helps it cook more evenly. This is one of those small steps that makes a big difference in the final texture without adding significant active prep time to your evening routine.
Apply the Glaze and Begin Baking
Using a basting brush or spoon, generously coat each drumstick with about half of your honey garlic mixture, making sure to cover all sides. Reserve the remaining glaze for basting later in the cooking process. Place the baking sheet in your preheated 400°F oven and set your timer for 20 minutes. The high initial temperature helps create that beautiful caramelization on the outside while keeping the interior juicy. During this first half of cooking, the chicken will start to release its natural juices, which will mix with the glaze to create that signature sticky sauce. Resist the temptation to open the oven door frequently, as this causes temperature fluctuations that can affect cooking time and texture.
Baste and Finish Cooking
After 20 minutes, carefully remove the baking sheet from the oven and use tongs to flip each drumstick. Brush the remaining honey garlic glaze over the now-exposed sides, making sure to coat evenly. The flipping process ensures both sides get that beautiful caramelized finish and prevents the bottom from becoming soggy. Return the pan to the oven and continue baking for another 15-20 minutes, or until the internal temperature reaches 165°F when measured with a meat thermometer in the thickest part of the drumstick (avoiding the bone). The glaze should be bubbly and slightly darkened, and the chicken skin should be crispy and golden brown.
Rest and Serve
Once the drumsticks reach 165°F internally, remove them from the oven and let them rest on the baking sheet for 5-10 minutes before serving. This resting period is non-negotiable for juicy chicken – it allows the muscle fibers to relax and reabsorb the natural juices that have been forced toward the center during cooking. If you cut into chicken immediately, all those precious juices will run out, leaving you with drier meat. While the chicken rests, you can sprinkle with chopped fresh parsley if desired, though this is purely aesthetic. The residual heat will continue to gently cook the chicken during this time, so don’t worry about it getting cold – it will be perfectly warm and much more tender when you serve it.
Tips and Tricks
If you’re really pressed for time in the mornings, you can actually prepare the honey garlic glaze the night before and store it in an airtight container in the refrigerator. This cuts your active prep time down to literally just arranging chicken on a pan and brushing with pre-made sauce. The flavors actually improve with a little marinating time, so this advance prep trick works in your favor flavor-wise too. For families with varying spice preferences, consider dividing your glaze and adding a pinch of red pepper flakes or a teaspoon of sriracha to one portion for the adults while keeping the kids’ portion mild. When it comes to cleanup, if any glaze does happen to stick to your baking sheet despite the foil lining, fill the pan with hot soapy water and let it soak while you eat dinner – by the time you’re done, any residue will wipe away easily. For extra crispy skin, you can pat the drumsticks dry one more time right before applying the glaze, and consider placing them on a wire rack set inside your baking sheet to allow air circulation on all sides. If you don’t have fresh garlic, garlic powder works in a pinch – use about 1 teaspoon instead of the fresh cloves. For those really hectic nights where even measuring feels like too much, remember that the ingredient ratios are forgiving – a little more honey, a little less soy sauce, it will still turn out delicious. Finally, if you’re doubling the recipe to have leftovers, make sure to use two baking sheets rather than crowding one – the extra pan is worth the trade-off for properly cooked chicken that reheats beautifully for lunches the next day.
Recipe Variations
- For a spicy kick that adults will love, add 1-2 teaspoons of sriracha or 1/2 teaspoon of red pepper flakes to the honey garlic glaze. The sweetness of the honey balances the heat beautifully, creating a complex flavor profile that makes ordinary chicken drumsticks feel restaurant-quality. This variation works particularly well if you’re making a double batch and want to customize some pieces for grown-up palates while keeping others kid-friendly.
- Transform this into a complete one-pan meal by adding chopped vegetables to the baking sheet during the last 20 minutes of cooking. Broccoli florets, carrot coins, or potato wedges roast beautifully alongside the chicken and absorb the delicious honey garlic flavors. Just toss your vegetables with a tablespoon of olive oil and spread them around the drumsticks – they’ll cook in the chicken drippings and glaze for incredible flavor.
- Create an Asian-inspired version by substituting the paprika with 1 teaspoon of grated fresh ginger and adding 1 tablespoon of rice vinegar to the glaze. Serve over steamed rice with a sprinkle of sesame seeds and sliced green onions for a meal that feels completely different but uses the same basic technique and similar ingredients.
- For a crispier, almost fried-chicken texture without the mess of actual frying, toss the drumsticks in 2 tablespoons of cornstarch before applying the glaze. The cornstarch creates a delicate crust that becomes wonderfully crispy in the oven while helping the glaze adhere better to the chicken surface.
- Make it barbecue-style by replacing half of the honey with your favorite barbecue sauce and adding 1 teaspoon of smoked paprika instead of regular paprika. This hybrid approach gives you the sticky-sweet quality of barbecue chicken with the garlicky depth of the original recipe, perfect for when you can’t decide between the two flavor profiles.
Frequently Asked Questions
Can I use boneless chicken thighs instead of drumsticks?
Absolutely, boneless, skinless chicken thighs work beautifully with this recipe and actually cook slightly faster – about 25-30 minutes total instead of 35-40. The higher fat content in thighs makes them incredibly forgiving and juicy, and the lack of bones means even quicker eating for little ones who struggle with drumsticks. Just arrange them in a single layer on your baking sheet and reduce the cooking time, checking for doneness at the 25-minute mark. The internal temperature should still reach 165°F, and the glaze will caramelize beautifully on the flat surface of the thighs.
How do I know when the chicken is fully cooked without a meat thermometer?
While I strongly recommend using a meat thermometer for food safety and perfect results every time, if you don’t have one, there are visual cues you can rely on. The chicken should no longer be pink inside when you cut into the thickest part near the bone, and the juices should run clear rather than pink. The meat should feel firm to the touch and should easily pull away from the bone when gently tugged. However, investing in an inexpensive digital meat thermometer is one of the best kitchen purchases for busy parents – it takes the guesswork out of cooking and ensures your family’s safety.
Can I make this recipe ahead of time for meal prep?
This honey garlic chicken holds up wonderfully for meal prep and actually develops more flavor as it sits. After cooking and cooling completely, store the drumsticks in an airtight container in the refrigerator for up to 4 days. They reheat beautifully in the microwave, toaster oven, or conventional oven at 350°F for 10-15 minutes until warmed through. The glaze may solidify slightly when chilled, but it will become saucy again upon reheating. These make excellent next-day lunches or quick dinners when you’re really short on time.
What sides pair well with honey garlic chicken drumsticks?
This versatile chicken pairs well with almost any simple side dish, which is part of what makes it such a weeknight lifesaver. Steamed rice or quinoa are perfect for soaking up the extra glaze, while roasted vegetables like broccoli, carrots, or sweet potatoes cook alongside the chicken for a complete one-pan meal. For even quicker options, instant mashed potatoes, frozen vegetable blends, or a simple green salad require minimal effort but round out the meal perfectly. The key is choosing sides that don’t require much active attention so you can focus on the main event.
My family doesn’t like garlic – can I leave it out?
Certainly, you can omit the garlic entirely and still have delicious honey-glazed chicken. The recipe will work perfectly fine without it, though you might want to add another flavor element to balance the sweetness. Try adding a teaspoon of Dijon mustard for tanginess, or increase the paprika to 1.5 teaspoons for more smoky depth. The beauty of this recipe is its adaptability to your family’s specific tastes while maintaining the same easy preparation method that makes weeknight dinners manageable.
Summary
This honey garlic chicken drumsticks recipe delivers maximum flavor with minimal effort, using simple ingredients and one pan for easy cleanup. Perfect for busy weeknights when you need a family-friendly meal that practically cooks itself while you handle other responsibilities. The sweet-savory glaze appeals to all ages, and the hands-off baking method gives you back precious time.
Honey Garlic Chicken Drumsticks
4
servings10
minutes35
minutesIngredients
Instructions
- 1 Preheat oven to 400°F and line a rimmed baking sheet with foil or parchment paper
- 2 In a small bowl, whisk together honey, garlic, soy sauce, olive oil, paprika, pepper, and salt until well combined
- 3 Arrange drumsticks in a single layer on prepared baking sheet, making sure they don't touch
- 4 Brush drumsticks with half of the honey garlic mixture and bake for 20 minutes
- 5 Remove from oven, flip drumsticks, brush with remaining glaze, and return to oven for 15-20 more minutes until internal temperature reaches 165°F
- 6 Let rest for 5-10 minutes before serving, garnished with parsley if desired


