You’re probably wondering if those store-bought cat treats are truly the best option for your feline friend. Well, wonder no more! We’ve gathered 24 vet-approved homemade recipes that are not only delicious but also packed with wholesome ingredients. From simple salmon bites to chicken liver delights, these treats will have your cat purring with joy. Let’s dive into these easy-to-make recipes that will make your kitty feel extra special!
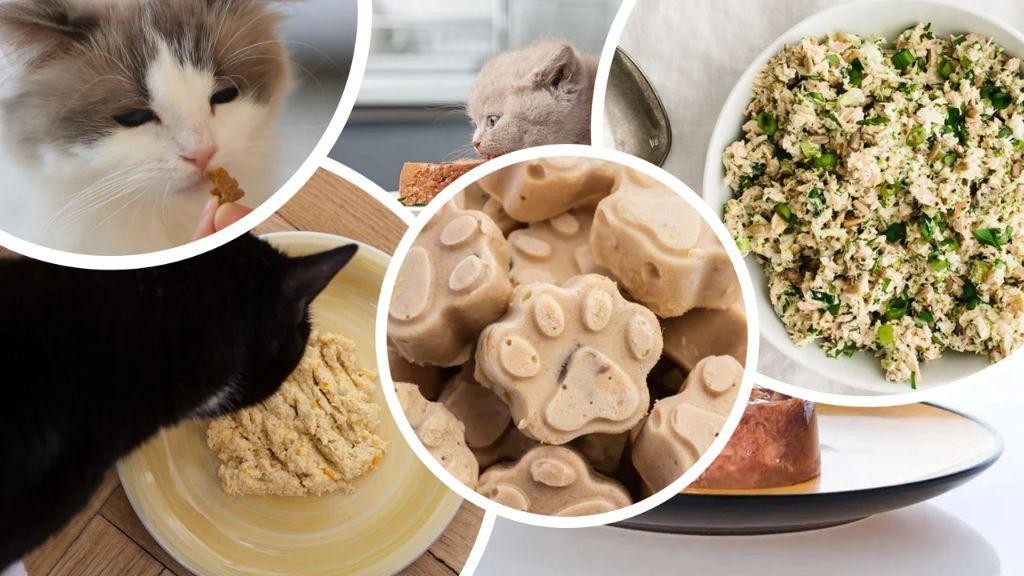
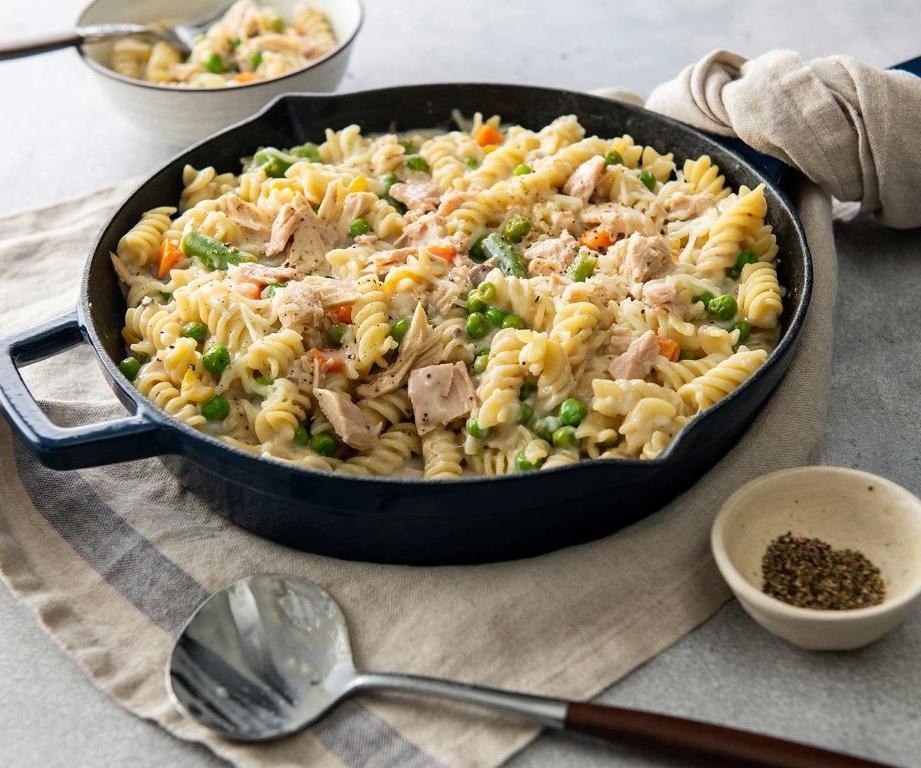
Tuna Delight Vet-Approved Cat Treats
Unleash your inner feline fanatic with these purr-fectly crafted tuna treats that’ll have your cat plotting kitchen heists! We’ve whipped up a vet-approved delight that transforms simple ingredients into gourmet goodies worthy of even the most discerning whiskered connoisseur. Forget those mystery-meat commercial snacks—this homemade version delivers pure oceanic bliss in every crunchy bite.
24
treats15
minutes15
minutesIngredients
– 1 cup canned albacore tuna in spring water, thoroughly drained
– 1 large pasture-raised egg, lightly beaten
– ½ cup whole wheat flour
– 2 tablespoons nutritional yeast
– 1 tablespoon extra virgin olive oil
– ¼ cup low-sodium chicken bone broth
Instructions
1. Preheat your oven to 350°F and line a baking sheet with parchment paper.
2. Combine the drained albacore tuna and lightly beaten pasture-raised egg in a medium mixing bowl, mashing thoroughly with a fork until no large chunks remain.
3. Whisk in the whole wheat flour and nutritional yeast until the mixture forms a coarse, sand-like texture.
4. Drizzle in the extra virgin olive oil while continuously stirring to distribute fat evenly throughout the mixture.
5. Gradually incorporate the low-sodium chicken bone broth, one tablespoon at a time, until the dough becomes pliable but not sticky.
6. Roll the dough into ¼-inch thick sheets between two pieces of parchment paper to prevent sticking.
7. Use a small cookie cutter or knife to create uniform ½-inch treat shapes, arranging them ½ inch apart on the prepared baking sheet.
8. Bake for 12-15 minutes until the treats develop a golden-brown crust and firm to the touch.
9. Transfer the baking sheet to a wire rack and cool completely for 45 minutes to achieve maximum crispness.
10. Store in an airtight container at room temperature for up to two weeks. Zesty with oceanic notes and satisfyingly crunchy, these treats shatter with an audible snap that cats find irresistible. The nutritional yeast adds a subtle umami depth that complements the tuna’s natural richness, making these perfect for training rewards or as a special dinner topper that turns ordinary kibble into a celebratory feast.
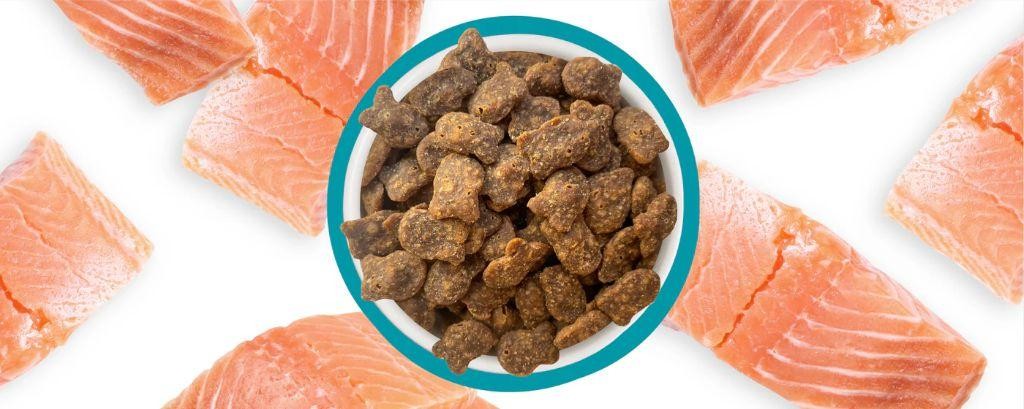
Salmon & Catnip Crunchies
Oh, the things we do for our feline overlords! This salmon and catnip crunchies recipe will have your kitty convinced you graduated from culinary school—or at least that you finally understand their sophisticated palate. Prepare for purrs of approval and possibly some dramatic floor-rolling when you whip up these irresistible treats.
1
batch15
minutes15
minutesIngredients
– 1 cup canned wild-caught pink salmon, thoroughly drained and flaked
– 2 tablespoons dried organic catnip leaves, finely crumbled
– 1 large pasture-raised egg, lightly beaten
– ¾ cup whole wheat flour
– 2 tablespoons unsalted clarified butter, melted
– 2 tablespoons filtered water
Instructions
1. Preheat your oven to 325°F and line a baking sheet with parchment paper.
2. In a medium mixing bowl, combine the flaked wild-caught pink salmon and finely crumbled dried organic catnip leaves until evenly distributed.
3. Add the lightly beaten pasture-raised egg and melted unsalted clarified butter to the salmon mixture, stirring until a cohesive paste forms.
4. Gradually incorporate the whole wheat flour into the mixture, adding 2 tablespoons of filtered water to achieve a firm, workable dough consistency. (Tip: The dough should hold together when pressed but not be sticky—add an extra teaspoon of water if too crumbly.)
5. Turn the dough onto a lightly floured surface and roll to a ¼-inch thickness using a rolling pin.
6. Use a small cookie cutter or knife to cut the dough into ½-inch pieces, transferring them to the prepared baking sheet. (Tip: Uniform sizing ensures even baking—no undercooked centers or burnt edges.)
7. Bake for 12–15 minutes, or until the edges are golden brown and the centers feel firm to the touch. (Tip: Rotate the baking sheet halfway through for consistent browning, as oven hotspots can cause uneven cooking.)
8. Cool completely on a wire rack before serving or storing. Generously gifted, these crunchies boast a satisfying snap that gives way to a fishy, herbaceous interior—perfect for stuffing into puzzle toys or crumbling over your cat’s regular kibble for a gourmet upgrade.
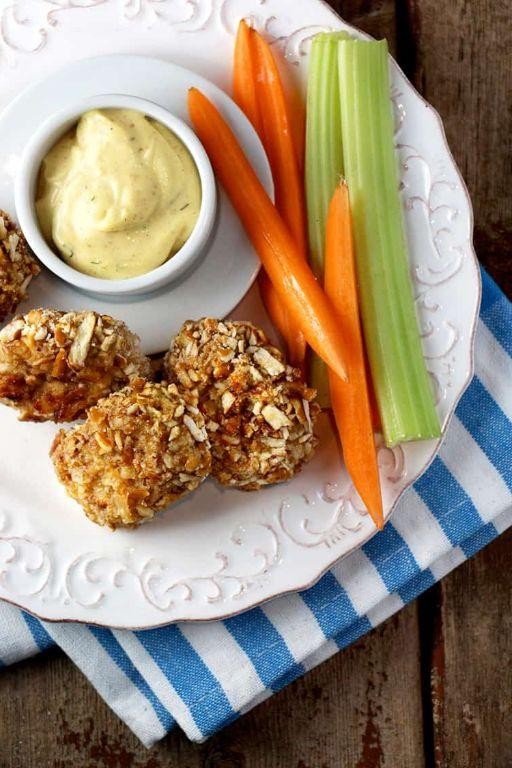
Chicken & Oats Kitty Bites
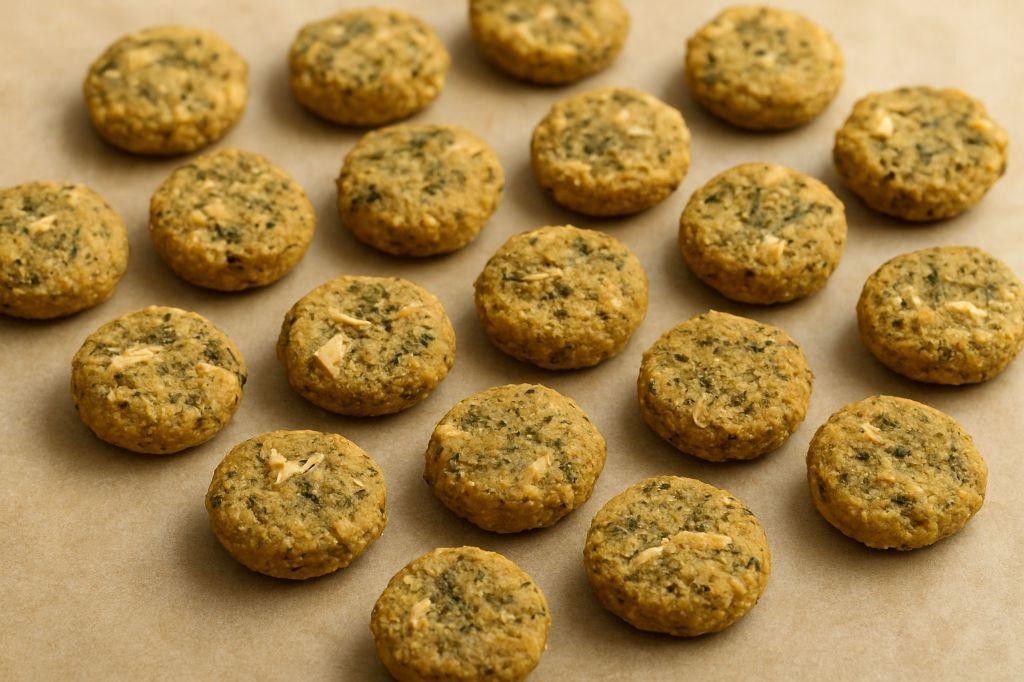
Cats might chase laser pointers, but these Chicken & Oats Kitty Bites will have them chasing your approval instead. Crafted with simple, wholesome ingredients, these homemade treats are the purr-fect way to spoil your feline friend without the mystery-meat worries of store-bought snacks. Let’s get those pawsitively delicious bites ready for your discerning furball.
24
bites15
minutes15
minutesIngredients
- 1 cup finely ground rolled oats
- 1/2 cup cooked, finely shredded chicken breast
- 1 large pasture-raised egg, lightly beaten
- 2 tablespoons unsalted chicken bone broth
- 1 tablespoon clarified butter, melted
Instructions
- Preheat your oven to 350°F and line a baking sheet with parchment paper.
- In a medium mixing bowl, combine the finely ground rolled oats and finely shredded chicken breast until evenly distributed.
- Pour the lightly beaten pasture-raised egg over the oat-chicken mixture, using a fork to incorporate it fully until the mixture holds together when pressed. Tip: Grinding the oats in a food processor to a fine powder ensures a smoother texture that’s easier for cats to digest.
- Add the unsalted chicken bone broth and melted clarified butter, stirring until a cohesive, slightly sticky dough forms. Tip: If the dough feels too dry, add broth 1 teaspoon at a time; if too wet, sprinkle in extra ground oats.
- Roll the dough into 1/2-inch balls and place them 1 inch apart on the prepared baking sheet.
- Flatten each ball gently with your fingertips to form 1/4-inch thick discs.
- Bake for 12–15 minutes, or until the edges are lightly golden and the tops feel firm to the touch. Tip: For a crunchier treat, extend baking by 2–3 minutes, but watch closely to avoid over-browning.
- Remove from the oven and let cool completely on the baking sheet before serving.
Perfectly crisp on the outside with a tender, crumbly interior, these bites deliver a savory chicken flavor enhanced by the nuttiness of oats. Present them as a post-nap reward or crumble over your cat’s regular meal for an instant upgrade that’ll have them meowing for more.
Pumpkin Puree Cat Snacks
Gather ’round, feline fanatics! Your cat’s about to become the pumpkin-spice-everything enthusiast you never knew they needed. These purr-fectly wholesome snacks will have your kitty trading their usual treats for something that’s actually good for them—revolutionary, we know!
24
portions15
minutes22
minutesIngredients
– 1 cup organic pumpkin purée
– 1/4 cup oat flour
– 1 pasture-raised egg, lightly beaten
– 1 tablespoon extra-virgin coconut oil, melted
– 1/4 teaspoon ground catnip
Instructions
1. Preheat your conventional oven to 325°F and line a baking sheet with parchment paper.
2. In a medium mixing bowl, combine 1 cup organic pumpkin purée and 1/4 cup oat flour using a silicone spatula until a thick paste forms. (Tip: For maximum fluffiness, avoid overmixing once dry and wet ingredients combine.)
3. Add 1 lightly beaten pasture-raised egg and 1 tablespoon melted extra-virgin coconut oil to the pumpkin mixture, folding gently until fully incorporated.
4. Sprinkle in 1/4 teaspoon ground catnip and stir for exactly 15 seconds to distribute evenly without bruising the herb.
5. Scoop teaspoon-sized portions of dough onto the prepared baking sheet, spacing them 1 inch apart.
6. Bake for 18-22 minutes, rotating the sheet halfway through, until the edges are lightly golden and the centers spring back when pressed. (Tip: For crispier treats, extend baking by 2-3 minutes and cool completely on a wire rack.)
7. Transfer the baked snacks to a cooling rack and let them rest for 30 minutes until firm to the touch. (Tip: Store in an airtight container with a silica gel packet to maintain crunch for up to two weeks.)
8. Serve one treat to your cat and observe their reaction before offering more. Really, these pumpkin delights boast a subtly earthy sweetness with a satisfying crumble that shatters delicately between tiny teeth. The coconut oil lends a luxurious mouthfeel that contrasts beautifully with the oat flour’s gentle graininess—perfect for crumbling over their regular food or hiding in puzzle toys for extended entertainment.
Sardine & Sweet Potato Nibbles
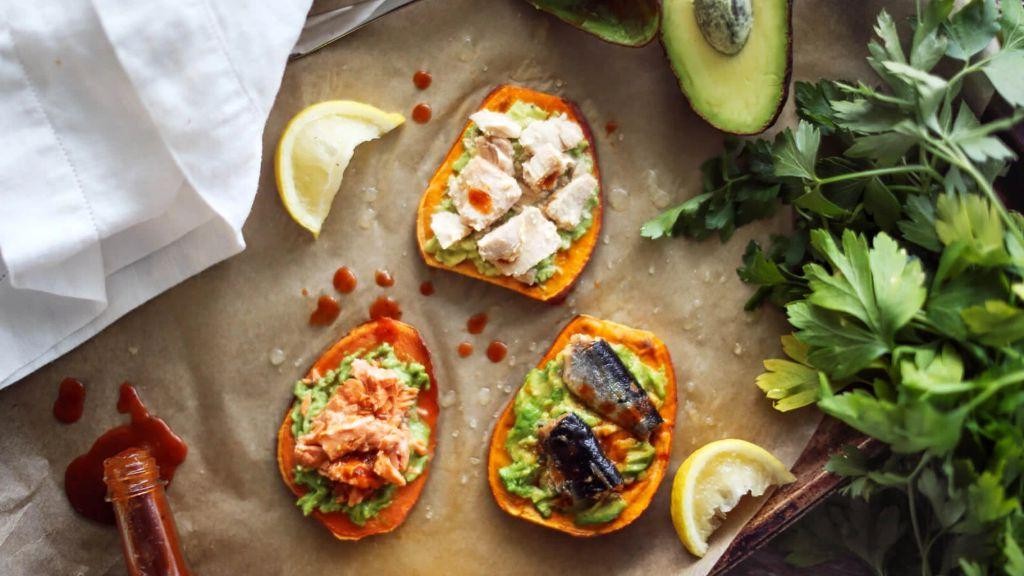
Tired of the same old snack routine? These sardine and sweet potato nibbles are about to become your new obsession—they’re the perfect marriage of oceanic goodness and earthy sweetness that’ll make your taste buds do a happy dance. Think of them as fancy fish crackers for grown-ups who appreciate bold flavors and crispy textures.
5
portions15
minutes30
minutesIngredients
– 2 medium sweet potatoes, peeled and diced into ½-inch cubes
– 2 cans (3.75 oz each) wild-caught sardines in olive oil, drained
– ¼ cup extra virgin olive oil
– 2 tbsp fresh lemon juice
– 1 tsp smoked paprika
– ½ tsp garlic powder
– ¼ tsp cayenne pepper
– 1 tsp flaky sea salt
– 2 tbsp fresh parsley, finely chopped
Instructions
1. Preheat your oven to 425°F and line a baking sheet with parchment paper.
2. Toss the sweet potato cubes with 2 tablespoons of olive oil until evenly coated.
3. Arrange the sweet potatoes in a single layer on the prepared baking sheet.
4. Roast for 20 minutes until the edges begin to caramelize and crisp.
5. While potatoes roast, combine sardines, remaining olive oil, lemon juice, smoked paprika, garlic powder, and cayenne in a medium bowl.
6. Mash the mixture with a fork until it forms a coarse paste.
7. Remove sweet potatoes from oven and gently fold in the sardine mixture until evenly distributed.
8. Return to oven and bake for 8-10 minutes until the sardine mixture is slightly crisped.
9. Transfer to a serving platter and immediately sprinkle with flaky sea salt.
10. Garnish with fresh parsley just before serving.
Vibrantly golden and delightfully crisp, these nibbles offer a wonderful textural contrast between the tender sweet potato interior and the savory, crispy sardine coating. The smoky paprika and bright lemon create a flavor profile that’s both sophisticated and utterly addictive—perfect for elevating your charcuterie board or serving as unexpected appetizers at your next gathering.
Cheesy Tuna Twists
Dazzlingly delicious and dangerously addictive, these Cheesy Tuna Twists are the culinary equivalent of finding money in your pocket—unexpectedly wonderful and immediately satisfying. Imagine flaky tuna and gooey cheese wrapped in golden pastry, creating the perfect weeknight dinner that even picky eaters will devour without complaint. They’re basically fancy Hot Pockets that actually taste good and won’t leave you questioning your life choices.
12
twists20
minutes22
minutesIngredients
- 1 package (17.3 oz) frozen puff pastry sheets, thawed
- 2 cans (5 oz each) solid white albacore tuna in spring water, thoroughly drained
- 1 cup sharp white cheddar cheese, freshly grated
- 1/2 cup whole milk ricotta cheese
- 1/4 cup crème fraîche
- 2 tbsp unsalted European-style butter, melted
- 1 large pasture-raised egg, lightly beaten
- 1 tbsp fresh dill fronds, finely chopped
- 1 tsp Dijon mustard
- 1/2 tsp smoked paprika
- 1/4 tsp freshly ground black pepper
- 1/4 tsp sea salt flakes
Instructions
- Preheat your oven to 400°F and line a baking sheet with parchment paper.
- Unfold both puff pastry sheets on a lightly floured surface and roll each to 10×12 inches using a rolling pin.
- In a medium mixing bowl, combine drained tuna, grated cheddar, ricotta, crème fraîche, dill, Dijon mustard, smoked paprika, black pepper, and sea salt flakes.
- Spread the tuna mixture evenly over one puff pastry sheet, leaving a 1-inch border around all edges.
- Brush the exposed edges with beaten egg using a pastry brush.
- Carefully place the second pastry sheet over the filling and press edges firmly to seal.
- Cut the filled pastry into 1-inch wide strips using a sharp pizza cutter or bench scraper.
- Twist each strip 3-4 times to create spiral patterns, then transfer to the prepared baking sheet.
- Brush each twist generously with melted butter, ensuring complete coverage.
- Bake for 18-22 minutes until golden brown and puffed, rotating the pan halfway through cooking.
- Remove from oven and let rest on the baking sheet for 5 minutes before serving.
Just out of the oven, these twists offer a satisfying crunch that gives way to creamy, savory filling with pops of briny tuna and sharp cheddar. The flaky layers shatter beautifully with each bite, while the ricotta keeps everything luxuriously moist. Try serving them alongside a simple arugula salad dressed with lemon vinaigrette, or pack them cold for a picnic where they’ll be the star of the spread.
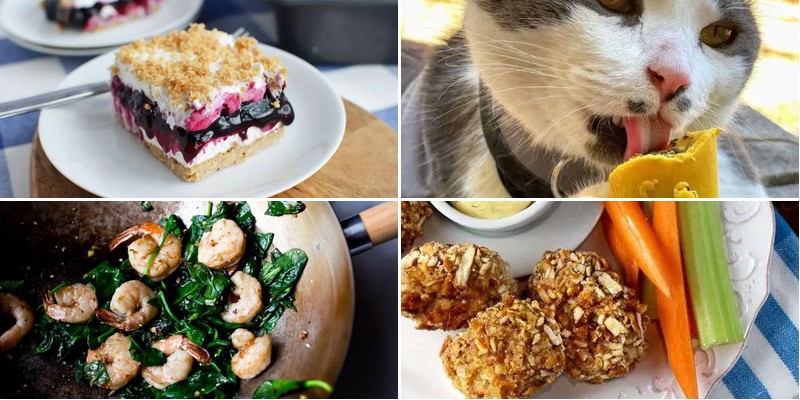
Liver & Parsley Pet Bites

Mmm, let’s be honest—sometimes our furry friends eat better than we do, and these Liver & Parsley Pet Bites are about to make your pup the envy of the dog park with their gourmet appeal and tail-wagging flavor. Crafted with simple, wholesome ingredients that’ll have you wondering if you should sneak a bite yourself (don’t worry, we won’t tell), these treats are as easy to make as they are irresistible. Get ready to become your pet’s personal chef with this foolproof recipe that balances nutrition and deliciousness in every morsel.
24
bites15
minutes18
minutesIngredients
– 1 pound fresh beef liver, finely diced
– 1/2 cup fresh parsley leaves, minced
– 1 cup whole wheat flour
– 1 large pasture-raised egg, lightly beaten
– 2 tablespoons clarified butter
– 1/4 cup low-sodium chicken broth
Instructions
1. Preheat your oven to 350°F and line a baking sheet with parchment paper.
2. Pulse the finely diced beef liver in a food processor for 15 seconds until it reaches a coarse paste consistency—this creates optimal texture for binding.
3. Combine the processed liver, minced fresh parsley leaves, whole wheat flour, and lightly beaten pasture-raised egg in a large mixing bowl.
4. Mix the ingredients thoroughly with a spatula for 2 minutes until a uniform, slightly sticky dough forms.
5. Roll the dough into 1-inch balls between your palms, placing them 1 inch apart on the prepared baking sheet.
6. Brush each ball with clarified butter using a pastry brush for enhanced browning and flavor development.
7. Bake at 350°F for 18 minutes until the treats develop a firm exterior and internal temperature reaches 165°F.
8. Remove the baking sheet from the oven and immediately brush the hot treats with low-sodium chicken broth using a basting brush—this adds moisture and palatability.
9. Cool the treats completely on a wire rack for 45 minutes until crisp on the outside yet slightly chewy inside.
Crunchy on the outside with a satisfyingly chewy center, these bites deliver an iron-rich punch from the liver balanced by the fresh, clean notes of parsley. For an extra special presentation, crumble them over your dog’s regular kibble or serve as training rewards during your next adventure—either way, prepare for some serious tail wags and hopeful stares toward the treat jar.
Turkey & Carrot Morsels
Mmm, who knew ground turkey and humble carrots could have such a glow-up? These bite-sized wonders are about to become your new favorite party trick—they’re so good, they might just upstage the main course (no offense, turkey). Get ready to impress even the pickiest eaters with these golden, savory morsels that pack a punch of flavor and fun in every bite.
24
morsels15
minutes20
minutesIngredients
- 1 pound ground turkey (93% lean)
- 1 cup finely grated carrots
- 1/2 cup panko breadcrumbs
- 1/4 cup whole milk
- 1 large pasture-raised egg, lightly beaten
- 2 tablespoons clarified butter
- 1 tablespoon Worcestershire sauce
- 1 teaspoon Diamond Crystal kosher salt
- 1/2 teaspoon freshly ground black pepper
- 1/4 teaspoon smoked paprika
- 2 tablespoons extra-virgin olive oil
Instructions
- Preheat your oven to 375°F and line a rimmed baking sheet with parchment paper.
- In a small bowl, combine the panko breadcrumbs and whole milk; let sit for 5 minutes until the breadcrumbs soften and absorb the liquid.
- In a large mixing bowl, add the ground turkey, finely grated carrots, soaked breadcrumb mixture, lightly beaten pasture-raised egg, Worcestershire sauce, Diamond Crystal kosher salt, freshly ground black pepper, and smoked paprika.
- Gently mix the ingredients with your hands until just combined—overmixing can make the morsels tough, so stop as soon as everything is incorporated.
- Portion the mixture into 1-tablespoon scoops and roll each into a smooth, compact ball between your palms.
- Heat the extra-virgin olive oil and clarified butter in a large skillet over medium-high heat until shimmering but not smoking.
- Arrange the morsels in the skillet in a single layer, leaving space between them to ensure even browning.
- Sear the morsels for 2–3 minutes per side, turning them with tongs, until they develop a deep golden-brown crust on all sides.
- Transfer the seared morsels to the prepared baking sheet and bake in the preheated oven for 10–12 minutes, or until the internal temperature reaches 165°F on an instant-read thermometer.
- Let the morsels rest on the baking sheet for 3 minutes before serving to allow the juices to redistribute.
Remarkably tender with a subtle sweetness from the carrots, these morsels boast a crispy exterior that gives way to a juicy, savory interior. Serve them skewered with toothpicks for a fun appetizer, or tuck them into a pita with tzatziki for a playful twist on a handheld meal—they’re versatile enough to steal the spotlight anywhere.
Shrimp & Spinach Purr-fections
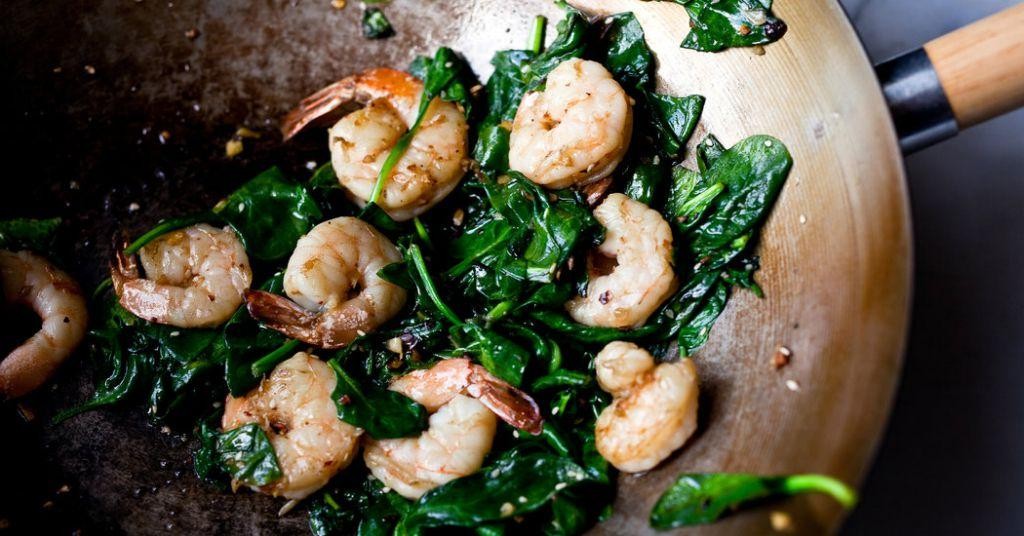
Zesty doesn’t even begin to describe these shrimp and spinach purr-fections—they’re the culinary equivalent of finding money in last season’s jeans, but way more delicious and guaranteed to make your taste buds do a happy dance. This dish combines ocean-fresh sweetness with earthy greens in a way that’ll have you questioning why you ever ordered takeout. Get ready to impress your inner food critic and anyone lucky enough to snag an invitation to your table.
2
servings15
minutes7
minutesIngredients
- 1 lb wild-caught jumbo shrimp, peeled and deveined
- 2 cups fresh baby spinach leaves, thoroughly washed
- 3 tbsp clarified butter
- 4 garlic cloves, microplaned
- ½ cup dry white wine (such as Sauvignon Blanc)
- ¼ cup heavy cream
- 1 tsp smoked paprika
- ½ tsp cayenne pepper
- Kosher salt to season
- Freshly cracked black pepper to season
- 2 tbsp freshly chopped parsley
- 1 lemon, cut into wedges
Instructions
- Pat the wild-caught jumbo shrimp completely dry with paper towels and season both sides generously with kosher salt and freshly cracked black pepper.
- Heat 2 tablespoons of clarified butter in a large skillet over medium-high heat until it shimmers and barely begins to smoke, about 2 minutes.
- Arrange the shrimp in a single layer in the hot skillet and cook for exactly 90 seconds per side until they curl into a C-shape and develop a golden-brown sear.
- Transfer the shrimp to a clean plate using tongs, being careful not to overcrowd the pan during cooking to ensure proper caramelization.
- Reduce the heat to medium and add the remaining tablespoon of clarified butter to the same skillet.
- Add the microplaned garlic cloves and sauté for 45 seconds until fragrant but not browned, stirring constantly with a wooden spoon.
- Pour in the dry white wine and use the wooden spoon to scrape up any browned bits from the bottom of the skillet, incorporating those flavorful fond into the sauce.
- Simmer the wine reduction for 2 minutes until reduced by half and the alcohol aroma has dissipated.
- Whisk in the heavy cream, smoked paprika, and cayenne pepper until fully incorporated and the sauce thickens slightly, about 1 minute.
- Add the fresh baby spinach leaves to the skillet and toss continuously with tongs for 1-2 minutes until just wilted but still vibrant green.
- Return the cooked shrimp to the skillet along with any accumulated juices, gently folding them into the spinach and cream sauce.
- Cook for exactly 30 seconds to reheat the shrimp without overcooking, maintaining their tender texture.
- Remove the skillet from heat and stir in the freshly chopped parsley until evenly distributed.
- Serve immediately in warm bowls, garnished with lemon wedges for squeezing over the top.
Buttery, garlicky shrimp nestle into velvety cream sauce with just-wilted spinach that maintains its structural integrity. The smoked paprika adds a subtle smokiness that plays beautifully against the bright acidity of fresh lemon juice. Consider serving these purr-fections over creamy polenta or crusty artisan bread to soak up every last drop of that incredible sauce, or stuff them into warm flour tortillas for an unexpected twist on taco night.
Beef & Catnip Chews
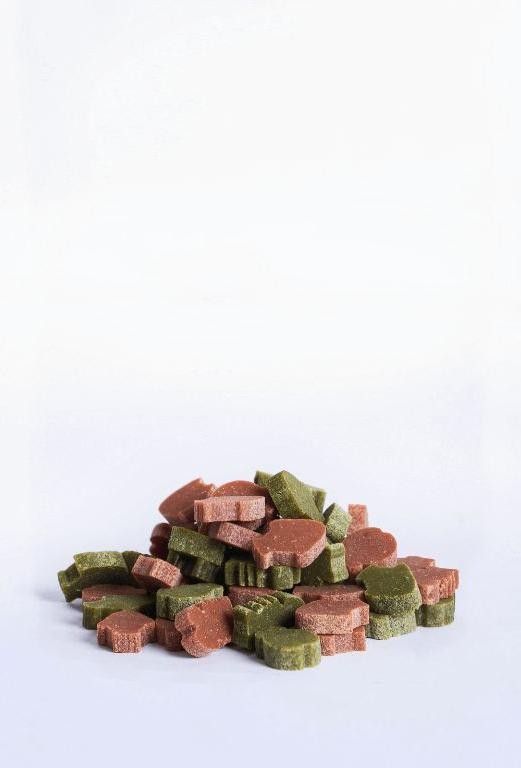
Venture beyond the ordinary with these Beef & Catnip Chews—a treat so delightfully quirky, it’s bound to make your whiskers twitch with joy. Imagine savory, slow-cooked beef infused with a hint of herbal mischief, creating a snack that’s as playful as a kitten chasing a laser pointer. Trust us, this isn’t your average chew; it’s a tail-swishing triumph in every bite!
1
batch15
minutes73
minutesIngredients
– 1 pound grass-fed beef sirloin, trimmed and finely diced
– 2 tablespoons dried organic catnip leaves
– 1/4 cup unsalted beef bone broth, reduced to 2 tablespoons
– 1 teaspoon cold-pressed sunflower oil
– 1/2 teaspoon fine sea salt
Instructions
1. Preheat your oven to 200°F and line a baking sheet with parchment paper.
2. In a medium skillet, heat the cold-pressed sunflower oil over medium-high heat until it shimmers, about 1 minute.
3. Add the finely diced grass-fed beef sirloin to the skillet, spreading it in a single layer to ensure even browning.
4. Sauté the beef for 5–7 minutes, stirring occasionally, until it develops a golden-brown crust and releases its juices.
5. Stir in the dried organic catnip leaves and fine sea salt, coating the beef evenly for 30 seconds to awaken the herbal aromas.
6. Pour in the reduced unsalted beef bone broth, scraping any browned bits from the skillet bottom to incorporate flavorful fond.
7. Simmer the mixture over low heat for 10–12 minutes, until the liquid is fully absorbed and the beef is tender but chewy.
8. Spread the beef mixture in a thin, even layer on the prepared baking sheet, using a spatula to press it firmly.
9. Bake for 45–50 minutes at 200°F, rotating the sheet halfway through, until the chews are dry and leathery to the touch.
10. Remove from the oven and let cool completely on a wire rack for 20–25 minutes to crisp up.
11. Break the sheet into bite-sized pieces, storing them in an airtight container for up to 2 weeks.
Buttery and robust, these chews boast a satisfyingly firm texture that gives way to a savory, herb-kissed finish. Serve them as a post-play reward or crumble over a bowl of kibble for a gourmet twist—either way, they’re purr-fectly irresistible!
Blueberry & Chicken Yums

Unbelievably, we’re about to make chicken and blueberries best friends forever in a dish that’ll have your taste buds doing cartwheels. This unexpected flavor combo transforms ordinary weeknight dinner into something truly spectacular that’ll make you question why you haven’t been putting fruit in your savory dishes all along. Get ready for a culinary adventure that’s equal parts surprising and delicious!
2
portions15
minutes35
minutesIngredients
– 1.5 lbs boneless, skinless chicken thighs, trimmed
– 2 cups fresh blueberries
– 3 tbsp clarified butter
– 1 large shallot, finely minced
– 2 cloves garlic, microplaned
– 1/2 cup dry white wine
– 1 cup heavy cream
– 1 tbsp fresh thyme leaves
– 1 tsp kosher salt
– 1/2 tsp freshly cracked black pepper
Instructions
1. Pat chicken thighs completely dry with paper towels and season both sides evenly with kosher salt and black pepper.
2. Heat clarified butter in a large skillet over medium-high heat until shimmering but not smoking, about 2 minutes.
3. Place chicken thighs presentation-side down in the hot skillet, ensuring they don’t touch for proper browning.
4. Sear chicken for 5-6 minutes without moving until a deep golden-brown crust forms on the bottom.
5. Flip chicken thighs using tongs and cook for another 4-5 minutes until the second side develops similar coloration.
6. Transfer chicken to a clean plate, leaving rendered fat and browned bits in the skillet.
7. Add minced shallot to the hot skillet and sauté for 2 minutes until translucent and fragrant.
8. Stir in microplaned garlic and cook for 30 seconds until aromatic but not browned.
9. Deglaze the pan with dry white wine, scraping up all the fond from the bottom with a wooden spoon.
10. Simmer wine for 2 minutes until reduced by half and the alcohol aroma dissipates.
11. Add fresh blueberries to the skillet and cook for 3 minutes until they begin to burst and release their juices.
12. Pour in heavy cream and add fresh thyme leaves, stirring to combine all ingredients.
13. Return chicken thighs to the skillet, nestling them into the blueberry cream sauce.
14. Reduce heat to medium-low and simmer uncovered for 8-10 minutes until chicken reaches an internal temperature of 165°F.
15. Remove skillet from heat and let rest for 3 minutes to allow flavors to meld and sauce to thicken slightly.
Just wait until you experience the magical contrast of savory, tender chicken against the bright, jammy blueberry sauce that’s both tangy and luxurious. The creamy reduction clings beautifully to each bite, creating a symphony of textures from the crispy-edged chicken to the burst berries. Serve this stunning dish over creamy polenta or alongside crispy roasted potatoes to soak up every last drop of that incredible sauce!
Cheddar & Bacon Kitty Bites
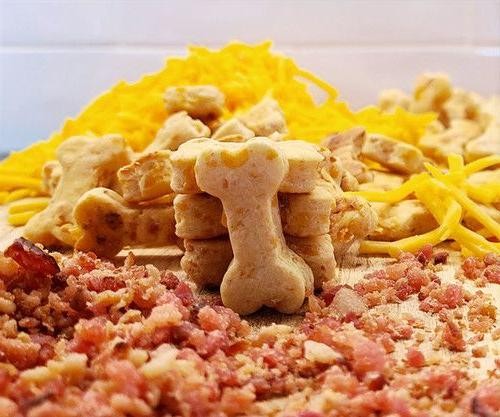
Sassy, savory, and seriously snackable—these Cheddar & Bacon Kitty Bites are the purr-fect party pleaser that’ll have your guests meowing for more, blending crispy bacon with sharp cheddar in a bite-sized treat that’s dangerously addictive. Seriously, who needs catnip when you’ve got these golden nuggets of joy? They’re so good, you might just forget to share.
24
bites15
minutes23
minutesIngredients
– 1 cup all-purpose flour
– 1 teaspoon baking powder
– ½ teaspoon smoked paprika
– ¼ teaspoon fine sea salt
– 4 slices thick-cut applewood-smoked bacon, finely diced
– 1 cup sharp white cheddar cheese, freshly grated
– 2 pasture-raised eggs, lightly beaten
– ½ cup whole milk
– 2 tablespoons unsalted butter, melted
– 1 tablespoon clarified butter for greasing
Instructions
1. Preheat your oven to 375°F (190°C) and lightly grease a mini muffin tin with clarified butter using a pastry brush.
2. In a medium skillet over medium heat, cook the finely diced bacon for 6–8 minutes until crisp and golden brown, then transfer to a paper towel-lined plate to drain excess fat.
3. Whisk together the all-purpose flour, baking powder, smoked paprika, and fine sea salt in a large mixing bowl until fully combined.
4. Tip: For optimal rise, ensure your baking powder is fresh by testing it with hot water—it should bubble vigorously.
5. Stir in the freshly grated sharp white cheddar cheese and crisp bacon bits until evenly distributed throughout the dry mixture.
6. In a separate bowl, combine the lightly beaten pasture-raised eggs, whole milk, and melted unsalted butter, whisking for 30 seconds until smooth and emulsified.
7. Pour the wet ingredients into the dry mixture and fold gently with a spatula until just combined, avoiding overmixing to keep the bites tender.
8. Tip: A few streaks of flour are fine; overworking the batter can lead to tough bites.
9. Spoon the batter into the prepared mini muffin tin, filling each cup about ¾ full to allow for expansion.
10. Bake in the preheated oven for 12–15 minutes, or until the tops are golden brown and a toothpick inserted into the center comes out clean.
11. Tip: Rotate the tin halfway through baking for even browning and to prevent hot spots.
12. Let the bites cool in the tin for 5 minutes before transferring to a wire rack to cool completely.
Delightfully crisp on the outside with a fluffy, cheesy interior, these bites offer a smoky bacon kick that’s balanced by the sharp cheddar tang. Serve them warm with a dollop of spicy aioli for dipping, or crumble them over a salad for an unexpected crunch that’ll elevate any meal from mundane to magnificent.
Apple & Salmon Tidbits
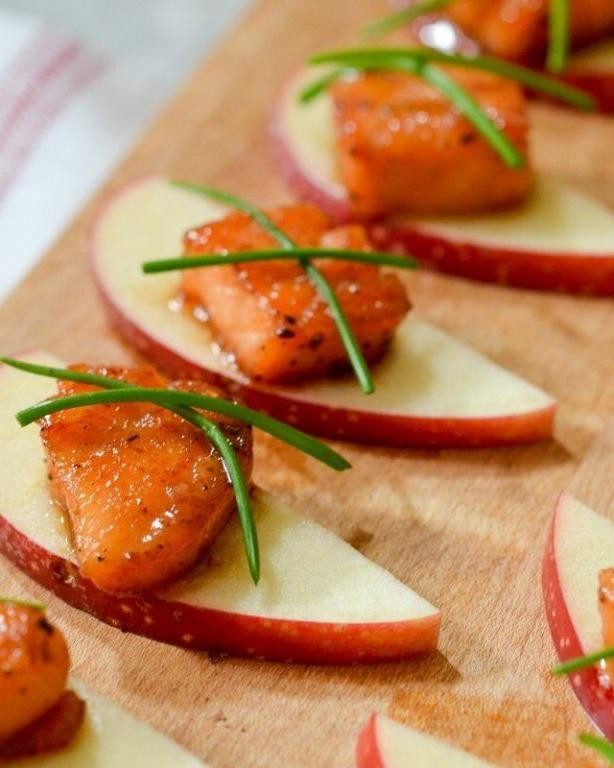
Zesty, zippy, and downright zany—these Apple & Salmon Tidbits are the culinary equivalent of a surprise party in your mouth, where sweet, crisp apples crash into rich, flaky salmon in a flavor fiesta that’ll make your taste buds do a happy dance. Forget boring appetizers; this dish is the life of the party, packed with playful contrasts that’ll have everyone asking for the recipe (and maybe your secret to such kitchen brilliance). Trust me, it’s the snack that steals the show without even trying too hard—just pure, delicious fun.
5
servings15
minutes9
minutesIngredients
– 1 lb fresh salmon fillet, skin removed and cut into 1-inch cubes
– 2 medium Honeycrisp apples, peeled, cored, and diced into 1/2-inch pieces
– 2 tbsp clarified butter
– 1 tbsp extra-virgin olive oil
– 1 tsp freshly grated ginger root
– 1/2 tsp smoked paprika
– 1/4 tsp fine sea salt
– 1/4 tsp freshly cracked black pepper
– 1 tbsp freshly squeezed lemon juice
– 2 tbsp finely chopped fresh chives
Instructions
1. Preheat a non-stick skillet over medium-high heat (375°F) for 2 minutes until evenly hot.
2. Pat the salmon cubes dry with paper towels to ensure a crisp sear.
3. Add clarified butter and extra-virgin olive oil to the skillet, swirling to coat the surface.
4. Place salmon cubes in the skillet in a single layer, searing for 2 minutes per side until golden-brown crusts form.
5. Transfer seared salmon to a plate, covering loosely with foil to retain warmth.
6. In the same skillet, add diced apples, sautéing for 3–4 minutes until lightly caramelized and fork-tender.
7. Stir in freshly grated ginger root and smoked paprika, cooking for 30 seconds until fragrant.
8. Return salmon to the skillet, gently tossing with apples to combine.
9. Season with fine sea salt and freshly cracked black pepper, stirring to distribute evenly.
10. Drizzle with freshly squeezed lemon juice, tossing once more to coat.
11. Remove from heat and garnish with finely chopped fresh chives before serving.
Buttery, flaky salmon mingles with the crisp-tender apples in a symphony of textures, while the smoky paprika and zesty lemon add a bright, savory kick. Serve these tidbits atop mini toasts for a chic appetizer or toss them into a leafy green salad for a light, elegant meal that’s as versatile as it is irresistible.
Yogurt & Peanut Butter Drops
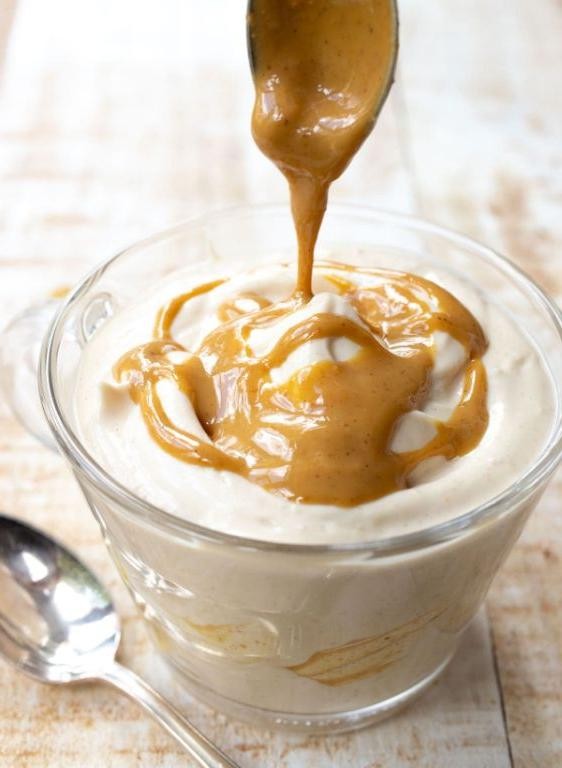
Zesty doesn’t even begin to cover the delightful chaos these Yogurt & Peanut Butter Drops bring to your kitchen—they’re the quirky, no-bake heroes that rescue you from boring snacks with a wink and a creamy, dreamy texture that’ll have you questioning all your previous life choices.
24
drops25
minutesIngredients
- 1 cup creamy, unsweetened peanut butter
- 1/2 cup full-fat Greek yogurt
- 1/4 cup pure maple syrup
- 1/2 cup old-fashioned rolled oats
- 2 tablespoons chia seeds
- 1/2 teaspoon Madagascar bourbon vanilla extract
- 1/4 teaspoon fine sea salt
- 1/4 cup Dutch-process cocoa powder, for dusting
Instructions
- Line a baking sheet with parchment paper.
- In a medium mixing bowl, combine 1 cup creamy, unsweetened peanut butter, 1/2 cup full-fat Greek yogurt, and 1/4 cup pure maple syrup, whisking vigorously for 60 seconds until smooth and emulsified.
- Fold in 1/2 cup old-fashioned rolled oats, 2 tablespoons chia seeds, 1/2 teaspoon Madagascar bourbon vanilla extract, and 1/4 teaspoon fine sea salt with a spatula until fully incorporated.
- Chill the mixture in the refrigerator for 20 minutes to firm up, which prevents sticking during shaping.
- Using a 1-tablespoon cookie scoop, portion the mixture into uniform balls, rolling each between your palms for 15 seconds to form smooth spheres.
- Place the balls on the prepared baking sheet, spacing them 1 inch apart.
- Refrigerate the drops for 1 hour until firm to the touch.
- Roll each chilled drop in 1/4 cup Dutch-process cocoa powder until lightly coated, tapping off excess for an even finish.
Amazingly, these drops boast a fudgy, melt-in-your-mouth texture with a nutty richness from the peanut butter, balanced by the tangy yogurt—serve them stacked like tiny edible towers or crumbled over vanilla bean ice cream for a playful twist.
Almond & Rice Kitty Delights
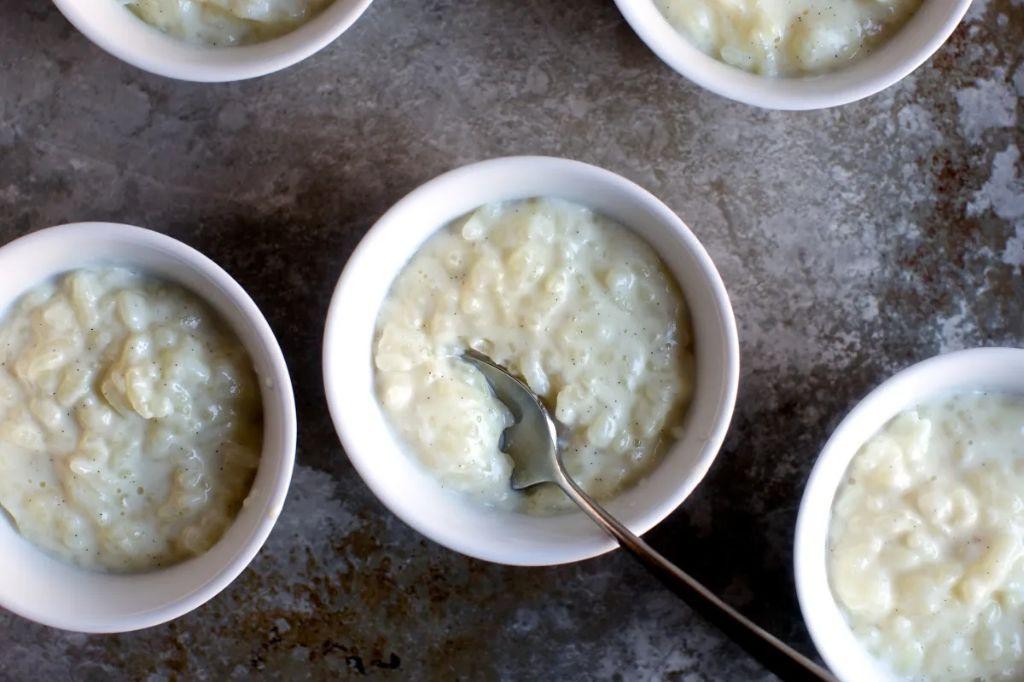
Never has a treat sounded more delightfully contradictory than these Almond & Rice Kitty Delights—part gourmet snack, part whimsical indulgence that’ll have everyone purring for more. Imagine the nutty sophistication of almonds meeting the gentle comfort of rice in a bite-sized package that’s simply irresistible.
12
portions15
minutes15
minutesIngredients
- 1 cup finely ground almond flour
- 1/2 cup cooked sushi rice, cooled to room temperature
- 1/4 cup clarified butter, melted
- 2 tbsp wildflower honey
- 1 tsp pure vanilla extract
- 1/4 tsp fine sea salt
Instructions
- Preheat your oven to 325°F and line a baking sheet with parchment paper.
- Combine 1 cup finely ground almond flour and 1/2 cup cooked sushi rice in a large mixing bowl, breaking up any rice clumps with your fingers for even distribution.
- Whisk 1/4 cup clarified butter, 2 tbsp wildflower honey, 1 tsp pure vanilla extract, and 1/4 tsp fine sea salt in a separate bowl until fully emulsified. Tip: Warming the honey slightly beforehand helps it blend more smoothly with the butter.
- Pour the wet ingredients into the dry mixture and stir with a spatula until a cohesive dough forms, about 2 minutes.
- Roll tablespoon-sized portions of dough into smooth balls, then gently flatten them into 1/2-inch thick discs on the prepared baking sheet, spacing them 1 inch apart.
- Bake for 12-15 minutes, or until the edges turn a pale golden brown and the centers are set but still slightly soft. Tip: Rotate the baking sheet halfway through for even browning.
- Transfer the delights to a wire rack and cool completely for 20 minutes to allow them to firm up. Tip: Resist sampling them warm—the texture improves dramatically once cooled.
Subtly sweet with a crumbly yet tender bite, these delights offer a satisfying crunch from the almond flour that melts into the creamy rice base. Serve them stacked like miniature towers drizzled with extra honey, or crumble over vanilla bean ice cream for an elegant dessert twist.
Cranberry & Fish Morsels
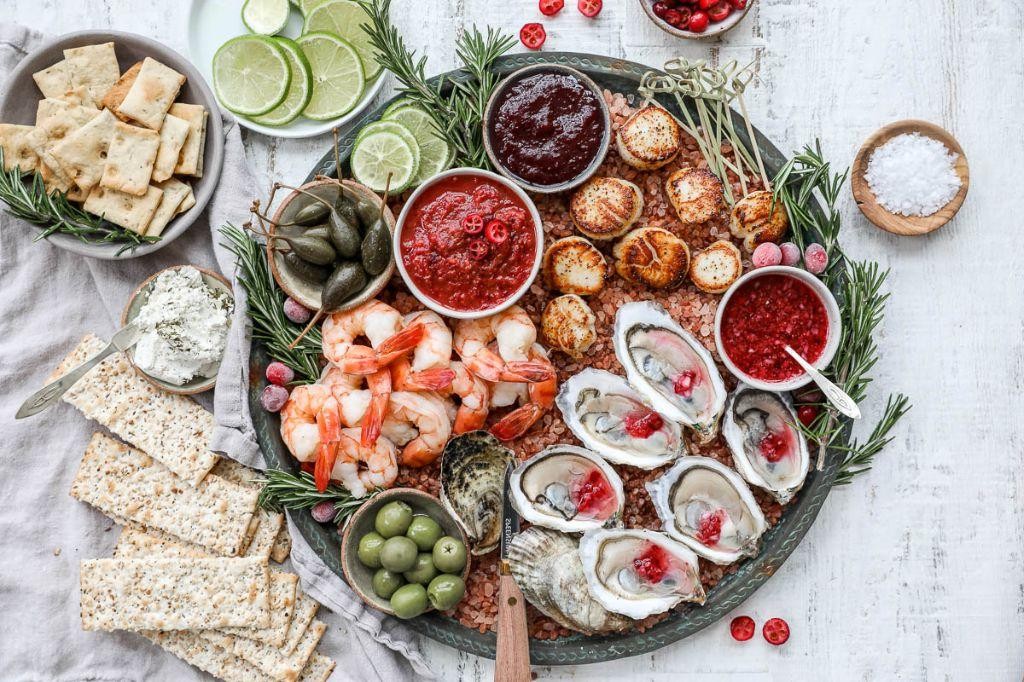
Pucker up, buttercup—we’re diving fork-first into the most unexpectedly brilliant flavor marriage since Netflix and chill. Cranberry & Fish Morsels are here to rescue your dinner routine from the clutches of culinary boredom, packing a tart-savory punch that’ll make your taste buds do a happy dance.
5
portions15
minutes20
minutesIngredients
- 1 lb wild-caught cod fillets, cut into 1-inch cubes
- 1 cup fresh cranberries
- 2 tbsp clarified butter
- 1/4 cup pure maple syrup
- 1 tsp finely grated orange zest
- 1/2 tsp coarse sea salt
- 1/4 tsp freshly cracked black pepper
- 1 tbsp fresh thyme leaves
- 1/2 cup panko breadcrumbs
Instructions
- Preheat your oven to 400°F and line a baking sheet with parchment paper.
- Pat the wild-caught cod cubes completely dry with paper towels to ensure proper browning.
- Toss the cod cubes with clarified butter until evenly coated.
- Season the fish with coarse sea salt and freshly cracked black pepper.
- Arrange the cod in a single layer on the prepared baking sheet.
- Bake for 8 minutes at 400°F until the edges begin to turn opaque.
- While the fish bakes, combine fresh cranberries, pure maple syrup, and finely grated orange zest in a small saucepan.
- Cook the cranberry mixture over medium heat for 5-7 minutes until the berries burst and the sauce thickens slightly.
- Remove the baking sheet from the oven and spoon the cranberry sauce over each fish cube.
- Sprinkle panko breadcrumbs and fresh thyme leaves evenly over the morsels.
- Return to the oven and bake for an additional 4-6 minutes until the breadcrumbs are golden and the fish flakes easily with a fork.
- Let rest for 2 minutes before serving to allow the flavors to meld.
Keep these little flavor bombs in mind when you need something that plays equally well at a fancy dinner party or Tuesday night Netflix binge. The contrast between the flaky, mild fish and the vibrant, tart cranberry glaze creates a textural symphony that’s downright addictive—serve them skewered with cocktail picks for maximum party appeal, or piled over creamy polenta for a comfort food upgrade that’ll have everyone asking for seconds.
Conclusion
Satisfy your feline friend with these vet-approved homemade treats! Whether you’re baking for health, bonding, or just spoiling your kitty, these 24 recipes offer something special for every cat. We’d love to hear which recipes your cat adores—drop a comment below with your favorites! Don’t forget to pin this article on Pinterest to share these delicious ideas with fellow cat lovers.