Are you ready to transform your kitchen into a bakery wonderland? We’ve gathered 35 irresistible homemade cake recipes that will satisfy every craving—from classic chocolate layer cakes to fruity summer delights and cozy spice-infused treats. Whether you’re baking for celebrations or just because, these foolproof sensations promise to impress. Get your mixing bowls ready and discover your next favorite dessert!
Chocolate Fudge Layer Cake
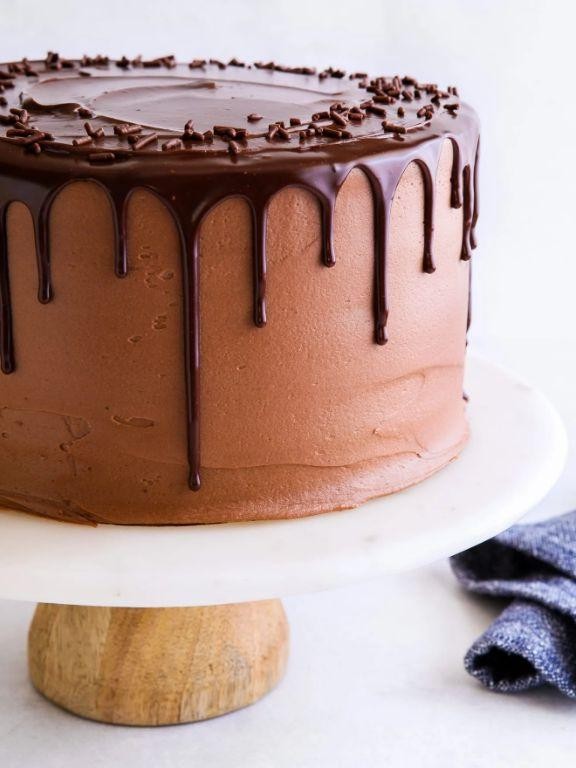
Oh my goodness, I still remember the first time I attempted this chocolate fudge layer cake for my husband’s birthday—it was a near disaster with frosting everywhere but the cake! Now, after countless trials (and happy taste-testers), I’ve perfected this foolproof version that’s become our family’s go-to celebration dessert.
2
layers20
minutes35
minutesIngredients
Flour – 2 cups
Sugar – 1½ cups
Cocoa powder – ¾ cup
Baking soda – 1 tsp
Salt – ½ tsp
Eggs – 2
Buttermilk – 1 cup
Vegetable oil – ½ cup
Vanilla extract – 2 tsp
Boiling water – 1 cup
Instructions
1. Preheat your oven to 350°F and grease two 9-inch round cake pans.
2. Whisk together 2 cups flour, 1½ cups sugar, ¾ cup cocoa powder, 1 tsp baking soda, and ½ tsp salt in a large bowl until no lumps remain.
3. Add 2 eggs, 1 cup buttermilk, ½ cup vegetable oil, and 2 tsp vanilla extract to the dry ingredients.
4. Beat the mixture on medium speed for 2 minutes until fully combined and smooth.
5. Carefully pour in 1 cup boiling water and stir by hand until the batter becomes thin and glossy.
6. Divide the batter evenly between the prepared pans using a kitchen scale for perfectly even layers.
7. Bake at 350°F for 30-35 minutes until a toothpick inserted in the center comes out clean.
8. Cool the cakes in their pans on wire racks for 15 minutes before inverting them.
9. Run a knife around the edges of the pans to ensure clean release of the cakes.
10. Allow the cakes to cool completely on wire racks for at least 1 hour before frosting.
The cake emerges incredibly moist with an intense chocolate flavor that deepens overnight, and I love serving it slightly chilled—the fudge texture becomes wonderfully dense, almost like a cross between cake and truffle. For special occasions, I’ll add fresh raspberries between the layers for a tart contrast that cuts through the richness beautifully.
Classic Vanilla Sponge Cake
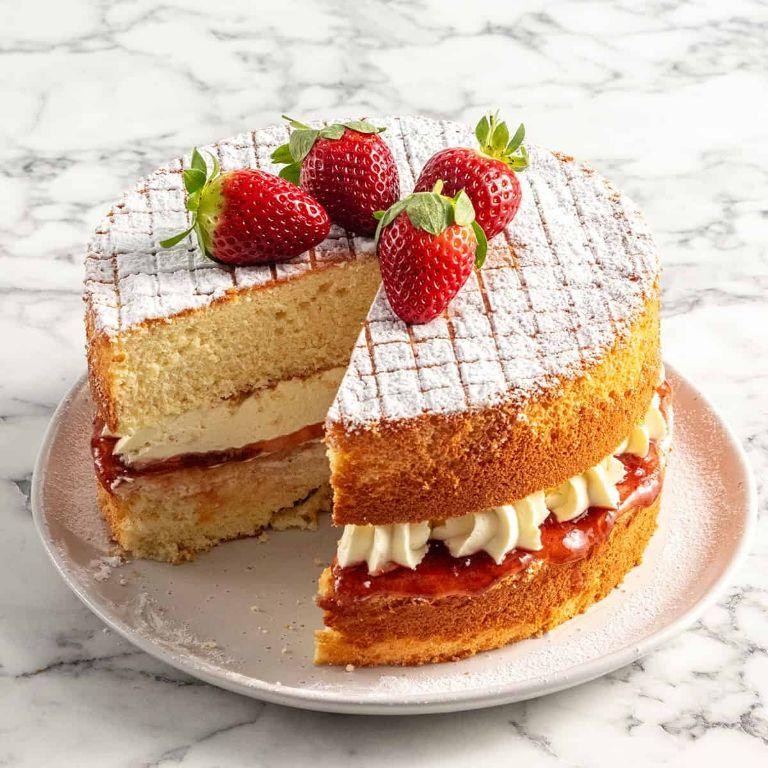
A perfectly fluffy vanilla sponge cake always reminds me of my grandmother’s kitchen – the warm aroma filling the house, the simple joy of watching it rise in the oven, and that first tender slice that somehow makes everything better. I’ve made this classic dozens of times, and it’s become my go-to for birthdays, potlucks, or just when I need a little comfort baking. There’s something magical about how these basic ingredients transform into such a delightful treat.
8
servings20
minutes30
minutesIngredients
Flour – 1 ½ cups
Sugar – 1 cup
Butter – ½ cup
Eggs – 3
Milk – ½ cup
Vanilla extract – 1 tsp
Baking powder – 2 tsp
Salt – ¼ tsp
Instructions
1. Preheat your oven to 350°F and grease a 9-inch round cake pan.
2. In a medium bowl, whisk together 1 ½ cups flour, 2 tsp baking powder, and ¼ tsp salt until fully combined.
3. In a separate large bowl, beat ½ cup softened butter with 1 cup sugar for exactly 3 minutes until light and fluffy.
4. Add 3 eggs one at a time, beating for 30 seconds after each addition until fully incorporated.
5. Mix in 1 tsp vanilla extract until just combined.
6. Alternate adding the flour mixture and ½ cup milk to the butter mixture, beginning and ending with flour, and mix until just smooth.
7. Pour the batter into your prepared pan and tap it firmly on the counter 3 times to release air bubbles.
8. Bake at 350°F for 25-30 minutes until the top springs back when lightly touched and a toothpick inserted in the center comes out clean.
9. Cool the cake in the pan for 15 minutes before transferring to a wire rack to cool completely.
10. Slice and serve once fully cooled.Every slice of this cake delivers that signature tender crumb and delicate vanilla flavor that makes it so versatile. I love serving it simply dusted with powdered sugar, or get creative by splitting layers and filling with fresh berries and whipped cream for a stunning dessert that always impresses guests.
Rich Red Velvet Cake
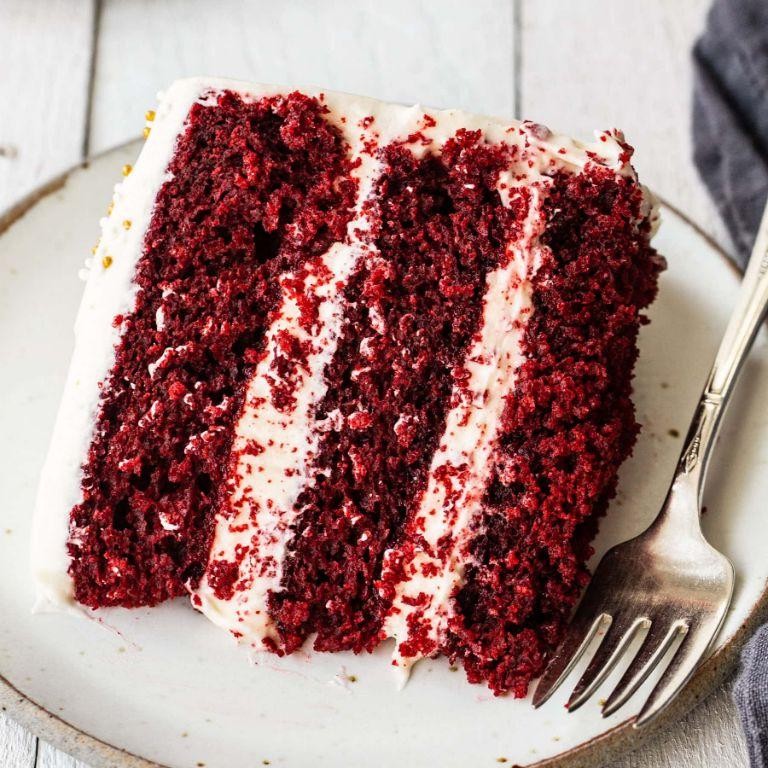
Zesty and vibrant, this red velvet cake always reminds me of my grandmother’s holiday baking traditions—she’d make it every December, and the rich crimson color would fill her kitchen with warmth. I’ve adapted her recipe over the years, simplifying the ingredients but keeping that signature velvety texture and subtle cocoa flavor that makes this dessert so unforgettable. Honestly, it’s become my go-to for birthdays and celebrations because it never fails to impress guests with its stunning appearance and moist crumb.
2
layers20
minutes30
minutesIngredients
Flour – 2 cups
Cocoa powder – 2 tbsp
Buttermilk – 1 cup
Vegetable oil – 1 cup
Eggs – 2
Sugar – 1½ cups
Vanilla extract – 1 tsp
Baking soda – 1 tsp
Vinegar – 1 tsp
Red food coloring – 2 tbsp
Salt – ½ tsp
Instructions
1. Preheat your oven to 350°F and grease two 9-inch round cake pans.
2. Whisk together flour, cocoa powder, baking soda, and salt in a medium bowl until fully combined.
3. In a separate large bowl, beat vegetable oil and sugar together for 3 minutes until pale and fluffy.
4. Add eggs one at a time, beating for 30 seconds after each addition until fully incorporated.
5. Mix in vanilla extract and red food coloring until the batter achieves a uniform deep red color.
6. Alternate adding the dry ingredients and buttermilk to the wet mixture, beginning and ending with dry ingredients, and mix just until combined—overmixing can lead to a tough cake.
7. Stir in vinegar quickly until just blended; the reaction with baking soda helps create that characteristic velvety texture.
8. Divide the batter evenly between the prepared pans and smooth the tops with a spatula.
9. Bake for 25-30 minutes until a toothpick inserted into the center comes out clean and the cakes spring back when lightly touched.
10. Cool the cakes in their pans on a wire rack for 15 minutes before turning them out to cool completely—this prevents them from breaking apart while warm.
11. Once cooled, frost with your favorite cream cheese frosting between layers and over the top and sides. A final dusting of cocoa powder or sprinkles adds a beautiful finishing touch that makes the red color pop even more.
Amazingly moist with a tender crumb, this cake delivers that perfect balance between subtle chocolate notes and tangy buttermilk richness. I love serving it chilled—the frosting firms up slightly, creating a delightful contrast with the soft cake layers. For a festive twist, try topping individual slices with fresh berries or a drizzle of chocolate ganache to elevate this classic into something truly special.
Moist Lemon Drizzle Cake
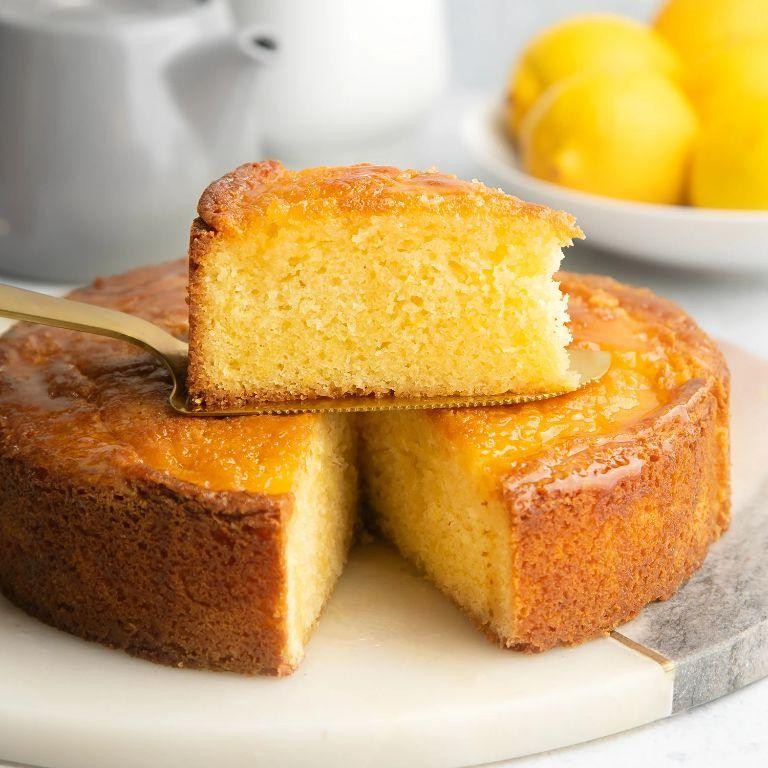
Now, I have to confess—I’ve tried countless lemon drizzle cakes over the years, but this one truly stands out for its incredible moistness and zesty kick. It’s the kind of recipe I whip up on lazy Sunday afternoons, filling the kitchen with that fresh citrus aroma that just screams comfort. Trust me, once you try this version, you’ll never go back to the dry, crumbly ones again.
1
cake15
minutes45
minutesIngredients
Flour – 1 ½ cups
Sugar – 1 cup
Butter – ½ cup
Eggs – 2
Lemon – 1
Baking powder – 1 tsp
Salt – ¼ tsp
Instructions
1. Preheat your oven to 350°F and grease a 9-inch loaf pan.
2. In a large bowl, cream together the butter and sugar until light and fluffy, which usually takes about 3-4 minutes with an electric mixer.
3. Beat in the eggs one at a time, mixing well after each addition to ensure the batter emulsifies properly.
4. Zest the entire lemon and add the zest to the batter, stirring to distribute the citrus oils evenly.
5. In a separate bowl, whisk together the flour, baking powder, and salt to aerate the dry ingredients.
6. Gradually fold the dry mixture into the wet ingredients until just combined, being careful not to overmix to avoid a tough cake.
7. Pour the batter into the prepared pan and smooth the top with a spatula.
8. Bake for 40-45 minutes, or until a toothpick inserted into the center comes out clean.
9. While the cake bakes, juice the zested lemon to get about 2 tablespoons of fresh juice.
10. In a small bowl, mix the lemon juice with ¼ cup of sugar to create the drizzle.
11. As soon as the cake comes out of the oven, prick the top all over with a skewer.
12. Immediately pour the lemon-sugar drizzle evenly over the hot cake, allowing it to soak in for maximum moisture.
13. Let the cake cool completely in the pan before slicing, which helps the drizzle set and prevents crumbling.
Let this cake cool fully, and you’ll be rewarded with a tender, syrupy crumb that practically melts in your mouth. The lemon drizzle seeps into every bite, creating a perfect balance of sweet and tangy that’s irresistible with a cup of tea. For a fun twist, try serving it warm with a dollop of whipped cream or alongside fresh berries for a bright, summery dessert.
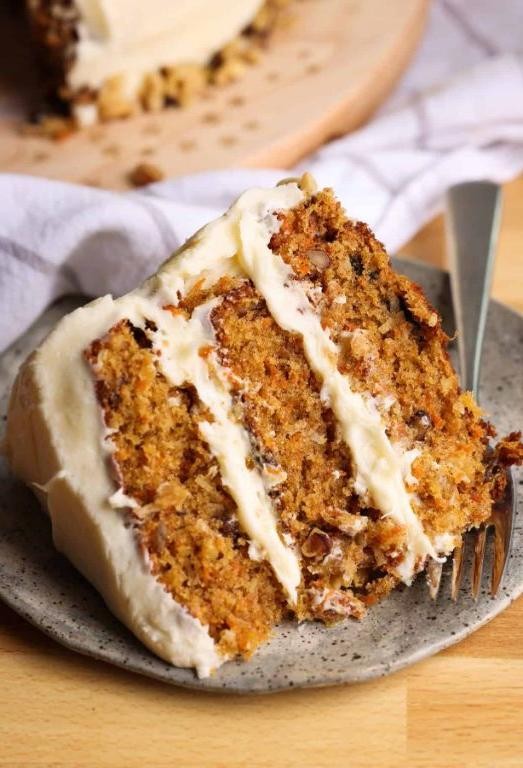
Decadent Carrot Cake with Cream Cheese Frosting
T
There’s something magical about the way carrot cake fills a kitchen with its warm, spicy aroma—it instantly feels like home. I first fell in love with this recipe after tweaking my grandmother’s version to be a bit more moist and flavorful, and now it’s my go-to for birthdays and cozy weekends alike. Trust me, once you try this version with its ultra-creamy frosting, you’ll understand why it’s become a staple in my household.
12
servings20
minutes30
minutesIngredients
Flour – 2 cups
Baking soda – 1 tsp
Cinnamon – 2 tsp
Salt – ½ tsp
Vegetable oil – 1 cup
Brown sugar – 1 cup
Eggs – 3
Vanilla extract – 2 tsp
Carrots – 3 cups grated
Cream cheese – 8 oz
Butter – ½ cup
Powdered sugar – 2 cups
Instructions
1. Preheat your oven to 350°F and grease two 9-inch round cake pans.
2. Whisk together 2 cups flour, 1 tsp baking soda, 2 tsp cinnamon, and ½ tsp salt in a medium bowl.
3. In a large bowl, combine 1 cup vegetable oil, 1 cup brown sugar, 3 eggs, and 2 tsp vanilla extract until smooth.
4. Gradually mix the dry ingredients into the wet ingredients until just combined—overmixing can make the cake dense.
5. Fold in 3 cups grated carrots until evenly distributed throughout the batter.
6. Divide the batter evenly between the prepared pans and bake for 25–30 minutes, or until a toothpick inserted into the center comes out clean.
7. Let the cakes cool in the pans for 10 minutes, then transfer them to a wire rack to cool completely—this prevents the frosting from melting.
8. For the frosting, beat 8 oz cream cheese and ½ cup butter together until fluffy, about 2 minutes.
9. Gradually add 2 cups powdered sugar, beating until the frosting is smooth and spreadable.
10. Frost the cooled cake layers, stacking them with a generous layer of frosting in between.
My favorite part is slicing into this cake and seeing those moist, tender crumbs speckled with carrot, while the tangy cream cheese frosting balances the warm spices perfectly. For a fun twist, try serving it with a drizzle of caramel or a sprinkle of toasted walnuts on top—it’s irresistible either way.
Fluffy Angel Food Cake
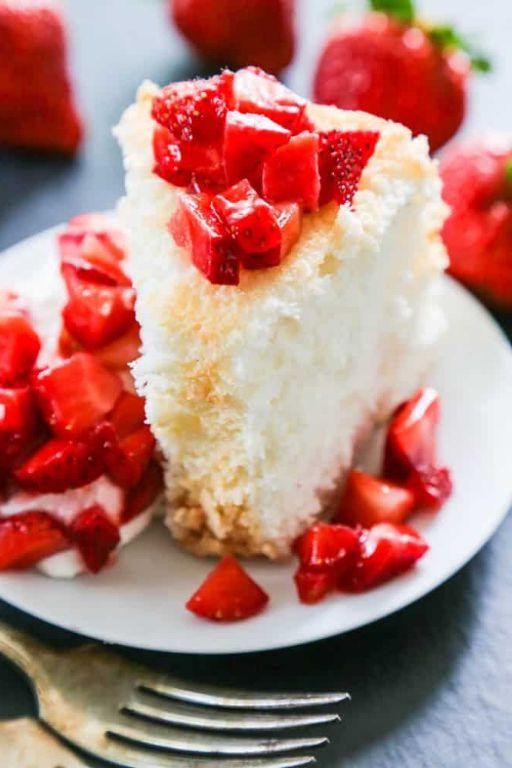
A perfect angel food cake has been my baking nemesis for years—until I finally cracked the code after that disastrous birthday cake incident where it collapsed into a sad, dense pancake. After countless trials (and a few more failures), I’ve nailed down this foolproof version that’s light as air and impossibly fluffy.
10
servings25
minutes40
minutesIngredients
– Cake flour – 1 cup
– Granulated sugar – 1 ½ cups
– Egg whites – 12 large
– Cream of tartar – 1 ½ tsp
– Vanilla extract – 1 tsp
– Salt – ¼ tsp
Instructions
1. Preheat your oven to 350°F and place an oven rack in the lower third position.
2. Sift the cake flour and ¾ cup of the granulated sugar together into a medium bowl three times to ensure maximum lightness.
3. In a perfectly clean, grease-free large bowl, beat the egg whites with an electric mixer on medium speed until foamy, about 1 minute.
4. Add the cream of tartar, vanilla extract, and salt, then continue beating until soft peaks form, about 2-3 minutes.
5. Gradually add the remaining ¾ cup sugar while beating on high speed until stiff, glossy peaks form, about 2 more minutes.
6. Gently fold the sifted flour mixture into the egg whites in four additions using a rubber spatula, being careful not to deflate the batter.
7. Spoon the batter into an ungreased 10-inch tube pan and smooth the top with a spatula.
8. Bake for 35-40 minutes until the top is golden brown and springs back when lightly touched.
9. Immediately invert the pan onto a bottle or cooling rack and let it cool completely upside down for at least 2 hours.
10. Run a thin knife around the edges and center tube to release the cake from the pan.
Every bite of this cake dissolves into a sweet, cloud-like texture that makes you forget all the calories. I love serving thick slices with fresh berries and a dusting of powdered sugar for a simple yet elegant dessert that always impresses guests.
Traditional Butter Pound Cake
Sometimes the simplest recipes are the ones that transport me right back to my grandmother’s kitchen, where the scent of butter and sugar wafting through the air meant something delicious was coming. This traditional butter pound cake is one of those timeless treats that never fails to comfort, with its rich flavor and dense, moist crumb that I still crave on lazy Sunday afternoons.
1
loaf20
minutes65
minutesIngredients
– Butter – 1 cup
– Sugar – 1 cup
– Eggs – 4
– Flour – 2 cups
– Baking powder – 1 tsp
– Salt – ½ tsp
– Vanilla extract – 1 tsp
Instructions
1. Preheat your oven to 325°F and grease a 9×5 inch loaf pan thoroughly.
2. Beat 1 cup of softened butter with 1 cup of sugar in a large bowl using an electric mixer on medium speed for exactly 5 minutes until pale and fluffy.
3. Add 4 eggs one at a time, beating for 30 seconds after each addition until fully incorporated.
4. Whisk together 2 cups of flour, 1 teaspoon of baking powder, and ½ teaspoon of salt in a separate bowl.
5. Gradually add the dry ingredients to the butter mixture on low speed, mixing just until combined to avoid overworking the batter.
6. Stir in 1 teaspoon of vanilla extract until evenly distributed throughout the batter.
7. Pour the batter into the prepared pan and smooth the top with a spatula.
8. Bake at 325°F for 60-70 minutes until a toothpick inserted into the center comes out completely clean.
9. Cool the cake in the pan on a wire rack for 15 minutes before transferring it out to cool completely. What I love most about this pound cake is its firm yet tender texture that holds up beautifully to slicing, making it perfect for toasting and serving with fresh berries or a simple dusting of powdered sugar for an elegant dessert.
Gooey Chocolate Lava Cake
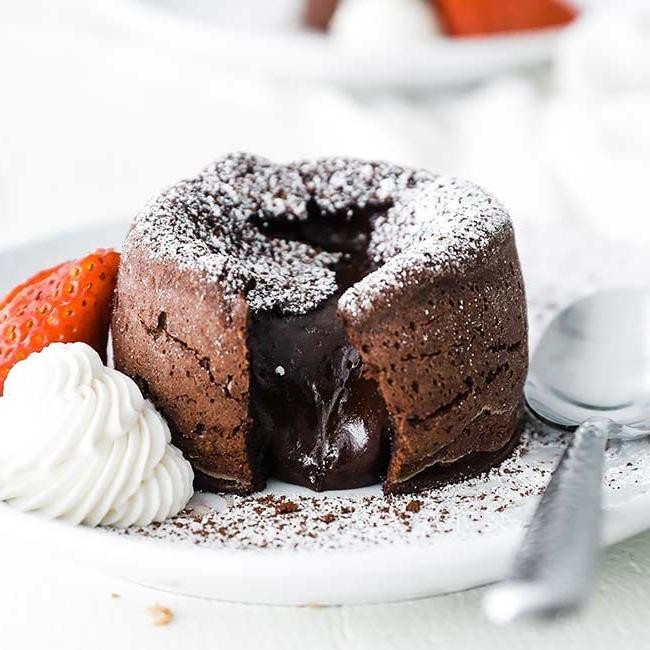
Aren’t there days when only a warm, decadent dessert will do? I first tried chocolate lava cake at a cozy bistro years ago, and I’ve been perfecting this easy home version ever since—it’s my go-to for impressing guests without spending hours in the kitchen.
3
portions15
minutes14
minutesIngredients
Unsweetened chocolate – 4 oz
Butter – ½ cup
Eggs – 2
Sugar – ½ cup
Flour – ¼ cup
Instructions
1. Preheat your oven to 425°F and grease four 6-ounce ramekins thoroughly.2. Chop the unsweetened chocolate into small pieces for even melting.3. Melt the butter and chocolate together in a double boiler over simmering water, stirring until completely smooth.4. In a separate bowl, whisk the eggs and sugar together for 2–3 minutes until pale and slightly thickened.5. Pour the melted chocolate mixture into the egg mixture and stir gently to combine.6. Sift the flour into the batter and fold it in just until no dry streaks remain—overmixing can make the cakes dense.7. Divide the batter evenly among the prepared ramekins, filling each about three-quarters full.8. Bake for 12–14 minutes until the edges are set but the centers still jiggle slightly when shaken.9. Let the cakes rest for 1 minute out of the oven before running a knife around the edges.10. Invert each ramekin onto a plate and carefully lift it off to release the cake.Lava-like chocolate flows out when you break into these warm cakes, with a rich, bittersweet flavor that pairs perfectly with a dusting of powdered sugar or a scoop of vanilla ice cream melting into the gooey center.
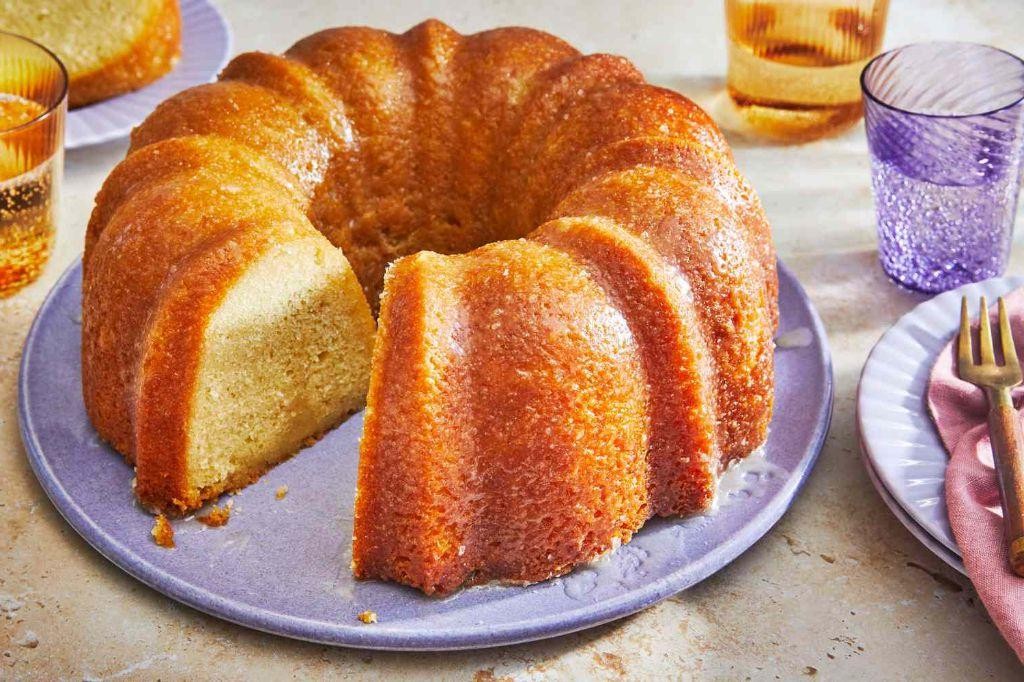
Zesty Orange Bundt Cake
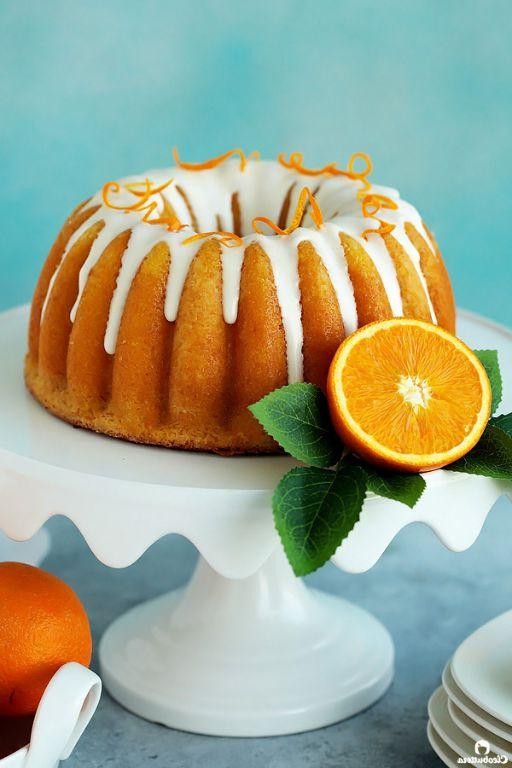
Years of testing citrus cakes have taught me one thing—nothing beats the bright punch of fresh orange in a tender bundt. Yesterday’s farmers market haul inspired this version, and I’m already planning to make it again for my neighbor’s potluck next week. You’ll love how the citrus glaze soaks right into every crumb.
10
servings20
minutes50
minutesIngredients
Flour – 2 cups
Sugar – 1 ½ cups
Eggs – 3
Butter – 1 cup
Orange – 1
Baking powder – 2 tsp
Salt – ½ tsp
Instructions
1. Preheat your oven to 350°F and generously grease a 10-cup bundt pan with butter, making sure to get into all the crevices.
2. Zest the entire orange into a small bowl, then juice it—you should get about ¼ cup of juice.
3. Cream 1 cup of softened butter with 1 ½ cups of sugar in a large mixing bowl on medium speed for 3 minutes, until pale and fluffy.
4. Beat in 3 eggs one at a time, waiting until each is fully incorporated before adding the next.
5. Whisk together 2 cups of flour, 2 tsp baking powder, and ½ tsp salt in a separate bowl.
6. Tip: For an extra-moist cake, alternate adding the dry ingredients and orange juice to the butter mixture, starting and ending with flour.
7. Fold in the orange zest until just combined—overmixing can make the cake tough.
8. Pour the batter into the prepared pan and tap it firmly on the counter to release any air bubbles.
9. Bake at 350°F for 45–50 minutes, or until a skewer inserted into the center comes out clean.
10. Tip: Let the cake cool in the pan for 15 minutes before inverting it onto a wire rack—this prevents sticking.
11. While the cake cools, whisk together 1 cup powdered sugar and 2 tbsp orange juice for the glaze.
12. Tip: For a glossy finish, drizzle the glaze over the slightly warm cake so it soaks in lightly.
13. Slice and serve once the glaze has set, about 20 minutes.
Glazed and gorgeous, this cake stays incredibly moist for days thanks to that fresh orange juice. The crumb is tender with a zesty kick that pairs perfectly with a cup of Earl Grey tea. I sometimes add a sprinkle of candied orange peel on top for a festive touch.
Soft Pumpkin Spice Cake
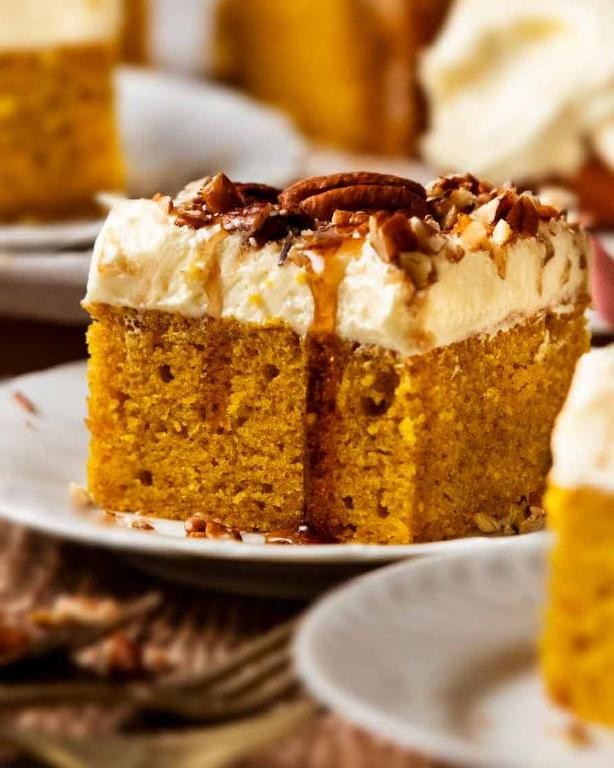
Zesty autumn flavors have been calling my name lately, especially after that first crisp morning walk through the falling leaves. There’s something about pumpkin spice that just feels like a warm hug, and this cake is my go-to when I want that cozy feeling without spending hours in the kitchen. I actually developed this recipe after my oven thermometer broke mid-bake last year – talk about a kitchen disaster that turned into a happy accident!
8
servings15
minutes40
minutesIngredients
Flour – 1 ½ cups
Sugar – 1 cup
Pumpkin puree – 1 cup
Eggs – 2
Vegetable oil – ½ cup
Baking powder – 2 tsp
Pumpkin pie spice – 2 tsp
Salt – ½ tsp
Instructions
1. Preheat your oven to 350°F and grease an 8-inch round cake pan.
2. Whisk together 1 ½ cups flour, 1 cup sugar, 2 tsp baking powder, 2 tsp pumpkin pie spice, and ½ tsp salt in a large bowl until fully combined.
3. In a separate bowl, beat 2 eggs with ½ cup vegetable oil until smooth and slightly thickened.
4. Mix 1 cup pumpkin puree into the egg mixture until no streaks remain.
5. Gradually fold the wet ingredients into the dry ingredients using a spatula, being careful not to overmix.
6. Pour the batter into your prepared pan and smooth the top with a spatula.
7. Bake at 350°F for 35-40 minutes until a toothpick inserted in the center comes out clean.
8. Cool the cake in the pan for 15 minutes before transferring to a wire rack.
9. Let the cake cool completely before slicing.
Yield to that first bite – the cake stays incredibly moist thanks to the pumpkin puree, with the warm spices dancing across your palate. I love serving thick slices slightly warmed with a dollop of whipped cream, though it’s equally delicious straight from the pan when no one’s watching!
Luscious Coconut Cream Cake
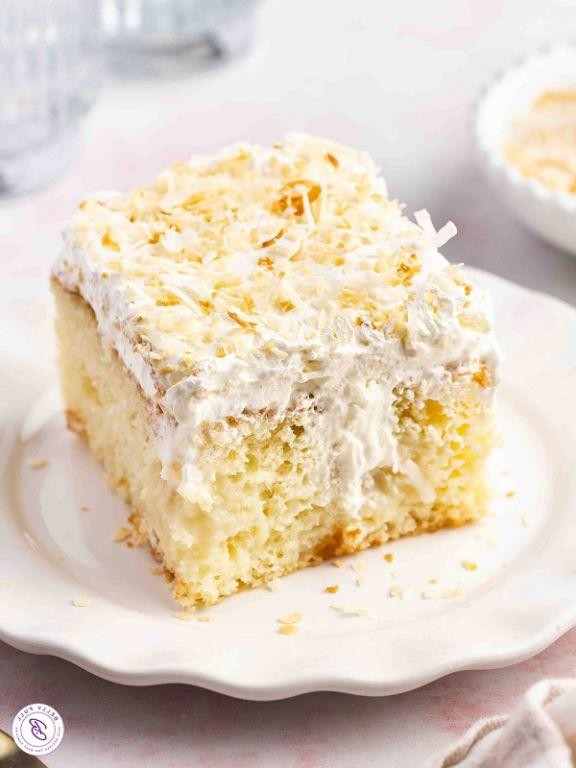
Haven’t we all had those moments where only a truly decadent cake will do? I first discovered this coconut cream cake during a rainy weekend when I needed some serious comfort food, and now it’s my go-to for celebrations and tough days alike. This version is surprisingly simple but delivers that bakery-quality richness we all crave.
8
servings20
minutes30
minutesIngredients
– All-purpose flour – 2 cups
– Granulated sugar – 1½ cups
– Baking powder – 2 tsp
– Salt – ½ tsp
– Coconut milk – 1 cup
– Vegetable oil – ½ cup
– Eggs – 2 large
– Vanilla extract – 1 tsp
– Sweetened shredded coconut – 1 cup
Instructions
1. Preheat your oven to 350°F and grease two 9-inch round cake pans.
2. Whisk together 2 cups flour, 1½ cups sugar, 2 tsp baking powder, and ½ tsp salt in a large bowl.
3. In a separate bowl, combine 1 cup coconut milk, ½ cup vegetable oil, 2 eggs, and 1 tsp vanilla extract.
4. Pour the wet ingredients into the dry ingredients and mix until just combined—don’t overmix or your cake will be tough.
5. Divide the batter evenly between the prepared pans and smooth the tops with a spatula.
6. Bake for 25-30 minutes until a toothpick inserted in the center comes out clean.
7. Cool the cakes in their pans for 10 minutes, then transfer to a wire rack to cool completely.
8. Fold ¾ cup shredded coconut into your favorite vanilla frosting while the cakes cool.
9. Frost the cooled cake layers and press the remaining ¼ cup shredded coconut onto the sides. You’ll get better coconut adhesion if you apply it while the frosting is still slightly tacky.
10. Refrigerate the cake for at least 1 hour before serving to let the flavors meld—this resting time makes all the difference.Yet this cake never fails to impress with its incredibly moist, tender crumb and intense coconut flavor that’s neither too sweet nor overwhelming. The shredded coconut adds wonderful texture, and I love serving thick slices with strong coffee to balance the richness—it’s pure tropical comfort in every bite.
Heavenly Black Forest Cake
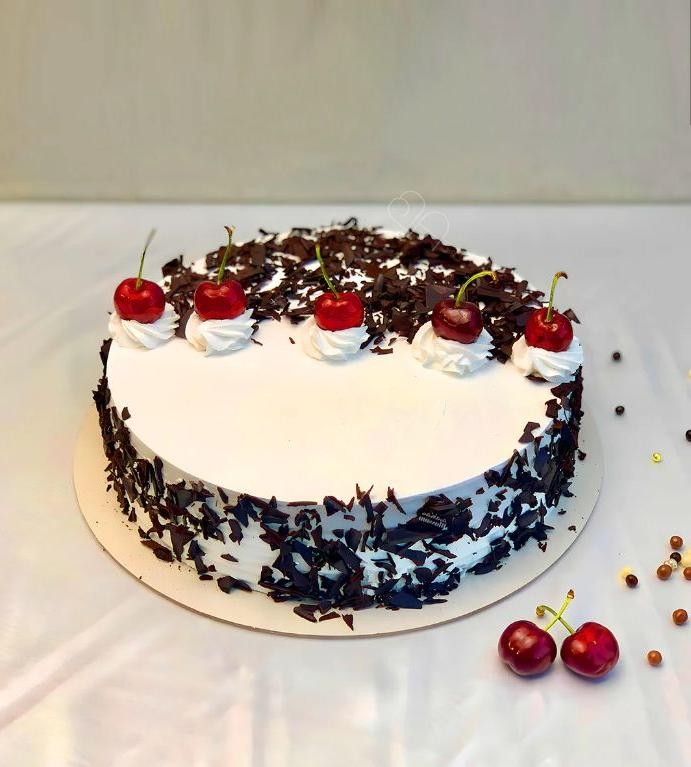
Haven’t we all had those moments where only a truly decadent chocolate cake will do? I first discovered this black forest cake recipe during a rainy weekend when my chocolate cravings hit hard, and now it’s my go-to celebration dessert that never fails to impress. Honestly, the combination of rich chocolate, tart cherries, and fluffy whipped cream feels like pure magic in every bite.
8
servings20
minutes30
minutesIngredients
Flour – 2 cups
Cocoa powder – ¾ cup
Sugar – 1½ cups
Eggs – 3
Butter – ½ cup
Cherries – 1 cup
Whipped cream – 2 cups
Instructions
1. Preheat your oven to 350°F and grease two 9-inch round cake pans.
2. Combine 2 cups flour, ¾ cup cocoa powder, and 1½ cups sugar in a large mixing bowl.
3. Add 3 eggs and ½ cup melted butter to the dry ingredients.
4. Mix the batter on medium speed for exactly 2 minutes until smooth and glossy.
5. Divide the batter evenly between the prepared pans.
6. Bake at 350°F for 25-30 minutes until a toothpick inserted in the center comes out clean.
7. Cool the cakes in their pans for 10 minutes before transferring to a wire rack.
8. While cakes cool, drain 1 cup of cherries and pat them dry with paper towels.
9. Whip 2 cups of heavy cream until stiff peaks form.
10. Place one cake layer on your serving plate and spread with half of the whipped cream.
11. Arrange half of the cherries evenly over the whipped cream layer.
12. Top with the second cake layer and repeat with remaining whipped cream and cherries.
Nothing compares to that first slice revealing the beautiful layers of moist chocolate cake, fluffy cream, and juicy cherries. The cake stays wonderfully moist for days, and I love serving it slightly chilled with a drizzle of chocolate sauce for extra indulgence.
Tangy Raspberry Swirl Cheesecake
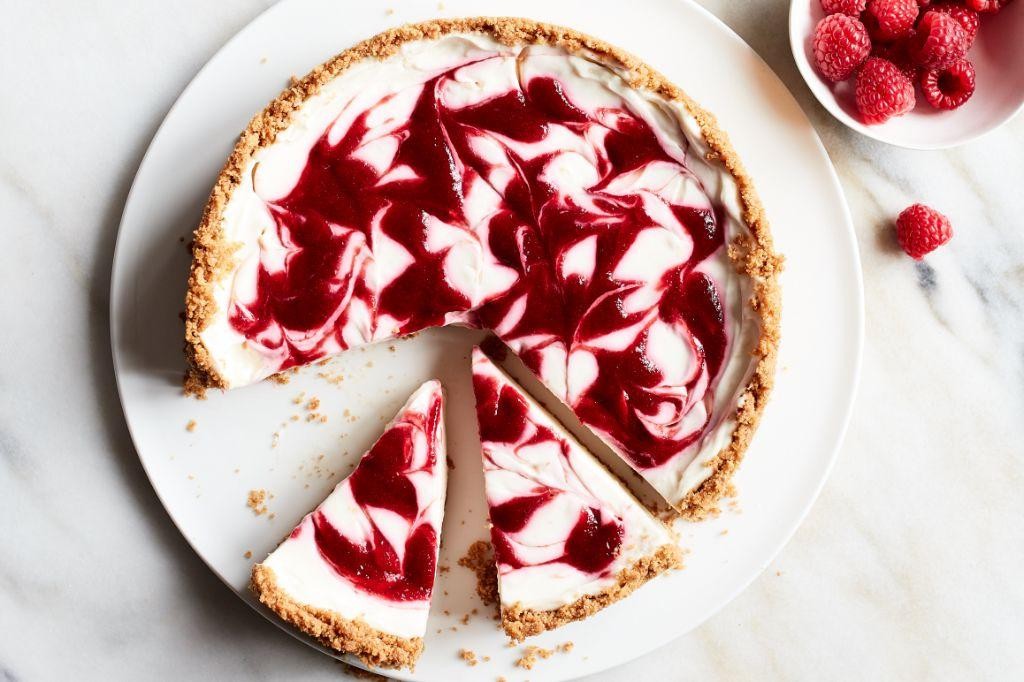
Unbelievably, this raspberry swirl cheesecake recipe came to me after a disastrous attempt at a complicated French dessert left my kitchen looking like a crime scene. Sometimes the simplest creations bring the most joy, and this tangy beauty has become my go-to for every special occasion since that fateful day.
8
servings30
minutes70
minutesIngredients
Graham crackers – 1 ½ cups crushed
Butter – ½ cup melted
Cream cheese – 24 oz softened
Sugar – 1 cup
Eggs – 3 large
Vanilla extract – 1 tsp
Raspberry jam – ½ cup
Instructions
1. Preheat your oven to 325°F and grease a 9-inch springform pan.2. Combine crushed graham crackers with melted butter in a medium bowl until the mixture resembles wet sand.3. Press the graham cracker mixture firmly into the bottom of the prepared pan using the bottom of a measuring cup to create an even layer.4. Bake the crust for 10 minutes at 325°F until lightly golden around the edges.5. While the crust bakes, beat softened cream cheese with an electric mixer on medium speed for 2 minutes until completely smooth.6. Gradually add sugar to the cream cheese while continuing to mix for another minute.7. Add eggs one at a time, mixing just until each egg disappears into the batter.8. Stir in vanilla extract until fully incorporated.9. Pour the cheesecake filling over the pre-baked crust and spread evenly with a spatula.10. Warm raspberry jam in the microwave for 15 seconds to make it pourable.11. Drop spoonfuls of raspberry jam randomly over the cheesecake surface.12. Use a knife to gently swirl the jam through the cheesecake batter in a figure-eight pattern.13. Place the springform pan into a larger baking dish and create a water bath by pouring hot water into the outer dish until it reaches halfway up the sides of the springform pan.14. Bake at 325°F for 55-60 minutes until the edges are set but the center still jiggles slightly when shaken.15. Turn off the oven, crack the door open, and let the cheesecake cool inside for 1 hour to prevent cracking.16. Transfer the cheesecake to the refrigerator and chill for at least 6 hours or overnight before serving. Getting that perfect creamy texture with bright raspberry swirls makes every bite worth the wait. The contrast between the tangy fruit and rich cheesecake creates such a delightful balance that I love serving it with fresh mint leaves for an extra pop of color and freshness.
Nutty Banana Walnut Cake
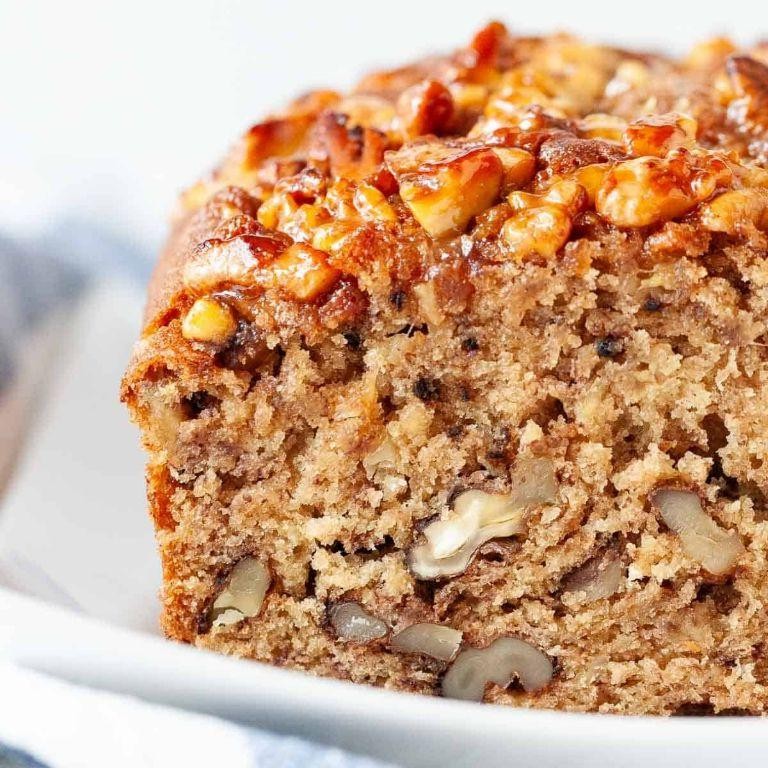
Nothing beats the comforting aroma of banana walnut cake filling my kitchen on a crisp fall afternoon. I always seem to have overripe bananas on my counter—my kids refuse to eat them once they develop those little brown spots—so this recipe has become my go-to solution for preventing food waste while creating something truly delicious. The nutty crunch of walnuts paired with sweet banana creates a perfect balance that keeps everyone coming back for seconds.
1
loaf15
minutes60
minutesIngredients
- Flour – 2 cups
- Baking soda – 1 tsp
- Salt – ½ tsp
- Butter – ½ cup
- Sugar – 1 cup
- Eggs – 2
- Bananas – 3 mashed
- Walnuts – 1 cup chopped
Instructions
- Preheat your oven to 350°F and grease a 9-inch loaf pan thoroughly.
- Whisk together 2 cups flour, 1 tsp baking soda, and ½ tsp salt in a medium bowl until fully combined.
- Cream ½ cup softened butter with 1 cup sugar in a separate large bowl for 3 minutes until light and fluffy.
- Beat in 2 eggs one at a time, mixing completely after each addition.
- Stir in 3 mashed ripe bananas until just incorporated into the wet mixture.
- Gradually add the dry flour mixture to the wet ingredients, folding gently until no white streaks remain.
- Fold in 1 cup chopped walnuts, being careful not to overmix the batter.
- Pour the batter into your prepared loaf pan and spread it evenly with a spatula.
- Bake at 350°F for 55-65 minutes until a toothpick inserted in the center comes out clean.
- Cool the cake in the pan for 15 minutes before transferring to a wire rack.
Ultimate comfort in cake form, this beauty emerges with a golden-brown crust that gives way to an incredibly moist, tender crumb. The walnuts provide delightful crunch in every bite, while the banana flavor shines through without being overpowering. I love serving thick slices slightly warmed with a dollop of whipped cream or even toasted for breakfast with my morning coffee—it’s that versatile!
Tender Almond Genoise Cake
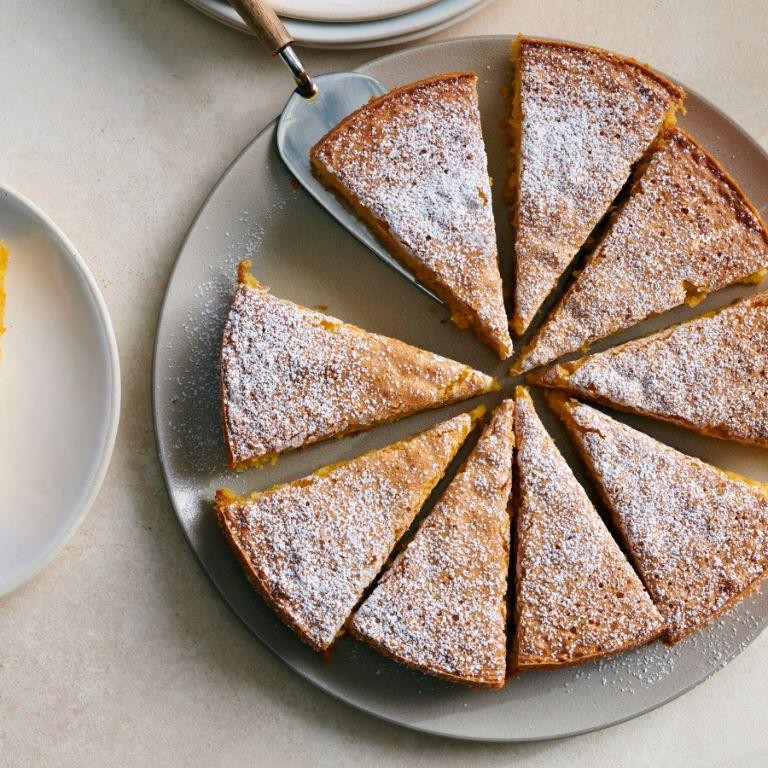
Oh my goodness, I can’t tell you how many times I’ve tried to perfect this almond genoise cake—my kitchen counter has seen more failed attempts than I care to admit! But this version? It’s the one that finally earned a permanent spot in my recipe binder, and I’m thrilled to share it with you today.
8
servings20
minutes30
minutesIngredients
– Eggs – 4 large
– Sugar – ¾ cup
– Almond flour – 1 cup
– All-purpose flour – ¼ cup
– Unsalted butter – 4 tbsp, melted
– Vanilla extract – 1 tsp
Instructions
1. Preheat your oven to 350°F and grease an 8-inch round cake pan, then line the bottom with parchment paper.
2. Place the eggs and sugar in a heatproof bowl and set it over a saucepan of simmering water, whisking constantly for 5 minutes until the mixture is warm to the touch (about 110°F).
3. Remove the bowl from the heat and use an electric mixer to beat the egg mixture on high speed for 8–10 minutes until it’s pale, thick, and forms ribbons when the whisk is lifted—this aeration is key for that signature genoise lightness.
4. Sift the almond flour and all-purpose flour together in a separate bowl to eliminate any lumps.
5. Gently fold the sifted flours into the egg mixture in three additions using a spatula, taking care not to deflate the batter.
6. Stir the melted butter and vanilla extract together in a small bowl, then drizzle it into the batter while folding gently to incorporate evenly.
7. Pour the batter into the prepared pan and tap it lightly on the counter to release any large air bubbles.
8. Bake for 25–30 minutes until the cake is golden, springs back when lightly pressed, and a toothpick inserted into the center comes out clean.
9. Let the cake cool in the pan for 10 minutes, then transfer it to a wire rack to cool completely—this prevents it from becoming soggy.
What I adore about this cake is its delicate, airy crumb that melts on your tongue, with the nutty almond flavor shining through without being overpowering. Try serving it with a dusting of powdered sugar and fresh berries for a simple yet elegant dessert, or slice it horizontally and fill with whipped cream and toasted almonds for a more indulgent treat.
Creamy Tiramisu Layer Cake
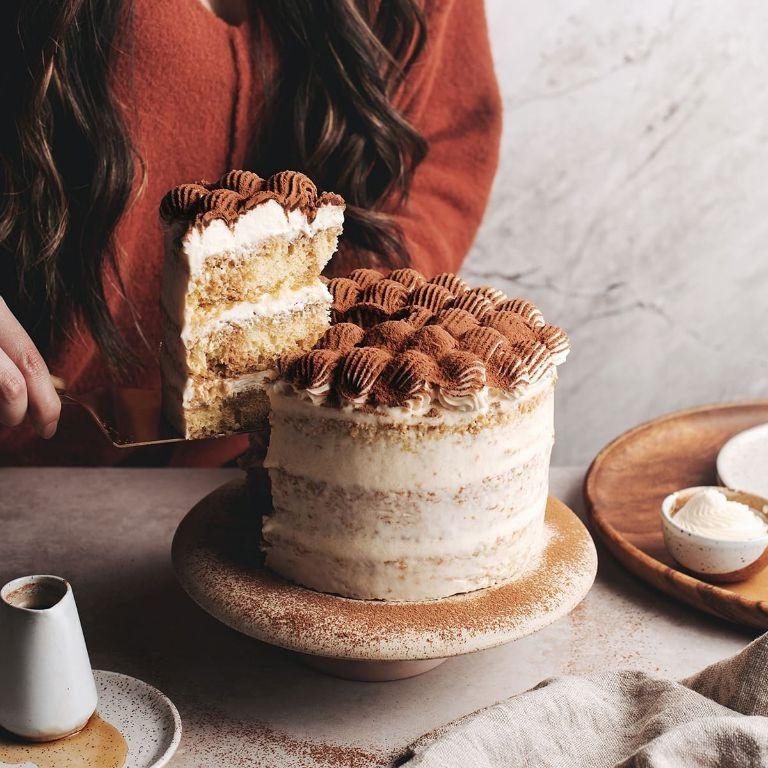
You know how sometimes you crave that classic tiramisu flavor but want something with a bit more structure? I recently made this for my book club, and let me tell you—it disappeared faster than the plot twists in our current read! This creamy tiramisu layer cake gives you all the coffee-kissed, mascarpone-rich goodness in sliceable form.
9
squares20
minutesIngredients
– Ladyfinger cookies – 24
– Strong brewed coffee – 1 cup, cooled
– Mascarpone cheese – 16 oz
– Heavy cream – 1 cup
– Granulated sugar – ½ cup
– Unsweetened cocoa powder – 2 tbsp
Instructions
1. Brew 1 cup of strong coffee and let it cool completely to room temperature.
2. Arrange 8 ladyfinger cookies in a single layer in an 8×8 inch baking dish.
3. Brush the ladyfinger layer generously with ⅓ cup of the cooled coffee using a pastry brush.
4. In a large mixing bowl, combine 16 oz mascarpone cheese, 1 cup heavy cream, and ½ cup granulated sugar.
5. Beat the mascarpone mixture on medium-high speed with an electric mixer for 2 minutes until stiff peaks form.
6. Spread half of the mascarpone cream evenly over the coffee-soaked ladyfinger layer.
7. Repeat with another layer of 8 ladyfingers, brushing with another ⅓ cup of coffee.
8. Spread the remaining mascarpone cream over the second ladyfinger layer.
9. Create a third layer with the final 8 ladyfingers, brushing with the remaining ⅓ cup of coffee.
10. Cover the baking dish tightly with plastic wrap and refrigerate for at least 8 hours or overnight.
11. Just before serving, dust the top evenly with 2 tbsp unsweetened cocoa powder using a fine-mesh sieve.
12. Cut into 9 squares with a sharp knife wiped clean between cuts for neat edges.
Heavenly doesn’t even begin to describe the cloud-like texture that forms after that overnight chill—each forkful balances bitter cocoa, sweet cream, and coffee-kissed cookies. For a fun twist, I sometimes serve individual portions in espresso cups with an extra dusting of cocoa and a chocolate-covered espresso bean on top.
Exquisite Matcha Green Tea Cake
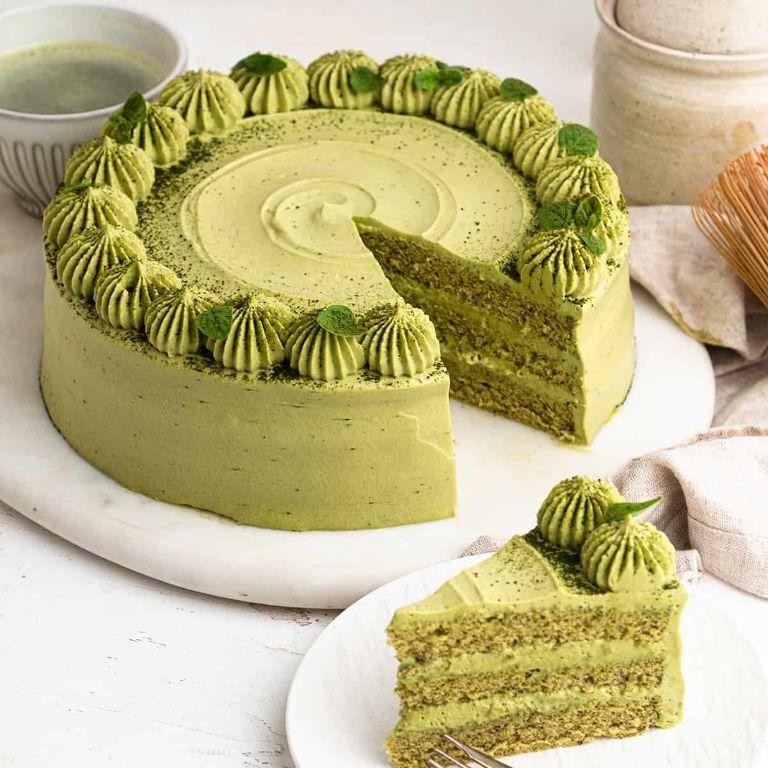
Every time I bake this matcha cake, it reminds me of that rainy afternoon in Kyoto when I first tasted authentic matcha—the vibrant green color and earthy flavor instantly won me over. Now I make this cake whenever I need a moment of calm, and it never fails to transport me back to that cozy tea house. Let’s bake some serenity together!
8
portions15
minutes40
minutesIngredients
Flour – 1 ½ cups
Sugar – 1 cup
Matcha powder – 2 tbsp
Eggs – 3
Butter – ½ cup
Milk – ⅓ cup
Baking powder – 1 tsp
Salt – ¼ tsp
Instructions
1. Preheat your oven to 350°F and grease an 8-inch round cake pan.
2. Sift together 1 ½ cups flour, 2 tbsp matcha powder, 1 tsp baking powder, and ¼ tsp salt into a medium bowl.
3. Cream ½ cup softened butter with 1 cup sugar in a large bowl using an electric mixer on medium speed for 3 minutes until light and fluffy.
4. Beat in 3 eggs one at a time, mixing for 30 seconds after each addition until fully incorporated.
5. Gradually add the dry ingredients to the wet mixture, alternating with ⅓ cup milk, beginning and ending with the dry ingredients.
6. Pour the batter into the prepared pan and smooth the top with a spatula.
7. Bake at 350°F for 35-40 minutes until a toothpick inserted into the center comes out clean.
8. Cool the cake in the pan on a wire rack for 15 minutes before transferring it directly to the rack to cool completely.
Nothing compares to the delicate crumb and subtle earthiness of this matcha cake—it’s moist without being heavy, with just the right balance of sweetness. I love serving thin slices with fresh berries for contrast, or enjoying a thick wedge with my morning coffee when I need an extra boost.
Conclusion
Joyful baking awaits with these 35 homemade cake sensations! Whether you’re a beginner or seasoned baker, there’s something here to delight every sweet tooth. We’d love to hear which recipes become your family favorites—drop us a comment below and don’t forget to share this sweet inspiration on Pinterest!