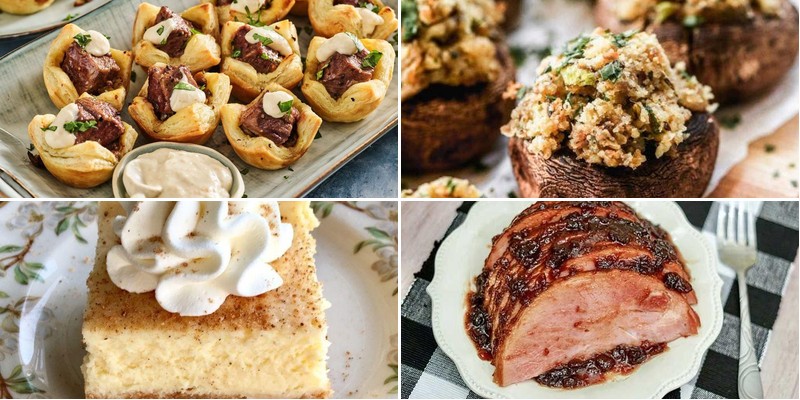
Season’s greetings, party planners! ‘Tis the season for festive gatherings, and we’ve gathered 34 delightful holiday recipes to make your celebrations shine. From elegant appetizers to cozy desserts, these crowd-pleasing dishes are sure to impress your guests. Get ready to spread joy and flavor—let’s dive into this delicious roundup!
Cranberry-Glazed Ham with Spiced Apples
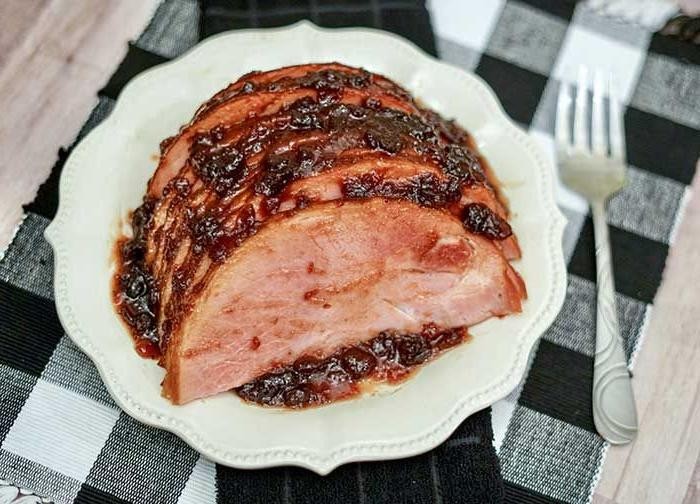
Radiant with autumnal elegance, this cranberry-glazed ham with spiced apples transforms the classic holiday centerpiece into a symphony of sweet, savory, and aromatic notes. The deep ruby glaze lacquers the ham with a glossy sheen, while the apples simmer alongside, absorbing warm spices and pan juices. It’s a showstopping dish that marries tradition with a touch of contemporary flair.
12
servings20
minutes140
minutesIngredients
For the Ham and Glaze:
– 1 (8-10 lb) fully cooked, bone-in ham
– 1 cup whole-berry cranberry sauce
– 1/2 cup packed light brown sugar
– 2 tbsp Dijon mustard
– 1 tbsp apple cider vinegar
For the Spiced Apples:
– 4 large Granny Smith apples, peeled, cored, and sliced into 1/2-inch wedges
– 1/4 cup light brown sugar
– 1 tsp ground cinnamon
– 1/4 tsp ground nutmeg
– 1/4 tsp ground cloves
– 2 tbsp unsalted butter
Instructions
1. Preheat your oven to 325°F and position a rack in the lower third of the oven.
2. Place the ham, flat-side down, in a large roasting pan and score the surface in a diamond pattern with a sharp knife, cutting about 1/4-inch deep.
3. Cover the ham tightly with aluminum foil and bake for 1 hour and 30 minutes, or until the internal temperature reaches 130°F when measured with an instant-read thermometer.
4. While the ham bakes, combine the cranberry sauce, 1/2 cup brown sugar, Dijon mustard, and apple cider vinegar in a small saucepan over medium heat.
5. Stir the glaze mixture constantly for 5 minutes, until the sugar dissolves completely and the sauce thickens slightly.
6. Remove the ham from the oven and carefully peel back the foil, then brush half of the cranberry glaze evenly over the entire surface.
7. Increase the oven temperature to 375°F and return the ham, uncovered, to the oven for 20 minutes to set the glaze.
8. In a medium bowl, toss the apple wedges with 1/4 cup brown sugar, cinnamon, nutmeg, and cloves until evenly coated.
9. Melt the butter in a large skillet over medium heat, then add the spiced apples and sauté for 8-10 minutes, stirring occasionally, until the apples are tender but still hold their shape.
10. Remove the ham from the oven and brush with the remaining glaze, then let it rest for 15 minutes before carving to allow the juices to redistribute.
11. Transfer the ham to a serving platter and arrange the spiced apples around it.
Succulent and richly glazed, the ham boasts a caramelized crust that gives way to tender, juicy meat, while the spiced apples offer a soft, fragrant counterpoint with hints of warmth and tartness. Serve slices alongside the apples, drizzled with any remaining pan juices, or pair with wild rice pilaf for a complete feast that celebrates the season’s bounty.
Bacon-Wrapped Dates Stuffed with Goat Cheese
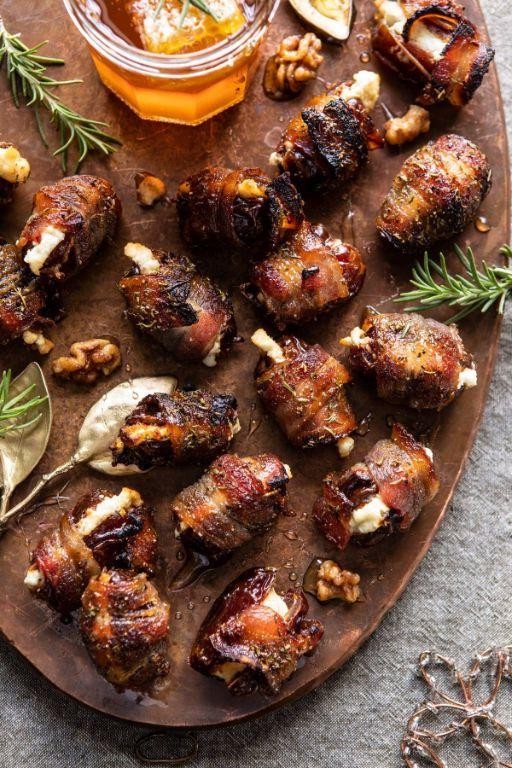
Meticulously crafted and delightfully indulgent, these bacon-wrapped dates stuffed with goat cheese transform humble ingredients into elegant morsels perfect for entertaining. Their sweet-savory balance and sophisticated presentation make them an instant crowd-pleaser at any gathering. With just three key components working in harmony, this recipe delivers maximum flavor with minimal effort.
24
portions15
minutes22
minutesIngredients
For the stuffed dates:
- 24 Medjool dates
- 4 ounces soft goat cheese
- 12 slices thin-cut bacon
- 24 toothpicks
Instructions
- Preheat your oven to 375°F and line a baking sheet with parchment paper.
- Using a sharp paring knife, make a lengthwise slit in each date and remove the pit completely.
- Fill each pitted date with approximately 1 teaspoon of goat cheese, pressing gently to seal.
- Cut each bacon slice in half crosswise to create 24 shorter strips.
- Wrap one bacon strip tightly around each stuffed date, ensuring the ends overlap slightly.
- Secure each bacon-wrapped date with a toothpick inserted through the center where the bacon ends meet.
- Arrange the dates seam-side down on the prepared baking sheet, spacing them 1 inch apart.
- Bake for 18-22 minutes until the bacon is crispy and golden brown, rotating the pan halfway through cooking.
- Transfer the dates to a wire rack using tongs and let them rest for 5 minutes before serving.
Juxtaposing textures create an unforgettable experience—the crisp bacon gives way to sticky-sweet dates and creamy, tangy cheese. Serve these warm morsels arranged on a wooden board with sprigs of fresh rosemary for visual appeal, or pair them with a crisp sparkling wine to cut through the richness. Their elegant simplicity belies the complex flavor profile that develops with each satisfying bite.
Festive Spinach and Artichoke Dip
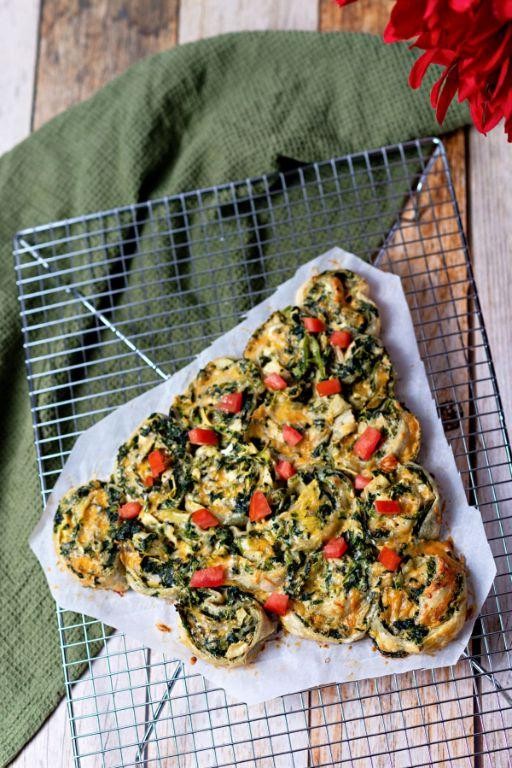
Lusciously creamy with vibrant green flecks and tender artichoke hearts, this elevated spinach and artichoke dip transforms the classic party favorite into a sophisticated centerpiece worthy of any festive gathering. Layers of melted cheeses mingle with aromatic garlic and shallots, creating a harmonious balance of flavors that both comforts and impresses. Perfect for holiday entertaining or intimate gatherings, this dip promises to be the star of your appetizer spread.
8
servings20
minutes35
minutesIngredients
For the aromatics and spinach:
– 2 tablespoons olive oil
– 1/4 cup finely chopped shallots
– 3 cloves garlic, minced
– 10 ounces fresh spinach
For the creamy base:
– 8 ounces cream cheese, softened
– 1/2 cup sour cream
– 1/2 cup mayonnaise
– 1/4 teaspoon cayenne pepper
– 1/4 teaspoon black pepper
– 1/2 teaspoon salt
For the cheese and artichokes:
– 1 cup shredded mozzarella cheese
– 1/2 cup grated Parmesan cheese
– 14 ounces canned artichoke hearts, drained and chopped
Instructions
1. Preheat your oven to 375°F and lightly grease a 1.5-quart baking dish.
2. Heat 2 tablespoons olive oil in a large skillet over medium heat until shimmering.
3. Add 1/4 cup finely chopped shallots and cook for 3 minutes until translucent.
4. Stir in 3 cloves minced garlic and cook for 1 minute until fragrant.
5. Add 10 ounces fresh spinach in batches, wilting each addition before adding more, about 4-5 minutes total.
6. Transfer the spinach mixture to a colander and press out excess liquid using the back of a spoon.
7. In a large mixing bowl, combine 8 ounces softened cream cheese, 1/2 cup sour cream, and 1/2 cup mayonnaise until smooth.
8. Mix in 1/4 teaspoon cayenne pepper, 1/4 teaspoon black pepper, and 1/2 teaspoon salt.
9. Fold in the drained spinach mixture, 1 cup shredded mozzarella, 1/2 cup grated Parmesan, and 14 ounces chopped artichoke hearts.
10. Transfer the mixture to the prepared baking dish and spread evenly.
11. Bake at 375°F for 25-30 minutes until bubbly and golden brown on top.
12. Let the dip rest for 5 minutes before serving to allow the flavors to meld.
Golden and beautifully browned on top, this dip emerges from the oven with a captivating contrast of textures—creamy beneath its lightly crusted surface. The subtle heat from cayenne pepper enhances the rich cheese flavors without overwhelming the delicate artichoke and spinach notes. Consider serving it in individual ramekins for an elegant presentation, or accompany with crisp crostini and colorful vegetable crudités for a stunning visual display.
Butternut Squash Soup with Ginger and Thyme

On crisp autumn afternoons when golden light filters through turning leaves, few dishes capture the season’s essence quite like this velvety butternut squash soup, where earthy sweetness meets the warm spice of ginger and the herbal notes of fresh thyme. Our version balances these flavors with precision, creating a sophisticated yet comforting bowl that feels both nourishing and celebratory. Each spoonful delivers the perfect harmony of roasted squash depth, zesty ginger brightness, and thyme’s subtle complexity.
5
servings20
minutes50
minutesIngredients
For the roasted squash:
– 1 large butternut squash (about 3 pounds), peeled, seeded, and cubed into 1-inch pieces
– 2 tablespoons olive oil
– 1 teaspoon kosher salt
For the soup base:
– 1 medium yellow onion, diced
– 3 cloves garlic, minced
– 2 tablespoons fresh ginger, grated
– 4 cups vegetable broth
– 1 cup heavy cream
– 2 teaspoons fresh thyme leaves
– ½ teaspoon black pepper
Instructions
1. Preheat your oven to 400°F and line a baking sheet with parchment paper.
2. Toss the cubed butternut squash with 2 tablespoons olive oil and 1 teaspoon kosher salt until evenly coated.
3. Spread the squash in a single layer on the prepared baking sheet and roast for 25-30 minutes until tender and lightly caramelized at the edges.
4. While the squash roasts, heat a large Dutch oven or heavy-bottomed pot over medium heat.
5. Add the diced onion and cook for 6-8 minutes, stirring occasionally, until translucent and fragrant.
6. Stir in the minced garlic and grated ginger, cooking for 1 minute until aromatic but not browned.
7. Add the roasted squash to the pot along with 4 cups vegetable broth, scraping any browned bits from the bottom.
8. Bring the mixture to a simmer, then reduce heat to low and cook for 15 minutes to allow flavors to meld.
9. Carefully transfer the soup in batches to a blender and puree until completely smooth, holding the lid firmly with a towel.
10. Return the pureed soup to the pot and stir in 1 cup heavy cream, 2 teaspoons fresh thyme leaves, and ½ teaspoon black pepper.
11. Heat gently over low heat for 5 minutes until warmed through, being careful not to boil.
Creamy and luxuriously smooth, this soup’s velvety texture contrasts beautifully with the gentle heat of ginger and earthy thyme undertones. Consider garnishing with toasted pumpkin seeds for crunch or a drizzle of sage-infused oil for aromatic depth, making each bowl a celebration of autumn’s bounty.
Holiday Cheese Board with Homemade Chutney

Glistening with seasonal abundance, this holiday cheese board elevates entertaining with its artful arrangement and homemade spiced pear chutney. Perfect for festive gatherings, it transforms simple ingredients into an elegant centerpiece that delights both the eye and palate. The jewel-toned chutney adds a sweet-tart complexity that beautifully complements rich cheeses and crisp accompaniments.
8
servings20
minutes40
minutesIngredients
For the Spiced Pear Chutney
– 2 ripe Bartlett pears, peeled and diced
– 1/2 cup granulated sugar
– 1/4 cup apple cider vinegar
– 1/4 cup dried cranberries
– 1 tablespoon fresh lemon juice
– 1/2 teaspoon ground cinnamon
– 1/4 teaspoon ground ginger
– Pinch of kosher salt
For the Cheese Board Assembly
– 8 ounces aged cheddar cheese, cubed
– 6 ounces creamy brie cheese, whole wheel
– 4 ounces blue cheese, crumbled
– 1 cup Marcona almonds
– 1 baguette, sliced and toasted
– 2 cups red seedless grapes
– Fresh rosemary sprigs for garnish
Instructions
1. Combine diced pears, sugar, apple cider vinegar, dried cranberries, lemon juice, cinnamon, ginger, and salt in a medium saucepan.
2. Bring the mixture to a simmer over medium heat, stirring constantly until sugar dissolves completely.
3. Reduce heat to low and cook uncovered for 25-30 minutes, stirring occasionally, until the chutney thickens to a jam-like consistency.
4. Transfer the hot chutney to a heatproof jar and cool completely to room temperature before refrigerating.
5. Slice the baguette into 1/2-inch thick pieces and arrange in a single layer on a baking sheet.
6. Toast the bread slices in a 375°F oven for 8-10 minutes until golden brown and crisp around the edges.
7. Arrange the toasted baguette slices around the perimeter of a large wooden board or platter.
8. Place the whole brie wheel in the center of the board as your focal point.
9. Group the cubed cheddar cheese in one section and the crumbled blue cheese in another.
10. Scatter Marcona almonds and red grapes in the remaining empty spaces.
11. Spoon the chilled pear chutney into a small serving bowl and place it prominently on the board.
12. Tuck fresh rosemary sprigs between the cheese groupings for aromatic garnish.
While the chutney offers a delightful sweet-tart contrast with subtle warm spices, the variety of cheeses provides creamy, sharp, and pungent notes that create a harmonious tasting experience. The crisp toasted baguette and juicy grapes offer refreshing textural balance, making this board perfect for holiday entertaining when arranged with artful intention.
Mini Beef Wellington Bites
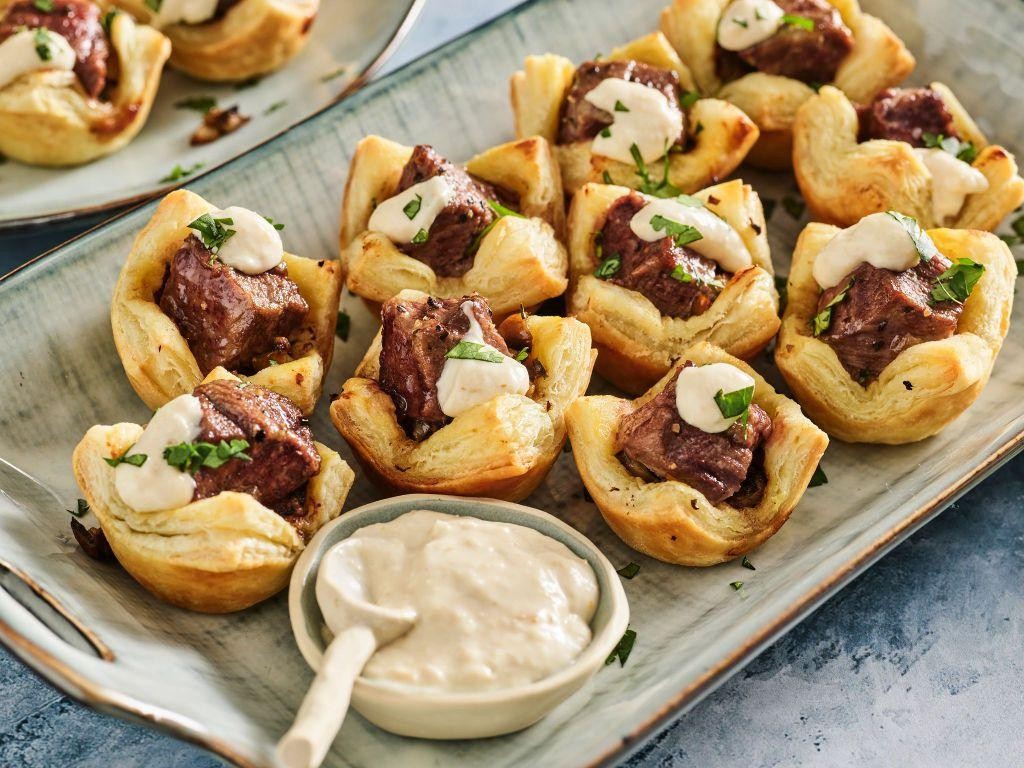
Heralding the essence of classic elegance in a single bite, these Mini Beef Wellington Bites transform the iconic centerpiece into perfectly portioned appetizers. Each morsel features a tender beef center enveloped in a savory mushroom duxelles and wrapped in a delicate, golden puff pastry crust. They offer a sophisticated yet approachable way to impress guests at any gathering, marrying rich flavors with beautiful presentation.
16
bites30
minutes35
minutesIngredients
For the Beef and Filling:
– 1 lb beef tenderloin, cut into 1-inch cubes
– 2 tbsp olive oil
– 8 oz cremini mushrooms, finely chopped
– 2 tbsp unsalted butter
– 1 small shallot, minced
– 1 tsp fresh thyme leaves
– 2 tbsp dry sherry
– 2 tbsp heavy cream
– Salt and black pepper
For Assembly:
– 1 sheet frozen puff pastry, thawed
– 2 tbsp Dijon mustard
– 1 large egg, beaten
– All-purpose flour, for dusting
Instructions
1. Preheat your oven to 400°F and line a baking sheet with parchment paper.
2. Season the beef cubes generously with salt and pepper on all sides.
3. Heat 1 tablespoon of olive oil in a large skillet over high heat until shimmering.
4. Sear the beef cubes for 1 minute per side until deeply browned but rare inside, then transfer to a plate.
5. Tip: Avoid overcrowding the skillet to ensure a proper sear and develop a flavorful crust.
6. Reduce the heat to medium and melt the butter in the same skillet.
7. Add the remaining 1 tablespoon of olive oil, then sauté the mushrooms and shallot for 8-10 minutes until all moisture has evaporated and the mixture is golden brown.
8. Stir in the thyme and cook for 1 minute until fragrant.
9. Pour in the sherry and cook for 2 minutes, scraping up any browned bits from the pan.
10. Stir in the heavy cream and cook for 1 minute until the mixture thickens, then season with salt and pepper to taste and let cool completely.
11. Lightly dust your work surface with flour and roll the puff pastry sheet into a 12×12-inch square.
12. Cut the pastry into sixteen 3×3-inch squares.
13. Brush the center of each pastry square with a thin layer of Dijon mustard.
14. Place 1 teaspoon of the cooled mushroom mixture in the center of each square.
15. Set one seared beef cube on top of the mushroom mixture on each square.
16. Tip: Ensure the beef is completely cool before assembling to prevent the pastry from becoming soggy.
17. Brush the edges of each pastry square with the beaten egg.
18. Gather the corners of each square over the beef, pinching the seams tightly to seal completely.
19. Place the assembled bites seam-side down on the prepared baking sheet.
20. Brush the tops and sides of each bite with the remaining beaten egg.
21. Tip: Chill the assembled bites for 15 minutes before baking to help the pastry hold its shape and become extra flaky.
22. Bake for 18-20 minutes until the pastry is puffed and golden brown.
23. Let the bites rest for 5 minutes before serving.
Nothing compares to the satisfying contrast of the flaky, buttery pastry giving way to the juicy, medium-rare beef and earthy mushroom filling. The subtle sharpness of Dijon mustard cuts through the richness, creating a perfectly balanced flavor profile in every bite. For an elegant presentation, serve them atop a swipe of additional Dijon mustard or alongside a simple arugula salad dressed with lemon vinaigrette.
Prosciutto-Wrapped Asparagus with Lemon Aioli
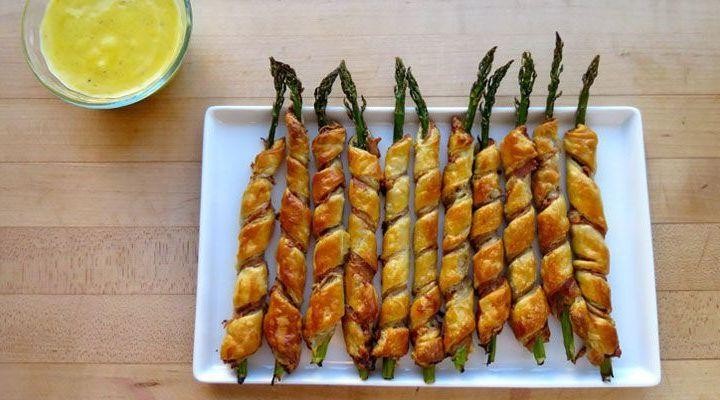
Luminous spears of asparagus wrapped in silken prosciutto create an elegant appetizer that marries earthy freshness with savory richness, while a vibrant lemon aioli provides the perfect zesty counterpoint to this sophisticated yet simple preparation. This dish transforms humble ingredients into restaurant-worthy fare with minimal effort, making it ideal for entertaining or elevating weeknight dinners. The combination of crisp-tender vegetables, salty cured meat, and creamy citrus sauce delivers complex flavors that belie its straightforward assembly.
8
bundles15
minutes15
minutesIngredients
For the asparagus bundles:
– 1 pound fresh asparagus spears, ends trimmed
– 8 thin slices prosciutto (about 4 ounces)
– 2 tablespoons olive oil
– ½ teaspoon freshly ground black pepper
For the lemon aioli:
– ½ cup mayonnaise
– 1 tablespoon freshly squeezed lemon juice
– 1 teaspoon lemon zest
– 1 small garlic clove, minced
– ¼ teaspoon salt
Instructions
1. Preheat your oven to 400°F and line a baking sheet with parchment paper.
2. Divide the trimmed asparagus spears into 8 equal bundles of 3-4 spears each.
3. Wrap one slice of prosciutto around the middle of each asparagus bundle, slightly overlapping the ends.
4. Arrange the wrapped bundles in a single layer on the prepared baking sheet.
5. Drizzle the olive oil evenly over the asparagus bundles.
6. Sprinkle the black pepper across all bundles.
7. Bake for 12-15 minutes until the asparagus is tender-crisp and the prosciutto is lightly crisped.
8. While the asparagus bakes, combine the mayonnaise, lemon juice, lemon zest, minced garlic, and salt in a small bowl.
9. Whisk the aioli ingredients vigorously until completely smooth and well incorporated.
10. Let the aioli rest for 5 minutes to allow the flavors to meld.
11. Remove the asparagus bundles from the oven when the tips begin to brown slightly.
12. Transfer the bundles to a serving platter using tongs.
13. Serve immediately with the lemon aioli for dipping.
Nothing compares to the delightful contrast between the crisp, salty prosciutto and the tender, earthy asparagus, while the bright lemon aioli cuts through the richness with its citrusy sharpness. These elegant bundles offer a satisfying textural experience from the snap of perfectly cooked asparagus to the creamy dip that clings to each spear. For a stunning presentation, arrange them like sunbursts on a wooden board with the aioli in a small ramekin at the center, creating an impressive appetizer that belies its simple preparation.
Festive Shrimp Cocktail with Horseradish Sauce
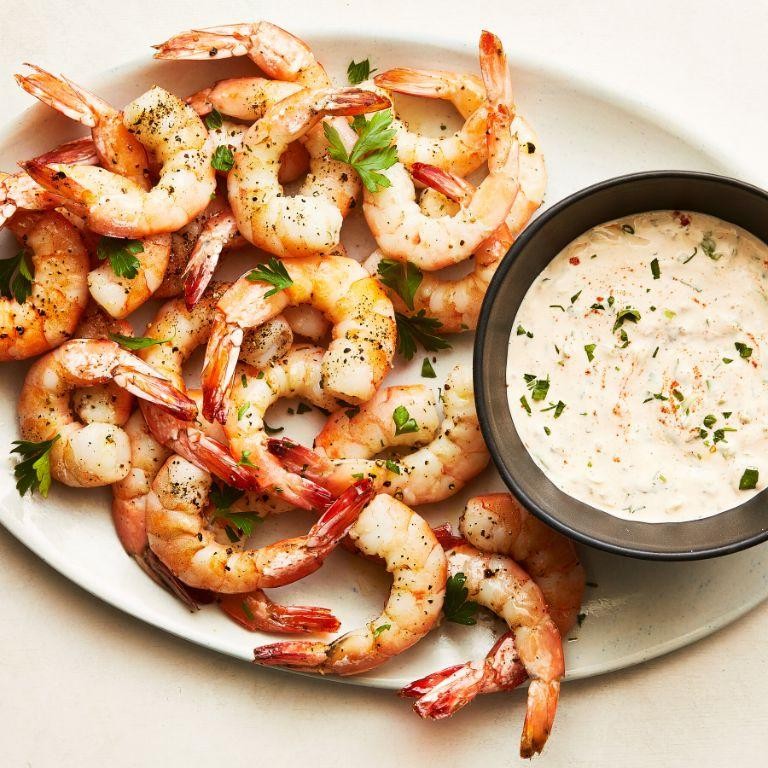
With its vibrant pink curls and elegant presentation, this festive shrimp cocktail transforms the classic appetizer into a celebration-worthy centerpiece. The horseradish-spiked sauce adds a sophisticated kick that perfectly complements the sweet, tender shrimp, making it ideal for holiday gatherings or special occasions.
2
servings20
minutes10
minutesIngredients
For the shrimp:
- 1 pound large raw shrimp, peeled and deveined
- 4 cups water
- 1 tablespoon salt
- 1 lemon, sliced
- 2 bay leaves
For the horseradish sauce:
- 1 cup ketchup
- 3 tablespoons prepared horseradish
- 2 tablespoons lemon juice
- 1 teaspoon Worcestershire sauce
- ½ teaspoon hot sauce
For serving:
- 1 head butter lettuce, leaves separated
- Fresh parsley, chopped
Instructions
- Combine 4 cups water, 1 tablespoon salt, sliced lemon, and 2 bay leaves in a large saucepan.
- Bring the mixture to a rolling boil over high heat, which should take approximately 5-7 minutes.
- Add 1 pound raw shrimp to the boiling liquid and immediately reduce heat to medium.
- Cook shrimp for exactly 2-3 minutes until they turn pink and form a tight C-shape.
- Transfer cooked shrimp to an ice water bath using a slotted spoon to stop the cooking process.
- Let shrimp chill in the ice bath for 5 minutes until completely cool to the touch.
- Drain the shrimp thoroughly and pat dry with paper towels to ensure the sauce adheres properly.
- Whisk together 1 cup ketchup, 3 tablespoons horseradish, 2 tablespoons lemon juice, 1 teaspoon Worcestershire sauce, and ½ teaspoon hot sauce in a medium bowl.
- Cover the sauce and refrigerate for at least 30 minutes to allow flavors to meld.
- Arrange butter lettuce leaves on individual serving plates or a large platter.
- Nestle the chilled shrimp among the lettuce leaves in a circular pattern.
- Drizzle the horseradish sauce over the shrimp or serve it in small ramekins alongside.
- Sprinkle chopped parsley over the finished dish for a fresh, colorful garnish.
Perfectly chilled shrimp offer a firm yet tender bite that contrasts beautifully with the creamy, spicy sauce. The horseradish provides a sinus-clearing warmth that builds gradually with each mouthful. For an elegant presentation, serve the cocktail in martini glasses lined with the butter lettuce leaves, creating individual portions that feel both sophisticated and celebratory.
Stuffed Mushrooms with Sausage and Parmesan
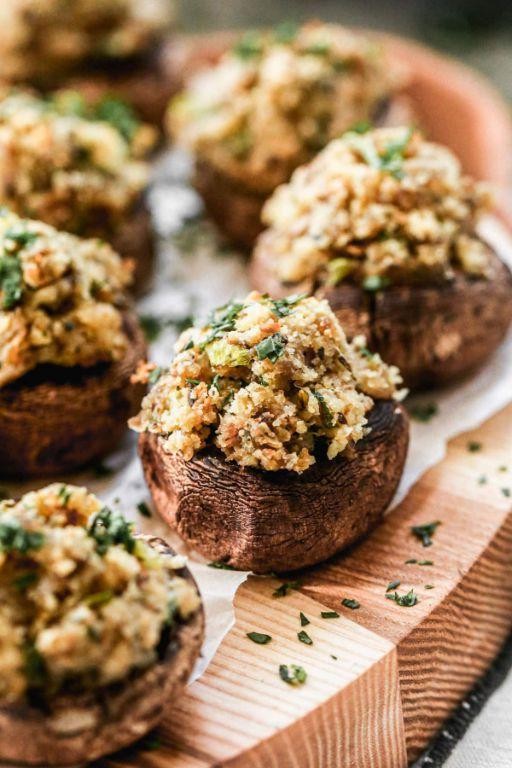
Crafted with care, these elegant stuffed mushrooms transform humble ingredients into sophisticated bites perfect for entertaining. Plump cremini mushrooms become delicate vessels for a savory sausage and Parmesan filling that balances richness with earthy depth. Each morsel offers a harmonious blend of textures and flavors that will impress even the most discerning palates.
24
portions20
minutes35
minutesIngredients
For the mushroom preparation:
– 24 large cremini mushrooms (about 1½ pounds)
– 2 tablespoons olive oil
– ½ teaspoon kosher salt
For the filling:
– 8 ounces mild Italian sausage, casings removed
– ½ cup finely chopped yellow onion
– 2 cloves garlic, minced
– 4 ounces cream cheese, softened
– ½ cup grated Parmesan cheese
– ¼ cup Italian breadcrumbs
– 2 tablespoons chopped fresh parsley
– ¼ teaspoon black pepper
Instructions
1. Preheat your oven to 375°F and line a baking sheet with parchment paper.
2. Gently twist the stems from all 24 mushrooms and set the caps aside.
3. Finely chop the mushroom stems until they resemble coarse crumbs.
4. Heat 1 tablespoon olive oil in a large skillet over medium heat for 1 minute.
5. Add the sausage to the skillet and cook for 5-7 minutes, breaking it into small crumbles with a wooden spoon.
6. Transfer the cooked sausage to a bowl using a slotted spoon, leaving 1 tablespoon of drippings in the skillet.
7. Add the remaining 1 tablespoon olive oil to the skillet and heat for 30 seconds.
8. Sauté the chopped onion for 3-4 minutes until translucent and fragrant.
9. Add the minced garlic and cook for 1 minute until golden but not browned.
10. Stir in the chopped mushroom stems and cook for 4-5 minutes until they release their moisture and become tender.
11. Combine the sausage, mushroom mixture, cream cheese, Parmesan, breadcrumbs, parsley, and pepper in a large bowl.
12. Mix thoroughly until all ingredients are evenly incorporated and the filling holds together.
13. Arrange the mushroom caps cavity-side up on the prepared baking sheet.
14. Brush the inside of each mushroom cap lightly with olive oil using a pastry brush.
15. Sprinkle the mushroom caps evenly with kosher salt.
16. Spoon approximately 1 tablespoon of filling into each mushroom cavity, mounding it slightly.
17. Press the filling gently into the caps to ensure it adheres during baking.
18. Bake at 375°F for 18-20 minutes until the mushrooms are tender and the filling is golden brown.
19. Let the mushrooms rest on the baking sheet for 3-4 minutes before serving to allow the filling to set.
Buttery, golden-brown tops give way to tender mushroom caps that practically melt in your mouth. The savory sausage filling provides a satisfying richness that’s beautifully balanced by the sharp Parmesan and fresh parsley notes. For an elegant presentation, arrange these gems on a slate board with rosemary sprigs, or serve them alongside a crisp arugula salad dressed with lemon vinaigrette to cut through the richness.
Winter Vegetable Platter with Roasted Red Pepper Dip
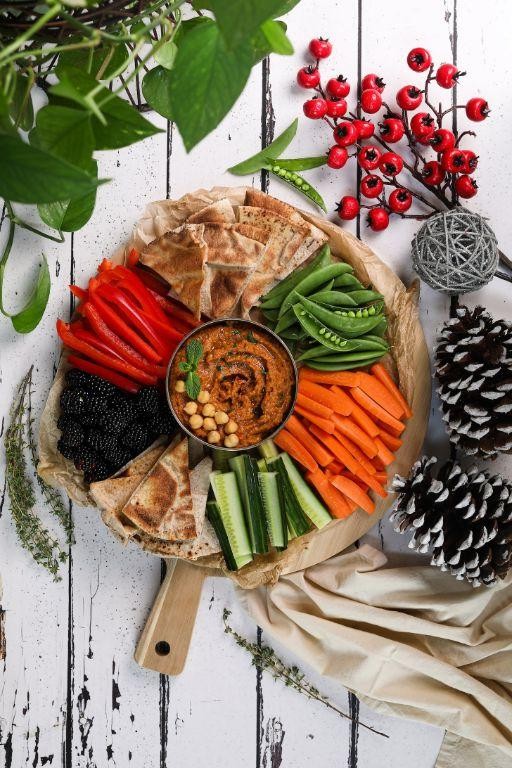
Warm, earthy flavors come alive in this sophisticated winter vegetable platter, where roasted seasonal produce meets a vibrant roasted red pepper dip that elevates humble roots into an elegant centerpiece. Perfect for holiday gatherings or cozy evenings, this dish celebrates the natural sweetness and textures of cold-weather vegetables with minimal fuss and maximum impact. Each component shines through careful preparation and thoughtful pairing, creating a visually stunning arrangement that delights both the palate and the eye.
2
servings25
minutes50
minutesIngredients
For the Roasted Vegetables:
– 1 large sweet potato, peeled and cut into 1-inch cubes
– 2 medium parsnips, peeled and cut into ½-inch thick rounds
– 1 large head of cauliflower, cut into 1½-inch florets
– 3 tablespoons olive oil
– 1 teaspoon kosher salt
– ½ teaspoon black pepper
For the Roasted Red Pepper Dip:
– 2 large red bell peppers
– ½ cup Greek yogurt
– 2 tablespoons tahini
– 1 small garlic clove, minced
– 1 tablespoon lemon juice
– ¼ teaspoon smoked paprika
– ¼ teaspoon salt
Instructions
1. Preheat your oven to 425°F and line two baking sheets with parchment paper.
2. Place the cubed sweet potato, parsnip rounds, and cauliflower florets in a large mixing bowl.
3. Drizzle the vegetables with 3 tablespoons of olive oil and toss thoroughly to coat evenly.
4. Sprinkle 1 teaspoon of kosher salt and ½ teaspoon of black pepper over the vegetables, tossing again to distribute the seasoning.
5. Arrange the vegetables in a single layer on the prepared baking sheets, ensuring they don’t crowd each other for optimal browning.
6. Roast the vegetables for 25-30 minutes until they develop golden-brown edges and are tender when pierced with a fork.
7. While the vegetables roast, place the whole red bell peppers directly on a gas burner flame or under the broiler set to high.
8. Char the peppers, turning every 2-3 minutes with tongs, until the skins are completely blackened and blistered on all sides.
9. Transfer the charred peppers to a bowl and cover tightly with plastic wrap, letting them steam for 15 minutes to loosen the skins.
10. Peel the blackened skins from the peppers using your fingers, then remove the stems and seeds.
11. Combine the peeled peppers, ½ cup Greek yogurt, 2 tablespoons tahini, minced garlic clove, 1 tablespoon lemon juice, ¼ teaspoon smoked paprika, and ¼ teaspoon salt in a blender.
12. Blend the mixture on high speed for 1-2 minutes until completely smooth and creamy.
13. Transfer the dip to a serving bowl and refrigerate for at least 20 minutes to allow the flavors to meld.
14. Arrange the roasted vegetables artfully on a large platter alongside the chilled dip.
A symphony of textures awaits—the caramelized edges of the roasted vegetables yield to tender interiors, while the silky dip offers a smoky, tangy counterpoint. Consider serving this platter as a stunning appetizer with crusty bread for dipping, or as a vibrant side dish alongside roasted meats. The contrast between the sweet roasted roots and the bright, creamy dip creates a memorable eating experience that celebrates winter’s bounty in every bite.
Spiced Mulled Wine with Citrus and Cloves

Radiant with the warmth of autumn, this spiced mulled wine transforms ordinary evenings into memorable gatherings. Fragrant cloves and bright citrus notes dance together in a sophisticated symphony that comforts both body and spirit. Perfect for crisp fall nights, this elegant beverage elevates simple moments with its complex aromatic profile.
2
servings10
minutes20
minutesIngredients
For the Spice Bundle
- 8 whole cloves
- 2 cinnamon sticks
- 4 star anise pods
For the Citrus Infusion
- 1 orange, sliced into ¼-inch rounds
- ½ lemon, sliced into ¼-inch rounds
For the Wine Base
- 1 bottle (750 ml) dry red wine
- ¼ cup honey
- ¼ cup brandy
Instructions
- Place the 8 whole cloves, 2 cinnamon sticks, and 4 star anise pods in the center of a 6-inch square of cheesecloth.
- Gather the cheesecloth edges and tie securely with kitchen twine to create a spice bundle.
- Slice 1 orange and ½ lemon into ¼-inch rounds, removing any seeds for a smoother infusion.
- Pour the entire 750 ml bottle of dry red wine into a medium saucepan.
- Add the spice bundle and citrus slices to the saucepan with the wine.
- Drizzle ¼ cup honey into the mixture, using a quality raw honey for deeper flavor complexity.
- Heat the mixture over medium-low heat until it reaches 160°F, using a digital thermometer to prevent boiling.
- Maintain the temperature at 160°F for 20 minutes to allow the spices to fully infuse without losing alcohol content.
- Remove the saucepan from heat and stir in ¼ cup brandy for an extra layer of warmth.
- Discard the spice bundle using tongs to avoid burning your fingers.
Heady with aromatic spices and bright citrus, this mulled wine offers a velvety texture that coats the palate gently. The cloves provide subtle warmth while the honey creates a smooth sweetness that balances the wine’s natural tannins. Serve in heatproof glass mugs garnished with a fresh cinnamon stick, or pour over ice for a refreshing chilled version that maintains its complex spice profile.
Gingerbread Cookies with Royal Icing

Fragrant with warm spices and rich molasses, these gingerbread cookies capture the very essence of holiday baking. Their crisp edges and soft centers provide the perfect canvas for intricate royal icing designs that transform them into edible works of art. This classic recipe yields cookies with that quintessential snap and deep, complex flavor profile that makes them a seasonal favorite.
24
cookies90
minutes20
minutesIngredients
For the Gingerbread Cookies:
- 3 cups all-purpose flour
- 1 tsp baking soda
- 2 tsp ground ginger
- 1 tsp ground cinnamon
- ½ tsp ground cloves
- ½ tsp salt
- ¾ cup unsalted butter, softened to room temperature
- ¾ cup dark brown sugar, packed
- 1 large egg
- ½ cup molasses
For the Royal Icing:
- 3 cups powdered sugar
- 2 large egg whites
- ½ tsp cream of tartar
- Food coloring (optional)
Instructions
- Preheat your oven to 350°F and line two baking sheets with parchment paper.
- Whisk together 3 cups all-purpose flour, 1 tsp baking soda, 2 tsp ground ginger, 1 tsp ground cinnamon, ½ tsp ground cloves, and ½ tsp salt in a medium bowl until thoroughly combined.
- Cream ¾ cup softened unsalted butter and ¾ cup packed dark brown sugar in a stand mixer fitted with the paddle attachment on medium speed for 3 minutes until light and fluffy.
- Beat in 1 large egg until fully incorporated, then mix in ½ cup molasses until the mixture is smooth and uniform.
- Gradually add the dry ingredients to the wet ingredients, mixing on low speed just until the dough comes together and no dry streaks remain.
- Divide the dough in half, shape each portion into a disc, wrap tightly in plastic wrap, and chill in the refrigerator for at least 1 hour until firm. Tip: Chilling prevents spreading and makes rolling easier.
- Roll one disc of dough to ¼-inch thickness on a lightly floured surface using a floured rolling pin.
- Cut out shapes with cookie cutters and transfer them to the prepared baking sheets, spacing them 1 inch apart.
- Bake for 8-10 minutes until the edges are set and the centers appear slightly puffed. Tip: For crisp cookies, bake the full 10 minutes; for softer ones, remove at 8 minutes.
- Cool cookies on the baking sheet for 5 minutes before transferring to a wire rack to cool completely.
- Repeat the rolling, cutting, and baking process with the remaining dough.
- Combine 3 cups powdered sugar, 2 large egg whites, and ½ tsp cream of tartar in a clean mixing bowl.
- Beat on medium-high speed for 5-7 minutes until the icing forms stiff peaks and has a glossy sheen.
- Divide the icing into separate bowls and tint with food coloring if desired, adding water 1 tsp at a time to reach piping consistency. Tip: Test icing consistency by lifting the spoon—it should slowly ribbon back into the bowl.
- Pipe borders and flood the cookies with royal icing using piping bags or squeeze bottles.
- Allow the icing to dry completely at room temperature for 4-6 hours before stacking or packaging.
Amazingly crisp with a subtle chew, these cookies deliver warm ginger and molasses notes that deepen over time. Their sturdy structure supports elaborate icing designs, making them ideal for holiday gift boxes or as edible ornaments hung with ribbon. The contrast between spicy cookie and sweet, crisp icing creates a textural experience that feels both nostalgic and sophisticated.
Pomegranate and Pear Holiday Salad
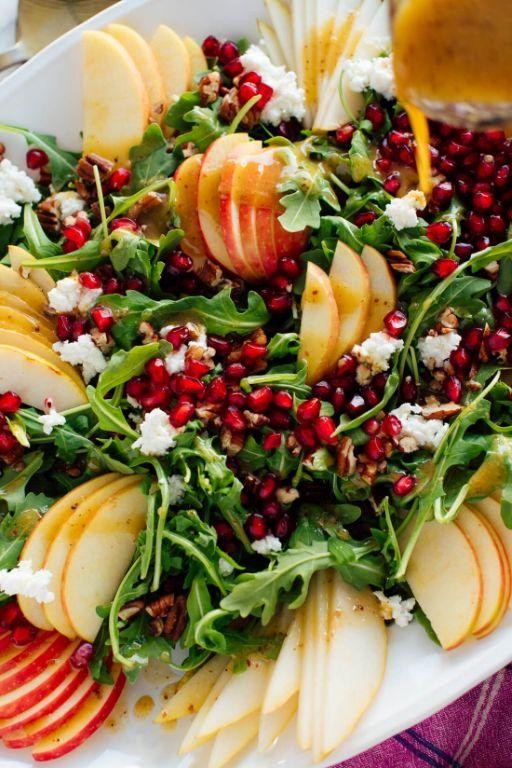
A vibrant celebration of seasonal flavors, this pomegranate and pear salad brings festive elegance to any holiday table with its jewel-toned ingredients and sophisticated balance of sweet, tart, and savory notes.
5
servings15
minutesIngredients
For the Salad Base
- 8 cups mixed baby greens
- 2 ripe Bartlett pears, thinly sliced
- 1/2 cup pomegranate arils
- 1/2 cup candied pecans
- 4 oz crumbled goat cheese
For the Vinaigrette
- 1/4 cup extra virgin olive oil
- 2 tbsp pomegranate juice
- 1 tbsp honey
- 1 tbsp apple cider vinegar
- 1/2 tsp Dijon mustard
- 1/4 tsp salt
- 1/8 tsp black pepper
Instructions
- Combine 1/4 cup olive oil, 2 tbsp pomegranate juice, 1 tbsp honey, 1 tbsp apple cider vinegar, 1/2 tsp Dijon mustard, 1/4 tsp salt, and 1/8 tsp black pepper in a small jar.
- Secure the lid tightly on the jar and shake vigorously for 30 seconds until the vinaigrette is fully emulsified. Tip: Shaking in a sealed jar creates perfect emulsion without whisking.
- Arrange 8 cups mixed baby greens evenly across a large serving platter.
- Thinly slice 2 ripe Bartlett pears and fan them decoratively over the greens.
- Sprinkle 1/2 cup pomegranate arils evenly across the salad. Tip: For easier aril removal, score pomegranate and submerge in water while separating seeds.
- Scatter 1/2 cup candied pecans over the salad composition.
- Crumble 4 oz goat cheese evenly across the salad ingredients.
- Drizzle the prepared vinaigrette over the assembled salad just before serving. Tip: Dress salad at the last moment to maintain crisp greens and prevent wilting.
The crisp pear slices provide a delicate crunch against the juicy burst of pomegranate arils, while the candied pecans add caramelized texture that contrasts beautifully with the creamy goat cheese. For an elegant presentation, serve this salad in individual chilled bowls garnished with extra pomegranate arils and a sprig of fresh mint.
Eggnog Cheesecake Bars with Nutmeg
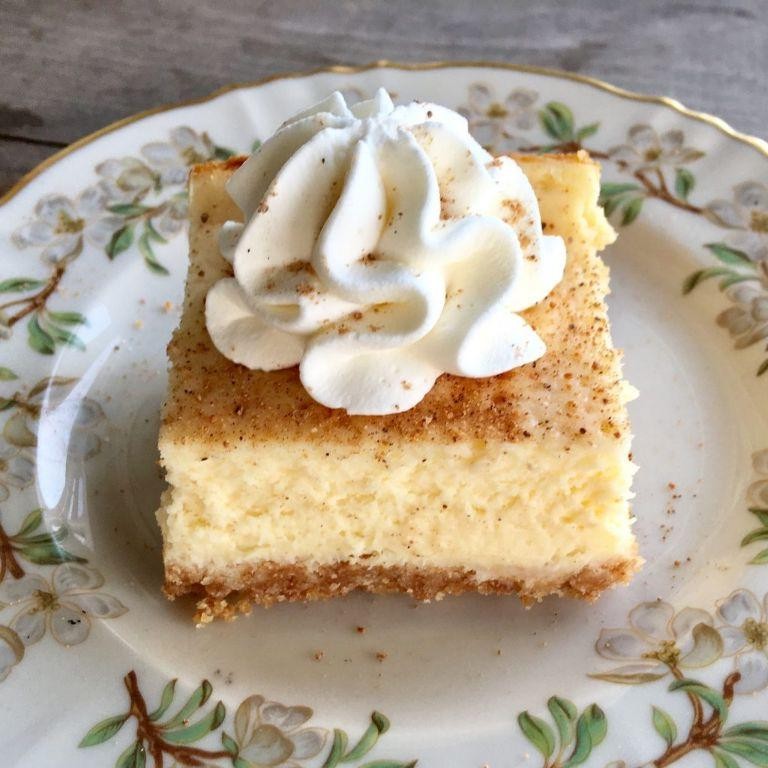
Tenderly spiced with the nostalgic warmth of holiday tradition, these Eggnog Cheesecake Bars marry the creamy indulgence of classic cheesecake with the rich, aromatic flavors of seasonal eggnog. A buttery graham cracker crust provides the perfect textural contrast to the velvety filling, while freshly grated nutmeg adds an elegant finishing touch that elevates this dessert beyond ordinary holiday treats. These bars capture the essence of festive gatherings in every sophisticated bite.
16
bars20
minutes50
minutesIngredients
For the Crust
– 1 ½ cups graham cracker crumbs
– ⅓ cup granulated sugar
– 6 tablespoons unsalted butter, melted
For the Filling
– 16 ounces cream cheese, softened to room temperature
– ½ cup granulated sugar
– 2 large eggs
– ¾ cup prepared eggnog
– 1 teaspoon vanilla extract
– ½ teaspoon ground nutmeg
– ¼ teaspoon ground cinnamon
For Topping
– ½ cup sour cream
– 2 tablespoons granulated sugar
– Freshly grated nutmeg for dusting
Instructions
1. Preheat your oven to 325°F and line an 8×8-inch baking pan with parchment paper, leaving overhang on two sides for easy removal.
2. Combine 1 ½ cups graham cracker crumbs, ⅓ cup granulated sugar, and 6 tablespoons melted butter in a medium bowl until the mixture resembles wet sand.
3. Press the crust mixture firmly into the bottom of the prepared pan using the bottom of a measuring cup to create an even layer.
4. Bake the crust for 10 minutes at 325°F until lightly golden around the edges, then transfer to a wire rack to cool slightly.
5. Beat 16 ounces of softened cream cheese with ½ cup granulated sugar in a stand mixer fitted with the paddle attachment on medium speed for 2 minutes until completely smooth and free of lumps.
6. Add 2 large eggs one at a time, mixing just until each egg is incorporated before adding the next to prevent overmixing.
7. Slowly pour in ¾ cup eggnog while mixing on low speed, followed by 1 teaspoon vanilla extract, ½ teaspoon ground nutmeg, and ¼ teaspoon ground cinnamon.
8. Pour the filling over the pre-baked crust and smooth the top with an offset spatula.
9. Bake at 325°F for 35-40 minutes until the edges are set but the center still has a slight jiggle when gently shaken.
10. While the bars bake, whisk together ½ cup sour cream and 2 tablespoons granulated sugar in a small bowl until smooth.
11. Remove the bars from the oven and carefully spread the sour cream mixture evenly over the top using the back of a spoon.
12. Return to the oven and bake for an additional 5 minutes at 325°F until the topping is set.
13. Transfer the pan to a wire rack and cool completely to room temperature, about 2 hours.
14. Refrigerate the bars for at least 4 hours, or preferably overnight, to allow the flavors to develop and the texture to firm up properly.
15. Use the parchment paper overhang to lift the chilled bars from the pan, then dust with freshly grated nutmeg before cutting into squares.
Silken and luxuriously smooth, these cheesecake bars offer a perfect balance between the rich cream cheese base and the subtle spice of eggnog. The cool, firm texture slices cleanly when properly chilled, revealing layers of flavor that deepen overnight. For an elegant presentation, serve these bars on a chilled platter with a dusting of cinnamon sugar or alongside spiced coffee for a complete holiday dessert experience.
Conclusion
Gather your loved ones and create unforgettable holiday memories with these 34 delightful recipes! From appetizers to desserts, there’s something for every festive gathering. We’d love to hear which recipes become your favorites—leave a comment below and share this roundup on Pinterest to spread the holiday cheer. Happy cooking!


