Back when I was just a little girl, my grandmother’s kitchen smelled like heaven every Sunday afternoon. The scent of melting chocolate and sweet cream would drift through our old farmhouse, calling us children away from our games and into her warm embrace. Those precious moments, standing on tiptoe to watch her transform simple ingredients into magic, taught me that the best recipes aren’t just about taste—they’re about the memories we bake into every bite.
Why This Recipe Works
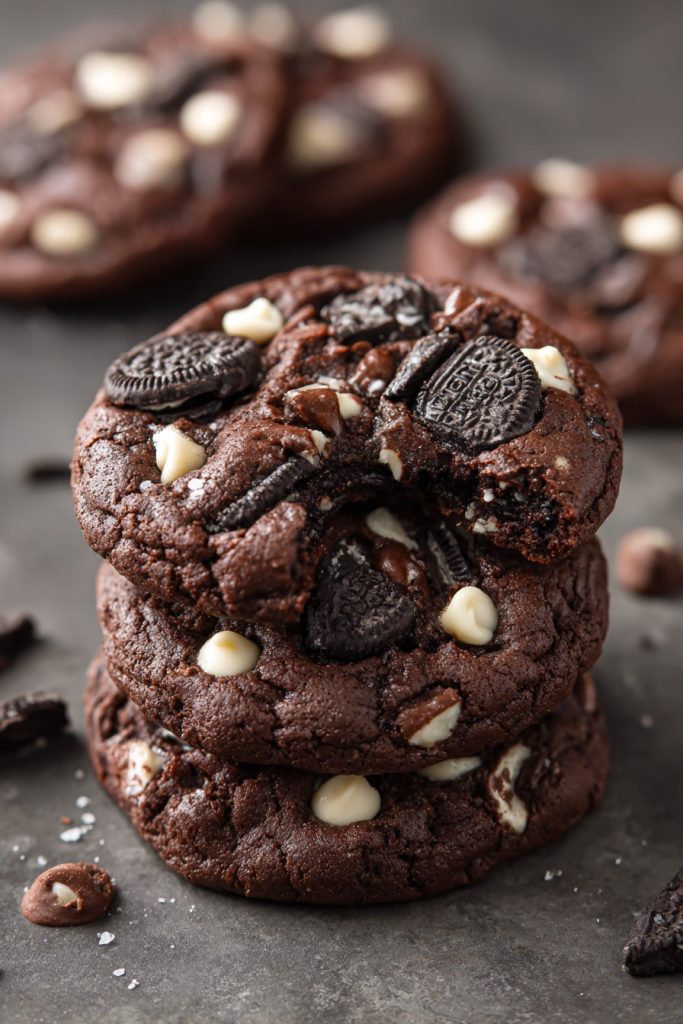
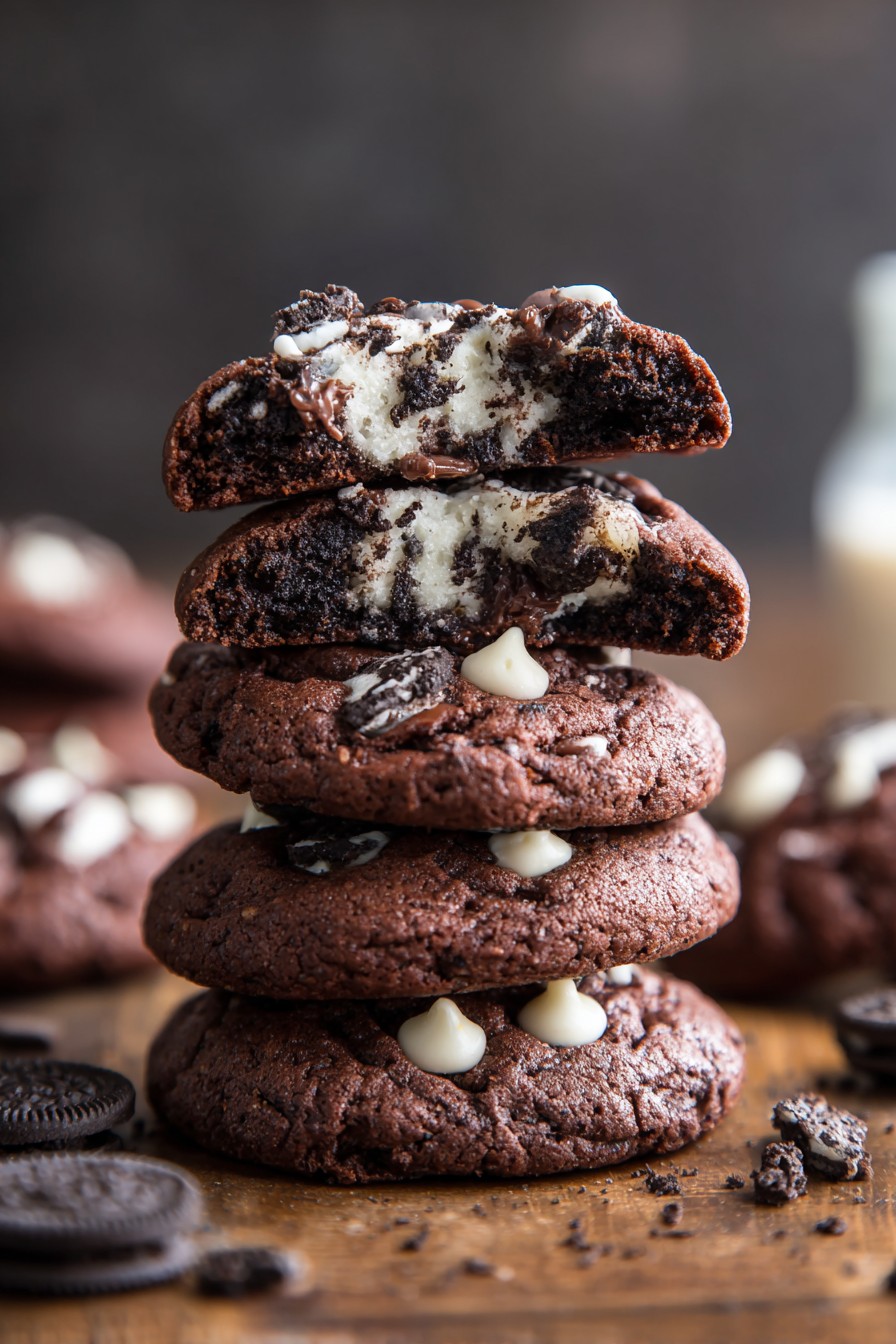
- The combination of rich Hershey’s chocolate and crunchy Oreo cookies creates that perfect textural contrast we all remember from childhood ice cream treats, but in cookie form that fills your kitchen with the most comforting aroma.
- Using both melted chocolate and cocoa powder gives these cookies a deep, complex chocolate flavor that reminds me of those double-chocolate brownies my mother used to sneak us after school when we needed a little cheering up.
- The generous chunks of Oreo cookies scattered throughout provide little pockets of creamy sweetness that burst with flavor, just like finding an extra marshmallow in your hot cocoa on a cold winter morning.
- This dough comes together beautifully without being fussy, making it perfect for baking with children who want to help just like I did with my grandmother, creating those precious kitchen memories that last generations.
- The cookies bake up with crisp edges and soft, chewy centers that transport you right back to after-school snacks and weekend treats shared around the family table.
Ingredients
- 2 ¼ cups all-purpose flour
- ¾ cup unsweetened cocoa powder
- 1 teaspoon baking soda
- 1 teaspoon salt
- 1 cup unsalted butter, softened to room temperature
- ¾ cup granulated sugar
- ¾ cup packed light brown sugar
- 2 large eggs, at room temperature
- 2 teaspoons pure vanilla extract
- 2 cups Hershey’s Cookies ‘n’ Creme baking chips
- 15 Oreo cookies, roughly chopped into chunks
Equipment Needed
- Stand mixer or electric hand mixer
- Large mixing bowls
- Measuring cups and spoons
- Baking sheets
- Parchment paper or silicone baking mats
- Wire cooling racks
- Cookie scoop or tablespoon
- Whisk
- Spatula
Instructions
Prepare Your Dry Ingredients
Begin by whisking together your flour, cocoa powder, baking soda, and salt in a medium bowl until they’re completely combined and there are no streaks of white flour visible. This careful mixing ensures every cookie will have that consistent, rich chocolate flavor we all love, without any bitter pockets of pure cocoa. As you whisk, remember how my grandmother would let me sift the flour through her old metal sifter, the rhythmic motion and soft puff of white powder feeling like magic to my young eyes. She’d always say that taking your time with these simple steps makes all the difference, just like taking time to listen to a child’s stories makes their day special. Make sure your cocoa powder is fresh and fragrant for the best flavor, and if you notice any lumps, break them up with the back of a spoon before mixing.
Cream Butter and Sugars
In your stand mixer fitted with the paddle attachment, beat the softened butter with both granulated and brown sugars on medium speed for a full 3-4 minutes until the mixture becomes light, fluffy, and pale in color. This creaming process creates tiny air pockets that will give your cookies that perfect lift and tender texture we all crave. The scent of sweet butter and molasses-rich brown sugar will fill your kitchen with the same warm, welcoming aroma that greeted me every time I visited my aunt’s house during holiday seasons. Scrape down the sides of the bowl periodically to ensure everything incorporates evenly, just like my mother taught me when I was learning to bake at her elbow. The butter should be soft enough that your finger leaves an indent but not so soft that it’s oily or melted.
Incorporate Wet Ingredients
Add the eggs one at a time, beating well after each addition until fully incorporated before adding the next egg. Then mix in the vanilla extract, that familiar scent taking me back to Christmas mornings when my mother would bake her special French toast. The mixture might look slightly curdled at this point, but don’t worry—this is normal and will come together when you add the dry ingredients. Each egg should be fully blended into the mixture before adding the next, creating that smooth, emulsified base that makes these cookies so wonderfully chewy. This careful addition reminds me of teaching my own daughter to bake, showing her how patience in small steps creates something beautiful in the end.
Combine Dry and Wet Mixtures
With your mixer on low speed, gradually add the flour mixture to the wet ingredients, mixing just until the flour disappears and no white streaks remain. Be careful not to overmix at this stage, as too much mixing can develop the gluten and make your cookies tough rather than tender. This gentle folding motion takes me back to watching my grandmother’s capable hands working her magic, her movements fluid and confident from years of Saturday baking sessions. The dough will be thick and somewhat sticky, just like the chocolate chip cookie dough we’d sneak tastes of when the adults weren’t looking. Scrape the bottom of the bowl to ensure all ingredients are fully incorporated.
Fold in Chocolate and Cookies
Using a sturdy spatula or wooden spoon, gently fold in the Hershey’s Cookies ‘n’ Creme baking chips and chopped Oreo pieces until they’re evenly distributed throughout the dough. Those white and brown speckles scattered through the dark chocolate dough always reminded me of starry nights from my childhood bedroom window. Be gentle with this step to avoid breaking the cookie pieces too much—you want nice chunks that will provide those wonderful textural surprises in every bite. The way the creamy white chips and dark cookie pieces mingle together tells a story of contrast and harmony, much like family members with different personalities coming together around the dinner table.
Chill and Portion the Dough
Cover the bowl with plastic wrap and refrigerate the dough for at least 30 minutes, though 1-2 hours is even better if you have the time. This chilling step is crucial—it allows the flour to fully hydrate and prevents the cookies from spreading too much during baking. While the dough chills, line your baking sheets with parchment paper, remembering how my mother would reuse hers until it was nearly brown, teaching us the value of making things last. Using a cookie scoop or tablespoon, portion the dough into 2-tablespoon sized balls and place them 2 inches apart on your prepared baking sheets. The cold dough will be easier to handle and will bake up with that perfect thickness we all love.
Bake to Perfection
Bake in a preheated 375°F oven for 10-12 minutes, rotating the baking sheets halfway through baking to ensure even browning. The cookies are done when the edges look set and the centers still appear slightly soft and underbaked—they’ll continue cooking on the hot baking sheet after removal. That moment when you pull them from the oven, their surfaces crackled and fragrant, always takes me back to coming home from school to find my mother had baked “just because.” Let the cookies cool on the baking sheets for 5 minutes before transferring them to wire racks to cool completely, though we all know the best ones are eaten warm when the chocolate is still melty.
Tips and Tricks
For the absolute best Hershey’s Cookies and Cream cookies, there are several little secrets I’ve gathered over years of baking that make all the difference. First, always use room temperature ingredients—this isn’t just baking advice, it’s a lesson in patience I learned from my grandmother, who would set her butter and eggs on the windowsill first thing in the morning so they’d be perfect by afternoon baking time. If you forget to take your eggs out ahead of time, you can place them in a bowl of warm water for 5-10 minutes to bring them to room temperature quickly. When measuring your flour, use the spoon-and-level method rather than scooping directly from the bag with your measuring cup—this prevents packing too much flour into your cookies and keeps them tender rather than dense. My mother taught me this technique when I was barely tall enough to see over the counter, her hands guiding mine as we carefully spooned flour into the metal cups. For the Oreo pieces, I prefer to chop them roughly by hand rather than using a food processor—this gives you nice, varied chunks rather than uniform crumbs, creating those wonderful textural surprises in every bite that remind me of finding hidden treasures. If your dough seems too soft after mixing, don’t hesitate to chill it longer—even overnight chilling will develop more flavor and make for thicker, chewier cookies. When baking, watch for those visual cues rather than relying solely on the timer—the edges should be set and the centers should still look slightly underdone when you remove them from the oven. And here’s my grandmother’s secret trick: if you want extra-crispy edges with soft centers, gently bang the baking sheet on the counter right when the cookies come out of the oven—this deflates them slightly and creates those beautiful crackled tops we all love. Store your completely cooled cookies in an airtight container with a slice of bread—the bread will help keep them soft for days, just like my aunt always did with her famous chocolate chip cookies. If you need to freeze the dough, portion it into balls first and freeze on a baking sheet before transferring to freezer bags—then you can bake just a few at a time whenever that cookie craving hits, creating spontaneous sweet moments just like my mother used to do on rainy afternoons.
Recipe Variations
- For an extra-indulgent treat that reminds me of birthday parties from my childhood, try adding 1 cup of white chocolate chips along with the Hershey’s chips—the combination creates a sweeter, creamier cookie that melts in your mouth and takes you right back to celebration cakes and blowing out candles.
- If you love that mint-chocolate combination like my sister always did, replace the vanilla extract with 1 teaspoon of peppermint extract and add ½ cup of Andes mint pieces—the cool mint flavor paired with rich chocolate creates a refreshing twist that’s perfect for holiday baking and sharing with loved ones.
- For a cookies-and-cream-bar version that’s easier for little hands to help with, press the dough into a 9×13 inch baking pan and bake at 350°F for 20-25 minutes until the edges pull away from the pan—this method creates soft, cake-like bars that slice beautifully and travel well for picnics and family gatherings.
- If you’re feeling adventurous like my grandmother always encouraged us to be, replace half the Oreos with chopped peanut butter cups or other favorite candy bars—this creates a surprise-in-every-bite experience that makes baking feel like a treasure hunt, just like searching for Easter eggs in our backyard.
- For a seasonal twist that brings back memories of autumn fairs, add ½ teaspoon of cinnamon to the dry ingredients and use pumpkin-spice Oreos if you can find them—the warm spices complement the chocolate beautifully and make your kitchen smell like falling leaves and cozy sweaters.
Frequently Asked Questions
Can I use regular chocolate chips instead of Hershey’s Cookies ‘n’ Creme chips?
While you can certainly use regular chocolate chips, the special Hershey’s Cookies ‘n’ Creme chips really make this recipe sing with that authentic cookies-and-cream flavor we all remember from childhood ice cream treats. If you can’t find them, you could use white chocolate chips and increase the chopped Oreo amount by half a cup to compensate. The beauty of this recipe, much like family traditions, is that it’s adaptable to what you have available while still creating something wonderful and memorable for everyone gathered around your table.
Why do I need to chill the cookie dough before baking?
Chilling the dough serves several important purposes that my grandmother taught me through years of Saturday baking sessions. It allows the flour to fully hydrate, resulting in cookies with better texture and more developed flavor, much like how good relationships need time to deepen and grow. The chilling also solidifies the butter, which prevents the cookies from spreading too much in the oven and gives you that perfect thick, chewy texture we all love. Think of this waiting time as an opportunity to anticipate the joy to come, just like counting down the days until a family reunion or holiday celebration.
Can I freeze the baked cookies or cookie dough?
Absolutely! Both the baked cookies and unbaked dough freeze beautifully, which means you can always have a taste of home waiting for unexpected guests or those moments when only a homemade cookie will do. To freeze baked cookies, ensure they’re completely cooled first, then store in airtight freezer bags for up to 3 months—they’ll thaw perfectly at room temperature in about an hour. For dough, portion it into balls and freeze on a baking sheet before transferring to bags, then bake straight from frozen, adding 1-2 minutes to the baking time. This freezer flexibility reminds me of my mother always having cookie dough ready for when friends dropped by unexpectedly, creating instant hospitality and warmth.
My cookies spread too much—what did I do wrong?
If your cookies spread more than you’d like, there are several possible causes that I’ve learned through trial and error over the years, much like learning family stories through retellings. Your butter might have been too soft or melted, your dough might not have been chilled long enough, or your baking sheets could have been warm when you placed the dough on them. Also check that your measurements are accurate—too much butter or sugar can cause spreading. Remember that baking is a journey of learning, just like family life, and even imperfect cookies still taste wonderful when shared with people you love.
Can I make these cookies without a stand mixer?
You certainly can make these cookies without a stand mixer—in fact, my grandmother never used anything but a wooden spoon and her own strong arms, and her cookies were always the stuff of family legend. Using a hand mixer or even mixing by hand will work perfectly fine, though it will require a bit more elbow grease, especially when creaming the butter and sugars. This hands-on approach can feel more connected to the baking process, much like handwritten letters feel more personal than emails, creating that sense of tradition and care that makes homemade treats so special.
Summary
These Hershey’s Cookies and Cream cookies capture the magic of childhood treats and family baking traditions. With perfect chocolate flavor, delightful texture contrasts, and endless adaptability, they create sweet moments and lasting memories around every kitchen table.
Hershey's Cookies and Cream Cookies
5
servings20
minutes12
minutesIngredients
Instructions
- 1 Whisk together flour, cocoa powder, baking soda, and salt in medium bowl
- 2 Cream butter and sugars until light and fluffy, about 3-4 minutes
- 3 Beat in eggs one at a time, then mix in vanilla extract
- 4 Gradually mix in dry ingredients until just combined
- 5 Fold in Hershey's chips and chopped Oreos
- 6 Chill dough for 30 minutes to 2 hours
- 7 Preheat oven to 375°F and portion dough onto lined baking sheets
- 8 Bake for 10-12 minutes until edges are set and centers are soft
- 9 Cool on baking sheets for 5 minutes before transferring to wire racks