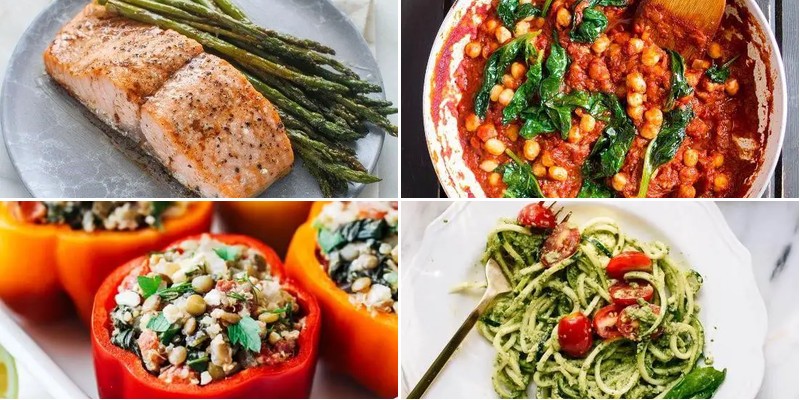
Zesty, wholesome, and downright delicious—that’s what’s on the menu tonight! If you’re craving easy, nutrient-packed dinners that don’t skimp on flavor, you’ve come to the right place. From vibrant veggie bowls to lean protein mains, these 32 healthy supper recipes are your ticket to nourishing evenings without the fuss. Ready to get cooking? Let’s dive in!
Quinoa-Stuffed Bell Peppers
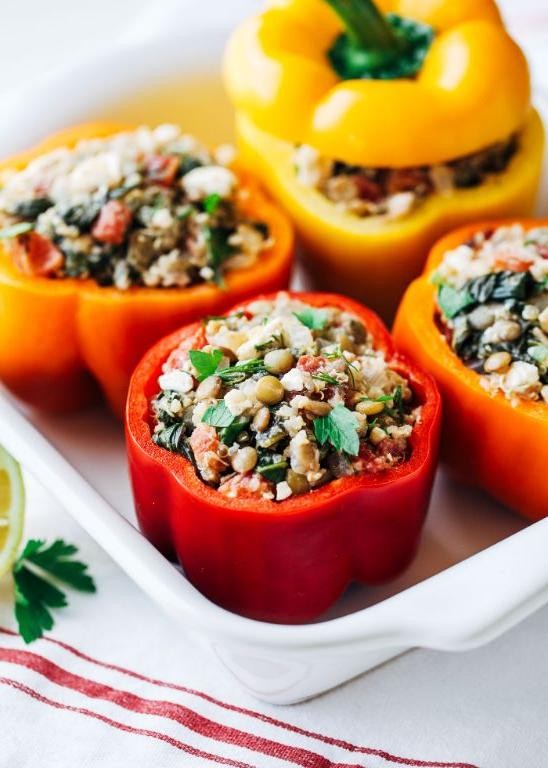
When the afternoon light slants through the kitchen window, I find myself craving something that feels both nourishing and comforting, something simple enough for a quiet Tuesday yet special enough to slow down and savor. These quinoa-stuffed bell peppers are exactly that kind of meal—a gentle assembly of earthy grains and sweet roasted vegetables that fills the kitchen with the kind of warmth that lingers long after the plates are cleared.
5
servings20
minutes55
minutesIngredients
– Bell peppers – 4 large
– Quinoa – 1 cup
– Vegetable broth – 2 cups
– Black beans – 1 can (15 oz), rinsed
– Olive oil – 2 tbsp
– Salt – ½ tsp
– Black pepper – ¼ tsp
– Shredded cheddar cheese – 1 cup
Instructions
1. Preheat your oven to 375°F.
2. Rinse 1 cup of quinoa under cold water in a fine-mesh strainer for 1 minute to remove any bitterness.
3. Combine the rinsed quinoa and 2 cups of vegetable broth in a medium saucepan.
4. Bring the mixture to a boil over high heat.
5. Reduce the heat to low, cover the saucepan, and simmer for 15 minutes until all the liquid is absorbed.
6. Remove the saucepan from the heat and let the quinoa stand covered for 5 minutes to finish steaming.
7. While the quinoa cooks, slice the tops off 4 large bell peppers and remove all seeds and membranes.
8. Arrange the hollowed bell peppers upright in a baking dish just large enough to hold them snugly.
9. Fluff the cooked quinoa with a fork to separate the grains.
10. Stir in 1 can of rinsed black beans, 2 tbsp of olive oil, ½ tsp of salt, and ¼ tsp of black pepper until evenly combined.
11. Spoon the quinoa mixture into the bell peppers, pressing gently to fill them completely.
12. Top each stuffed pepper with ¼ cup of shredded cheddar cheese.
13. Pour ½ cup of water into the bottom of the baking dish around the peppers to create steam.
14. Cover the baking dish tightly with aluminum foil.
15. Bake at 375°F for 30 minutes until the peppers are tender when pierced with a fork.
16. Remove the foil and bake for another 10 minutes until the cheese is bubbly and lightly browned.
17. Let the stuffed peppers rest for 5 minutes before serving to allow the filling to set. The tender peppers give way to a fluffy, protein-rich filling with pops of creamy beans, while the melted cheese forms a golden crust that contrasts beautifully with the sweet roasted flesh. I love serving them alongside a simple green salad or crumbling tortilla chips over the top for extra crunch.
Lemon Herb Grilled Chicken

Folding back the pages of summer evenings, I remember how the scent of lemon and herbs would drift through the screen door, promising something simple yet deeply comforting. This grilled chicken has become my quiet ritual when the world feels too loud, a dish that asks for little but gives so much in return.
2
servings15
minutes12
minutesIngredients
– Chicken breasts – 4 (6 oz each)
– Lemon juice – ¼ cup
– Olive oil – 3 tbsp
– Garlic – 3 cloves, minced
– Fresh rosemary – 1 tbsp, chopped
– Salt – 1 tsp
– Black pepper – ½ tsp
Instructions
1. Place chicken breasts between two sheets of plastic wrap and pound to ½-inch uniform thickness using a meat mallet or heavy pan.
2. Whisk together lemon juice, olive oil, minced garlic, chopped rosemary, salt, and black pepper in a medium bowl until fully combined.
3. Submerge chicken breasts in the marinade, turning to coat all surfaces completely.
4. Cover the bowl with plastic wrap and refrigerate for exactly 2 hours—no longer, as the acid will begin to break down the texture.
5. Preheat your gas or charcoal grill to medium-high heat (400°F), brushing the grates lightly with oil to prevent sticking.
6. Remove chicken from marinade, letting excess liquid drip back into the bowl, and discard the remaining marinade.
7. Place chicken breasts diagonally across the grill grates to create attractive cross-hatch marks.
8. Grill for 6 minutes without moving, until the bottom develops clear grill marks and releases easily from the grates.
9. Flip chicken using tongs and grill for another 6 minutes on the second side.
10. Check for doneness by inserting an instant-read thermometer into the thickest part—it should read 165°F exactly.
11. Transfer chicken to a clean plate and let rest for 5 minutes before slicing to allow juices to redistribute evenly. Keeping the skin slightly charred but not burned gives that perfect balance of smoky and bright. Knowing how the rosemary-infused oil mingles with the lemon’s brightness creates a crust that crackles gently under your knife. The interior stays remarkably moist, making it wonderful sliced over a grain bowl or tucked into warm pita with crisp vegetables.
Mediterranean Lentil Salad
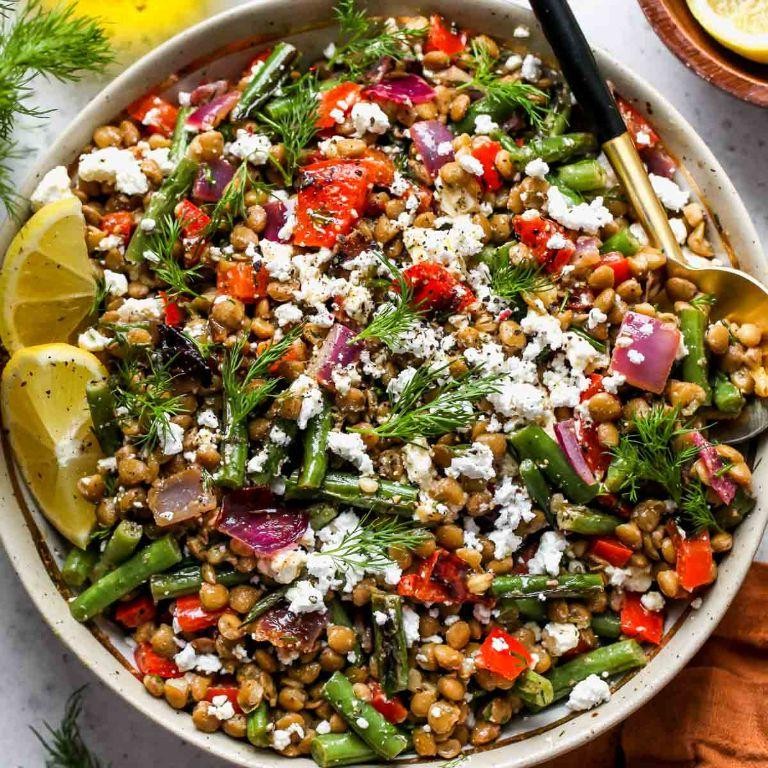
Years of chasing bold flavors have taught me that sometimes the most profound meals emerge from the quietest of ingredients, simmering patiently until they become something entirely new.
2
servings25
minutes20
minutesIngredients
Lentils – 1 cup
Water – 4 cups
Red onion – ½ cup
Cucumber – 1 cup
Feta cheese – ½ cup
Olive oil – 3 tbsp
Lemon juice – 2 tbsp
Salt – 1 tsp
Instructions
1. Rinse 1 cup of lentils under cold running water for 30 seconds to remove any debris.
2. Combine rinsed lentils and 4 cups of water in a medium saucepan.
3. Bring the water to a rolling boil over high heat, then reduce heat to maintain a gentle simmer.
4. Simmer lentils uncovered for 20 minutes, stirring occasionally to prevent sticking.
5. Test lentils for doneness by tasting one—they should be tender but still hold their shape.
6. Drain cooked lentils in a fine-mesh strainer and rinse briefly with cool water to stop the cooking process.
7. Transfer drained lentils to a large mixing bowl and let them cool to room temperature for 15 minutes.
8. While lentils cool, finely dice ½ cup of red onion.
9. Chop 1 cup of cucumber into ¼-inch pieces.
10. Crumble ½ cup of feta cheese into small chunks.
11. Add diced red onion, chopped cucumber, and crumbled feta to the cooled lentils.
12. In a small bowl, whisk together 3 tablespoons of olive oil and 2 tablespoons of lemon juice until emulsified.
13. Pour the dressing over the lentil mixture and sprinkle with 1 teaspoon of salt.
14. Gently toss all ingredients together until evenly coated with dressing.
15. Let the salad rest for 10 minutes to allow flavors to meld before serving.
But what truly captivates me is how the creamy lentils absorb the sharp lemon dressing while the cucumber maintains its crisp integrity. The feta crumbles melt slightly against the warm lentils, creating pockets of salty richness that contrast beautifully with the sweet onion. Serve it alongside grilled fish or spoon it into lettuce cups for a refreshing handheld lunch.
Zucchini Noodles with Basil Pesto
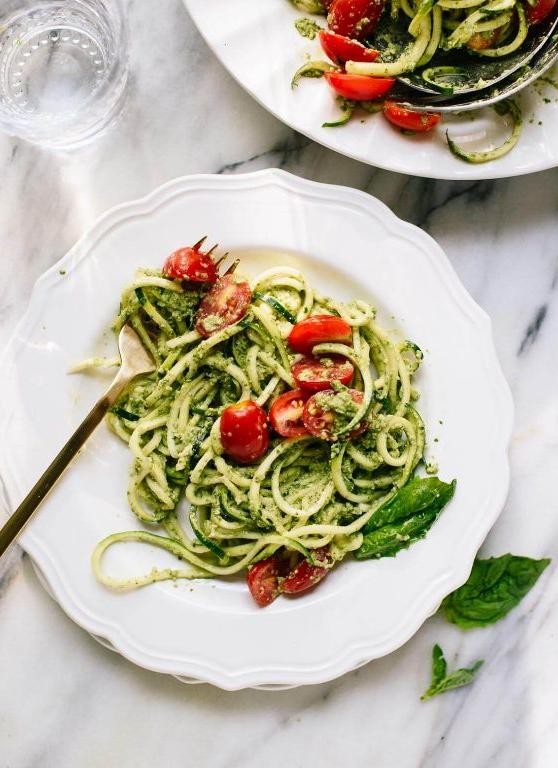
Floating through the kitchen today, I found myself reaching for the spiralizer, drawn to the quiet rhythm of turning summer’s abundance into something delicate and new. There’s something meditative about watching zucchini transform into ribbons, each twist revealing pale green flesh that will soon cradle the boldness of fresh pesto.
4
servings25
minutes4
minutesIngredients
Zucchini – 4 medium
Fresh basil leaves – 2 cups
Pine nuts – ¼ cup
Garlic – 2 cloves
Extra virgin olive oil – ½ cup
Parmesan cheese – ½ cup, grated
Salt – 1 tsp
Black pepper – ½ tsp
Instructions
1. Wash 4 medium zucchini thoroughly under cool running water.
2. Trim both ends from each zucchini using a sharp knife.
3. Spiralize all zucchini using the medium blade setting to create noodle-like strands.
4. Spread zucchini noodles in a single layer on a clean kitchen towel.
5. Sprinkle ½ teaspoon salt evenly over the zucchini noodles.
6. Let the salted zucchini noodles sit for 15 minutes to release excess moisture.
7. While zucchini rests, toast ¼ cup pine nuts in a dry skillet over medium heat for 3-4 minutes until golden brown, shaking the pan frequently.
8. Combine 2 cups fresh basil leaves, toasted pine nuts, 2 peeled garlic cloves, and ½ cup grated Parmesan cheese in a food processor.
9. Pulse the mixture 5-6 times until coarsely chopped.
10. With the food processor running, slowly drizzle in ½ cup extra virgin olive oil through the feed tube.
11. Process for 30 seconds until the pesto becomes smooth and emulsified.
12. Gently pat the zucchini noodles dry with paper towels to remove the released moisture.
13. Toss the dried zucchini noodles with the prepared pesto in a large mixing bowl.
14. Season with remaining ½ teaspoon salt and ½ teaspoon black pepper.
15. Divide the zucchini noodles among 4 serving plates immediately.
Using your hands to tear basil leaves instead of cutting them helps preserve their delicate oils and fragrance. The toasting of pine nuts deepens their flavor dramatically, transforming them from mild to richly nutty. Pressing moisture from the zucchini noodles ensures your pesto won’t become watery and diluted. Unexpectedly light yet deeply satisfying, these zucchini noodles carry the pesto like silk threads holding emerald jewels, their cool crispness contrasting with the garlic’s warm bite. Try serving them alongside grilled chicken or scattered with cherry tomatoes for a burst of sweetness that complements the basil’s herbaceous notes.
Spicy Shrimp Tacos with Avocado Slaw
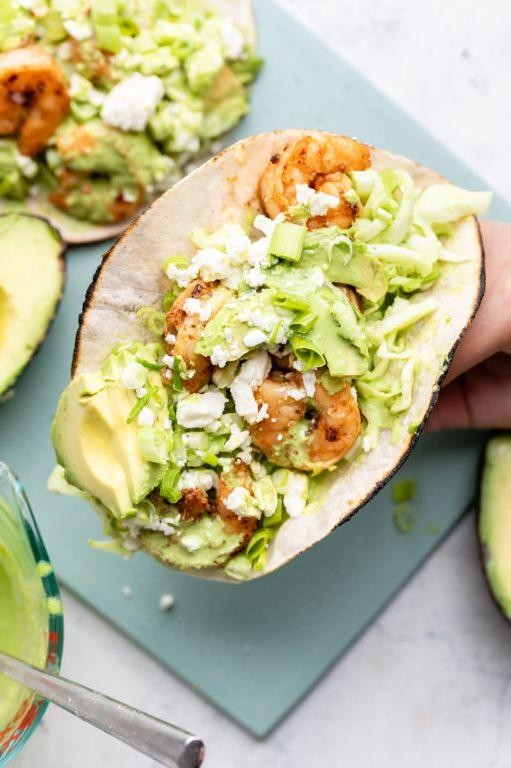
Lately, I’ve been craving something that carries both warmth and freshness, something that feels like a gentle embrace after a long day. These spicy shrimp tacos with avocado slaw have become my quiet kitchen companion, their preparation a slow, mindful ritual. There’s something deeply comforting in the way the spices mingle and the crisp slaw contrasts with tender shrimp.
8
tacos15
minutes5
minutesIngredients
– Shrimp – 1 lb
– Corn tortillas – 8
– Avocado – 1
– Cabbage – 2 cups
– Lime – 1
– Chili powder – 1 tsp
– Cumin – ½ tsp
– Olive oil – 2 tbsp
– Salt – ½ tsp
– Cilantro – ¼ cup
Instructions
1. Pat the shrimp completely dry with paper towels to ensure proper searing.
2. Toss shrimp with chili powder, cumin, and ¼ tsp salt in a medium bowl.
3. Heat 1 tbsp olive oil in a large skillet over medium-high heat until shimmering.
4. Arrange shrimp in a single layer in the hot skillet.
5. Cook shrimp for 2 minutes until edges turn pink and opaque.
6. Flip each shrimp carefully with tongs.
7. Cook for another 1-2 minutes until shrimp are fully opaque and firm to touch.
8. Remove shrimp from skillet and set aside on a clean plate.
9. Thinly slice cabbage into fine shreds using a sharp knife for maximum crispness.
10. Dice avocado into ½-inch cubes.
11. Chop cilantro leaves roughly.
12. Combine cabbage, avocado, and cilantro in a medium bowl.
13. Squeeze juice from the entire lime over the slaw mixture.
14. Drizzle remaining 1 tbsp olive oil over the slaw.
15. Sprinkle remaining ¼ tsp salt over the slaw.
16. Toss slaw gently with clean hands to avoid mashing the avocado.
17. Warm corn tortillas one at a time in a dry skillet over medium heat for 30 seconds per side.
18. Stack warmed tortillas and wrap in a clean kitchen towel to keep them pliable.
19. Place 3-4 shrimp in the center of each warm tortilla.
20. Top generously with avocado slaw mixture.
My favorite part is how the creamy avocado melts into the spicy shrimp, creating pockets of coolness that balance the heat. The cabbage maintains its satisfying crunch, providing texture that makes each bite interesting. Sometimes I serve these open-faced on a wooden board, letting guests build their own tacos while the evening light fades.
Balsamic Glazed Salmon with Asparagus
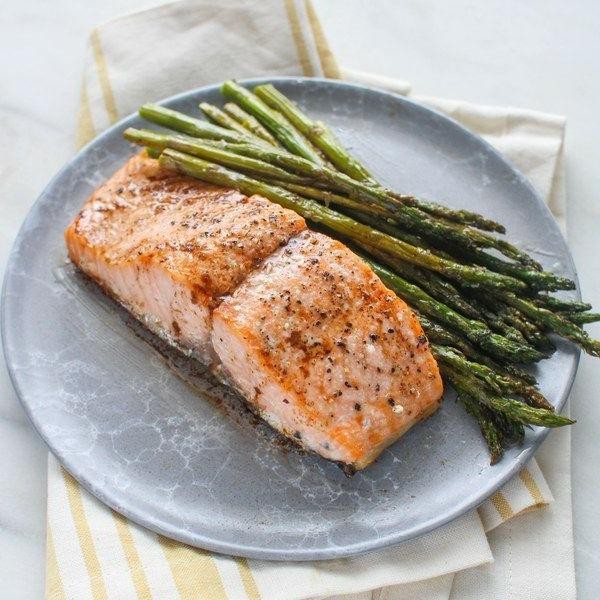
Just thinking about how some evenings call for something simple yet deeply satisfying, where the process of cooking becomes a quiet meditation rather than a rushed task. Joy comes in these small moments, like watching a glaze bubble and thicken, transforming plain ingredients into something special. This salmon dish feels like one of those gentle kitchen rituals that nourish both body and soul.
5
servings10
minutes19
minutesIngredients
Salmon fillets – 4 (6 oz each)
Balsamic vinegar – ¼ cup
Honey – 2 tbsp
Olive oil – 2 tbsp
Asparagus – 1 lb
Salt – 1 tsp
Black pepper – ½ tsp
Instructions
1. Preheat your oven to 400°F and line a baking sheet with parchment paper.
2. Pat the salmon fillets completely dry with paper towels to ensure crispy skin.
3. Arrange the salmon and asparagus in a single layer on the prepared baking sheet.
4. Drizzle 1 tablespoon of olive oil evenly over the asparagus and salmon.
5. Season the salmon and asparagus with salt and black pepper.
6. Roast in the preheated oven for 12 minutes exactly.
7. While roasting, combine balsamic vinegar and honey in a small saucepan over medium heat.
8. Simmer the glaze for 5 minutes until it reduces by half and coats the back of a spoon.
9. Remove the baking sheet from the oven when the salmon flakes easily with a fork.
10. Brush the reduced balsamic glaze generously over the salmon fillets.
11. Return the baking sheet to the oven and broil on high for 2 minutes until the glaze caramelizes.
12. Let the salmon rest for 3 minutes before serving to allow juices to redistribute. You’ll love how the sweet-tart glaze forms a shiny crust against the tender salmon, while the roasted asparagus provides a satisfying crisp-tender contrast. Try serving it over creamy polenta or with crusty bread to soak up every bit of the reduced glaze, making even the simplest weeknight feel quietly celebratory.
Sweet Potato and Black Bean Chili

Holding this warm bowl between my hands, I’m reminded how some meals feel like quiet conversations with ourselves, simple ingredients coming together to create something deeply comforting on days when the world moves just a bit too fast.
4
servings15
minutes37
minutesIngredients
- Olive oil – 2 tbsp
- Yellow onion – 1 medium, diced
- Garlic – 3 cloves, minced
- Sweet potatoes – 2 medium, peeled and cubed
- Chili powder – 2 tbsp
- Cumin – 1 tsp
- Crushed tomatoes – 1 (28 oz) can
- Black beans – 2 (15 oz) cans, drained and rinsed
- Vegetable broth – 2 cups
- Salt – 1 tsp
Instructions
- Heat olive oil in a large pot over medium heat for 1 minute until shimmering.
- Add diced onion and cook for 5 minutes, stirring occasionally, until translucent.
- Add minced garlic and cook for 1 minute until fragrant.
- Stir in cubed sweet potatoes, coating them in the oil and onion mixture.
- Sprinkle chili powder and cumin over the vegetables, toasting the spices for 30 seconds to deepen their flavor.
- Pour in crushed tomatoes, scraping any browned bits from the bottom of the pot.
- Add drained black beans and vegetable broth, stirring to combine all ingredients.
- Bring the chili to a boil, then reduce heat to low and cover the pot.
- Simmer for 25 minutes, stirring every 8-10 minutes to prevent sticking.
- After 25 minutes, test sweet potato tenderness by piercing a cube with a fork – it should slide through easily.
- Stir in salt, then simmer uncovered for 5 more minutes to slightly thicken the chili.
- Remove from heat and let rest for 3 minutes before serving.
For serving, I love how the sweet potatoes break down slightly into the broth, creating a naturally thickened texture that holds the black beans in soft suspension. The gentle heat from the chili powder lingers without overwhelming, making this perfect spooned over cornbread or topped with avocado slices for contrasting creaminess.
Vegetable Stir-Fry with Tofu
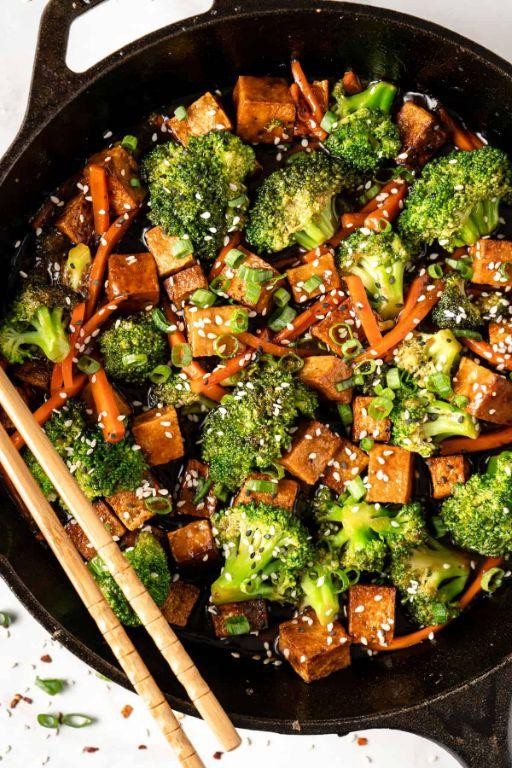
Maybe it’s the quiet hum of the kitchen, or the way vegetables soften into something comforting, but this stir-fry feels like a gentle pause in the day. I love how simple ingredients come together, filling the room with warmth and the promise of a nourishing meal.
4
servings20
minutes12
minutesIngredients
- Firm tofu – 14 oz
- Soy sauce – 3 tbsp
- Vegetable oil – 2 tbsp
- Broccoli florets – 2 cups
- Carrots – 1 cup, sliced
- Bell pepper – 1, sliced
- Garlic – 2 cloves, minced
- Ginger – 1 tsp, grated
Instructions
- Press the tofu between paper towels for 15 minutes to remove excess water, which helps it crisp up better later.
- Cut the pressed tofu into 1-inch cubes.
- Heat 1 tablespoon of vegetable oil in a large skillet over medium-high heat until it shimmers.
- Add the tofu cubes and cook for 4–5 minutes, flipping halfway, until golden brown on all sides.
- Remove the tofu from the skillet and set it aside on a plate.
- Add the remaining 1 tablespoon of vegetable oil to the same skillet.
- Sauté the minced garlic and grated ginger for 30 seconds until fragrant but not browned.
- Add the broccoli florets and carrot slices, stir-frying for 3 minutes until they brighten in color.
- Add the bell pepper slices and cook for another 2 minutes, keeping the veggies crisp-tender.
- Return the tofu to the skillet and pour in the soy sauce, tossing everything to coat evenly.
- Cook for 1 more minute, stirring constantly, until the sauce lightly glazes the ingredients.
Fresh from the pan, the tofu offers a slight crispness against the tender-crunch of the vegetables, all wrapped in a savory, ginger-kissed sauce. For a cozy twist, try serving it over quinoa or tucked into lettuce cups, letting each bite feel both wholesome and a little playful.
Chickpea and Spinach Stew
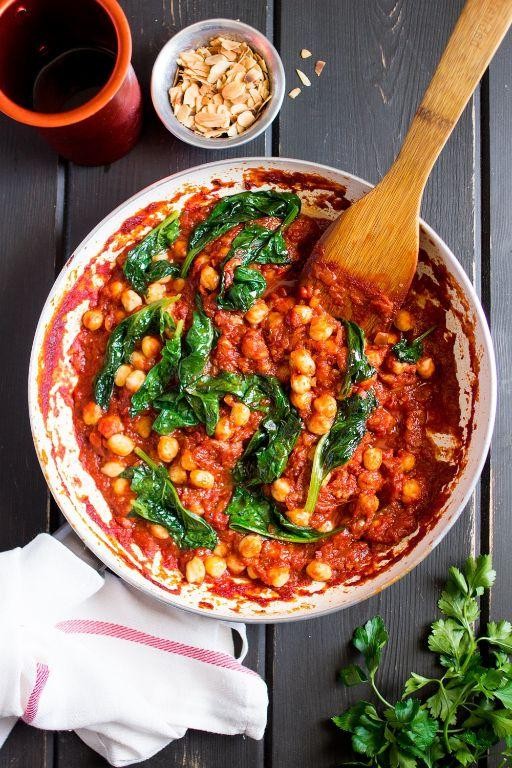
Under the soft glow of the kitchen light, I find myself drawn to the gentle simmer of this stew, a quiet comfort that unfolds slowly, like afternoon shadows stretching across the floor. It’s the kind of meal that asks for patience and rewards it with warmth, each ingredient softening into the next until the whole pot feels like a whispered secret.
2
servings15
minutes32
minutesIngredients
– Olive oil – 2 tbsp
– Onion – 1, chopped
– Garlic – 3 cloves, minced
– Chickpeas – 2 (15 oz) cans, drained and rinsed
– Vegetable broth – 3 cups
– Spinach – 5 oz
– Salt – 1 tsp
– Black pepper – ½ tsp
Instructions
1. Heat 2 tbsp olive oil in a large pot over medium heat until it shimmers.
2. Add 1 chopped onion and cook for 5–7 minutes, stirring occasionally, until translucent and fragrant.
3. Stir in 3 minced garlic cloves and cook for 1 minute until golden but not browned.
4. Pour in 2 cans of drained and rinsed chickpeas, coating them in the oil and onion mixture.
5. Add 3 cups vegetable broth, 1 tsp salt, and ½ tsp black pepper, then bring to a boil.
6. Reduce heat to low, cover the pot, and simmer for 20 minutes until the chickpeas are tender.
7. Stir in 5 oz spinach and cook for 3–4 minutes, just until wilted and bright green.
8. Remove from heat and let rest for 2 minutes to allow flavors to meld. Knowing how the spinach wilts into the broth, leaving flecks of green among the creamy chickpeas, makes each spoonful a quiet delight. Serve it over crusty bread to soak up the savory liquid, or with a sprinkle of red pepper flakes for a gentle heat that lingers like a memory.
Spaghetti Squash with Marinara Sauce
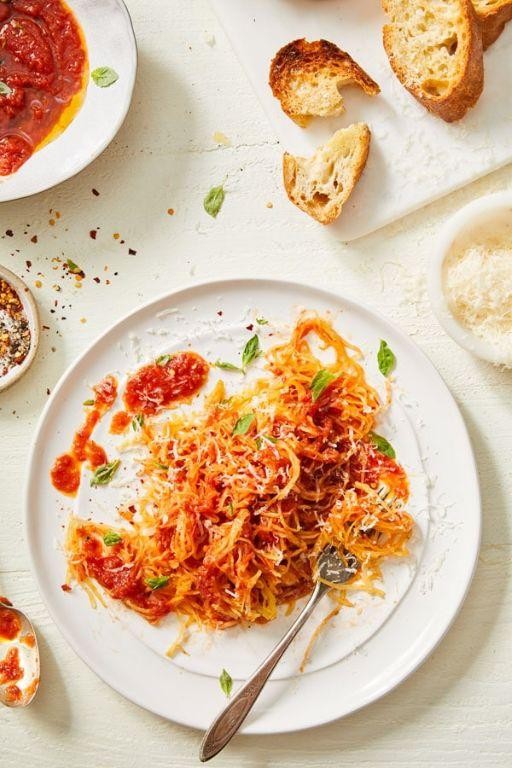
When the autumn light slants golden through the kitchen window, I find myself reaching for the humble spaghetti squash, its pale yellow shell promising something simple and satisfying. There’s a quiet comfort in transforming this unassuming vegetable into tender strands, a gentle process that feels like unwrapping a secret. Today, I’m pairing it with a classic marinara, letting the flavors speak for themselves without any fuss.
2
servings15
minutes60
minutesIngredients
– Spaghetti squash – 1 medium (about 3 pounds)
– Olive oil – 2 tablespoons
– Salt – ½ teaspoon
– Marinara sauce – 2 cups
– Fresh basil – ¼ cup chopped
Instructions
1. Preheat your oven to 400°F.
2. Carefully slice the spaghetti squash in half lengthwise using a sharp chef’s knife.
3. Scoop out all the seeds and stringy pulp from both halves with a spoon.
4. Drizzle 1 tablespoon of olive oil over the cut surface of each squash half.
5. Sprinkle ¼ teaspoon of salt evenly inside each squash half.
6. Place the squash halves cut-side down on a baking sheet lined with parchment paper.
7. Roast in the preheated oven for 45 minutes until the flesh is easily pierced with a fork.
8. While the squash roasts, pour the marinara sauce into a small saucepan.
9. Heat the sauce over medium-low heat for 15 minutes, stirring occasionally.
10. Remove the roasted squash from the oven and let it cool for 5 minutes until safe to handle.
11. Use a fork to scrape the squash flesh into long, spaghetti-like strands.
12. Divide the squash strands evenly between two serving bowls.
13. Ladle 1 cup of warm marinara sauce over each portion of squash.
14. Sprinkle 2 tablespoons of chopped fresh basil over each serving. Knowing how the roasted squash strands hold their delicate texture against the rich tomato sauce makes each bite feel both light and substantial. The subtle sweetness of the squash plays beautifully with the basil’s fresh brightness, creating a dish that feels nourishing in the truest sense—maybe try topping it with a soft-poached egg for a different kind of comfort.
Herbed Turkey Meatloaf

Years ago, I discovered this recipe tucked inside my grandmother’s weathered cookbook, its ink fading but the memory of her kitchen still vivid. Today, as autumn light filters through my window, I find myself returning to its simple comfort, the gentle rhythm of mixing and baking feeling like a quiet conversation across time. There’s something deeply soothing about how these humble ingredients transform into something that nourishes both body and spirit.
8
portions15
minutes50
minutesIngredients
Ground turkey – 1 lb
Breadcrumbs – ½ cup
Egg – 1
Milk – ¼ cup
Onion – ½ cup, finely chopped
Garlic – 2 cloves, minced
Fresh parsley – 2 tbsp, chopped
Fresh thyme – 1 tsp, chopped
Salt – 1 tsp
Black pepper – ½ tsp
Ketchup – ¼ cup
Instructions
1. Preheat your oven to 375°F and lightly grease a 9×5-inch loaf pan.
2. Combine 1 lb ground turkey, ½ cup breadcrumbs, 1 egg, ¼ cup milk, ½ cup finely chopped onion, 2 minced garlic cloves, 2 tbsp chopped parsley, 1 tsp chopped thyme, 1 tsp salt, and ½ tsp black pepper in a large mixing bowl.
3. Mix gently with your hands just until combined, being careful not to overwork the meat to keep the texture tender.
4. Transfer the mixture to the prepared loaf pan and press it evenly into all corners.
5. Spread ¼ cup ketchup evenly over the top of the meatloaf using the back of a spoon.
6. Bake at 375°F for 45-50 minutes, until the internal temperature reaches 165°F when tested with a meat thermometer inserted into the center.
7. Let the meatloaf rest in the pan for 10 minutes before slicing to allow the juices to redistribute.
8. Use a sharp knife to slice the meatloaf into 1-inch thick portions for serving.
Moist and fragrant with herbs, this meatloaf develops a beautiful caramelized crust while remaining incredibly tender inside. The subtle sweetness of the ketchup glaze balances perfectly with the savory turkey and aromatic thyme. I love serving thick slices over creamy mashed potatoes or crumbling leftovers into tomorrow’s pasta sauce for an entirely new meal.
Thai Green Curry with Vegetables

Holding this warm bowl feels like a quiet comfort, the steam carrying scents of lemongrass and coconut that fill my kitchen with gentle memories of shared meals and rainy afternoons. Sometimes the simplest dishes become the ones we return to again and again, each spoonful a small meditation on flavor and familiarity.
2
servings15
minutes35
minutesIngredients
- Thai green curry paste – 3 tbsp
- Coconut milk – 1 can (13.5 oz)
- Vegetable broth – 1 cup
- Bell peppers – 2, sliced
- Zucchini – 1, sliced
- Carrots – 2, sliced
- Basil leaves – ¼ cup
- Jasmine rice – 1 cup
- Water – 2 cups
- Vegetable oil – 1 tbsp
Instructions
- Rinse 1 cup jasmine rice under cold running water until the water runs clear.
- Combine the rinsed rice with 2 cups water in a medium saucepan.
- Bring the rice to a boil over high heat, then immediately reduce heat to low and cover the pan.
- Simmer the rice for 15 minutes, then remove from heat and let it steam, covered, for 10 more minutes.
- Heat 1 tbsp vegetable oil in a large pot over medium heat until it shimmers.
- Add 3 tbsp Thai green curry paste and cook for 2 minutes, stirring constantly until fragrant.
- Pour in 1 can coconut milk and 1 cup vegetable broth, stirring to combine completely.
- Bring the curry to a gentle simmer over medium-low heat, stirring occasionally.
- Add 2 sliced carrots and cook for 5 minutes until slightly softened.
- Add 2 sliced bell peppers and 1 sliced zucchini, stirring to coat with the curry sauce.
- Simmer the vegetables for 8-10 minutes until tender but still slightly crisp.
- Stir in ¼ cup basil leaves just before serving.
Just spooned over that fluffy jasmine rice, the curry creates a beautiful contrast between the creamy coconut broth and the crisp-tender vegetables. The heat builds slowly, warming from within rather than overwhelming the palate, while the fresh basil leaves provide little bursts of brightness throughout. I love serving this in wide, shallow bowls where the vibrant green broth can pool around the rice, sometimes topping it with extra basil or a squeeze of lime for those who want a brighter finish.
Roasted Cauliflower and Quinoa Bowl
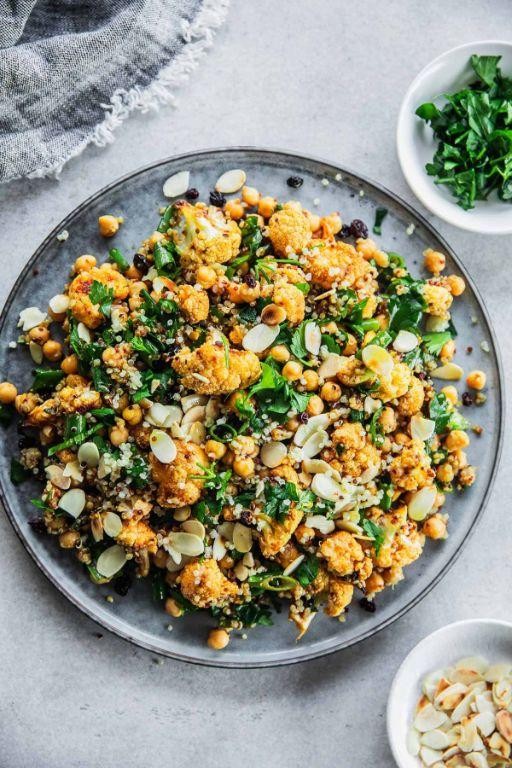
When the afternoon light slants through the kitchen window, I find myself craving something simple yet deeply satisfying, something that feels like a quiet conversation between ingredients. This roasted cauliflower and quinoa bowl has become my gentle refuge on such days, a meal that unfolds slowly and nourishes completely.
3
portions15
minutes35
minutesIngredients
Cauliflower – 1 medium head
Olive oil – 2 tbsp
Salt – ½ tsp
Black pepper – ¼ tsp
Quinoa – 1 cup
Water – 2 cups
Lemon – 1
Parsley – ¼ cup chopped
Instructions
1. Preheat your oven to 425°F and line a baking sheet with parchment paper.
2. Cut the cauliflower into 1-inch florets, making sure they’re roughly the same size for even roasting.
3. Toss the cauliflower florets with 1 tablespoon olive oil, ½ teaspoon salt, and ¼ teaspoon black pepper in a large bowl.
4. Spread the cauliflower in a single layer on the prepared baking sheet, giving each piece space to caramelize properly.
5. Roast for 25-30 minutes until the edges are deeply golden brown and the stems are tender when pierced with a fork.
6. While the cauliflower roasts, rinse 1 cup quinoa thoroughly in a fine-mesh strainer to remove the natural coating that can make it bitter.
7. Combine the rinsed quinoa with 2 cups water in a medium saucepan and bring to a boil over high heat.
8. Reduce heat to low, cover the saucepan, and simmer for 15 minutes until the quinoa has absorbed all the water and the grains have unfurled their little tails.
9. Remove the quinoa from heat and let it stand covered for 5 minutes to finish steaming and become fluffy.
10. Fluff the quinoa with a fork, then stir in the remaining 1 tablespoon olive oil to keep the grains separate and glossy.
11. Zest the entire lemon, then juice half of it, catching any seeds with your other hand.
12. Gently fold the roasted cauliflower, lemon zest, lemon juice, and chopped parsley into the quinoa.
Zesty lemon brightens the earthy roasted cauliflower, while the quinoa provides a delicate, nutty base that holds everything together. I love serving this warm in a shallow bowl, watching how the golden-brown cauliflower pieces nestle into the fluffy grains, sometimes topping it with an extra sprinkle of parsley for that fresh green contrast.
Conclusion
Ultimately, these 32 healthy supper recipes make nutritious evenings deliciously simple. We hope you find new favorites to add to your weekly rotation! Don’t forget to share which recipes you loved most in the comments below and pin this article on Pinterest to save these ideas for busy nights ahead.


