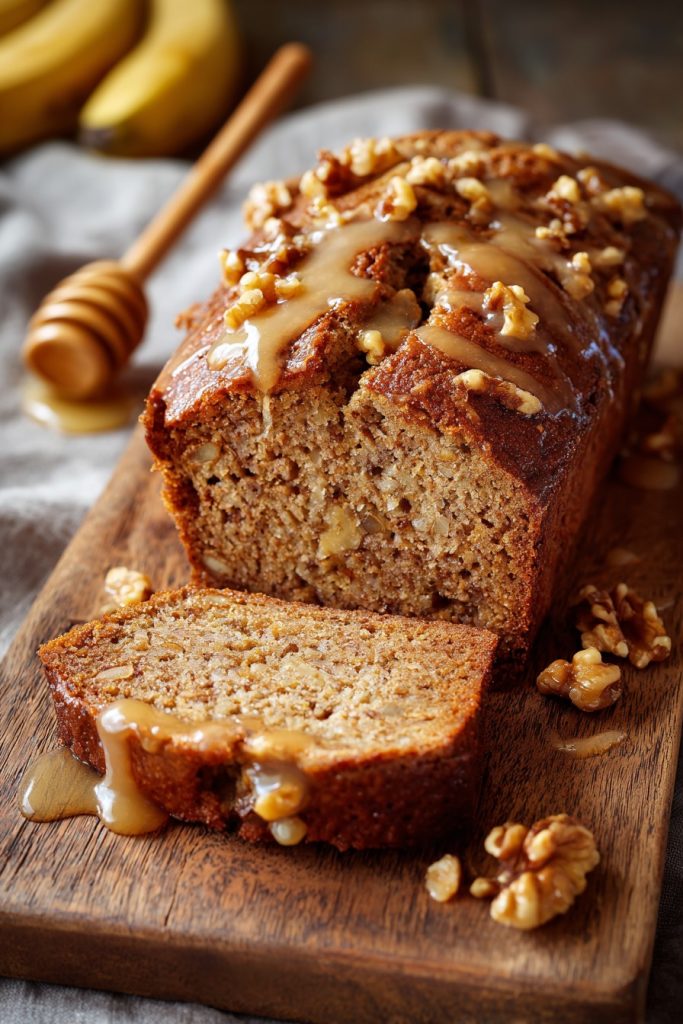
You know those bananas turning brown on your counter? They’re about to become your new best friend for quick, healthy breakfasts and snacks that your kids will actually eat without the morning battle. Years of parenting have taught me that the secret to surviving busy mornings is having grab-and-go options that don’t sacrifice nutrition for convenience.
Why This Recipe Works
- Greek yogurt adds protein that keeps everyone full longer, meaning fewer mid-morning snack requests and meltdowns when you’re trying to get work done or run errands
- Using overripe bananas means you’re reducing food waste while naturally sweetening the recipe without needing excessive sugar – it’s a win for your wallet and your family’s health
- The one-bowl method cuts cleanup time in half, which is crucial when you’re juggling multiple kids’ schedules and barely have time to breathe let alone scrub multiple mixing bowls
- Freezer-friendly portions let you make a big batch on Sunday and have ready-to-go breakfasts all week, eliminating the 6 AM panic about what to feed hungry little mouths
- Versatile enough to accommodate picky eaters – you can add chocolate chips for the resistant ones or keep it plain for the more adventurous palates
Ingredients
- 3 very ripe medium bananas, mashed with brown spots
- 1 cup plain Greek yogurt (I prefer full-fat for creaminess)
- 2 large eggs, at room temperature
- 1/3 cup maple syrup or honey
- 1 teaspoon vanilla extract
- 1 3/4 cups whole wheat flour
- 1 teaspoon baking soda
- 1/2 teaspoon salt
- 1 teaspoon cinnamon
- 1/2 cup chopped walnuts or chocolate chips (optional)
- Cooking spray or butter for greasing
Equipment Needed
- 1 large mixing bowl
- Standard loaf pan (9×5 inch)
- Fork or potato masher
- Measuring cups and spoons
- Rubber spatula
- Wire rack for cooling
- Toothpick or cake tester
Instructions
Prepare Your Ingredients and Pan
Before you even think about mixing, take two minutes to get everything organized. Preheat your oven to 350°F and generously grease your 9×5 inch loaf pan with cooking spray or butter – don’t skimp here or you’ll be scraping stuck banana bread out for days. Mash those spotty bananas right in your large mixing bowl using a fork or potato masher until they’re relatively smooth with just a few small chunks for texture. Measure out all your other ingredients so they’re ready to go – this prevents the panic of realizing you’re out of baking soda when your hands are covered in batter. Pro tip: If your eggs are straight from the fridge, place them in a bowl of warm water for 5 minutes to bring them to room temperature, which helps everything incorporate more smoothly.
Combine Wet Ingredients
Incorporate Dry Ingredients
Here’s where you need to work quickly but gently. Add the whole wheat flour, baking soda, salt, and cinnamon directly to your wet ingredients. Use your spatula to fold everything together until just combined – you should still see a few streaks of flour but no large dry patches. Overmixing is the enemy of tender banana bread because it develops the gluten in the flour, leading to a tough, dense texture that nobody wants. The whole wheat flour adds fiber and nutrients while the cinnamon gives that warm, comforting flavor that makes this feel like a treat. If you’re including walnuts or chocolate chips, fold in most of them now, reserving that small amount for topping.
Bake to Perfection
Transfer your batter to the prepared loaf pan and spread it evenly with your spatula. Sprinkle the reserved mix-ins over the top if using, then slide it into your preheated 350°F oven. Set your timer for 45 minutes – this is when you’ll do your first check. The bread should be golden brown on top and starting to pull away from the sides of the pan. Insert a toothpick into the center – if it comes out with a few moist crumbs attached, it’s perfect. If there’s wet batter, continue baking in 5-minute increments until done. Total baking time typically ranges from 50-65 minutes depending on your oven and how moist your bananas were.
Cool and Store Properly
Once baked, remove the loaf from the oven and let it cool in the pan on a wire rack for exactly 15 minutes – this allows it to set up enough to handle but stay warm. After 15 minutes, run a knife around the edges and carefully turn it out onto the wire rack to cool completely. I know it’s tempting to slice into warm banana bread, but waiting until it’s fully cooled gives you cleaner slices and better texture. For storage, wrap tightly in plastic wrap or place in an airtight container at room temperature for 3 days, in the refrigerator for up to a week, or freeze individual slices for up to 3 months.
Tips and Tricks
If you’re really pressed for time, you can mash the bananas directly in the measuring cup you’ll use for the Greek yogurt – one less bowl to wash. For families with varying tastes, consider baking this in a muffin tin instead of a loaf pan – you’ll get 12 standard muffins that bake in 18-22 minutes, and you can customize each batch with different mix-ins. When freezing, slice the cooled loaf and place parchment paper between slices before wrapping the whole thing in plastic wrap and foil – this lets you grab individual slices without thawing the entire loaf. If your bananas aren’t ripe enough, you can speed up the process by baking them (peels on) at 300°F for 15-20 minutes until the skins blacken, then let them cool before mashing. For extra protein that picky eaters won’t notice, replace 1/4 cup of the flour with vanilla or unflavored protein powder – it blends right in with the whole wheat flour. If you only have all-purpose flour, use 1 1/2 cups instead of 1 3/4 cups whole wheat since all-purpose is more absorbent. To make this dairy-free, use your favorite plant-based yogurt alternative, though the texture might be slightly different. For gluten-free families, substitute with 1 3/4 cups of your preferred gluten-free flour blend with 1/2 teaspoon xanthan gum added. When measuring flour, spoon it into your measuring cup and level it off with a knife rather than scooping directly from the bag – this prevents packing too much flour and ending up with dry bread.
Recipe Variations
- Chocolate Lover’s Version: Replace 1/4 cup of flour with 1/4 cup cocoa powder and use 1/2 cup chocolate chips instead of walnuts. The cocoa adds richness while the chocolate chips make it feel like dessert for breakfast – perfect for motivating sleepy kids on school mornings.
- Nut-Free School Safe: Omit walnuts and add 1/2 cup sunflower seeds or pumpkin seeds instead. Many schools have nut-free policies, and seeds provide similar crunch and nutrition without the allergy concerns while keeping the texture interesting for kids who might otherwise reject “healthy” bread.
- Apple Cinnamon Twist: Replace one banana with 1 cup finely chopped apple and increase cinnamon to 1 1/2 teaspoons. This stretches your banana supply while adding different fruit nutrition, and the extra cinnamon makes your kitchen smell amazing – great for autumn mornings or when apples are on sale.
- Lemon Blueberry Boost: Add zest of one lemon to the wet ingredients and fold in 1 cup fresh or frozen blueberries instead of nuts. The lemon brightens all the flavors while blueberries add antioxidants and natural sweetness – plus the purple streaks make it visually appealing to children who eat with their eyes first.
- Double Protein Power: Use 1 1/2 cups Greek yogurt instead of 1 cup and reduce maple syrup to 1/4 cup. This creates an extra-protein-packed version perfect for active teens or mornings when you know lunch might be delayed – it keeps everyone satisfied longer without sacrificing flavor.
Frequently Asked Questions
Can I make this recipe without eggs for allergies?
Absolutely – for each egg, you can substitute 1/4 cup unsweetened applesauce or 1 tablespoon ground flaxseed mixed with 3 tablespoons water (let it sit for 5 minutes to thicken). The applesauce version will be slightly denser but still delicious, while the flax version adds fiber and works well with the whole wheat flour. Just note that without eggs, the bread might not rise quite as high and will be more delicate when slicing, so use a sharp serrated knife and gentle sawing motion. Both substitutions work well for vegan families too when combined with plant-based yogurt.
My bananas aren’t ripe enough – what can I do?
If your bananas are still yellow with minimal spots, you have a few options. The quickest method is to bake them at 300°F for 15-20 minutes until the skins blacken – let them cool completely before peeling and mashing. Alternatively, you can microwave peeled bananas for 1-2 minutes until soft, though this makes them very watery so you might need to reduce the Greek yogurt slightly. For planning ahead, freeze bananas when they’re ripe and thaw them when needed – they’ll be perfect for baking and release extra liquid that makes the bread even moister.
Can I double this recipe for freezing?
Doubling works beautifully – simply use two loaf pans or make one loaf and 12 muffins. The muffins freeze particularly well and are perfect for individual portions. When freezing, cool completely, wrap tightly in plastic wrap, then foil, and label with the date. Frozen banana bread keeps for 3 months and thaws perfectly at room temperature in about 2 hours or in the microwave in 30-second bursts. I often double the recipe on weekends so I have emergency breakfasts and snacks ready for busy weeks.
Why did my banana bread sink in the middle?
A sunken middle usually means either too much leavening (check your baking soda measurement) or underbaking. Make sure your baking soda is fresh – it should fizz when mixed with vinegar. Also, ovens can have hot spots, so rotate your pan halfway through baking and use an oven thermometer to ensure accurate temperature. If the top is browning too quickly while the center remains underdone, tent with foil for the last 15 minutes of baking. Proper cooling is also crucial – don’t skip the 15 minutes in the pan before transferring to a wire rack.
Can I use different types of yogurt?
You can use any plain yogurt, but Greek yogurt works best because its thickness provides structure and protein without adding excess moisture. Regular plain yogurt will make the batter thinner and might require 5-10 extra minutes of baking time. Flavored yogurts will add extra sugar and might overpower the banana flavor. For dairy-free options, coconut or almond-based Greek-style yogurts work well, though the flavor will be slightly different. Avoid using yogurt with fruit chunks or added gelatin as they can create uneven texture.
Summary
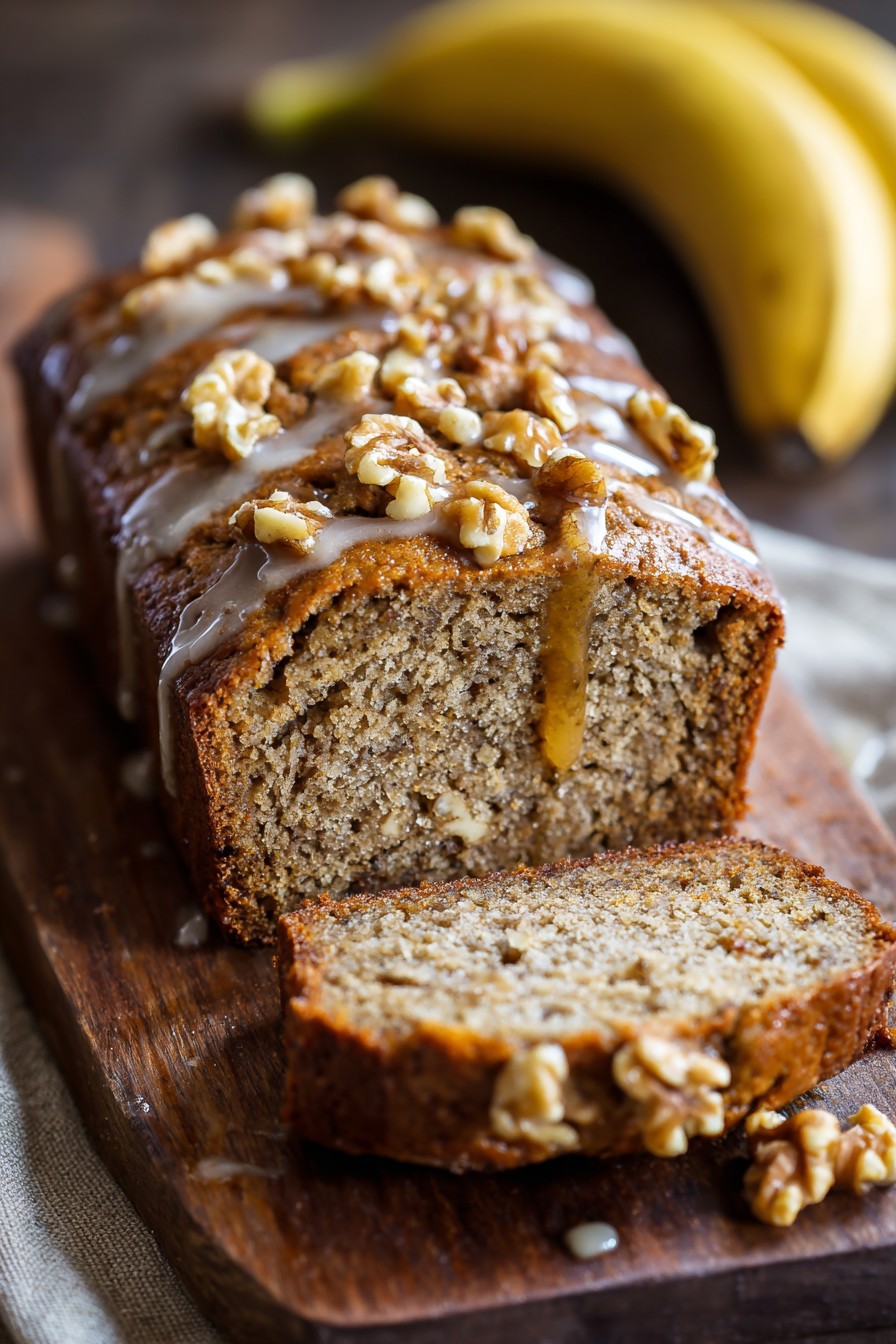
This healthy banana bread with Greek yogurt solves the busy parent’s breakfast dilemma with minimal cleanup, maximum nutrition, and freezer-friendly convenience that keeps mornings stress-free and kids happily fed.
Healthy Banana Bread Greek Yogurt
4
servings15
minutes55
minutesIngredients
Instructions
- 1 Preheat oven to 350°F and grease a 9x5 inch loaf pan
- 2 Mash bananas in large bowl, then add yogurt, eggs, maple syrup, and vanilla
- 3 Add flour, baking soda, salt, and cinnamon, folding until just combined
- 4 Fold in optional mix-ins, reserving 2 tablespoons for topping
- 5 Transfer to prepared pan, sprinkle with reserved mix-ins, and bake 50-65 minutes until toothpick comes out clean
- 6 Cool in pan 15 minutes, then transfer to wire rack to cool completely