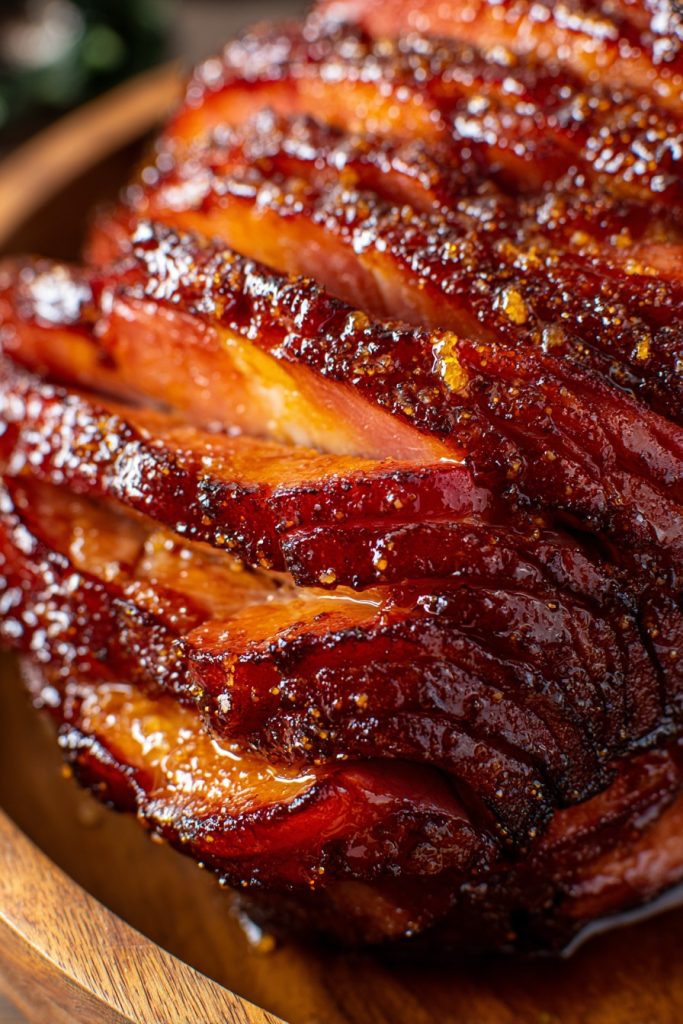
Crack open the holiday excitement because we’re diving into the most incredible brown sugar glazed ham you’ll ever taste! This isn’t just any ham recipe—this is the show-stopping centerpiece that will have your guests begging for seconds and demanding your secret. Get ready to transform that beautiful ham into a sticky, sweet, caramelized masterpiece that crackles with flavor in every single bite!
Why This Recipe Works
- The brown sugar creates this incredible caramelized crust that crackles when you slice into it, giving you that perfect sweet-and-savory balance that makes taste buds dance with joy!
- Using both Dijon mustard and pineapple juice in the glaze adds this amazing tangy complexity that cuts through the sweetness and enhances the ham’s natural savory flavors in the most spectacular way!
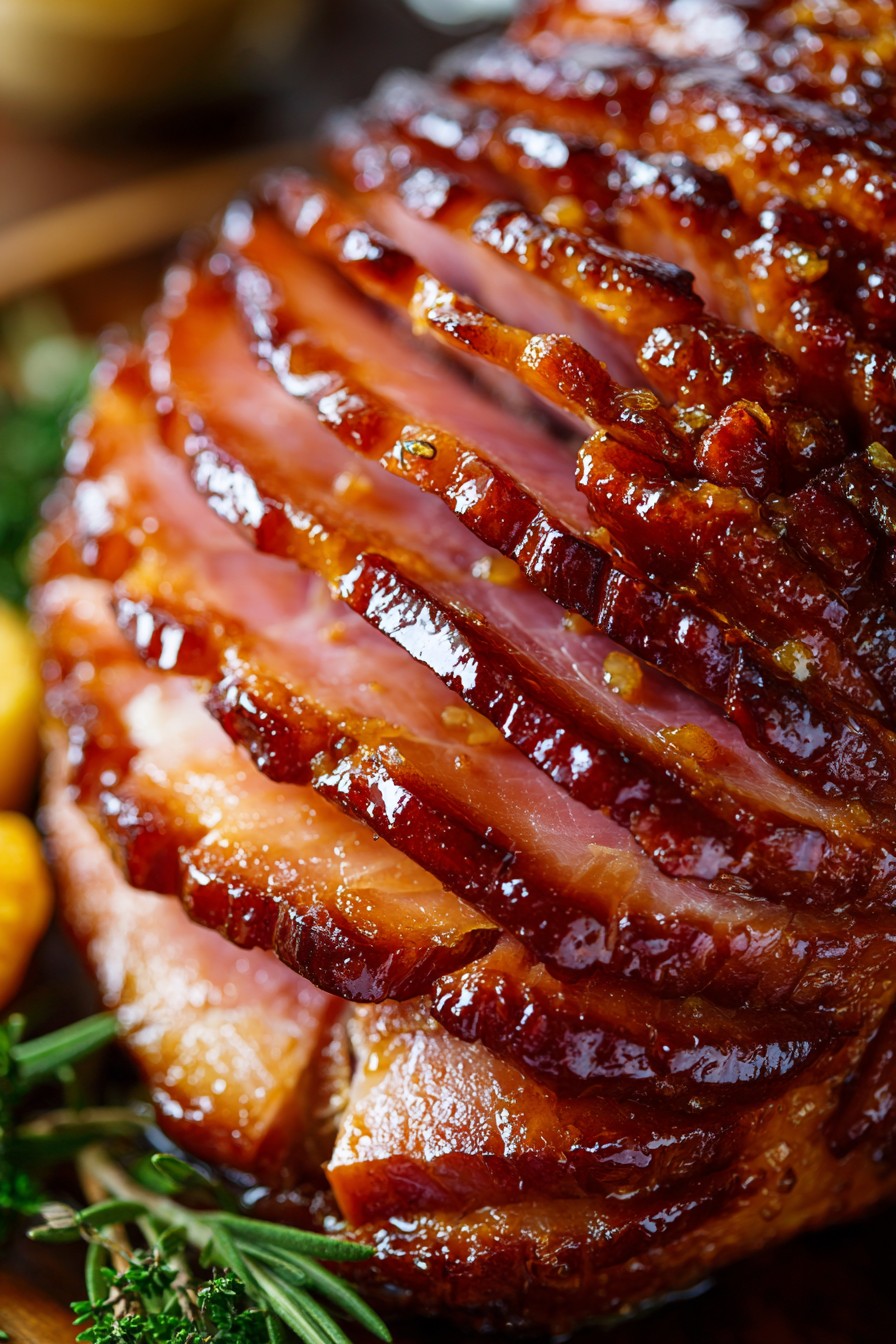
- Scoring the ham in that beautiful diamond pattern isn’t just for looks—it creates all these little pockets for the glaze to seep deep into the meat, ensuring every single slice is packed with flavor from edge to center!
- The low-and-slow baking method followed by that final high-heat blast gives you the most tender, juicy interior while creating that gorgeous, sticky, picture-perfect exterior that will make you the star of any gathering!
- This glaze recipe is incredibly versatile and forgiving, meaning even if you’re new to cooking ham, you’re guaranteed to create something absolutely spectacular that will have everyone thinking you’re a culinary genius!
Ingredients
- 1 (8-10 pound) fully cooked spiral-cut ham
- 1 cup packed dark brown sugar
- 1/2 cup Dijon mustard
- 1/4 cup pineapple juice
- 2 tablespoons apple cider vinegar
- 1 teaspoon ground cinnamon
- 1/2 teaspoon ground cloves
- 1/4 teaspoon cayenne pepper (optional for heat)
- 1/4 cup unsalted butter, melted
Equipment Needed
- Large roasting pan with rack
- Medium saucepan
- Sharp knife
- Pastry brush
- Measuring cups and spoons
- Aluminum foil
- Meat thermometer
- Mixing bowl
- Whisk
Instructions
Prep Your Ham for Glory
Get that beautiful ham ready for its flavor transformation by placing it cut-side down on the rack in your roasting pan—this positioning is absolutely crucial because it allows all those glorious glaze drippings to cascade down through the spiral cuts, infusing every single layer with sweet, sticky goodness! Preheat your oven to 325°F and while that’s heating up, take your sharp knife and if your ham isn’t already spiral-cut, create those signature diamond patterns across the fat cap about 1/4-inch deep—this isn’t just decorative, it creates hundreds of little flavor channels for our amazing glaze to penetrate deep into the meat! Now here’s a pro tip: if you want extra flavor infusion, gently separate some of those spiral slices and tuck little bits of the glaze mixture between the layers before you even start baking—this creates surprise pockets of caramelized goodness throughout the entire ham!
Create the Magical Glaze
Initial Baking and Glazing
It’s time to work some oven magic! Place your prepared ham in the preheated 325°F oven uncovered and let it bake for about 1 hour and 15 minutes—this initial baking period allows the ham to heat through gently while rendering some of that beautiful fat that will help our glaze adhere perfectly! After that first hour, carefully remove the ham from the oven and using your pastry brush, generously apply about two-thirds of your amazing glaze mixture, making sure to get it into all those scored lines and spiral cuts—be thorough here because this first glaze application creates the foundation for that incredible crust! Here’s a crucial tip: brush with the grain of the meat rather than against it to help the glaze settle into all those nooks and crannies instead of just sliding off the surface—this technique makes all the difference in achieving that perfect glaze coverage!
Final Glaze and Temperature Check
Now we’re building up to that spectacular finish! Return the glazed ham to the oven and continue baking for another 30-45 minutes, then pull it out once more for your final glaze application—this time, use the remaining third of your glaze mixture and really lay it on thick, focusing on any spots that might have absorbed the first coat more quickly! After this second glaze, insert your meat thermometer into the thickest part of the ham without touching bone—you’re looking for that perfect internal temperature of 140°F, which indicates your ham is heated all the way through while remaining incredibly juicy and tender! If you notice any areas getting too dark too quickly, simply tent those spots with small pieces of aluminum foil to prevent burning while the rest of the ham catches up!
The Grand Finale – Caramelization
This is where the magic really happens—the grand caramelization finale! Once your ham reaches that perfect 140°F internal temperature, increase your oven temperature to 425°F and let that beautiful ham bake for one final 10-15 minutes, watching closely as the glaze bubbles, thickens, and transforms into that stunning, crackly, caramelized crust we’ve been working toward! You’ll know it’s ready when the entire surface is glossy, deeply browned, and you can see those sugar crystals sparkling in the light—the aroma filling your kitchen will be absolutely intoxicating with notes of caramel, spice, and savory ham goodness! Remove the ham from the oven and let it rest for 15-20 minutes before slicing—this resting period is absolutely essential because it allows the juices to redistribute throughout the meat and gives the glaze time to set up properly so it doesn’t just slide off when you cut into it!
Tips and Tricks
Let’s talk next-level ham mastery! If you really want to take your glazed ham to extraordinary heights, consider scoring your ham even if it’s already spiral-cut—creating additional shallow cuts in a diamond pattern across the surface gives you double the glaze-holding capacity and creates that beautiful presentation that will have your guests snapping pictures before they even take a bite! For the most incredible flavor development, you can actually prepare your glaze a day in advance and let those spices meld together in the refrigerator overnight—the cinnamon and cloves will infuse the entire mixture with deeper, more complex notes that will make your ham taste like it came from a five-star restaurant! When applying your glaze, work in sections rather than trying to cover the entire ham at once—focus on one area, really working the glaze into all the nooks and crannies, then move to the next section to ensure even coverage and maximum flavor in every single bite!
Don’t be afraid to get creative with your glaze ingredients either—while our base recipe is absolutely phenomenal, you can substitute the pineapple juice with orange juice for a brighter citrus note, or even use ginger ale for a different kind of sweetness that plays beautifully with the brown sugar! If you’re concerned about the glaze burning during that final high-heat blast, you can achieve similar caramelization by using your oven’s broiler function for just 2-3 minutes instead—but watch it like a hawk because sugar goes from perfectly caramelized to completely burnt in seconds under the broiler! For the most tender results, always bring your ham to room temperature before baking—taking it straight from refrigerator to oven can result in uneven cooking and a less juicy final product, so plan ahead and let it sit on your counter for about 45-60 minutes before you start prepping!
When selecting your ham, opt for one with a good fat cap if possible—that layer of fat isn’t just for flavor, it actually protects the meat during cooking and creates the most amazing textural contrast between the crispy glazed exterior and the tender interior! If you find yourself without a pastry brush, you can use a silicone basting brush or even carefully spoon the glaze over the ham and use the back of the spoon to spread it evenly—the key is getting that glaze into all the crevices regardless of what tool you use! And here’s a fantastic leftover tip: save those amazing pan drippings and glaze remnants to make the most incredible ham gravy or to use as a glaze for roasted vegetables later in the week—nothing goes to waste when you’re working with flavors this spectacular!
Recipe Variations
- Maple-Bourbon Bliss: Replace the pineapple juice with real maple syrup and add 2 tablespoons of bourbon to the glaze mixture—the bourbon adds this incredible depth and complexity that pairs magically with the smokiness of the ham while the maple syrup creates a richer, more nuanced sweetness that will have your guests wondering what your secret ingredient is! The alcohol cooks off during baking, leaving behind just that wonderful bourbon essence that makes this variation perfect for sophisticated holiday gatherings or when you really want to impress your foodie friends with something extraordinary.
- Honey-Orange Zest Explosion: Swap the brown sugar for honey and add the zest of one orange to your glaze mixture—this creates a brighter, fruit-forward flavor profile that’s absolutely refreshing and perfect for spring gatherings or when you want something a little lighter than the traditional brown sugar version! The orange zest adds these beautiful citrus notes that cut through the richness of the ham, while the honey gives you a different kind of sweetness that’s floral and delicate rather than deep and caramel-like.
- Spicy Pineapple Fiesta: Keep the pineapple juice but add 1-2 tablespoons of finely chopped jalapeño and a teaspoon of chili powder to the glaze—this creates an amazing sweet-heat combination that will wake up your taste buds and add this incredible excitement to every single bite! The spice level is completely customizable based on how much jalapeño you use, making this variation perfect for those who love a little kick with their sweet, or for adding some unexpected excitement to your traditional holiday spread.
- Apple Cider Wonder: Substitute the pineapple juice with reduced apple cider and add a pinch of nutmeg to the spice mixture—this autumn-inspired variation fills your kitchen with the most incredible fall aromas and creates a glaze that tastes like the essence of the season in every delicious bite! Reducing the apple cider first concentrates those apple flavors and natural sugars, giving you a more complex fruit note that pairs beautifully with pork and makes this variation ideal for Thanksgiving or any cozy fall gathering.
Frequently Asked Questions
Can I make this glaze ahead of time?
Absolutely, and it actually gets better when you do! You can prepare the brown sugar glaze up to 3 days in advance and store it in an airtight container in the refrigerator—just make sure to give it a good stir before using and gently reheat it on the stove or in the microwave until it returns to that brushable consistency. The extra time allows all those amazing spices to really meld together and develop deeper, more complex flavors that will make your ham taste even more incredible! When you’re ready to use it, if it’s too thick after refrigeration, simply add a tablespoon of warm water or additional pineapple juice and whisk until it reaches the perfect brushing consistency for that beautiful, even application.
What if I don’t have a spiral-cut ham?
No problem at all—this glaze works magnificently on any type of ham! If you’re working with a non-spiral-cut ham, you’ll want to score the surface in that beautiful diamond pattern about 1/4-inch deep before applying the glaze, which creates those crucial channels for the glaze to penetrate and ensures every bite is packed with flavor. The cooking time might be slightly longer since solid hams take a bit more time to heat through, so just keep checking that internal temperature until it reaches 140°F in the thickest part. The finished result will be equally spectacular, with that same incredible caramelized crust and tender, juicy interior that makes this recipe so unforgettable!
How should I store leftovers?
Leftover glazed ham is practically a gift that keeps on giving! Once completely cooled, store your ham in an airtight container in the refrigerator for up to 5 days, making sure to include some of that amazing glaze from the pan to keep the meat moist and flavorful. For longer storage, you can freeze sliced ham in freezer-safe bags or containers for up to 2 months—just be aware that the glaze texture might change slightly upon thawing, but the flavor will still be absolutely fantastic. Leftover ham is incredibly versatile—use it in sandwiches, breakfast scrambles, soups, casseroles, or even chopped up in salads for days of delicious meals that remind you of that spectacular main event!
Can I use light brown sugar instead of dark?
You absolutely can, but there are some important flavor differences to consider! Light brown sugar has a milder, more delicate molasses flavor that will give you a lighter-colored glaze with a subtler sweetness, while dark brown sugar contains more molasses, resulting in that deeper, richer flavor and darker caramel color that really makes this recipe shine. If you only have light brown sugar on hand, your ham will still be delicious, but for that classic, robust brown sugar glaze flavor, dark brown sugar is definitely the way to go. You could even mix them half and half if you want something right in the middle—the beauty of this recipe is its flexibility while still delivering amazing results every single time!
Summary
This brown sugar glazed ham creates the most spectacular centerpiece with its perfect sweet-savory balance, incredible caramelized crust, and tender, juicy interior that will have everyone at your table cheering for more! The combination of brown sugar, Dijon mustard, and warm spices transforms ordinary ham into an extraordinary culinary experience that’s surprisingly simple to achieve yet tastes like you spent all day in the kitchen. Whether it’s for holidays, special occasions, or just because you deserve something amazing, this recipe delivers show-stopping results every single time!
Brown Sugar Glazed Ham
4
servings20
minutes2
minutesIngredients
Instructions
- 1 Preheat oven to 325°F. Place ham cut-side down on rack in roasting pan. If not spiral-cut, score surface in diamond pattern.
- 2 In saucepan, combine brown sugar, mustard, pineapple juice, vinegar, cinnamon, cloves, and cayenne. Whisk over medium heat until sugar dissolves, 3-5 minutes. Remove from heat, stir in melted butter.
- 3 Bake ham uncovered for 1 hour 15 minutes. Remove from oven and brush with 2/3 of glaze, working into all cuts and scores.
- 4 Return to oven for 30-45 minutes. Remove and apply remaining glaze. Check internal temperature—should reach 140°F.
- 5 Increase oven to 425°F. Bake 10-15 minutes until glaze is bubbly and caramelized. Rest 15-20 minutes before slicing.