Ready to transform ordinary corn into an extraordinary flavor explosion? Rushing to share this game-changing grilled corn recipe that will make you the undisputed grill master of every backyard bash! Get ready for smoky, buttery, perfectly charred ears of corn that will have everyone begging for your secret—this isn’t just side dish territory, we’re talking main event status!
Why This Recipe Works
- The high-heat grilling creates incredible caramelization that brings out the corn’s natural sweetness while adding that signature smoky flavor you can only get from live fire cooking
- Soaking the corn in water before grilling ensures the husks don’t burn and creates steam that keeps the kernels incredibly moist and tender throughout the cooking process
- Our signature compound butter mixture melts into every nook and cranny, infusing each bite with garlic, herbs, and just the right amount of spice that complements without overwhelming the corn’s natural flavor
- The dual cooking method—starting with husks on then finishing with direct heat—gives you the best of both worlds: steamed tenderness and that beautiful charred exterior that makes grilled corn so irresistible
- Customizable toppings mean everyone can create their perfect corn experience, from classic butter lovers to adventurous spice seekers looking to turn up the heat
Ingredients
- 8 ears fresh corn with husks intact
- 1/2 cup unsalted butter, softened
- 2 tablespoons fresh lime juice
- 1 teaspoon chili powder
- 1/2 teaspoon garlic powder
- 1/4 teaspoon cayenne pepper (optional for heat)
- 2 tablespoons chopped fresh cilantro
- 1 teaspoon kosher salt
- 1/2 teaspoon black pepper
- 1/4 cup crumbled cotija cheese
- 2 tablespoons chopped fresh parsley for garnish
- 1 lime, cut into wedges for serving
Equipment Needed
- Gas or charcoal grill
- Large bowl or clean sink for soaking
- Mixing bowl
- Pastry brush or spoon for butter application
- Tongs
- Cutting board
- Sharp knife
- Aluminum foil
- Kitchen timer
Instructions
Prepare the Corn and Flavor Butter
Get ready to create flavor magic! Start by carefully peeling back the corn husks without removing them completely—you want to create a little blanket that you can wrap back around the corn later. Remove all the silk threads that cling to the kernels (this is crucial for that perfect texture), then gently pull the husks back up to cover the corn. Now for the soaking party! Submerge all your prepared corn in a large bowl or clean sink filled with cold water for at least 30 minutes—this hydrates the husks so they steam the corn instead of burning on the grill. While that’s happening, let’s make the most incredible compound butter you’ve ever tasted! In a medium bowl, combine the softened butter, fresh lime juice, chili powder, garlic powder, cayenne pepper (if you’re feeling spicy), chopped cilantro, kosher salt, and black pepper. Mix everything together until it’s beautifully combined and fragrant. Pro tip: Make extra of this butter because your guests will want to put it on everything from bread to potatoes!
Fire Up the Grill and Initial Cooking
It’s time to bring the heat! Preheat your grill to medium-high heat, aiming for that sweet spot around 400°F where magic happens. If you’re using a charcoal grill, wait until the coals are covered with gray ash and glowing red—that’s your signal they’re perfectly ready. While the grill heats up, drain your soaked corn and give each ear a gentle shake to remove excess water. Place the corn directly on the grill grates with the husks still on, arranging them in a single layer with some space between each ear for even cooking. Close the lid and let the corn cook for 15-20 minutes, turning every 5 minutes with your tongs to ensure all sides get that beautiful heat exposure. You’ll know it’s working when you start smelling that incredible smoky corn aroma wafting through the air—that’s the sound of summer success!
Unwrap and Char to Perfection
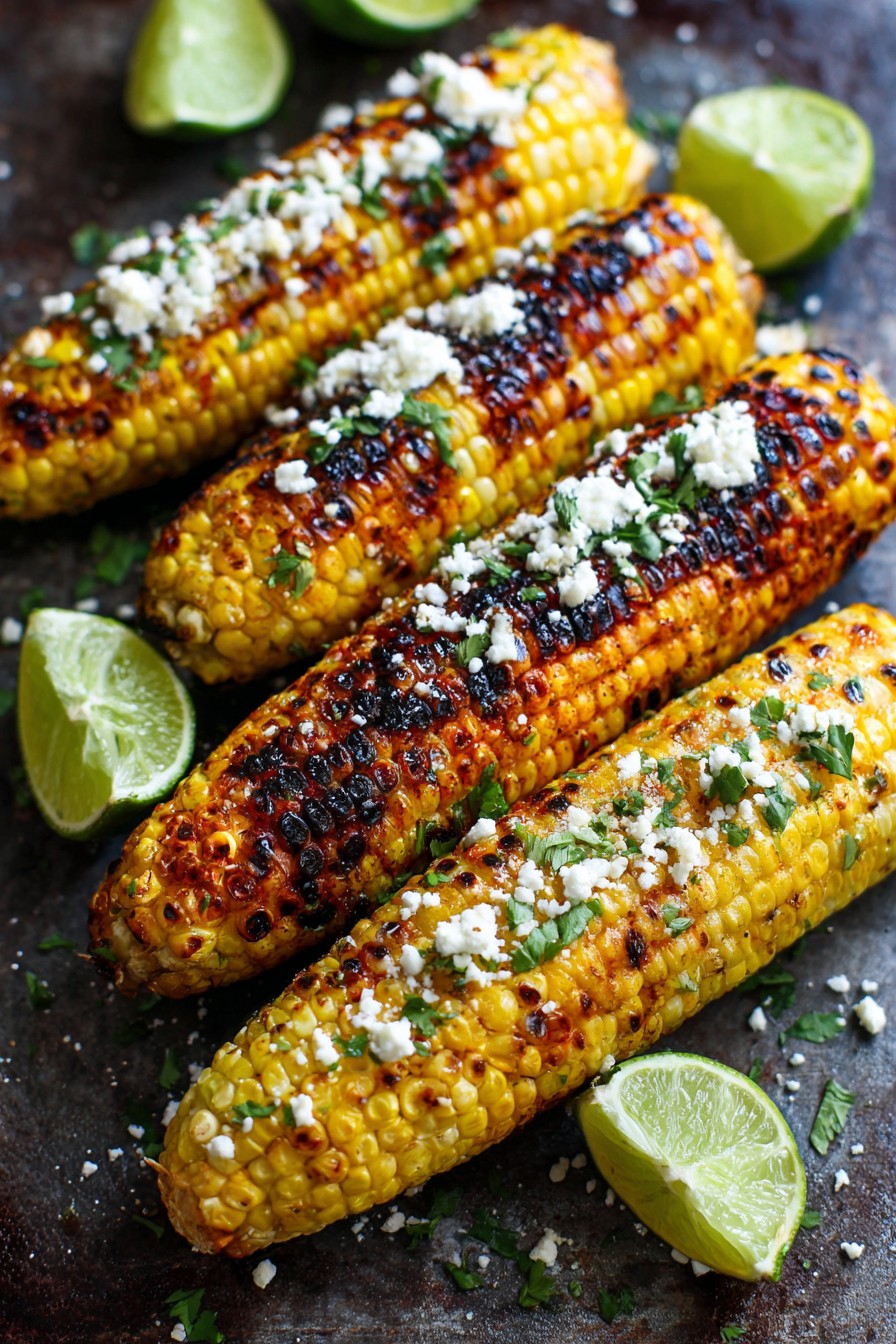
The big reveal moment is here! Carefully peel back the husks (they’ll be hot, so use those tongs) and behold the beautifully steamed corn underneath. Now comes the transformation—pull the husks down to use as handles or remove them completely if you prefer. Brush each ear generously with your prepared flavor butter, making sure to coat every single kernel with that glorious mixture. Return the corn to the grill, this time placing it directly on the grates for that signature char. Cook for another 5-8 minutes, turning frequently with your tongs, until you see those beautiful golden-brown grill marks appearing and maybe even a few perfectly blackened spots—that’s where the flavor lives! Watch carefully during this stage because the sugar in the corn can go from perfectly caramelized to burnt faster than you can say “more please!”
Final Seasoning and Garnish
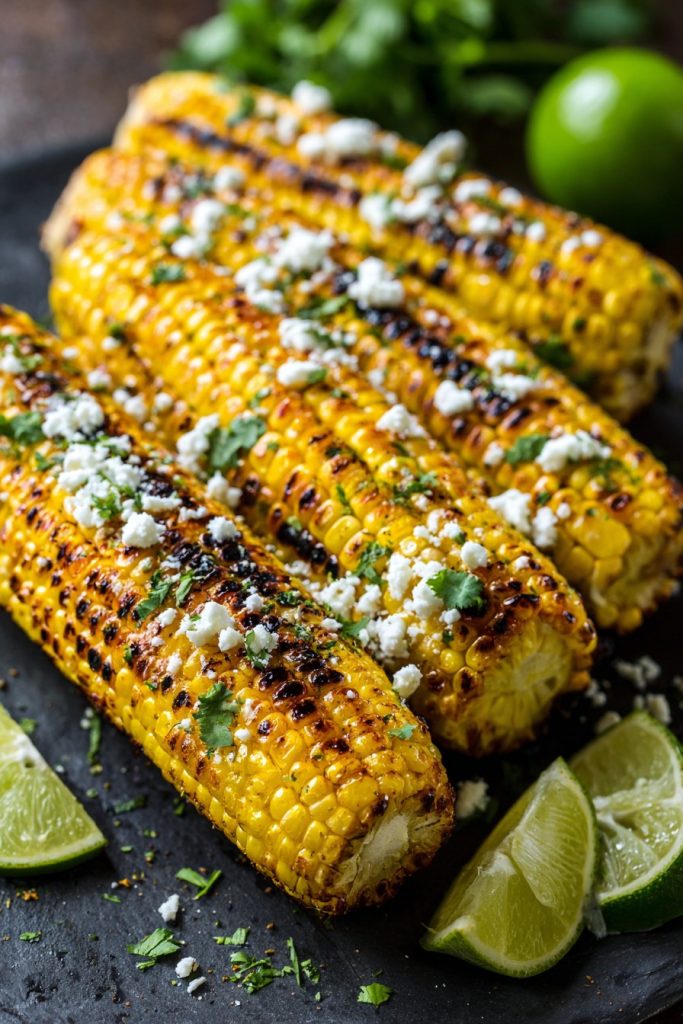
The finishing touches make all the difference! Once your corn has achieved that perfect charred appearance with grill marks visible on all sides, transfer it to a serving platter using your trusty tongs. While the corn is still piping hot, give it one more generous brushing with any remaining compound butter—the heat will help it melt into every crevice. Now for the confetti celebration! Sprinkle each ear with crumbled cotija cheese, which will slightly melt from the residual heat, creating this amazing salty contrast to the sweet corn. Follow with a shower of fresh chopped parsley for that vibrant green pop and fresh herbal note. Arrange lime wedges around the platter for that final zesty touch that cuts through the richness. Pro tip: Serve immediately while everything is hot and melty for the ultimate texture experience!
Serve and Enjoy the Flavor Explosion
This is the moment you’ve been waiting for—flavor party time! Arrange your beautifully charred, butter-glazed, cheese-dusted corn on a large platter that shows off all that gorgeous color and texture. Encourage your guests to squeeze fresh lime juice over their corn right before diving in—that acidic burst elevates every other flavor to superstar status. Provide small bowls with extra cotija cheese, chopped cilantro, and additional chili powder for those who want to customize their experience even further. Watch as eyes light up with that first bite—the combination of smoky char, sweet corn, creamy butter, tangy lime, and salty cheese creates a symphony of flavors that dances across the taste buds. This isn’t just eating corn—this is a culinary experience that will have people talking about your grilling skills for weeks!
Tips and Tricks
Ready to take your grilled corn game to professional level? Let me share some insider secrets that will make you look like a grill master legend! First up—corn selection is everything. Look for ears with bright green, tightly wrapped husks and golden brown silk that’s slightly sticky to the touch. The kernels should be plump and come all the way to the tip without gaps. Give them a gentle squeeze—you should hear a slight squeak when they’re perfectly fresh! Now let’s talk grill setup—if you’re using charcoal, create two zones: a hot direct heat area for charring and a cooler indirect area in case you need to move corn that’s cooking too quickly. For gas grill users, keep one burner on medium-high and another on low for the same flexibility. The soaking step is non-negotiable—don’t rush it! Thirty minutes minimum ensures the husks absorb enough water to create that crucial steaming effect. If you’re really planning ahead, you can soak corn for up to 2 hours for even more moisture insurance. When it comes to turning frequency during the initial cooking phase, set a timer for every 5 minutes religiously—this prevents hot spots and ensures even cooking throughout. Don’t be afraid of a little char—those blackened bits are packed with flavor, but if you see flames licking up from dripping butter, simply move the corn to a cooler part of the grill temporarily. Storage tip: If you have leftovers (unlikely, but possible), store them in an airtight container in the refrigerator for up to 3 days. To reheat, wrap in foil and warm in a 350°F oven for 10-15 minutes or until heated through. For meal prep enthusiasts, you can make the compound butter up to a week in advance and store it wrapped in parchment paper in the refrigerator—it also freezes beautifully for up to 3 months! Finally, don’t forget presentation—serving corn on a wooden board with the husks arranged around the edges creates that rustic, impressive look that says “I know what I’m doing with fire!”
Recipe Variations
- Mexican Street Corn Style takes this recipe to flavor town by mixing 1/2 cup mayonnaise with 1/2 cup sour cream instead of butter, then coating the grilled corn generously before sprinkling with cotija cheese, chili powder, and chopped cilantro. The creamy, tangy combination with the smoky char creates an authentic elote experience that will transport your taste buds straight to the streets of Mexico City! Serve with extra lime wedges and watch as your guests marvel at the incredible texture and flavor combination that makes this variation an absolute crowd-pleaser.
- Herb Garden Delight transforms your corn into a fresh, aromatic masterpiece by replacing the chili and garlic powder with 2 tablespoons each of finely chopped fresh basil, chives, and dill mixed into the butter. Add the zest of one lemon instead of lime juice for a brighter, more herbal-forward flavor profile that pairs beautifully with grilled chicken or fish. This variation is perfect for those who prefer more subtle, garden-fresh flavors that still pack a punch without the heat element.
- Spicy Buffalo Ranch kicks up the heat by combining 1/2 cup hot sauce with 1/4 cup melted butter and 1 tablespoon of ranch seasoning mix for a tangy, spicy coating that will have heat lovers cheering. After grilling, drizzle with blue cheese crumbles instead of cotija and sprinkle with chopped celery leaves for that classic buffalo wing flavor transformation. This variation is absolutely incredible for game day gatherings or anytime you want to bring some serious excitement to your corn game!
- Brown Sugar Bourbon Glaze creates a sweet and sophisticated twist by mixing 1/4 cup bourbon, 1/4 cup brown sugar, and 2 tablespoons Dijon mustard with your butter mixture. The alcohol cooks off during grilling, leaving behind a complex, caramel-like flavor that pairs beautifully with the natural corn sweetness. Finish with a sprinkle of smoked sea salt instead of regular salt to enhance the smoky notes from the grill.
- Mediterranean Magic transports your corn to the shores of the Mediterranean by using a mixture of 1/2 cup Greek yogurt, 2 tablespoons tahini, 1 minced garlic clove, and the juice of half a lemon. After grilling, top with crumbled feta cheese, chopped Kalamata olives, and a sprinkle of dried oregano for a salty, tangy, creamy combination that’s completely unexpected yet utterly delicious.
Frequently Asked Questions
Can I make grilled corn without the husks?
Absolutely, and it creates a different but equally delicious result! When grilling corn without husks, you’ll get more direct char and smoky flavor penetration, but you need to adjust your technique. Brush the naked corn with oil before placing directly on the grill grates over medium heat, then cook for 10-15 minutes, turning frequently until evenly charred on all sides. The key is keeping a closer eye on it since without the protective husk, the corn can go from perfectly caramelized to burnt more quickly. Many grill masters actually prefer this method for maximum smoky flavor and those beautiful grill marks that form directly on the kernels. Just remember to baste with butter or oil throughout cooking to prevent drying out!
How do I know when the corn is perfectly cooked?
You’re looking for multiple visual and textural cues that signal perfection! The kernels should be bright yellow and appear plump and slightly translucent rather than pale and starchy. When you press a kernel with your fingernail or a fork, it should release a milky liquid—that’s the starch converting to sugar, which is exactly what you want. The husks will have dark brown or blackened sections from the grill marks, and when you peel them back, the corn should smell incredibly fragrant and sweet. Another great test is to gently pierce a kernel with a fork—it should be tender but still have a slight pop or snap rather than being mushy. Perfect grilled corn should have that wonderful contrast between slightly crisp exterior from the char and juicy, tender interior from the steaming process.
Can I prepare grilled corn ahead of time for a party?
You can absolutely get a head start without sacrificing quality! The best approach is to complete the initial husk-on grilling stage up to 2 hours before serving. Let the corn cool completely, then store it covered at room temperature. When your guests arrive or you’re ready to serve, simply finish the final charring and butter application steps—this takes only 5-8 minutes but makes all the difference in serving temperature and texture. You can also prepare the compound butter up to 3 days in advance and store it in the refrigerator. Another great make-ahead tip is to partially shuck the corn—remove most of the silk but leave a few layers of husk attached, then store in the refrigerator until grilling time. This saves precious minutes when you’re managing multiple dishes for your gathering!
What’s the best way to reheat leftover grilled corn?
Leftover grilled corn (if you’re lucky enough to have any!) deserves proper treatment to maintain that amazing texture. The absolute best method is wrapping each ear tightly in aluminum foil and reheating in a 350°F oven for 10-15 minutes until heated through. This method helps retain moisture and prevents the corn from drying out. You can also reheat on the grill over medium heat for 5-7 minutes, turning occasionally, which adds a bit more smoky flavor. Avoid the microwave if possible, as it tends to make the corn rubbery and can create hot spots. If you need to microwave, wrap in a damp paper towel and heat in 30-second intervals, checking frequently. Pro tip: Add a fresh pat of butter after reheating to bring back that just-grilled richness!
Summary
Transform ordinary corn into extraordinary grilled perfection with this foolproof method that combines steaming and charring for incredible texture and flavor. Our signature compound butter and customizable toppings create a versatile crowd-pleaser that will make you the grill master hero of every summer gathering. Fire up those grills and get ready for corn that’s anything but ordinary!
Grilled Corn
4
servings35
minutes25
minutesIngredients
Instructions
- 1 Peel back corn husks without removing, remove silk, then rewrap and soak in cold water for 30 minutes
- 2 Mix butter, lime juice, spices, and herbs to create compound butter
- 3 Grill soaked corn with husks on over medium-high heat for 15-20 minutes, turning every 5 minutes
- 4 Remove husks, brush with butter mixture, and grill directly for 5-8 minutes until charred
- 5 Sprinkle with cotija cheese and parsley, serve with lime wedges


