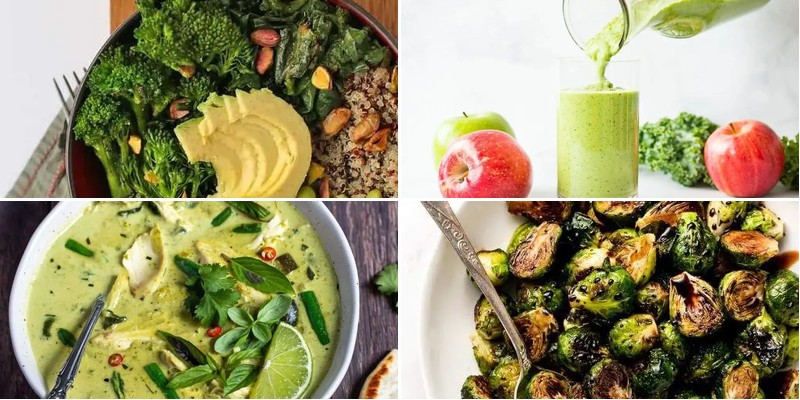
Spring into a world of fresh flavors with our collection of 25 vibrant green dishes! From quick weeknight dinners to seasonal favorites, these colorful creations prove that eating your greens has never been more delicious. Whether you’re looking for healthy comfort food or impressive party dishes, get ready to discover recipes that will make your plate pop with natural beauty and incredible taste.
Spinach and Basil Pesto Pasta
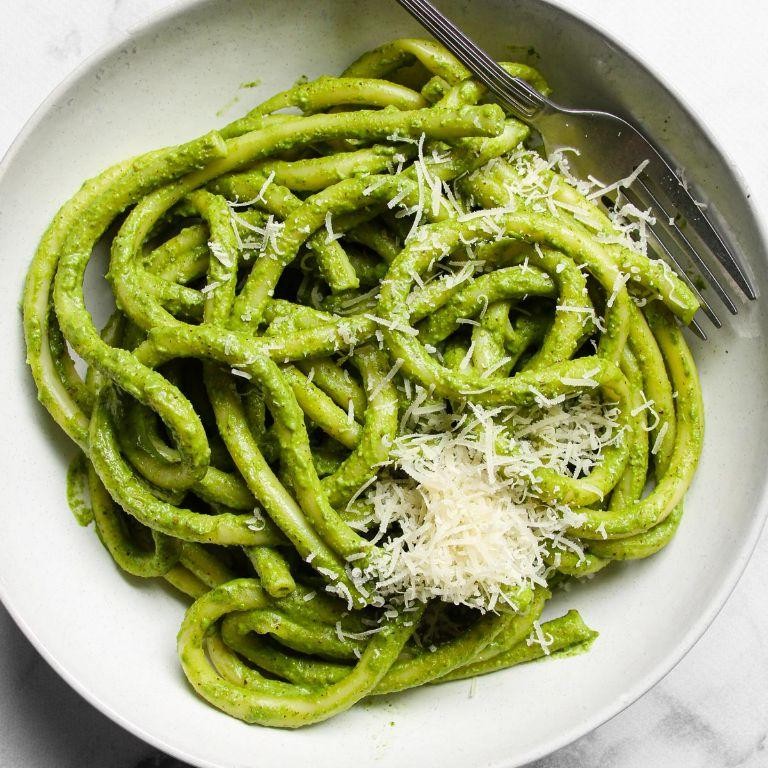
Beneath the gentle hum of the kitchen light, there’s something quietly comforting about swirling pasta in a bowl, especially when it’s dressed in the vibrant green of spinach and basil pesto—a dish that feels like a soft exhale at the end of a long day.
2
servings10
minutes12
minutesIngredients
– 12 ounces of dried pasta, like linguine or fusilli
– a big handful of fresh spinach, about 2 cups packed
– a generous bunch of fresh basil leaves, roughly 1 cup loosely packed
– 1/2 cup of extra virgin olive oil
– 1/3 cup of grated Parmesan cheese
– 1/4 cup of toasted pine nuts
– 2 cloves of garlic, peeled
– a good squeeze of lemon juice, about 1 tablespoon
– a pinch of salt and a few cracks of black pepper
Instructions
1. Bring a large pot of salted water to a rolling boil over high heat—it should taste like the sea, which helps season the pasta from within.
2. Add the dried pasta and cook for 8–10 minutes, stirring occasionally to prevent sticking, until it’s al dente (tender but with a slight bite).
3. While the pasta cooks, combine the fresh spinach, fresh basil, grated Parmesan cheese, toasted pine nuts, peeled garlic cloves, and a pinch of salt in a food processor.
4. Pulse the mixture 5–7 times until roughly chopped, then scrape down the sides with a spatula to ensure everything is evenly incorporated.
5. With the food processor running on low, slowly drizzle in the extra virgin olive oil through the feed tube until the pesto is smooth and emulsified, which should take about 30 seconds.
6. Stir in the lemon juice and a few cracks of black pepper by hand to preserve the pesto’s bright color and avoid over-processing.
7. Drain the cooked pasta, reserving 1/4 cup of the starchy pasta water to help the pesto cling to the noodles.
8. In the empty pot, toss the hot pasta with the pesto and reserved pasta water over low heat for 1–2 minutes, until everything is warmly coated and glossy. Reserve that pasta water—it’s the secret to a silky, non-greasy sauce that hugs each strand.
9. Serve immediately, garnished with extra Parmesan if you like. Really, the pesto clings to the pasta in velvety ribbons, with the pine nuts adding a buttery crunch and the lemon cutting through the richness—try it topped with grilled shrimp or cherry tomatoes for a sun-kissed twist.
Avocado and Lime Zucchini Noodles
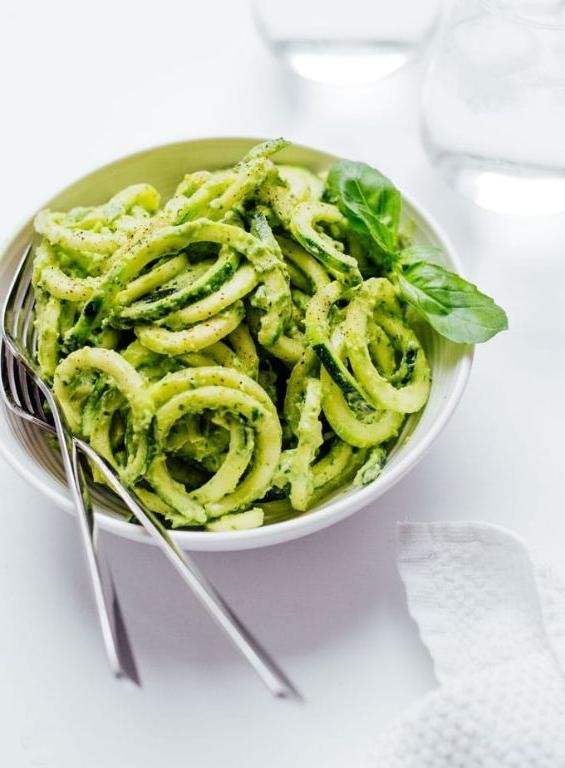
Vividly remembering the first time I spiralized zucchini on a quiet afternoon, I find myself returning to this simple preparation whenever I need something fresh yet comforting. The way the avocado clings to those delicate green ribbons creates such a gentle satisfaction. There’s something almost meditative about watching the lime juice brighten everything up.
2
servings15
minutesIngredients
– 2 medium zucchinis, spiralized into noodles
– 1 ripe avocado, pitted and scooped
– A generous squeeze from half a lime
– A tablespoon of olive oil
– A small handful of fresh cilantro leaves
– A pinch of salt
– A couple of cherry tomatoes for serving
Instructions
1. Spiralize both zucchinis using the medium blade setting, catching the noodles in a large mixing bowl.
2. Drizzle the olive oil over the zucchini noodles and toss gently with your hands to coat every strand.
3. Scoop the avocado flesh directly into the bowl with the zucchini noodles.
4. Squeeze the lime juice evenly over the avocado and zucchini mixture.
5. Sprinkle the pinch of salt across the surface of the ingredients.
6. Use a fork to mash the avocado into the zucchini noodles, creating a creamy coating that clings to each strand.
7. Chop the cilantro leaves roughly and scatter them throughout the bowl.
8. Toss everything together until the avocado cream evenly coats all zucchini noodles.
9. Halve the cherry tomatoes and gently fold them into the mixture.
10. Let the dish sit for exactly 5 minutes to allow the zucchini to soften slightly from the lime juice.
Kind of magical how the zucchini maintains its delicate crunch while the avocado creates this velvety embrace around each strand. The lime keeps everything tasting bright and clean, while the cherry tomatoes burst with sweet contrast. Sometimes I’ll serve it in a shallow bowl with extra cilantro scattered on top, or pack it cold for a picnic where the flavors deepen as they mingle.
Green Goddess Buddha Bowl
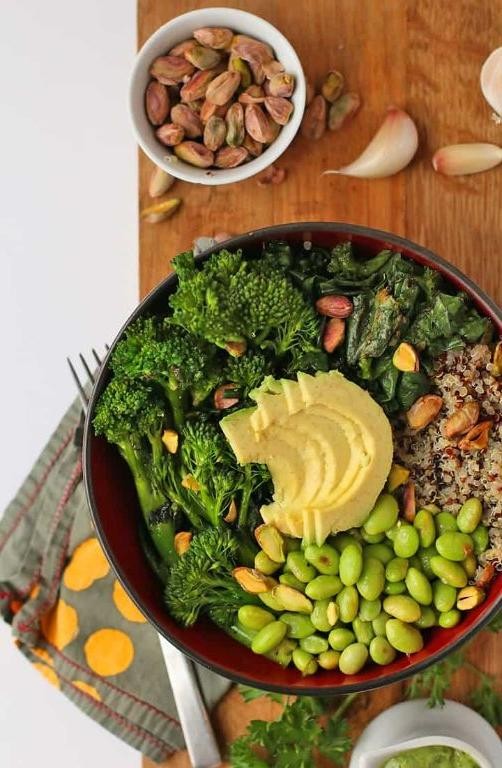
Just yesterday, as the afternoon light softened across my kitchen counter, I found myself craving something that felt both nourishing and gentle—a meal that would slow down time with each colorful bite. This Green Goddess Buddha Bowl became that quiet meditation, each ingredient chosen with intention and care.
1
bowl15
minutesIngredients
– a couple of cups of cooked quinoa
– a generous handful of fresh spinach
– half of a ripe avocado, sliced
– a small cucumber, thinly sliced
– a quarter cup of cherry tomatoes, halved
– two tablespoons of olive oil
– one tablespoon of lemon juice
– a pinch of sea salt
– a splash of water
– a tablespoon of chopped fresh basil
Instructions
1. Measure two cups of cooked quinoa into a medium mixing bowl.
2. Place a handful of fresh spinach at the bottom of your serving bowl as the base layer.
3. Slice half of a ripe avocado into thin, even pieces to ensure creamy texture in every bite.
4. Thinly slice one small cucumber using a sharp knife for clean cuts.
5. Cut a quarter cup of cherry tomatoes in half to release their juicy sweetness.
6. Arrange the avocado slices, cucumber slices, and tomato halves over the spinach bed.
7. Spoon the cooked quinoa over the vegetables, covering about half of the surface area.
8. Combine two tablespoons of olive oil and one tablespoon of lemon juice in a small jar.
9. Add a pinch of sea salt to the dressing mixture to enhance the flavors.
10. Pour a splash of water into the jar to lightly thin the dressing consistency.
11. Add one tablespoon of freshly chopped basil to the dressing for herbal brightness.
12. Secure the jar lid tightly and shake vigorously for 30 seconds until the dressing emulsifies.
13. Drizzle the dressing evenly over the entire bowl just before serving.
14. Gently toss the ingredients once to lightly coat everything without crushing the avocado.
Creating this bowl feels like composing a landscape—the quinoa’s nutty warmth balances the cucumber’s crisp chill, while the dressing ties everything together with its zesty embrace. Sometimes I’ll add toasted sunflower seeds for crunch, or serve it alongside warm flatbread for dipping into any leftover dressing at the bottom of the bowl.
Kale and Apple Smoothie
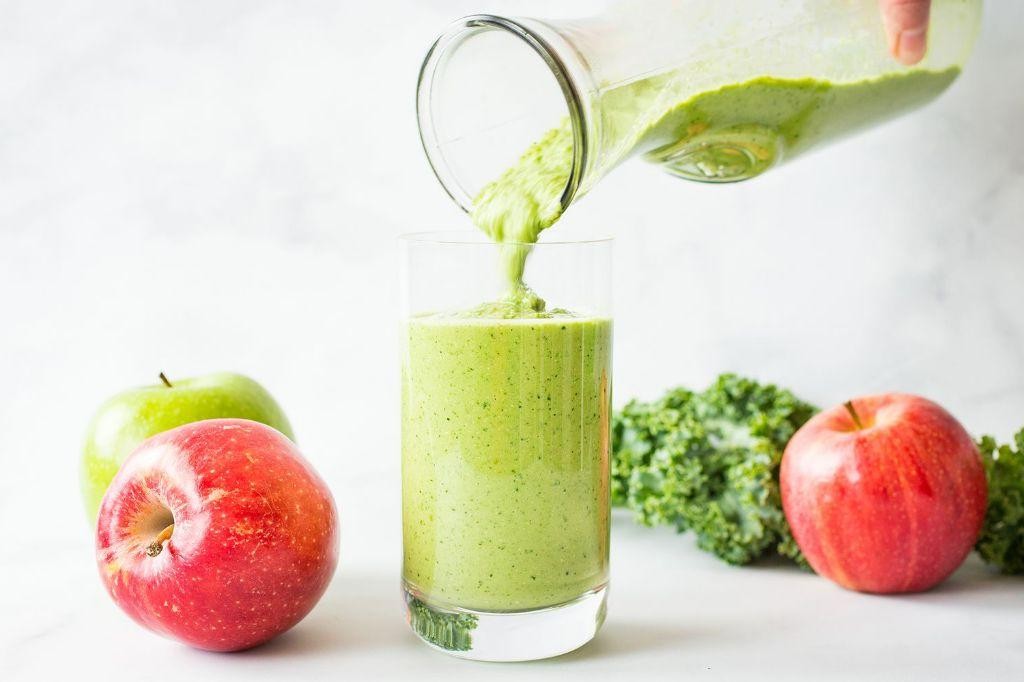
Nestled in the quiet morning light, I find myself reaching for the simplest of comforts—this smoothie that somehow manages to feel both nourishing and gentle, like a slow deep breath in liquid form. It’s the kind of recipe that doesn’t ask for much, just a few humble ingredients and a moment of stillness to blend them together.
1
servings5
minutesIngredients
– a couple of big handfuls of fresh kale, stems removed
– one crisp apple, cored and chopped
– a cup of cold almond milk
– a tablespoon of creamy almond butter
– a splash of fresh lemon juice
– a teaspoon of maple syrup
– a handful of ice cubes
Instructions
1. Wash the kale thoroughly under cool running water, then pat it dry with a clean kitchen towel.
2. Tear the kale leaves from their tough stems—discard the stems, as they can make the smoothie bitter.
3. Core the apple and chop it into rough chunks, leaving the skin on for extra fiber and nutrients.
4. Add the kale, apple chunks, almond milk, almond butter, lemon juice, maple syrup, and ice cubes to your blender.
5. Secure the blender lid tightly to prevent any spills during blending.
6. Start blending on low speed for about 10 seconds to break down the larger pieces.
7. Increase to high speed and blend for 45–60 seconds, until the mixture is completely smooth and no leafy bits remain.
8. Pause blending and scrape down the sides of the blender with a spatula if needed to incorporate any unblended ingredients.
9. Blend again for another 15–20 seconds to ensure a velvety consistency.
10. Pour the smoothie immediately into a tall glass. Zestfully vibrant and slightly creamy, this smoothie drinks like a crisp autumn morning with just a hint of nutty sweetness. I love serving it in a mason jar with a reusable straw, or pouring it over oatmeal for a breakfast that feels both wholesome and a little bit special.
Matcha Green Tea Cheesecake

Maybe it’s the quiet hum of morning light, or the way steam curls from my mug, but today feels like the perfect moment to share this recipe. Matcha green tea cheesecake has become my gentle companion on these reflective days, its earthy sweetness a soothing contrast to life’s sharper edges. There’s something deeply comforting in the ritual of measuring, mixing, and waiting for flavors to bloom.
8
servings25
minutes60
minutesIngredients
– About two sleeves of graham crackers, crushed into fine crumbs
– Half a cup of melted butter, still warm and fragrant
– A generous tablespoon of matcha powder, the vibrant green kind
– Two blocks of cream cheese, softened to room temperature
– Three-quarters cup of granulated sugar
– Two large eggs, lightly beaten
– A splash of pure vanilla extract
– Just under a cup of heavy cream
– A couple of tablespoons of powdered sugar for dusting
Instructions
1. Preheat your oven to 325°F and line a 9-inch springform pan with parchment paper.
2. Combine the graham cracker crumbs with melted butter until the mixture holds together when pressed.
3. Firmly press the crust mixture into the bottom of the prepared pan, creating an even layer about 1/4-inch thick.
4. Bake the crust for 10 minutes until lightly golden, then cool completely on a wire rack.
5. Sift the matcha powder to remove any clumps—this ensures a smooth, vibrant green color throughout your cheesecake.
6. In a large bowl, beat the softened cream cheese with an electric mixer on medium speed for 2 minutes until completely smooth.
7. Gradually add the sugar while continuing to beat, scraping down the sides of the bowl with a spatula.
8. Add the eggs one at a time, mixing just until incorporated after each addition to avoid overbeating.
9. Whisk in the vanilla extract and sifted matcha powder until no streaks remain.
10. Gently fold in the heavy cream using a spatula, being careful not to deflate the mixture.
11. Pour the filling over the cooled crust and smooth the top with an offset spatula.
12. Place the springform pan inside a larger baking dish and create a water bath by pouring hot water into the outer dish until it reaches halfway up the sides of the springform pan.
13. Bake for 45-50 minutes until the edges are set but the center still jiggles slightly when gently shaken.
14. Turn off the oven and crack the door open, letting the cheesecake cool gradually inside for 1 hour to prevent cracking.
15. Remove from the oven and cool completely at room temperature before refrigerating for at least 6 hours, preferably overnight.
16. When ready to serve, run a thin knife around the edges before releasing the springform pan.
17. Dust the top with powdered sugar through a fine-mesh sieve for a delicate finish.
Just beyond its creamy surface lies a dessert that feels both elegant and humble. The matcha lends an earthy depth that balances the richness, while the velvety texture melts away like a whispered secret. I love serving thin slices with fresh berries or enjoying a small square with my afternoon tea, watching how the light catches that subtle green hue.
Green Pea and Mint Soup
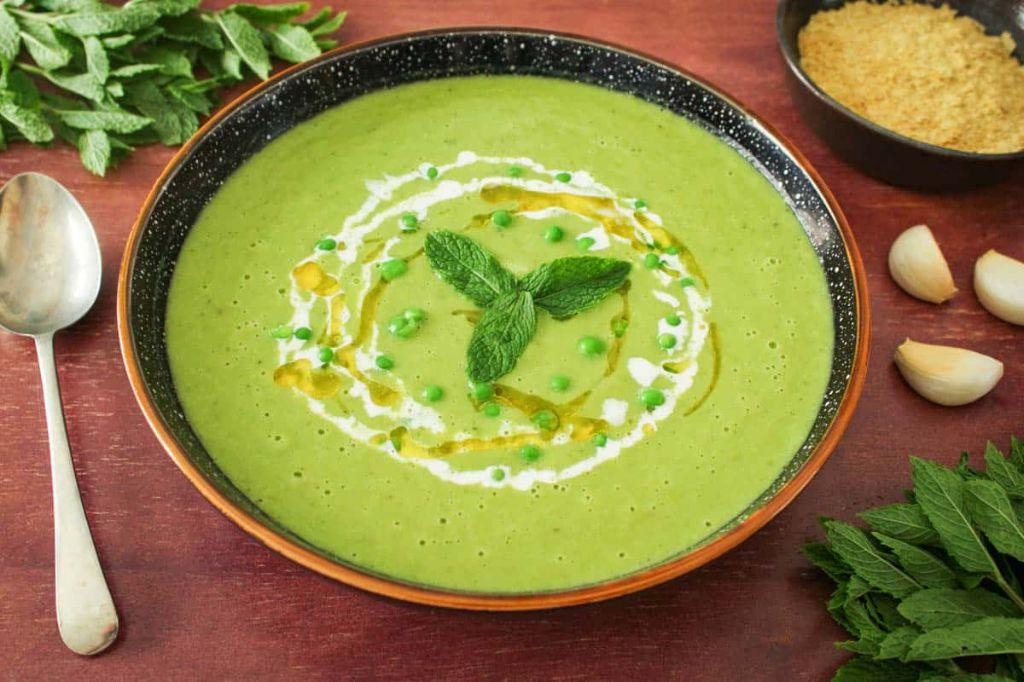
Now, as the afternoon light slants across my kitchen counter, I find myself craving something simple and soothing—a bowl of green pea and mint soup that feels like a gentle embrace after a long day. It’s one of those recipes that quietly settles the soul, with its fresh, clean flavors and effortless preparation.
5
servings15
minutes25
minutesIngredients
– 2 tablespoons of olive oil
– 1 small yellow onion, chopped
– 2 cloves of garlic, minced
– 4 cups of frozen green peas
– 4 cups of vegetable broth
– a big handful of fresh mint leaves
– a splash of heavy cream
– salt and freshly ground black pepper
Instructions
1. Heat 2 tablespoons of olive oil in a large pot over medium heat until it shimmers.
2. Add 1 small chopped yellow onion and cook for 5–7 minutes, stirring occasionally, until the onion turns translucent and soft.
3. Stir in 2 minced garlic cloves and cook for 1 minute until fragrant, being careful not to let the garlic brown.
4. Pour in 4 cups of frozen green peas and 4 cups of vegetable broth, then bring the mixture to a boil over high heat.
5. Once boiling, reduce the heat to low, cover the pot, and let it simmer for 10 minutes so the peas become tender.
6. Turn off the heat and stir in a big handful of fresh mint leaves, allowing them to wilt slightly from the residual warmth.
7. Carefully transfer the soup to a blender, working in batches if needed, and blend on high speed for 1–2 minutes until completely smooth and vibrant green.
8. Return the blended soup to the pot and stir in a splash of heavy cream until well incorporated.
9. Season with salt and freshly ground black pepper to your liking, then warm the soup over low heat for 2–3 minutes until heated through. Here, the soup reveals its velvety texture, with the sweetness of peas balanced by the bright, herbal notes of mint. I love serving it with a drizzle of cream or a sprinkle of crushed pistachios for a subtle crunch that makes each spoonful feel just a little more special.
Grilled Asparagus with Herbed Butter
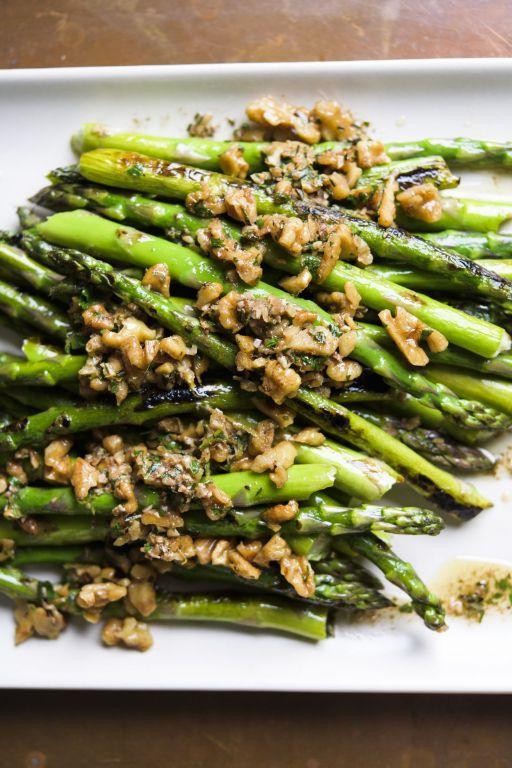
Remembering how the first crisp days of autumn make me crave something simple yet deeply satisfying, I find myself returning to this grilled asparagus time and again. There’s a quiet comfort in watching the spears char and soften, their earthy scent mingling with the herby butter in a way that feels like a gentle embrace for the soul.
4
servings10
minutes7
minutesIngredients
– A big bunch of fresh asparagus, about a pound’s worth
– A couple of tablespoons of good olive oil
– A generous pinch of kosher salt
– A few cracks of freshly ground black pepper
– Half a stick of unsalted butter, softened
– A small handful of fresh parsley, finely chopped
– A teaspoon of fresh lemon juice
Instructions
1. Preheat your grill to medium-high heat, aiming for about 400°F.
2. Rinse the asparagus spears under cool water and pat them completely dry with a clean kitchen towel.
3. Snap off the tough, woody ends of each asparagus spear—they’ll break naturally where the tender part begins.
4. Drizzle the olive oil evenly over the asparagus, then sprinkle with the kosher salt and black pepper.
5. Toss the spears gently with your hands to coat them thoroughly in the oil and seasonings.
6. Place the asparagus perpendicular to the grill grates to prevent them from falling through.
7. Grill for 5–7 minutes, turning them once with tongs halfway through, until they’re bright green with visible char marks.
8. While the asparagus grills, mix the softened butter, chopped parsley, and lemon juice in a small bowl until well combined.
9. Transfer the grilled asparagus to a serving platter and immediately dot the herbed butter over the hot spears.
10. Let the butter melt and coat the asparagus for about 1 minute before serving.
The asparagus emerges tender-crisp, with a smoky depth from the grill that’s beautifully balanced by the bright, creamy butter. I love serving it alongside grilled chicken or crumbling a bit of feta over the top for a salty contrast.
Cucumber and Dill Salad
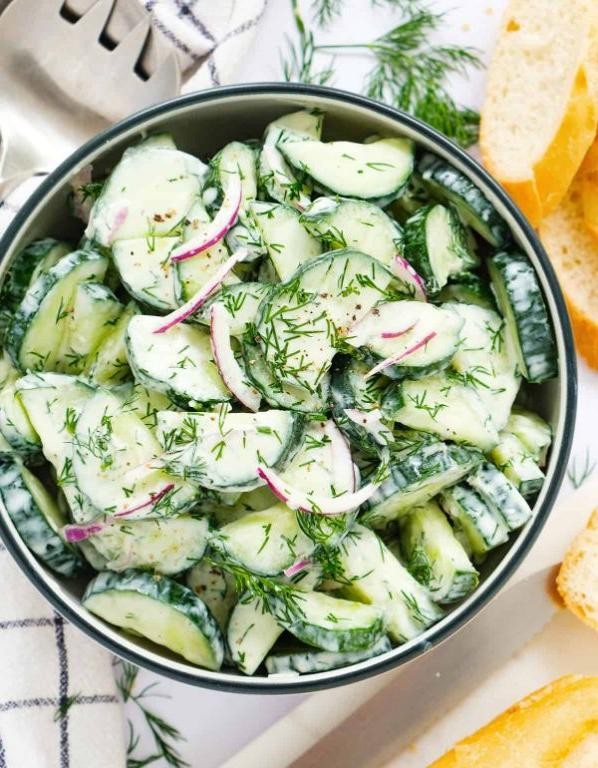
Years from now, I’ll still remember how the crisp chill of autumn mornings makes me crave something fresh and bright to cut through the hearty meals of the season. Yesterday, standing in my kitchen with the afternoon light fading, I found myself reaching for the cool, smooth skin of cucumbers, wanting to capture that last whisper of summer in a bowl. This simple salad is my gentle rebellion against the coming cold, a reminder that freshness can be found even as the leaves turn.
3
servings20
minutesIngredients
– 2 large cucumbers, sliced thin
– A small handful of fresh dill, chopped
– A generous glug of extra virgin olive oil (about 2 tablespoons)
– A good squeeze of fresh lemon juice (about 1 tablespoon)
– A couple of pinches of salt
– A few cracks of black pepper
Instructions
1. Wash 2 large cucumbers thoroughly under cold running water to remove any dirt from the skin.
2. Use a sharp knife or mandoline to slice the cucumbers into thin, even rounds about 1/8-inch thick.
3. Place the cucumber slices in a large mixing bowl, arranging them in a single layer if possible.
4. Sprinkle a couple of pinches of salt evenly over the cucumber slices.
5. Let the salted cucumbers sit undisturbed for exactly 15 minutes to draw out excess moisture.
6. While waiting, rinse a small handful of fresh dill under cold water and pat completely dry with paper towels.
7. Finely chop the dill until you have about 2 tablespoons of loosely packed green flecks.
8. After 15 minutes, carefully pour off the liquid that has collected at the bottom of the bowl.
9. Add the chopped dill to the drained cucumbers in the bowl.
10. Pour a generous glug of extra virgin olive oil (about 2 tablespoons) over the cucumber and dill mixture.
11. Squeeze the juice from half a lemon directly into the bowl, catching any seeds with your other hand.
12. Add a few cracks of black pepper from a pepper mill directly over the salad.
13. Using clean hands or two large spoons, gently toss everything together until evenly coated.
14. Taste one cucumber slice to check if it needs more salt, adding only if necessary.
That gentle crunch of cucumber against the soft whisper of dill creates a texture that feels both substantial and light. I love how the lemon brightens everything without overwhelming, making this perfect alongside roasted chicken or simply eaten straight from the bowl while standing at the counter.
Broccoli and Cheddar Quiche

Kind of like a quiet morning when the kitchen feels like a sanctuary, this broccoli and cheddar quiche is what happens when simple ingredients come together with gentle intention. It’s a cozy, forgiving dish that welcomes you to slow down and savor the process.
6
portions20
minutes50
minutesIngredients
– 1 store-bought pie crust, thawed if frozen
– a couple of cups of fresh broccoli florets
– 1 cup of shredded sharp cheddar cheese
– 4 large eggs
– 1 cup of whole milk
– a splash of heavy cream (about ¼ cup)
– a pinch of salt and black pepper
– a drizzle of olive oil
Instructions
1. Preheat your oven to 375°F.
2. Place the pie crust into a 9-inch pie dish, pressing it gently against the sides and bottom.
3. Trim any excess crust hanging over the edges with kitchen scissors.
4. Prick the bottom of the crust all over with a fork to prevent bubbling.
5. Bake the empty crust for 10 minutes, until it looks lightly golden.
6. Steam the broccoli florets in a steamer basket over boiling water for 4–5 minutes, until bright green and tender-crisp.
7. Tip: Don’t overcook the broccoli here—it will soften further in the oven.
8. Chop the steamed broccoli into small, bite-sized pieces.
9. In a medium bowl, whisk the eggs vigorously until frothy and fully blended.
10. Pour in the whole milk and heavy cream, whisking to combine smoothly.
11. Stir in the shredded cheddar cheese, salt, and black pepper.
12. Add the chopped broccoli to the egg mixture, folding gently to distribute evenly.
13. Tip: Let the broccoli cool slightly before mixing to avoid scrambling the eggs.
14. Pour the filling into the pre-baked pie crust, spreading it out with a spatula.
15. Bake at 375°F for 35–40 minutes, until the center is set and the top is golden brown.
16. Tip: Check for doneness by inserting a knife near the center—it should come out clean.
17. Let the quiche cool on a wire rack for at least 15 minutes before slicing.
During those first bites, you’ll notice the flaky crust giving way to a creamy, tender filling, with the sharp cheddar melting into the earthy broccoli. Serve it warm with a simple side salad, or slice it cold for a picnic—it holds its shape beautifully and feels like a little edible hug.
Green Curry Coconut Chicken

A gentle simmer fills the kitchen as I stir this golden-green curry, remembering how the warmth of coconut milk can soften even the chilliest autumn evening. This simple chicken curry has become my quiet companion on days when the world moves too fast, its fragrant steam rising like a soft exhale. Sometimes the most comforting meals are the ones that require little more than patience and a wooden spoon.
5
servings15
minutes38
minutesIngredients
– 1 pound of chicken thighs, cut into bite-sized pieces
– A generous glug of olive oil, about 2 tablespoons
– 1 yellow onion, thinly sliced
– 3 cloves of garlic, minced
– A thumb-sized piece of fresh ginger, grated
– 2 tablespoons of green curry paste
– 1 can (13.5 ounces) of coconut milk
– A big handful of fresh basil leaves
– A good squeeze of lime juice, about 1 tablespoon
– A pinch of salt
Instructions
1. Heat 2 tablespoons of olive oil in a large pot over medium heat until it shimmers.
2. Add the sliced onion and cook for 5-7 minutes, stirring occasionally, until translucent and fragrant.
3. Stir in the minced garlic and grated ginger, cooking for exactly 1 minute until aromatic but not browned.
4. Add the chicken pieces in a single layer and cook for 6-8 minutes, turning once, until lightly golden on both sides.
5. Spoon in 2 tablespoons of green curry paste and stir continuously for 2 minutes to toast the spices.
6. Pour in the entire can of coconut milk, scraping the bottom of the pot to incorporate any browned bits.
7. Bring the curry to a gentle bubble, then reduce heat to low and simmer uncovered for 20 minutes.
8. Stir in the fresh basil leaves and 1 tablespoon of lime juice just before serving.
9. Season with a pinch of salt, tasting and adjusting if needed. The curry should coat the back of a spoon thickly. The finished dish cradles tender chicken in a velvety coconut broth that carries both gentle heat and herbal brightness. I love serving it over jasmine rice to soak up every drop, though it’s equally comforting with crusty bread for dipping on rainy afternoons.
Edamame and Mint Risotto
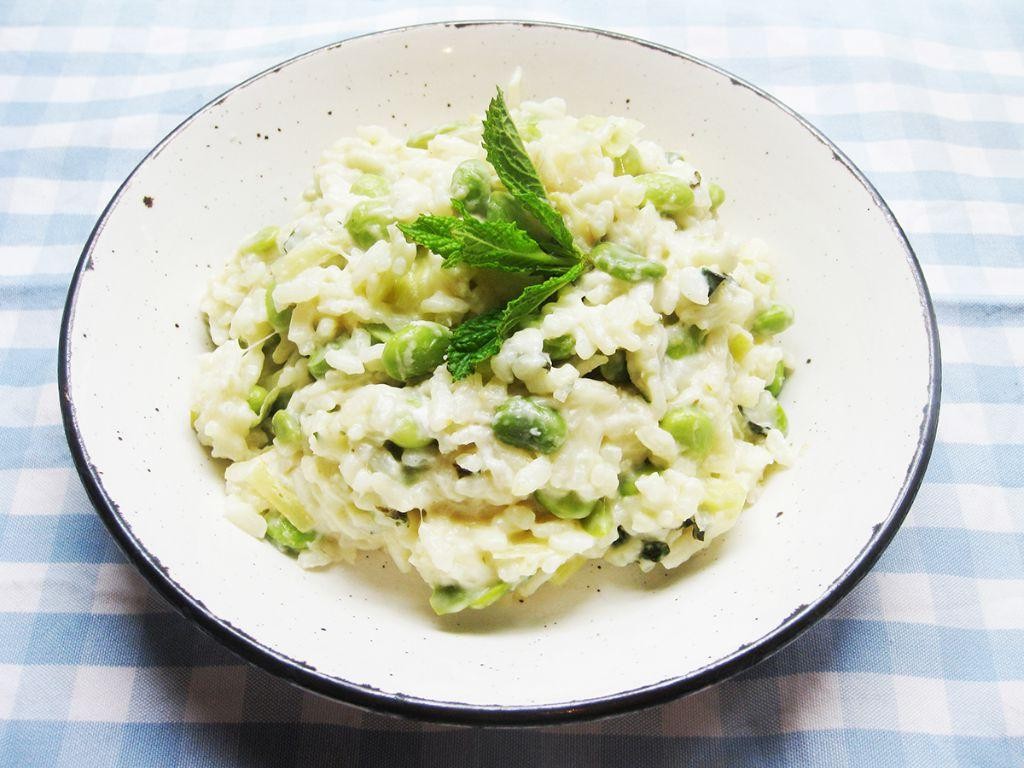
A quiet afternoon calls for something both comforting and surprising, something that unfolds slowly like the pages of a well-loved journal. This risotto brings together the gentle sweetness of edamame with the bright whisper of mint, creating a dish that feels like a peaceful conversation between flavors. It’s the kind of meal that asks you to slow down and savor each step, each stir, as the rice swells with warmth and intention.
5
servings15
minutes35
minutesIngredients
– 1 cup of Arborio rice
– 4 cups of vegetable broth, kept warm
– 1 cup of shelled edamame
– 1 small yellow onion, finely chopped
– 2 cloves of garlic, minced
– a splash of dry white wine
– a couple of fresh mint leaves, chopped
– 2 tablespoons of unsalted butter
– 1/4 cup of grated Parmesan cheese
– a drizzle of olive oil
– salt to season
Instructions
1. Heat a drizzle of olive oil in a heavy-bottomed pot over medium heat until it shimmers.
2. Add the finely chopped onion and cook for 5–7 minutes, stirring occasionally, until it turns translucent and soft.
3. Stir in the minced garlic and cook for 1 minute until fragrant, being careful not to let it brown.
4. Tip in the Arborio rice and toast for 2 minutes, stirring constantly, until the grains look slightly translucent at the edges.
5. Pour in a splash of dry white wine and cook, stirring, until the liquid is fully absorbed, which should take about 1–2 minutes.
6. Add 1/2 cup of warm vegetable broth to the rice and stir continuously until the broth is absorbed.
7. Continue adding broth in 1/2-cup increments, stirring after each addition until absorbed, for about 18–20 minutes total.
8. Stir in the shelled edamame and cook for 3–4 minutes until they are tender and bright green.
9. Remove the pot from the heat and stir in the unsalted butter, grated Parmesan, and chopped mint leaves until creamy.
10. Season with salt to balance the flavors, stirring gently to combine everything evenly.
But what emerges is a risotto that’s both creamy and punctuated by the pop of edamame, with mint lending a cool, refreshing finish. Serve it in shallow bowls, perhaps with a extra sprinkle of mint on top, and let it be a quiet centerpiece for a thoughtful meal.
Lettuce Wraps with Spicy Green Hummus
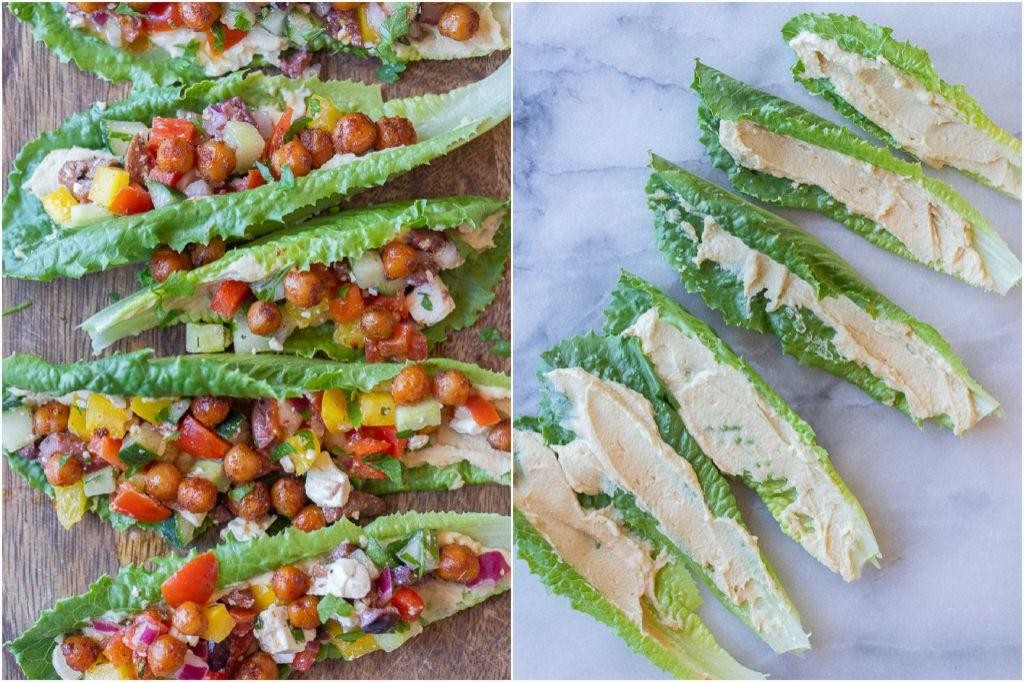
Vaguely remembering the crunch of fresh lettuce from childhood gardens, I find myself drawn to recipes that honor simplicity while surprising the palate. This one came together on a quiet afternoon when I wanted something light yet satisfying, with just enough spice to make things interesting. The cool lettuce against the vibrant hummus creates a lovely contrast that feels both nourishing and indulgent.
8
portions15
minutesIngredients
– A couple of large butter lettuce leaves, about 8-10
– One 15-ounce can of chickpeas, drained and rinsed
– A generous 1/4 cup of tahini
– A big squeeze of fresh lemon juice, about 2 tablespoons
– A couple of tablespoons of olive oil
– One small jalapeño, seeds removed if you prefer less heat
– A small handful of fresh parsley
– One garlic clove
– A splash of cold water, about 2-3 tablespoons
– A good pinch of salt
Instructions
1. Gently separate 8-10 large butter lettuce leaves, being careful not to tear them, then rinse under cold water and pat completely dry with paper towels.
2. Drain and rinse one 15-ounce can of chickpeas in a colander, shaking off any excess water.
3. Combine the chickpeas, 1/4 cup tahini, 2 tablespoons lemon juice, 2 tablespoons olive oil, one seeded jalapeño, a handful of parsley, one garlic clove, and a pinch of salt in a food processor.
4. Pulse the mixture for 30 seconds, then scrape down the sides with a spatula to ensure everything incorporates evenly.
5. With the food processor running, slowly stream in 2-3 tablespoons of cold water until the hummus becomes smooth and creamy.
6. Taste the hummus and adjust seasoning if needed, remembering it should be noticeably spicy but balanced.
7. Spoon approximately 2 tablespoons of the spicy green hummus into the center of each prepared lettuce leaf.
8. Fold the sides of the lettuce leaves over the filling, creating neat packages that are easy to hold.
Notably, the cool crispness of the lettuce provides the perfect vessel for the creamy, slightly spicy hummus that carries just enough garlic warmth to linger pleasantly. These wraps feel wonderfully fresh when served immediately, though you might also enjoy them arranged on a platter with extra lemon wedges for squeezing over top—the bright acidity cutting through the richness in the most delightful way.
Roasted Brussels Sprouts with Balsamic Glaze
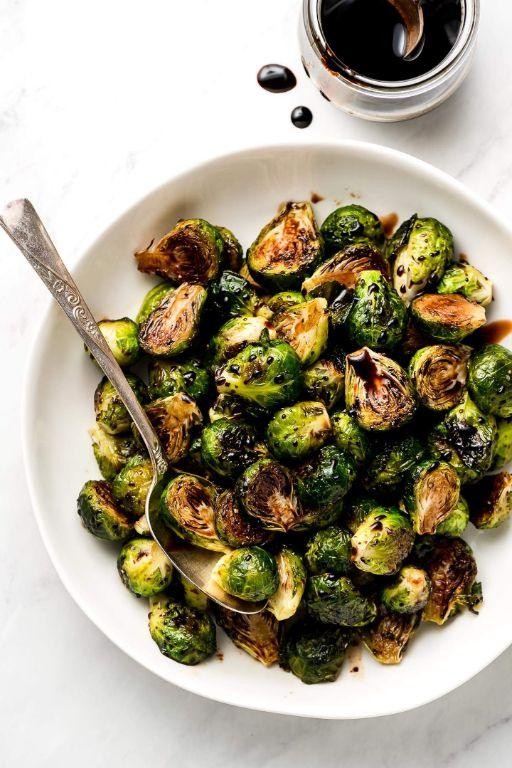
There’s something quietly magical about how heat transforms these humble little cabbages, turning their slight bitterness into something sweet and caramelized. Making this dish always feels like a small act of kitchen alchemy, especially when that balsamic reduction starts to thicken and coat everything in its glossy embrace.
5
servings10
minutes35
minutesIngredients
– A pound or so of Brussels sprouts, trimmed and halved
– A couple of tablespoons of olive oil
– A good pinch of kosher salt
– Several cracks of black pepper
– A generous half cup of balsamic vinegar
– A tablespoon of honey
– A sprinkle of flaky sea salt for finishing
Instructions
1. Preheat your oven to 400°F and line a baking sheet with parchment paper.
2. Toss the halved Brussels sprouts with olive oil, kosher salt, and black pepper until evenly coated.
3. Arrange the sprouts cut-side down on the baking sheet in a single layer, which helps them caramelize beautifully.
4. Roast for 20-25 minutes until the edges are crispy and the centers are tender when pierced with a fork.
5. While the sprouts roast, combine balsamic vinegar and honey in a small saucepan over medium heat.
6. Bring the mixture to a gentle simmer, then reduce heat to low and cook for 8-10 minutes until it thickens enough to coat the back of a spoon.
7. Remove the roasted Brussels sprouts from the oven and transfer them to a serving bowl.
8. Drizzle the warm balsamic glaze over the sprouts, tossing gently to coat.
9. Finish with a sprinkle of flaky sea salt for that perfect salty crunch.
My favorite thing is how the crispy outer leaves give way to tender centers, while the sweet-tart glaze balances everything perfectly. Sometimes I’ll scatter toasted walnuts over the top for extra crunch, or serve them alongside roasted chicken for a complete meal that feels both rustic and elegant.
Green Tea Matcha Pancakes

Nestled in the quiet morning light, I find myself craving something that bridges comfort and mindfulness, a recipe that feels like a gentle pause before the day begins. These green tea matcha pancakes emerged from such a moment, their earthy hue and subtle bitterness offering a serene start. They’re simple to make, yet each bite feels like a small, intentional ritual.
8
pancakes10
minutes20
minutesIngredients
– 1 cup of all-purpose flour
– 2 tablespoons of matcha powder, the vibrant green kind
– 1 tablespoon of granulated sugar, just enough for a hint of sweetness
– 2 teaspoons of baking powder, for that lovely lift
– A pinch of fine salt
– 1 large egg, lightly beaten
– 1 cup of whole milk, or a splash more if needed
– 2 tablespoons of melted unsalted butter, cooled a bit
– A drizzle of vegetable oil for the pan
Instructions
1. In a medium bowl, whisk together 1 cup of all-purpose flour, 2 tablespoons of matcha powder, 1 tablespoon of granulated sugar, 2 teaspoons of baking powder, and a pinch of salt until no streaks remain. Tip: Sift the matcha powder first to avoid clumps and ensure a smooth batter.
2. In a separate bowl, combine 1 large egg, 1 cup of whole milk, and 2 tablespoons of melted unsalted butter, stirring gently until fully blended.
3. Pour the wet ingredients into the dry mixture and fold together with a spatula until just combined; do not overmix, as a few lumps are fine for tender pancakes.
4. Heat a non-stick skillet or griddle over medium heat and add a drizzle of vegetable oil, spreading it evenly with a paper towel.
5. Pour about 1/4 cup of batter onto the skillet for each pancake, cooking until bubbles form on the surface and the edges look set, about 2-3 minutes. Tip: Wait for those bubbles—it’s the sign to flip for even cooking.
6. Flip each pancake carefully and cook for another 1-2 minutes, until the bottom is golden brown and the center springs back lightly to touch.
7. Transfer the cooked pancakes to a plate and repeat with the remaining batter, adding more oil to the skillet as needed. Tip: Keep finished pancakes warm in a 200°F oven to maintain their fluffy texture while you finish the batch.
Perhaps what I love most is how the matcha infuses these pancakes with a delicate earthiness, balanced by their soft, airy crumb. Serve them stacked high with a drizzle of honey or fresh berries for a touch of brightness, turning breakfast into a quiet celebration.
Conclusion
Zesty greens bring both beauty and nutrition to your table! We hope this vibrant collection inspires you to add more colorful dishes to your meals. Try these recipes and let us know which ones become your favorites in the comments below. Don’t forget to share this delicious inspiration by pinning your top picks on Pinterest!


