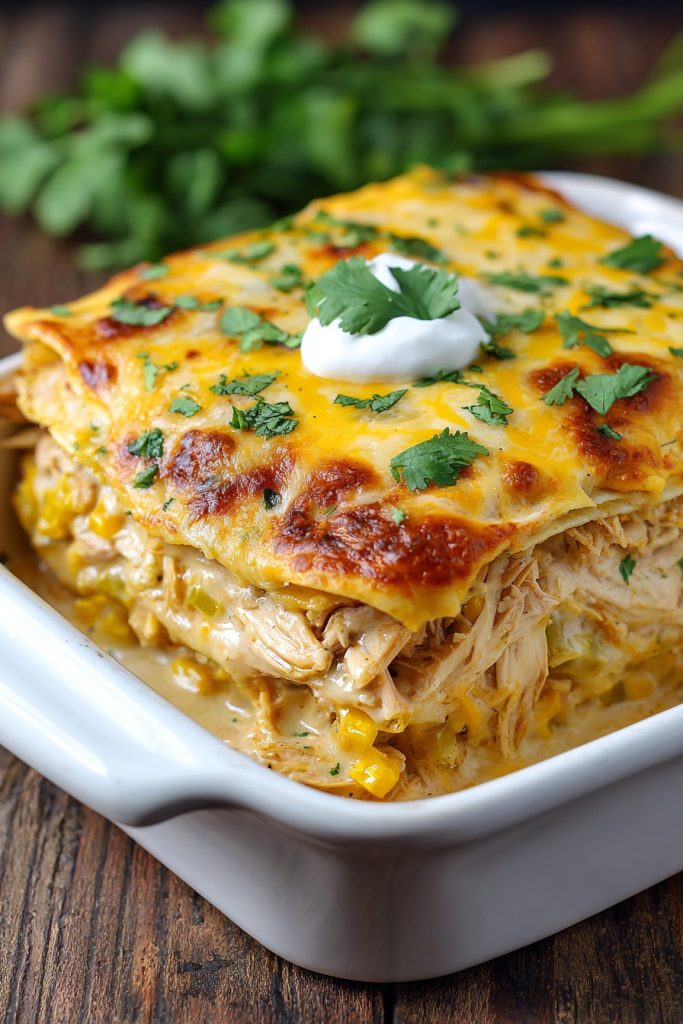
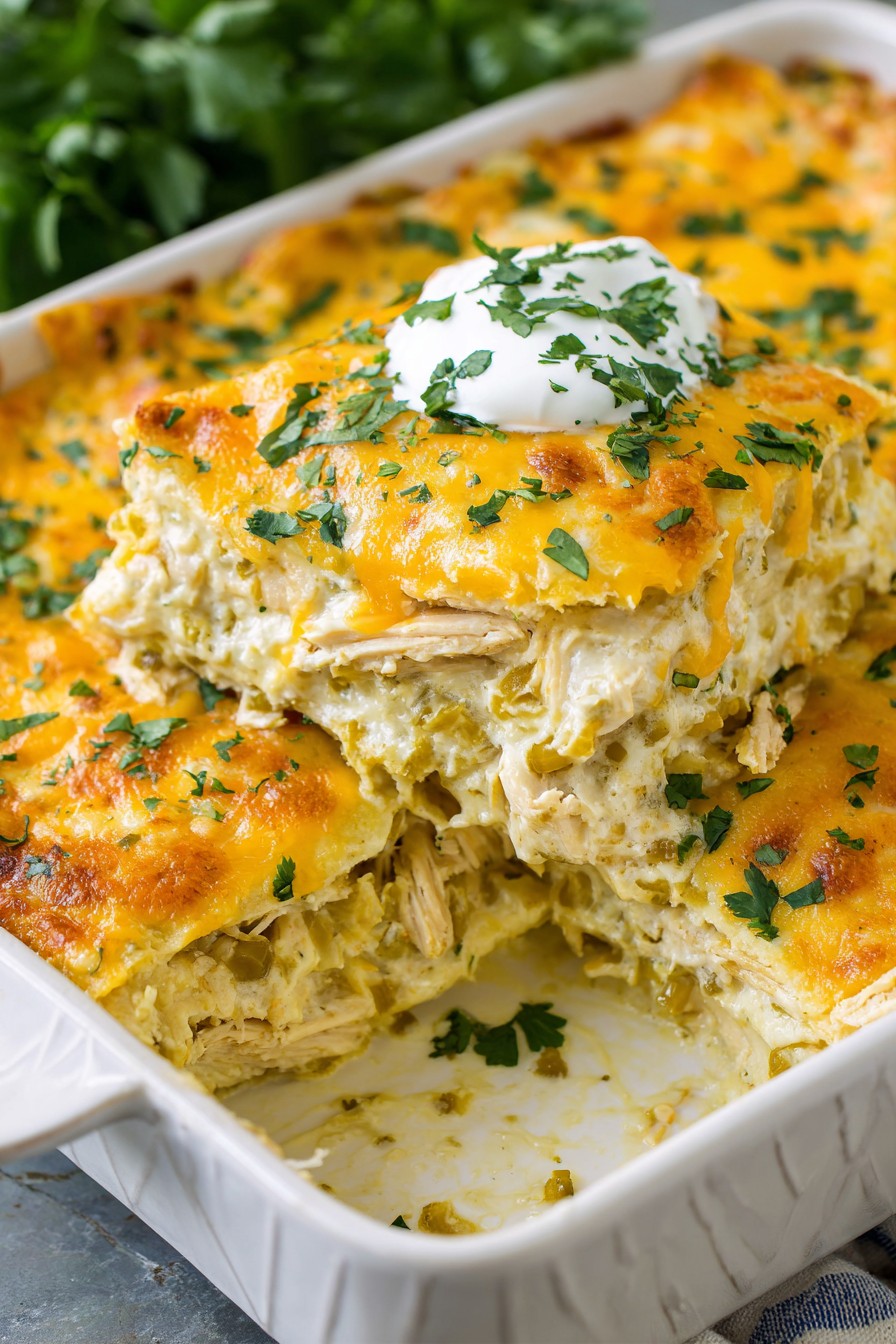
Finally, a casserole that actually deserves the hype! Forget about dry, boring enchiladas that fall apart when you look at them wrong—this layered masterpiece combines all the flavors you love with none of the fuss. Friends, prepare to meet your new go-to weeknight dinner that’ll have everyone begging for seconds.
Why This Recipe Works
- Layering instead of rolling eliminates the frustration of torn tortillas and creates perfect portion control with every scoop
- Using both Monterey Jack and sharp cheddar cheeses provides a complex flavor profile with the perfect melt-to-stretch ratio that cheese lovers dream about
- Homemade green enchilada sauce takes just 10 minutes but delivers fresher, brighter flavor than any canned version while letting you control the spice level
- Shredded rotisserie chicken saves time without sacrificing flavor and absorbs the sauce beautifully during baking
- The corn tortilla layers become perfectly tender without turning mushy, creating ideal textural contrast with the creamy filling
Ingredients
- 2 cups shredded cooked chicken (from 1 rotisserie chicken)
- 12 corn tortillas, cut into quarters
- 2 cups Monterey Jack cheese, shredded
- 1 cup sharp cheddar cheese, shredded
- 1 cup sour cream
- 1 (4 oz) can diced green chilies, undrained
- 1 small white onion, finely diced
- 3 cloves garlic, minced
- 1 tsp ground cumin
- 1/2 tsp chili powder
- 1/4 cup fresh cilantro, chopped
- 2 tbsp olive oil
- Salt and black pepper to taste
- For the green sauce: 2 cups chicken broth, 1/4 cup all-purpose flour, 1 (7 oz) can salsa verde, 1/2 cup heavy cream
Equipment Needed
- 9×13 inch baking dish
- Medium saucepan
- Large mixing bowl
- Whisk
- Cutting board and chef’s knife
- Measuring cups and spoons
- Box grater (if shredding cheese yourself)
- Rubber spatula
Instructions
Prepare the Green Enchilada Sauce
Heat 2 tablespoons of olive oil in a medium saucepan over medium heat until shimmering but not smoking, about 2 minutes. Add the finely diced onion and cook until translucent and slightly golden around the edges, approximately 5-7 minutes, stirring occasionally to prevent burning. Add the minced garlic and cook for just 30 seconds until fragrant—be careful not to let it brown or it will turn bitter. Sprinkle in the 1/4 cup of flour and whisk constantly for 1 minute to create a roux that will thicken your sauce beautifully. Gradually pour in the 2 cups of chicken broth while whisking vigorously to prevent lumps from forming. Bring the mixture to a gentle simmer and cook for 3-4 minutes until it thickens enough to coat the back of a spoon. Remove from heat and stir in the entire can of salsa verde, 1/2 cup heavy cream, diced green chilies, ground cumin, and chili powder. Season with salt and pepper to taste—I usually start with 1/2 teaspoon salt and 1/4 teaspoon pepper, then adjust after baking.
Mix the Chicken Filling
In a large mixing bowl, combine the 2 cups of shredded chicken with 1 cup of sour cream, half of your prepared green sauce (about 1.5 cups), and 1/4 cup of chopped fresh cilantro. Mix thoroughly until every piece of chicken is coated in the creamy, flavorful mixture—this ensures maximum moisture and flavor distribution throughout the casserole. Taste the filling and adjust seasoning if needed; remember the cheeses will add saltiness later. Let this mixture sit for 10 minutes while you prepare the other components; this resting time allows the chicken to absorb the sauce flavors more deeply. If you’re using freshly cooked chicken rather than rotisserie, make sure it’s cooled slightly so the sour cream doesn’t break. The filling should be moist but not soupy; if it seems too thick, add another tablespoon or two of green sauce.
Layer the Casserole
Spread 1/2 cup of the remaining green sauce evenly across the bottom of your 9×13 inch baking dish—this prevents sticking and adds extra flavor to the bottom layer. Arrange one-third of your quartered corn tortillas (about 16 pieces) over the sauce, overlapping them slightly like shingles to create a solid base layer. Spoon half of the chicken mixture evenly over the tortillas, spreading it gently with a spatula to cover the entire surface without pressing too hard. Sprinkle one-third of your combined cheeses (about 1 cup total) over the chicken layer, making sure to get coverage all the way to the edges. Repeat these layers exactly: another 1/2 cup of sauce, tortillas, remaining chicken mixture, and another third of cheese. For the final layer, arrange the remaining tortillas, pour the rest of the sauce evenly over the top, and finish with the remaining cheese blend.
Bake to Perfection
Preheat your oven to 375°F and place the rack in the center position for even heating. Cover the baking dish tightly with aluminum foil, making sure to tent it slightly so the cheese doesn’t stick to the foil when melting. Bake covered for 25 minutes—this steaming phase allows the tortillas to absorb liquid and become perfectly tender without drying out. Remove the foil carefully (watch for steam!) and continue baking uncovered for another 15-20 minutes. You’ll know it’s ready when the cheese is completely melted with golden brown spots, the edges are bubbly, and the center reaches an internal temperature of 165°F when tested with an instant-read thermometer. If you want extra browning on top, switch to broil for the final 2-3 minutes but watch constantly to prevent burning.
Rest and Serve
Remove the casserole from the oven and let it rest on a wire rack for exactly 15 minutes before cutting—this crucial step allows the layers to set so you get clean slices instead of a saucy mess. While waiting, prepare your toppings: slice some fresh avocado, chop extra cilantro, dice red onion, or whatever your heart desires. Use a sharp knife to portion the casserole into 8 equal squares, wiping the knife between cuts for neat presentation. Serve directly from the baking dish or transfer portions to plates using a sturdy spatula that can support all the layers. The resting time also brings the temperature down to the perfect eating level—hot enough to enjoy but not mouth-scorching. Leftovers will keep beautifully in the refrigerator for up to 4 days, and honestly, they might taste even better after the flavors meld overnight.
Tips and Tricks
For the absolute best texture, briefly warm your corn tortillas before assembling—either microwave them wrapped in a damp paper towel for 30 seconds or quickly toast them in a dry skillet for 10 seconds per side. This prevents them from cracking when you cut them and helps them absorb the sauce more evenly during baking. If you’re making this ahead, assemble the entire casserole up to 24 hours in advance, cover tightly, and refrigerate—just add 10-15 minutes to the baking time since it’s starting cold. For freezer meals, assemble without baking, wrap in both plastic wrap and foil, and freeze for up to 3 months; thaw overnight in refrigerator before baking as directed.
Cheese matters more than you think! Always shred your own cheese from blocks—pre-shredded cheeses contain anti-caking agents that prevent proper melting and can make your sauce grainy. If you want extra creaminess, replace half the sour cream with 4 ounces of softened cream cheese beaten until smooth. For a crispy top, sprinkle crushed tortilla chips over the final cheese layer before baking—they add fantastic texture contrast. If your casserole seems too wet after baking, don’t panic; let it rest longer (up to 30 minutes) and the tortillas will continue absorbing liquid. To prevent soggy bottom layers, make sure your sauce isn’t too thin—it should coat a spoon thickly; if it’s runny, simmer it longer before assembling.
Temperature control is key: always bring your refrigerated ingredients (sour cream, chicken) to room temperature for 20 minutes before mixing to ensure even heating and prevent curdling. If you’re using homemade cooked chicken instead of rotisserie, poach breasts in well-seasoned broth rather than baking them—this keeps them moist and flavorful. For easy clean-up, line your baking dish with parchment paper strips crossing in the bottom before adding sauce; you’ll be able to lift out entire sections later. Don’t skip the resting time! Those 15 minutes allow the starches in the tortillas to set properly—cutting too early turns your beautiful layers into enchilada soup. Finally, invest in an oven thermometer—many home ovens run hot or cold, and 25°F can make the difference between perfect and overdone.
Recipe Variations
- Vegetarian Delight: Replace chicken with 2 cups of roasted sweet potatoes and black beans. Dice 2 medium sweet potatoes into 1/2-inch cubes, toss with 1 tbsp olive oil and 1 tsp cumin, roast at 400°F for 25 minutes until tender. Mix with 1 can drained black beans, and use vegetable broth instead of chicken broth in the sauce. The sweetness balances beautifully with the spicy green sauce.
- Seafood Twist: Substitute shredded chicken with 2 cups of cooked shrimp or flaked white fish. Sauté 1 lb raw shrimp with garlic until pink, then chop roughly. The seafood version cooks faster—reduce covered baking time to 20 minutes and uncovered to 10 minutes to prevent overcooking. Add a teaspoon of Old Bay seasoning to the filling for coastal flavor.
- Breakfast Enchilada Casserole: Layer cooked breakfast sausage or bacon with scrambled eggs instead of chicken. Whisk 8 eggs with 1/4 cup milk, scramble until just set, and mix with 1 cup cooked crumbled sausage. Use breakfast potatoes instead of tortillas for a hash brown crust variation. Perfect for brunch crowds!
- Spicy Upgrade: Kick up the heat with 1-2 diced jalapeños (seeds included) in the filling, plus 1 tsp chipotle powder in the sauce. For extreme heat lovers, add 1/4 cup pickled jalapeño juice to the sauce and top with sliced fresh jalapeños before baking. Serve with cooling avocado crema on the side.
- Low-Carb Version: Replace corn tortillas with sliced zucchini or eggplant layers. Slice 2 medium zucchini lengthwise into 1/4-inch strips, salt them, and let sit for 20 minutes to draw out moisture. Pat dry before layering. Increase baking time by 10 minutes since vegetables release more liquid.
Frequently Asked Questions
Can I use flour tortillas instead of corn?
Absolutely, but expect a different texture and flavor profile! Flour tortillas become softer and more pasta-like when baked, while corn tortillas hold their structure better and provide authentic flavor. If using flour tortillas, reduce the sauce slightly as they absorb less liquid. I recommend using the 8-inch size and cutting them into six wedges instead of quarters. The baking time remains the same, but watch for earlier browning since flour tortillas contain more sugar. For best results, use a mix of both—corn on bottom layers for stability and flour on top for tenderness.
How do I prevent a soggy casserole?
Sogginess usually comes from too much sauce or insufficient baking time. Make sure your sauce thickens properly before assembling—it should coat the back of a spoon without running off immediately. Another trick: lightly spray your tortillas with cooking oil and bake at 350°F for 5 minutes before assembling to create a moisture barrier. Always let the casserole rest fully after baking; the residual heat continues cooking and absorbing liquid. If you’ve already ended up with a watery casserole, serve it with a slotted spoon and consider reducing sauce next time by 1/4 cup.
Can I make this dairy-free?
Yes, with a few smart swaps! Replace sour cream with cashew cream (soak 1 cup raw cashews overnight, blend with 1/2 cup water until smooth) and use dairy-free cheese alternatives that melt well. For the sauce, substitute heavy cream with full-fat coconut milk and use vegetable broth. Be aware that coconut milk will add slight sweetness, so balance with extra lime juice and chili powder. The texture will be slightly different but still delicious. Look for Mexican-style dairy-free cheeses specifically designed for melting in casseroles.
What’s the best way to reheat leftovers?
For single servings, microwave at 50% power for 2-3 minutes covered with a damp paper towel to prevent drying out. For larger portions, reheat in a 350°F oven covered with foil for 20-25 minutes until heated through. The air fryer works wonders too—place portion at 325°F for 8-10 minutes to regain crispy edges. Never reheat frozen casserole directly; thaw overnight in refrigerator first. Add a tablespoon of water or extra sauce before reheating to maintain moisture. Leftovers actually develop more flavor after a day or two!
Can I freeze this casserole?
Freezes beautifully for up to 3 months! Assemble completely but do not bake. Wrap tightly in plastic wrap followed by foil, label with date, and freeze flat. Thaw in refrigerator for 24 hours before baking as directed, adding 10-15 minutes to the covered baking time. For best results, freeze individual portions in oven-safe containers for quick meals. Avoid freezing if you’ve used fresh avocado or sour cream topping. The texture may be slightly softer after freezing but still delicious. Great for meal prep or new parents!
Summary
This green chicken enchilada casserole delivers all the authentic flavors without the tedious rolling. Layers of saucy chicken, melted cheese, and tender tortillas create the ultimate comfort food that feeds a crowd effortlessly. Perfect for weeknights or potlucks!
Green Chicken Enchilada Casserole
5
servings25
minutes45
minutesIngredients
Instructions
- 1 Make sauce: Cook onion in oil, add garlic, flour, then whisk in broth. Simmer until thick, stir in salsa verde, cream, and spices.
- 2 Mix chicken with sour cream, half the sauce, and cilantro.
- 3 Layer: sauce, tortillas, chicken mixture, cheese. Repeat layers.
- 4 Top with remaining tortillas, sauce, and cheese.
- 5 Bake covered at 375°F for 25 minutes, uncovered for 15-20 minutes.
- 6 Rest 15 minutes before serving.
