Brace yourselves for the most incredible green bean transformation you’ll ever experience! These aren’t your grandma’s boring green beans – we’re talking crispy, garlicky, cheesy perfection that’ll have everyone fighting for seconds. Get ready to elevate this humble veggie into the star of your dinner table with flavors that pop and textures that crunch!
Why This Recipe Works
- The quick blanching then roasting method creates the perfect texture – tender-crisp with beautifully caramelized edges that give you the best of both worlds
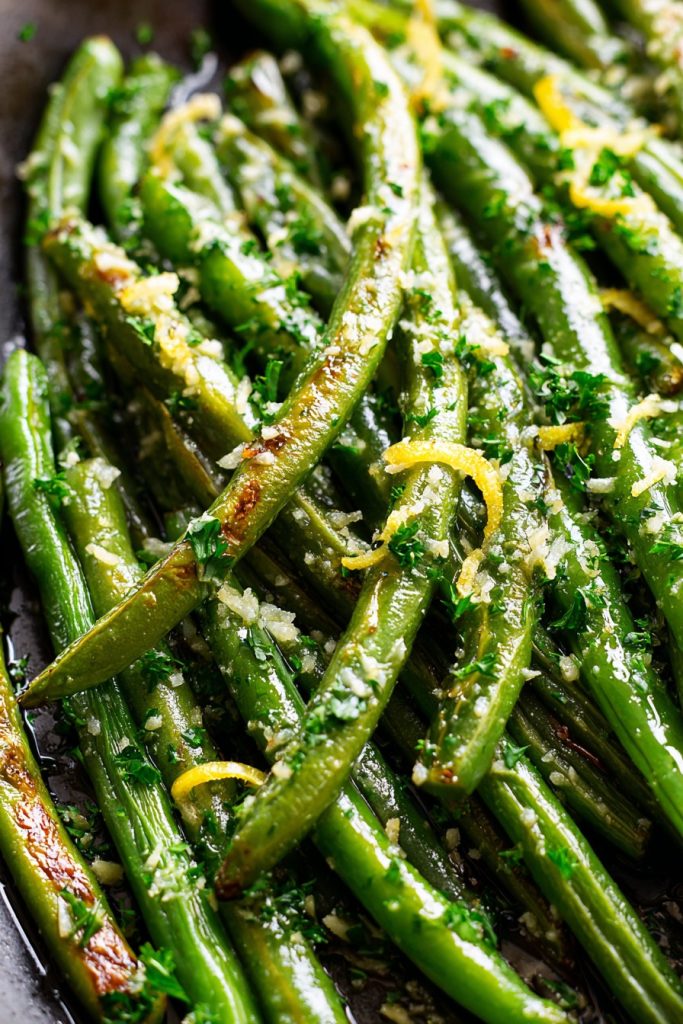
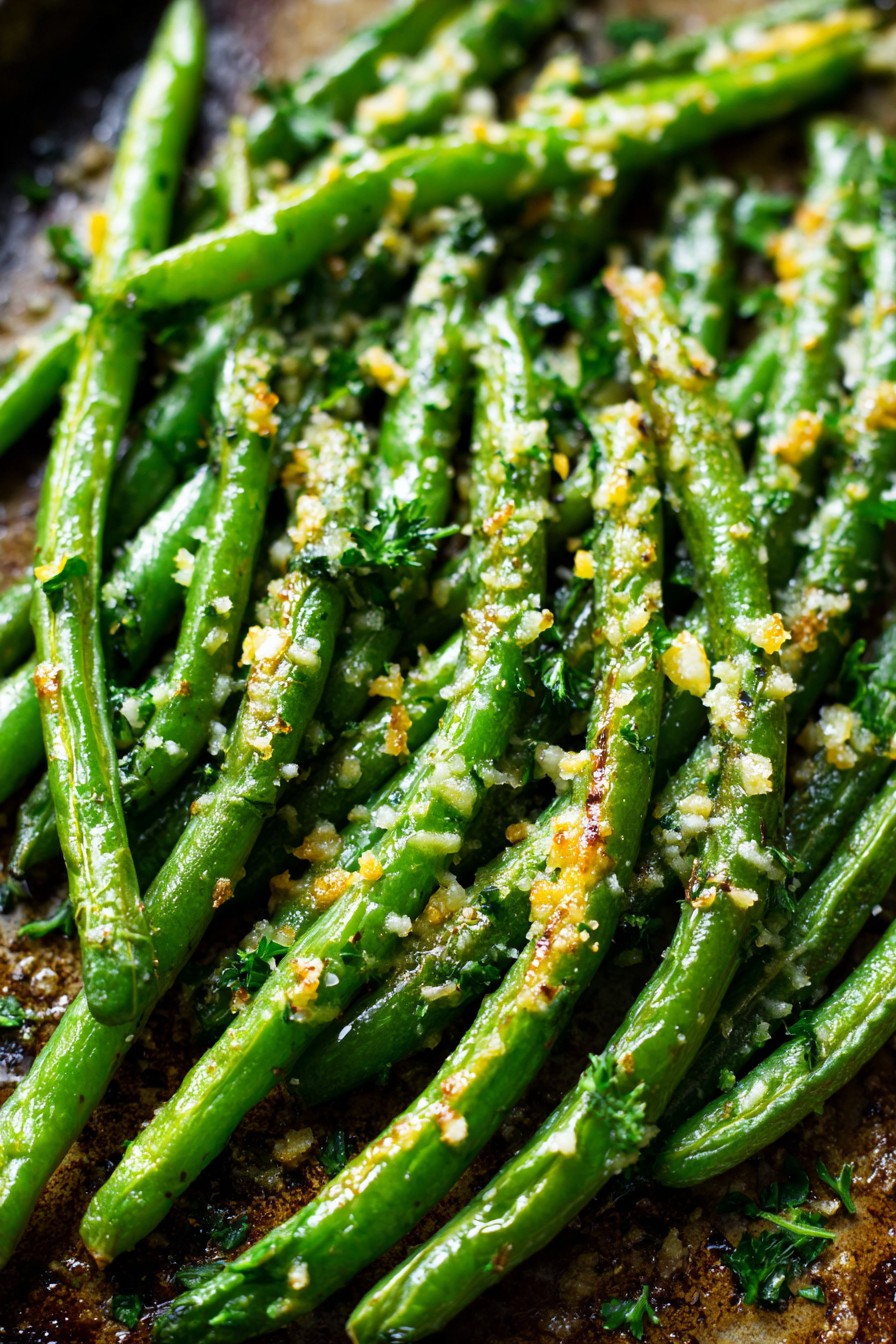
- Fresh garlic and high-quality Parmesan cheese combine to create an umami explosion that transforms simple green beans into a flavor powerhouse that complements any main course
- Using both olive oil and butter gives you the rich flavor of butter with the high smoke point of olive oil, allowing for perfect roasting without burning
- The lemon zest finish adds a bright, fresh acidity that cuts through the richness and makes every single bite taste vibrant and exciting
- Simple seasoning with just salt, pepper, and optional red pepper flakes lets the natural flavors shine while adding just enough kick to keep things interesting
Ingredients
- 1 ½ pounds fresh green beans, ends trimmed
- 3 tablespoons extra virgin olive oil
- 2 tablespoons unsalted butter, melted
- 6 large garlic cloves, minced
- ½ cup freshly grated Parmesan cheese
- 1 teaspoon lemon zest
- 1 teaspoon kosher salt
- ½ teaspoon freshly ground black pepper
- ¼ teaspoon red pepper flakes (optional)
- 2 tablespoons chopped fresh parsley for garnish
Equipment Needed
- Large pot for boiling
- Large bowl for ice bath
- Rimmed baking sheet
- Parchment paper
- Cheese grater
- Garlic press or sharp knife
- Zester or fine grater
- Tongs or large slotted spoon
- Mixing bowls
- Measuring cups and spoons
Instructions
Prep and Blanch Those Beautiful Beans
Get ready to work some magic on those green beans! First, bring a large pot of heavily salted water to a roaring boil – we’re talking about 2 tablespoons of salt in 8 cups of water, which might seem like a lot but trust me, it seasons the beans from the inside out. While that’s heating up, prepare an ice bath by filling a large bowl with equal parts ice and cold water – this will be our secret weapon for locking in that vibrant green color and perfect crisp-tender texture. Once your water is boiling like crazy, carefully add all your trimmed green beans and set your timer for exactly 3 minutes. Watch them transform from dull to dazzling emerald green! The moment that timer dings, immediately use tongs to transfer them straight into the ice bath to stop the cooking process completely. Let them chill for about 2 minutes until they’re completely cool, then drain thoroughly and pat them completely dry with paper towels – this step is crucial for getting that beautiful roast instead of steam!
Create the Flavor Powerhouse Coating
Coat and Arrange for Perfect Roasting
This is where the transformation really begins! Take your perfectly blanched and dried green beans and add them to that incredible garlicky oil mixture in the bowl. Now get your hands in there – yes, I said hands! Toss those beans like you’re mixing the most important salad of your life, making sure every single bean gets coated in that flavorful mixture. Don’t be shy – really massage that coating into every nook and cranny! Line your rimmed baking sheet with parchment paper – this isn’t just for easy cleanup, it helps ensure even browning and prevents sticking that could ruin our beautiful caramelization. Arrange the beans in a single layer with some space between them – no overcrowding allowed! If they’re too crowded, they’ll steam instead of roast, and we want that beautiful caramelization that only comes from proper air circulation. This careful arrangement is what separates okay green beans from absolutely legendary green beans!
Roast to Crispy Perfection
Get ready for the main event! Preheat your oven to a blazing 425°F – and I mean fully preheated, don’t even think about putting those beans in until your oven thermometer reads exactly 425°F. Place your perfectly arranged baking sheet on the middle rack and set your timer for 15 minutes. About halfway through, at the 7-8 minute mark, take those beans out and give them a good shake or flip them with tongs – this ensures even browning on all sides and prevents any hot spots from burning certain beans while others remain pale. You’ll know they’re getting close when you start smelling that incredible garlic aroma filling your kitchen and see the edges beginning to caramelize and get slightly crispy. Watch for visual cues: the beans should be tender when pierced with a fork but still have some snap, with beautiful browned spots and slightly shriveled skins that indicate perfect roasting!
The Grand Finale – Cheese and Garnish Extravaganza
This is the moment we’ve been waiting for! The second those gorgeous beans come out of the oven, immediately shower them with that freshly grated Parmesan cheese – and I mean FRESHLY grated, none of that pre-shredded stuff that contains anti-caking agents. The residual heat will melt the cheese into the most beautiful, slightly crispy coating that clings to every bean. Now zest your lemon directly over the top – that bright, citrusy aroma will cut through the richness and make everything taste fresh and vibrant. Give everything one final toss to distribute the cheese and lemon zest evenly. For the finishing touch, sprinkle with that chopped fresh parsley – not just for color, but for that fresh, herbal note that balances all the rich flavors. Serve immediately while they’re still sizzling hot and watch as these become the most talked-about dish on your table!
Tips and Tricks
Let me share some next-level secrets that will take your green bean game from great to absolutely legendary! First up – bean selection: when you’re at the market, look for the freshest, crispest green beans you can find. They should snap cleanly in half when bent, not bend limply. The thickness matters too – medium-sized beans work best for this recipe as they hold up to roasting while still getting tender inside. If you can find haricot verts (those skinny French green beans), grab them! They roast even faster and have an incredible delicate texture. Now let’s talk garlic: if you’re a garlic lover like me, you might be tempted to add more, but be careful – too much raw garlic can burn and become bitter during roasting. The sweet spot is 6 cloves for this quantity, but if you want more garlic flavor, try roasting whole cloves alongside the beans and then mashing them into the finished dish.
Storage and reheating are crucial knowledge! These beans are absolutely best served immediately, but if you have leftovers, store them in an airtight container in the refrigerator for up to 3 days. When reheating, avoid the microwave at all costs – it will make them soggy and sad. Instead, spread them on a baking sheet and re-crisp in a 375°F oven for 5-7 minutes, or toss them in a hot skillet until they’re warmed through and crispy again. For meal prep enthusiasts, you can blanch the green beans up to 2 days in advance and store them in the refrigerator until you’re ready to roast – this cuts down on active cooking time when you’re preparing dinner. Another pro tip: if you’re serving these for a holiday meal or dinner party, you can blanch and coat the beans ahead of time, then refrigerate them on the baking sheet, and simply pop them in the oven 20 minutes before serving!
Let’s talk cheese alternatives because I know some of you might have dietary restrictions or just want to mix things up! If you’re dairy-free, nutritional yeast gives a similar cheesy flavor, or you could use vegan Parmesan. For a different flavor profile, try Pecorino Romano for a sharper, saltier kick, or Asiago for a nuttier flavor. If you want to get really fancy, finish with some shaved Manchego or aged Gouda. The oil mixture can also be customized – try using avocado oil for its high smoke point, or infused olive oils like lemon or garlic oil for extra flavor dimensions. And don’t forget about herbs! While parsley is classic, fresh thyme, rosemary, or oregano can add wonderful earthy notes. The key is experimenting and making this recipe your own!
Recipe Variations
- Asian-Inspired Sesame Green Beans: Swap the olive oil for sesame oil, use soy sauce instead of salt, and top with toasted sesame seeds and green onions instead of Parmesan. Add a teaspoon of grated ginger to the garlic for an extra flavor kick that will transport your taste buds straight to your favorite Asian restaurant! The combination of nutty sesame, salty soy, and aromatic ginger creates an entirely different but equally delicious experience that pairs perfectly with salmon, chicken, or beef dishes.
- Bacon and Almond Crunch: Cook 4 slices of chopped bacon until crispy, then use the bacon fat instead of olive oil for roasting. After roasting, toss with the crispy bacon bits and ¼ cup of toasted sliced almonds. The smoky bacon flavor combined with the nutty crunch of almonds takes these green beans to a whole new level of deliciousness that will have even vegetable skeptics coming back for more!
- Lemon Herb Mediterranean Style: Increase the lemon zest to 2 teaspoons and add 1 tablespoon each of chopped fresh oregano, thyme, and basil to the oil mixture. Finish with crumbled feta cheese instead of Parmesan and a drizzle of good quality balsamic glaze. This bright, herbaceous version tastes like summer on a plate and pairs beautifully with grilled meats or fish!
- Spicy Buffalo Style: Toss the roasted beans with 2 tablespoons of Buffalo sauce and 1 tablespoon of melted butter right after they come out of the oven. Skip the Parmesan and instead top with crumbled blue cheese and chopped celery leaves. This variation is perfect for game day or when you’re craving that classic Buffalo flavor in vegetable form!
- Brown Butter and Sage: Cook 4 tablespoons of butter until it turns nutty brown and smells amazing, then add 8 fresh sage leaves until crispy. Use this brown butter sage mixture instead of the regular oil mixture and proceed with the recipe. The nutty, earthy flavors of brown butter and crispy sage make this the ultimate fall and winter side dish!
Frequently Asked Questions
Can I use frozen green beans instead of fresh?
Absolutely you can use frozen green beans, but there are some important adjustments to make! First, do NOT thaw them – roast them straight from frozen to prevent them from becoming mushy. You’ll need to increase the roasting time by 5-7 minutes since they start out colder and contain more moisture. The texture will be slightly different – they won’t get quite as crispy around the edges, but they’ll still be delicious. I recommend using frozen cut green beans rather than whole ones for more even cooking. The flavor will still be fantastic, though fresh beans definitely give you that superior crisp-tender texture that makes this recipe so special!
How do I prevent the garlic from burning during roasting?
This is such an important question because burnt garlic can ruin the whole dish! The key is using fresh, properly minced garlic rather than jarred, which tends to burn more easily. Make sure your garlic is evenly distributed and mixed thoroughly with the oil coating – clumps of garlic will definitely burn. Another pro tip: you can roast whole, unpeeled garlic cloves alongside the beans, then squeeze out the soft, sweet roasted garlic and mix it in after cooking. If you’re really concerned, you can add minced garlic during the last 5 minutes of roasting rather than at the beginning. The parchment paper also helps prevent burning compared to roasting directly on the baking sheet!
Can I make this recipe dairy-free or vegan?
You absolutely can make incredible dairy-free green beans! Simply omit the butter and use all olive oil or avocado oil. For the cheesy element, nutritional yeast is your best friend – use about ¼ cup instead of Parmesan, and you’ll get that similar savory, umami flavor. You could also use vegan Parmesan cheese, or for a different approach, try topping with toasted breadcrumbs mixed with olive oil and Italian seasoning. The lemon zest becomes even more important in the dairy-free version to provide that bright, fresh contrast. I’ve served these to dairy-free friends who raved about them, so don’t think you’re missing out on flavor!
What’s the purpose of blanching before roasting?
Blanching is our secret weapon for perfect green beans! It serves three crucial purposes: first, it sets that vibrant green color so your beans look as amazing as they taste. Second, it partially cooks the beans so they become perfectly tender inside while still getting crispy outside during roasting. Without blanching, you’d either have raw centers or burnt exteriors trying to cook them through. Third, it helps the seasoning penetrate better and shortens the roasting time, which means your garlic and cheese are less likely to burn. It might seem like an extra step, but it makes all the difference between good green beans and absolutely phenomenal green beans!
Can I prepare these green beans ahead of time for a party?
You’re in luck because these are fantastic for make-ahead entertaining! You can blanch the green beans up to 2 days in advance – after shocking them in ice water, pat them completely dry and store in an airtight container in the refrigerator. You can even mix the oil, garlic, and seasoning mixture separately and refrigerate it. When you’re ready to serve, toss the cold beans with the oil mixture, spread on your baking sheet, and roast – you might need to add 2-3 extra minutes since you’re starting with cold ingredients. For the absolute best results, I recommend doing the final roast no more than 30 minutes before serving to maintain that perfect crispy texture!
Summary
These Garlic Parmesan Green Beans will completely transform how you think about vegetable side dishes! With perfect crisp-tender texture, explosive garlic flavor, and cheesy goodness in every bite, they’re guaranteed to become your new go-to recipe for everything from weeknight dinners to holiday feasts.
Garlic Parmesan Green Beans
5
servings15
minutes15
minutesIngredients
Instructions
- 1 Bring large pot of salted water to boil. Prepare ice bath in large bowl.
- 2 Blanch green beans in boiling water for 3 minutes, then transfer to ice bath for 2 minutes. Drain and pat dry thoroughly.
- 3 Whisk together olive oil, melted butter, minced garlic, salt, pepper, and red pepper flakes in large bowl.
- 4 Toss blanched green beans in garlic oil mixture until evenly coated.
- 5 Arrange beans in single layer on parchment-lined baking sheet.
- 6 Roast at 425°F for 15 minutes, flipping halfway through, until tender-crisp with caramelized edges.
- 7 Immediately toss with Parmesan cheese, lemon zest, and garnish with fresh parsley. Serve hot.


