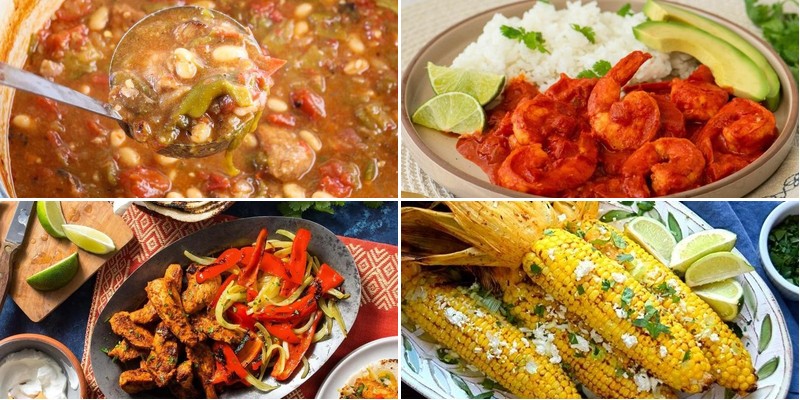
Picture this: it’s Tuesday night, and you’re craving something vibrant, something with a little fiesta flair—but without the fuss. Well, you’ve come to the right place! We’ve gathered 33 of the most delicious Mexican recipes to turn your weeknight dinners into a celebration of flavor. From speedy tacos to cozy enchiladas, get ready to spice things up. Let’s dive in!
Chicken Enchiladas with Red Sauce
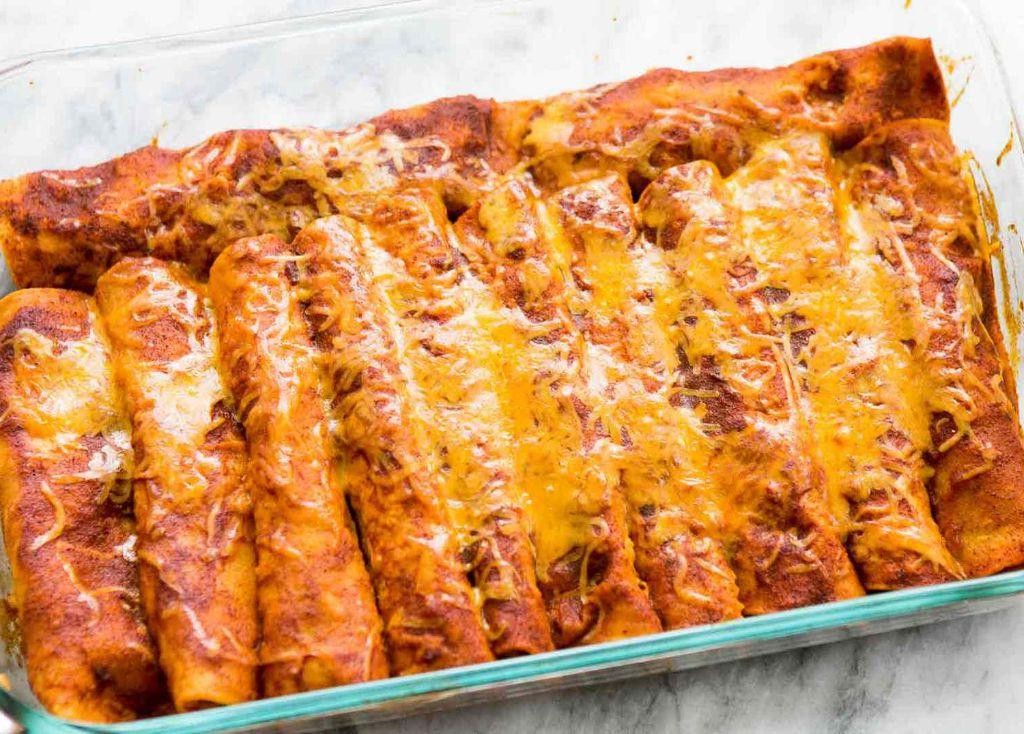
Making restaurant-quality chicken enchiladas at home is simpler than you might think, especially when you break it down into manageable steps. This method walks you through creating tender shredded chicken, a flavorful red sauce, and perfectly rolled enchiladas that bake up bubbly and delicious. Follow along closely, and you’ll have a comforting meal ready to share in no time.
8
enchiladas30
minutes60
minutesIngredients
- 1 pound of boneless, skinless chicken breasts
- 2 cups of chicken broth
- 1 onion, chopped
- 2 cloves of garlic, minced
- 1 tablespoon of olive oil
- 1 (15-ounce) can of tomato sauce
- 1 tablespoon of chili powder
- 1 teaspoon of ground cumin
- a pinch of salt
- 8 corn tortillas
- 2 cups of shredded Monterey Jack cheese
- a splash of water, if needed
Instructions
- Place the chicken breasts and chicken broth in a medium saucepan over high heat.
- Bring the broth to a boil, then reduce the heat to low, cover the pan, and simmer for 20 minutes until the chicken is fully cooked and reaches 165°F internally.
- Remove the chicken from the broth, let it cool for 5 minutes, then shred it using two forks. (Tip: Reserve 1 cup of the cooking broth for the sauce to add extra flavor.)
- Heat the olive oil in a skillet over medium heat until it shimmers.
- Add the chopped onion and cook for 5 minutes, stirring occasionally, until it turns translucent.
- Stir in the minced garlic and cook for 1 more minute until fragrant.
- Pour in the tomato sauce, reserved chicken broth, chili powder, cumin, and salt, then bring the mixture to a simmer.
- Cook the sauce for 10 minutes, stirring occasionally, until it thickens slightly. (Tip: If the sauce gets too thick, add a splash of water to reach your desired consistency.)
- Preheat your oven to 350°F and lightly grease a 9×13-inch baking dish.
- Warm the corn tortillas one at a time in a dry skillet over medium heat for 20 seconds per side to make them pliable. (Tip: This prevents them from cracking when you roll them.)
- Spread 1/2 cup of the red sauce evenly over the bottom of the prepared baking dish.
- Place a warmed tortilla on a clean surface, then top it with 1/4 cup of shredded chicken and 2 tablespoons of shredded Monterey Jack cheese.
- Roll the tortilla tightly around the filling and place it seam-side down in the baking dish.
- Repeat steps 12 and 13 with the remaining tortillas, chicken, and cheese.
- Pour the remaining red sauce over the top of the rolled enchiladas.
- Sprinkle the remaining shredded Monterey Jack cheese evenly over the sauce.
- Bake the enchiladas in the preheated oven for 20 minutes until the cheese is melted and bubbly.
- Remove the baking dish from the oven and let the enchiladas rest for 5 minutes before serving.
Perfectly baked, these enchiladas boast a tender, saucy interior with a lightly crisp tortilla edge. The red sauce delivers a smoky, tangy kick that complements the creamy Monterey Jack cheese beautifully. For a fun twist, top them with a dollop of sour cream or serve alongside a crisp green salad to balance the richness.
Beef Tacos with Fresh Salsa
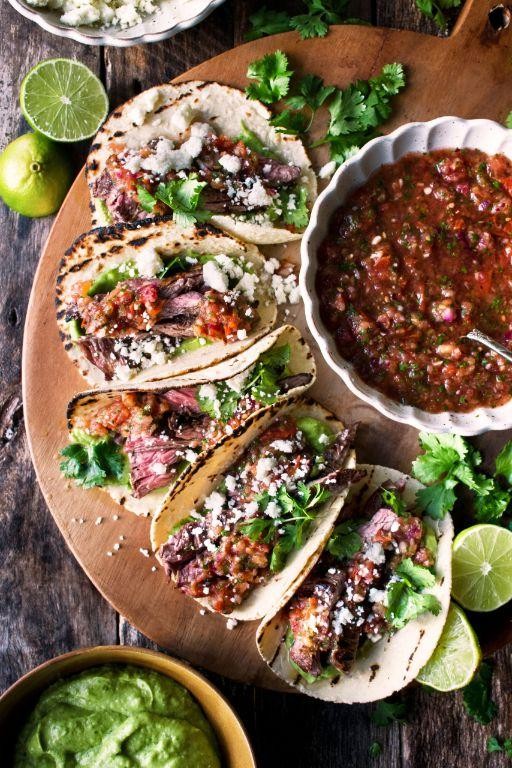
You’ve probably had taco night before, but this methodical approach will give you the crispiest shells and freshest salsa you’ve ever made at home. Let’s walk through each step together to create perfectly balanced beef tacos that will become your new weeknight favorite.
8
tacos15
minutes17
minutesIngredients
– 1 pound of ground beef
– A couple of tablespoons of olive oil
– 1 medium yellow onion, chopped small
– 2 cloves of garlic, minced fine
– A good sprinkle of chili powder
– A teaspoon of ground cumin
– Half a teaspoon of paprika
– A pinch of salt and black pepper
– 8 small corn tortillas
– 2 ripe tomatoes, diced small
– A quarter of a red onion, chopped fine
– A handful of fresh cilantro, chopped
– A splash of lime juice
– A cup of shredded lettuce
– Half a cup of shredded cheddar cheese
Instructions
1. Heat a large skillet over medium-high heat and add 1 tablespoon of olive oil.
2. Add the chopped yellow onion and cook for 4-5 minutes until translucent and slightly golden around the edges.
3. Add the minced garlic and cook for 1 minute until fragrant but not browned.
4. Crumble the ground beef into the skillet, breaking it up with a wooden spoon as it cooks.
5. Cook the beef for 6-8 minutes until no pink remains, stirring occasionally to ensure even browning.
6. Sprinkle the chili powder, cumin, paprika, salt, and black pepper over the beef mixture.
7. Stir to coat everything evenly and cook for 2 more minutes to toast the spices.
8. While the beef cooks, combine the diced tomatoes, red onion, cilantro, and lime juice in a small bowl to make the fresh salsa.
9. Heat a separate skillet over medium heat and warm the corn tortillas for 30 seconds per side until pliable and slightly toasted.
10. Spoon the seasoned beef mixture into the center of each warm tortilla.
11. Top each taco with a generous pinch of shredded lettuce.
12. Sprinkle the shredded cheddar cheese evenly over the lettuce.
13. Finish each taco with a spoonful of the fresh salsa you prepared earlier.
Soft tortillas cradle the savory spiced beef beautifully, while the crisp lettuce and cool salsa provide refreshing contrast. Serve these immediately with extra lime wedges for squeezing, or try stacking them open-faced for a pretty platter presentation that’s perfect for gatherings.
Chiles Rellenos with Cheese Filling
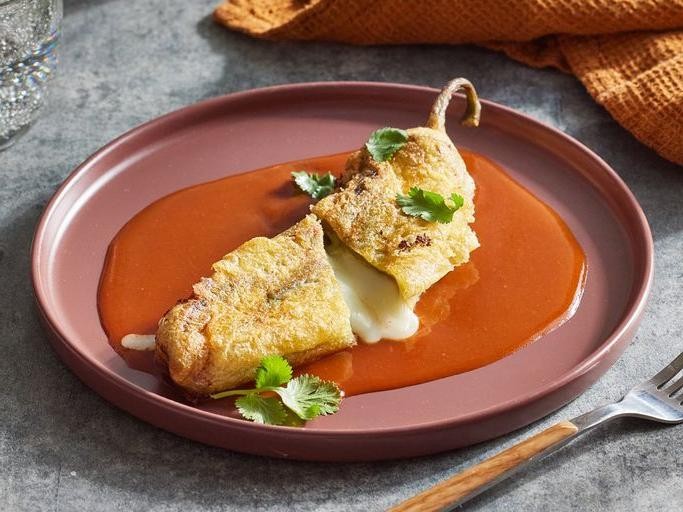
Finally, let’s tackle chiles rellenos with cheese filling—a classic Mexican dish that’s surprisingly approachable when broken down step by step. Follow these instructions carefully, and you’ll create perfectly roasted peppers stuffed with melty cheese, coated in a light egg batter, and fried to golden perfection. We’ll walk through each stage together, from prepping the chiles to serving them hot and delicious.
5
servings25
minutes20
minutesIngredients
– 4 large poblano peppers
– 8 ounces of Monterey Jack cheese, cut into 4 thick sticks
– 3 large eggs, separated
– 1/4 cup of all-purpose flour
– 1/2 teaspoon of baking powder
– A generous pinch of salt
– About 2 cups of vegetable oil for frying
– A splash of water
Instructions
1. Preheat your broiler to high and place the poblano peppers on a baking sheet.
2. Broil the peppers for 5–7 minutes, turning occasionally with tongs, until the skins are blistered and blackened all over.
3. Immediately transfer the peppers to a bowl, cover it with plastic wrap, and let them steam for 10 minutes to loosen the skins.
4. Gently peel off the charred skins from each pepper, being careful not to tear the flesh.
5. Make a small lengthwise slit in each pepper and carefully remove the seeds and membranes.
6. Stuff each pepper with one stick of Monterey Jack cheese, pressing the edges gently to seal.
7. In a medium bowl, whisk the egg yolks with the flour, baking powder, salt, and a splash of water until smooth.
8. In a separate clean bowl, beat the egg whites with an electric mixer on high speed until stiff peaks form, which should take about 3–4 minutes.
9. Gently fold the egg yolk mixture into the beaten egg whites until just combined to create a light batter.
10. Heat 2 cups of vegetable oil in a deep skillet over medium heat until it reaches 350°F on a thermometer.
11. Dredge each stuffed pepper in the batter, ensuring it’s fully coated.
12. Carefully place one battered pepper into the hot oil and fry for 2–3 minutes per side until golden brown and crispy.
13. Remove the fried pepper with a slotted spoon and drain on paper towels.
14. Repeat the battering and frying process with the remaining peppers, working in batches to avoid overcrowding.
15. Serve the chiles rellenos immediately while hot and crispy.
Outstandingly, these chiles rellenos offer a delightful contrast of textures—the crisp, airy coating gives way to tender pepper and oozing, savory cheese. The mild heat from the poblanos balances beautifully with the rich Monterey Jack, making each bite satisfying. Try serving them topped with a fresh tomato salsa or alongside Mexican rice for a complete meal that’s sure to impress.
Pork Carnitas with Warm Corn Tortillas
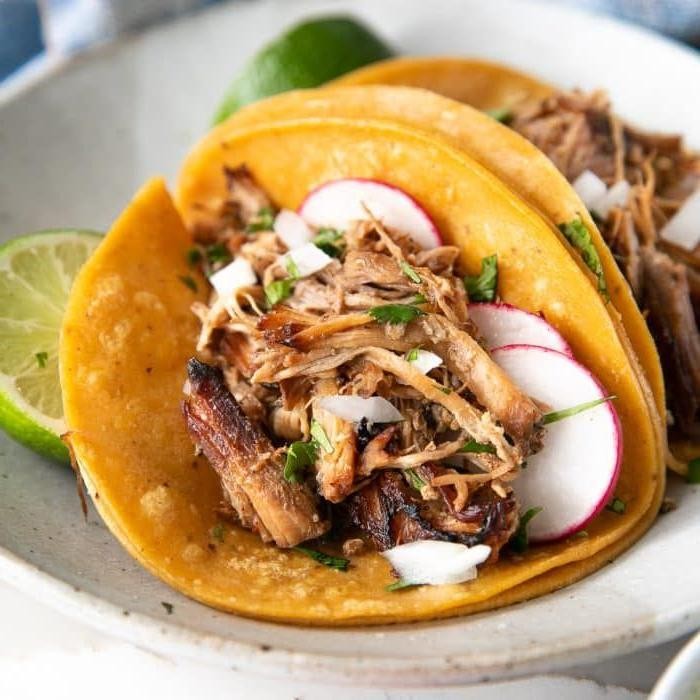
Just imagine coming home to the incredible aroma of slow-cooked pork carnitas filling your kitchen. Juicy, tender pork with crispy edges, perfect for stuffing into warm corn tortillas with your favorite toppings. This methodical approach ensures perfect results every time, even for first-time cooks.
6
servings15
minutes155
minutesIngredients
– About 3 pounds of pork shoulder, cut into 2-inch chunks
– A couple of tablespoons of vegetable oil
– A whole orange, juiced
– A few limes, juiced
– A splash of water
– A generous pinch of kosher salt
– A teaspoon of ground cumin
– A couple of bay leaves
– A package of corn tortillas
Instructions
1. Preheat your oven to 300°F.
2. Pat the pork shoulder chunks completely dry with paper towels.
3. Heat vegetable oil in a large Dutch oven over medium-high heat until it shimmers.
4. Sear pork chunks in a single layer until deeply browned on all sides, about 3-4 minutes per side.
5. Add orange juice, lime juice, water, kosher salt, cumin, and bay leaves to the pot.
6. Bring the liquid to a simmer, then cover the pot with a tight-fitting lid.
7. Transfer the covered pot to the preheated oven and cook for 2 hours.
8. Remove the pot from the oven and increase oven temperature to 450°F.
9. Use two forks to shred the pork directly in the cooking liquid.
10. Spread the shredded pork in an even layer on a baking sheet.
11. Roast at 450°F for 15-20 minutes until the edges become crispy and golden brown.
12. While pork crisps, warm corn tortillas directly over a gas flame for 30 seconds per side until slightly charred.
13. Transfer crispy carnitas to a serving bowl, discarding any remaining bay leaves.
14. Serve immediately with warm tortillas.
What makes these carnitas truly special is the contrast between the tender, juicy interior and those irresistible crispy edges. The citrus-infused pork pairs beautifully with the charred corn tortillas, creating perfect little tacos. Try serving them with pickled red onions and fresh cilantro for an extra burst of flavor and color.
Shrimp Ceviche Tostadas
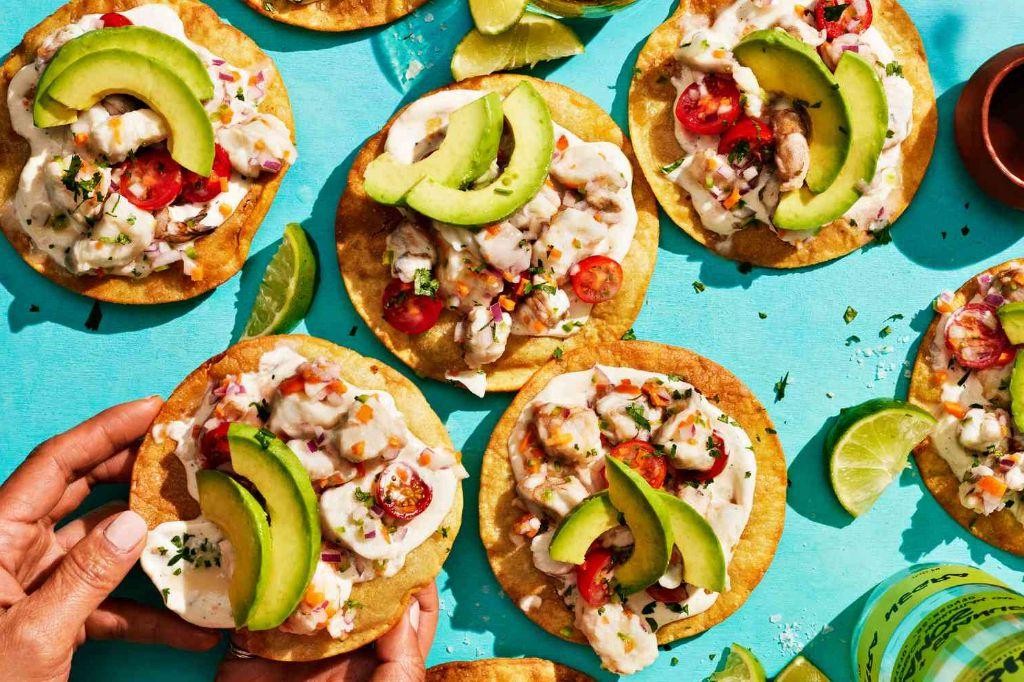
When you’re craving something fresh, vibrant, and perfect for a warm evening, these shrimp ceviche tostadas deliver incredible flavor with minimal cooking. We’ll walk through each simple step to create this refreshing dish that’s bursting with citrus and spice. You’ll be amazed at how quickly these come together for an impressive yet easy meal.
8
tostadas55
minutes2
minutesIngredients
– 1 pound of raw medium shrimp, peeled and deveined
– 1 cup of freshly squeezed lime juice (about 8-10 limes)
– 1/2 cup of finely diced red onion
– 1 large tomato, seeds removed and diced
– 1 jalapeño, minced (remove seeds for less heat)
– 1/4 cup of chopped fresh cilantro
– A generous pinch of salt
– 8 crispy tostada shells
– 1 ripe avocado, sliced
– A splash of hot sauce
Instructions
1. Bring 4 cups of water to a rolling boil in a medium saucepan over high heat.
2. Add the raw shrimp and cook for exactly 2 minutes until they turn pink and opaque.
3. Immediately transfer the cooked shrimp to a bowl of ice water using a slotted spoon to stop the cooking process.
4. Drain the cooled shrimp thoroughly and pat them dry with paper towels.
5. Chop the shrimp into 1/2-inch pieces and place them in a glass or ceramic bowl.
6. Pour the freshly squeezed lime juice over the chopped shrimp, ensuring all pieces are submerged.
7. Cover the bowl with plastic wrap and refrigerate for 45 minutes until the shrimp turns opaque white from the citrus marinade.
8. While the shrimp marinates, combine the diced red onion, tomato, jalapeño, and cilantro in a separate bowl.
9. Drain excess lime juice from the marinated shrimp, reserving 2 tablespoons for later use.
10. Gently fold the shrimp into the vegetable mixture until evenly combined.
11. Season the ceviche mixture with a generous pinch of salt and the reserved lime juice.
12. Arrange the crispy tostada shells on a serving platter.
13. Spoon the ceviche mixture evenly onto each tostada shell.
14. Top each tostada with sliced avocado and a splash of hot sauce.
Here’s why this combination works so beautifully—the crisp tostada provides the perfect crunchy base for the tender, citrus-marinated shrimp, while the creamy avocado balances the bright acidity. For a stunning presentation, arrange them on a large platter with extra lime wedges and let guests build their own, or try stacking them vertically for a modern appetizer display that showcases all the colorful layers.
Vegetarian Black Bean Quesadillas
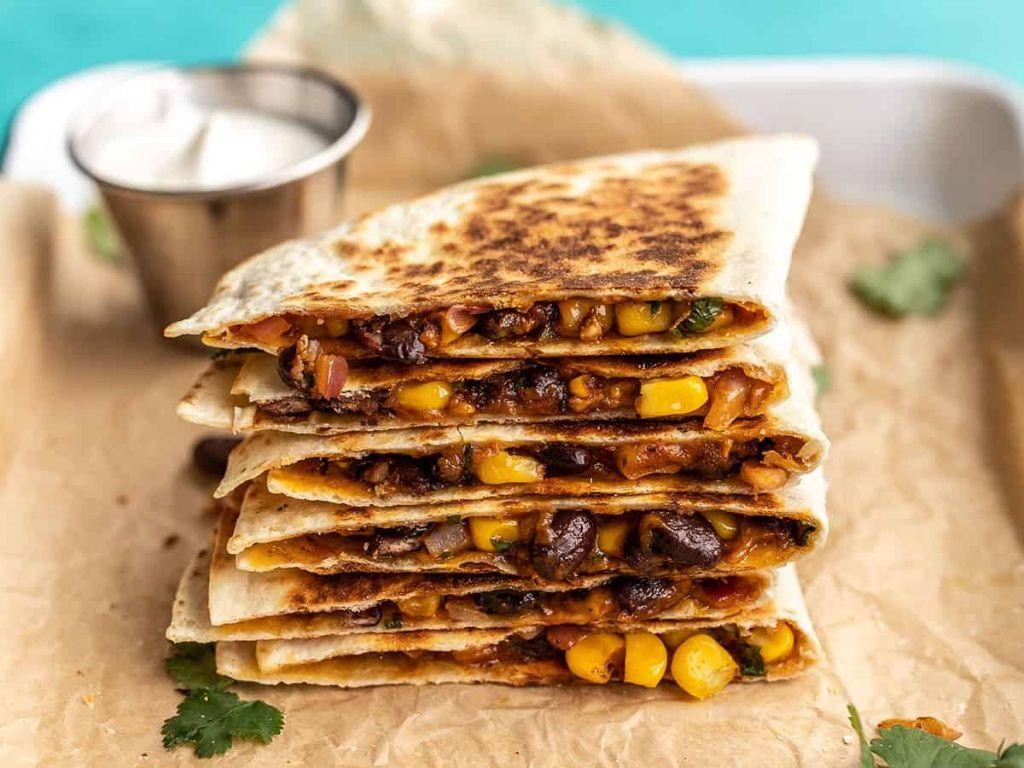
Sometimes the simplest meals are the most satisfying, especially when you’re short on time but craving something hearty and delicious. Start by gathering your ingredients and prepping your workspace for these easy vegetarian black bean quesadillas that come together in under 30 minutes.
2
servings10
minutes16
minutesIngredients
– 4 large flour tortillas
– 1 can (15 oz) of black beans, rinsed and drained
– 1 cup of shredded Monterey Jack cheese
– 1/2 cup of corn kernels (fresh, frozen, or canned)
– 1/4 cup of finely diced red onion
– 1 tablespoon of olive oil
– A generous pinch of chili powder
– A couple of fresh cilantro sprigs, chopped
– A squeeze of fresh lime juice
– A dollop of sour cream for serving
Instructions
1. Heat a large non-stick skillet over medium heat (about 325°F) for 2 minutes until warm.
2. Place one tortilla in the skillet and sprinkle half of it with 1/4 cup of shredded cheese.
3. Spoon 1/2 cup of black beans evenly over the cheese-covered half.
4. Scatter 2 tablespoons of corn kernels and 1 tablespoon of diced red onion over the beans.
5. Sprinkle another 1/4 cup of cheese over the vegetable layer to help bind everything together.
6. Fold the empty tortilla half over the filled side, pressing down gently with your spatula.
7. Cook for 3-4 minutes until the bottom is golden brown with visible toast marks.
8. Carefully flip the quesadilla using a wide spatula and cook for another 3-4 minutes until the second side is equally golden and the cheese is fully melted.
9. Transfer the cooked quesadilla to a cutting board and repeat steps 2-8 with the remaining tortillas and filling.
10. Cut each quesadilla into 3 wedges using a sharp knife or pizza cutter.
11. Drizzle with fresh lime juice and garnish with chopped cilantro before serving.
12. Serve immediately with sour cream on the side for dipping. Enjoy these quesadillas while they’re hot and crispy for the best texture experience. Each bite delivers a satisfying crunch from the toasted tortilla, followed by the creamy melted cheese and hearty black beans. For a fun twist, try serving them with different dipping sauces like chipotle ranch or fresh salsa to customize the flavor to your preference.
Spicy Mexican Rice with Cilantro
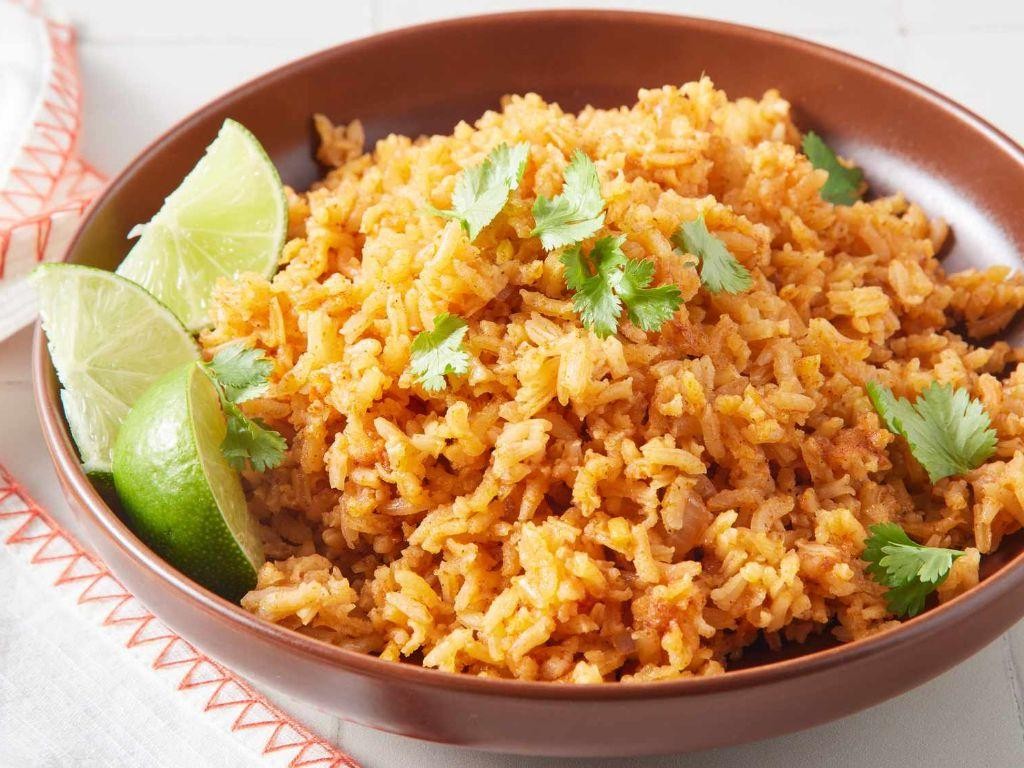
Zesty and vibrant, this Spicy Mexican Rice with Cilantro brings bold flavors to your table with minimal fuss. Perfect for busy weeknights or casual gatherings, it’s a one-pot wonder that even beginners can master. Let’s walk through each step together to create this aromatic dish.
2
servings15
minutes27
minutesIngredients
– 1 cup of long-grain white rice
– 2 tablespoons of olive oil
– 1 small yellow onion, finely chopped
– 2 cloves of garlic, minced
– 1 jalapeño, seeds removed and diced
– 1 can (14.5 ounces) of diced tomatoes, undrained
– 1.5 cups of chicken broth
– 1 teaspoon of ground cumin
– A pinch of salt
– A handful of fresh cilantro, chopped
Instructions
1. Rinse 1 cup of long-grain white rice under cold water in a fine-mesh strainer until the water runs clear to remove excess starch, which helps prevent clumping.
2. Heat 2 tablespoons of olive oil in a large skillet over medium heat for 1 minute until shimmering.
3. Add the finely chopped small yellow onion and cook for 4–5 minutes, stirring occasionally, until it turns translucent and soft.
4. Stir in the minced garlic and diced jalapeño, and cook for 1 minute until fragrant to release their flavors without burning.
5. Tip: Toasting the rice at this stage enhances its nutty taste—add the rinsed rice and cook for 2 minutes, stirring constantly, until lightly golden.
6. Pour in the undrained can of diced tomatoes, 1.5 cups of chicken broth, 1 teaspoon of ground cumin, and a pinch of salt, then bring to a boil over high heat.
7. Reduce the heat to low, cover the skillet with a tight-fitting lid, and simmer for 18 minutes without peeking to ensure even cooking.
8. Tip: Let the rice rest off the heat for 5 minutes after cooking to allow steam to finish softening the grains.
9. Remove the lid and fluff the rice gently with a fork to separate the grains.
10. Tip: Stir in the chopped fresh cilantro just before serving to keep its bright color and fresh flavor intact.
Perfectly fluffy with a subtle kick, this rice boasts tender grains that soak up the smoky cumin and tangy tomatoes. Serve it alongside grilled chicken or stuffed into burritos for a meal that’s as versatile as it is delicious.
Authentic Chicken Pozole
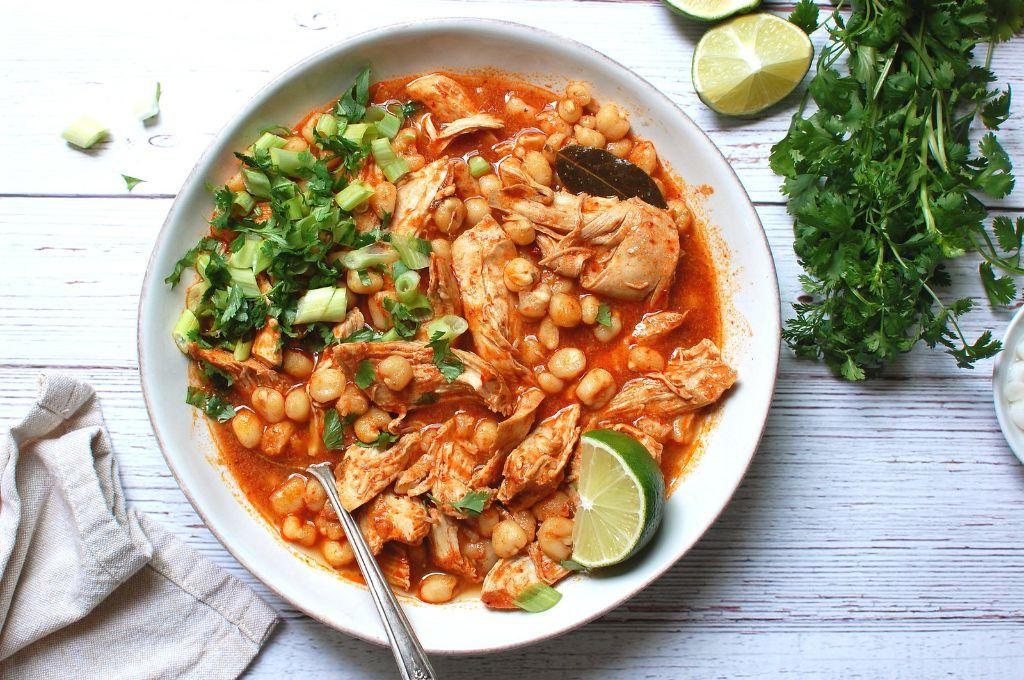
Brimming with rich history and comforting warmth, authentic chicken pozole brings Mexican tradition right to your kitchen. This soul-satisfying stew combines tender chicken with hominy in a deeply flavorful broth that’s perfect for cozy evenings. Let’s walk through each step together to create this nourishing bowl from scratch.
6
servings15
minutes80
minutesIngredients
– 2 pounds of bone-in chicken thighs
– A big 8-quart stockpot
– 10 cups of cold water
– 1 large yellow onion, roughly chopped
– 4 cloves of garlic, smashed
– 2 bay leaves
– 1 tablespoon of dried oregano
– 2 teaspoons of cumin
– 1 tablespoon of chili powder
– 2 (15-ounce) cans of white hominy, drained and rinsed
– A generous sprinkle of salt
– Fresh lime wedges for serving
– A handful of shredded cabbage
– A couple of radishes, thinly sliced
– A bunch of fresh cilantro, chopped
Instructions
1. Place 2 pounds of bone-in chicken thighs in your 8-quart stockpot.
2. Pour 10 cups of cold water over the chicken until completely submerged.
3. Add 1 large roughly chopped yellow onion to the pot.
4. Toss in 4 smashed garlic cloves.
5. Drop 2 bay leaves into the liquid.
6. Sprinkle 1 tablespoon of dried oregano over the ingredients.
7. Measure 2 teaspoons of cumin and add to the pot.
8. Stir in 1 tablespoon of chili powder.
9. Bring the pot to a boil over high heat, which should take about 8-10 minutes.
10. Once boiling, reduce heat to maintain a gentle simmer.
11. Skim off any foam that rises to the surface with a spoon.
12. Simmer uncovered for 45 minutes until chicken is fork-tender.
13. Remove chicken from broth using tongs and place on a cutting board.
14. Let chicken cool until safe to handle, about 10 minutes.
15. Shred chicken meat from bones, discarding skin and bones.
16. Return shredded chicken to the broth.
17. Stir in 2 drained and rinsed cans of white hominy.
18. Season with a generous sprinkle of salt until broth tastes balanced.
19. Simmer for another 15 minutes to let flavors meld.
20. Ladle pozole into bowls and top with shredded cabbage, radish slices, and fresh cilantro.
21. Serve immediately with lime wedges for squeezing over each bowl.
The finished pozole delivers a wonderful contrast between the chewy hominy and tender shredded chicken, while the rich broth carries subtle earthy notes from the spices. For a creative twist, serve it with warm corn tortillas for dipping, or add a dollop of Mexican crema for extra creaminess that complements the chili warmth beautifully.
Chipotle Lime Grilled Corn
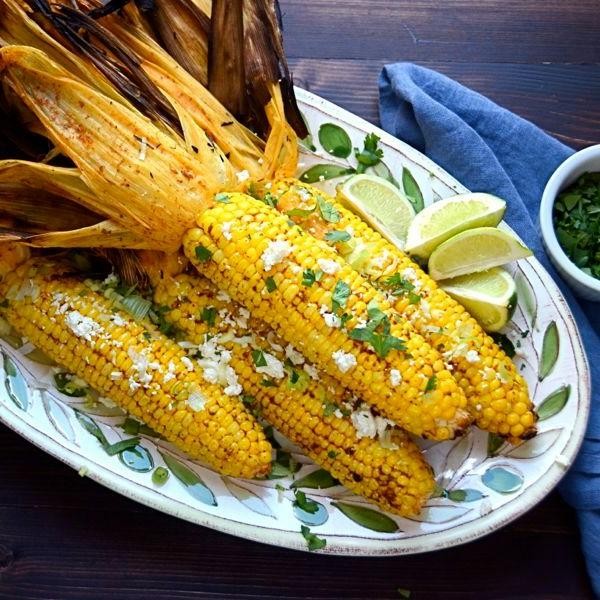
Unbelievably simple yet packed with flavor, this grilled corn recipe will become your go-to summer side dish. Using just a handful of ingredients, you’ll transform ordinary corn into something extraordinary with smoky chipotle and zesty lime. Follow these steps carefully and you’ll have restaurant-quality corn right from your own backyard grill.
3
servings10
minutes20
minutesIngredients
– 4 ears of fresh corn, husks on
– A couple tablespoons of olive oil
– 1 teaspoon of chipotle powder
– The juice from 1 lime
– A generous pinch of kosher salt
– A small handful of fresh cilantro, chopped
Instructions
1. Preheat your grill to medium-high heat, around 400°F, and make sure the grates are clean.
2. Carefully peel back the corn husks without removing them, then remove all the silk threads completely.
3. Brush each ear of corn evenly with olive oil using a pastry brush, making sure to coat all sides.
4. Sprinkle the chipotle powder evenly over all four ears of corn, rotating to cover every surface.
5. Pull the husks back up over the corn to protect it from direct flame during grilling.
6. Place the corn directly on the grill grates and close the lid to maintain consistent heat.
7. Grill for 15-20 minutes, turning the corn every 5 minutes with tongs for even cooking.
8. Check for doneness by peeking inside the husk – the kernels should be bright yellow with some charred spots.
9. Remove the corn from the grill using heat-proof gloves or tongs and let it rest for 2 minutes.
10. Pull back the husks completely and squeeze fresh lime juice evenly over all four ears.
11. Sprinkle with kosher salt while the corn is still warm so it sticks to the surface.
12. Garnish with chopped cilantro just before serving for maximum freshness.
You’ll notice the kernels have a satisfying pop when you bite into them, with the smoky chipotle creating a beautiful contrast against the sweet corn and tangy lime. Try serving these alongside grilled meats or crumbling some cotija cheese over the top for an extra layer of flavor that will have everyone asking for seconds.
Mole Poblano Enchiladas
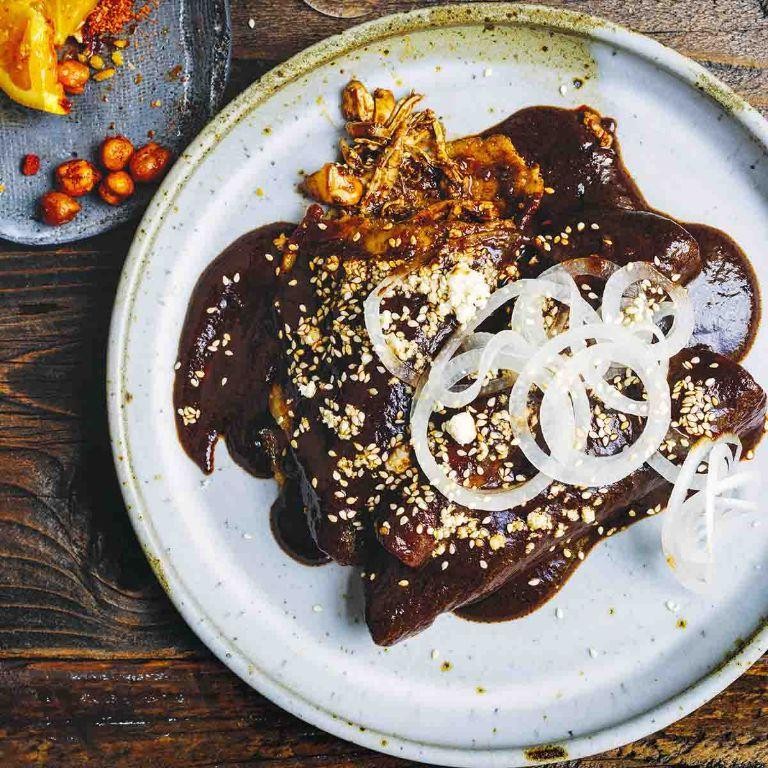
Just imagine transforming simple tortillas into a rich, complex Mexican masterpiece that fills your kitchen with the most incredible aromas. Mole Poblano Enchiladas combine tender chicken with that legendary sauce featuring chocolate, spices, and chilies in perfect harmony. Let’s walk through this methodically so you can recreate this authentic dish with confidence.
4
portions15
minutes32
minutesIngredients
– 8 corn tortillas
– 2 cups of shredded cooked chicken
– 1½ cups of mole poblano sauce
– a generous cup of shredded Oaxaca cheese
– 2 tablespoons of vegetable oil
– ½ cup of chicken broth
– a couple of toasted sesame seeds for garnish
– a splash of crema Mexicana
Instructions
1. Preheat your oven to 350°F to ensure even heating throughout the baking process.
2. Warm 2 tablespoons of vegetable oil in a skillet over medium heat for about 2 minutes until it shimmers.
3. Briefly fry each corn tortilla for 15 seconds per side to make them pliable and prevent cracking.
4. Dip one tortilla completely into the mole poblano sauce, coating both sides evenly.
5. Place ¼ cup of shredded cooked chicken in the center of the sauced tortilla.
6. Roll the tortilla tightly around the filling and place it seam-side down in a 9×13 baking dish.
7. Repeat steps 4-6 with all remaining tortillas, arranging them snugly in a single layer.
8. Pour the remaining mole sauce over the assembled enchiladas, covering them completely.
9. Sprinkle 1 generous cup of shredded Oaxaca cheese evenly across the top.
10. Carefully pour ½ cup of chicken broth around the edges of the baking dish to keep everything moist.
11. Cover the dish with aluminum foil and bake at 350°F for 20 minutes.
12. Remove the foil and bake for another 10 minutes until the cheese is bubbly and slightly golden.
13. Let the enchiladas rest for 5 minutes before serving to allow the sauces to set properly.
14. Drizzle with a splash of crema Mexicana and sprinkle with toasted sesame seeds for garnish.
Velvety mole sauce clings to each tender tortilla, creating layers of complex flavor that balance spicy, sweet, and savory notes beautifully. The melted Oaxaca cheese adds creamy richness that contrasts wonderfully with the slight chew of the corn tortillas. For a stunning presentation, serve these alongside Mexican rice and refried beans, or top with pickled red onions for a bright, acidic counterpoint to the rich mole.
Sizzling Fajitas with Bell Peppers
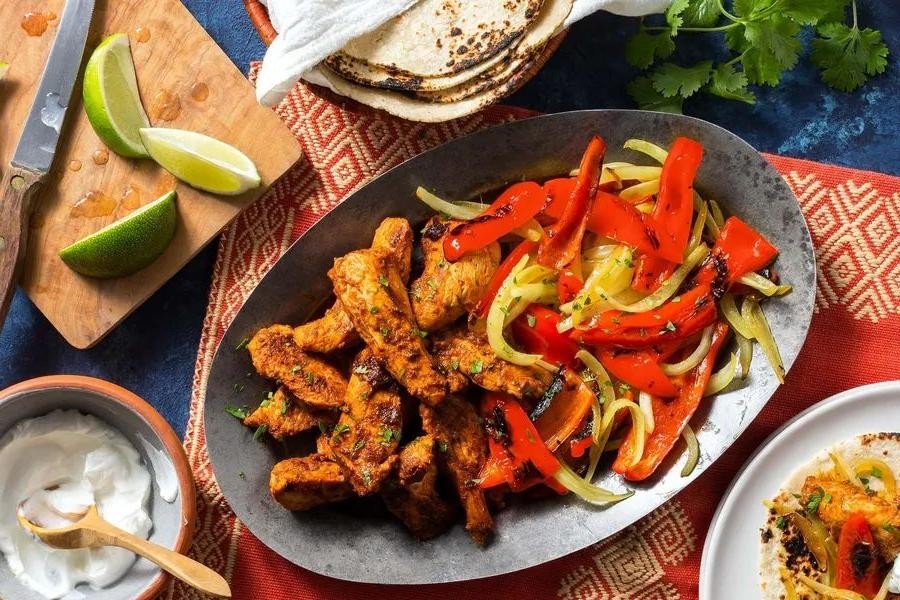
Fajitas bring that satisfying sizzle right to your table, combining tender strips of chicken with colorful bell peppers in a dish that’s as fun to make as it is to eat. Following these simple steps will give you perfectly cooked fajitas every time, with that characteristic restaurant-style presentation that makes dinner feel special.
4
servings15
minutes25
minutesIngredients
– 1.5 pounds of chicken breast cut into thin strips
– 3 bell peppers (mix of red, yellow, and green), sliced into thin strips
– 1 large onion, sliced into half-moons
– 2 tablespoons of olive oil
– 2 tablespoons of fajita seasoning
– 1 tablespoon of lime juice
– A couple of flour tortillas
– A splash of water
Instructions
1. Heat 1 tablespoon of olive oil in a large skillet over medium-high heat until it shimmers, about 2 minutes.
2. Add the chicken strips to the hot skillet in a single layer, being careful not to overcrowd the pan.
3. Cook the chicken for 4-5 minutes without moving it to develop a golden-brown sear on one side.
4. Flip each chicken strip and cook for another 3-4 minutes until the internal temperature reaches 165°F.
5. Remove the cooked chicken to a clean plate and set aside.
6. Add the remaining tablespoon of olive oil to the same skillet.
7. Add the sliced bell peppers and onions to the hot oil, spreading them evenly across the pan.
8. Cook the vegetables for 6-8 minutes, stirring only occasionally to allow them to develop some charred spots.
9. Sprinkle the fajita seasoning evenly over the vegetables and stir to coat completely.
10. Add the splash of water to the skillet to help create steam and prevent the seasoning from burning.
11. Return the cooked chicken to the skillet with the vegetables.
12. Drizzle the lime juice over the chicken and vegetable mixture.
13. Stir everything together and cook for 1-2 minutes until heated through and well combined.
14. Warm the flour tortillas in a dry skillet for 30 seconds per side or in the microwave for 20 seconds.
15. Transfer the hot fajita mixture to a serving platter.
You’ll love the contrast between the tender, well-seasoned chicken and the crisp-tender bell peppers with their slight char. The vibrant colors make these fajitas perfect for serving family-style right in the skillet, letting everyone build their own tortilla wraps at the table.
Green Chile Pork Stew
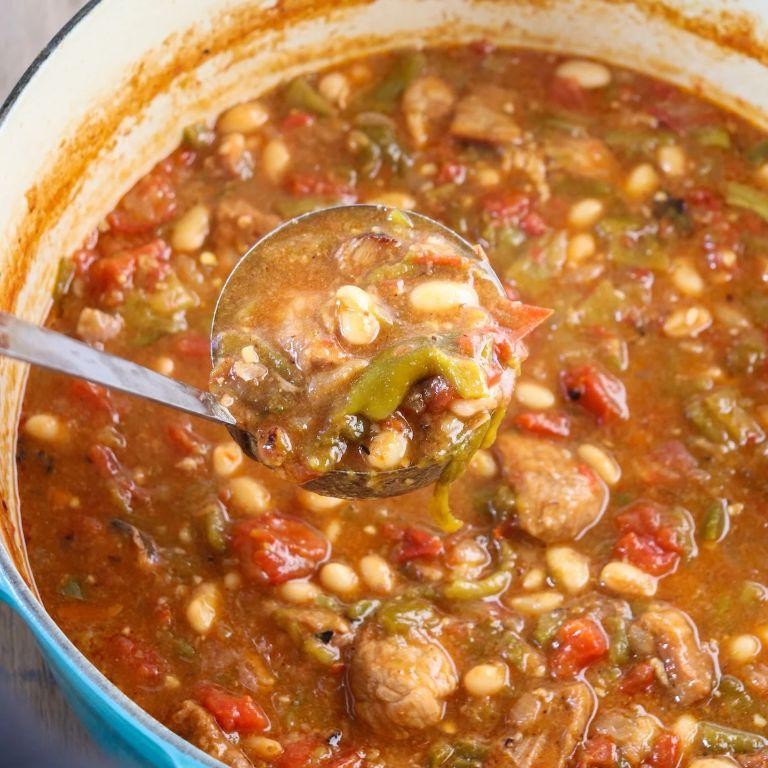
You’ll love how this Green Chile Pork Stew comes together with minimal fuss and maximum flavor. Let’s walk through it step by step so you can create a cozy, satisfying meal that’s perfect for chilly evenings.
2
servings20
minutes95
minutesIngredients
– 2 pounds of pork shoulder, cut into 1-inch cubes
– A couple of tablespoons of olive oil
– One large yellow onion, chopped
– Four cloves of garlic, minced
– Two 4-ounce cans of diced green chiles
– Four cups of chicken broth
– Three medium potatoes, peeled and diced into ½-inch pieces
– A teaspoon of ground cumin
– A splash of lime juice
– Salt and freshly ground black pepper, to season as you go
Instructions
1. Pat the pork shoulder cubes dry with paper towels to help them brown evenly.
2. Heat 2 tablespoons of olive oil in a large Dutch oven over medium-high heat until it shimmers.
3. Add the pork in a single layer, working in batches if needed, and sear for 4–5 minutes per side until deeply browned.
4. Transfer the browned pork to a plate and set aside.
5. Reduce the heat to medium and add the chopped onion to the same pot, sautéing for 5–7 minutes until softened and translucent.
6. Stir in the minced garlic and cook for 1 minute until fragrant.
7. Tip: Scrape up any browned bits from the bottom of the pot—they add rich flavor to the stew.
8. Return the pork to the pot along with any accumulated juices.
9. Add the diced green chiles, chicken broth, diced potatoes, and ground cumin, stirring to combine.
10. Bring the stew to a boil, then reduce the heat to low, cover, and simmer for 1 hour and 15 minutes.
11. Tip: Keep the lid slightly ajar to prevent boiling over and maintain a gentle simmer.
12. After simmering, uncover and stir in a splash of lime juice to brighten the flavors.
13. Season with salt and pepper, tasting and adjusting as needed.
14. Tip: Let the stew rest off the heat for 10 minutes before serving to allow the flavors to meld.
Just imagine tender pork mingling with the mild heat of green chiles and soft potatoes in every spoonful. Serve it over steamed rice or with warm tortillas for a comforting meal that’s sure to become a favorite.
Camarones a la Diabla
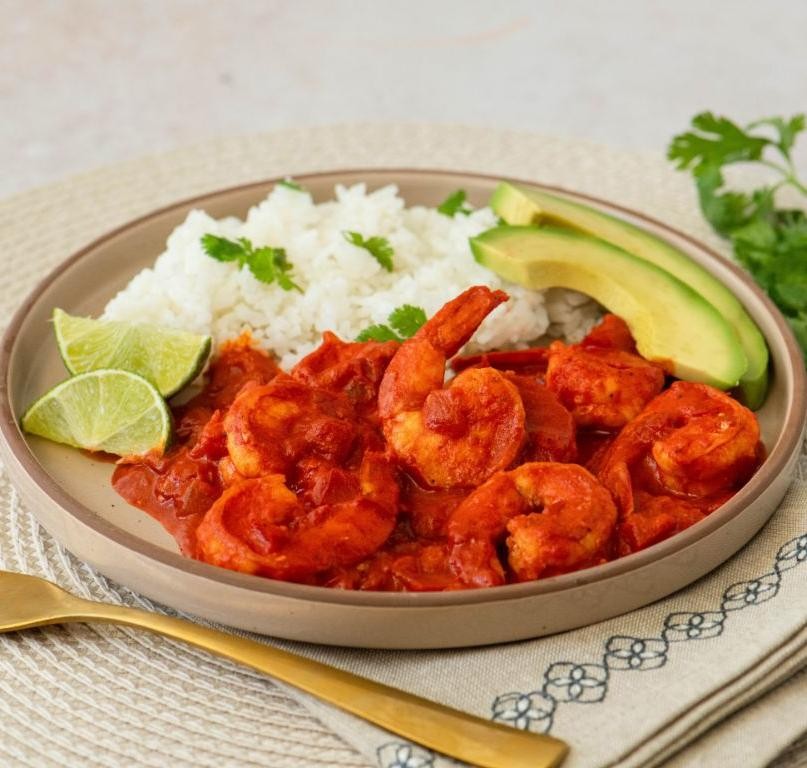
A fiery Mexican shrimp dish that brings the heat while keeping preparation straightforward, Camarones a la Diabla transforms simple ingredients into a spectacular meal perfect for weeknight dinners or entertaining guests. Let’s walk through each step together to create this vibrant, spicy masterpiece.
5
servings15
minutes20
minutesIngredients
– 1 pound of large raw shrimp, peeled and deveined
– 3 tablespoons of olive oil
– 1 medium white onion, thinly sliced
– 4 cloves of garlic, minced
– 2 cups of tomato puree
– 2-3 chipotle peppers in adobo sauce, chopped
– A generous splash of fresh lime juice (about 2 tablespoons)
– A couple of teaspoons of smoked paprika
– A pinch of salt
Instructions
1. Pat the shrimp completely dry with paper towels to ensure they sear properly instead of steaming.
2. Heat 2 tablespoons of olive oil in a large skillet over medium-high heat until it shimmers, about 2 minutes.
3. Add the shrimp in a single layer and cook for exactly 2 minutes per side until they turn pink and opaque.
4. Transfer the cooked shrimp to a clean plate using tongs.
5. Reduce the heat to medium and add the remaining 1 tablespoon of olive oil to the same skillet.
6. Sauté the sliced onion for 4-5 minutes until it becomes soft and translucent.
7. Stir in the minced garlic and cook for 1 minute until fragrant but not browned.
8. Add the tomato puree, chopped chipotle peppers, smoked paprika, and salt to the skillet.
9. Simmer the sauce for 8-10 minutes, stirring occasionally, until it thickens slightly and deepens in color.
10. Return the cooked shrimp to the skillet and toss gently to coat them evenly with the sauce.
11. Drizzle the fresh lime juice over the shrimp and sauce, stirring to combine.
12. Cook for 1 final minute to heat the shrimp through and allow the flavors to meld.
Creamy tomato sauce clings to each tender shrimp, creating a perfect balance between smoky chipotle heat and bright lime acidity. Consider serving these fiery camarones over cilantro-lime rice or stuffing them into warm corn tortillas for a truly memorable taco experience that will have everyone reaching for seconds.
Classic Mexican Sopa de Fideo
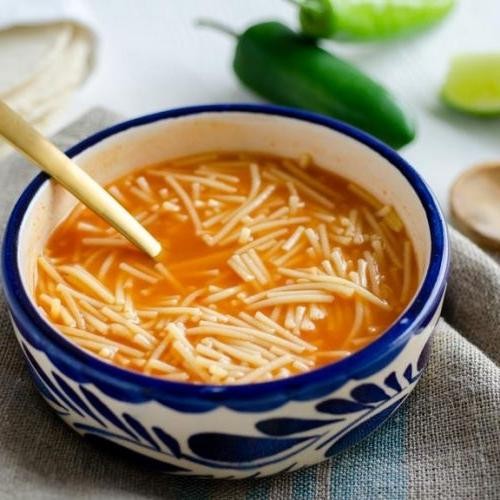
Every home cook needs a comforting, easy-to-make soup in their repertoire, and this traditional Mexican Sopa de Fideo fits the bill perfectly. Essentially a vermicelli noodle soup simmered in a rich tomato broth, it comes together with minimal effort but delivers maximum flavor. Let me walk you through each step so you can recreate this classic dish with confidence.
5
servings10
minutes21
minutesIngredients
– A couple of tablespoons of olive oil
– About 4 ounces of fideo or vermicelli noodles
– Half of a medium yellow onion, chopped
– A couple of garlic cloves, minced
– One 14.5-ounce can of diced tomatoes
– Four cups of chicken broth
– A splash of fresh lime juice
– A small handful of fresh cilantro, chopped
– Salt to season
Instructions
1. Heat 2 tablespoons of olive oil in a large pot over medium heat until it shimmers.
2. Add 4 ounces of fideo noodles and toast them, stirring constantly, for about 3-4 minutes until they turn golden brown and smell nutty—this deepens their flavor.
3. Stir in half of a chopped yellow onion and cook for 3 minutes until softened.
4. Add 2 minced garlic cloves and cook for 1 minute until fragrant, being careful not to burn them.
5. Pour in one 14.5-ounce can of diced tomatoes with their juices and cook for 2 minutes, mashing them slightly with a spoon to break them down.
6. Add 4 cups of chicken broth and bring the mixture to a boil over high heat.
7. Once boiling, reduce the heat to low, cover the pot, and simmer for 10 minutes until the noodles are tender but not mushy.
8. Stir in a splash of fresh lime juice and a small handful of chopped cilantro, then season with salt until the broth tastes balanced.
9. Remove the pot from the heat and let it sit for 2 minutes to allow the flavors to meld. Really, the noodles should be soft but still hold their shape, swimming in a vibrant, tomatoey broth that’s both light and satisfying. Try topping it with avocado slices or a dollop of crema for extra creaminess—it’s perfect as a starter or a simple main course.
Taco Salad with Homemade Shells
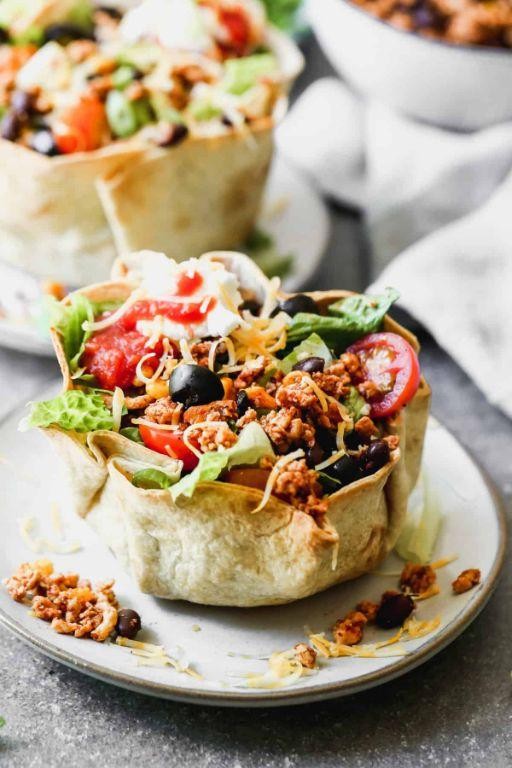
Diving into taco night just got more exciting with this build-your-own salad approach that lets everyone customize their perfect bowl. Making your own crispy shells from scratch might sound fancy, but it’s surprisingly simple and adds that wow factor. Follow these steps carefully for a restaurant-quality meal at home.
2
servings15
minutes20
minutesIngredients
– 4 large flour tortillas
– A couple tablespoons of olive oil
– A pound of ground beef
– A packet of taco seasoning
– A splash of water
– A head of romaine lettuce, chopped
– A cup of shredded cheddar cheese
– A couple of tomatoes, diced
– A half cup of sour cream
– A quarter cup of salsa
Instructions
1. Preheat your oven to 375°F.
2. Brush both sides of each tortilla lightly with olive oil using a pastry brush.
3. Drape each oiled tortilla over the inverted cups of an upside-down muffin tin to create bowl shapes.
4. Bake the tortilla bowls for 8-10 minutes until golden brown and crisp.
5. Remove the tortilla bowls from the oven and let them cool completely on a wire rack.
6. Brown the ground beef in a large skillet over medium-high heat for 6-8 minutes, breaking it into small crumbles with a wooden spoon.
7. Drain any excess grease from the skillet.
8. Sprinkle the taco seasoning over the cooked beef.
9. Add ¼ cup of water to the skillet and stir to combine.
10. Simmer the beef mixture for 3-4 minutes until the liquid reduces and coats the meat.
11. Arrange the chopped romaine lettuce in the bottom of each tortilla bowl.
12. Spoon the seasoned beef evenly over the lettuce in each bowl.
13. Top each salad with shredded cheddar cheese.
14. Distribute the diced tomatoes evenly among the bowls.
15. Add a dollop of sour cream to the center of each salad.
16. Spoon salsa over the sour cream.
17. Serve immediately while the tortilla bowls are still crisp. My favorite tip: For extra-crispy shells, make sure your tortillas are completely dry before brushing with oil. Makes all the difference!
Munching through the layers reveals wonderful contrasts—the cool crispness of fresh lettuce against the warm, savory beef, all held together by that satisfyingly crunchy homemade shell. The creamy sour cream and zesty salsa create a perfect sauce that ties everything together without making the shell soggy. For a fun twist, try setting up a taco salad bar with extra toppings like black beans, corn, or avocado slices so everyone can build their ultimate creation.
Slow-Cooked Barbacoa Beef
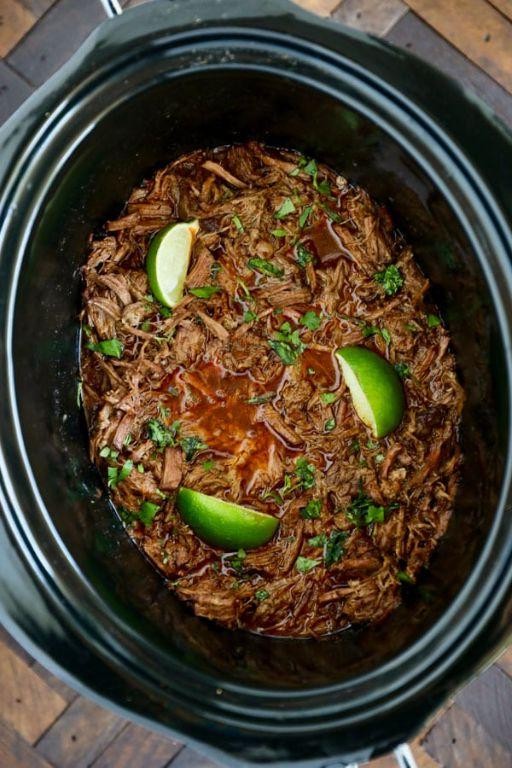
Very few dishes deliver such incredible flavor with such minimal effort as this slow-cooked barbacoa beef. You’ll be amazed how simple ingredients transform into something truly spectacular when given enough time to mingle and develop. Let’s walk through this methodical process together, step by step.
6
servings15
minutes480
minutesIngredients
– 3 pounds of beef chuck roast, cut into 4-inch chunks
– 4 cloves of garlic, minced
– 1 large yellow onion, roughly chopped
– 2 chipotle peppers in adobo sauce, chopped
– a generous splash of apple cider vinegar (about ¼ cup)
– a couple of tablespoons of lime juice
– 1 tablespoon of ground cumin
– 2 teaspoons of dried oregano
– 1 teaspoon of ground cloves
– ½ cup of beef broth
– salt to coat the meat generously
Instructions
1. Pat your beef chuck roast chunks completely dry with paper towels, then season all sides generously with salt.
2. Place the seasoned beef chunks in your slow cooker in a single layer.
3. Sprinkle the minced garlic, chopped onion, chopped chipotle peppers, ground cumin, dried oregano, and ground cloves evenly over the beef.
4. Pour the apple cider vinegar, lime juice, and beef broth around the sides of the meat, being careful not to wash off the seasonings.
5. Cover the slow cooker with its lid and cook on LOW heat for 8 hours until the beef shreds easily with two forks.
6. Using two forks, shred the beef directly in the slow cooker, mixing it with the cooking juices.
7. Let the shredded beef sit in the juices for 15 minutes to absorb maximum flavor before serving.
Perfectly tender and infused with smoky chipotle warmth, this barbacoa develops an incredible depth that makes ordinary tacos extraordinary. The meat stays remarkably juicy while picking up all the aromatic spices, creating that signature pull-apart texture ideal for stuffing into warm tortillas or piling over cilantro-lime rice.
Conclusion
These 33 delicious Mexican recipes offer endless inspiration for flavorful family dinners. We hope you’ll try a few favorites, leave a comment sharing which dishes you loved most, and pin this collection to your Pinterest boards for easy meal planning. ¡Buen provecho!
