Eating well with gout doesn’t mean sacrificing flavor or satisfaction! We’ve gathered 18 delicious, gout-friendly recipes that prove managing your diet can be both easy and enjoyable. From comforting dinners to vibrant sides, these dishes are designed to keep you nourished and happy. Ready to discover meals that taste as good as they make you feel? Let’s dive into these delightful options!
Hearty Lentil and Vegetable Stew

Sick of sad desk lunches and flavorless freezer meals? Let’s fix that with a pot of cozy magic that’ll hug your soul from the inside out. This hearty lentil and vegetable stew is basically a warm blanket in a bowl, ready to banish the winter blues one delicious spoonful at a time.
6
servings15
minutes58
minutesIngredients
– 2 tbsp olive oil
– 1 large yellow onion, diced
– 3 cloves garlic, minced
– 2 large carrots, sliced into 1/4-inch rounds
– 2 stalks celery, sliced
– 1 1/2 cups brown lentils, rinsed
– 6 cups vegetable broth
– 1 (14.5 oz) can diced tomatoes
– 1 tsp dried thyme
– 1 bay leaf
– 1 tsp salt
– 1/2 tsp black pepper
– 4 cups fresh spinach
Instructions
1. Heat 2 tbsp olive oil in a large pot over medium heat for 1 minute.
2. Add 1 large diced yellow onion and cook for 5 minutes, stirring occasionally, until translucent.
3. Stir in 3 minced garlic cloves and cook for 1 minute until fragrant.
4. Add 2 sliced carrots and 2 sliced celery stalks, cooking for 4 minutes until slightly softened.
5. Pour in 1 1/2 cups rinsed brown lentils and stir to coat with vegetables.
6. Add 6 cups vegetable broth, 1 can diced tomatoes, 1 tsp dried thyme, 1 bay leaf, 1 tsp salt, and 1/2 tsp black pepper.
7. Bring the stew to a boil over high heat, then reduce to a simmer.
8. Cover the pot and simmer for 35 minutes, stirring halfway through.
9. Uncover and simmer for 10 more minutes until lentils are tender but not mushy.
10. Stir in 4 cups fresh spinach and cook for 2 minutes until wilted.
11. Remove the pot from heat and discard the bay leaf.
Who says healthy can’t be hearty? This stew’s tender lentils and vibrant veggies create a satisfying, spoonable texture, while the thyme and garlic lend a savory depth that’s pure comfort. Serve it topped with a crusty bread “shovel” for maximum cozy vibes, or ladle it over mashed potatoes for the ultimate carb-on-carb celebration.
Quinoa and Roasted Vegetable Salad
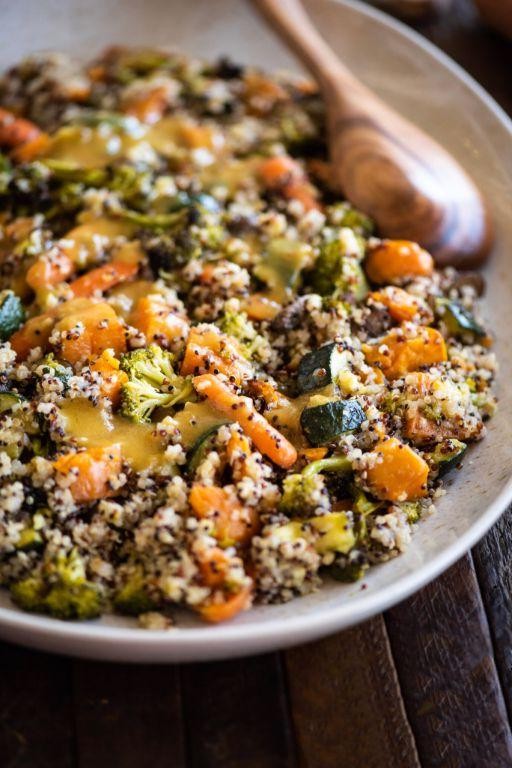
Brace yourselves, salad skeptics—this isn’t your average rabbit food! We’re talking quinoa that actually has personality and roasted veggies with more char than a reality TV villain, all coming together in a bowl that might just make you forget about boring lunches forever.
5
servings20
minutes40
minutesIngredients
- 1 cup quinoa
- 2 cups water
- 2 medium zucchini, chopped into 1-inch pieces
- 1 red bell pepper, chopped into 1-inch pieces
- 1 yellow bell pepper, chopped into 1-inch pieces
- 1 red onion, chopped into 1-inch pieces
- 3 tablespoons olive oil
- 1 teaspoon salt
- 1/2 teaspoon black pepper
- 2 tablespoons lemon juice
- 1/4 cup chopped fresh parsley
- 2 ounces feta cheese, crumbled
Instructions
- Preheat your oven to 425°F and line a baking sheet with parchment paper.
- Rinse 1 cup quinoa under cold water in a fine-mesh strainer for 1 minute to remove the natural bitter coating.
- Combine rinsed quinoa and 2 cups water in a medium saucepan over high heat.
- Bring the quinoa and water to a rolling boil, then immediately reduce heat to low and cover the saucepan.
- Simmer quinoa for 15 minutes until all water is absorbed and little spirals appear around the grains.
- While quinoa cooks, chop 2 medium zucchini, 1 red bell pepper, 1 yellow bell pepper, and 1 red onion into uniform 1-inch pieces.
- Toss chopped vegetables with 3 tablespoons olive oil, 1 teaspoon salt, and 1/2 teaspoon black pepper in a large bowl.
- Spread vegetables in a single layer on your prepared baking sheet, ensuring they aren’t crowded for optimal roasting.
- Roast vegetables at 425°F for 20-25 minutes until edges are caramelized and peppers have slight char spots.
- Transfer cooked quinoa to a large serving bowl and fluff with a fork to separate grains.
- Add roasted vegetables to the quinoa while both are still warm to help flavors meld together.
- Drizzle 2 tablespoons lemon juice over the salad and toss gently to combine.
- Fold in 1/4 cup chopped fresh parsley and 2 ounces crumbled feta cheese just before serving.
Unbelievably, this salad gets even better as it sits, with the quinoa soaking up all those roasted vegetable juices and lemon tang. The contrasting textures—fluffy quinoa, tender-crisp veggies, and creamy feta—create a party in every bite that’s perfect for meal prep or impressing last-minute guests. Try serving it warm with grilled chicken or cold straight from the fridge when those 3 PM hunger pangs strike!
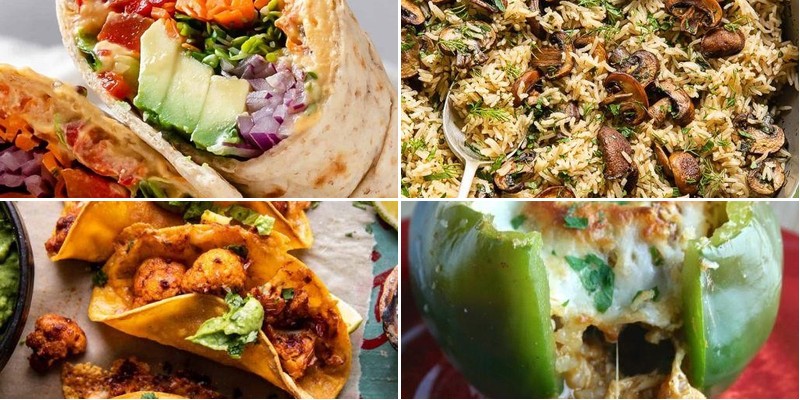
Spinach and Mushroom Stuffed Peppers
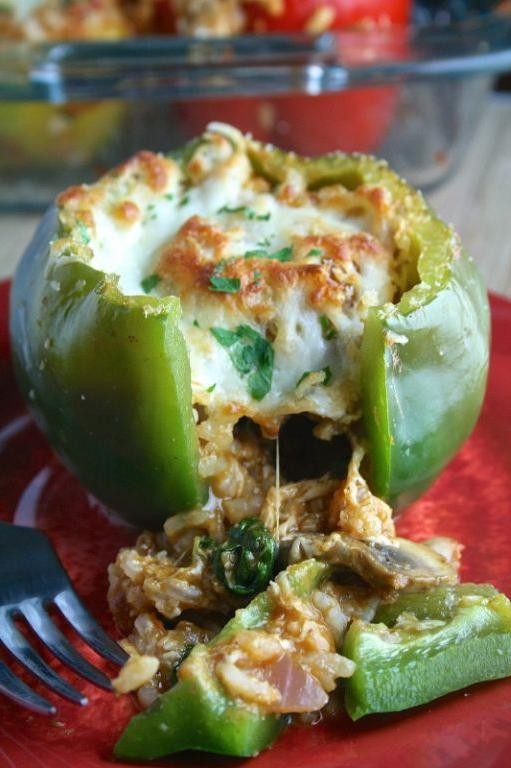
Eager for a veggie-packed dinner that doesn’t taste like punishment? These spinach and mushroom stuffed peppers are here to rescue your weeknight menu with cheesy, savory goodness that’ll make even the most devoted carnivores do a double take.
4
portions20
minutes45
minutesIngredients
– 4 large bell peppers
– 1 tablespoon olive oil
– 8 ounces cremini mushrooms
– 3 cloves garlic
– 5 ounces fresh spinach
– 1 cup cooked quinoa
– 1/2 cup grated Parmesan cheese
– 1 cup shredded mozzarella cheese
– 1 teaspoon dried oregano
– 1/2 teaspoon salt
– 1/4 teaspoon black pepper
Instructions
1. Preheat your oven to 375°F and line a baking dish with parchment paper.
2. Slice the tops off all 4 bell peppers and remove the seeds and membranes.
3. Place the hollowed peppers cut-side up in the prepared baking dish.
4. Heat 1 tablespoon olive oil in a large skillet over medium-high heat.
5. Chop 8 ounces cremini mushrooms into small pieces and add to the hot skillet.
6. Cook the mushrooms for 6-8 minutes until they release their liquid and turn golden brown.
7. Mince 3 cloves garlic and add to the skillet, cooking for 1 minute until fragrant.
8. Add 5 ounces fresh spinach to the skillet and cook for 2-3 minutes until completely wilted.
9. Transfer the mushroom-spinach mixture to a mixing bowl.
10. Stir in 1 cup cooked quinoa, 1/2 cup grated Parmesan cheese, 1 teaspoon dried oregano, 1/2 teaspoon salt, and 1/4 teaspoon black pepper.
11. Let the filling cool for 5 minutes before adding 1/2 cup shredded mozzarella cheese.
12. Divide the filling evenly among the 4 prepared bell peppers, packing it down gently.
13. Top each pepper with the remaining 1/2 cup shredded mozzarella cheese.
14. Bake at 375°F for 25-30 minutes until the peppers are tender and the cheese is bubbly and lightly browned.
15. Let the stuffed peppers rest for 5 minutes before serving.
Unbelievably satisfying, these peppers offer a delightful contrast between the tender-crisp vegetable shell and the rich, earthy filling that’s studded with melted cheese pockets. Serve them alongside a simple green salad for a complete meal, or get fancy by drizzling with balsamic glaze for an extra flavor dimension that’ll make your taste buds do a happy dance.
Zucchini Noodles with Pesto and Cherry Tomatoes
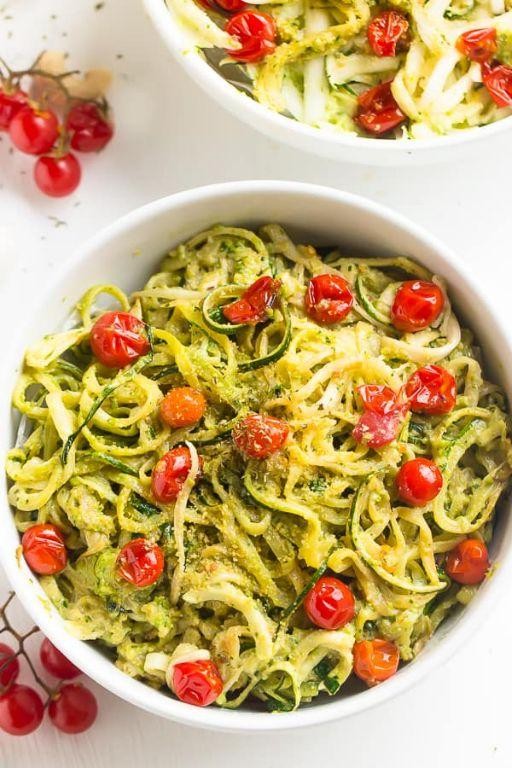
Finally, a pasta dish that won’t leave you feeling like you swallowed a bowling ball! These zucchini noodles are here to save dinner with their sneaky veggie powers and pesto-packed personality, proving that healthy eating doesn’t have to be a flavor-free snoozefest.
3
servings15
minutes15
minutesIngredients
– 4 medium zucchini
– 2 cups fresh basil leaves
– 1/2 cup grated Parmesan cheese
– 1/3 cup pine nuts
– 2 garlic cloves
– 1/2 cup olive oil
– 2 cups cherry tomatoes
– 1 tbsp lemon juice
– 1/2 tsp salt
– 1/4 tsp black pepper
Instructions
1. Spiralize 4 medium zucchini into noodles using a spiralizer, creating long, ribbon-like strands.
2. Toast 1/3 cup pine nuts in a dry skillet over medium heat for 3-4 minutes until golden brown and fragrant.
3. Combine 2 cups fresh basil leaves, toasted pine nuts, 2 garlic cloves, 1/2 cup grated Parmesan cheese, and 1/2 tsp salt in a food processor.
4. Pulse the mixture 5-6 times until coarsely chopped, scraping down the sides with a spatula between pulses.
5. With the food processor running, slowly drizzle in 1/2 cup olive oil until the pesto becomes smooth and emulsified.
6. Heat 1 tbsp olive oil in a large skillet over medium-high heat until shimmering.
7. Add 2 cups cherry tomatoes to the skillet and cook for 4-5 minutes until skins blister and tomatoes begin to burst.
8. Transfer the zucchini noodles to the skillet and toss with the tomatoes for 2-3 minutes until just warmed through but still crisp.
9. Remove the skillet from heat and stir in the prepared pesto, 1 tbsp lemon juice, and 1/4 tsp black pepper until evenly coated.
10. Serve immediately while the zucchini noodles maintain their al dente texture.
Now that’s what I call a veggie victory lap! The zucchini noodles provide that satisfying pasta-like chew without the carb coma, while the burst cherry tomatoes release their sweet acidity that cuts through the rich, garlicky pesto. Try serving this vibrant dish topped with extra Parmesan shavings and a sprinkle of red pepper flakes for those who like to live dangerously.
Baked Sweet Potatoes with Spicy Chickpeas

Whoever said sweet potatoes were just for Thanksgiving clearly never met these flavor-packed spuds! We’re taking humble sweet potatoes on a wild ride with spicy chickpeas that’ll make your taste buds do a happy dance. Get ready to transform your weeknight dinner game with this ridiculously easy yet impressively delicious combo.
2
servings15
minutes55
minutesIngredients
– 4 medium sweet potatoes
– 2 tablespoons olive oil
– 1 teaspoon smoked paprika
– 1/2 teaspoon cayenne pepper
– 1/2 teaspoon garlic powder
– 1/2 teaspoon salt
– 1 can (15 oz) chickpeas, drained and rinsed
– 1/2 cup plain Greek yogurt
– 2 tablespoons chopped fresh cilantro
– 1 tablespoon lime juice
Instructions
1. Preheat your oven to 400°F and line a baking sheet with parchment paper.
2. Scrub the sweet potatoes thoroughly and pat them completely dry with paper towels.
3. Pierce each sweet potato 6-8 times with a fork to allow steam to escape during baking.
4. Place the sweet potatoes directly on the oven rack and bake for 45-55 minutes until they yield easily when gently squeezed.
5. While the sweet potatoes bake, toss the drained chickpeas with olive oil, smoked paprika, cayenne pepper, garlic powder, and salt in a medium bowl.
6. Spread the seasoned chickpeas in a single layer on the prepared baking sheet.
7. Roast the chickpeas for 20-25 minutes until crispy and lightly browned, shaking the pan halfway through.
8. Combine Greek yogurt, chopped cilantro, and lime juice in a small bowl to create the cooling sauce.
9. Remove the sweet potatoes from the oven and make a lengthwise slit down the center of each one.
10. Gently press the ends toward the center to open up the sweet potatoes.
11. Divide the crispy chickpeas evenly among the four sweet potatoes.
12. Drizzle the cilantro-lime yogurt sauce over each stuffed sweet potato.
Outrageously good doesn’t even begin to cover it! The creamy sweet potato flesh creates the perfect contrast to those crunchy, spicy chickpeas, while the cool yogurt sauce tames the heat beautifully. Try crumbling some feta over the top or serving with a simple arugula salad for a complete meal that’ll have everyone asking for seconds.
Grilled Eggplant and Tomato Skewers

Finally, a vegetable dish that doesn’t make you feel like you’re punishing yourself for last night’s pizza binge! These grilled eggplant and tomato skewers are the summer side dish that actually makes you excited to eat your veggies—charred, smoky, and ridiculously simple to throw together when you’re already sweating by the grill.
8
skewers15
minutes16
minutesIngredients
- 2 medium eggplants
- 16 cherry tomatoes
- 3 tablespoons olive oil
- 1 teaspoon salt
- 1/2 teaspoon black pepper
- 2 tablespoons balsamic vinegar
- 1/4 cup fresh basil leaves
Instructions
- Cut 2 medium eggplants into 1-inch cubes, leaving the skin on for better texture on the grill.
- Thread eggplant cubes and 16 cherry tomatoes alternately onto 8 metal or soaked wooden skewers.
- Brush skewers evenly with 3 tablespoons olive oil, making sure all surfaces are coated to prevent sticking.
- Sprinkle skewers with 1 teaspoon salt and 1/2 teaspoon black pepper, distributing seasoning evenly across all pieces.
- Preheat grill to medium-high heat (400°F) and clean grates thoroughly with a wire brush.
- Place skewers directly on grill grates and close lid, cooking for 4 minutes until grill marks appear.
- Flip skewers using tongs and cook for another 4 minutes with lid closed.
- Continue flipping every 2 minutes until eggplant is tender when pierced with a fork and tomatoes are slightly blistered, about 8-10 minutes total.
- Remove skewers from grill and drizzle immediately with 2 tablespoons balsamic vinegar while still hot.
- Garnish with 1/4 cup fresh basil leaves torn by hand just before serving.
Now that smoky-sweet aroma has everyone hovering around your grill station, these skewers deliver that perfect contrast of creamy eggplant against burst tomato jewels. Nothing beats that satisfying char on the outside giving way to tender insides—serve them straight off the grill over couscous or tear the components into a rustic bruschetta situation.
Asparagus and Lemon Risotto
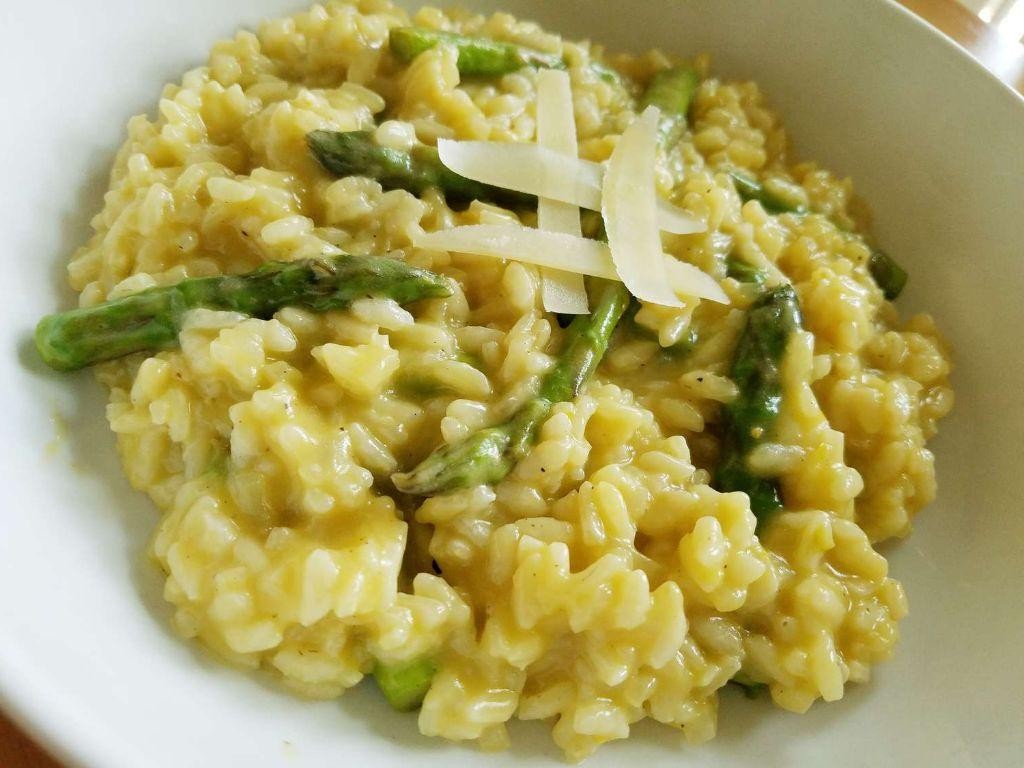
Absolutely nothing says “I’ve got my life together” quite like standing over a pot of risotto for 30 minutes straight, but this asparagus and lemon version is so ridiculously creamy and vibrant, you’ll forget you’re basically giving your bicep a workout while dinner cooks itself.
5
servings15
minutes35
minutesIngredients
- 1 tbsp olive oil
- 1 small yellow onion
- 2 cloves garlic
- 1 ½ cups Arborio rice
- ½ cup dry white wine
- 4 cups vegetable broth
- 1 lb asparagus
- 1 lemon
- ½ cup grated Parmesan cheese
- 2 tbsp unsalted butter
- ¼ tsp black pepper
- ¼ tsp salt
Instructions
- Heat 4 cups of vegetable broth in a separate saucepan over medium heat until it reaches a gentle simmer, then reduce heat to low to keep warm.
- Trim the tough ends from 1 lb asparagus and cut the spears into 1-inch pieces, setting aside the tips separately from the stalks.
- Heat 1 tbsp olive oil in a large, heavy-bottomed pot or Dutch oven over medium heat.
- Dice 1 small yellow onion and mince 2 cloves garlic, then add both to the hot oil.
- Sauté the onion and garlic for 4-5 minutes until the onion becomes translucent and fragrant.
- Add 1 ½ cups Arborio rice to the pot and toast for 2 minutes, stirring constantly until the rice grains appear slightly translucent around the edges.
- Pour in ½ cup dry white wine and cook while stirring until the liquid is fully absorbed, about 2 minutes.
- Begin adding the warm vegetable broth one ladleful at a time, stirring continuously until each addition is nearly absorbed before adding the next.
- After about 15 minutes of adding broth, stir in the asparagus stalks (not the tips) and continue the ladle-and-stir process.
- After 5 more minutes, add the reserved asparagus tips and continue cooking.
- Test the rice for doneness after about 25 total minutes of cooking—it should be creamy but still have a slight bite (al dente).
- Zest and juice 1 lemon, setting both aside separately.
- Remove the risotto from heat once the rice reaches the desired texture.
- Stir in ½ cup grated Parmesan cheese, 2 tbsp unsalted butter, the lemon zest, 2 tbsp lemon juice, ¼ tsp salt, and ¼ tsp black pepper until fully incorporated.
- Let the risotto rest for 2 minutes off heat before serving to allow the flavors to meld.
Crazy creamy with bright pops of lemon and tender-crisp asparagus, this risotto delivers restaurant-quality elegance in your pajamas. The Parmesan adds salty depth that plays beautifully against the citrus, while the asparagus provides just enough crunch to keep things interesting. Serve it immediately with extra lemon wedges for squeezing over the top, or be extra and top with seared scallops for a seriously impressive dinner party move.
Crispy Cauliflower Tacos with Avocado Sauce

Every time someone says “cauliflower is boring,” a little taco fairy loses its wings. We’re about to turn that humble veggie into the crispy, crave-worthy star of taco night, proving that sometimes the best things in life are covered in spices and dunked in creamy avocado sauce.
8
tacos15
minutes25
minutesIngredients
- 1 head cauliflower
- 2 tbsp olive oil
- 1 tsp chili powder
- 1/2 tsp cumin
- 1/4 tsp garlic powder
- 1/4 tsp smoked paprika
- 8 corn tortillas
- 1 avocado
- 1/4 cup Greek yogurt
- 2 tbsp lime juice
- 1/4 cup chopped cilantro
- 1/4 cup diced red onion
Instructions
- Preheat your oven to 425°F and line a baking sheet with parchment paper.
- Cut the cauliflower into bite-sized florets, about 1-inch pieces.
- In a large bowl, toss cauliflower florets with olive oil until evenly coated.
- Sprinkle chili powder, cumin, garlic powder, and smoked paprika over the cauliflower.
- Toss the spiced cauliflower for 2 minutes until every floret wears its spice coat proudly.
- Spread cauliflower in a single layer on the prepared baking sheet, giving each piece personal space to crisp up properly.
- Roast for 20-25 minutes until edges are deep golden brown and crispy.
- While cauliflower roasts, warm corn tortillas in a dry skillet over medium heat for 30 seconds per side until pliable.
- In a blender, combine avocado, Greek yogurt, and lime juice until smooth and creamy.
- Stir chopped cilantro into the avocado sauce by hand to maintain its fresh texture.
- Assemble tacos by placing crispy cauliflower in warmed tortillas.
- Drizzle avocado sauce generously over the cauliflower.
- Top each taco with diced red onion for crunch.
Seriously, the contrast between the shatteringly crispy cauliflower and that cool, creamy avocado sauce will make you forget meat ever existed. These tacos shine brightest when served immediately with extra lime wedges for squeezing, turning Tuesday dinner into a full-blown fiesta that even the pickiest eaters will devour.
Tomato and Basil Quinoa Bowl

Tired of salads that leave you hungry an hour later? This Tomato and Basil Quinoa Bowl is here to save your lunch game with more staying power than your favorite Netflix series. Trust me, your taste buds will be doing the happy dance while your stomach actually feels satisfied.
4
portions10
minutes22
minutesIngredients
– 1 cup quinoa
– 2 cups water
– 1/4 tsp salt
– 2 tbsp olive oil
– 2 cloves garlic, minced
– 1 pint cherry tomatoes, halved
– 1/4 cup fresh basil leaves, chopped
– 1 tbsp lemon juice
– 1/4 tsp black pepper
– 1/4 cup feta cheese, crumbled
Instructions
1. Rinse 1 cup quinoa thoroughly in a fine-mesh strainer under cold running water for 1 minute to remove the natural bitter coating.
2. Combine rinsed quinoa, 2 cups water, and 1/4 tsp salt in a medium saucepan and bring to a boil over high heat.
3. Reduce heat to low, cover the saucepan, and simmer for 15 minutes until all liquid is absorbed and quinoa grains have sprouted little white tails.
4. Remove quinoa from heat, fluff with a fork, and let it rest covered for 5 minutes to achieve perfect fluffy texture.
5. While quinoa rests, heat 2 tbsp olive oil in a large skillet over medium heat until shimmering but not smoking.
6. Add 2 cloves minced garlic and cook for 30 seconds until fragrant but not browned to prevent bitterness.
7. Add 1 pint halved cherry tomatoes to the skillet and cook for 4-5 minutes until they begin to soften and release their juices.
8. Stir in cooked quinoa, 1/4 cup chopped basil, 1 tbsp lemon juice, and 1/4 tsp black pepper until well combined.
9. Cook the mixture for 2 more minutes, stirring constantly, to allow flavors to meld together.
10. Remove from heat and gently fold in 1/4 cup crumbled feta cheese just before serving to maintain its texture.
Seriously, the fluffy quinoa creates the perfect base for those juicy burst tomatoes and creamy feta pockets. That bright basil and lemon combo cuts through beautifully, making this bowl feel both fresh and substantial. Try serving it warm with grilled chicken or chilled for a next-level picnic situation – either way, your lunch game just got a major upgrade.
Butternut Squash and Carrot Soup

Naturally, this butternut squash and carrot soup is basically autumn in a bowl—if autumn decided to wear cozy socks and binge-watch comfort shows. It’s the kind of recipe that makes you feel like a kitchen wizard with minimal effort, transforming humble veggies into a velvety, soul-warming masterpiece. Get ready to impress your taste buds (and maybe your mother-in-law) with this foolproof delight.
3
servings20
minutes49
minutesIngredients
– 1 large butternut squash
– 4 medium carrots
– 1 yellow onion
– 2 cloves garlic
– 2 tablespoons olive oil
– 4 cups vegetable broth
– 1/2 cup heavy cream
– 1 teaspoon salt
– 1/2 teaspoon black pepper
– 1/4 teaspoon nutmeg
Instructions
1. Preheat your oven to 400°F.
2. Peel the butternut squash, cut it in half lengthwise, and scoop out the seeds with a spoon.
3. Chop the butternut squash into 1-inch cubes.
4. Peel the carrots and chop them into 1/2-inch rounds.
5. Toss the butternut squash and carrots with 1 tablespoon of olive oil on a baking sheet.
6. Roast the vegetables in the preheated oven for 25 minutes, or until they are tender and lightly browned at the edges.
7. While the vegetables roast, dice the yellow onion and mince the garlic cloves.
8. Heat the remaining 1 tablespoon of olive oil in a large pot over medium heat.
9. Sauté the diced onion for 5 minutes, until it becomes translucent.
10. Add the minced garlic and cook for 1 more minute, stirring constantly to avoid burning.
11. Tip: For deeper flavor, let the onions cook until they just start to caramelize, about 2 minutes longer.
12. Add the roasted butternut squash and carrots to the pot.
13. Pour in the 4 cups of vegetable broth.
14. Bring the mixture to a boil, then reduce the heat to low and simmer for 15 minutes.
15. Remove the pot from the heat and let it cool slightly for 5 minutes.
16. Use an immersion blender to puree the soup until it is completely smooth.
17. Tip: If using a countertop blender, work in batches and hold the lid firmly to prevent hot splatters.
18. Stir in the 1/2 cup heavy cream, 1 teaspoon salt, 1/2 teaspoon black pepper, and 1/4 teaspoon nutmeg.
19. Return the pot to low heat and warm the soup for 3 minutes, stirring occasionally.
20. Tip: For a lighter version, substitute the heavy cream with coconut milk—it adds a subtle tropical twist.
21. Ladle the soup into bowls and serve immediately.
Kick back and savor that velvety texture that hugs your spoon like a warm blanket. The natural sweetness from the roasted squash and carrots dances with a hint of nutmeg, making each sip a cozy celebration. Try topping it with crunchy croutons or a swirl of extra cream for a restaurant-worthy finish that’ll have everyone asking for seconds.
Roasted Red Pepper and Hummus Wraps

Who says healthy eating has to be boring? These roasted red pepper and hummus wraps are the lunchtime superheroes you’ve been waiting for—packed with flavor, ready in minutes, and guaranteed to make your taste buds do a happy dance without any kitchen drama.
4
wraps10
minutes10
minutesIngredients
– 4 large flour tortillas
– 1 cup hummus
– 1 cup roasted red peppers, sliced
– 2 cups fresh spinach
– 1/2 cup crumbled feta cheese
– 1/4 cup sliced black olives
– 2 tbsp olive oil
– 1 tsp dried oregano
Instructions
1. Lay 4 large flour tortillas flat on a clean work surface.
2. Spread 1/4 cup hummus evenly over each tortilla, leaving a 1-inch border around the edges.
3. Arrange 1/4 cup roasted red pepper slices in a horizontal line across the center of each tortilla.
4. Top each with 1/2 cup fresh spinach leaves, gently pressing them into the hummus.
5. Sprinkle 2 tablespoons crumbled feta cheese over the spinach on each tortilla.
6. Scatter 1 tablespoon sliced black olives evenly over the feta cheese.
7. Drizzle 1/2 tablespoon olive oil evenly over the fillings on each tortilla.
8. Sprinkle 1/4 teaspoon dried oregano over each assembled wrap.
9. Fold the bottom edge of each tortilla up over the fillings, then tightly roll from left to right to form secure wraps.
10. Heat a non-stick skillet over medium heat for 2 minutes until warm.
11. Place 2 wraps seam-side down in the skillet and cook for 3 minutes until golden brown.
12. Flip wraps carefully using a spatula and cook for another 2 minutes until the second side is crisp.
13. Repeat steps 11-12 with remaining 2 wraps.
14. Transfer all wraps to a cutting board and let rest for 1 minute before slicing.
15. Cut each wrap diagonally into halves using a sharp knife. Getting that perfect golden sear makes all the difference—don’t skip the skillet toasting! For maximum structural integrity, avoid overfilling near the edges. Letting them rest briefly before cutting prevents filling spillage and gives you cleaner slices. Great textures abound here—the crisp tortilla gives way to creamy hummus, tender peppers, and that satisfying feta crumble. Serve these warm with a side of carrot sticks or tuck them into lunchboxes for a portable meal that actually excites you at noon.
Avocado and Black Bean Salad
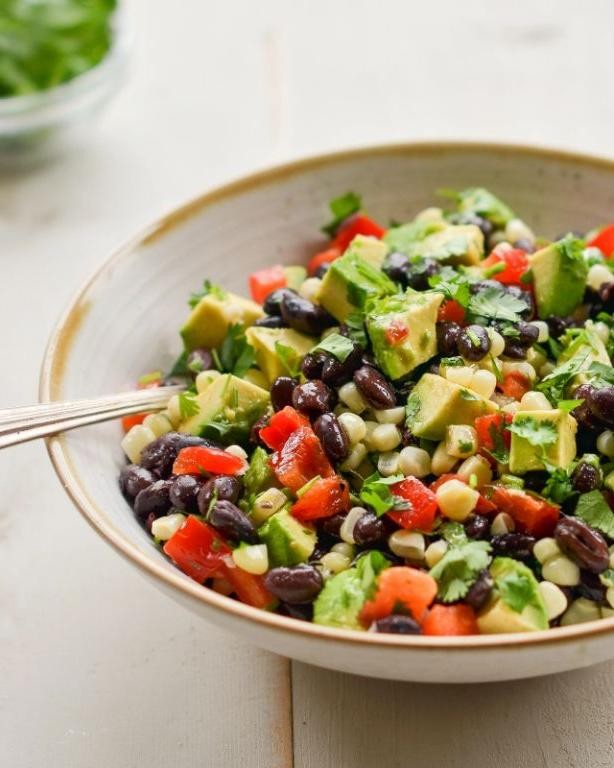
Gather ’round, salad skeptics! This isn’t your average rabbit food situation—we’re talking about an avocado and black bean fiesta that’ll make your taste buds do the cha-cha. Get ready to ditch boring lunches forever with this vibrant bowl of deliciousness.
5
servings15
minutesIngredients
– 2 ripe avocados
– 1 (15 oz) can black beans
– 1 cup cherry tomatoes
– 1/2 cup red onion
– 1/4 cup fresh cilantro
– 2 tbsp lime juice
– 1 tbsp olive oil
– 1/2 tsp cumin
– 1/4 tsp salt
Instructions
1. Drain and rinse the canned black beans in a colander under cold running water for 30 seconds to remove excess sodium.
2. Halve the cherry tomatoes using a sharp knife on a stable cutting board.
3. Finely dice the red onion into 1/4-inch pieces.
4. Chop the fresh cilantro leaves, discarding the thick stems.
5. Cut the ripe avocados in half, remove the pits, and scoop the flesh into a large mixing bowl.
6. Immediately add the lime juice to the avocado and gently mash with a fork until chunky—this prevents browning while creating texture.
7. Add the drained black beans, halved cherry tomatoes, diced red onion, and chopped cilantro to the bowl.
8. Drizzle the olive oil over the mixture.
9. Sprinkle the cumin and salt evenly across the ingredients.
10. Toss everything together with a large spoon until thoroughly combined, being careful not to overmix and turn the avocado mushy.
This salad delivers the ultimate texture party with creamy avocado chunks, firm beans, and juicy tomato bursts. The cumin adds earthy warmth that plays perfectly against the bright lime zing. Try scooping it up with tortilla chips or stuffing it into warm pita pockets for a handheld lunch upgrade!
Herbed Mushroom Pilaf
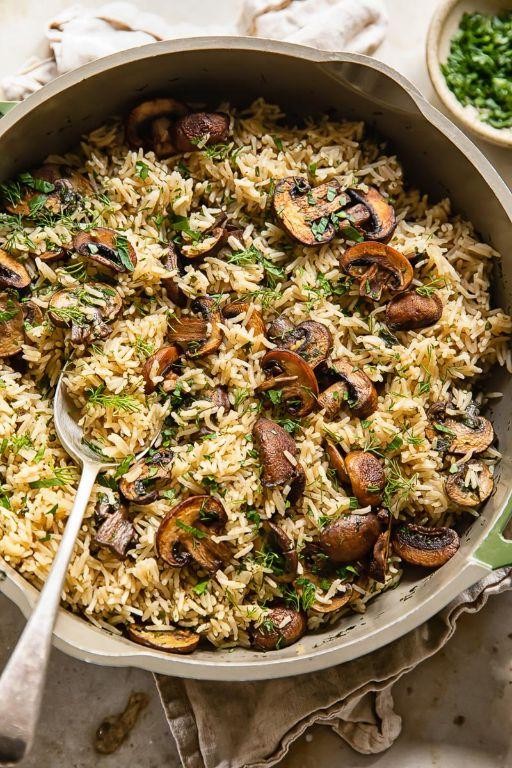
Hilariously enough, the most sophisticated dishes often start with the humblest ingredients—like this herbed mushroom pilaf that transforms basic pantry staples into a showstopping side dish worthy of any dinner party. Honestly, if mushrooms and rice had a glamorous lovechild, this would be it, bursting with earthy flavors and aromatic herbs that’ll make your taste buds do a happy dance.
5
servings15
minutes40
minutesIngredients
– 2 tbsp olive oil
– 1 medium yellow onion
– 3 cloves garlic
– 8 oz cremini mushrooms
– 1 cup long-grain white rice
– 2 cups vegetable broth
– 1 tsp dried thyme
– 1 tsp dried rosemary
– 1/2 tsp salt
– 1/4 tsp black pepper
– 2 tbsp fresh parsley
Instructions
1. Heat 2 tablespoons of olive oil in a large skillet over medium heat until it shimmers.
2. Dice 1 medium yellow onion into 1/4-inch pieces and add to the hot oil.
3. Sauté the onion for 5–7 minutes, stirring occasionally, until translucent and lightly golden.
4. Mince 3 cloves of garlic and add to the skillet, cooking for 1 minute until fragrant.
5. Slice 8 ounces of cremini mushrooms into 1/4-inch thick pieces and add to the pan.
6. Cook the mushrooms for 6–8 minutes, stirring every 2 minutes, until they release their liquid and turn golden brown.
7. Add 1 cup of long-grain white rice to the skillet and toast for 2 minutes, stirring constantly to coat each grain with oil.
8. Pour in 2 cups of vegetable broth, scraping any browned bits from the bottom of the pan.
9. Stir in 1 teaspoon of dried thyme, 1 teaspoon of dried rosemary, 1/2 teaspoon of salt, and 1/4 teaspoon of black pepper.
10. Bring the mixture to a boil, then reduce heat to low and cover the skillet tightly with a lid.
11. Simmer for 18–20 minutes without lifting the lid, until the rice has absorbed all the liquid.
12. Remove the skillet from heat and let it stand covered for 5 minutes to finish steaming.
13. Fluff the pilaf with a fork, then chop 2 tablespoons of fresh parsley and stir it through.
Remarkably fluffy and fragrant, this pilaf boasts tender rice grains that cling to savory mushroom slices and aromatic herbs. Serve it alongside roasted chicken for a cozy dinner, or top it with a fried egg for an instant brunch upgrade—either way, its earthy richness will have everyone asking for seconds.
Carrot and Ginger Stir Fry
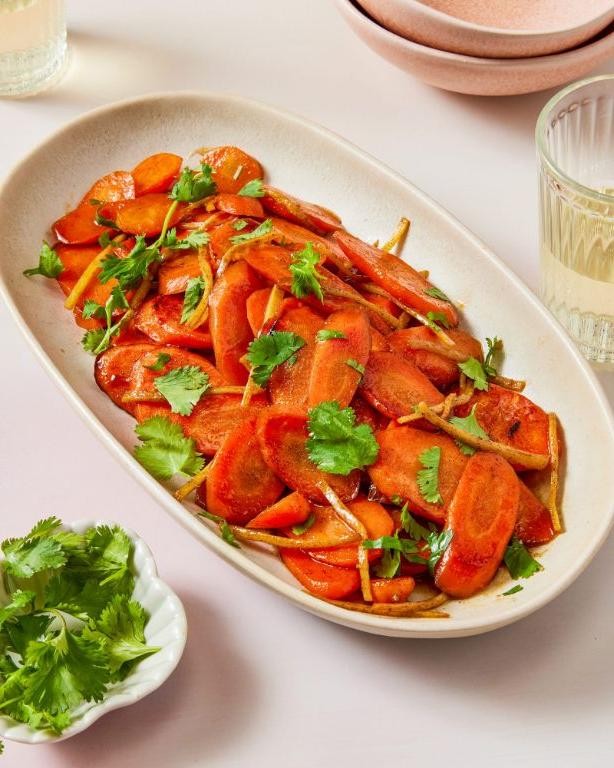
Oh, the humble carrot finally gets its moment to shine beyond rabbit food status in this zesty stir-fry that’ll make your taste buds do a happy dance. With ginger bringing the heat and carrots soaking up all that saucy goodness, this dish is basically a veggie party in a pan—no boring salads allowed! Trust me, your skillet is about to become the life of the dinner party.
5
servings10
minutes12
minutesIngredients
– 2 tbsp vegetable oil
– 1 lb carrots
– 2 tbsp fresh ginger
– 3 cloves garlic
– 1/4 cup soy sauce
– 1 tbsp rice vinegar
– 1 tsp sesame oil
– 1/4 tsp red pepper flakes
– 2 green onions
Instructions
1. Peel 1 lb carrots and slice them into 1/4-inch thick coins for even cooking.
2. Mince 2 tbsp fresh ginger and 3 cloves garlic finely to distribute flavor evenly.
3. Heat 2 tbsp vegetable oil in a large skillet or wok over medium-high heat until it shimmers, about 1-2 minutes.
4. Add carrots to the hot oil and stir-fry for 5-7 minutes until they begin to soften slightly.
5. Push carrots to one side of the skillet and add minced ginger and garlic to the empty space.
6. Cook ginger and garlic for 30-45 seconds until fragrant but not browned.
7. Combine carrots with ginger and garlic, stirring constantly.
8. Pour in 1/4 cup soy sauce, 1 tbsp rice vinegar, 1 tsp sesame oil, and 1/4 tsp red pepper flakes.
9. Continue stir-frying for 3-4 minutes until carrots are tender-crisp and sauce thickens slightly.
10. Thinly slice 2 green onions, reserving the green parts for garnish.
11. Remove skillet from heat and stir in the white parts of the green onions.
12. Transfer stir-fry to a serving dish and garnish with the reserved green onion tops.
Kick back and admire those glossy, ginger-kissed carrots—they’re tender yet still have a satisfying crunch, with a savory-sweet sauce that clings to every bite. Serve it over fluffy rice to soak up every last drop, or pile it into lettuce cups for a low-carb twist that’s just as delicious.
Chilled Cucumber and Dill Soup

Fancy escaping the summer heat without turning on your oven? This chilled cucumber and dill soup is basically air conditioning you can eat—a refreshingly cool, creamy bowl of pure bliss that’s ready to rescue you from sweltering afternoons. It’s so simple, even your microwave will feel neglected.
4
servings15
minutesIngredients
- 3 large English cucumbers
- 1 cup plain Greek yogurt
- 1/2 cup sour cream
- 1/4 cup fresh dill
- 2 tbsp fresh lemon juice
- 1 tbsp extra virgin olive oil
- 1 small garlic clove
- 1 tsp salt
- 1/2 tsp black pepper
- 1/4 cup ice water
Instructions
- Peel all 3 English cucumbers completely using a vegetable peeler.
- Slice the peeled cucumbers in half lengthwise and scrape out the seeds with a small spoon.
- Roughly chop the seeded cucumbers into 1-inch chunks.
- Place the cucumber chunks in a blender or food processor.
- Add 1 cup plain Greek yogurt, 1/2 cup sour cream, and 1/4 cup fresh dill to the blender.
- Pour in 2 tbsp fresh lemon juice, 1 tbsp extra virgin olive oil, and 1/4 cup ice water.
- Peel 1 small garlic clove and add it to the blender.
- Season with 1 tsp salt and 1/2 tsp black pepper.
- Blend on high speed for 45-60 seconds until completely smooth and pale green.
- Taste and adjust seasoning if needed, remembering flavors will intensify when chilled.
- Pour the soup through a fine-mesh strainer into a large bowl to remove any fibrous bits.
- Cover the bowl tightly with plastic wrap, pressing it directly against the soup surface to prevent a skin from forming.
- Refrigerate the soup for at least 4 hours or until thoroughly chilled to 40°F.
- Ladle the chilled soup into bowls just before serving.
Delightfully silky with a bright, tangy kick from the yogurt and lemon, this soup delivers garden-fresh flavor in every spoonful. Serve it in chilled bowls for maximum refreshment, or get fancy with edible flower garnishes for your next patio party—it’s the culinary equivalent of a cool breeze on a hot day.
Garlic and Herb Baked Tofu
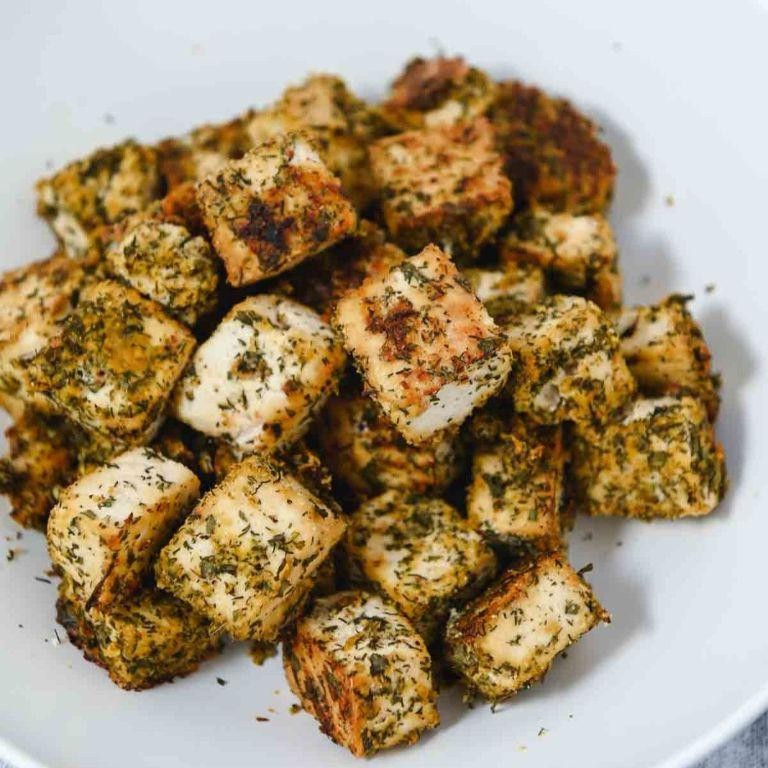
Brace yourselves, flavor adventurers, because we’re about to transform that humble block of tofu from bland to grand with a garlic and herb makeover that’ll have even the most devout carnivores asking for seconds. This baked wonder is so ridiculously simple, you’ll wonder why you ever bothered with complicated recipes that require more steps than a Broadway dance number. Get ready for crispy-on-the-outside, tender-on-the-inside perfection that’s about to become your new kitchen superstar.
4
servings35
minutes30
minutesIngredients
- 1 block (14 oz) extra-firm tofu
- 3 tablespoons olive oil
- 4 cloves garlic, minced
- 1 tablespoon fresh rosemary, chopped
- 1 tablespoon fresh thyme leaves
- 1 teaspoon smoked paprika
- ½ teaspoon black pepper
- ¾ teaspoon salt
Instructions
- Press the tofu block for 30 minutes using a tofu press or by wrapping it in paper towels and placing a heavy pan on top to remove excess moisture.
- Preheat your oven to 400°F and line a baking sheet with parchment paper.
- Cut the pressed tofu into 1-inch cubes and place them in a medium mixing bowl.
- Add 3 tablespoons olive oil to the tofu cubes and toss gently to coat evenly.
- Mix 4 cloves minced garlic, 1 tablespoon chopped rosemary, 1 tablespoon thyme leaves, 1 teaspoon smoked paprika, ½ teaspoon black pepper, and ¾ teaspoon salt in a small bowl.
- Sprinkle the herb mixture over the oiled tofu cubes and toss until every piece is thoroughly coated.
- Arrange the seasoned tofu in a single layer on the prepared baking sheet, making sure pieces don’t touch for maximum crispiness.
- Bake at 400°F for 25-30 minutes, flipping halfway through, until golden brown and crispy on the edges.
- Remove from oven and let rest for 5 minutes before serving to allow the texture to set properly.
Crave that satisfying crunch? These golden cubes deliver a crispy exterior that gives way to a surprisingly meaty, tender interior. The garlic and herb combo creates an aromatic punch that pairs beautifully with everything from grain bowls to pasta dishes—try tossing them into a Caesar salad for a vegetarian twist that’ll make romaine hearts flutter.
Oven-Roasted Brussels Sprouts with Lemon Zest
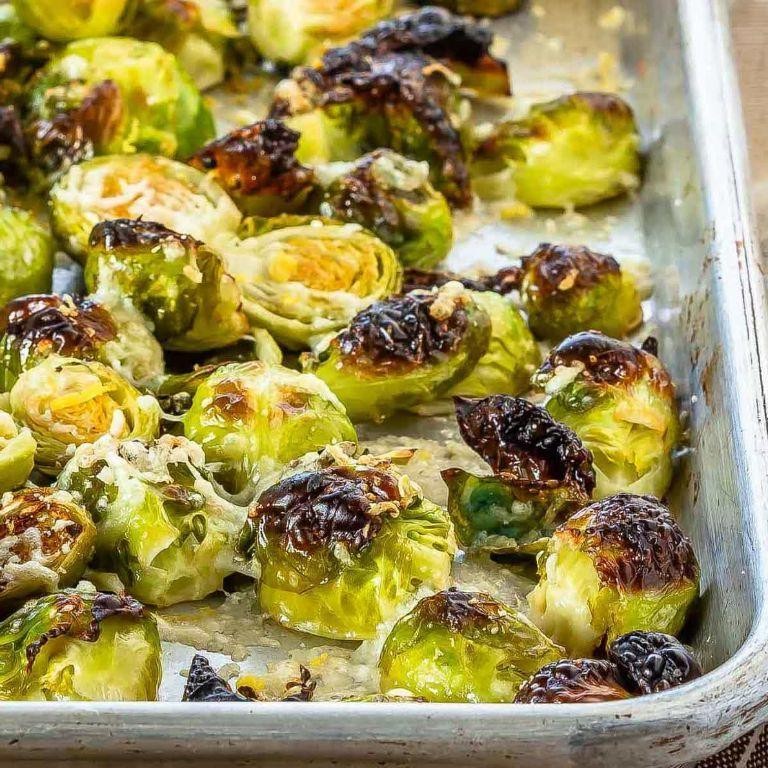
Unbelievably, these little green gems transform from dreaded childhood villains to crispy, caramelized superstars in your oven. Seriously, if you still think Brussels sprouts are bitter bullies, prepare for a flavor intervention that’ll make you question every life choice that led you here before. This lemon-zested version is basically a spa day for your taste buds—refreshing, revitalizing, and ridiculously easy.
2
servings10
minutes25
minutesIngredients
– 1.5 lbs Brussels sprouts
– 3 tbsp olive oil
– 1 tsp kosher salt
– 1/2 tsp black pepper
– 2 tbsp lemon zest
– 2 tbsp fresh lemon juice
Instructions
1. Preheat your oven to 400°F and line a baking sheet with parchment paper.
2. Trim the stem ends from Brussels sprouts and remove any discolored outer leaves.
3. Cut larger Brussels sprouts in half lengthwise, keeping smaller ones whole for even cooking.
4. Toss Brussels sprouts with olive oil, ensuring each piece is lightly coated.
5. Sprinkle kosher salt and black pepper evenly over the oiled sprouts.
6. Arrange Brussels sprouts in a single layer on the prepared baking sheet, cut sides down for maximum caramelization.
7. Roast at 400°F for 20-25 minutes until edges are dark brown and crispy.
8. Remove baking sheet from oven and immediately sprinkle lemon zest over hot sprouts.
9. Drizzle fresh lemon juice evenly across the roasted sprouts.
10. Toss gently to distribute lemon flavor while sprouts are still hot from the oven.
Absolutely magical how the high heat coaxes out natural sweetness while creating those crave-worthy crispy edges. The bright lemon zest cuts through the richness perfectly, creating a symphony of textures from tender centers to crackling leaves. Try serving these alongside grilled chicken or crumbling some feta over top for an extra flavor dimension that’ll make your dinner guests demand the recipe.
Fresh Herb and Mixed Bean Salad
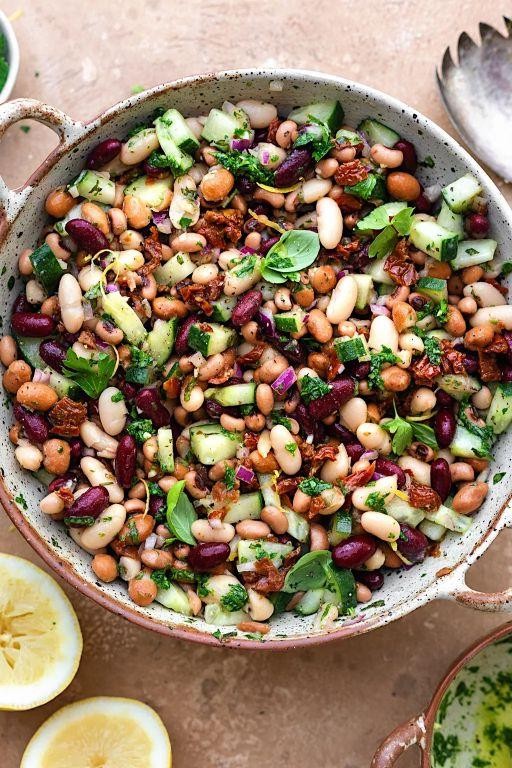
Sick of sad desk lunches and wilted greens? This vibrant Fresh Herb and Mixed Bean Salad is about to become your new go-to—it’s so fresh, it practically winks at you from the bowl.
4
servings15
minutesIngredients
– 2 cups mixed beans (canned, rinsed and drained)
– 1/4 cup extra virgin olive oil
– 2 tbsp red wine vinegar
– 1 tsp Dijon mustard
– 1/2 tsp salt
– 1/4 tsp black pepper
– 1/4 cup fresh parsley, chopped
– 2 tbsp fresh dill, chopped
– 1 tbsp fresh chives, chopped
– 1/2 cup red onion, finely diced
– 1 cup cherry tomatoes, halved
Instructions
1. Rinse 2 cups of mixed beans under cold water in a colander for 1 minute to remove excess sodium and improve texture.
2. Whisk 1/4 cup extra virgin olive oil, 2 tbsp red wine vinegar, 1 tsp Dijon mustard, 1/2 tsp salt, and 1/4 tsp black pepper in a large bowl until fully emulsified.
3. Add the rinsed beans to the dressing and stir gently to coat every bean evenly.
4. Fold in 1/4 cup chopped fresh parsley, 2 tbsp chopped fresh dill, and 1 tbsp chopped fresh chives to distribute the herbs without bruising them.
5. Incorporate 1/2 cup finely diced red onion and 1 cup halved cherry tomatoes, mixing just until combined.
6. Let the salad rest at room temperature for 15 minutes to allow the flavors to meld and the beans to absorb the dressing.
7. Taste and adjust seasoning if needed, ensuring the salad is balanced before serving. Ready? Revel in the crisp-tender beans, zesty herbs, and tangy dressing—this salad shines as a picnic star or piled high on toasted sourdough for an instant upgrade.
Conclusion
These 18 delightful gout-friendly recipes prove that managing your health doesn’t mean sacrificing flavor or satisfaction. Try these delicious dishes, leave a comment with your favorites, and share this helpful collection on Pinterest to inspire others in their wellness journey!


