Ready to embrace a healthier lifestyle without sacrificing flavor? These 26 delicious keto recipes prove that low-carb eating can be incredibly satisfying and diverse. From quick weeknight dinners to comforting classics, you’ll discover mouthwatering options that make sticking to your goals feel effortless. Let’s dive into these creative dishes that will keep you excited about your keto journey!
Creamy Garlic Butter Tuscan Shrimp

Having just returned from a trip to Italy, I couldn’t resist recreating one of my favorite coastal dishes with a creamy twist that’s perfect for busy weeknights. Honestly, this Creamy Garlic Butter Tuscan Shrimp has become my go-to when I want something fancy-feeling but don’t have hours to spend in the kitchen—it’s the kind of meal that makes you feel like you’re dining at a seaside trattoria even on a Tuesday.
4
servings15
minutes15
minutesIngredients
- 1 pound large wild-caught shrimp, peeled and deveined
- 3 tablespoons rich extra virgin olive oil
- 4 tablespoons creamy unsalted butter
- 6 cloves aromatic fresh garlic, minced
- 1 small sweet yellow onion, finely diced
- 1 cup sun-dried tomatoes in oil, drained and sliced
- 2 cups fresh baby spinach leaves
- 1 cup heavy cream
- ½ cup freshly grated Parmesan cheese
- 1 teaspoon smoked paprika
- ½ teaspoon crushed red pepper flakes
- 2 tablespoons freshly chopped parsley
- Salt and freshly ground black pepper to taste
Instructions
- Pat the shrimp completely dry with paper towels and season both sides generously with salt and black pepper.
- Heat 2 tablespoons of olive oil in a large skillet over medium-high heat until shimmering, about 1 minute.
- Add shrimp to the hot skillet in a single layer, cooking for 1-2 minutes per side until they turn pink and develop a light golden crust.
- Transfer shrimp to a clean plate immediately to prevent overcooking—they’ll finish cooking later in the sauce.
- Reduce heat to medium and melt butter in the same skillet, scraping up any browned bits from the shrimp.
- Add remaining olive oil and sauté diced onion for 3-4 minutes until translucent and fragrant.
- Stir in minced garlic and cook for 30 seconds until fragrant but not browned to avoid bitterness.
- Add sun-dried tomatoes and cook for 1 minute to intensify their sweet-tart flavor.
- Pour in heavy cream, stirring constantly to incorporate all the flavorful bits from the pan bottom.
- Bring cream to a gentle simmer, then reduce heat to low and stir in Parmesan cheese until completely melted and smooth.
- Season sauce with smoked paprika, red pepper flakes, and additional salt and pepper to your preference.
- Add baby spinach to the sauce, stirring until leaves are just wilted, about 1-2 minutes.
- Return shrimp to the skillet, along with any accumulated juices, and simmer for 1 minute to heat through.
- Stir in fresh parsley just before serving to maintain its bright color and fresh flavor.
Gorgeously creamy with just the right amount of garlicky punch, this dish delivers tender shrimp swimming in a velvety sauce that clings beautifully to pasta or crusty bread. The sun-dried tomatoes add delightful chewy texture and sweet acidity that cuts through the richness, while the spinach provides vibrant color and freshness. I love serving this over creamy polenta for ultimate comfort food vibes, or spooning it directly into bowls with plenty of garlic bread for dipping into that incredible sauce.
Zucchini Noodle Alfredo with Chicken
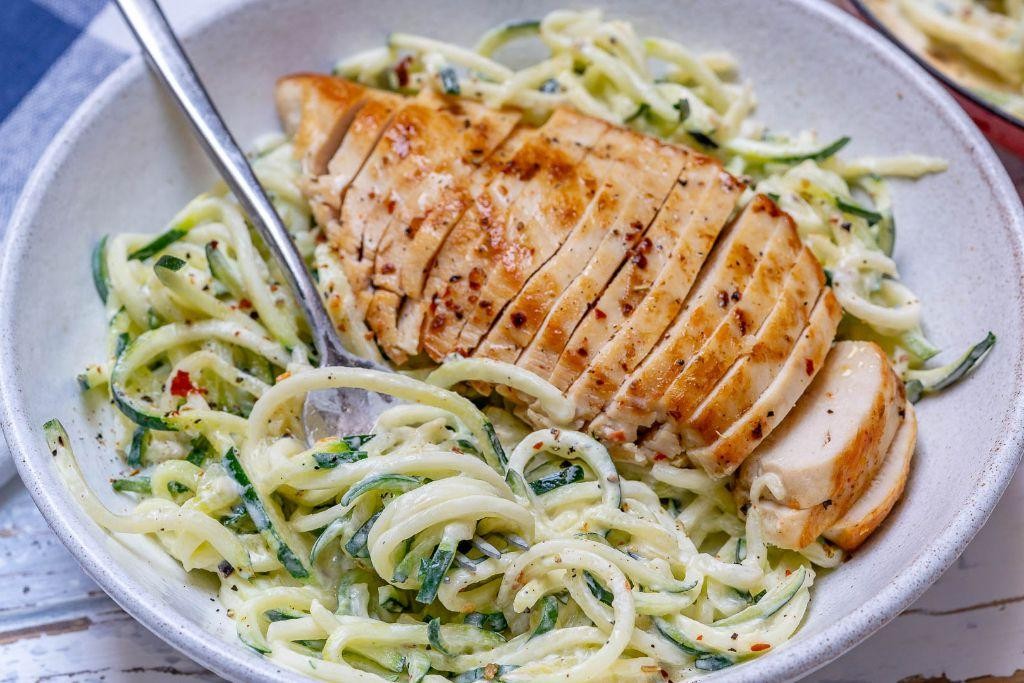
Oh my goodness, if you’re looking for a comforting meal that won’t leave you feeling weighed down, this zucchini noodle alfredo with chicken has become my absolute go-to. I actually started making this last summer when my garden was overflowing with zucchini, and now it’s in our regular dinner rotation—my kids don’t even miss the traditional pasta!
4
servings15
minutes20
minutesIngredients
– 2 large firm zucchini, spiralized into noodles
– 1 lb boneless, skinless chicken breasts, cut into 1-inch pieces
– 2 tbsp rich extra virgin olive oil
– 3 cloves fresh garlic, minced
– 1 cup heavy cream
– 1/2 cup freshly grated parmesan cheese
– 2 tbsp creamy unsalted butter
– 1/4 tsp freshly ground nutmeg
– 1/2 tsp fine sea salt
– 1/4 tsp coarsely ground black pepper
– 2 tbsp fresh parsley, chopped
Instructions
1. Heat 1 tablespoon of rich extra virgin olive oil in a large skillet over medium-high heat until shimmering.
2. Add 1 lb of boneless, skinless chicken breast pieces in a single layer and cook for 6-8 minutes, turning occasionally, until golden brown and internal temperature reaches 165°F.
3. Transfer the cooked chicken to a clean plate and cover loosely with foil to keep warm.
4. Reduce heat to medium and add remaining 1 tablespoon of rich extra virgin olive oil to the same skillet.
5. Add 3 cloves of minced fresh garlic and cook for 30 seconds until fragrant but not browned.
6. Pour in 1 cup of heavy cream and bring to a gentle simmer, stirring constantly with a wooden spoon.
7. Whisk in 1/2 cup of freshly grated parmesan cheese until completely melted and sauce is smooth.
8. Stir in 2 tablespoons of creamy unsalted butter until incorporated into the sauce.
9. Add 1/4 teaspoon of freshly ground nutmeg, 1/2 teaspoon of fine sea salt, and 1/4 teaspoon of coarsely ground black pepper to the sauce.
10. Add 2 large spiralized zucchini noodles to the skillet and toss gently to coat with the sauce.
11. Cook the zucchini noodles for 2-3 minutes, stirring frequently, until just tender but still slightly crisp.
12. Return the cooked chicken to the skillet and toss to combine with the zucchini noodles and sauce.
13. Remove from heat and stir in 2 tablespoons of chopped fresh parsley.
14. Serve immediately while hot. The creamy sauce clings beautifully to the zucchini noodles while the tender chicken adds satisfying protein. This dish has such a luxurious texture that you won’t believe it’s actually light, and I love serving it with a simple side salad for the perfect weeknight dinner that feels special enough for company.
Low-Carb Cauliflower Mac and Cheese
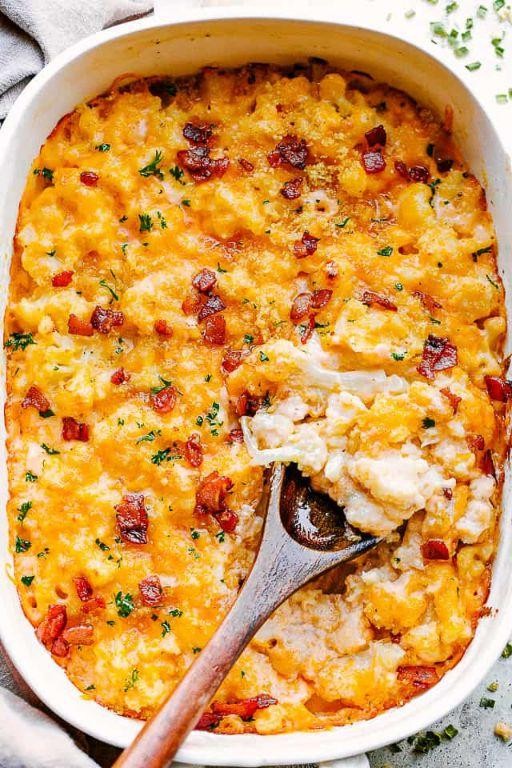
Zesty cauliflower mac and cheese has become my go-to comfort food since I discovered how incredible roasted cauliflower becomes when smothered in creamy cheese sauce. Last Tuesday, when my carb-conscious friend came over for dinner, I whipped up this version, and we both agreed it tasted even better than the traditional pasta dish—plus, no post-meal slump!
2
servings15
minutes30
minutesIngredients
- 1 large head of fresh cauliflower, cut into small, bite-sized florets
- 2 tablespoons of rich extra virgin olive oil
- 1/2 teaspoon of finely ground sea salt
- 1/4 teaspoon of freshly cracked black pepper
- 2 tablespoons of creamy unsalted butter
- 2 tablespoons of finely milled all-purpose flour
- 1 cup of whole milk, warmed to room temperature
- 1 1/2 cups of sharp cheddar cheese, freshly shredded
- 1/4 cup of nutty Parmesan cheese, finely grated
- 1/4 teaspoon of smoked paprika for subtle warmth
Instructions
- Preheat your oven to 425°F and line a large baking sheet with parchment paper.
- Toss the cauliflower florets with olive oil, sea salt, and black pepper until evenly coated. Tip: Cutting the florets uniformly ensures they roast evenly without some pieces burning.
- Spread the cauliflower in a single layer on the baking sheet and roast for 20–25 minutes, flipping halfway, until the edges are golden brown and tender when pierced with a fork.
- While the cauliflower roasts, melt butter in a saucepan over medium heat.
- Whisk in the flour continuously for 1–2 minutes until the mixture turns light golden and smells nutty. Tip: Constant whisking prevents lumps and gives your sauce a smooth base.
- Gradually pour in the warm milk, whisking constantly until the sauce thickens and coats the back of a spoon, about 3–4 minutes.
- Reduce heat to low and stir in the cheddar and Parmesan cheeses until fully melted and the sauce is silky.
- Mix in the smoked paprika and remove the saucepan from the heat.
- Combine the roasted cauliflower and cheese sauce in a large bowl, gently folding until every floret is coated. Tip: Let the cauliflower cool for 2–3 minutes before mixing to keep it crisp-tender.
- Transfer the mixture to a serving dish and serve immediately.
Yum—this dish delivers a creamy, velvety cheese sauce clinging to roasted cauliflower with just the right bite. The smoky paprika adds a warm undertone that makes it feel indulgent. For a fun twist, top it with crispy bacon bits or serve alongside grilled chicken for a complete low-carb meal.
Keto-Friendly Avocado Egg Salad
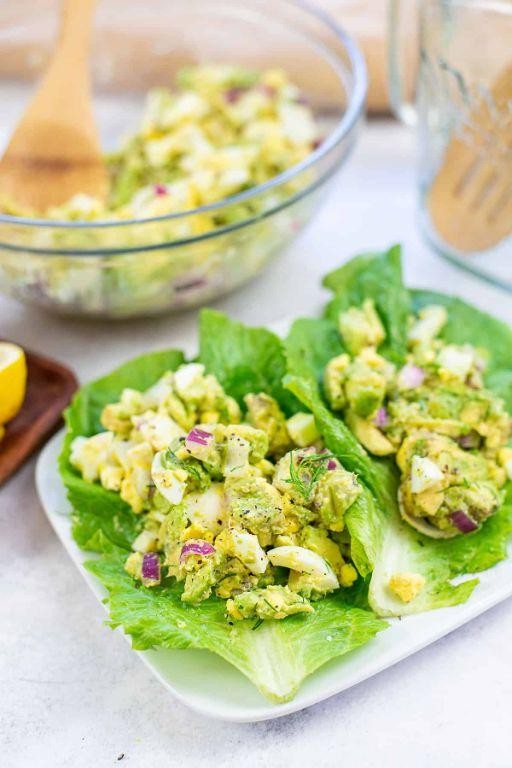
Usually, I find myself craving something creamy and satisfying that won’t derail my healthy eating goals, especially on busy weekdays when I need lunch in a hurry. That’s why this keto-friendly avocado egg salad has become my go-to—it’s packed with protein and healthy fats, and it comes together in minutes. I actually started making this after my sister raved about how it kept her full through her afternoon meetings without the usual carb crash.
3
servings15
minutes17
minutesIngredients
- 4 large farm-fresh eggs
- 1 perfectly ripe Hass avocado
- 2 tablespoons rich mayonnaise
- 1 tablespoon tangy Dijon mustard
- 1/4 cup finely diced crisp celery
- 2 tablespoons finely chopped fresh chives
- 1/2 teaspoon finely ground black pepper
- 1/4 teaspoon flaky sea salt
Instructions
- Place 4 large farm-fresh eggs in a single layer in a medium saucepan and cover with cold water by 1 inch.
- Bring the water to a rolling boil over high heat, then immediately remove the pan from heat and cover with a tight-fitting lid.
- Let the eggs stand in the hot water for exactly 12 minutes for perfectly cooked yolks without that gray ring.
- While the eggs cook, halve and pit 1 perfectly ripe Hass avocado, then scoop the flesh into a medium mixing bowl.
- Mash the avocado with a fork until slightly chunky but mostly smooth, leaving some texture for interest.
- Immediately transfer the cooked eggs to a bowl of ice water and let cool for 5 minutes until easy to handle—this stops the cooking process and makes peeling effortless.
- Peel the cooled eggs under running cool water to help remove any stubborn shell fragments.
- Chop the peeled eggs into 1/2-inch pieces and add them to the bowl with the mashed avocado.
- Add 2 tablespoons rich mayonnaise, 1 tablespoon tangy Dijon mustard, 1/4 cup finely diced crisp celery, 2 tablespoons finely chopped fresh chives, 1/2 teaspoon finely ground black pepper, and 1/4 teaspoon flaky sea salt.
- Gently fold everything together until just combined, being careful not to overmix and turn the salad mushy.
- For best flavor, cover and refrigerate the salad for at least 15 minutes to allow the ingredients to meld together.
Amazingly creamy from the avocado with little pops of crunch from the celery, this salad has a rich, savory flavor that’s brightened by the mustard and chives. I love serving it scooped into crisp butter lettuce cups for a low-carb lunch, or spreading it thick on toasted keto bread for a more substantial meal. The texture holds up beautifully if you make it ahead, though I recommend eating it within a day since the avocado can darken—not that it ever lasts that long in my house!
Garlic Herb Steak with Asparagus
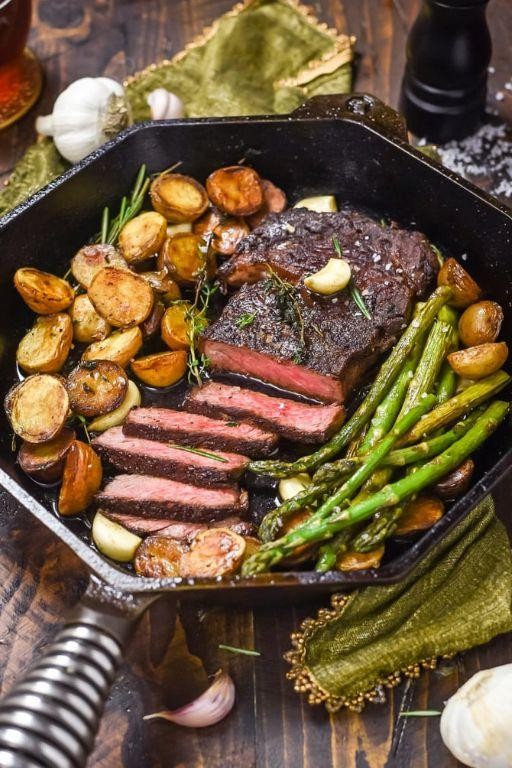
Sometimes, after a long day, nothing satisfies quite like a perfectly cooked steak with vibrant seasonal vegetables. I discovered this garlic herb combination during a summer dinner party when I needed something impressive but simple enough to pull off while chatting with guests. Now it’s my go-to weeknight luxury meal that always makes me feel like I’m dining at a fancy steakhouse.
2
servings15
minutes22
minutesIngredients
– 2 thick-cut ribeye steaks (about 1.5 inches thick)
– 1 pound fresh asparagus spears with crisp, bright green stalks
– 3 tablespoons rich extra virgin olive oil
– 4 cloves aromatic fresh garlic, minced
– 2 tablespoons freshly chopped rosemary
– 1 tablespoon freshly chopped thyme
– 1 teaspoon coarse kosher salt
– ½ teaspoon freshly cracked black pepper
– 2 tablespoons creamy unsalted butter
Instructions
1. Remove steaks from refrigerator 30 minutes before cooking to bring them to room temperature for even cooking.
2. Preheat your cast iron skillet over medium-high heat for 5 minutes until it’s smoking hot.
3. While skillet heats, pat steaks completely dry with paper towels to ensure proper searing.
4. Trim the tough woody ends from asparagus spears by snapping them where they naturally break.
5. In a small bowl, combine olive oil, minced garlic, rosemary, thyme, kosher salt, and black pepper.
6. Rub half of the garlic herb mixture evenly over both sides of the steaks.
7. Toss asparagus spears with the remaining garlic herb mixture until thoroughly coated.
8. Place steaks in the hot skillet and cook undisturbed for 4 minutes to develop a deep brown crust.
9. Flip steaks using tongs and cook for another 4 minutes for medium-rare (135°F internal temperature).
10. Add butter to the skillet during the last minute of cooking, tilting pan to baste steaks repeatedly.
11. Transfer steaks to a cutting board and let rest for 8 minutes to redistribute juices.
12. While steaks rest, place asparagus in the same hot skillet and cook for 5 minutes, turning occasionally until tender-crisp with slight char marks.
13. Slice steaks against the grain into ½-inch thick strips to maximize tenderness.
Perfectly rested steak yields incredibly juicy, tender slices that melt with garlicky herb butter richness. The asparagus provides a wonderful crisp-tender contrast while soaking up all those delicious pan drippings. I love serving this over creamy mashed potatoes to catch every last bit of that incredible garlic herb sauce.
Bacon-Wrapped Cheese-Stuffed Chicken
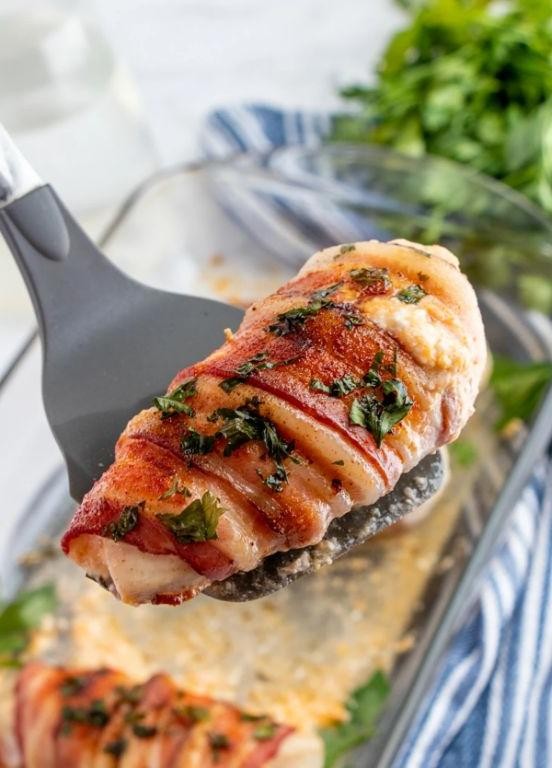
Every time I make this bacon-wrapped cheese-stuffed chicken, it reminds me of those cozy Sunday dinners at my grandma’s house where the whole kitchen would smell incredible for hours. Honestly, I used to be intimidated by stuffing chicken, but after a few messy attempts, I’ve perfected this method that’s surprisingly simple and always impresses guests.
3
portions20
minutes33
minutesIngredients
- 4 boneless, skinless chicken breasts
- 8 slices thick-cut applewood smoked bacon
- 1 cup shredded sharp cheddar cheese
- 4 ounces cream cheese, softened
- 2 tablespoons finely chopped fresh chives
- 1 teaspoon garlic powder
- 1/2 teaspoon smoked paprika
- 1/4 teaspoon freshly ground black pepper
- 1 tablespoon extra virgin olive oil
Instructions
- Preheat your oven to 375°F and line a baking sheet with parchment paper.
- Using a sharp knife, carefully cut a deep pocket horizontally through each chicken breast, being careful not to cut all the way through. Tip: Place your hand flat on top of the chicken while cutting to maintain control and prevent slicing through.
- In a medium bowl, combine the shredded sharp cheddar cheese, softened cream cheese, finely chopped fresh chives, garlic powder, smoked paprika, and freshly ground black pepper until well mixed.
- Divide the cheese mixture into four equal portions and stuff each portion firmly into the pockets of the chicken breasts.
- Secure the openings of each chicken breast with 2-3 toothpicks to prevent the cheese from leaking out during cooking.
- Wrap two slices of thick-cut applewood smoked bacon around each stuffed chicken breast, overlapping slightly and tucking the ends underneath.
- Brush each bacon-wrapped chicken breast lightly with extra virgin olive oil to help the bacon crisp up evenly.
- Place the prepared chicken breasts on the parchment-lined baking sheet, making sure they’re not touching. Tip: Use a wire rack on the baking sheet if you have one – this allows heat to circulate and creates crispier bacon all around.
- Bake for 25-30 minutes, then switch your oven to broil for 2-3 minutes to crisp the bacon further, watching carefully to prevent burning.
- Remove from oven when the internal temperature reaches 165°F and the bacon is crispy and golden brown. Tip: Let the chicken rest for 5 minutes before serving – this allows the juices to redistribute and prevents the cheese from oozing out immediately when cut.
Here’s what makes this dish so special – when you slice into it, the melted cheese oozes out dramatically while the bacon provides that perfect salty crunch against the tender chicken. Honestly, I love serving this over creamy mashed potatoes with roasted asparagus on the side, but it’s also fantastic sliced over a fresh garden salad for a lighter meal.
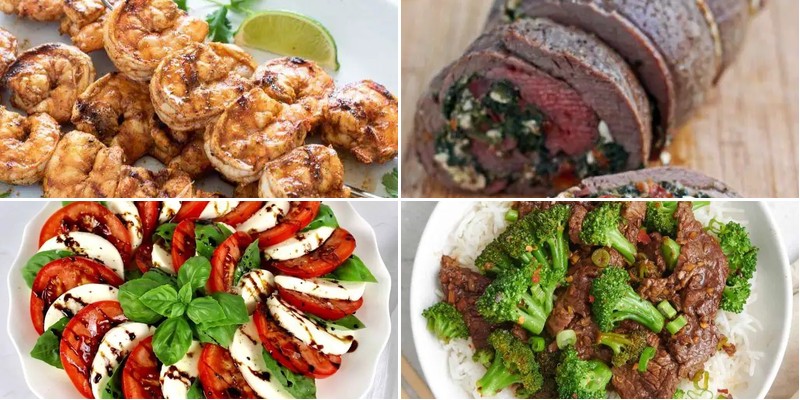
Spinach and Feta Stuffed Flank Steak
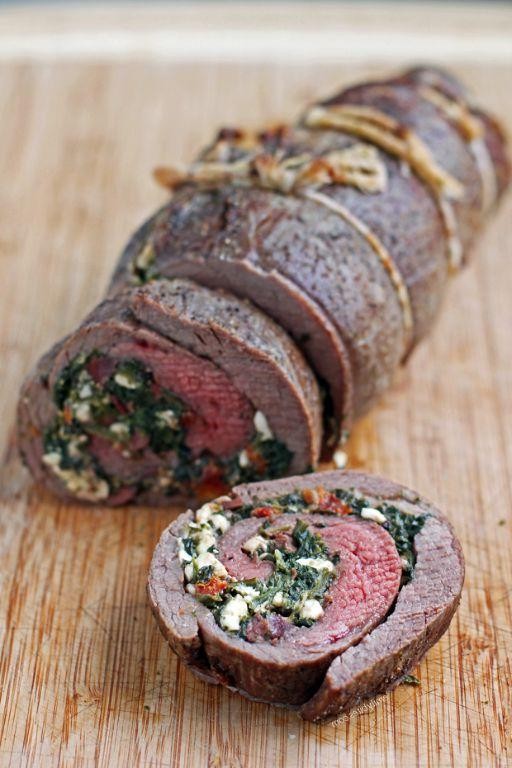
Now, I have to confess something—I used to be intimidated by stuffed meats until I discovered this spinach and feta flank steak. It’s become my go-to dinner party showstopper, and honestly, it’s easier than it looks!
5
portions15
minutes40
minutesIngredients
– 1.5 lbs flank steak
– 2 cups fresh baby spinach leaves
– 4 oz crumbled feta cheese
– 3 cloves garlic, minced
– 1 tbsp extra virgin olive oil
– 1 tsp dried oregano
– 1/2 tsp coarse sea salt
– 1/4 tsp freshly ground black pepper
– Kitchen twine for tying
Instructions
1. Lay the flank steak flat on a cutting board and butterfly it by slicing horizontally through the center, stopping about 1/2 inch from the opposite edge so it opens like a book.
2. Drizzle the extra virgin olive oil over the entire surface of the butterflied steak.
3. Sprinkle the minced garlic, dried oregano, coarse sea salt, and freshly ground black pepper evenly across the meat.
4. Arrange the fresh baby spinach leaves in a single layer over the seasoned steak, leaving a 1-inch border around all edges.
5. Distribute the crumbled feta cheese evenly over the spinach layer.
6. Starting from one short end, tightly roll the steak into a log, ensuring the filling stays contained.
7. Secure the roll by tying kitchen twine at 1.5-inch intervals along the length of the steak.
8. Preheat your oven to 375°F and place a rack in the center position.
9. Heat an oven-safe skillet over medium-high heat for 2 minutes until hot.
10. Sear the stuffed steak roll on all sides for 2-3 minutes per side until a golden-brown crust forms.
11. Transfer the skillet directly to the preheated oven and roast for 25-30 minutes until the internal temperature reaches 135°F for medium-rare.
12. Remove the skillet from the oven and transfer the steak to a cutting board.
13. Let the steak rest for exactly 10 minutes to allow juices to redistribute.
14. Carefully remove the kitchen twine and slice the steak into 1-inch thick rounds. This resting period is crucial—it ensures the feta doesn’t ooze out when slicing. The searing step creates that beautiful crust that locks in moisture, and using an oven-safe skillet means fewer dishes to wash! That first slice reveals the gorgeous spiral of green spinach and white feta against the pink beef. The flank steak stays remarkably tender when sliced against the grain, while the feta becomes wonderfully creamy against the earthy spinach. Try serving these beautiful pinwheels over creamy polenta with the pan drippings spooned over the top—it makes for such an elegant presentation that always impresses guests.
Lemon Butter Seared Salmon
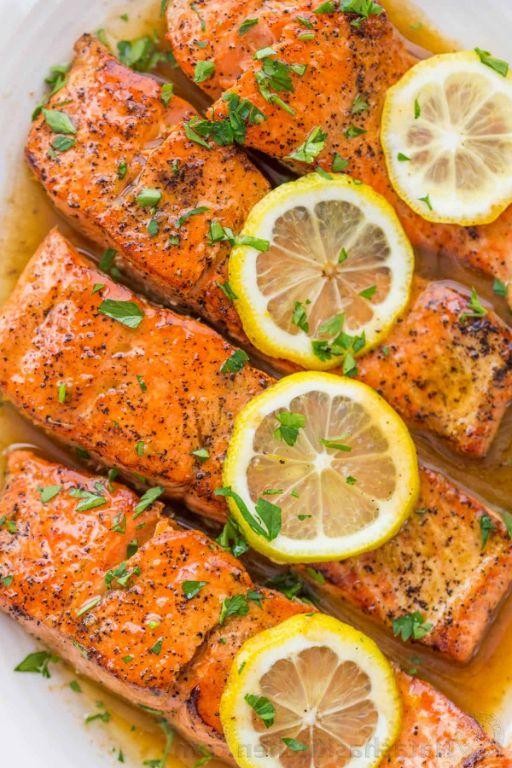
Vividly golden and bursting with bright citrus notes, this lemon butter seared salmon has become my go-to weeknight dinner that feels anything but ordinary. I first perfected this recipe after a friend brought me fresh lemons from her California tree, and now it’s the dish I make when I want something impressive but effortless. There’s something magical about how the buttery sauce comes together right in the pan while the salmon develops that beautiful crust.
4
servings10
minutes14
minutesIngredients
– 4 (6-ounce) skin-on salmon fillets with vibrant coral flesh
– 2 tablespoons rich extra virgin olive oil
– 3 tablespoons creamy unsalted butter, divided
– 3 cloves aromatic fresh garlic, minced
– 1 large juicy lemon, zested and juiced
– 2 tablespoons fresh Italian parsley, finely chopped
– 1 teaspoon coarse kosher salt
– ½ teaspoon freshly cracked black pepper
Instructions
1. Pat the salmon fillets completely dry with paper towels to ensure a crisp sear.
2. Season both sides of the salmon evenly with coarse kosher salt and freshly cracked black pepper.
3. Heat rich extra virgin olive oil in a large skillet over medium-high heat until it shimmers, about 2 minutes.
4. Place salmon skin-side up in the hot skillet and press gently with a spatula for 30 seconds to maximize surface contact.
5. Cook undisturbed for 4-5 minutes until a deep golden-brown crust forms on the bottom.
6. Flip the salmon carefully using a thin spatula to maintain the crispy crust.
7. Reduce heat to medium and cook skin-side down for 3-4 minutes until the flesh flakes easily with a fork.
8. Transfer salmon to a warm plate, leaving any rendered fat in the skillet.
9. Add 2 tablespoons of creamy unsalted butter to the same skillet and melt over medium heat.
10. Sauté aromatic fresh garlic for 1 minute until fragrant but not browned.
11. Add the juice and zest from one large juicy lemon, scraping up any browned bits from the pan bottom.
12. Whisk in the remaining 1 tablespoon of creamy unsalted butter until the sauce emulsifies and thickens slightly.
13. Stir in finely chopped fresh Italian parsley and immediately remove from heat.
14. Spoon the warm lemon butter sauce generously over the plated salmon fillets.
Crispy-skinned perfection meets tender, flaky flesh in every bite of this salmon. The bright lemon butter sauce cuts through the richness beautifully, creating a balanced flavor profile that’s both elegant and comforting. I love serving this over creamy polenta or with roasted asparagus to soak up every last drop of that incredible sauce.
Cauliflower Rice Stir-Fry
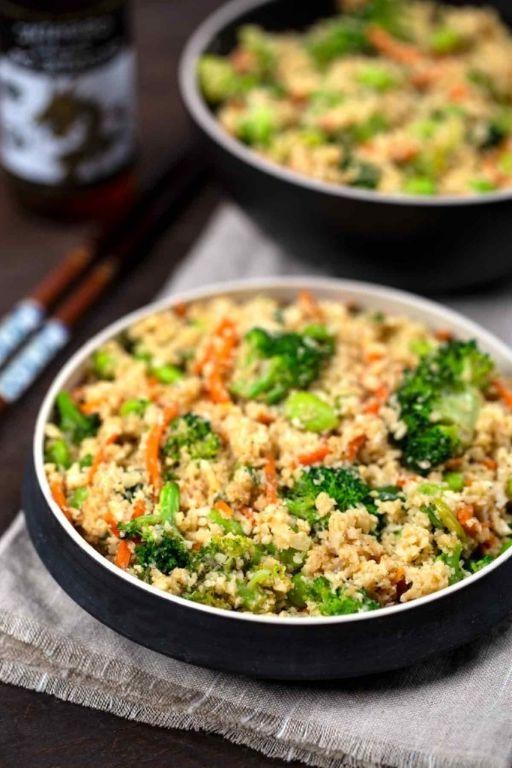
Sometimes, after a long day at work, the last thing I want is a complicated dinner that dirties every pan in my kitchen—that’s exactly why this cauliflower rice stir-fry has become my go-to weeknight lifesaver. It’s fresh, fast, and so satisfying you won’t even miss the grains.
3
servings15
minutes15
minutesIngredients
– 1 large head of fresh cauliflower, riced into fluffy, snow-white grains
– 2 tablespoons of toasted sesame oil with its warm, nutty aroma
– 1 cup of crisp, thinly sliced red bell pepper
– 1 cup of sweet, shredded carrots with their vibrant orange hue
– 3 cloves of garlic, minced into fragrant, pungent bits
– 1 tablespoon of freshly grated ginger, zesty and aromatic
– 3 tablespoons of rich, savory soy sauce
– 2 large eggs, lightly beaten until smooth and pale yellow
– 2 thinly sliced green onions for a fresh, peppery finish
Instructions
1. Heat 1 tablespoon of toasted sesame oil in a large skillet or wok over medium-high heat until it shimmers lightly, about 1 minute.
2. Add the minced garlic and grated ginger, stirring constantly for 30 seconds until fragrant but not browned—this quick bloom unlocks their deepest flavors.
3. Toss in the sliced red bell pepper and shredded carrots, cooking for 3–4 minutes until they’re tender-crisp and slightly brighter in color.
4. Push the vegetables to one side of the skillet and pour the beaten eggs into the empty space, scrambling them for 1–2 minutes until fully set and fluffy.
5. Mix the scrambled eggs with the vegetables, then add the riced cauliflower, stirring to combine everything evenly.
6. Pour in the soy sauce, drizzling it around the edges of the skillet so it sizzles and coats the cauliflower rice thoroughly.
7. Cook the stir-fry for 5–6 minutes, stirring occasionally, until the cauliflower is tender but still has a slight bite—overcooking can make it mushy, so keep an eye on the texture.
8. Remove the skillet from the heat and stir in the remaining 1 tablespoon of toasted sesame oil for an extra layer of nutty richness right at the end.
9. Garnish with the thinly sliced green onions just before serving to preserve their crisp, fresh flavor. Let this stir-fry cool for a minute or two before digging in—the cauliflower rice soaks up the savory sauce beautifully, and I love topping it with a sprinkle of sesame seeds or a dash of chili crunch for a little heat.
Crispy Buffalo Chicken Wings

Every time I hear that satisfying crunch of perfectly fried chicken wings, I’m transported back to my college days when my roommate and I would attempt to recreate our favorite sports bar wings in our tiny apartment kitchen. After countless experiments (and a few smoke detector incidents), I’ve perfected this crispy buffalo chicken wings recipe that never fails to impress game day crowds or satisfy those late-night cravings.
4
servings40
minutes42
minutesIngredients
– 2 pounds of plump, fresh chicken wings, separated into drumettes and flats
– 1 cup of all-purpose flour with a fine, snow-like texture
– 1 tablespoon of aromatic garlic powder
– 1 tablespoon of smoky paprika
– 2 teaspoons of coarse kosher salt
– 1 teaspoon of freshly ground black pepper
– 2 quarts of neutral vegetable oil for high-heat frying
– 1/2 cup of rich, melted unsalted butter
– 1/2 cup of tangy Frank’s RedHot sauce
– 1 tablespoon of raw honey for subtle sweetness
– 1/2 cup of cool, creamy blue cheese dressing for dipping
– 2 stalks of crisp celery, cut into 4-inch sticks
Instructions
1. Pat the chicken wings completely dry using paper towels to ensure maximum crispiness.
2. In a large bowl, whisk together the all-purpose flour, garlic powder, paprika, kosher salt, and black pepper until thoroughly combined.
3. Dredge each chicken wing piece in the flour mixture, shaking off any excess coating.
4. Place the coated wings on a wire rack and refrigerate them uncovered for 30 minutes to help the coating adhere better during frying.
5. Heat the vegetable oil in a large, heavy-bottomed Dutch oven to 375°F, using a deep-fry thermometer for accuracy.
6. Carefully lower 6-8 wings into the hot oil using tongs, being cautious not to overcrowd the pot.
7. Fry the wings for 12-14 minutes, turning them occasionally with tongs until they achieve a deep golden-brown color and reach an internal temperature of 165°F.
8. Remove the cooked wings from the oil and drain them on a fresh wire rack set over a baking sheet.
9. Repeat the frying process with the remaining wings in batches, allowing the oil to return to 375°F between each batch.
10. While the final batch fries, combine the melted butter, Frank’s RedHot sauce, and raw honey in a large bowl, whisking until fully emulsified.
11. Immediately toss the hot, crispy wings in the buffalo sauce mixture until evenly coated.
12. Serve the wings alongside the cool blue cheese dressing and fresh celery sticks.
Keeping these wings crispy is all about that double-fry technique and proper draining on a rack rather than paper towels. The contrast between the fiery buffalo sauce and cooling blue cheese dressing creates that perfect balance we all crave, while the celery sticks provide that essential fresh crunch to cut through the richness. I love serving these piled high on a wooden board with extra napkins—because the best wings are the messy ones that require you to lick your fingers clean!
Keto Caprese Salad with Balsamic Glaze
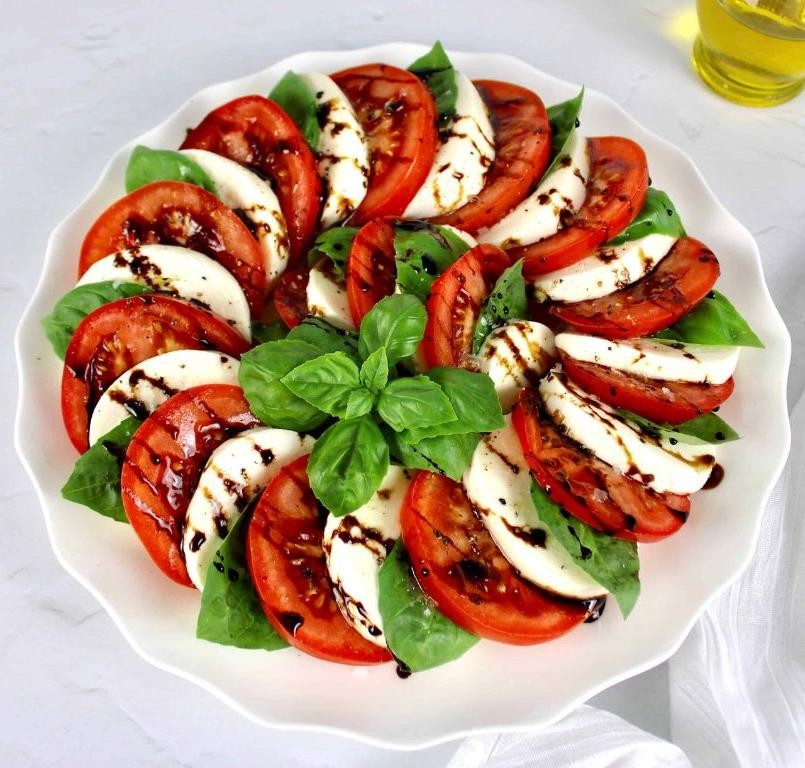
Nothing beats the classic combination of fresh mozzarella, ripe tomatoes, and fragrant basil—especially when you’re trying to keep things low-carb. I first fell in love with this keto-friendly twist during a summer picnic, where its vibrant colors and refreshing taste stole the show. Now, it’s my go-to for quick lunches or impressing guests without spending hours in the kitchen.
3
servings15
minutesIngredients
- 2 large, juicy heirloom tomatoes
- 8 ounces of creamy fresh mozzarella cheese
- 1/4 cup of fragrant fresh basil leaves
- 2 tablespoons of rich extra virgin olive oil
- 1 tablespoon of syrupy balsamic glaze
- 1/2 teaspoon of flaky sea salt
- 1/4 teaspoon of freshly cracked black pepper
Instructions
- Wash and pat dry 2 large, juicy heirloom tomatoes with a clean towel.
- Slice the tomatoes into 1/4-inch thick rounds using a sharp serrated knife for clean cuts.
- Drain 8 ounces of creamy fresh mozzarella cheese from its liquid and slice it into similar 1/4-inch thick rounds.
- Arrange the tomato and mozzarella slices in an alternating, overlapping pattern on a serving platter.
- Tuck 1/4 cup of fragrant fresh basil leaves between the tomato and mozzarella slices.
- Drizzle 2 tablespoons of rich extra virgin olive oil evenly over the arranged slices.
- Generously sprinkle 1/2 teaspoon of flaky sea salt and 1/4 teaspoon of freshly cracked black pepper across the salad.
- Finish by zigzagging 1 tablespoon of syrupy balsamic glaze over the top just before serving. Tip: Add the glaze last to prevent the colors from bleeding.
Dive into this salad immediately for the best experience—the cool, creamy mozzarella contrasts beautifully with the firm, juicy tomatoes, while the basil adds a fresh punch. I love serving it alongside grilled chicken or scooping it onto crisp romaine leaves for a portable lunch. The tangy balsamic glaze ties everything together with just the right touch of sweetness.
Zesty Lime Grilled Shrimp Skewers

Now, I have to tell you about these Zesty Lime Grilled Shrimp Skewers—they’re the kind of dish that makes me feel like I’m on vacation, even when I’m just out on my patio. I first started making them during a summer when my herb garden was overflowing with cilantro, and now they’re my go-to for quick, flavorful dinners that impress everyone.
2
servings25
minutes6
minutesIngredients
– 1 pound large, fresh wild-caught shrimp, peeled and deveined
– ¼ cup freshly squeezed lime juice
– 2 tablespoons rich extra virgin olive oil
– 3 cloves aromatic garlic, minced
– 1 teaspoon vibrant smoked paprika
– ½ teaspoon coarse sea salt
– ¼ teaspoon finely ground black pepper
– 2 tablespoons freshly chopped cilantro leaves
– 8-inch wooden skewers, soaked in water
Instructions
1. Soak 8-inch wooden skewers in water for at least 30 minutes to prevent burning on the grill.
2. In a medium bowl, whisk together ¼ cup freshly squeezed lime juice, 2 tablespoons rich extra virgin olive oil, 3 cloves minced aromatic garlic, 1 teaspoon vibrant smoked paprika, ½ teaspoon coarse sea salt, and ¼ teaspoon finely ground black pepper until fully combined.
3. Add 1 pound large, fresh wild-caught shrimp to the marinade, tossing gently to coat each piece evenly.
4. Cover the bowl with plastic wrap and refrigerate for exactly 20 minutes—this infuses flavor without toughening the shrimp.
5. Preheat your grill to medium-high heat, about 400°F, and lightly oil the grates to prevent sticking.
6. Thread 4-5 marinated shrimp onto each soaked skewer, leaving small gaps between them for even cooking.
7. Place the skewers on the preheated grill and cook for 2-3 minutes per side, until the shrimp turn opaque and develop light grill marks.
8. Remove the skewers from the grill and immediately sprinkle with 2 tablespoons freshly chopped cilantro leaves for a burst of freshness.
Diving into these skewers is a treat—the shrimp are tender with a slight snap, while the zesty lime and smoky paprika create a bright, tangy flavor that pairs perfectly with a simple cilantro rice or a crisp salad. I love serving them family-style on a big platter, letting everyone grab their own skewer and savor that just-off-the-grill warmth.
Beef and Broccoli Stir-Fried Rice

Very few dishes hit that perfect balance of comfort food and weeknight practicality quite like this beef and broccoli stir-fried rice. I first discovered this combination when trying to use up leftover rice and some flank steak, and now it’s become my go-to solution for busy evenings when I want something satisfying without spending hours in the kitchen.
3
servings15
minutes9
minutesIngredients
– 1 lb thinly sliced flank steak
– 3 cups cold, day-old jasmine rice
– 2 cups fresh broccoli florets
– 2 large farm-fresh eggs
– 3 cloves aromatic garlic, minced
– 1 tablespoon freshly grated ginger
– 3 tablespoons rich soy sauce
– 1 tablespoon toasted sesame oil
– 2 tablespoons vegetable oil
– 1/2 cup thinly sliced green onions
– 1 teaspoon coarse black pepper
Instructions
1. Heat 1 tablespoon of vegetable oil in a large wok or skillet over high heat until shimmering hot, about 1 minute.
2. Add the thinly sliced flank steak in a single layer and cook undisturbed for 90 seconds to develop a golden-brown sear.
3. Flip the steak pieces and cook for another 60 seconds until just cooked through, then transfer to a clean plate.
4. Crack 2 large farm-fresh eggs directly into the hot wok and scramble vigorously for 45 seconds until fluffy and set.
5. Push the scrambled eggs to one side and add the remaining 1 tablespoon of vegetable oil to the empty space.
6. Add the minced aromatic garlic and freshly grated ginger, stirring constantly for 30 seconds until fragrant but not browned.
7. Toss in the fresh broccoli florets and stir-fry for 2 minutes until bright green and slightly tender.
8. Add the 3 cups of cold, day-old jasmine rice, breaking up any clumps with your spatula.
9. Pour 3 tablespoons of rich soy sauce evenly over the rice mixture and toss continuously for 2 minutes until well combined.
10. Return the cooked flank steak to the wok along with any accumulated juices.
11. Drizzle 1 tablespoon of toasted sesame oil over the mixture and sprinkle with 1 teaspoon of coarse black pepper.
12. Toss everything together for 1 final minute until heated through and evenly distributed.
13. Remove from heat and fold in the thinly sliced green onions, reserving some for garnish.
Always serve this stir-fried rice immediately while it’s piping hot and the textures are at their peak. The tender beef contrasts beautifully with the crisp-tender broccoli, while the sesame oil adds that nutty depth that makes every bite so addictive. I love topping mine with an extra drizzle of chili oil or serving it alongside some quick-pickled vegetables for added crunch and brightness.
Conclusion
You now have 26 delicious keto recipes to transform your health journey! These tasty options prove eating well doesn’t mean sacrificing flavor. We’d love to hear which recipes become your favorites—drop a comment below and share this roundup on Pinterest to help other home cooks discover these wholesome dishes. Happy cooking!