Keen to explore the vibrant flavors of Asia from your own kitchen? Whether you’re craving quick weeknight dinners, comforting classics, or something new to impress guests, this collection of 24 exquisite recipes brings authentic tastes within easy reach. From sizzling stir-fries to aromatic curries, get ready to satisfy your cravings and discover your next favorite dish. Let’s dive into this delicious culinary adventure!
Spicy Thai Basil Chicken
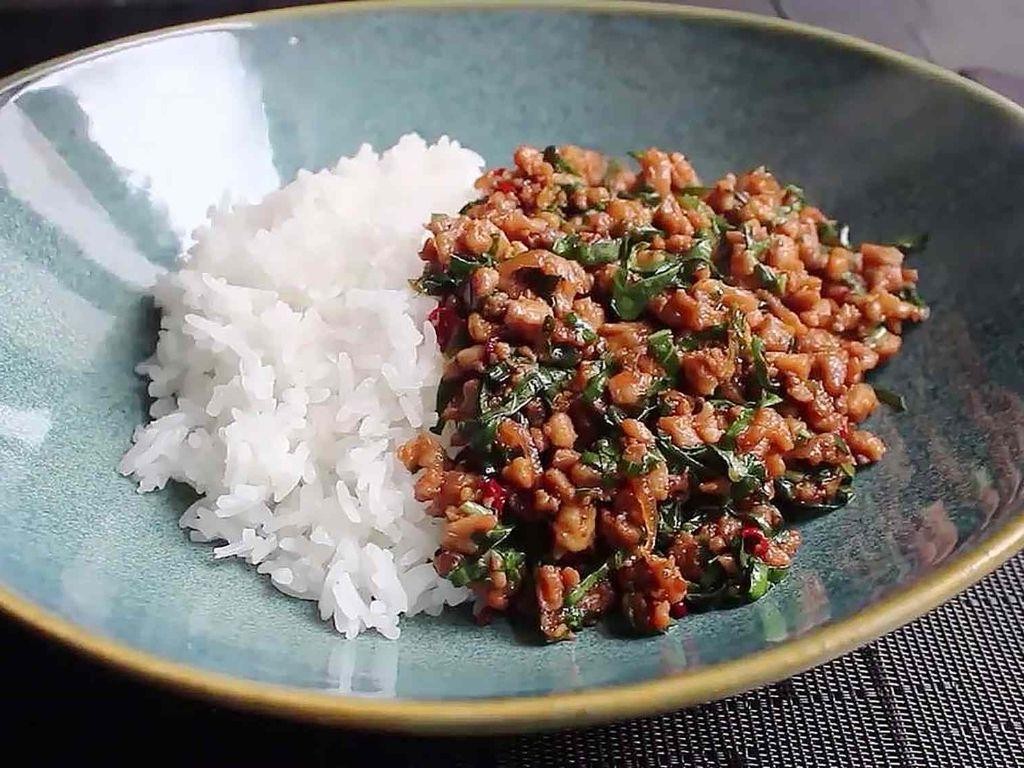
Phew, is it just me, or does your kitchen suddenly smell like a bustling Bangkok street food stall? That’s the magic of this fiery, fragrant, and frankly fantastic Spicy Thai Basil Chicken—a one-pan wonder that’s about to become your weeknight superhero. Let’s get sizzling!
Serving: 4 | Pre Time: 15 minutes | Cooking Time: 10 minutes
Ingredients
– 1.5 lbs boneless, skinless chicken thighs, cut into 1-inch pieces
– 3 tbsp fish sauce
– 2 tbsp oyster sauce
– 1 tbsp light soy sauce
– 1 tsp granulated sugar
– 3 tbsp neutral oil (such as grapeseed oil)
– 5 garlic cloves, finely minced
– 2–4 Thai bird’s eye chilies, thinly sliced (adjust for heat preference)
– 1 large yellow onion, thinly sliced
– 1 red bell pepper, julienned
– 2 cups fresh Thai basil leaves, loosely packed
– Cooked jasmine rice, for serving
Instructions
1. In a medium bowl, combine the chicken pieces with 1 tablespoon of fish sauce, tossing to coat evenly, and set aside to marinate for 10 minutes at room temperature.
2. Whisk together the remaining 2 tablespoons of fish sauce, oyster sauce, light soy sauce, and granulated sugar in a small bowl until the sugar dissolves completely; set this sauce mixture aside.
3. Heat the neutral oil in a large wok or skillet over high heat until it shimmers and just begins to smoke, about 1–2 minutes.
4. Add the marinated chicken to the hot oil in a single layer, searing undisturbed for 2 minutes to develop a golden-brown crust before stirring.
5. Continue cooking the chicken, stirring occasionally, until it is fully opaque and cooked through, about 3–4 more minutes; transfer the chicken to a clean plate using a slotted spoon, leaving the oil in the pan.
6. Tip: To prevent overcrowding and ensure proper searing, cook the chicken in two batches if your pan is smaller than 12 inches.
7. Reduce the heat to medium-high and add the minced garlic and sliced Thai chilies to the remaining oil; sauté for 30 seconds until fragrant but not browned.
8. Add the thinly sliced onion and julienned red bell pepper to the pan, stir-frying for 2–3 minutes until the vegetables are tender-crisp and slightly charred at the edges.
9. Tip: For maximum wok hei (breath of the wok), keep the ingredients moving constantly with a spatula during stir-frying.
10. Return the cooked chicken to the pan, pouring in the reserved sauce mixture and tossing everything together to coat evenly.
11. Cook for 1 more minute, allowing the sauce to thicken slightly and glaze the chicken and vegetables.
12. Remove the pan from the heat and immediately stir in the fresh Thai basil leaves until just wilted, about 30 seconds.
13. Tip: Adding the basil off the heat preserves its vibrant color and peppery aroma without turning bitter.
14. Serve the Spicy Thai Basil Chicken immediately over steamed jasmine rice.
The dish delivers a perfect textural symphony—tender chicken, crisp-tender vegetables, and wilted basil—all coated in a glossy, umami-rich sauce with a slow-building heat. For a creative twist, try stuffing it into lettuce cups with a squeeze of lime, or pile it atop crispy rice for an addictive contrast.
Japanese Teriyaki Salmon
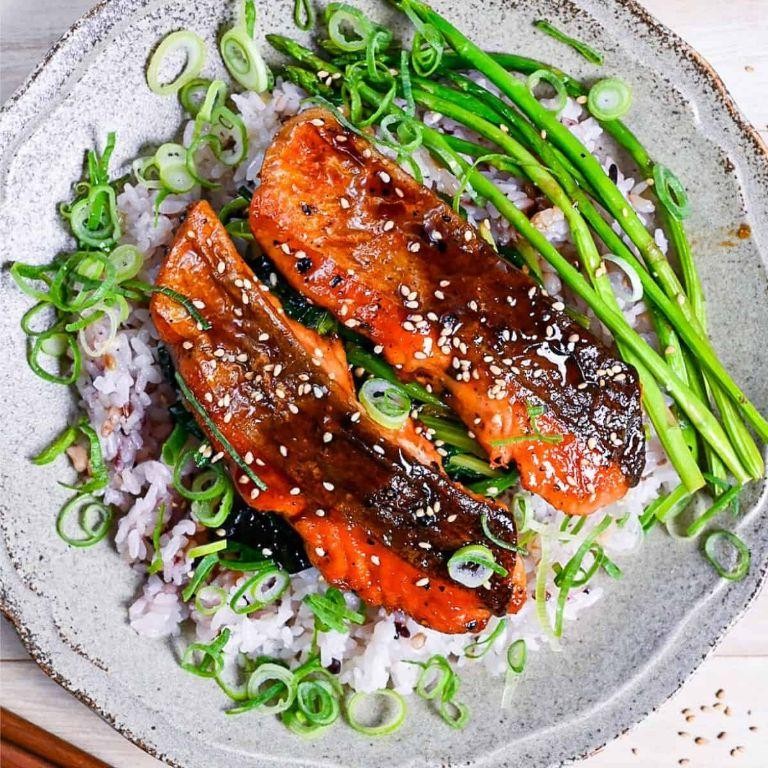
Ready to transform your weeknight dinner from ‘meh’ to magnificent? This Japanese Teriyaki Salmon is about to become your new culinary crush—it’s so easy, even your cat could probably make it (though we don’t recommend letting them near the stove). Serving: 4 | Pre Time: 15 minutes | Cooking Time: 12 minutes
Ingredients
– 4 (6-ounce) skin-on, center-cut salmon fillets, patted dry
– 1/4 cup low-sodium soy sauce
– 1/4 cup mirin
– 2 tablespoons granulated sugar
– 1 tablespoon freshly grated ginger root
– 1 teaspoon minced garlic
– 1 tablespoon neutral oil (such as avocado oil)
– 1 teaspoon toasted sesame seeds
– 2 thinly sliced scallions, for garnish
Instructions
1. In a small saucepan over medium heat, combine 1/4 cup low-sodium soy sauce, 1/4 cup mirin, 2 tablespoons granulated sugar, 1 tablespoon freshly grated ginger root, and 1 teaspoon minced garlic.
2. Bring the mixture to a simmer, stirring occasionally with a whisk until the sugar fully dissolves, about 2 minutes.
3. Reduce heat to low and let the sauce simmer gently until it thickens to a syrup-like consistency that coats the back of a spoon, approximately 5-7 minutes. (Tip: Don’t walk away—this sauce can go from glossy to gluey in seconds!)
4. Remove the teriyaki sauce from heat and set aside to cool slightly.
5. Pat 4 (6-ounce) skin-on, center-cut salmon fillets completely dry with paper towels to ensure a crisp sear.
6. Heat 1 tablespoon neutral oil in a large non-stick skillet over medium-high heat until it shimmers, about 1 minute.
7. Place the salmon fillets skin-side down in the hot skillet, pressing gently with a spatula for 10 seconds to prevent curling.
8. Cook undisturbed for 4-5 minutes until the skin is golden brown and crispy. (Tip: Listen for a steady sizzle—if it’s quiet, your pan isn’t hot enough.)
9. Carefully flip each fillet using a fish spatula and cook for an additional 2-3 minutes until the flesh is opaque and flakes easily with a fork.
10. Pour the reserved teriyaki sauce over the salmon in the skillet, swirling the pan to coat each fillet evenly.
11. Cook for 1 more minute, basting the salmon with the sauce until it forms a sticky, caramelized glaze.
12. Transfer the glazed salmon to a serving platter and immediately sprinkle with 1 teaspoon toasted sesame seeds and garnish with 2 thinly sliced scallions. (Tip: Toasting sesame seeds in a dry pan for 30 seconds before use intensifies their nutty flavor.)
Savor that first bite—the contrast of the crackling skin against the buttery-soft flesh, all wrapped in a sweet-savory glaze that’ll have you licking the plate. Serve it over a mound of steaming jasmine rice to catch every last drop of that addictive sauce, or get fancy with a side of quick-pickled cucumbers for a refreshing crunch.
Korean Bulgogi Beef
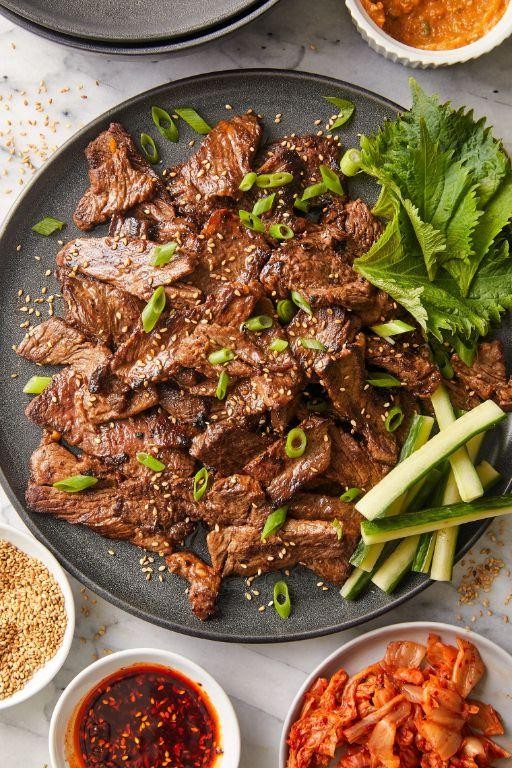
Talk about a flavor fiesta that’ll have your taste buds doing the cha-cha! Korean Bulgogi Beef is the sizzling, sweet-savory superstar that transforms humble beef into a caramelized, umami-packed masterpiece—perfect for when you’re craving something wildly delicious without a passport.
Serving: 4 | Pre Time: 30 minutes | Cooking Time: 10 minutes
Ingredients
- 1 ½ pounds flank steak, thinly sliced against the grain
- ½ cup low-sodium soy sauce
- ¼ cup granulated sugar
- 2 tablespoons toasted sesame oil
- 4 cloves garlic, finely minced
- 1 tablespoon freshly grated ginger
- ½ Asian pear, puréed
- 2 tablespoons mirin
- 1 tablespoon neutral oil (such as grapeseed oil)
- 2 green onions, thinly sliced
- 1 tablespoon toasted sesame seeds
Instructions
- In a large bowl, whisk together the low-sodium soy sauce, granulated sugar, toasted sesame oil, finely minced garlic, freshly grated ginger, puréed Asian pear, and mirin until the sugar is fully dissolved.
- Add the thinly sliced flank steak to the marinade, ensuring each piece is thoroughly coated. Tip: For maximum flavor penetration, massage the marinade into the beef with your hands.
- Cover the bowl with plastic wrap and refrigerate for at least 30 minutes, or up to 4 hours for deeper flavor. Tip: Do not marinate longer than 4 hours, as the pear’s enzymes can overly tenderize the meat, making it mushy.
- Heat a large cast-iron skillet or heavy-bottomed pan over high heat for 2 minutes until smoking hot.
- Add the neutral oil to the pan and swirl to coat the surface evenly.
- Using tongs, remove the beef from the marinade, letting excess drip off, and add it to the pan in a single layer without overcrowding; work in batches if necessary.
- Sear the beef for 2–3 minutes per side until deeply caramelized and no pink remains, but avoid overcooking to keep it tender.
- Transfer the cooked beef to a serving platter and repeat with any remaining batches, adding more oil only if the pan becomes dry.
- Sprinkle the finished bulgogi with thinly sliced green onions and toasted sesame seeds. Tip: For an extra flavor boost, drizzle a teaspoon of the reserved marinade (boiled for 1 minute first) over the top.
Marvel at the tender, juicy strips glazed in that sticky-sweet sauce, with a perfect char from the high-heat sear. Serve it piled high on steamed jasmine rice, tucked into lettuce wraps with a swipe of gochujang, or even stuffed into a grilled cheese for the ultimate fusion twist—this bulgogi is begging to be the star of your next meal.
Vietnamese Pho Ga
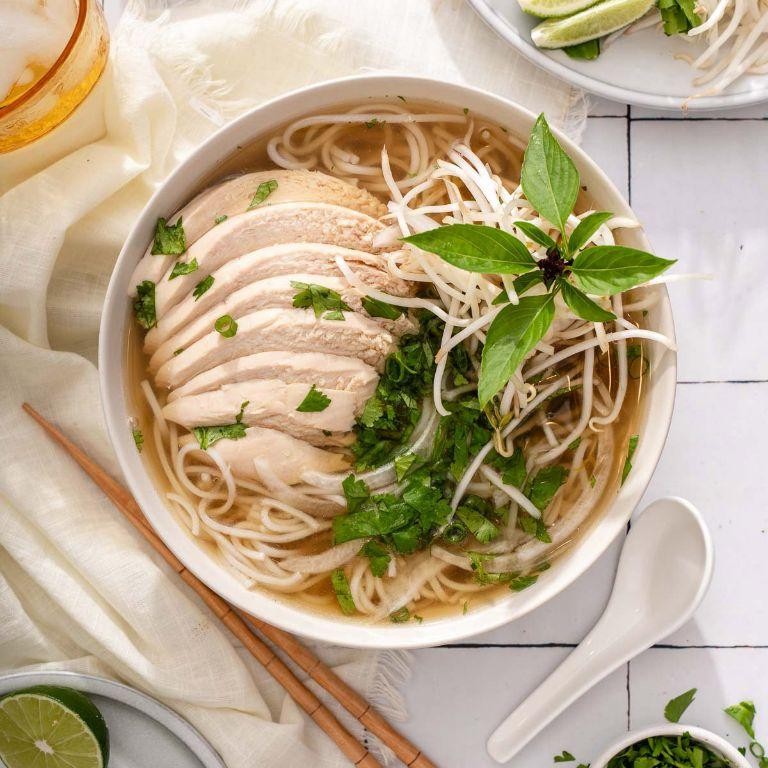
Whew, let’s be real—sometimes you crave a hug in a bowl, and this Vietnamese Pho Ga is basically a cozy, aromatic embrace that’ll make your taste buds do a happy dance. Forget the takeout menu; we’re diving into a homemade version that’s surprisingly simple to whip up, with a broth so fragrant it’ll have your kitchen smelling like a street-food stall in Hanoi.
Serving: 4 | Pre Time: 20 minutes | Cooking Time: 90 minutes
Ingredients
– 1 whole pasture-raised chicken (about 3 lbs), cut into 8 pieces
– 8 cups cold filtered water
– 1 large yellow onion, halved and charred
– 1 3-inch piece of fresh ginger, sliced and charred
– 3 whole star anise pods
– 1 cinnamon stick
– 4 whole cloves
– 2 tbsp fish sauce
– 1 tbsp granulated sugar
– 8 oz dried rice noodles (banh pho)
– 1 cup fresh bean sprouts
– 1/2 cup fresh Thai basil leaves
– 1/2 cup fresh cilantro sprigs
– 2 fresh jalapeños, thinly sliced
– 2 limes, cut into wedges
– Sriracha sauce, for serving
Instructions
1. Place the chicken pieces in a large stockpot and cover with 8 cups of cold filtered water. Bring to a boil over high heat, then immediately reduce to a gentle simmer.
2. Skim off any foam or impurities that rise to the surface with a slotted spoon for a clearer broth—this is a pro tip for achieving that pristine pho look.
3. Char the onion and ginger halves directly over a gas flame or under a broiler for 5–7 minutes until blackened in spots, which deepens their flavor.
4. Add the charred onion, ginger, star anise, cinnamon stick, and cloves to the pot. Simmer uncovered for 60 minutes, maintaining a low bubble.
5. Remove the chicken pieces with tongs and let them cool slightly on a cutting board. Shred the meat into bite-sized pieces, discarding the skin and bones.
6. Strain the broth through a fine-mesh sieve into a clean pot, pressing on the solids to extract all liquid. Discard the solids.
7. Stir in the fish sauce and granulated sugar until fully dissolved. Keep the broth warm over low heat.
8. Cook the rice noodles according to package instructions until al dente, usually 5–7 minutes in boiling water, then drain and rinse under cold water to prevent sticking.
9. Divide the noodles among four large bowls. Top each with shredded chicken and ladle the hot broth over them.
10. Arrange the bean sprouts, Thai basil, cilantro, jalapeños, and lime wedges on a separate platter for garnishing. Serve immediately with Sriracha sauce on the side.
Unexpectedly silky and rich, this pho ga boasts a broth that’s both light and deeply savory, with tender chicken and chewy noodles creating a perfect textural harmony. For a fun twist, try serving it with a side of crispy fried shallots or a drizzle of chili oil to kick up the heat—it’s a bowl that’s as versatile as it is delicious.
Chinese Kung Pao Chicken
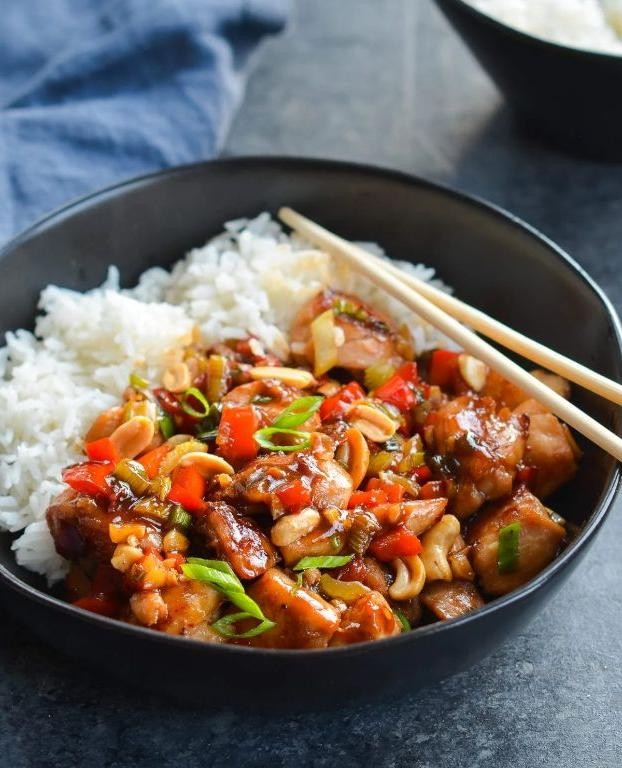
Picture this: a dish that’s as bold and sassy as your favorite reality TV star, packing a punch of flavor that’ll make your taste buds do a happy dance. Kung Pao Chicken is that iconic Chinese-American classic—a fiery, tangy, and nutty stir-fry that’s basically a party in a pan, ready to rescue your dinner routine from the doldrums.
Serving: 4 | Pre Time: 20 minutes | Cooking Time: 15 minutes
Ingredients
- 1.5 pounds boneless, skinless chicken thighs, cut into 1-inch cubes
- 2 tablespoons Shaoxing wine
- 1 tablespoon cornstarch
- 1 teaspoon kosher salt
- 3 tablespoons vegetable oil, divided
- 6 dried red chilies, stems removed
- 1 tablespoon Sichuan peppercorns, lightly toasted
- 3 cloves garlic, minced
- 1-inch piece fresh ginger, minced
- 1/2 cup roasted unsalted peanuts
- 4 scallions, sliced into 1/2-inch pieces
- 1/4 cup low-sodium soy sauce
- 2 tablespoons Chinkiang black vinegar
- 1 tablespoon granulated sugar
- 1 teaspoon sesame oil
Instructions
- In a medium bowl, combine the chicken cubes, Shaoxing wine, cornstarch, and kosher salt; marinate for 15 minutes at room temperature to tenderize the meat.
- Heat a large wok or skillet over high heat until a drop of water sizzles and evaporates immediately, about 2 minutes.
- Add 2 tablespoons of vegetable oil to the wok and swirl to coat the surface evenly.
- Add the marinated chicken in a single layer and sear undisturbed for 2 minutes to develop a golden-brown crust.
- Flip the chicken pieces and cook for an additional 2 minutes until opaque throughout, then transfer to a plate.
- Reduce the heat to medium and add the remaining 1 tablespoon of vegetable oil to the wok.
- Toss in the dried red chilies and Sichuan peppercorns; toast for 30 seconds until fragrant, stirring constantly to prevent burning.
- Add the minced garlic and ginger, stirring for 20 seconds until aromatic but not browned.
- Tip: Toasting the Sichuan peppercorns enhances their citrusy, numbing quality—don’t skip this step for authentic flavor!
- Return the cooked chicken to the wok, along with the roasted peanuts and scallions.
- In a small bowl, whisk together the soy sauce, Chinkiang black vinegar, granulated sugar, and sesame oil until the sugar dissolves.
- Pour the sauce mixture over the chicken and stir-fry for 2 minutes, ensuring everything is well-coated and the sauce thickens slightly.
- Tip: Use a high smoke-point oil like vegetable oil for stir-frying to achieve that coveted wok hei (breath of the wok) without smoking out your kitchen.
- Cook for an additional 1 minute until the sauce clings to the chicken and the peanuts are warmed through.
- Tip: For optimal texture, add the peanuts late in the process to keep them crunchy rather than soggy.
- Remove from heat and let rest for 2 minutes before serving to allow the flavors to meld.
Delight in the contrasting textures—tender chicken, crunchy peanuts, and a sauce that’s both spicy and tangy with a hint of numbing Sichuan peppercorns. Serve it over steamed jasmine rice to soak up every last drop, or get creative by stuffing it into lettuce cups for a low-carb twist that’s just as addictive.
Indian Lamb Vindaloo
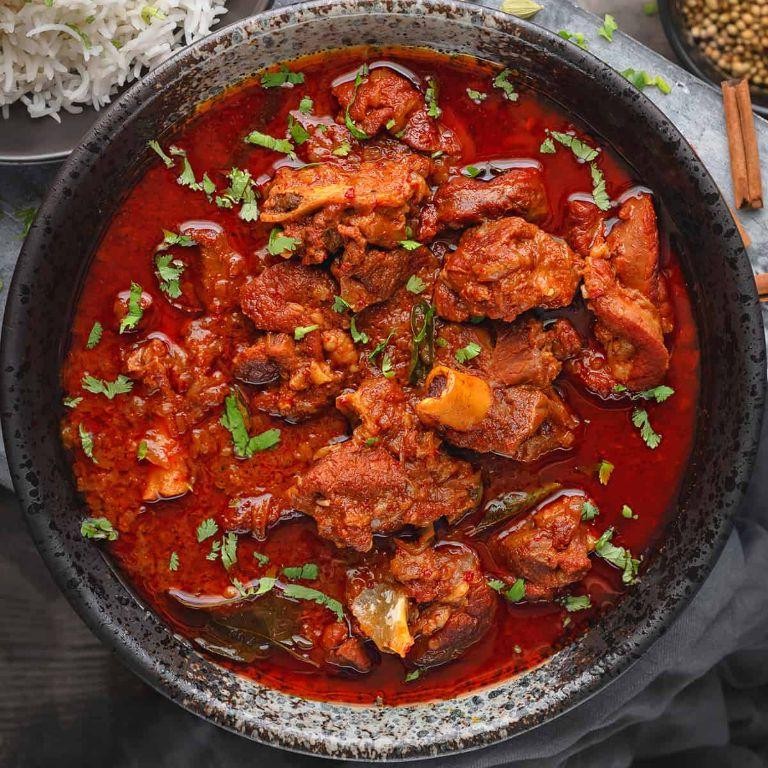
Brace your taste buds for a fiery adventure that’ll make your kitchen smell like a spice bazaar on a very good day. This Indian Lamb Vindaloo isn’t just a curry—it’s a flavor-packed journey that balances heat, tang, and tender meat in a way that’ll have you questioning all your previous dinner decisions. Get ready to impress your palate and maybe even your neighbors, because this dish is about to become your new culinary flex.
Serving: 4 | Pre Time: 20 minutes | Cooking Time: 90 minutes
Ingredients
– 2 pounds boneless lamb shoulder, cut into 1-inch cubes
– ¼ cup clarified butter (ghee)
– 1 large yellow onion, finely diced
– 6 garlic cloves, minced
– 2-inch piece fresh ginger, peeled and grated
– 2 tablespoons Kashmiri red chili powder
– 1 tablespoon ground cumin
– 1 teaspoon ground turmeric
– ½ teaspoon ground cinnamon
– ¼ teaspoon ground cloves
– 3 tablespoons white wine vinegar
– 1 tablespoon granulated sugar
– 1½ cups low-sodium chicken broth
– 1 teaspoon fine sea salt
– ¼ cup chopped fresh cilantro leaves
Instructions
1. In a large Dutch oven or heavy-bottomed pot, heat the clarified butter over medium-high heat until shimmering, about 2 minutes.
2. Pat the lamb cubes completely dry with paper towels to ensure proper browning.
3. Add the lamb to the pot in a single layer, working in batches if necessary to avoid overcrowding.
4. Sear the lamb until deeply browned on all sides, approximately 8-10 minutes total, then transfer to a plate.
5. Reduce the heat to medium and add the diced onion to the same pot, scraping up any browned bits from the bottom.
6. Sauté the onion until translucent and lightly golden, about 6-8 minutes, stirring frequently.
7. Add the minced garlic and grated ginger, cooking until fragrant, about 1 minute.
8. Stir in the Kashmiri red chili powder, ground cumin, turmeric, cinnamon, and cloves, toasting the spices for 30 seconds to release their oils.
9. Pour in the white wine vinegar to deglaze the pot, using a wooden spoon to loosen any remaining fond.
10. Add the granulated sugar and stir until dissolved, about 1 minute.
11. Return the seared lamb and any accumulated juices to the pot, tossing to coat in the spice mixture.
12. Pour in the chicken broth and add the fine sea salt, stirring to combine.
13. Bring the mixture to a gentle simmer, then reduce the heat to low and cover the pot.
14. Simmer the vindaloo for 1 hour and 15 minutes, stirring occasionally, until the lamb is fork-tender.
15. Uncover the pot and increase the heat to medium to reduce the sauce slightly, about 10 minutes, until it coats the back of a spoon.
16. Stir in the chopped fresh cilantro just before serving.
The finished vindaloo boasts tender, fall-apart lamb enveloped in a complex, glossy sauce that’s simultaneously fiery, tangy, and subtly sweet. Serve it over steamed basmati rice to soak up every last drop, or with warm naan for a truly immersive experience—just don’t forget a cooling raita on the side to tame the heat.
Indonesian Nasi Goreng

Okay, let’s get real: you’ve probably stared into your fridge, seen leftover rice and a few random veggies, and thought, “I guess it’s sad stir-fry night again.” But what if I told you those same humble ingredients could be transformed into a dish so packed with flavor it’ll make your taste buds do a happy dance? Enter Nasi Goreng, Indonesia’s legendary fried rice that turns kitchen scraps into a crave-worthy masterpiece. Forget boring leftovers—this is your ticket to a quick, wildly delicious dinner that feels like a culinary adventure without ever leaving your kitchen.
Serving: 4 | Pre Time: 15 minutes | Cooking Time: 15 minutes
Ingredients
– 4 cups day-old cooked jasmine rice, chilled
– 2 tablespoons clarified butter (ghee)
– 1 large yellow onion, finely diced
– 3 cloves garlic, minced
– 2 teaspoons sambal oelek (Indonesian chili paste)
– 2 tablespoons kecap manis (sweet soy sauce)
– 1 tablespoon fish sauce
– 4 pasture-raised eggs, lightly beaten
– 8 ounces large shrimp, peeled and deveined
– 1 cup finely shredded napa cabbage
– 4 scallions, thinly sliced
– 1 lime, cut into wedges
Instructions
1. Heat a large wok or skillet over high heat for 2 minutes until it begins to smoke slightly.
2. Add 2 tablespoons of clarified butter and swirl to coat the surface evenly.
3. Add 1 large finely diced yellow onion and sauté for 3–4 minutes until translucent and lightly golden.
4. Stir in 3 cloves of minced garlic and cook for 30 seconds until fragrant, being careful not to let it burn.
5. Add 8 ounces of peeled and deveined shrimp and cook for 2–3 minutes until they turn pink and opaque.
6. Push the shrimp and onion mixture to one side of the wok.
7. Pour 4 lightly beaten pasture-raised eggs into the empty side and scramble for 1 minute until just set but still soft.
8. Incorporate the eggs with the shrimp mixture.
9. Add 4 cups of chilled day-old jasmine rice, breaking up any clumps with a spatula.
10. Stir-fry the rice for 4–5 minutes until each grain is separated and heated through.
11. Add 2 teaspoons of sambal oelek, 2 tablespoons of kecap manis, and 1 tablespoon of fish sauce, tossing vigorously to coat evenly.
12. Mix in 1 cup of finely shredded napa cabbage and cook for 1 minute until just wilted.
13. Remove the wok from heat and fold in 4 thinly sliced scallions.
14. Divide the Nasi Goreng among four plates and garnish each with a lime wedge.
Fluffy, fragrant rice gets a smoky kiss from the wok, while the shrimp add a sweet brininess that plays off the spicy-sweet sauce. For a show-stopping presentation, top each serving with a crispy fried egg and a sprinkle of fried shallots—it’s the kind of dish that’ll have everyone asking for seconds before they’ve even finished their first bite.
Malaysian Laksa Soup
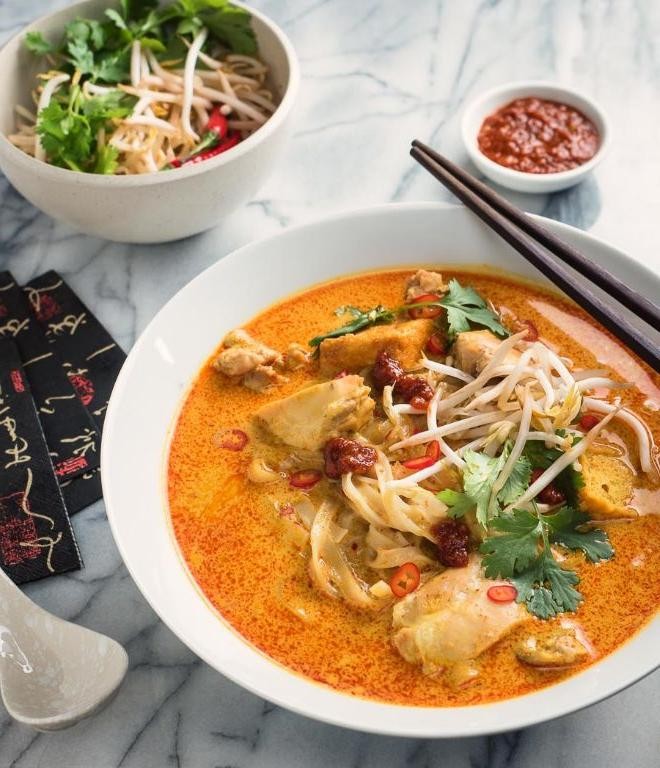
Fancy a culinary adventure that’ll make your taste buds do a happy dance? Let’s dive into the glorious, spicy-sour world of Malaysian Laksa Soup—a bowl of pure comfort that’s like a warm hug from Southeast Asia. This noodle soup is a flavor explosion, balancing creamy coconut, tangy tamarind, and a kick of heat that’ll have you slurping every last drop with gusto. Get ready to impress your friends (or just treat yourself) with this vibrant, soul-warming masterpiece that’s easier to whip up than you might think!
Serving: 4 | Pre Time: 20 minutes | Cooking Time: 30 minutes
Ingredients
– 2 tablespoons of high-smoke-point vegetable oil
– 1 large yellow onion, finely diced
– 4 cloves of garlic, minced
– 2 tablespoons of Laksa paste
– 4 cups of unsweetened full-fat coconut milk
– 4 cups of homemade chicken stock
– 2 tablespoons of tamarind concentrate
– 1 tablespoon of granulated sugar
– 8 ounces of rice vermicelli noodles
– 1 pound of large shrimp, peeled and deveined
– 4 pasture-raised eggs, lightly beaten
– 1 cup of bean sprouts
– 1/4 cup of fresh cilantro leaves, roughly chopped
– 2 limes, cut into wedges
Instructions
1. Heat the vegetable oil in a large Dutch oven over medium-high heat until shimmering, about 2 minutes.
2. Add the finely diced yellow onion and sauté until translucent and fragrant, approximately 5 minutes, stirring occasionally to prevent burning.
3. Stir in the minced garlic and cook for 1 minute until aromatic but not browned.
4. Incorporate the Laksa paste, toasting it with the aromatics for 2 minutes to deepen its flavors—this step is key for a rich base.
5. Pour in the unsweetened full-fat coconut milk and homemade chicken stock, bringing the mixture to a gentle boil over high heat.
6. Reduce the heat to medium-low, then add the tamarind concentrate and granulated sugar, simmering uncovered for 15 minutes to allow the broth to meld.
7. While the broth simmers, cook the rice vermicelli noodles according to package instructions until al dente, then drain and rinse under cold water to stop the cooking process.
8. Increase the heat to medium, add the peeled and deveined shrimp to the broth, and poach for 3-4 minutes until they turn pink and opaque, being careful not to overcook.
9. Slowly drizzle the lightly beaten pasture-raised eggs into the simmering broth in a thin stream, stirring gently to create silky ribbons, about 1 minute.
10. Divide the cooked rice vermicelli noodles among four bowls, ladle the hot broth with shrimp and egg over the noodles, and top with bean sprouts and roughly chopped fresh cilantro leaves.
11. Serve immediately with lime wedges on the side for squeezing over the soup to brighten the flavors.
Marvel at the luscious texture of this Laksa—creamy from the coconut milk, with tender shrimp and delicate egg ribbons floating in a tangy, spicy broth. The rice noodles soak up all that goodness, while the fresh bean sprouts and cilantro add a crisp, herbal crunch. For a fun twist, set out extra toppings like sliced chili peppers or fried shallots, and watch everyone customize their bowl to perfection!
Filipino Chicken Adobo
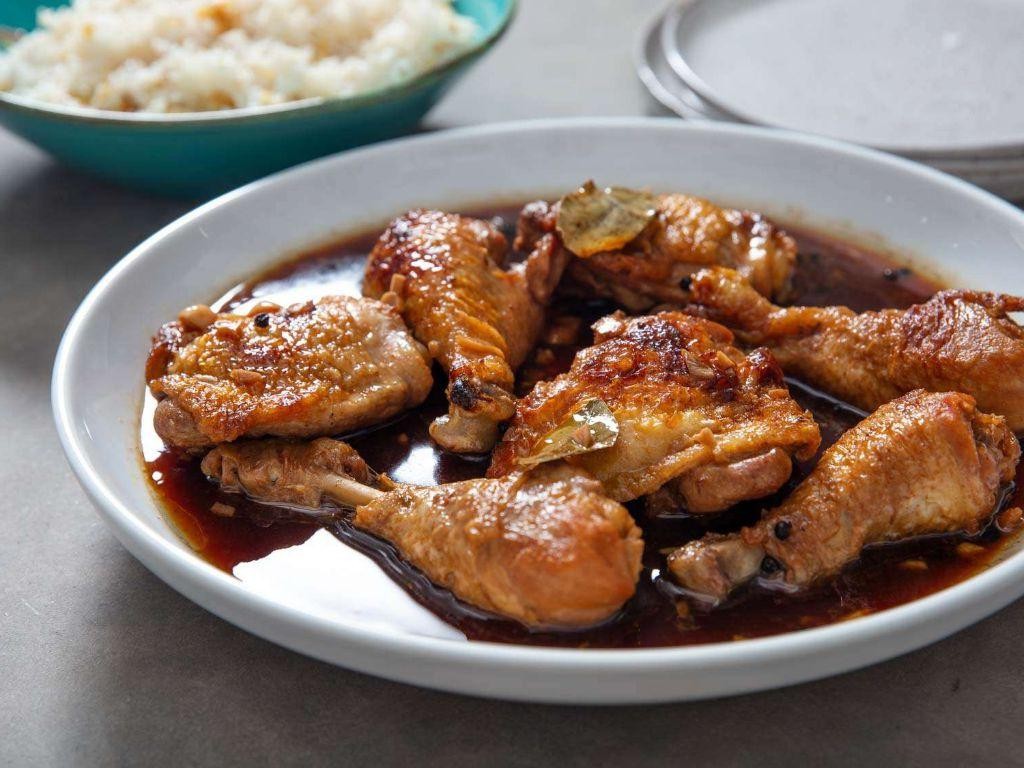
Savor the savory, tangy magic of Filipino Chicken Adobo, a dish so brilliantly simple and flavor-packed it’ll make your taste buds do a happy dance. Forget fussy techniques—this one-pot wonder braises chicken in a gorgeously glossy, garlicky, soy-and-vinegar sauce until it’s fall-off-the-bone tender and utterly irresistible. It’s the ultimate comfort food with a zesty kick, guaranteed to become a weeknight hero in your kitchen.
Serving: 4 | Pre Time: 15 minutes | Cooking Time: 50 minutes
Ingredients
– 2 lbs bone-in, skin-on chicken thighs
– ½ cup low-sodium soy sauce
– ½ cup cane vinegar
– 1 cup chicken stock
– 8 garlic cloves, finely minced
– 2 bay leaves
– 1 tsp whole black peppercorns
– 2 tbsp neutral oil (such as avocado oil)
Instructions
1. Pat the chicken thighs completely dry with paper towels to ensure a crisp sear.
2. Heat the neutral oil in a large Dutch oven or heavy-bottomed pot over medium-high heat until shimmering, about 2 minutes.
3. Sear the chicken thighs, skin-side down, for 5–7 minutes until the skin is deeply golden brown and crispy; flip and sear the other side for 3–4 minutes, then transfer to a plate.
4. Reduce the heat to medium and sauté the minced garlic in the remaining oil for 1 minute until fragrant but not browned.
5. Pour in the low-sodium soy sauce, cane vinegar, and chicken stock, scraping up any browned bits from the bottom of the pot.
6. Add the bay leaves and whole black peppercorns to the liquid.
7. Return the seared chicken thighs to the pot, skin-side up, ensuring they are mostly submerged in the braising liquid.
8. Bring the liquid to a gentle simmer, then reduce the heat to low, cover, and braise for 35 minutes.
9. Uncover the pot and continue simmering for an additional 10 minutes to slightly reduce the sauce.
10. Using tongs, transfer the chicken to a serving platter.
11. Increase the heat to medium-high and simmer the sauce for 3–5 minutes until it thickens to a glossy, coating consistency.
12. Spoon the reduced sauce over the chicken thighs.
Just look at that glistening, mahogany-colored chicken! The meat is incredibly tender and juicy, pulling easily from the bone, while the sauce is a perfect balance of savory, tangy, and subtly sweet. Serve it over a mound of fluffy jasmine rice to soak up every last drop, or get creative by shredding the meat for adobo tacos topped with pickled onions and fresh cilantro.
Singaporean Chilli Crab

Zesty, messy, and utterly irresistible—Singaporean Chilli Crab is the kind of dish that demands you roll up your sleeves and dive in, fork and crab cracker in hand. This iconic seafood spectacle transforms sweet, succulent crab into a saucy, tangy, and slightly spicy masterpiece that’s perfect for a festive gathering or a seriously indulgent weeknight treat. Just be warned: you’ll need plenty of napkins and zero shame about licking your fingers clean.
Serving: 4 | Pre Time: 20 minutes | Cooking Time: 25 minutes
Ingredients
– 2 whole Dungeness crabs (about 2 lbs each), cleaned and cracked into sections
– 3 tablespoons grapeseed oil
– 6 cloves garlic, finely minced
– 1 (2-inch) piece fresh ginger, peeled and finely grated
– 2 large shallots, finely diced
– 2 tablespoons tomato paste
– 1/4 cup sambal oelek
– 1/4 cup rice vinegar
– 1/4 cup granulated sugar
– 1 cup seafood stock
– 2 large pasture-raised eggs, lightly beaten
– 2 scallions, thinly sliced
– 1 tablespoon cornstarch mixed with 2 tablespoons cold water (slurry)
Instructions
1. In a large wok or Dutch oven, heat the grapeseed oil over medium-high heat until shimmering, about 2 minutes.
2. Add the crab sections and sear until the shells turn bright orange, about 3–4 minutes per side; remove and set aside.
3. In the same wok, reduce heat to medium and sauté the garlic, ginger, and shallots until fragrant and softened, about 2 minutes.
4. Stir in the tomato paste and cook for 1 minute to deepen its flavor, stirring constantly to prevent burning.
5. Add the sambal oelek, rice vinegar, and sugar, stirring until the sugar dissolves and the mixture bubbles slightly, about 1 minute.
6. Pour in the seafood stock and bring to a gentle simmer, scraping up any browned bits from the bottom of the wok.
7. Return the crab to the wok, coating each piece thoroughly with the sauce, then cover and simmer for 8–10 minutes, until the crab is fully cooked and opaque.
8. Uncover and slowly drizzle in the cornstarch slurry, stirring continuously until the sauce thickens to a glossy, coating consistency, about 1–2 minutes.
9. Remove the wok from heat and immediately pour the lightly beaten eggs in a thin stream over the sauce, letting them set for 10 seconds before gently folding to create silky ribbons.
10. Garnish with sliced scallions and serve immediately.
The resulting dish boasts tender, sweet crab meat enveloped in a luscious, tangy-sweet sauce with a subtle kick, all clinging to every nook and cranny of the shell. For a fun twist, serve it with crusty baguette slices or steamed mantou buns to sop up every last drop of that irresistible sauce—because wasting it would be a culinary crime.
Thai Green Curry
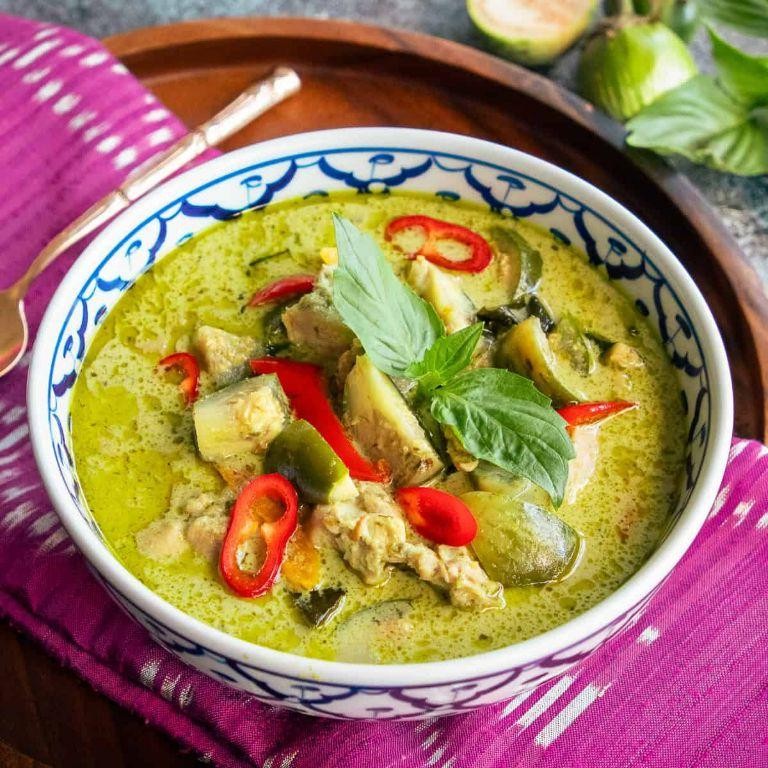
Oof, does anyone else’s week feel like a marathon that forgot the finish line? Let’s hit pause on the chaos and dive into a pot of pure, aromatic comfort. This Thai Green Curry is your culinary escape hatch—a vibrant, coconutty hug that banishes the mundane in about the time it takes to doom-scroll.
Serving: 4 | Pre Time: 15 minutes | Cooking Time: 25 minutes
Ingredients
– 1 ½ lbs boneless, skinless chicken thighs, cut into 1-inch pieces
– 2 tbsp virgin coconut oil
– ¼ cup Thai green curry paste
– 2 (13.5 oz) cans full-fat coconut milk
– 1 cup low-sodium chicken stock
– 1 tbsp fish sauce
– 1 tbsp palm sugar, finely grated
– 1 red bell pepper, julienned
– 1 cup Thai eggplant, quartered
– ½ cup fresh Thai basil leaves
– 2 fresh makrut lime leaves
– Steamed jasmine rice, for serving
Instructions
1. Pat the chicken thighs completely dry with paper towels to ensure a proper sear.
2. In a large Dutch oven or heavy-bottomed pot, heat the virgin coconut oil over medium-high heat until it shimmers, about 2 minutes.
3. Add the chicken pieces in a single layer, searing until golden brown on all sides, approximately 6-8 minutes total. Remove and set aside.
4. Reduce heat to medium. Add the Thai green curry paste to the pot and sauté for 1-2 minutes until fragrant, stirring constantly to prevent burning.
5. Pour in the full-fat coconut milk and low-sodium chicken stock, scraping the bottom of the pot to incorporate any browned bits.
6. Stir in the fish sauce and finely grated palm sugar until fully dissolved.
7. Return the seared chicken and any accumulated juices to the pot.
8. Add the julienned red bell pepper and quartered Thai eggplant. Submerge the makrut lime leaves.
9. Bring the curry to a gentle simmer, then reduce heat to maintain a low simmer. Partially cover and cook for 15 minutes, or until the chicken is cooked through and the vegetables are tender-crisp.
10. Remove from heat. Discard the makrut lime leaves and stir in the fresh Thai basil leaves until just wilted.
11. Ladle the curry over steamed jasmine rice in shallow bowls.
Just behold that velvety, jade-hued broth clinging to each tender piece of chicken. The curry delivers a brilliant dance of heat, sweetness, and herbaceous fragrance that’s utterly moreish. For a show-stopping twist, serve it in hollowed-out young coconuts or with a side of crispy roti for dipping into that glorious sauce.
Japanese Miso Ramen
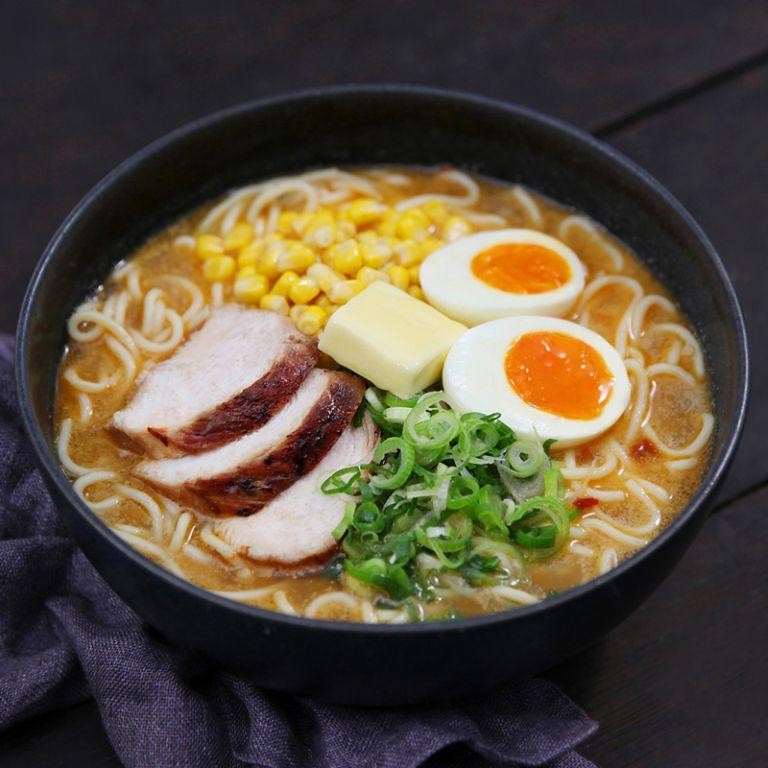
Yikes, it’s that time of year when you crave something soul-warming but can’t face another boring soup—enter Japanese miso ramen, the umami-packed hug in a bowl that’ll make your taste buds do a happy dance. This isn’t your average instant noodle situation; we’re talking a rich, savory broth, springy noodles, and toppings so good they deserve a standing ovation. Let’s ditch the takeout menus and whip up a bowl of cozy magic that’s easier than pronouncing ‘umami’ after a long day!
Serving: 2 | Pre Time: 20 minutes | Cooking Time: 30 minutes
Ingredients
– 6 cups filtered water
– 1 lb pork belly, skin-on, cut into 1-inch cubes
– 1 large yellow onion, thinly sliced
– 3 cloves garlic, minced
– 1-inch piece fresh ginger, peeled and grated
– 4 tbsp white miso paste
– 2 tbsp soy sauce
– 1 tbsp mirin
– 1 tsp toasted sesame oil
– 8 oz fresh ramen noodles
– 2 pasture-raised eggs, lightly beaten
– 2 green onions, thinly sliced
– 1 sheet nori, cut into strips
– 1 tbsp clarified butter
Instructions
1. In a large pot over medium-high heat, add 1 tbsp clarified butter and heat until shimmering, about 1 minute.
2. Add 1 lb pork belly cubes and sear until golden brown on all sides, approximately 5–7 minutes, rendering the fat.
3. Stir in 1 large thinly sliced yellow onion, 3 cloves minced garlic, and 1-inch grated ginger, cooking until fragrant and softened, about 3–4 minutes.
4. Pour in 6 cups filtered water and bring to a boil, then reduce heat to low and simmer uncovered for 20 minutes to develop flavor.
5. While the broth simmers, in a small bowl, whisk together 4 tbsp white miso paste, 2 tbsp soy sauce, 1 tbsp mirin, and 1 tsp toasted sesame oil until smooth.
6. After 20 minutes, remove the pot from heat and slowly whisk the miso mixture into the broth until fully dissolved to prevent curdling.
7. In a separate pot, bring water to a rolling boil and cook 8 oz fresh ramen noodles according to package instructions, typically 2–3 minutes, then drain immediately.
8. Divide the cooked noodles evenly between two large bowls and ladle the hot miso broth over them.
9. In a non-stick skillet over medium heat, pour 2 lightly beaten pasture-raised eggs and cook undisturbed for 2 minutes until set, then gently fold into soft curds.
10. Top each bowl with the egg curds, 2 thinly sliced green onions, and 1 sheet nori strips.
Unbelievably silky and deeply savory, this ramen boasts a broth that’s rich with umami from the miso and pork, while the springy noodles and tender egg curds add a delightful textural contrast. Serve it steaming hot with extra nori for a crispy bite, or get creative by adding a dollop of chili oil for a spicy kick—it’s the ultimate comfort food that’ll have you slurping every last drop!
Korean Kimchi Jjigae
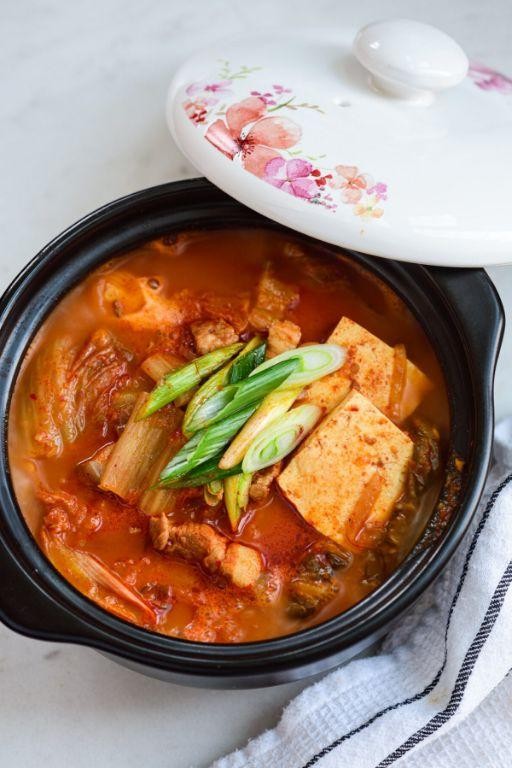
Whew, is it just me, or does your kitchen suddenly feel like it needs a spicy, soul-warming hug? Let’s talk about Korean Kimchi Jjigae, the bubbling cauldron of comfort that’s basically a fermented flavor party in a pot—perfect for when your taste buds are bored of being polite.
Serving: 4 | Pre Time: 15 minutes | Cooking Time: 25 minutes
Ingredients
– 2 cups of well-fermented kimchi, chopped into 1-inch pieces
– 8 ounces of pork belly, thinly sliced
– 1 tablespoon of toasted sesame oil
– 4 cups of homemade or high-quality chicken stock
– 1 medium yellow onion, thinly sliced
– 3 cloves of garlic, minced
– 1 tablespoon of gochujang (Korean red chili paste)
– 1 teaspoon of gochugaru (Korean red chili flakes)
– 14 ounces of firm tofu, cut into 1-inch cubes
– 2 pasture-raised eggs, lightly beaten
– 2 scallions, thinly sliced on a bias
Instructions
1. Heat a large, heavy-bottomed pot or Dutch oven over medium-high heat for 2 minutes until the surface is hot.
2. Add 1 tablespoon of toasted sesame oil to the pot and swirl to coat the bottom evenly.
3. Place 8 ounces of thinly sliced pork belly in the pot in a single layer and sear for 3–4 minutes until the edges are crispy and golden brown, stirring once halfway through.
4. Add 1 medium thinly sliced yellow onion and 3 cloves of minced garlic to the pot, sautéing for 2 minutes until the onion is translucent and fragrant.
5. Stir in 2 cups of chopped kimchi, 1 tablespoon of gochujang, and 1 teaspoon of gochugaru, cooking for 3 minutes to deepen the flavors and slightly caramelize the kimchi.
6. Tip: For a richer broth, use homemade chicken stock; it adds a cleaner, more nuanced base than store-bought versions.
7. Pour 4 cups of chicken stock into the pot, scraping the bottom with a wooden spoon to release any browned bits.
8. Bring the mixture to a boil over high heat, then reduce to a simmer and cook uncovered for 10 minutes to allow the flavors to meld.
9. Tip: Simmer gently to prevent the tofu from breaking apart, which keeps the texture intact for serving.
10. Gently add 14 ounces of cubed firm tofu to the pot, submerging it in the broth, and simmer for an additional 5 minutes.
11. Tip: Lightly beat the eggs just before adding to ensure they cook evenly and create silky ribbons in the stew.
12. Slowly drizzle 2 lightly beaten pasture-raised eggs into the simmering stew in a circular motion, then turn off the heat and let it sit for 1 minute to set the eggs.
13. Garnish the stew with 2 thinly sliced scallions just before serving.
14. Aromatic and robust, this jjigae boasts a tangy kick from the fermented kimchi, balanced by the creamy tofu and rich pork belly. Serve it piping hot in deep bowls with a side of steamed rice to soak up every last drop of that spicy, umami-packed broth—it’s a flavor fiesta that’ll make your weeknight dinners feel like a celebration.
Chinese Mapo Tofu

Ever had a dish that feels like a cozy hug with a spicy kick? That’s Chinese Mapo Tofu for you—a saucy, savory, and slightly fiery masterpiece that’s basically comfort food with a PhD in flavor. It’s the kind of meal that makes you want to do a happy dance, no chopsticks required!
Serving: 4 | Pre Time: 15 minutes | Cooking Time: 20 minutes
Ingredients
– 1 lb firm tofu, drained and cut into 1-inch cubes
– 2 tbsp Sichuan peppercorns, toasted and ground
– 1 tbsp fermented black beans, rinsed and minced
– 2 tbsp doubanjiang (fermented chili bean paste)
– 3 cloves garlic, finely minced
– 1-inch piece fresh ginger, peeled and finely grated
– 4 oz ground pork (80% lean)
– 1 cup low-sodium chicken broth
– 1 tbsp light soy sauce
– 1 tsp granulated sugar
– 2 tsp cornstarch, dissolved in 2 tbsp cold water
– 2 tbsp vegetable oil
– 2 scallions, thinly sliced
Instructions
1. Place the tofu cubes in a bowl of hot water and let them soak for 10 minutes to firm up, then drain thoroughly and pat dry with paper towels—this prevents crumbling during cooking.
2. Heat the vegetable oil in a large wok or skillet over medium-high heat until shimmering, about 2 minutes.
3. Add the ground pork and cook, breaking it up with a spatula, until browned and no longer pink, approximately 4-5 minutes.
4. Stir in the minced garlic and grated ginger, cooking for 1 minute until fragrant to release their aromatic oils.
5. Add the doubanjiang and minced fermented black beans, stirring constantly for 2 minutes to toast and deepen their flavors.
6. Pour in the chicken broth, light soy sauce, and granulated sugar, bringing the mixture to a gentle simmer over medium heat.
7. Gently add the tofu cubes to the sauce, spooning the liquid over them, and simmer uncovered for 5 minutes to allow the tofu to absorb the flavors.
8. Stir in the cornstarch slurry and cook for 2 minutes, until the sauce thickens to a glossy, coating consistency—avoid over-stirring to keep the tofu intact.
9. Remove from heat and fold in half of the sliced scallions and ground Sichuan peppercorns, reserving the rest for garnish.
10. Transfer to a serving dish and top with the remaining scallions and a sprinkle of Sichuan peppercorns for an extra tingly finish.
Zesty and unapologetically bold, this Mapo Tofu boasts a silky-smooth texture from the tender tofu cubes swimming in a rich, umami-packed sauce with a numbing Sichuan peppercorn kick. Serve it over a bed of steamed jasmine rice to soak up every last drop, or get creative by stuffing it into lettuce wraps for a crunchy, low-carb twist that’ll have everyone asking for seconds!
Vietnamese Banh Mi Sandwich

Let’s be honest: you’ve probably had a sad, soggy sandwich that made you question your life choices. But this Vietnamese Banh Mi is here to redeem your lunch game—it’s a flavor-packed party in a baguette that’ll have you doing a happy dance in your kitchen. Trust me, your taste buds will thank you for this crispy, savory, and tangy masterpiece.
Serving: 4 | Pre Time: 30 minutes | Cooking Time: 15 minutes
Ingredients
– 1 lb boneless, skinless chicken thighs, thinly sliced
– 2 tbsp fish sauce
– 1 tbsp granulated sugar
– 1 tbsp freshly squeezed lime juice
– 2 cloves garlic, minced
– 1 tsp freshly ground black pepper
– 2 tbsp neutral oil (e.g., grapeseed oil)
– 4 Vietnamese-style baguettes (about 6 inches each)
– 1 cup pickled daikon and carrot (julienned)
– 1/2 cup fresh cilantro leaves
– 1/4 cup mayonnaise
– 2 fresh jalapeños, thinly sliced
Instructions
1. In a medium bowl, combine the sliced chicken thighs, fish sauce, granulated sugar, lime juice, minced garlic, and black pepper; marinate at room temperature for 20 minutes.
2. Heat the neutral oil in a large skillet over medium-high heat until it shimmers, about 2 minutes.
3. Add the marinated chicken to the skillet in a single layer; cook for 4–5 minutes per side until golden brown and cooked through, with an internal temperature of 165°F.
4. While the chicken cooks, slice the Vietnamese-style baguettes lengthwise, leaving one edge intact to form a hinge.
5. Lightly toast the baguettes in a toaster oven at 350°F for 3–4 minutes until crisp and golden.
6. Spread 1 tablespoon of mayonnaise evenly on the inside of each toasted baguette.
7. Layer the cooked chicken, pickled daikon and carrot, fresh cilantro leaves, and sliced jalapeños into each baguette.
8. Press the sandwiches gently to compact the fillings and slice each in half diagonally for serving.
Perfectly balanced, this Banh Mi delivers a satisfying crunch from the toasted baguette against the tender, savory chicken and bright, tangy pickles. For a fun twist, serve it with a side of crispy sweet potato fries or wrap leftovers in parchment paper for an on-the-go lunch that stays fresh.
Indonesian Satay Skewers

Hold onto your skewers, folks, because we’re about to take your backyard BBQ from basic to brilliant with these Indonesian Satay Skewers. Imagine tender, marinated meat, kissed by smoky flames and dunked in a peanut sauce so good you’ll want to drink it—but please, let’s keep it classy and use it for dipping.
Serving: 4 | Pre Time: 30 minutes | Cooking Time: 10 minutes
Ingredients
- 1.5 lbs boneless, skinless chicken thighs, cut into 1-inch cubes
- 1/4 cup kecap manis (Indonesian sweet soy sauce)
- 2 tbsp fresh lime juice
- 2 cloves garlic, finely minced
- 1 tsp ground turmeric
- 1/2 tsp ground coriander
- 1/4 cup creamy peanut butter
- 1/2 cup full-fat coconut milk
- 1 tbsp sambal oelek
- 1 tbsp granulated sugar
- 2 tbsp neutral oil (such as grapeseed oil)
- Bamboo skewers, soaked in water for 30 minutes
Instructions
- In a large mixing bowl, combine the kecap manis, lime juice, minced garlic, ground turmeric, and ground coriander to create the marinade.
- Add the cubed chicken thighs to the marinade, ensuring each piece is thoroughly coated, then cover and refrigerate for a minimum of 20 minutes to allow the flavors to penetrate. Tip: For maximum flavor, marinate overnight if time permits.
- While the chicken marinates, prepare the peanut sauce by whisking together the creamy peanut butter, coconut milk, sambal oelek, and granulated sugar in a small saucepan over medium-low heat until smooth and slightly thickened, about 5 minutes, then set aside.
- Thread the marinated chicken pieces onto the pre-soaked bamboo skewers, leaving a small space between each cube to ensure even cooking.
- Preheat a grill or grill pan to medium-high heat, approximately 400°F, and lightly brush the grates with the neutral oil to prevent sticking.
- Place the skewers on the hot grill and cook for 4-5 minutes per side, or until the chicken reaches an internal temperature of 165°F and develops visible char marks. Tip: Avoid overcrowding the grill to maintain consistent heat and achieve a proper sear.
- Remove the skewers from the grill and let them rest for 3 minutes before serving to allow the juices to redistribute. Tip: Serve the peanut sauce warm for optimal texture and flavor.
Captivatingly tender and bursting with savory-sweet notes, these skewers offer a perfect contrast between the smoky, charred exterior and the juicy interior. For a creative twist, serve them over a bed of coconut rice or with a side of quick-pickled cucumbers to cut through the richness, turning a simple meal into a vibrant, shareable feast that’ll have everyone reaching for more.
Conclusion
Journey through 24 exquisite Asian dishes right from your kitchen! These recipes bring authentic flavors and simple techniques to home cooks. We hope you find new favorites to satisfy your cravings. Don’t forget to leave a comment sharing which recipes you loved, and pin this article on Pinterest to save for your next culinary adventure. Happy cooking!