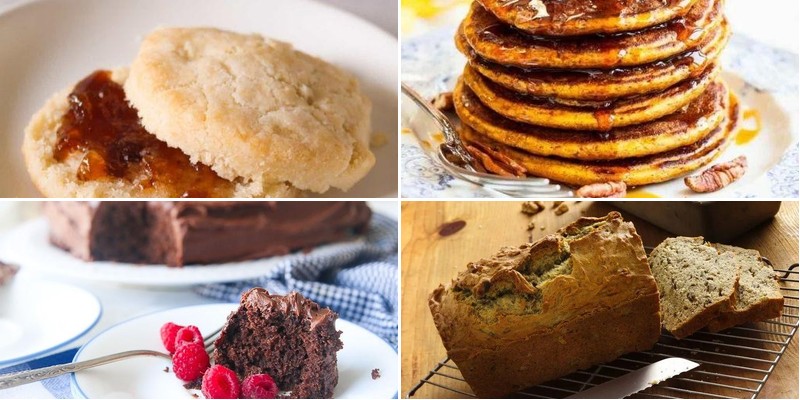
Get ready to transform your gluten-free kitchen with these mouthwatering Bisquick creations! Whether you’re craving quick weeknight dinners, comforting baked goods, or seasonal favorites, this collection proves that gluten-free cooking can be both delicious and effortless. From fluffy pancakes to savory casseroles, prepare to discover 27 recipes that will make your taste buds dance—keep reading to find your next family favorite!
Gluten Free Bisquick Pancakes
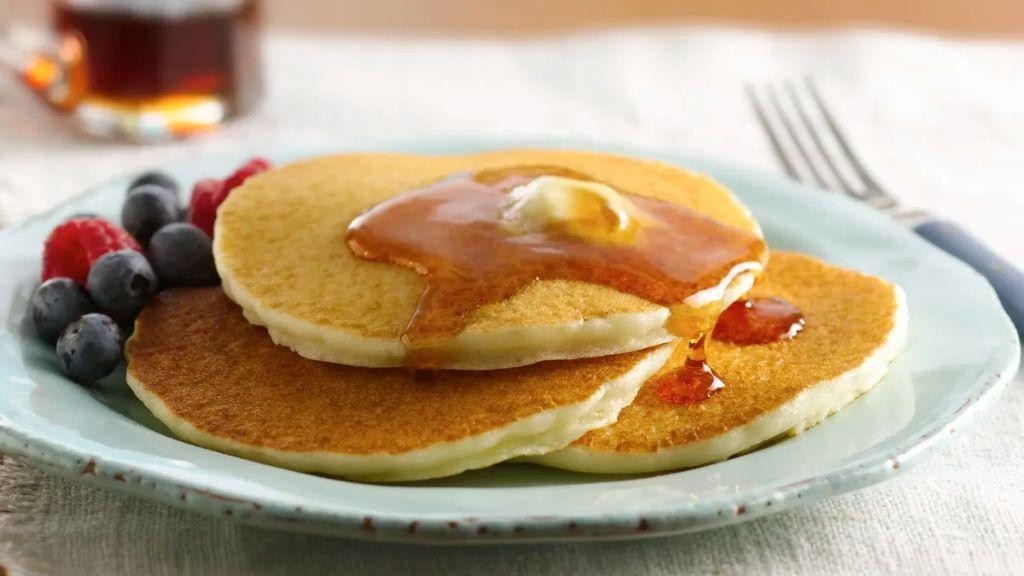
Whip up the fluffiest gluten-free pancakes that’ll make you forget they’re allergy-friendly. Grab your Bisquick and get ready for breakfast bliss in minutes—these golden stacks deliver that classic diner taste without the gluten guilt.
8
pancakes5
minutes20
minutesIngredients
For the batter:
– 2 cups gluten-free Bisquick mix
– 1 cup milk
– 2 large eggs
– 2 tbsp granulated sugar
– 1 tsp vanilla extract
For cooking:
– 2 tbsp unsalted butter
– Maple syrup for serving
Instructions
1. Whisk together 2 cups gluten-free Bisquick mix, 1 cup milk, 2 large eggs, 2 tbsp sugar, and 1 tsp vanilla extract in a large bowl until just combined.
2. Let the batter rest for 5 minutes to allow the gluten-free flour to hydrate properly—this prevents gummy pancakes.
3. Melt 1 tbsp unsalted butter on a griddle or large non-stick skillet over medium heat (350°F).
4. Pour ¼ cup portions of batter onto the hot surface, leaving space between each pancake.
5. Cook for 2-3 minutes until bubbles form across the surface and edges look set.
6. Flip each pancake carefully using a thin spatula—wait for those surface bubbles to pop and stay open.
7. Cook for another 1-2 minutes until the bottoms are golden brown and centers spring back when lightly pressed.
8. Transfer cooked pancakes to a wire rack instead of stacking them to maintain crisp edges.
9. Repeat with remaining batter, adding remaining 1 tbsp butter to the cooking surface as needed.
Light, airy stacks with that perfect golden-brown crust await. Drench them in maple syrup for classic comfort, or get creative with fresh berries and whipped cream for a brunch-worthy presentation. These pancakes stay remarkably tender thanks to the gluten-free blend—nobody will guess they’re allergy-friendly.
Crispy Gluten Free Bisquick Waffles
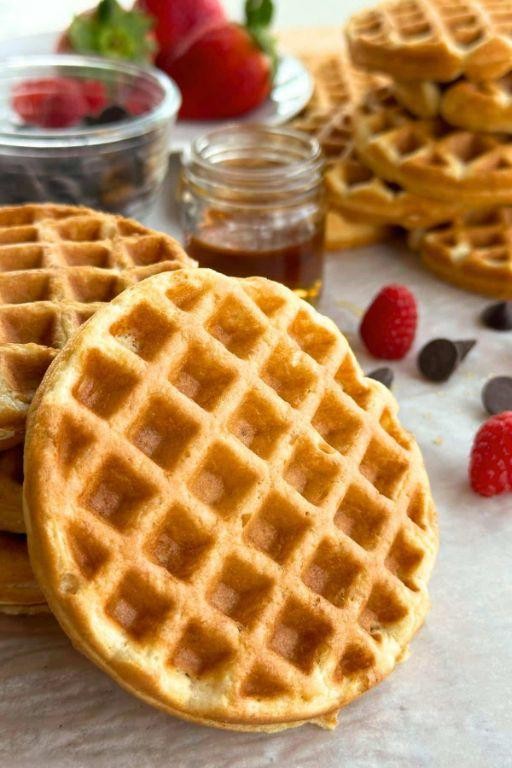
OBSESSED with crispy waffles but avoiding gluten? This gluten-free Bisquick hack delivers golden perfection every time. Forget dense, soggy waffles—these come out light, crunchy, and ready in minutes. Your breakfast game just leveled up.
3
waffles5
minutes20
minutesIngredients
For the Batter:
- 2 cups gluten-free Bisquick mix
- 1 ⅓ cups milk
- 2 large eggs
- 2 tbsp vegetable oil
- 1 tbsp granulated sugar
- 1 tsp vanilla extract
Instructions
- Preheat your waffle iron to 375°F on the medium-crisp setting.
- Whisk 2 cups gluten-free Bisquick mix, 1 ⅓ cups milk, 2 large eggs, 2 tbsp vegetable oil, 1 tbsp granulated sugar, and 1 tsp vanilla extract in a large bowl until just combined—don’t overmix. Tip: A few lumps keep waffles tender.
- Lightly spray the preheated waffle iron with nonstick cooking spray.
- Pour ½ cup batter onto the center of the iron, close the lid, and cook for 4–5 minutes until steam stops rising. Tip: Resist peeking early to avoid tearing.
- Check for deep golden-brown color and crisp edges before removing with a fork.
- Repeat with remaining batter, spraying the iron between each waffle. Tip: Keep cooked waffles crisp on a wire rack, not a plate.
MAGIC happens when that first bite cracks into fluffy insides. These waffles boast a buttery vanilla sweetness with edges that shatter perfectly. Stack them high with fresh berries and maple syrup, or go savory with fried chicken and hot honey for a gluten-free twist on classic comfort.
Fluffy Gluten Free Bisquick Biscuits

Perfect gluten-free biscuits that actually rise! These Bisquick beauties deliver that classic flaky texture without the gluten. Get ready for golden, buttery perfection in under 30 minutes.
8
biscuits15
minutes10
minutesIngredients
– For the dough: 2 cups gluten-free Bisquick mix, ⅔ cup whole milk, 3 tbsp cold unsalted butter
– For finishing: 2 tbsp melted butter
Instructions
1. Preheat your oven to 450°F.
2. Cut 3 tbsp cold butter into small cubes.
3. Combine 2 cups gluten-free Bisquick mix with butter cubes in a large bowl.
4. Use a pastry cutter or fork to blend butter into mix until crumbly.
5. Pour in ⅔ cup whole milk.
6. Stir gently with a fork until just combined—don’t overmix!
7. Turn dough onto surface lightly dusted with gluten-free Bisquick.
8. Knead dough 8-10 times until it holds together.
9. Pat dough into ½-inch thick rectangle.
10. Cut biscuits using 2½-inch round cutter—press straight down without twisting.
11. Place biscuits on ungreased baking sheet 1 inch apart.
12. Brush tops with 2 tbsp melted butter using pastry brush.
13. Bake at 450°F for 8-10 minutes until golden brown.
14. Check that bottoms are lightly browned when lifted with spatula.
15. Transfer to wire rack to cool slightly.
Light, airy layers with that signature buttery flavor make these impossible to resist. Split them warm for strawberry shortcake or load with sausage gravy for the ultimate breakfast sandwich.
Savory Gluten Free Bisquick Pizza Crust
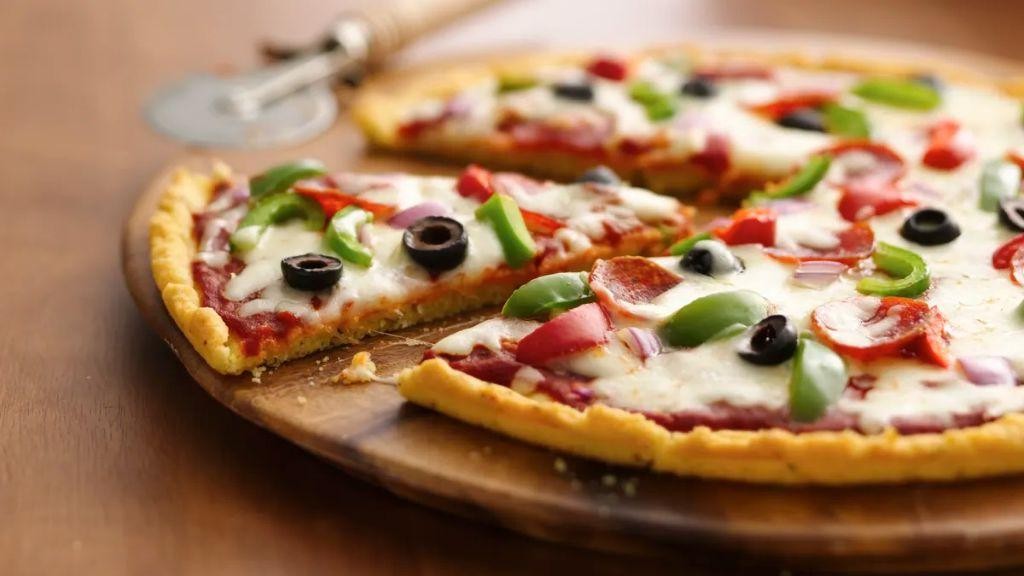
Let’s revolutionize pizza night with this gluten-free game-changer. Forget complicated dough—this Bisquick crust transforms in minutes. Get ready for crispy, chewy perfection that’ll fool any pizza purist.
8
portions15
minutes23
minutesIngredients
For the Crust
– 2 cups gluten-free Bisquick mix
– 1/2 cup grated Parmesan cheese
– 2/3 cup milk
– 2 tablespoons olive oil
– 1 large egg
For Assembly
– 1/2 cup pizza sauce
– 1 cup shredded mozzarella cheese
– Your favorite toppings (pepperoni, vegetables, etc.)
Instructions
1. Preheat your oven to 425°F and line a baking sheet with parchment paper.
2. Combine 2 cups gluten-free Bisquick mix and 1/2 cup grated Parmesan cheese in a large bowl.
3. Whisk together 2/3 cup milk, 2 tablespoons olive oil, and 1 large egg in a separate bowl.
4. Pour the wet ingredients into the dry ingredients and stir until just combined—don’t overmix.
5. Tip: The dough will be sticky; wet your hands with water to prevent sticking when shaping.
6. Transfer the dough to the prepared baking sheet and press into a 12-inch circle, about 1/4-inch thick.
7. Bake the crust alone for 8 minutes at 425°F until the edges look dry and lightly golden.
8. Remove the crust from the oven and spread 1/2 cup pizza sauce evenly across the surface.
9. Sprinkle 1 cup shredded mozzarella cheese over the sauce, leaving a 1/2-inch border.
10. Add your favorite toppings in a single layer—don’t overload or the crust may get soggy.
11. Tip: For extra crispiness, brush the exposed crust edges with olive oil before baking.
12. Return the pizza to the oven and bake for 12-15 minutes at 425°F until the cheese is bubbly and golden.
13. Tip: Let the pizza rest for 3 minutes before slicing—this helps the cheese set and prevents toppings from sliding.
14. Use a pizza cutter to slice into 8 equal pieces.
Crispy edges give way to a surprisingly chewy center that holds toppings like a champ. The Parmesan in the crust adds a savory depth that pairs perfectly with classic marinara. Try serving it cut into strips for dipping in garlic sauce or ranch—it’s the ultimate gluten-free crowd-pleaser.
Easy Gluten Free Bisquick Chicken Pot Pie
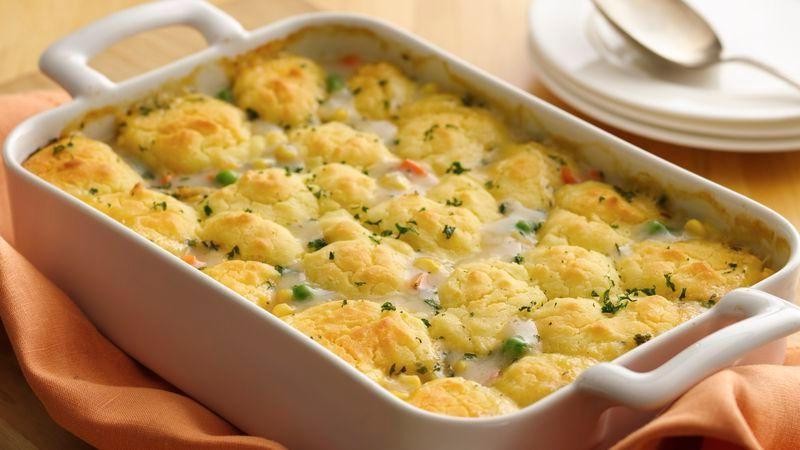
Melt away that dinner stress with this gluten-free comfort classic. Transform basic ingredients into a creamy, golden-brown masterpiece. Your family won’t believe it’s gluten-free!
6
servings15
minutes40
minutesIngredients
For the filling:
– 2 cups cooked chicken, shredded
– 1 cup frozen mixed vegetables
– 1/2 cup chopped onion
– 1/4 cup butter
– 1/4 cup gluten-free flour
– 2 cups chicken broth
– 1/2 cup heavy cream
– 1 tsp salt
– 1/2 tsp black pepper
For the crust:
– 1 1/2 cups gluten-free Bisquick mix
– 1/2 cup milk
– 1 egg
– 2 tbsp melted butter
Instructions
1. Preheat your oven to 375°F.
2. Melt 1/4 cup butter in a large skillet over medium heat.
3. Add chopped onion and sauté for 3-4 minutes until translucent.
4. Whisk in 1/4 cup gluten-free flour and cook for 1 minute to remove raw flour taste.
5. Gradually pour in 2 cups chicken broth while continuously whisking to prevent lumps.
6. Stir in 1/2 cup heavy cream until the sauce thickens, about 2-3 minutes.
7. Mix in 2 cups shredded chicken, 1 cup frozen vegetables, 1 tsp salt, and 1/2 tsp black pepper.
8. Transfer the filling to a 9-inch pie dish.
9. In a separate bowl, combine 1 1/2 cups gluten-free Bisquick mix, 1/2 cup milk, 1 egg, and 2 tbsp melted butter.
10. Drop spoonfuls of the biscuit mixture over the hot filling, leaving small gaps for steam to escape.
11. Bake at 375°F for 25-30 minutes until the crust is golden brown and the filling is bubbly.
12. Let rest for 10 minutes before serving to allow the filling to set.
Nothing beats that first crack through the flaky crust into the creamy chicken filling. The gluten-free biscuit topping soaks up just enough sauce while staying perfectly crisp. Serve it straight from the dish for maximum cozy vibes, or portion into individual ramekins for easy weeknight dinners.
Cheddar and Chive Gluten Free Bisquick Scones

Hear me out: these gluten-free scones will change your brunch game forever. Grab that Bisquick and get ready to bake the flakiest, cheesiest scones you’ve ever tasted—no gluten required.
8
scones15
minutes15
minutesIngredients
For the scone dough:
- 2 cups gluten-free Bisquick baking mix
- 1/2 cup cold unsalted butter, cubed
- 1 cup shredded sharp cheddar cheese
- 1/4 cup fresh chopped chives
- 2/3 cup cold whole milk
- 1 large egg
For finishing:
- 1 tablespoon melted butter
- 1 tablespoon grated Parmesan cheese
Instructions
- Preheat your oven to 425°F and line a baking sheet with parchment paper.
- Whisk together 2 cups gluten-free Bisquick and 1/4 cup chopped chives in a large bowl.
- Cut 1/2 cup cold cubed butter into the dry mixture using a pastry cutter until pea-sized crumbs form. Tip: Keep butter cold for maximum flakiness.
- Stir in 1 cup shredded cheddar cheese until evenly distributed.
- Whisk 2/3 cup cold milk with 1 large egg in a separate bowl.
- Pour the wet ingredients into the dry mixture and stir just until a shaggy dough forms. Tip: Don’t overmix—lumps are good!
- Turn the dough onto a lightly floured surface and gently pat into a 1-inch thick circle.
- Cut the circle into 8 wedges using a sharp knife.
- Arrange the wedges 2 inches apart on your prepared baking sheet.
- Brush the tops with 1 tablespoon melted butter and sprinkle with 1 tablespoon grated Parmesan.
- Bake at 425°F for 12-15 minutes until golden brown and firm to the touch. Tip: Check at 12 minutes—gluten-free baked goods can brown quickly.
- Transfer to a wire rack and cool for 5 minutes before serving.
Just pulled from the oven, these scones boast a tender crumb with crispy, cheesy edges. The sharp cheddar and fresh chives create a savory explosion that pairs perfectly with morning coffee. Try splitting one warm and topping with scrambled eggs for the ultimate breakfast sandwich situation.
Gluten Free Bisquick Blueberry Muffins
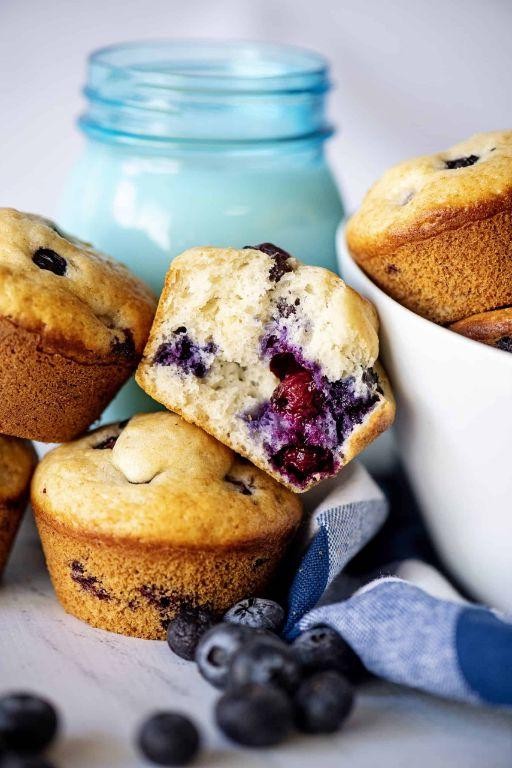
Bake your morning blues away with these gluten-free Bisquick blueberry muffins. Grab that box from your pantry and transform basic ingredients into bakery-worthy treats in under 30 minutes. Get ready for tender crumb perfection that’ll make you forget they’re gluten-free.
12
muffins12
minutes18
minutesIngredients
For the muffin batter:
– 2 cups gluten-free Bisquick baking mix
– 3/4 cup milk
– 1/4 cup granulated sugar
– 1 large egg
– 2 tablespoons vegetable oil
– 1 cup fresh blueberries
For finishing:
– 2 tablespoons coarse sugar
Instructions
1. Preheat your oven to 400°F and line a 12-cup muffin tin with paper liners.
2. In a large mixing bowl, combine 2 cups gluten-free Bisquick, 3/4 cup milk, 1/4 cup granulated sugar, 1 large egg, and 2 tablespoons vegetable oil.
3. Stir the mixture just until combined—don’t overmix or your muffins will be tough.
4. Gently fold in 1 cup fresh blueberries using a spatula to avoid crushing them.
5. Divide the batter evenly among the 12 muffin cups, filling each about 2/3 full.
6. Sprinkle 2 tablespoons coarse sugar evenly over the tops of all the muffins.
7. Bake at 400°F for 15-18 minutes until the tops spring back when lightly touched.
8. Insert a toothpick into the center of a muffin—it should come out clean with no wet batter.
9. Let the muffins cool in the pan for 5 minutes before transferring to a wire rack.
Enjoy these warm from the oven when the blueberries burst with juicy sweetness. The coarse sugar topping adds delightful crunch against the soft, cakey texture. Try splitting one open and spreading with cream cheese for an extra-indulgent breakfast treat.
Tasty Gluten Free Bisquick Zucchini Bread
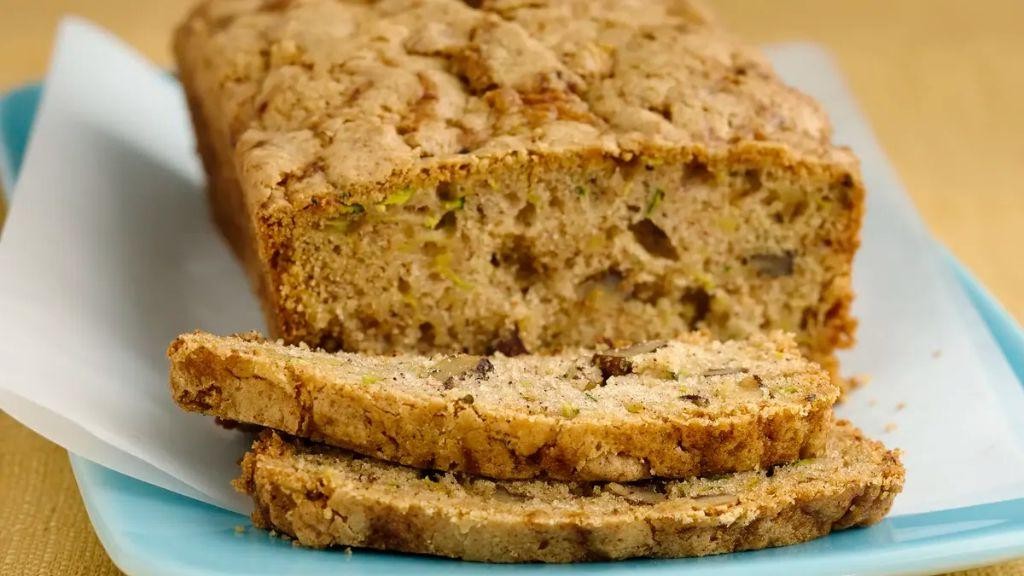
Hangry for something sweet but need it gluten-free? This zucchini bread uses Bisquick for foolproof baking. Grab that squash and let’s get mixing!
1
loaf15
minutes55
minutesIngredients
For the wet mixture:
- 2 cups shredded zucchini
- 2 large eggs
- 1/2 cup vegetable oil
- 1/2 cup granulated sugar
- 1/4 cup brown sugar
- 1 teaspoon vanilla extract
For the dry mixture:
- 2 cups Gluten Free Bisquick mix
- 1 teaspoon ground cinnamon
- 1/2 teaspoon baking soda
- 1/4 teaspoon salt
Instructions
- Preheat your oven to 350°F.
- Grease a 9×5-inch loaf pan thoroughly with non-stick spray.
- Squeeze excess moisture from shredded zucchini using paper towels. Tip: Dry zucchini prevents soggy bread.
- Whisk eggs, oil, both sugars, and vanilla in a large bowl until fully combined.
- Fold in the dried zucchini until evenly distributed.
- In a separate bowl, whisk Bisquick, cinnamon, baking soda, and salt.
- Gradually stir dry ingredients into wet mixture until just combined. Tip: Don’t overmix—lumps are okay!
- Pour batter into the prepared loaf pan, spreading it evenly.
- Bake for 50-60 minutes at 350°F until a toothpick inserted into the center comes out clean.
- Cool the bread in the pan for 10 minutes, then transfer to a wire rack. Tip: Cooling completely prevents crumbling.
Warm slices boast a moist, tender crumb with cozy cinnamon notes. Toast a piece and slather with cream cheese for a next-level breakfast. This bread freezes beautifully—wrap slices individually for quick snacks.
Breakfast Gluten Free Bisquick Sausage Balls
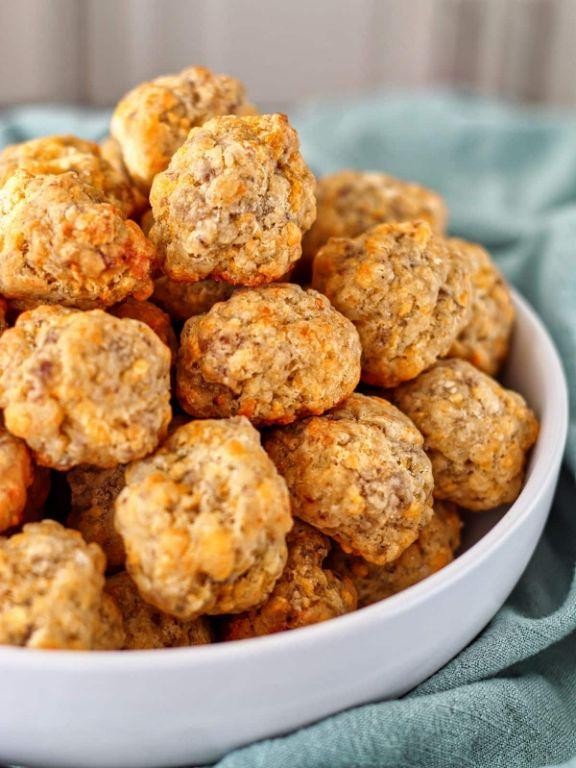
A gluten-free breakfast game-changer that’s about to become your morning obsession. These sausage balls deliver maximum flavor with minimal effort—perfect for busy mornings or weekend brunch spreads. Get ready to impress with this crowd-pleasing recipe that comes together in minutes.
48
balls10
minutes22
minutesIngredients
For the sausage mixture:
- 1 pound ground breakfast sausage
- 2 cups gluten-free Bisquick baking mix
- 4 cups shredded sharp cheddar cheese
- 1/2 cup whole milk
- 1 teaspoon garlic powder
- 1/2 teaspoon black pepper
Instructions
- Preheat your oven to 375°F and line a baking sheet with parchment paper.
- Combine 1 pound ground breakfast sausage, 2 cups gluten-free Bisquick baking mix, and 4 cups shredded sharp cheddar cheese in a large mixing bowl.
- Add 1/2 cup whole milk, 1 teaspoon garlic powder, and 1/2 teaspoon black pepper to the bowl.
- Mix all ingredients thoroughly with your hands until fully incorporated and the mixture holds together when pressed. Tip: Don’t overmix—just combine until no dry spots remain.
- Scoop approximately 1 tablespoon of mixture and roll into tight balls between your palms.
- Arrange balls on the prepared baking sheet, spacing them 1 inch apart to allow for even cooking.
- Bake at 375°F for 18-22 minutes until golden brown and cooked through. Tip: Rotate the baking sheet halfway through cooking for even browning.
- Check for doneness by inserting a toothpick—it should come out clean with no raw dough visible.
- Remove from oven and let rest on the baking sheet for 5 minutes before serving. Tip: This resting time helps the cheese set and prevents crumbling.
Fresh from the oven, these sausage balls boast a crispy exterior that gives way to a tender, cheesy interior. The sharp cheddar melds perfectly with the savory sausage, creating little flavor bombs that disappear fast. For an extra kick, serve them with spicy ranch dip or tuck them into breakfast sandwiches for the ultimate morning upgrade.
Quick Gluten Free Bisquick Apple Fritters
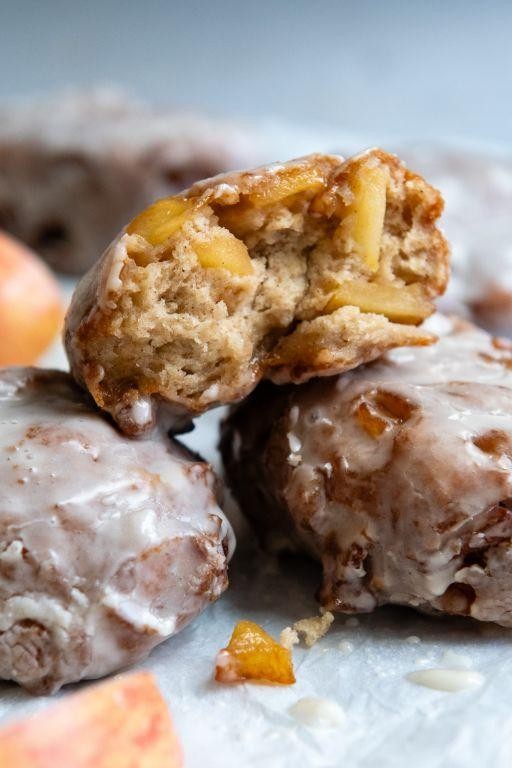
Ready for apple fritters that won’t wreck your gluten-free diet? Grab that Bisquick box and transform humble apples into golden, crispy perfection. These quick-fry wonders deliver all the cozy vibes without the gluten guilt.
2
portions15
minutes15
minutesIngredients
For the fritter batter:
– 2 cups gluten-free Bisquick baking mix
– 2 large eggs
– ⅔ cup milk
– 2 medium apples, peeled and diced
– 1 tsp cinnamon
For frying and finishing:
– 4 cups vegetable oil
– ½ cup granulated sugar
Instructions
1. Heat vegetable oil in a heavy-bottomed pot to 350°F, using a candy thermometer for accuracy.
2. Whisk gluten-free Bisquick, eggs, and milk in a large bowl until just combined.
3. Fold in diced apples and cinnamon until evenly distributed throughout the batter.
4. Drop heaping tablespoons of batter into the hot oil, frying 4-5 fritters at a time to avoid crowding.
5. Fry for 2-3 minutes until deep golden brown, flipping halfway through cooking.
6. Remove fritters with a slotted spoon and drain on a wire rack set over a baking sheet.
7. Immediately roll warm fritters in granulated sugar while still slightly oily for perfect adhesion.
Perfectly crisp outside with tender, apple-studded centers, these fritters deliver warm cinnamon spice in every bite. Serve them stacked high with vanilla ice cream for dessert or alongside morning coffee for the ultimate breakfast treat.
Decadent Gluten Free Bisquick Chocolate Cake
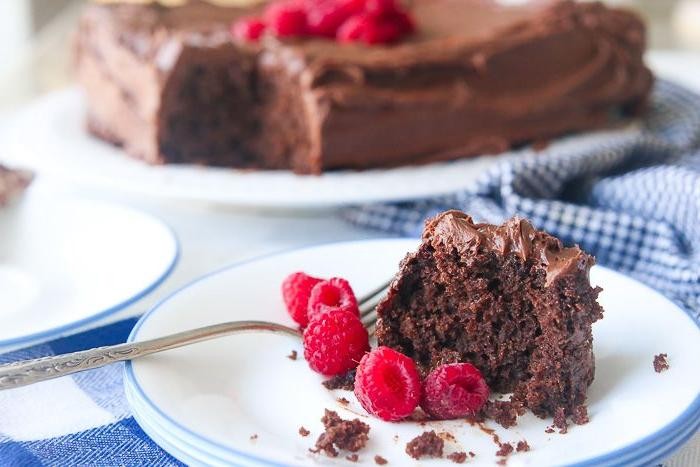
Forget everything you thought about gluten-free baking. This Bisquick chocolate cake delivers pure indulgence without the gluten guilt. Get ready to impress with minimal effort.
8
servings15
minutes35
minutesIngredients
For the cake batter:
– 2 cups gluten-free Bisquick baking mix
– 1 cup granulated sugar
– 1/2 cup unsweetened cocoa powder
– 1 cup milk
– 2 large eggs
– 1/2 cup vegetable oil
– 1 teaspoon vanilla extract
For the chocolate glaze:
– 1 cup powdered sugar
– 1/4 cup unsweetened cocoa powder
– 3 tablespoons milk
– 1/2 teaspoon vanilla extract
Instructions
1. Preheat your oven to 350°F and grease a 9-inch round cake pan thoroughly.
2. Whisk together gluten-free Bisquick, granulated sugar, and 1/2 cup cocoa powder in a large bowl.
3. Pour in 1 cup milk, eggs, vegetable oil, and 1 teaspoon vanilla extract all at once.
4. Beat the mixture with an electric mixer on medium speed for exactly 2 minutes until completely smooth.
5. Tip: Scrape the bowl’s sides halfway through mixing to incorporate all dry pockets.
6. Pour the batter into your prepared pan and spread it evenly with a spatula.
7. Bake at 350°F for 30-35 minutes until a toothpick inserted in the center comes out clean.
8. Tip: Rotate the pan halfway through baking for even browning.
9. Cool the cake in the pan on a wire rack for 15 minutes before inverting.
10. Whisk powdered sugar, 1/4 cup cocoa powder, 3 tablespoons milk, and 1/2 teaspoon vanilla extract in a small bowl until glossy.
11. Tip: For a thicker glaze, add more powdered sugar 1 tablespoon at a time.
12. Drizzle the warm glaze over the completely cooled cake.
13. Slice and serve immediately. Just imagine sinking your fork into that moist, fudgy crumb. The rich chocolate flavor pairs perfectly with vanilla ice cream or fresh berries for a stunning dessert presentation.
Gluten Free Bisquick Dumplings
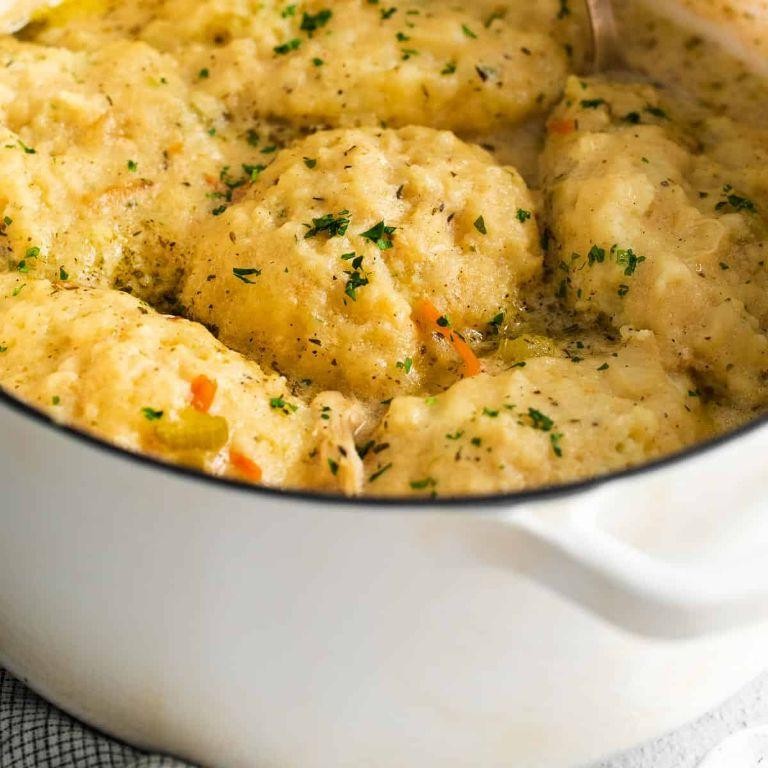
Brace yourself for the fluffiest gluten-free dumplings you’ll ever make—these Bisquick beauties transform any soup into a cozy masterpiece in minutes. Forget complicated dough recipes and hello to pantry-staple simplicity that delivers cloud-like texture every single time.
6
servings5
minutes12
minutesIngredients
For the Dumplings:
– 2 cups gluten-free Bisquick baking mix
– ⅔ cup whole milk
– 1 tablespoon chopped fresh parsley
– ½ teaspoon garlic powder
– ¼ teaspoon black pepper
For Cooking:
– 6 cups simmering chicken broth (at 180°F)
Instructions
1. Combine 2 cups gluten-free Bisquick, ⅔ cup whole milk, 1 tablespoon chopped fresh parsley, ½ teaspoon garlic powder, and ¼ teaspoon black pepper in a medium bowl.
2. Stir the mixture with a fork just until a soft dough forms—do not overmix to keep dumplings tender.
3. Bring 6 cups of chicken broth to a gentle simmer over medium heat, maintaining tiny bubbles (approximately 180°F).
4. Drop tablespoon-sized scoops of dough directly into the simmering broth using two spoons.
5. Cover the pot tightly with a lid to trap steam, which helps the dumplings rise evenly.
6. Simmer dumplings for 10 minutes without lifting the lid—this prevents them from becoming dense.
7. Uncover and check that dumplings have doubled in size and a toothpick inserted comes out clean.
8. Simmer uncovered for 2 more minutes to slightly firm the exteriors.
9. Use a slotted spoon to transfer dumplings to serving bowls immediately. Zero effort yields pillowy-soft dumplings that soak up broth while holding their shape beautifully. Serve them over creamy chicken stew or float them in vegetable soup for instant comfort—the subtle garlic and parsley notes make every bite irresistible.
Spiced Gluten Free Bisquick Pumpkin Pancakes
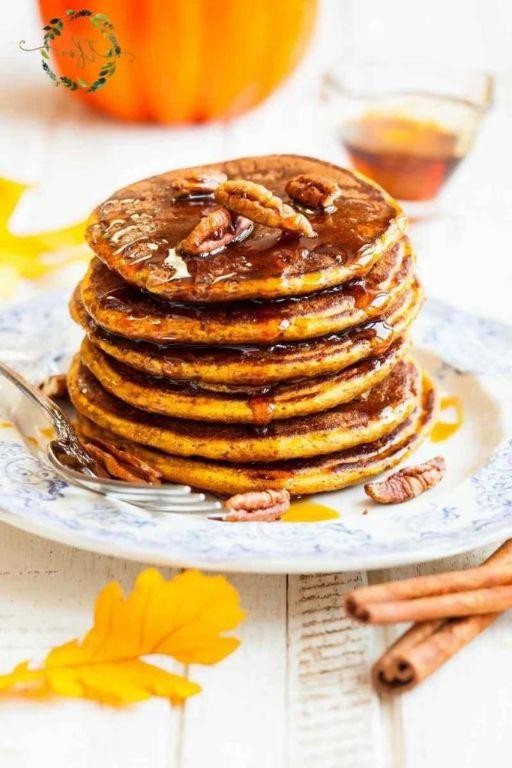
Kickstart your fall mornings with these perfectly spiced pumpkin pancakes that deliver all the cozy vibes without the gluten. Grab your Bisquick and let’s flip our way to breakfast bliss. These golden stacks bring the warmth of pumpkin spice in every fluffy bite.
12
pancakes10
minutes20
minutesIngredients
For the Dry Mix
- 2 cups gluten-free Bisquick baking mix
- 2 tsp pumpkin pie spice
- 1 tsp baking powder
For the Wet Ingredients
- 1 cup canned pumpkin puree
- 2 large eggs
- 1 cup whole milk
- 2 tbsp melted unsalted butter
- 2 tbsp maple syrup
For Cooking
- 1 tbsp vegetable oil
Instructions
- Whisk together 2 cups gluten-free Bisquick, 2 tsp pumpkin pie spice, and 1 tsp baking powder in a large bowl.
- In a separate bowl, combine 1 cup canned pumpkin puree, 2 large eggs, 1 cup whole milk, 2 tbsp melted unsalted butter, and 2 tbsp maple syrup until smooth.
- Pour the wet ingredients into the dry ingredients and stir gently—just until combined. Tip: Don’t overmix; a few lumps keep pancakes tender.
- Heat a non-stick skillet or griddle over medium heat (350°F) and brush with 1 tbsp vegetable oil.
- Pour ¼ cup batter for each pancake onto the hot surface. Tip: Wait for bubbles to form and pop on the surface before flipping—about 2–3 minutes.
- Flip each pancake and cook for another 1–2 minutes until golden brown and cooked through. Tip: Press the center gently; it should spring back when ready.
- Transfer cooked pancakes to a plate and repeat with remaining batter, adding more oil if needed.
Perfectly fluffy with a warm, spiced aroma that fills your kitchen. The pumpkin keeps them moist, while the edges crisp up just right. Pile them high with extra maple syrup, toasted pecans, or a dollop of whipped cream for that extra fall flair.
Yummy Gluten Free Bisquick Banana Bread
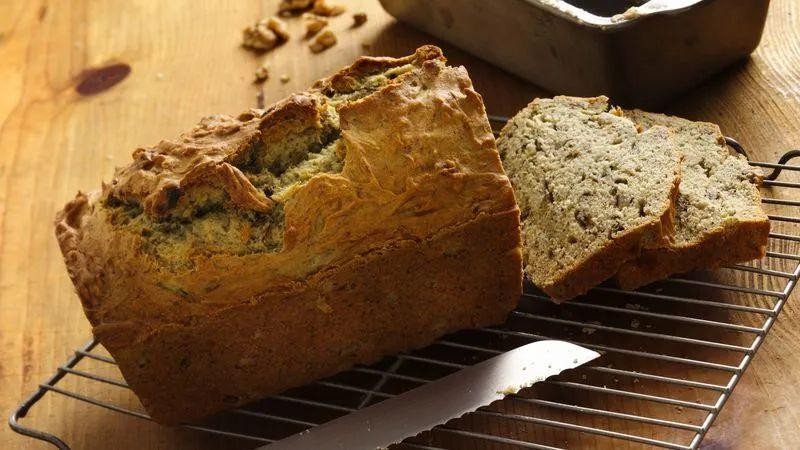
Mash those overripe bananas sitting on your counter! Transform them into moist, gluten-free banana bread that’s ready in under an hour. No fancy ingredients needed—just your trusty Bisquick and a craving for something warm and comforting.
1
loaf15
minutes55
minutesIngredients
– For the batter:
– 2 cups gluten-free Bisquick mix
– 1 cup mashed very ripe bananas (about 2-3 medium bananas)
– ¾ cup granulated sugar
– ⅓ cup milk
– 3 tablespoons vegetable oil
– 2 large eggs
– 1 teaspoon vanilla extract
Instructions
1. Preheat your oven to 350°F and grease a 9×5-inch loaf pan with nonstick spray.
2. In a large bowl, mash 2-3 very ripe bananas with a fork until smooth.
3. Add ¾ cup granulated sugar, ⅓ cup milk, 3 tablespoons vegetable oil, 2 large eggs, and 1 teaspoon vanilla extract to the mashed bananas.
4. Whisk the wet ingredients together until fully combined and slightly frothy.
5. Tip: Use bananas with brown spots for maximum sweetness and moisture.
6. Pour 2 cups of gluten-free Bisquick mix into the wet ingredients.
7. Gently fold the mixture with a spatula until just combined—do not overmix.
8. Tip: A few lumps are okay; overmixing makes the bread dense.
9. Pour the batter into the prepared loaf pan and spread it evenly.
10. Bake at 350°F for 50-55 minutes, or until a toothpick inserted into the center comes out clean.
11. Tip: If the top browns too quickly, loosely tent it with aluminum foil halfway through baking.
12. Remove the pan from the oven and let it cool in the pan for 10 minutes.
13. Transfer the banana bread to a wire rack to cool completely before slicing.
Venture into banana bread bliss with this gluten-free version—it’s tender with a crackly sugar crust and bursts of banana in every bite. Slice it thick, toast it lightly, and slather with almond butter for a next-level breakfast. Perfect for sharing (or not!).
Conclusion
Clearly, gluten-free baking just got easier and more delicious! This collection proves you can enjoy all your favorite comfort foods without compromise. We hope these Bisquick recipes inspire your next kitchen adventure. Don’t forget to share which recipe you loved most in the comments below and pin this article to your Pinterest boards for easy reference!


