You won’t believe the flavor explosion waiting in this simple corn recipe! Get ready to transform ordinary corn into an extraordinary crispy, buttery sensation that will have everyone begging for your secret. This isn’t just fried corn – it’s a party on a plate that brings the energy and excitement to any gathering!
Why This Recipe Works
- The double-cooking method creates incredible texture contrast – we start with a quick boil to lock in the corn’s natural sweetness, then move to a screaming hot skillet where the magic happens, developing those gorgeous golden-brown crispy edges while keeping the centers tender and juicy!
- Using both butter and oil gives us the best of both worlds – butter brings that rich, nutty flavor we all crave, while the high-smoke point oil ensures we can get our skillet HOT enough to create that perfect crispy crust without any burnt bitterness!
- The simple seasoning blend of smoked paprika, garlic powder, and black pepper enhances the corn’s natural sweetness without overpowering it, creating layers of flavor that build with every single bite – it’s sophisticated enough for adults but approachable enough for even the pickiest kids!
- Fresh corn kernels release just enough natural starch during cooking to create their own light coating, eliminating the need for flour or breading while still achieving that irresistible crispy texture that makes this dish absolutely addictive!
- The quick cooking time means you can go from zero to hero in under 15 minutes, making this the perfect last-minute side dish that looks and tastes like you spent hours in the kitchen when really you’re the smartest cook in the room!
Ingredients
- 4 cups fresh corn kernels (from about 6 ears of corn)
- 3 tablespoons unsalted butter
- 2 tablespoons vegetable oil
- 1 teaspoon smoked paprika
- 1/2 teaspoon garlic powder
- 1/2 teaspoon black pepper, freshly ground
- 1 teaspoon salt
- 2 tablespoons fresh parsley, finely chopped
- 1 tablespoon fresh lime juice
Equipment Needed
- Large skillet or cast-iron pan
- Medium saucepan
- Sharp knife
- Cutting board
- Mixing bowls
- Measuring spoons
- Spatula or wooden spoon
- Colander
Instructions
Prepare and Blanch the Corn
Get ready for some kitchen excitement! Start by shucking those beautiful ears of corn and carefully cutting the kernels off the cob – you want about 4 cups total, which should come from roughly 6 medium ears. Now here’s where we build our flavor foundation: bring a medium saucepan of water to a rolling boil, then add your fresh corn kernels and let them dance in that bubbling water for exactly 3 minutes! This quick blanching process locks in the corn’s natural sweetness and gives it a head start on cooking, ensuring we get that perfect tender-yet-crispy texture later. Drain the corn immediately in a colander and give it a quick shake to remove excess water – we want our corn ready to sizzle, not steam! PRO TIP: Don’t skip the blanching step! This quick water bath not only enhances the corn’s natural sweetness but also helps create that amazing crispy texture when we hit the hot skillet later.
Heat the Skillet and Combine Fats
Now we’re turning up the heat – literally! Grab your largest, heaviest skillet (cast iron works wonders here) and place it over medium-high heat. Let that skillet get properly hot – we’re talking about 2 full minutes of preheating until you can feel the heat radiating when you hold your hand about 6 inches above the surface. Once your skillet is properly heated, add both the vegetable oil and butter simultaneously – listen for that immediate sizzle! The combination of oil and butter is pure genius because the oil can handle the high heat we need for crisping, while the butter brings that incredible rich flavor. Swirl the pan to coat the entire surface evenly, watching as the butter melts and foams beautifully. You’ll know you’re at the perfect temperature when the butter-oil mixture is shimmering but not smoking – that’s your green light for corn paradise!
Add Corn and Create the Crispy Magic
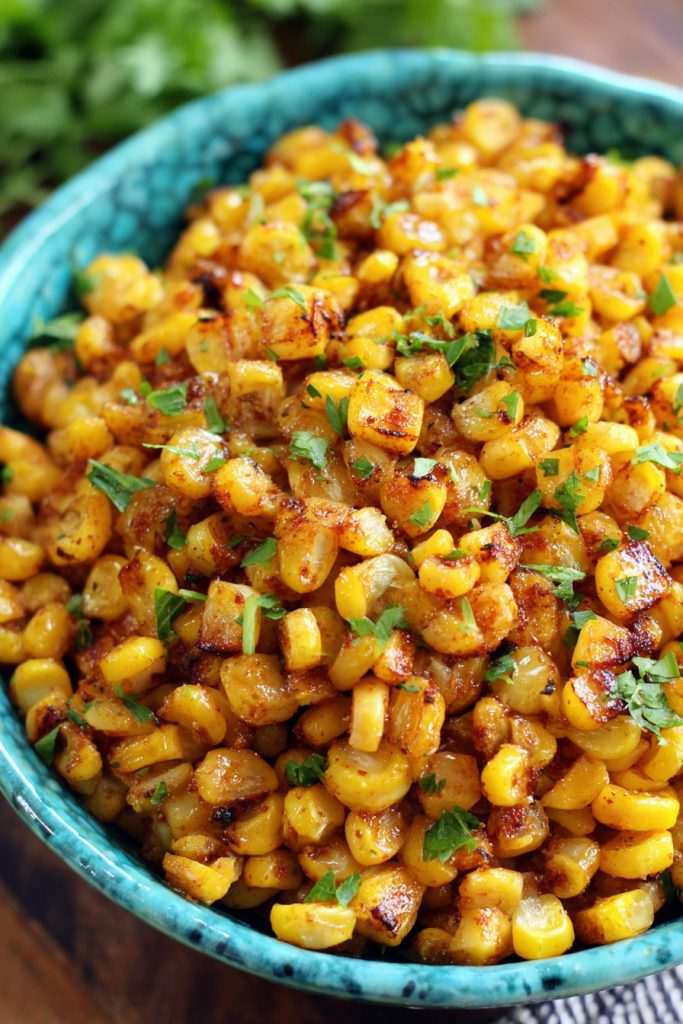
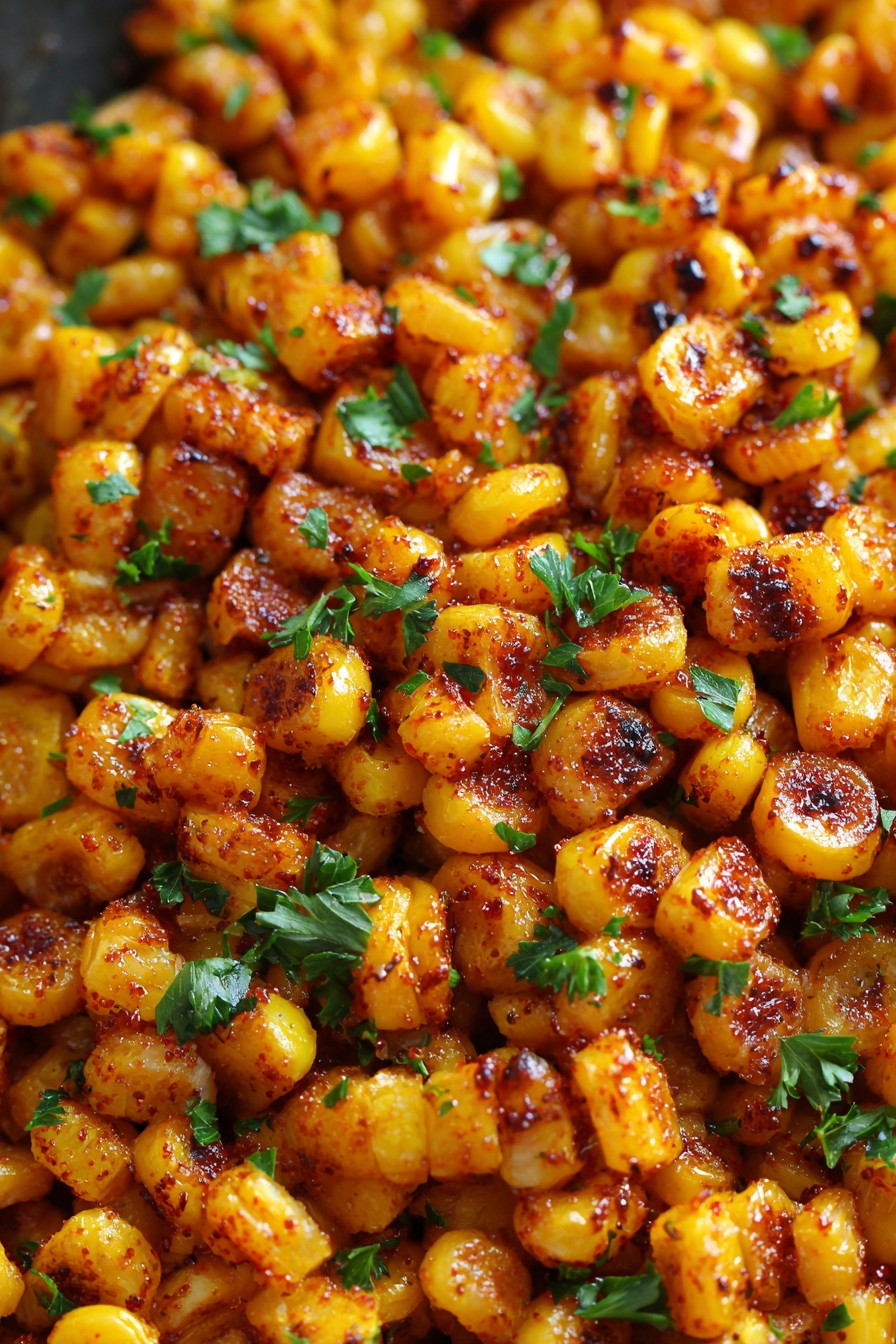
Here comes the main event! Carefully add your blanched corn kernels to the hot skillet – listen to that glorious sizzle as they hit the fat! This is where the transformation happens from simple corn to crispy perfection. Spread the corn in an even layer across the skillet and resist the urge to stir immediately – let those kernels make contact with the hot surface and start developing those beautiful golden-brown spots. After about 2 minutes, give everything a good stir with your spatula, then let it cook undisturbed for another 2 minutes. You’re looking for about 30-40% of the kernels to develop deep golden-brown coloring – that’s your visual cue that the crispy magic is happening! The sound will change from a aggressive sizzle to a more gentle crackle as the moisture evaporates and the crisping intensifies.
Season to Perfection
Now we’re building flavor layers that will blow your mind! After your corn has developed those beautiful crispy edges (about 4-5 minutes total cooking time), it’s time to introduce our flavor power team. Sprinkle the smoked paprika, garlic powder, black pepper, and salt evenly over the corn – watch as the spices bloom in the hot fat, releasing their incredible aromas throughout your kitchen! Give everything a vigorous stir to ensure every single kernel gets coated in that flavor magic. Continue cooking for another 2-3 minutes, stirring occasionally, until the spices are fragrant and well-incorporated. You’ll notice the color deepening to a gorgeous golden-orange hue from the smoked paprika – that’s your signal that the flavors have melded perfectly!
Finish with Fresh Brightness
We’re in the home stretch and about to take this dish from great to absolutely unforgettable! Turn off the heat under your skillet – the residual heat will be perfect for our final touches. Immediately sprinkle the freshly chopped parsley over the corn, followed by a generous tablespoon of fresh lime juice. The lime juice will sizzle and steam slightly, creating an incredible aroma that will make everyone within smelling distance come running! Give everything one final toss to distribute the parsley and lime juice evenly throughout the dish. The fresh parsley adds a pop of color and herbal freshness, while the lime juice cuts through the richness and brightens all the flavors – it’s the perfect finishing touch that makes this fried corn absolutely irresistible!
Tips and Tricks
Ready to take your fried corn game to legendary status? Let me share some next-level techniques that will make you the fried corn master! First up – corn selection is everything! For the absolute best results, use the freshest corn you can find. Look for ears with bright green, snug-fitting husks and golden-brown silk that’s slightly sticky. The kernels should be plump and tightly packed in neat rows – give them a gentle press with your thumbnail; if milky liquid squirts out, you’ve got prime corn! When cutting kernels from the cob, use a sharp chef’s knife and work on a stable cutting board. Place the ear upright in a large bowl and slice downward – the bowl catches all those precious kernels and prevents messy kitchen explosions! Now let’s talk skillet strategy: if you’re lucky enough to have a well-seasoned cast iron skillet, this is its time to shine! The even heat distribution and excellent heat retention of cast iron creates the most consistent crispy results. No cast iron? No problem! Any heavy-bottomed skillet will work, but avoid non-stick for this recipe – we need that direct contact with the hot metal surface for proper crisping. Temperature control is your secret weapon here – if your corn starts browning too quickly, don’t be afraid to reduce the heat slightly. Remember, we’re going for golden-brown perfection, not burnt bitterness! Storage and reheating wisdom: if you somehow have leftovers (unlikely, but possible), store them in an airtight container in the refrigerator for up to 3 days. To reheat, spread the corn in a single layer on a baking sheet and pop it in a 375°F oven for 5-7 minutes – this restores the crispy texture much better than microwaving! For large batches, work in two batches rather than overcrowding the skillet – overcrowding creates steam instead of crispiness, and we’re all about that crunch! Finally, don’t be shy with the final seasoning – taste your masterpiece right before serving and adjust salt or lime juice if needed. Your taste buds are the ultimate judge!
Recipe Variations
- Southwest Fiesta Fried Corn: Turn up the heat and bring the party vibes by adding 1/4 cup diced green chilies, 1/2 teaspoon cumin, and 1/4 cup crumbled cotija cheese during the final minute of cooking! The green chilies add mild heat while the cumin brings earthy warmth that pairs perfectly with the corn’s sweetness. Finish with extra lime juice and fresh cilantro instead of parsley for that authentic Southwest flair that will transport your taste buds straight to a Mexican street food festival!
- Bacon Lover’s Dream Fried Corn: Because everything is better with bacon! Cook 4 slices of thick-cut bacon until crispy, then crumble and set aside. Use the rendered bacon fat instead of vegetable oil for cooking your corn – talk about flavor explosion! Add the crumbled bacon back in during the final minute of cooking along with 2 tablespoons of chopped chives. The smoky, salty bacon takes this fried corn to savory heaven while the chives add a delicate onion flavor that balances everything perfectly!
- Creamy Parmesan Herb Fried Corn: Transform your fried corn into the ultimate comfort food by stirring in 1/4 cup grated Parmesan cheese and 2 tablespoons of heavy cream during the last minute of cooking! The Parmesan melts into a salty, nutty coating while the cream creates a luxurious sauce that clings to every kernel. Add 1 teaspoon of Italian seasoning along with your other spices, and use fresh basil instead of parsley for an Italian-inspired twist that will have everyone coming back for seconds!
- Spicy Maple Glazed Fried Corn: Sweet heat alert! Create an incredible glaze by whisking together 2 tablespoons maple syrup, 1 teaspoon chili powder, and 1/2 teaspoon cayenne pepper. During the last 2 minutes of cooking, pour this glaze over the corn and stir constantly until it thickens and coats every kernel beautifully. The maple syrup caramelizes slightly, creating sticky-sweet kernels with a spicy kick that builds with every bite – it’s the perfect balance of sweet and heat that will keep people talking!
- Mediterranean Herb Fried Corn: Take a trip to the Mediterranean by using olive oil instead of vegetable oil and adding 1 teaspoon dried oregano, 1/2 teaspoon lemon zest, and 2 tablespoons chopped kalamata olives during the seasoning step. Finish with fresh mint instead of parsley and a squeeze of lemon juice instead of lime. The briny olives and aromatic herbs create a sophisticated flavor profile that pairs beautifully with grilled meats or makes an impressive standalone side dish for dinner parties!
Frequently Asked Questions
Can I use frozen corn instead of fresh corn for this recipe?
Absolutely yes, and here’s how to make it work perfectly! Frozen corn can be a fantastic time-saver, but there are a few key adjustments to ensure you still get that incredible crispy texture. First, you’ll want to thaw the corn completely and pat it VERY dry with paper towels – excess moisture is the enemy of crispiness! Skip the blanching step since frozen corn is already partially cooked during the freezing process. When you add the corn to the hot skillet, spread it in a single layer and let it cook for an extra minute or two to evaporate any remaining moisture before it starts crisping up. The results will be slightly different from fresh corn but still absolutely delicious – you’ll get great flavor and good crispiness that makes this a viable option when fresh corn isn’t available!
How can I make this recipe spicier for those who love heat?
Let’s turn up the temperature! There are so many fantastic ways to add heat to this fried corn recipe, and you can customize the spice level to match exactly what your crowd craves. For mild heat with great flavor, add 1/2 teaspoon of chili powder or chipotle powder along with your other spices – these bring smoky heat that complements the corn beautifully. For medium heat lovers, include 1/4 teaspoon of cayenne pepper or red pepper flakes. For serious heat seekers, add 1 finely chopped jalapeño (seeds included for maximum fire!) when you add the corn to the skillet. You could also stir in 1-2 tablespoons of your favorite hot sauce during the final minute of cooking. Remember to taste as you go and adjust accordingly – you can always add more heat, but you can’t take it away!
What’s the best way to serve this fried corn at parties?
Party serving is where this recipe truly shines! For casual gatherings, serve it family-style in a beautiful colorful bowl with a large serving spoon – the vibrant golden color makes it a centerpiece that draws people in. For more formal events or buffet-style serving, consider using a chafing dish to keep it warm throughout the party. Garnish with extra fresh parsley and lime wedges for that professional touch. For individual servings at seated dinners, use small ramekins or colorful small bowls – this creates an elegant presentation and makes guests feel special. Don’t forget to provide small spoons for easy eating! This fried corn pairs incredibly well with grilled meats, barbecue dishes, or as part of a taco bar setup – its versatility makes it the perfect party companion!
Can I prepare this fried corn in advance for a big event?
Great question for all you smart party planners! While fried corn is absolutely best served immediately after cooking, you CAN do some advance prep to make your life easier. You can blanch the corn and store it in an airtight container in the refrigerator for up to 24 hours before your event. Have all your spices measured and ready to go in small bowls. When party time arrives, your actual cooking time will be just 8-10 minutes from start to finish! If you MUST make it completely in advance, cook it as directed, then spread it on a baking sheet to cool completely before refrigerating. To reheat, spread it in a single layer on a baking sheet and bake at 375°F for 5-7 minutes – this will restore much of the crispy texture. The flavor will still be fantastic, though the texture might be slightly less perfect than fresh-off-the-skillet!
Summary
This incredible fried corn recipe transforms simple ingredients into crispy, buttery perfection that steals the show at any gathering! With its perfect balance of sweet corn, rich spices, and bright finishing touches, it’s guaranteed to become your new go-to side dish that brings energy and excitement to every meal!
Crispy Fried Corn
4
servings10
minutes15
minutesIngredients
Instructions
- 1 Bring a medium saucepan of water to boil, add corn kernels and blanch for 3 minutes, then drain thoroughly
- 2 Heat a large skillet over medium-high heat for 2 minutes, then add vegetable oil and butter
- 3 Add blanched corn to hot skillet and cook undisturbed for 2 minutes, then stir and cook for another 2 minutes until kernels develop golden-brown edges
- 4 Sprinkle smoked paprika, garlic powder, black pepper, and salt over corn, stir well and cook for 2-3 more minutes
- 5 Turn off heat, add fresh parsley and lime juice, toss to combine and serve immediately


