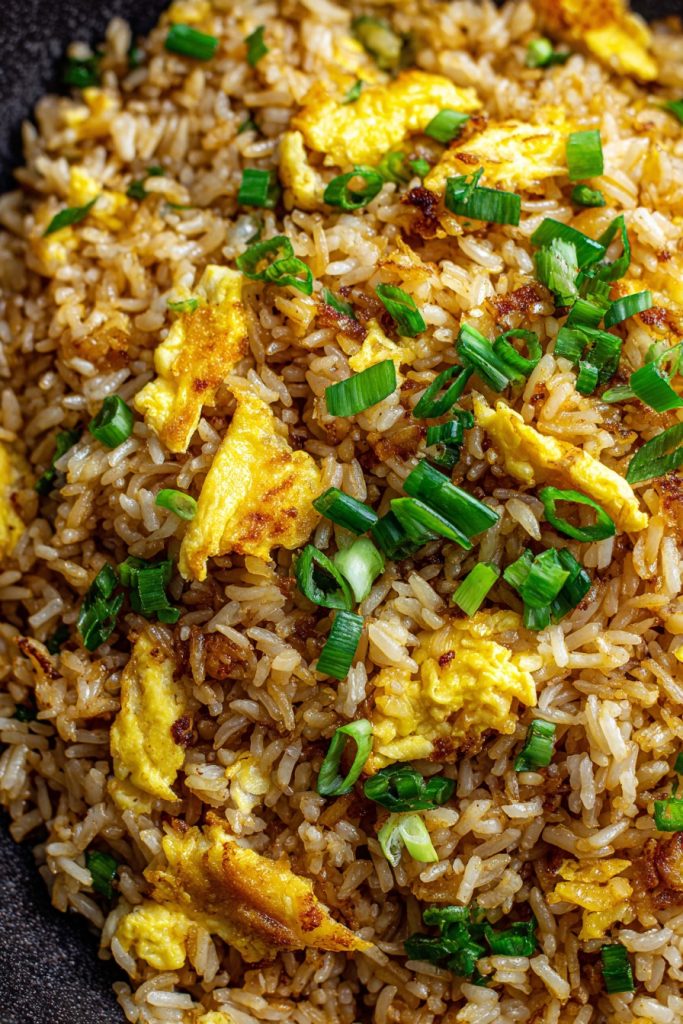
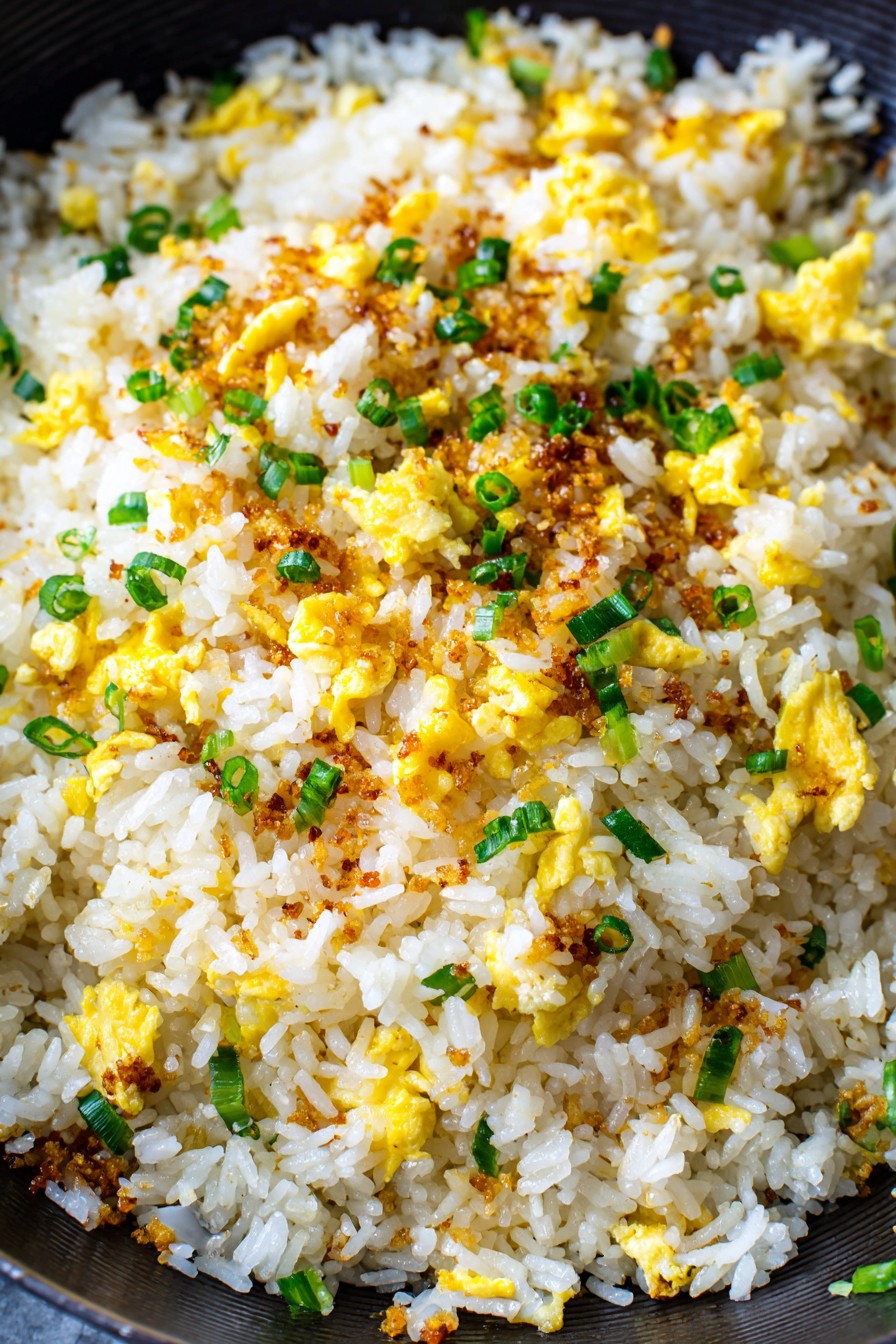
Nowhere does breakfast achieve such aromatic perfection as in Filipino cuisine, where garlic fried rice transforms simple ingredients into a culinary masterpiece. This technique-driven approach elevates day-old rice through precise temperature control and garlic infusion methods that create distinct textural contrasts and flavor layers.
Why This Recipe Works
- The use of day-old rice provides optimal moisture content and starch crystallization, preventing clumping while allowing individual grains to absorb aromatic oils without becoming mushy during the frying process.
- Dual-stage garlic cooking creates complex flavor profiles: minced garlic delivers immediate aromatic impact while sliced garlic develops deeper, nuttier notes through extended caramelization at lower temperatures.
- High smoke point oil selection (canola or vegetable) enables proper Maillard reaction development without burning delicate garlic components, while the addition of butter at the final stage introduces rich dairy notes that complement the garlic’s pungency.
- Strategic seasoning timing ensures salt penetrates the rice structure effectively while preventing premature moisture extraction that would compromise the desired dry, separate grain texture characteristic of authentic sinangag.
- Resting periods between cooking stages allow for proper heat distribution and flavor integration, resulting in a harmonious balance between crispy, golden elements and tender rice cores.
Ingredients
- 4 cups day-old jasmine rice, refrigerated overnight and broken into individual grains
- 12 medium garlic cloves, divided: 8 cloves finely minced, 4 cloves thinly sliced
- 3 tablespoons canola oil
- 2 tablespoons unsalted butter
- 1½ teaspoons fine sea salt
- ½ teaspoon freshly ground black pepper
- 2 tablespoons neutral-flavored cooking oil for initial frying
- 2 large eggs, beaten for optional topping
- 2 tablespoons chopped scallions for garnish
Equipment Needed
- 14-inch carbon steel wok or large cast iron skillet
- Wire mesh spider or slotted spoon
- Microplane or fine grater for garlic preparation
- Mandoline slicer for uniform garlic slices
- Kitchen scale for precise ingredient measurement
- Wooden spatula or wok chan
- Rimmed baking sheet for rice preparation
- Fine-mesh strainer for garlic removal
Instructions
Prepare and Temper Ingredients
Begin by systematically preparing all components to ensure seamless execution during the cooking process. Remove the refrigerated rice from its storage container and spread it evenly across a rimmed baking sheet, using your fingers to gently break apart any clusters while maintaining grain integrity. This aeration process allows surface moisture to evaporate, crucial for achieving the desired separate grain texture. Meanwhile, separate your garlic preparation: using a microplane, finely grate eight cloves until they achieve a paste-like consistency that will distribute evenly throughout the rice, then use a mandoline to create uniformly thin slices from the remaining four cloves, ensuring consistent cooking times. Measure your oils and seasonings into individual containers for immediate access during the high-heat cooking phases. This mise en place organization prevents rushed decisions and ensures precise timing when working with fast-cooking ingredients like garlic.
Render Garlic Infused Oil
Place your wok over medium-low heat and add three tablespoons of canola oil, allowing it to heat until it reaches 250°F as verified by an infrared thermometer. Introduce the thinly sliced garlic, distributing them evenly across the oil’s surface, and maintain this temperature range while stirring constantly with a wire mesh spider. Observe the garlic slices as they transition from opaque white to pale golden, a process requiring approximately four to five minutes of attentive monitoring. The moment you detect the first signs of browning around the edges, immediately remove the wok from heat and transfer the garlic chips to a paper towel-lined plate using your spider, reserving the now-infused oil in the wok. This technique captures the garlic’s essential oils while preventing bitter compounds from developing through excessive browning.
Develop Flavor Foundation
Return the garlic-infused oil to medium-high heat until it shimmers and reaches 350°F, then immediately add the minced garlic paste. Employ constant circular motions with your wooden spatula, ensuring the garlic maintains contact with the wok’s surface for no more than thirty seconds before it begins to release its pungent aroma. The moment you observe the minced garlic turning light golden at the edges—typically between twenty-five and thirty-five seconds—introduce the prepared rice in a circular pattern around the wok’s perimeter. This distribution method allows the rice to gradually incorporate the hot oil rather than causing temperature shock that would result in steaming. Begin folding the rice from the edges toward the center, coating each grain with the aromatic oil while breaking any remaining clusters with the back of your spatula.
Pro Tip: For maximum flavor extraction, crush your garlic cloves with the flat side of a chef’s knife before mincing to rupture cell walls and release alliinase enzymes that create garlic’s characteristic pungency.
Integrate and Season
Once the rice is thoroughly coated with garlic oil and begins to sizzle audibly—approximately two minutes into the cooking process—create a well in the center of the wok by pushing the rice toward the edges. Add the remaining tablespoon of neutral oil to this exposed surface and allow it to heat for fifteen seconds before adding the beaten eggs if using. Scramble the eggs quickly within this confined space until they achieve soft curds, then immediately incorporate them into the surrounding rice using chopping motions with your spatula. Distribute the sea salt evenly across the rice surface, followed by the black pepper, and continue folding for another ninety seconds until the seasoning is fully integrated. At this stage, the rice should exhibit individual grain separation and develop a slight crispness on the bottom layer where contact with the wok surface is most direct.
Pro Tip: Season in stages rather than all at once—add half the salt during initial integration and the remainder after the rice has heated through to ensure even distribution without over-concentrating in specific areas.
Finish and Garnish
Reduce the heat to medium and add the unsalted butter to the perimeter of the wok, allowing it to melt and foam before incorporating it into the rice mixture through gentle folding motions. Continue cooking for an additional two minutes, during which the butter will emulsify with the existing oils and coat each rice grain with a rich, glossy sheen. Test for seasoning adjustment by tasting a small sample from the center of the wok where heat distribution is most even, adding additional salt if necessary but being mindful of the salted garlic chips that will be added later. Transfer the finished rice to a serving platter, creating a slight mound in the center to maximize surface area for garnishing. Distribute the reserved garlic chips evenly across the top, followed by the chopped scallions, serving immediately to preserve textural contrasts.
Pro Tip: For optimal textural contrast, reserve half of your garlic chips to sprinkle over individual servings rather than incorporating all during the final mixing stage, ensuring some maintain their crispness throughout the meal.
Tips and Tricks
Beyond the fundamental technique outlined in the instructions, several advanced approaches can elevate your garlic fried rice to professional standards. When selecting rice varieties, consider the specific starch content of each type—jasmine rice provides the ideal balance of fragrance and separate grain structure, but medium-grain Calrose can offer a pleasantly chewy alternative if properly handled. For optimal texture development, spread your day-old rice on a sheet pan and place it in a 200°F oven for fifteen minutes before cooking to drive off additional surface moisture without actually cooking the grains further. When working with garlic, understand that its flavor compounds develop differently based on cut size and cooking method—the finely minced garlic provides immediate aromatic impact while the sliced components develop deeper, caramelized notes through slower cooking.
Temperature control represents the most critical element in achieving perfect sinangag. Use an infrared thermometer to monitor your oil temperature throughout the process, maintaining 250-275°F during the initial garlic infusion stage to extract flavor without burning, then increasing to 325-350°F when introducing the rice to ensure proper searing rather than steaming. For those seeking maximum wok hei (breath of the wok), consider the two-stage cooking method where you briefly remove the wok from heat after adding the rice, allowing residual heat to begin the cooking process before returning to high heat for the final sear. When seasoning, consider using a combination of fine sea salt for immediate dissolution and a small amount of flaky Maldon salt added at the very end to provide bursts of salinity that complement the garlic’s pungency.
Storage and reheating techniques significantly impact leftover quality. To preserve textural integrity, spread any unused fried rice in a thin layer on a baking sheet to cool completely before transferring to an airtight container, which prevents condensation from creating sogginess. For reheating, avoid microwave methods that steam the rice—instead, use a non-stick skillet over medium heat with a teaspoon of additional oil, spreading the rice in a single layer and allowing it to crisp for three to four minutes before tossing. For large batch preparation, cook the rice in smaller quantities rather than attempting to overcrowd the wok, as proper evaporation and Maillard reaction development require sufficient surface contact that only smaller batches can provide.
Recipe Variations
- Seafood Sinangag: Incorporate dried shrimp (hibe) soaked in warm water for fifteen minutes then finely chopped, adding them during the initial oil infusion stage to develop profound umami depth. Complement with a tablespoon of shrimp paste (bagoong) dissolved in a teaspoon of water and added during the final seasoning phase, creating a complex briny counterpoint to the garlic’s sharpness. Finish with freshly squeezed calamansi juice and chopped Chinese celery leaves for brightness that cuts through the richness.
- Breakfast Power Version: Create a more substantial meal by rendering four slices of diced bacon until crisp, using the rendered fat as your primary cooking oil. Add one cup of finely diced Spanish chorizo during the rice integration phase, allowing the paprika-infused oils to stain the grains crimson. Fold in two additional scrambled eggs and a cup of frozen peas that have been blanched and shocked, creating a complete breakfast dish that stands independently.
- Vegetarian Garlic Fried Rice: Replace the traditional animal fats with coconut oil for initial frying, enhancing the aromatic profile with Southeast Asian notes. Introduce one cup of finely chopped king oyster mushrooms during the garlic mince phase, allowing them to develop meaty texture and absorb the garlic essence. Finish with a tablespoon of vegetarian oyster sauce and a teaspoon of dark soy sauce for color depth, garnishing with fried shallots and cilantro sprigs.
- Spicy Garlic Bomb: For those who prefer intense heat, infuse your oil with three tablespoons of crushed red pepper flakes removed before adding garlic, creating a chili oil base. Add two finely chopped Thai bird’s eye chilies with the minced garlic, and incorporate a tablespoon of sambal oelek during the final seasoning adjustment. Balance the heat with a squeeze of lime juice and a teaspoon of palm sugar dissolved in a tablespoon of warm water.
Frequently Asked Questions
Can I use freshly cooked rice instead of day-old rice?
While technically possible, freshly cooked rice contains significantly higher moisture content that prevents proper separation during the frying process, resulting in clumping and steamed rather than fried texture. The starch retrogradation that occurs during refrigeration changes the rice’s crystalline structure, making it less prone to absorbing excess oil while maintaining grain integrity. If you must use fresh rice, spread it in a thin layer on sheet pans and refrigerate uncovered for at least four hours to accelerate moisture evaporation. Alternatively, cook your rice with slightly less water than usual (reducing by 10-15%) and allow it to rest uncovered for thirty minutes after cooking before spreading for cooling, though this still won’t achieve the ideal texture of properly aged rice.
What’s the purpose of using both minced and sliced garlic?
The dual garlic preparation serves distinct culinary purposes that create a more complex flavor profile than using a single cut. Minced garlic, with its increased surface area, releases allicin and other volatile compounds quickly during high-heat cooking, providing immediate aromatic presence that permeates the rice. The thinly sliced garlic, when gently fried at lower temperatures, undergoes gradual caramelization that develops sweeter, nuttier notes without the sharp pungency of raw garlic. This combination creates layers of garlic flavor—the immediate impact of the minced variety and the deeper, rounded notes from the caramelized slices—that evolve throughout the eating experience. Additionally, the crispy garlic chips provide textural contrast that complements the tender rice grains.
How can I prevent the garlic from burning during cooking?
Garlic burning prevention requires meticulous temperature control and attentive monitoring throughout the cooking process. Begin by ensuring your garlic is uniformly cut—irregular pieces will cook at different rates, with smaller fragments burning before larger pieces properly cook. Use an infrared thermometer to maintain oil temperature between 250-275°F during the initial infusion stage, as garlic begins to burn rapidly above 300°F. Constant motion is crucial—employ a wire mesh spider or slotted spoon to keep the garlic moving continuously, ensuring even heat distribution and preventing hot spots from developing. The moment you detect color change from pale gold to deeper amber, immediately remove from heat and transfer the garlic from the oil, as residual heat will continue the cooking process even off the burner.
What’s the best rice variety for authentic sinangag?
Traditional Filipino garlic fried rice typically utilizes jasmine rice due to its fragrant aroma and naturally separate grain structure when properly cooked. The long grains contain less amylopectin than short-grain varieties, resulting in firmer texture that withstands the vigorous tossing required during frying. If jasmine rice is unavailable, basmati serves as an acceptable substitute with similar characteristics, though its distinctive nutty flavor will alter the final profile. Medium-grain Calrose rice can be used but requires more careful handling—reduce moisture content further by refrigerating for twenty-four hours and handle gently during frying to prevent mushiness. Avoid using sushi rice or other short-grain varieties with high starch content, as they tend to become gummy and clump excessively during the frying process.
Summary
Mastering Filipino garlic fried rice requires understanding starch retrogradation in day-old rice, dual-stage garlic preparation for flavor complexity, and precise temperature control throughout the cooking process to achieve the perfect balance of aromatic pungency and textural contrast.
Filipino Garlic Fried Rice
5
servings15
minutes12
minutesIngredients
Instructions
- 1 Prepare rice by breaking apart clusters on a baking sheet. Separate garlic into minced and sliced portions.
- 2 Heat canola oil to 250°F in wok. Fry sliced garlic until pale golden, then remove and reserve both garlic chips and infused oil.
- 3 Return infused oil to wok and heat to 350°F. Add minced garlic and cook for 30 seconds until fragrant.
- 4 Add rice in circular pattern, folding to coat with oil. Create well in center, add neutral oil and eggs if using, then scramble and incorporate.
- 5 Season with salt and pepper, cook for 90 seconds. Add butter, cook 2 minutes more until glossy.
- 6 Garnish with reserved garlic chips and scallions. Serve immediately.