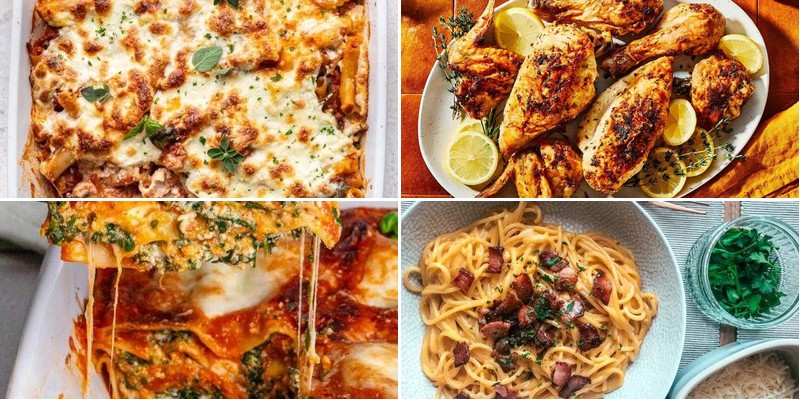
Cooking for your crew just got easier! Whether you’re planning a cozy weeknight dinner, a festive holiday feast, or a casual weekend brunch, we’ve gathered 22 beloved family recipes that are sure to please every palate. From timeless comfort foods to quick, crowd-pleasing meals, this collection has something delicious for every occasion. Dive in and discover your next favorite dish to share around the table.
Classic Meatloaf with a Sweet Glaze
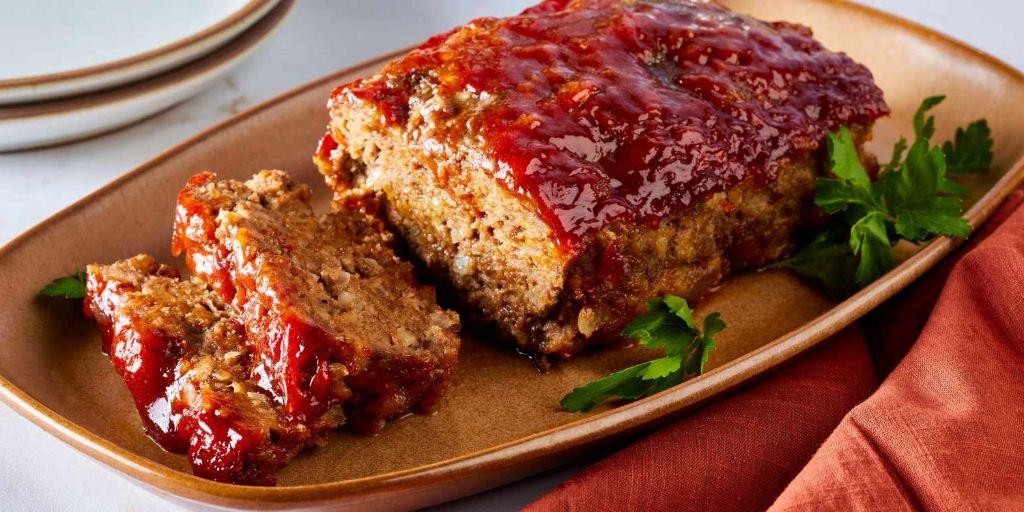
Ever crave that nostalgic, home-cooked comfort food that just hits the spot? You know, the kind of dish that feels like a warm hug on a plate. That’s exactly what this classic meatloaf with its sweet, sticky glaze delivers—a timeless favorite that’s surprisingly simple to pull together.
Serving: 6 | Pre Time: 20 minutes | Cooking Time: 60 minutes
Ingredients
– 2 lbs 80/20 ground beef chuck
– 1 cup panko breadcrumbs
– 1 cup whole milk
– 2 large pasture-raised eggs, lightly beaten
– 1 medium yellow onion, finely minced
– 2 cloves garlic, finely minced
– 2 tbsp Worcestershire sauce
– 1 tbsp Dijon mustard
– 1 tsp kosher salt
– 1/2 tsp freshly ground black pepper
– 1/2 tsp dried thyme
– 1/2 cup ketchup
– 1/4 cup packed light brown sugar
– 1 tbsp apple cider vinegar
Instructions
1. Preheat your oven to 350°F (175°C) and lightly grease a 9×5-inch loaf pan.
2. In a large mixing bowl, combine the panko breadcrumbs and whole milk, allowing them to soak for 5 minutes to form a panade, which will help keep the meatloaf moist.
3. Add the lightly beaten pasture-raised eggs, finely minced yellow onion, finely minced garlic, Worcestershire sauce, Dijon mustard, kosher salt, freshly ground black pepper, and dried thyme to the breadcrumb mixture. Stir until fully incorporated.
4. Gently fold in the 80/20 ground beef chuck using your hands or a spatula until just combined; overmixing can result in a dense, tough texture.
5. Transfer the meat mixture to the prepared loaf pan, shaping it into an even loaf.
6. Place the loaf pan on a baking sheet to catch any drips and bake in the preheated oven for 45 minutes.
7. While the meatloaf bakes, prepare the glaze by whisking together the ketchup, packed light brown sugar, and apple cider vinegar in a small bowl until smooth.
8. After 45 minutes, remove the meatloaf from the oven and carefully pour off any accumulated fat from the pan.
9. Evenly spread the prepared glaze over the top of the meatloaf using a pastry brush or spoon, ensuring full coverage for a caramelized finish.
10. Return the meatloaf to the oven and continue baking for an additional 15 minutes, or until the internal temperature reaches 160°F (71°C) when measured with an instant-read thermometer inserted into the center.
11. Remove the meatloaf from the oven and let it rest in the pan for 10 minutes; this allows the juices to redistribute, ensuring a sliceable loaf that holds its shape.
12. Carefully transfer the meatloaf to a cutting board, slice, and serve.
The resulting meatloaf boasts a tender, juicy crumb with a savory depth from the aromatics, perfectly contrasted by the glossy, sweet-tangy glaze. Try serving thick slices alongside creamy mashed potatoes and roasted green beans for a complete, comforting meal that’s sure to become a weeknight staple.
Creamy Chicken Alfredo Pasta
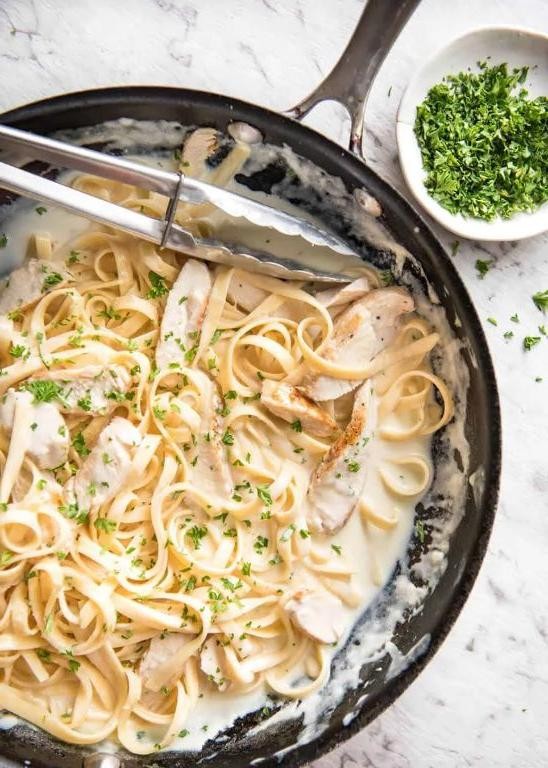
Let’s be real—some days you just need a bowl of creamy, comforting pasta without any fuss. This creamy chicken Alfredo pasta delivers exactly that, with a rich sauce that clings to every noodle and tender, seasoned chicken in every bite. It’s the kind of meal that feels indulgent but comes together in under an hour, perfect for a cozy weeknight dinner.
Serving: 4 | Pre Time: 15 minutes | Cooking Time: 25 minutes
2
servings15
minutes25
minutesIngredients
– 12 ounces dried fettuccine pasta
– 1 pound boneless, skinless chicken breasts, cut into 1-inch pieces
– 1 teaspoon kosher salt, divided
– ½ teaspoon freshly ground black pepper, divided
– 2 tablespoons extra-virgin olive oil
– 4 tablespoons unsalted butter
– 4 garlic cloves, minced
– 1 cup heavy cream
– 1 cup freshly grated Parmigiano-Reggiano cheese
– ¼ teaspoon freshly grated nutmeg
– 2 tablespoons chopped fresh flat-leaf parsley
Instructions
1. Bring a large pot of generously salted water to a rolling boil over high heat.
2. Add the dried fettuccine pasta to the boiling water and cook according to package directions until al dente, about 10-12 minutes, stirring occasionally to prevent sticking.
3. While the pasta cooks, season the chicken breast pieces evenly with ½ teaspoon of the kosher salt and ¼ teaspoon of the black pepper.
4. Heat the extra-virgin olive oil in a large skillet over medium-high heat until it shimmers, about 1 minute.
5. Add the seasoned chicken pieces to the hot skillet in a single layer, working in batches if necessary to avoid overcrowding.
6. Cook the chicken for 5-7 minutes, turning occasionally, until it is golden brown on all sides and the internal temperature reaches 165°F on an instant-read thermometer.
7. Transfer the cooked chicken to a clean plate and set aside, covering loosely with foil to keep warm.
8. Reduce the skillet heat to medium and add the unsalted butter, swirling until melted and foamy.
9. Add the minced garlic to the butter and cook, stirring constantly, for 30-45 seconds until fragrant but not browned.
10. Pour in the heavy cream, stirring to combine, and bring the mixture to a gentle simmer.
11. Reduce the heat to low and gradually whisk in the freshly grated Parmigiano-Reggiano cheese until the sauce is smooth and thickened, about 2-3 minutes.
12. Stir in the remaining ½ teaspoon kosher salt, ¼ teaspoon black pepper, and the freshly grated nutmeg.
13. Drain the cooked fettuccine pasta, reserving ½ cup of the pasta cooking water.
14. Add the drained pasta and the reserved cooked chicken to the skillet with the Alfredo sauce.
15. Toss everything together over low heat for 1-2 minutes, adding splashes of the reserved pasta water as needed to loosen the sauce to a creamy, clinging consistency.
16. Remove the skillet from the heat and stir in the chopped fresh flat-leaf parsley.
17. Divide the creamy chicken Alfredo pasta among four serving bowls immediately.
Really, the magic is in that silky, cheese-laden sauce coating each strand of pasta. You get a perfect balance of savory garlic, rich cream, and a hint of nutmeg that makes it feel special. For a fun twist, try serving it with a side of garlic bread or topping it with extra parsley and a crack of black pepper right at the table.
Homestyle Beef and Vegetable Stew
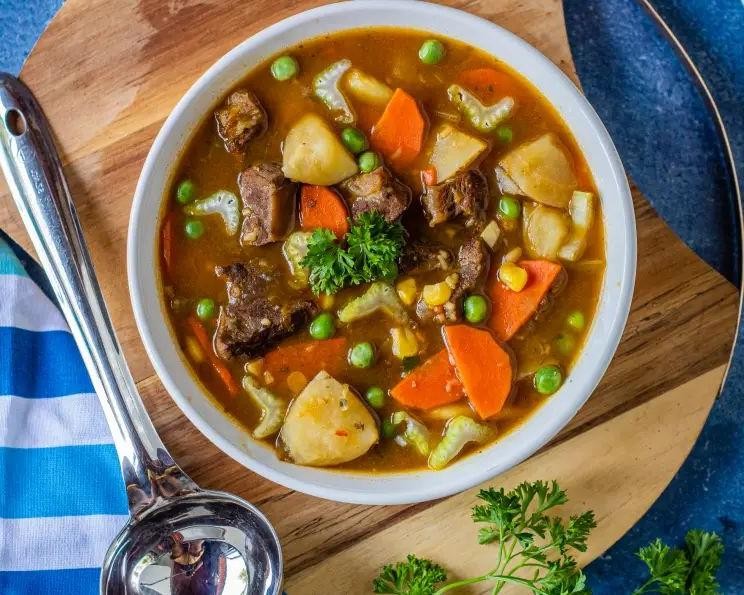
Diving into a bowl of this homestyle beef and vegetable stew feels like wrapping yourself in a cozy blanket on a chilly day. You’ll love how the rich, savory flavors develop slowly, making your kitchen smell absolutely incredible. It’s the kind of hearty, comforting meal that everyone needs in their rotation.
Serving: 6 | Pre Time: 20 minutes | Cooking Time: 2 hours 30 minutes
6
servings20
minutes150
minutesIngredients
– 2 lbs beef chuck roast, cut into 1-inch cubes
– 2 tbsp clarified butter
– 1 large yellow onion, finely diced
– 3 cloves garlic, minced
– 1/4 cup all-purpose flour
– 4 cups beef stock
– 1 cup dry red wine
– 2 tbsp tomato paste
– 2 tsp fresh thyme leaves
– 2 bay leaves
– 3 large carrots, peeled and cut into 1-inch pieces
– 3 Yukon Gold potatoes, peeled and cut into 1-inch cubes
– 1 cup frozen pearl onions
– 1 cup frozen peas
– Kosher salt and freshly ground black pepper
Instructions
1. Pat the beef chuck roast cubes completely dry with paper towels and season generously on all sides with kosher salt and freshly ground black pepper.
2. Heat the clarified butter in a large Dutch oven over medium-high heat until shimmering, about 2 minutes.
3. Working in batches to avoid overcrowding, sear the beef cubes until deeply browned on all sides, approximately 4-5 minutes per batch. Transfer the seared beef to a clean plate. (Tip: Do not move the beef for the first few minutes to ensure a proper crust forms.)
4. Reduce the heat to medium and add the finely diced yellow onion to the Dutch oven. Sauté until translucent and softened, about 5 minutes.
5. Add the minced garlic and cook until fragrant, about 1 minute.
6. Sprinkle the all-purpose flour over the onion and garlic mixture. Cook, stirring constantly, for 2 minutes to form a roux and cook out the raw flour taste.
7. Slowly whisk in the beef stock and dry red wine, scraping up any browned bits from the bottom of the pot.
8. Whisk in the tomato paste until fully incorporated.
9. Return the seared beef and any accumulated juices to the Dutch oven. Add the fresh thyme leaves and bay leaves.
10. Bring the liquid to a gentle simmer, then immediately reduce the heat to low. Cover the pot with a tight-fitting lid.
11. Braise the stew for 1 hour and 30 minutes, maintaining a low simmer. (Tip: The liquid should barely bubble; adjust the heat as necessary.)
12. Add the carrot pieces and potato cubes to the stew. Stir to combine.
13. Cover and continue braising for an additional 45 minutes, or until the beef and vegetables are fork-tender.
14. Stir in the frozen pearl onions and frozen peas. Cook, uncovered, for 5-7 minutes until the peas are heated through and the stew has thickened slightly. (Tip: Taste and adjust seasoning with salt and pepper at this final stage.)
15. Remove and discard the bay leaves before serving.
Comforting and rich, this stew boasts tender beef that falls apart and vegetables that melt in your mouth. The red wine adds a wonderful depth to the savory gravy. For a creative twist, serve it over a bed of creamy mashed cauliflower or with a slice of crusty, buttered sourdough bread to soak up every last drop.
Grandma’s Hearty Chicken Noodle Soup

Kick off those chilly days with a bowl of pure comfort. You know the feeling—when you need something warm, nourishing, and just like home. This recipe delivers exactly that, with rich flavor in every spoonful.
Serving: 6 | Pre Time: 20 minutes | Cooking Time: 1 hour 30 minutes
6
servings20
minutes90
minutesIngredients
– 1 whole pasture-raised chicken (about 4 lbs)
– 2 tbsp extra-virgin olive oil
– 1 large yellow onion, finely diced
– 3 celery stalks, finely diced
– 3 carrots, peeled and finely diced
– 3 cloves garlic, minced
– 8 cups cold filtered water
– 2 bay leaves
– 1 tsp whole black peppercorns
– 1 tbsp kosher salt
– 8 oz wide egg noodles
– ¼ cup fresh flat-leaf parsley, finely chopped
Instructions
1. Pat the whole pasture-raised chicken completely dry with paper towels.
2. Heat the extra-virgin olive oil in a large Dutch oven over medium-high heat until shimmering.
3. Carefully place the chicken in the pot and sear for 5-7 minutes per side until the skin is deeply golden brown.
4. Remove the chicken and set it aside on a plate.
5. Add the finely diced yellow onion, celery, and carrots to the pot, scraping up any browned bits from the chicken.
6. Sauté the vegetables for 8-10 minutes until softened and the onion is translucent.
7. Add the minced garlic and cook for 1 minute until fragrant.
8. Return the chicken to the pot and add the cold filtered water, ensuring it covers the chicken by at least 1 inch.
9. Add the bay leaves, whole black peppercorns, and kosher salt.
10. Bring the liquid to a gentle boil, then immediately reduce the heat to low to maintain a bare simmer.
11. Cover the pot and simmer for 1 hour, skimming off any foam that rises to the surface with a slotted spoon for a clearer broth.
12. Remove the chicken from the pot and place it on a cutting board to cool slightly.
13. Strain the broth through a fine-mesh sieve into a clean pot, discarding the solids.
14. Shred all the chicken meat from the bones, discarding the skin and bones.
15. Return the strained broth to the stove and bring it to a boil over medium-high heat.
16. Add the wide egg noodles and cook for 8-10 minutes according to package instructions until al dente.
17. Stir the shredded chicken back into the pot and cook for 2 more minutes just to heat through.
18. Remove the pot from the heat and stir in the finely chopped fresh flat-leaf parsley.
19. Ladle the soup into bowls and serve immediately.
Here, the broth is deeply savory and rich, while the vegetables and chicken remain tender. The wide egg noodles provide a satisfying, hearty bite that makes this soup a complete meal. For a creative twist, serve it with a dollop of herb-infused crème fraîche or a side of crusty, buttered sourdough toast for dipping.
Savoring Sunday Pot Roast with Vegetables
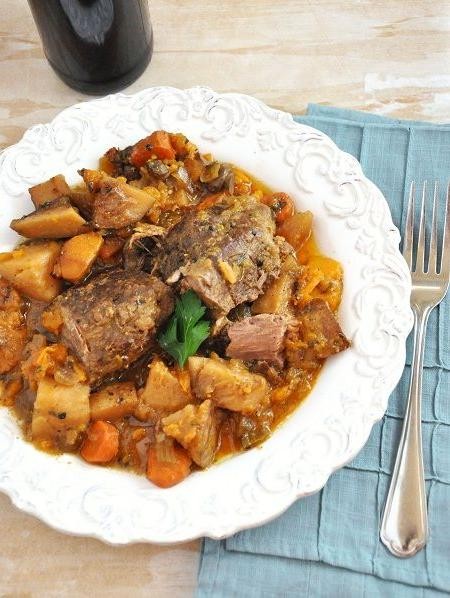
Remember those cozy Sunday afternoons when the whole house smells like comfort? You’re about to create that magic with a classic pot roast. It’s the perfect hands-off meal for a relaxing day, yielding tender meat and flavorful vegetables with minimal fuss.
Serving: 6 | Pre Time: 20 minutes | Cooking Time: 3 hours 30 minutes
6
servings20
minutes210
minutesIngredients
– 3 lb beef chuck roast, trimmed of excess fat
– 2 tbsp clarified butter
– 1 large yellow onion, julienned
– 4 cloves garlic, minced
– 2 tbsp tomato paste
– 2 cups dry red wine (such as Cabernet Sauvignon)
– 4 cups beef stock, preferably homemade or low-sodium
– 3 sprigs fresh rosemary
– 4 sprigs fresh thyme
– 2 bay leaves
– 1 lb baby carrots, peeled
– 1.5 lbs Yukon Gold potatoes, quartered
– 1 lb pearl onions, peeled
– Kosher salt and freshly cracked black pepper, for seasoning
Instructions
1. Preheat your oven to 325°F (163°C).
2. Pat the beef chuck roast completely dry with paper towels, then season all sides generously with kosher salt and freshly cracked black pepper.
3. Heat the clarified butter in a large Dutch oven over medium-high heat until shimmering, about 2 minutes.
4. Carefully place the seasoned roast in the hot pot and sear until a deep brown crust forms, about 4-5 minutes per side. Tip: Do not move the roast during searing to ensure proper Maillard reaction and flavor development.
5. Transfer the seared roast to a clean plate.
6. Add the julienned yellow onion to the pot and cook, stirring occasionally, until softened and beginning to caramelize, about 8 minutes.
7. Add the minced garlic and cook until fragrant, about 1 minute.
8. Stir in the tomato paste and cook for 2 minutes to deepen its flavor and color.
9. Deglaze the pot by pouring in the dry red wine, using a wooden spoon to scrape up any browned bits (fond) from the bottom.
10. Bring the wine to a simmer and cook until reduced by half, about 5 minutes.
11. Return the seared roast and any accumulated juices to the pot.
12. Pour in the beef stock until the liquid comes about halfway up the sides of the roast.
13. Add the fresh rosemary sprigs, fresh thyme sprigs, and bay leaves to the pot.
14. Bring the liquid to a gentle simmer over medium heat.
15. Cover the Dutch oven with a tight-fitting lid and carefully transfer it to the preheated oven.
16. Braise the roast for 2 hours and 30 minutes.
17. Remove the pot from the oven and carefully arrange the peeled baby carrots, quartered Yukon Gold potatoes, and peeled pearl onions around the roast. Tip: Submerge the vegetables in the braising liquid for even cooking and flavor absorption.
18. Cover the pot again and return it to the oven to cook for an additional 45-60 minutes, or until the vegetables are fork-tender and the meat shreds easily with a fork.
19. Remove the pot from the oven and transfer the roast and vegetables to a serving platter, tenting loosely with foil. Tip: For a richer sauce, skim any excess fat from the surface of the braising liquid with a spoon, then simmer the liquid on the stovetop until slightly thickened.
20. Shred the pot roast into large chunks using two forks.
21. Serve the shredded meat and vegetables with the reduced braising liquid spooned over the top.
Succulent, slow-braised beef practically melts alongside sweet carrots and creamy potatoes. The red wine-infused sauce adds a beautiful depth of flavor that ties everything together. For a creative twist, shred any leftovers and serve them on toasted brioche buns with a dollop of horseradish cream the next day.
Cheesy Baked Ziti with Italian Sausage

Let’s be honest—some days you just need a big, comforting pan of cheesy baked pasta. This cheesy baked ziti with Italian sausage is that cozy hug in dish form, perfect for feeding a crowd or enjoying leftovers all week. You’ll love how the flavors meld together while it bakes into bubbly perfection.
Serving: 8 | Pre Time: 20 minutes | Cooking Time: 45 minutes
8
servings20
minutes45
minutesIngredients
– 1 lb sweet Italian sausage, casings removed
– 1 yellow onion, finely diced
– 3 garlic cloves, minced
– 28 oz canned San Marzano tomatoes, crushed by hand
– 1 tsp dried oregano
– 1 tsp dried basil
– 1/2 tsp crushed red pepper flakes
– 1 lb ziti pasta
– 15 oz whole-milk ricotta cheese
– 1 large pasture-raised egg, lightly beaten
– 1/4 cup fresh parsley, finely chopped
– 2 cups low-moisture mozzarella cheese, shredded
– 1 cup Parmigiano-Reggiano cheese, freshly grated
– 2 tbsp extra-virgin olive oil
– Kosher salt and freshly ground black pepper, as needed
Instructions
1. Preheat your oven to 375°F.
2. Bring a large pot of salted water to a rolling boil over high heat.
3. Heat 2 tbsp extra-virgin olive oil in a large Dutch oven over medium-high heat.
4. Add 1 lb sweet Italian sausage, breaking it into small crumbles with a wooden spoon, and cook until browned, about 5-7 minutes.
5. Stir in 1 finely diced yellow onion and cook until translucent, about 4 minutes.
6. Add 3 minced garlic cloves and cook until fragrant, about 30 seconds.
7. Pour in 28 oz hand-crushed San Marzano tomatoes, 1 tsp dried oregano, 1 tsp dried basil, and 1/2 tsp crushed red pepper flakes.
8. Reduce heat to low and simmer the sauce for 15 minutes, stirring occasionally, to allow flavors to meld.
9. Cook 1 lb ziti pasta in the boiling water until al dente, about 8 minutes, then drain and set aside.
10. In a medium bowl, combine 15 oz whole-milk ricotta cheese, 1 lightly beaten pasture-raised egg, and 1/4 cup finely chopped fresh parsley.
11. Tip: Lightly beating the egg first ensures it incorporates evenly into the ricotta without overmixing.
12. In a 9×13-inch baking dish, spread a thin layer of the sausage-tomato sauce on the bottom.
13. Add half of the cooked ziti, followed by half of the ricotta mixture, half of the remaining sauce, 1 cup shredded mozzarella, and 1/2 cup grated Parmigiano-Reggiano.
14. Repeat the layers with the remaining ingredients, ending with the cheeses on top.
15. Tip: For a golden-brown crust, let the assembled dish rest for 10 minutes before baking to allow the pasta to absorb some sauce.
16. Bake uncovered at 375°F for 25-30 minutes, until the cheese is melted and bubbly with browned edges.
17. Tip: If the top browns too quickly, loosely tent the dish with aluminum foil for the last 10 minutes of baking.
18. Remove from the oven and let rest for 10 minutes before serving.
This baked ziti emerges with a creamy interior from the ricotta layers and a satisfyingly crispy cheese topping. The sweet Italian sausage adds a savory depth that pairs beautifully with the tangy tomatoes. For a fresh twist, serve it with a simple arugula salad dressed in lemon vinaigrette to cut through the richness.
Traditional Lasagna with Spinach and Ricotta

You know those cozy Sunday dinners that just feel like a warm hug? This traditional lasagna with spinach and ricotta is exactly that kind of comfort food. It’s layered with rich flavors and creamy textures that make it perfect for feeding a crowd or enjoying as leftovers all week.
Serving: 8 | Pre Time: 30 minutes | Cooking Time: 60 minutes
8
servings30
minutes60
minutesIngredients
– 1 lb ground beef (80/20 blend)
– 1 large yellow onion, finely diced
– 3 garlic cloves, minced
– 28 oz canned San Marzano tomatoes, crushed
– 2 tbsp extra virgin olive oil
– 1 tsp dried oregano
– 1 tsp kosher salt
– ½ tsp freshly ground black pepper
– 15 oz whole-milk ricotta cheese
– 10 oz frozen spinach, thawed and squeezed dry
– 1 large pasture-raised egg, lightly beaten
– ¼ cup grated Parmigiano-Reggiano cheese
– 12 no-boil lasagna noodles
– 8 oz low-moisture whole-milk mozzarella cheese, shredded
– 2 tbsp unsalted butter
– 2 tbsp all-purpose flour
– 2 cups whole milk, warmed to 110°F
– ⅛ tsp freshly grated nutmeg
Instructions
1. Heat the extra virgin olive oil in a large Dutch oven over medium heat until shimmering, about 2 minutes.
2. Add the finely diced yellow onion and cook until translucent, 5-7 minutes, stirring occasionally.
3. Add the minced garlic and cook until fragrant, 30 seconds, stirring constantly to prevent burning.
4. Add the ground beef and cook until browned, 8-10 minutes, breaking it up with a wooden spoon.
5. Stir in the crushed San Marzano tomatoes, dried oregano, kosher salt, and freshly ground black pepper.
6. Simmer the sauce uncovered for 20 minutes, stirring occasionally, until slightly thickened.
7. In a medium bowl, combine the whole-milk ricotta cheese, thawed spinach, lightly beaten pasture-raised egg, and grated Parmigiano-Reggiano cheese until homogeneous.
8. Melt the unsalted butter in a saucepan over medium heat until foaming subsides, about 3 minutes.
9. Whisk in the all-purpose flour and cook for 1 minute to form a pale roux, stirring constantly.
10. Gradually whisk in the warmed whole milk until smooth, then cook until thickened to a coating consistency, 5-7 minutes, whisking frequently to prevent lumps.
11. Remove the béchamel from heat and stir in the freshly grated nutmeg.
12. Preheat your oven to 375°F and lightly grease a 9×13-inch baking dish.
13. Spread 1 cup of the meat sauce evenly across the bottom of the baking dish.
14. Arrange 4 no-boil lasagna noodles in a single layer over the sauce, slightly overlapping if necessary.
15. Spread half of the ricotta-spinach mixture evenly over the noodles using an offset spatula.
16. Spoon 1 cup of meat sauce over the ricotta layer, then drizzle with ⅓ cup of béchamel.
17. Repeat the layering sequence: 4 noodles, remaining ricotta mixture, 1 cup meat sauce, and ⅓ cup béchamel.
18. Top with the final 4 noodles, remaining meat sauce, remaining béchamel, and shredded low-moisture whole-milk mozzarella cheese.
19. Cover the dish tightly with aluminum foil and bake at 375°F for 40 minutes.
20. Remove the foil and bake uncovered until the cheese is golden brown and bubbly, 15-20 minutes.
21. Let the lasagna rest at room temperature for 15 minutes before slicing to allow the layers to set.
Dense, creamy layers of ricotta and spinach balance beautifully with the robust meat sauce, while the béchamel adds a velvety richness that ties everything together. For a stunning presentation, garnish individual portions with fresh basil leaves and serve alongside a crisp arugula salad dressed with lemon vinaigrette.
Mom’s Perfect Banana Bread

Mmm, you know that comforting smell that fills the kitchen and feels like a hug? That’s exactly what you get with this classic banana bread. It’s the perfect way to use up those spotty bananas sitting on your counter, turning them into something truly special.
Serving: 8 | Pre Time: 15 minutes | Cooking Time: 65 minutes
8
servings15
minutes65
minutesIngredients
- 1 ¾ cups all-purpose flour
- 1 teaspoon baking soda
- ½ teaspoon fine sea salt
- ¾ cup granulated sugar
- ½ cup unsalted butter, clarified and cooled to room temperature
- 2 large pasture-raised eggs, lightly beaten
- 3 very ripe medium bananas, mashed (approximately 1 ½ cups)
- ⅓ cup full-fat plain Greek yogurt
- 1 teaspoon pure vanilla extract
Instructions
- Preheat your oven to 350°F (175°C) and generously grease a 9×5-inch loaf pan with butter or non-stick spray.
- In a medium bowl, whisk together the all-purpose flour, baking soda, and fine sea salt until fully combined.
- In a separate large bowl, use a hand mixer or stand mixer fitted with the paddle attachment to cream the clarified butter and granulated sugar together on medium-high speed for 3-4 minutes, until the mixture is pale and fluffy. Tip: Properly creaming the butter and sugar incorporates air, which is key for a tender crumb.
- With the mixer on low speed, gradually add the lightly beaten pasture-raised eggs to the butter-sugar mixture, mixing just until each addition is incorporated before adding the next.
- Add the mashed ripe bananas, full-fat Greek yogurt, and pure vanilla extract to the wet ingredients. Mix on low speed until just combined; the batter will look slightly curdled, which is normal.
- Gradually add the dry flour mixture to the wet ingredients, folding gently with a rubber spatula until no streaks of flour remain. Tip: Avoid overmixing to prevent developing gluten, which can make the bread tough.
- Pour the batter into the prepared loaf pan and use the spatula to smooth the top into an even layer.
- Bake on the center rack for 60-65 minutes. Tip: To test for doneness, insert a toothpick or skewer into the center of the loaf; it should come out clean or with a few moist crumbs, but no wet batter.
- Remove the pan from the oven and let the banana bread cool in the pan on a wire rack for 15 minutes.
- After 15 minutes, carefully run a knife around the edges of the pan and invert the loaf onto the wire rack to cool completely before slicing.
Deliciously moist and fragrant, this loaf boasts a tight, tender crumb speckled with sweet banana. The subtle tang from the Greek yogurt balances the richness perfectly. For a decadent twist, serve a thick slice warm with a generous smear of salted honey butter or toasted and topped with a dollop of crème fraîche.
Lemon Herb Roasted Chicken

Mmm, picture this: a golden-brown chicken with crispy skin, juicy meat, and the bright aroma of lemon and herbs filling your kitchen. It’s the kind of simple, impressive meal that feels like a hug on a plate. You’ll love how easy it is to pull together for a cozy weeknight or a special Sunday dinner.
Serving: 4 | Pre Time: 15 minutes | Cooking Time: 75 minutes
3
servings15
minutes75
minutesIngredients
– 1 whole chicken (approximately 4 lbs), patted dry
– 3 tbsp clarified butter, melted
– 2 lemons, one zested and juiced, one quartered
– 4 cloves garlic, minced
– 2 tbsp fresh rosemary, finely chopped
– 1 tbsp fresh thyme leaves
– 1 tsp kosher salt
– 1/2 tsp freshly cracked black pepper
– 1/2 cup low-sodium chicken stock
Instructions
1. Preheat your oven to 425°F (218°C) and position a rack in the center.
2. In a small bowl, combine the melted clarified butter, lemon zest, lemon juice, minced garlic, chopped rosemary, thyme leaves, kosher salt, and black pepper to create a cohesive herb paste.
3. Using your fingers, carefully loosen the skin over the chicken breast and thighs.
4. Gently spread half of the herb paste directly onto the meat underneath the loosened skin.
5. Rub the remaining herb paste all over the exterior of the chicken, ensuring it is fully coated.
6. Place the quartered lemon and any remaining herb bits from the bowl into the main cavity of the chicken.
7. Truss the chicken legs together with kitchen twine to promote even cooking.
8. Place the chicken, breast-side up, on a wire rack set inside a roasting pan.
9. Pour the chicken stock into the bottom of the roasting pan to create a flavorful base for pan juices.
10. Roast the chicken at 425°F for 20 minutes to initiate crisping.
11. Reduce the oven temperature to 375°F (190°C) and continue roasting for 50-55 minutes.
12. Check for doneness by inserting an instant-read thermometer into the thickest part of the thigh; it should register 165°F (74°C).
13. Transfer the chicken to a carving board and tent it loosely with aluminum foil.
14. Allow the chicken to rest undisturbed for 15 minutes to let the juices redistribute.
15. While the chicken rests, skim excess fat from the pan juices and serve them warm alongside the carved meat.
Outstandingly, the skin emerges shatteringly crisp, giving way to incredibly moist, herb-infused meat. The lemon provides a subtle, bright acidity that cuts through the richness perfectly. For a complete meal, serve the carved chicken over a bed of creamy polenta or alongside roasted root vegetables to soak up every last drop of those savory pan juices.
Comforting Shepherd’s Pie

On a chilly evening when you crave something warm and satisfying, shepherd’s pie delivers that perfect hug in a dish. It’s a cozy classic that layers savory meat and vegetables under a blanket of creamy mashed potatoes. You’ll love how simple it is to make from scratch, filling your kitchen with comforting aromas.
Serving: 6 | Pre Time: 20 minutes | Cooking Time: 45 minutes
6
servings20
minutes45
minutesIngredients
– 1.5 lbs ground lamb
– 2 tbsp clarified butter
– 1 large yellow onion, finely diced
– 2 carrots, peeled and diced into 1/4-inch pieces
– 2 celery stalks, finely chopped
– 2 garlic cloves, minced
– 1 tbsp tomato paste
– 1 cup beef stock
– 1 tsp Worcestershire sauce
– 1 tbsp all-purpose flour
– 1 tsp fresh thyme leaves
– 2 lbs Yukon Gold potatoes, peeled and quartered
– 1/2 cup heavy cream
– 4 tbsp unsalted butter
– 1/2 cup sharp cheddar cheese, grated
– Kosher salt and freshly ground black pepper
Instructions
1. Preheat your oven to 400°F.
2. Place the quartered potatoes in a large pot, cover with cold water, and add 1 tbsp kosher salt.
3. Bring to a boil over high heat, then reduce to a simmer and cook for 15-20 minutes until fork-tender.
4. While potatoes cook, heat clarified butter in a large skillet over medium-high heat.
5. Add the ground lamb and cook for 5-7 minutes, breaking it up with a spoon until browned and crumbly.
6. Transfer the lamb to a plate, leaving drippings in the skillet.
7. Add the diced onion, carrots, and celery to the skillet and sauté for 8-10 minutes until softened.
8. Stir in the minced garlic and tomato paste, cooking for 1 minute until fragrant.
9. Sprinkle the flour over the vegetables and cook for 1 minute to remove the raw taste.
10. Gradually pour in the beef stock and Worcestershire sauce, stirring constantly to avoid lumps.
11. Return the lamb to the skillet, add thyme leaves, and simmer for 10 minutes until the sauce thickens slightly.
12. Season the lamb mixture with 1 tsp kosher salt and 1/2 tsp black pepper, then transfer to a 9×13-inch baking dish.
13. Drain the cooked potatoes and return them to the hot pot to evaporate excess moisture for 1 minute.
14. Mash the potatoes with a ricer or masher until smooth.
15. Heat the heavy cream and unsalted butter in a small saucepan until the butter melts, then fold into the mashed potatoes.
16. Season the potatoes with 1/2 tsp kosher salt and 1/4 tsp black pepper.
17. Spread the mashed potatoes evenly over the lamb mixture in the baking dish.
18. Sprinkle the grated cheddar cheese over the top.
19. Bake for 20-25 minutes until the cheese is golden and the filling is bubbling at the edges.
20. Let the shepherd’s pie rest for 10 minutes before serving to allow the layers to set.
Just out of the oven, this shepherd’s pie boasts a golden, cheesy crust that gives way to fluffy potatoes and a rich, savory filling. The lamb melds beautifully with the aromatic vegetables, creating a depth of flavor that’s both hearty and refined. For a creative twist, serve individual portions in ramekins or top with a sprinkle of fresh parsley for a vibrant finish.
Spaghetti Carbonara with Crisp Bacon

Ooh, you know those nights when you want something comforting but don’t want to spend hours in the kitchen? This spaghetti carbonara with crisp bacon is your answer—it’s creamy, savory, and ready in about the time it takes to boil pasta. You’ll love how the salty bacon pairs with that rich egg sauce.
Serving: 4 | Pre Time: 10 minutes | Cooking Time: 20 minutes
3
servings10
minutes20
minutesIngredients
– 1 lb dried spaghetti
– 8 oz thick-cut bacon, cut into ½-inch lardons
– 3 large pasture-raised eggs, lightly beaten
– ¾ cup finely grated Pecorino Romano cheese
– ½ cup finely grated Parmigiano-Reggiano cheese
– 2 tbsp extra-virgin olive oil
– 4 cloves garlic, minced
– 1 tsp freshly cracked black pepper
– ½ tsp kosher salt
Instructions
1. Bring a large pot of salted water to a rolling boil over high heat.
2. Add the spaghetti and cook according to package directions until al dente, about 8–10 minutes, stirring occasionally to prevent sticking.
3. While the pasta cooks, heat the olive oil in a large skillet over medium heat until shimmering, about 2 minutes.
4. Add the bacon lardons and cook, stirring frequently, until crisp and golden brown, about 6–8 minutes.
5. Using a slotted spoon, transfer the bacon to a paper towel-lined plate, leaving the rendered fat in the skillet.
6. Reduce the heat to low and add the minced garlic to the skillet, sautéing until fragrant and lightly golden, about 1 minute, to avoid burning.
7. In a medium bowl, whisk together the lightly beaten eggs, Pecorino Romano, Parmigiano-Reggiano, black pepper, and kosher salt until smooth.
8. Drain the spaghetti, reserving 1 cup of the pasta cooking water.
9. Immediately add the hot spaghetti to the skillet with the garlic-infused fat, tossing to coat evenly.
10. Remove the skillet from the heat and quickly pour in the egg mixture, stirring vigorously with tongs to create a creamy emulsion without scrambling the eggs.
11. Gradually add reserved pasta water, ¼ cup at a time, until the sauce reaches a silky consistency that coats the pasta, about ½ cup total.
12. Fold in the crisp bacon lardons, reserving a few for garnish.
13. Serve immediately in warmed bowls, topped with the reserved bacon and an extra sprinkle of cheese.
The texture is luxuriously creamy with a slight bite from the al dente pasta, while the crisp bacon adds a smoky crunch. For a twist, try serving it with a side of sautéed bitter greens like escarole to balance the richness—it’s a simple upgrade that makes this classic feel new again.
Old-Fashioned Potato Salad with Dill
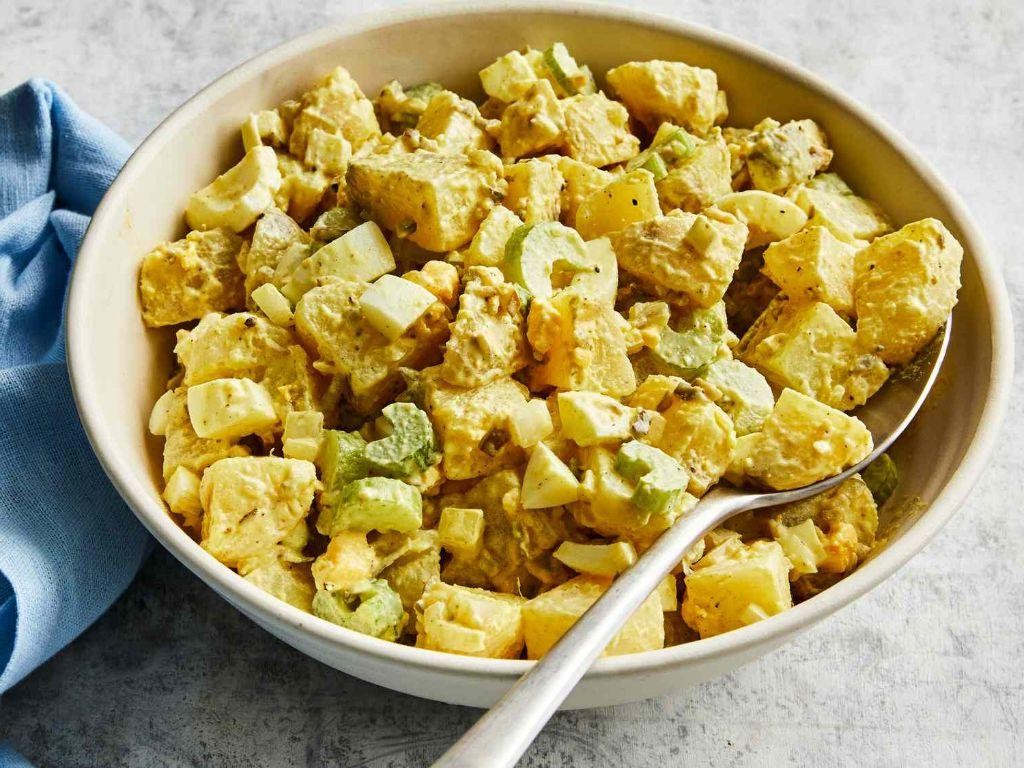
Dive into a classic that never goes out of style. This creamy, herby potato salad is perfect for picnics, potlucks, or just a cozy weeknight side. You’ll love how the fresh dill brightens up every bite.
Serving: 6 | Pre Time: 20 minutes | Cooking Time: 15 minutes
6
servings20
minutes15
minutesIngredients
– 2 pounds Yukon Gold potatoes, peeled and cut into ¾-inch cubes
– 4 pasture-raised eggs
– ¾ cup mayonnaise
– ¼ cup sour cream
– 2 tablespoons Dijon mustard
– ¼ cup finely chopped fresh dill
– ¼ cup finely chopped red onion
– 2 celery stalks, finely diced
– 1 teaspoon celery seed
– ½ teaspoon smoked paprika
– Kosher salt and freshly ground black pepper
Instructions
1. Place the peeled and cubed Yukon Gold potatoes in a large pot and cover with cold water by 1 inch. Add 1 tablespoon of kosher salt to the water.
2. Bring the pot to a boil over high heat, then reduce to a simmer and cook the potatoes for 12-15 minutes, or until they are fork-tender but not mushy.
3. While the potatoes cook, place the pasture-raised eggs in a separate saucepan, cover with cold water, and bring to a boil over high heat.
4. Once boiling, remove the saucepan from heat, cover, and let the eggs sit for 10 minutes for perfectly hard-boiled yolks.
5. Drain the cooked potatoes in a colander and spread them in a single layer on a baking sheet to cool for 10 minutes, which helps prevent them from becoming gummy.
6. Transfer the cooled potatoes to a large mixing bowl.
7. Peel the hard-boiled eggs under cold running water for easier shell removal, then chop them into ½-inch pieces.
8. Add the chopped eggs to the bowl with the potatoes.
9. In a separate medium bowl, whisk together the mayonnaise, sour cream, and Dijon mustard until fully combined and smooth.
10. Stir the finely chopped fresh dill, red onion, diced celery, celery seed, and smoked paprika into the dressing mixture.
11. Pour the dressing over the potatoes and eggs, then gently fold everything together with a rubber spatula until evenly coated, being careful not to break up the potatoes.
12. Season the salad with kosher salt and freshly ground black pepper to your preference, starting with ½ teaspoon of salt and ¼ teaspoon of pepper, then adjust after tasting.
13. Cover the bowl with plastic wrap and refrigerate the potato salad for at least 1 hour to allow the flavors to meld, which enhances the overall taste.
14. Before serving, give the salad a final gentle stir and check the seasoning, adding more salt or pepper if needed.
15. Transfer the potato salad to a serving dish.
Ultimately, you’ll get a salad with tender potato chunks, creamy dressing, and pops of fresh herb flavor. The dill adds a lovely aromatic note that pairs beautifully with the smoky paprika. Try serving it alongside grilled sausages or as a topping for an open-faced sandwich for a creative twist.
Savory Garlic Mashed Potatoes

Nothing beats a cozy side dish that feels like a warm hug, and these savory garlic mashed potatoes are exactly that. You’ll love how the roasted garlic melts right into creamy potatoes, making them the ultimate comfort food for any dinner table.
Serving: 6 | Pre Time: 15 minutes | Cooking Time: 45 minutes
6
servings15
minutes45
minutesIngredients
– 3 pounds Yukon Gold potatoes, peeled and quartered
– 1 whole head of garlic
– 1 tablespoon extra-virgin olive oil
– 1 cup heavy cream, warmed to 180°F
– ½ cup unsalted butter, cubed and at room temperature
– 1 teaspoon kosher salt
– ½ teaspoon freshly ground black pepper
– 2 tablespoons fresh chives, finely chopped
Instructions
1. Preheat your oven to 400°F.
2. Slice the top off the head of garlic to expose the cloves, drizzle with extra-virgin olive oil, wrap tightly in aluminum foil, and roast for 30 minutes until soft and golden.
3. While the garlic roasts, place the peeled and quartered Yukon Gold potatoes in a large pot, cover with cold water by 2 inches, and add 1 teaspoon of kosher salt.
4. Bring the pot to a boil over high heat, then reduce to a simmer and cook for 15–20 minutes until the potatoes are fork-tender.
5. Drain the potatoes thoroughly in a colander and return them to the warm pot to evaporate excess moisture, which prevents a watery texture.
6. Squeeze the roasted garlic cloves from their skins into a small bowl and mash into a paste with a fork.
7. Pass the drained potatoes through a ricer or food mill into a large mixing bowl for a silky-smooth consistency.
8. Gently fold in the roasted garlic paste, warmed heavy cream, and cubed unsalted butter until fully incorporated and creamy.
9. Season with the remaining kosher salt and freshly ground black pepper, adjusting gradually to avoid over-salting.
10. Garnish with finely chopped fresh chives just before serving to maintain their vibrant color and fresh flavor.
Out of this world creamy and rich, these potatoes have a velvety texture that clings to your fork, with the deep, mellow sweetness of roasted garlic shining through. Try swirling in a dollop of crème fraîche or topping with crispy fried shallots for an elegant twist that’ll impress at holiday gatherings.
Delightful Apple Crisp with Oat Topping
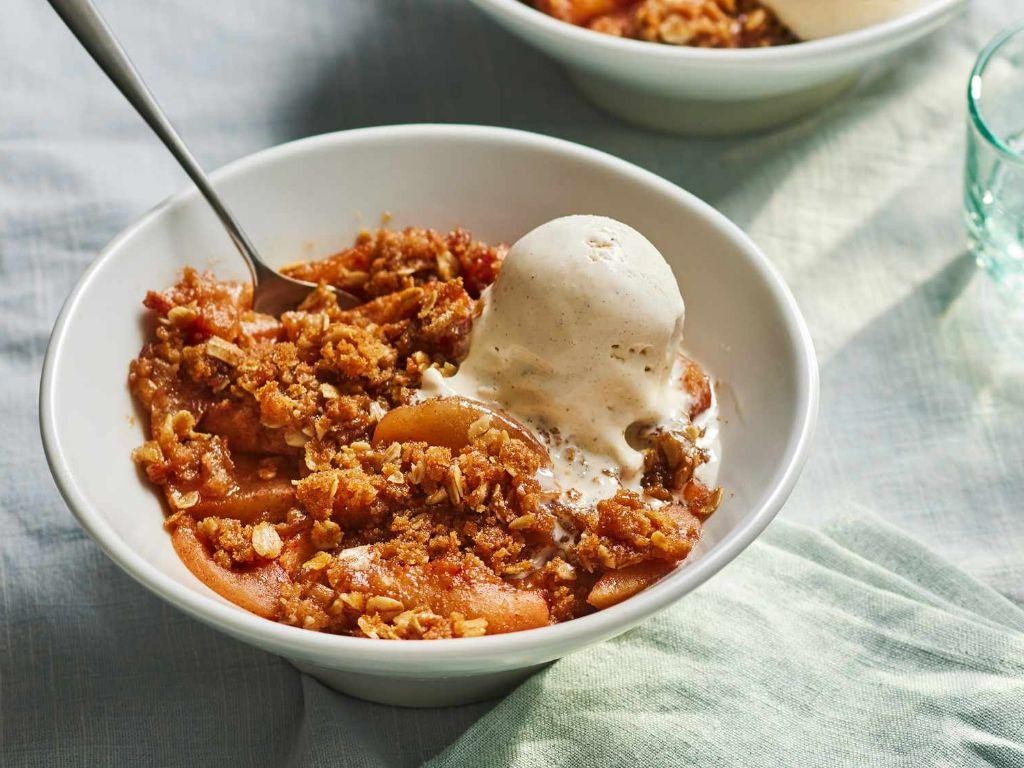
A cozy apple crisp with a crunchy oat topping is exactly what you need on a chilly day. It’s simple to make and fills your kitchen with the most comforting aroma. You’ll love how the sweet, tender apples pair with that buttery, crisp topping.
Serving: 6 | Pre Time: 20 minutes | Cooking Time: 45 minutes
6
servings20
minutes45
minutesIngredients
– 6 medium Granny Smith apples, peeled, cored, and thinly sliced
– 1/2 cup granulated sugar
– 1 tablespoon fresh lemon juice
– 1 teaspoon ground cinnamon
– 1/4 teaspoon freshly grated nutmeg
– 1 cup old-fashioned rolled oats
– 3/4 cup all-purpose flour
– 3/4 cup packed light brown sugar
– 1/2 teaspoon kosher salt
– 1/2 cup unsalted butter, cold and cut into small cubes
Instructions
1. Preheat your oven to 375°F (190°C) and lightly grease a 9-inch square baking dish with butter.
2. In a large mixing bowl, combine the sliced Granny Smith apples, granulated sugar, fresh lemon juice, ground cinnamon, and freshly grated nutmeg until the apples are evenly coated.
3. Transfer the apple mixture to the prepared baking dish, spreading it into an even layer.
4. In a separate bowl, whisk together the old-fashioned rolled oats, all-purpose flour, packed light brown sugar, and kosher salt.
5. Add the cold, cubed unsalted butter to the oat mixture. Using your fingertips or a pastry cutter, work the butter into the dry ingredients until the mixture resembles coarse crumbs with some pea-sized pieces remaining. Tip: Keep the butter cold for a flakier topping.
6. Sprinkle the oat topping evenly over the apples in the baking dish, covering them completely.
7. Place the baking dish on the middle rack of the preheated oven and bake for 40-45 minutes. Tip: Bake until the topping is golden brown and the filling is bubbling around the edges.
8. Remove the crisp from the oven and let it cool on a wire rack for at least 15 minutes before serving. Tip: This resting time allows the juices to thicken slightly for easier serving.
9. Serve the apple crisp warm, optionally with a scoop of vanilla ice cream or a dollop of freshly whipped cream.
For the perfect finish, this crisp offers a delightful contrast between the soft, spiced apples and the crunchy, buttery oat topping. Fresh from the oven, it’s wonderfully comforting with a hint of caramel from the brown sugar. Try serving it alongside a sharp cheddar cheese for a savory twist that highlights the apples’ natural tartness.
Crispy Oven-Baked Chicken Tenders

Gather around, friends—let’s talk about the ultimate comfort food upgrade. You know those crispy, golden chicken tenders you crave? We’re making them oven-baked, so they’re just as satisfying but way easier and healthier. No deep-fryer needed, just a simple method that delivers crunch in every bite.
Serving: 4 | Pre Time: 15 minutes | Cooking Time: 20 minutes
5
servings15
minutes20
minutesIngredients
– 1.5 pounds boneless, skinless chicken breasts, cut into 1-inch strips
– 1 cup all-purpose flour
– 2 large pasture-raised eggs, lightly beaten
– 1.5 cups panko breadcrumbs
– 1/4 cup grated Parmigiano-Reggiano cheese
– 1 teaspoon smoked paprika
– 1/2 teaspoon garlic powder
– 1/2 teaspoon onion powder
– 1/4 teaspoon cayenne pepper
– 1/2 teaspoon kosher salt
– 1/4 teaspoon freshly ground black pepper
– 2 tablespoons clarified butter, melted
– Cooking spray
Instructions
1. Preheat your oven to 425°F and line a baking sheet with parchment paper.
2. Pat the chicken strips dry with paper towels to ensure the coating adheres properly.
3. In a shallow dish, combine the flour, smoked paprika, garlic powder, onion powder, cayenne pepper, kosher salt, and black pepper.
4. In a second shallow dish, place the lightly beaten pasture-raised eggs.
5. In a third shallow dish, mix the panko breadcrumbs and grated Parmigiano-Reggiano cheese.
6. Dredge each chicken strip in the flour mixture, shaking off any excess.
7. Dip the floured chicken into the beaten eggs, allowing any excess to drip off.
8. Press the chicken firmly into the panko-Parmigiano mixture, coating all sides evenly.
9. Arrange the coated chicken strips on the prepared baking sheet in a single layer, leaving space between them.
10. Lightly brush the tops of the chicken strips with the melted clarified butter for enhanced browning.
11. Bake in the preheated oven for 10 minutes.
12. Flip the chicken tenders using tongs and bake for an additional 8–10 minutes, until the internal temperature reaches 165°F and the coating is golden brown and crispy.
13. Remove from the oven and let rest for 5 minutes on the baking sheet to allow the crust to set.
Outcome: These tenders emerge with a shatteringly crisp exterior that gives way to juicy, tender chicken inside. The hint of smoked paprika and Parmigiano-Reggiano adds a savory depth that’s irresistible. Serve them stacked high with a side of honey mustard or tucked into a soft brioche bun for a gourmet twist on a classic sandwich.
Hearty Chili Con Carne
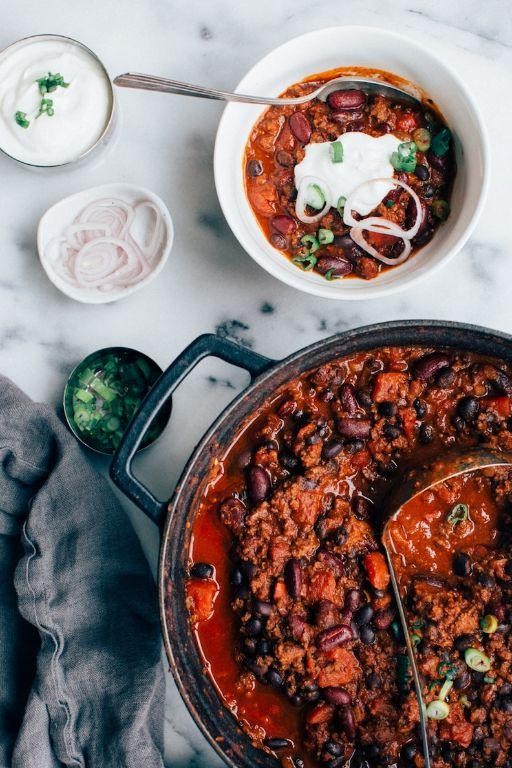
There’s nothing quite like a big pot of chili to warm you up on a chilly day. This hearty chili con carne is packed with flavor and comes together easily—perfect for a cozy weeknight dinner or a casual gathering with friends. You’ll love how the spices meld together as it simmers.
Serving: 6 | Pre Time: 15 minutes | Cooking Time: 90 minutes
6
servings15
minutes90
minutesIngredients
– 2 tablespoons extra-virgin olive oil
– 1 large yellow onion, finely diced
– 3 cloves garlic, minced
– 1 pound ground beef (80/20 blend)
– 1 tablespoon chili powder
– 1 teaspoon ground cumin
– 1 teaspoon smoked paprika
– 1/2 teaspoon dried oregano
– 1/4 teaspoon cayenne pepper
– 1 (28-ounce) can crushed tomatoes
– 1 (15-ounce) can kidney beans, drained and rinsed
– 1 (15-ounce) can pinto beans, drained and rinsed
– 1 cup beef broth
– 1 teaspoon kosher salt
– 1/2 teaspoon freshly ground black pepper
– 1 tablespoon apple cider vinegar
– Fresh cilantro, chopped, for garnish
– Shredded sharp cheddar cheese, for serving
– Sour cream, for serving
Instructions
1. Heat 2 tablespoons extra-virgin olive oil in a large Dutch oven or heavy-bottomed pot over medium heat until shimmering, about 2 minutes.
2. Add 1 large yellow onion, finely diced, and sauté until translucent and softened, about 5 minutes, stirring occasionally.
3. Stir in 3 cloves garlic, minced, and cook until fragrant, about 1 minute, to release its aromatic oils.
4. Add 1 pound ground beef (80/20 blend) to the pot, breaking it up with a wooden spoon, and cook until browned and no pink remains, about 8 minutes, draining any excess fat if desired for a leaner chili.
5. Sprinkle 1 tablespoon chili powder, 1 teaspoon ground cumin, 1 teaspoon smoked paprika, 1/2 teaspoon dried oregano, and 1/4 teaspoon cayenne pepper over the beef, stirring to coat evenly and toast the spices for 1 minute to deepen their flavors.
6. Pour in 1 (28-ounce) can crushed tomatoes, 1 (15-ounce) can kidney beans (drained and rinsed), 1 (15-ounce) can pinto beans (drained and rinsed), and 1 cup beef broth, stirring to combine all ingredients.
7. Season with 1 teaspoon kosher salt and 1/2 teaspoon freshly ground black pepper, stirring well to distribute.
8. Bring the mixture to a boil over high heat, then reduce the heat to low, cover the pot partially, and simmer for 1 hour, stirring every 15 minutes to prevent sticking and allow the flavors to meld.
9. After 1 hour, stir in 1 tablespoon apple cider vinegar to brighten the chili, and simmer uncovered for an additional 15 minutes to thicken slightly.
10. Taste and adjust seasoning if needed, then remove from heat.
11. Ladle the chili into bowls and garnish with fresh cilantro, chopped, shredded sharp cheddar cheese, and a dollop of sour cream for serving.
Velvety and rich, this chili boasts a deep, smoky flavor with a hint of heat from the cayenne. Serve it over a bed of fluffy rice or with warm cornbread for a complete meal that’s sure to satisfy.
Sweet and Tangy Pulled Pork Sandwiches
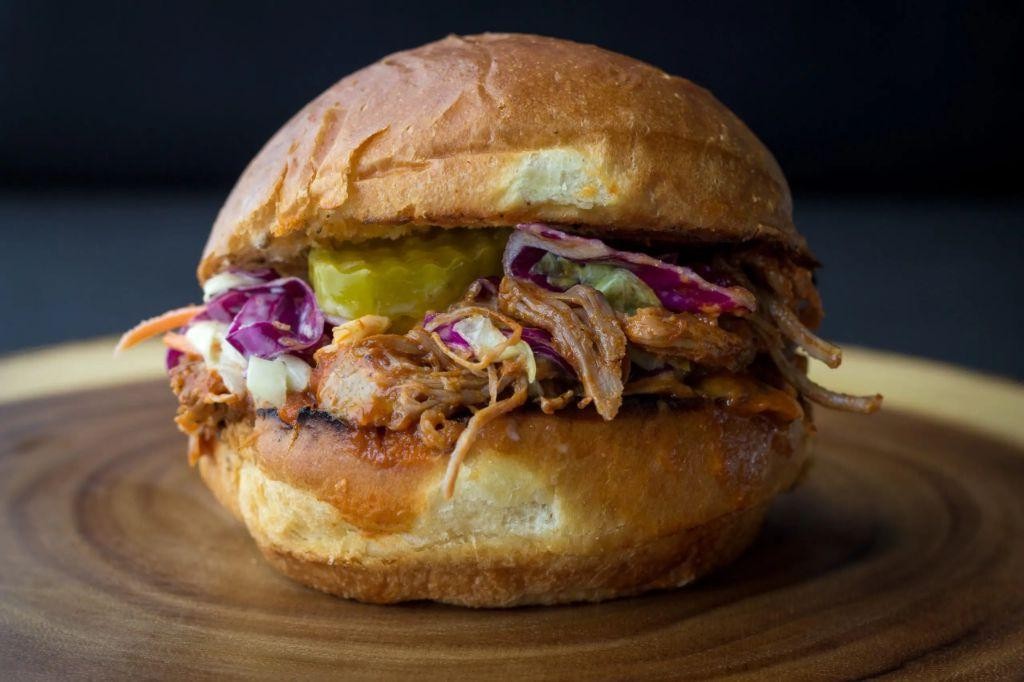
Unexpectedly simple yet incredibly flavorful, these pulled pork sandwiches will become your new go-to for casual gatherings. You’ll love how the sweet and tangy sauce caramelizes into a sticky glaze, creating tender shreds of pork that practically melt on your tongue. Just imagine piling it high on soft buns with a crisp slaw for the perfect bite.
Serving: 8 | Pre Time: 20 minutes | Cooking Time: 8 hours
8
sandwiches20
minutes485
minutesIngredients
– 4 lb bone-in pork shoulder roast, trimmed of excess fat
– 2 tbsp extra-virgin olive oil
– 1 cup ketchup
– ½ cup apple cider vinegar
– ¼ cup dark brown sugar, firmly packed
– 2 tbsp Worcestershire sauce
– 2 tbsp Dijon mustard
– 1 tbsp smoked paprika
– 2 tsp garlic powder
– 1 tsp onion powder
– ½ tsp cayenne pepper
– 8 soft brioche buns, split and lightly toasted
– 2 cups prepared coleslaw mix
Instructions
1. Preheat your oven to 300°F (149°C).
2. Pat the pork shoulder completely dry with paper towels to ensure proper browning.
3. Heat the extra-virgin olive oil in a large Dutch oven over medium-high heat until shimmering.
4. Sear the pork shoulder on all sides until deeply browned, about 4-5 minutes per side.
5. While the pork sears, whisk together ketchup, apple cider vinegar, dark brown sugar, Worcestershire sauce, Dijon mustard, smoked paprika, garlic powder, onion powder, and cayenne pepper in a medium bowl.
6. Pour the sauce mixture over the seared pork shoulder in the Dutch oven, scraping the bottom to incorporate any browned bits.
7. Cover the Dutch oven tightly with its lid and transfer to the preheated oven.
8. Braise the pork for 7-8 hours until the meat easily shreds with two forks, checking at the 7-hour mark for doneness.
9. Carefully remove the Dutch oven from the oven and transfer the pork to a large cutting board, reserving the cooking liquid in the pot.
10. Using two forks, shred the pork into bite-sized pieces, discarding any large fat deposits and the bone.
11. Skim excess fat from the surface of the reserved cooking liquid with a spoon.
12. Return the shredded pork to the Dutch oven and toss with the reduced sauce until thoroughly coated.
13. Toast the split brioche buns in a dry skillet over medium heat until golden brown, about 1-2 minutes per side.
14. Assemble sandwiches by piling the saucy pulled pork onto the bottom buns, topping with prepared coleslaw mix, and finishing with the top buns.
Succulent and complex, the pork develops a beautiful bark-like exterior while staying impossibly moist inside. The sauce reduces to a glossy, finger-licking glaze that balances sweet molasses notes with bright vinegar acidity. For a fun twist, try serving the pulled pork over crispy waffle fries or stuffed into warm flour tortillas with pickled red onions.
Golden Buttermilk Pancakes

Unbelievably fluffy and golden, these buttermilk pancakes are the weekend breakfast you’ve been dreaming about. You’ll love how simple they come together with just a few pantry staples, delivering that classic diner-style stack right at home. They’re perfect for lazy mornings when you want something special without too much fuss.
Serving: 4 | Pre Time: 10 minutes | Cooking Time: 15 minutes
2
servings10
minutes15
minutesIngredients
– 1 ½ cups all-purpose flour
– 2 tablespoons granulated sugar
– 1 teaspoon baking powder
– ½ teaspoon baking soda
– ¼ teaspoon fine sea salt
– 1 ¼ cups whole buttermilk
– 1 large pasture-raised egg, lightly beaten
– 2 tablespoons unsalted butter, melted and cooled slightly
– 1 teaspoon pure vanilla extract
– Clarified butter for cooking
Instructions
1. In a large mixing bowl, whisk together the all-purpose flour, granulated sugar, baking powder, baking soda, and fine sea salt until fully combined.
2. In a separate medium bowl, combine the whole buttermilk, lightly beaten pasture-raised egg, melted unsalted butter, and pure vanilla extract, whisking until smooth.
3. Pour the wet ingredients into the dry ingredients and gently fold with a spatula until just incorporated, leaving a few small lumps; overmixing can lead to tough pancakes.
4. Preheat a non-stick griddle or large skillet over medium heat (approximately 350°F) and lightly coat the surface with clarified butter.
5. For each pancake, ladle ¼ cup of batter onto the hot griddle, spacing them about 2 inches apart to allow for spreading.
6. Cook until bubbles form on the surface and the edges appear set, about 2–3 minutes, then flip carefully with a spatula.
7. Cook the second side until golden brown and cooked through, about 1–2 minutes more, adjusting heat if needed to prevent burning.
8. Transfer cooked pancakes to a wire rack in a single layer to prevent sogginess, repeating with remaining batter and adding clarified butter as necessary.
9. Serve immediately while warm. Delightfully tender and rich with a subtle tang from the buttermilk, these pancakes boast a light, airy crumb that pairs beautifully with maple syrup or fresh berries. For a creative twist, try layering them with whipped cream and seasonal fruit for an indulgent breakfast dessert.
Conclusion
Lovingly curated, these 22 family recipes are your ticket to delicious memories for any gathering. We hope you’ll whip up a few, share which ones become your new favorites in the comments below, and pin this article to your Pinterest boards to save for your next kitchen adventure!


