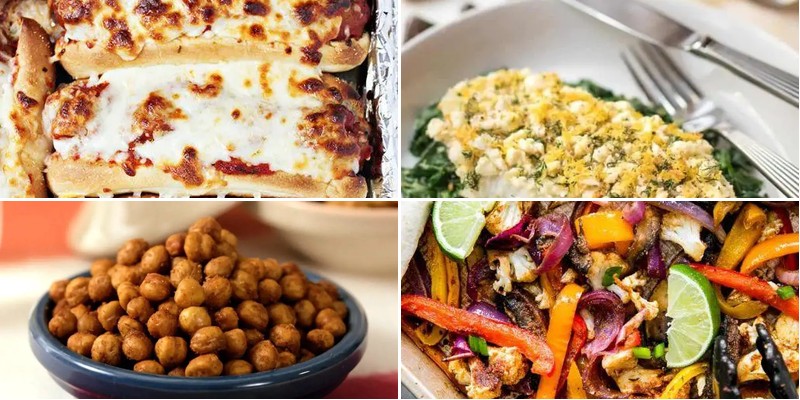
How many times have you stared into your fridge after a long day, wishing dinner would magically appear? We’ve all been there. That’s why we’ve gathered 23 fast oven recipes that turn simple ingredients into delicious meals with minimal effort. From cozy casseroles to perfectly roasted veggies, these dishes are your ticket to stress-free dinners. Ready to make your evenings easier? Let’s dive in!
Quick Roasted Chicken Thighs with Lemon and Herbs
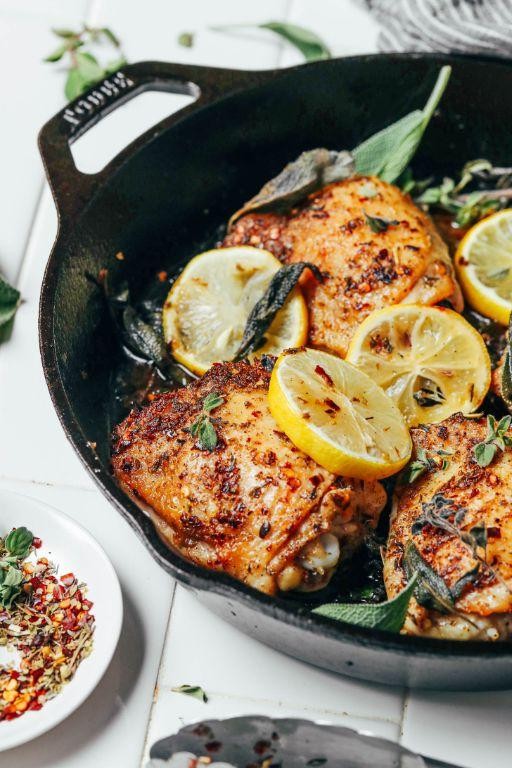
Perfectly roasted chicken thighs with bright lemon and aromatic herbs make for an effortless yet impressive weeknight dinner. Preparing this dish requires minimal hands-on time while yielding maximum flavor through simple techniques. Let’s walk through each step methodically to achieve crispy skin and juicy meat every time.
8
portions15
minutes40
minutesIngredients
- 8 bone-in, skin-on chicken thighs (approximately 3 pounds)
- 3 tablespoons extra-virgin olive oil
- 2 medium lemons, thinly sliced into rounds
- 4 fresh rosemary sprigs
- 6 fresh thyme sprigs
- 1 tablespoon Diamond Crystal kosher salt
- 1 teaspoon freshly cracked black pepper
- 4 garlic cloves, thinly sliced
Instructions
- Preheat your oven to 425°F and position one rack in the middle position.
- Pat the chicken thighs completely dry using paper towels, ensuring both skin and bone surfaces are moisture-free.
- Drizzle the olive oil evenly over all chicken pieces, rubbing to coat both sides thoroughly.
- Season the chicken uniformly with kosher salt and freshly cracked black pepper, concentrating seasoning on the skin side.
- Arrange the lemon slices in a single layer across the bottom of a 9×13-inch baking dish.
- Place the rosemary and thyme sprigs evenly distributed over the lemon layer.
- Nestle the chicken thighs skin-side up in the baking dish, ensuring they don’t overlap.
- Scatter the thinly sliced garlic cloves between the chicken pieces.
- Roast the chicken at 425°F for 35-40 minutes until the skin is deeply golden brown and crisp.
- Verify doneness by inserting an instant-read thermometer into the thickest part of a thigh, registering 165°F.
- Transfer the chicken to a wire rack set over a baking sheet to rest for 8 minutes before serving.
This resting period allows the juices to redistribute throughout the meat, resulting in exceptionally moist chicken. The high-heat roasting creates crackling-crisp skin while keeping the interior succulent and tender. Try serving these lemon-herb thighs over creamy polenta or alongside roasted root vegetables to soak up the flavorful pan juices.
Speedy Oven-Baked Salmon with Garlic Butter
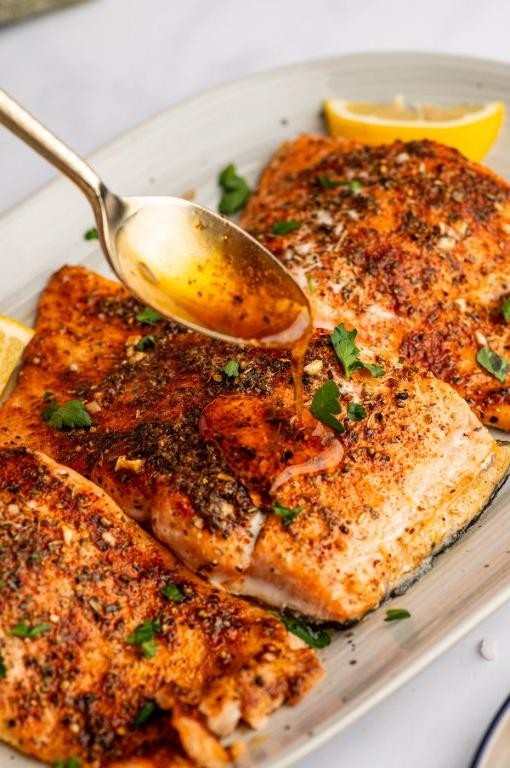
A perfectly cooked salmon fillet can transform an ordinary weeknight into something special with minimal effort. Achieving that flaky, moist interior and beautifully caramelized surface is simpler than you might think when you follow these precise steps. This method ensures consistent results every time, making it ideal for both novice cooks and seasoned home chefs looking for a reliable technique.
4
servings10
minutes16
minutesIngredients
- 1 ½ pounds wild-caught salmon fillet, skin-on, pin bones removed
- 3 tablespoons European-style unsalted butter, clarified
- 4 cloves fresh garlic, finely minced
- 1 tablespoon freshly squeezed lemon juice
- 1 teaspoon fine sea salt
- ½ teaspoon freshly cracked black pepper
- 1 tablespoon extra virgin olive oil
- 2 teaspoons fresh dill fronds, chopped
Instructions
- Position one oven rack in the center position and preheat your oven to 425°F (218°C) for even heat distribution.
- Pat the 1 ½ pounds wild-caught salmon fillet completely dry using paper towels to ensure proper browning.
- Brush a rimmed baking sheet evenly with 1 tablespoon extra virgin olive oil to prevent sticking.
- Place the salmon fillet skin-side down on the prepared baking sheet.
- Season the top of the salmon evenly with 1 teaspoon fine sea salt and ½ teaspoon freshly cracked black pepper.
- Combine 3 tablespoons clarified European-style unsalted butter, 4 cloves minced fresh garlic, and 1 tablespoon freshly squeezed lemon juice in a small saucepan.
- Warm the butter mixture over low heat for 2 minutes until fragrant but not browned, stirring constantly.
- Brush half of the warm garlic butter mixture evenly over the seasoned salmon fillet.
- Transfer the baking sheet to the preheated oven and bake for 12-14 minutes until the internal temperature reaches 125°F (52°C) for medium-rare.
- Remove the salmon from the oven and immediately brush with the remaining garlic butter mixture.
- Let the salmon rest on the baking sheet for 3 minutes to allow juices to redistribute.
- Sprinkle 2 teaspoons chopped fresh dill fronds over the salmon just before serving.
Here, the salmon develops a beautifully crisp exterior while maintaining a moist, flaky texture that separates cleanly with a fork. The clarified butter creates a rich, nutty base that carries the pungent garlic aroma without burning, while the fresh dill adds a bright, herbaceous finish. For an elegant presentation, serve atop creamy polenta or alongside roasted asparagus spears to complement the dish’s rich flavors.
Effortless Sheet Pan Veggie Fajitas

Whether you’re new to cooking or simply pressed for time, these sheet pan fajitas transform humble vegetables into a vibrant, satisfying meal with minimal cleanup. We’ll walk through each precise step together, ensuring perfectly caramelized vegetables and tender protein every single time. This methodical approach guarantees restaurant-quality results from your own kitchen.
8
servings15
minutes22
minutesIngredients
- 2 large pasture-raised chicken breasts, sliced against the grain into ½-inch strips
- 3 bell peppers (red, yellow, and orange), julienned into uniform ¼-inch strips
- 1 large sweet onion, thinly sliced pole to pole
- 3 tablespoons cold-pressed extra virgin olive oil
- 2 tablespoons freshly squeezed lime juice
- 4 cloves garlic, microplaned into paste
- 2 teaspoons smoked paprika
- 1 teaspoon ground cumin
- 1 teaspoon fine sea salt
- ½ teaspoon freshly cracked black pepper
- 8 warm flour tortillas
- ½ cup crumbled queso fresco
- ¼ cup fresh cilantro leaves, roughly chopped
- 1 ripe avocado, sliced
Instructions
- Position one oven rack in the upper third and another in the lower third of your oven, then preheat to 425°F.
- Combine sliced chicken, bell peppers, and onion in a large mixing bowl.
- Whisk together olive oil, lime juice, garlic paste, smoked paprika, cumin, sea salt, and black pepper in a small bowl until fully emulsified.
- Pour the marinade over the chicken and vegetables, using tongs to toss until every piece is evenly coated.
- Arrange the mixture in a single layer on a standard half-sheet pan, ensuring pieces don’t overlap for proper caramelization.
- Roast on the upper rack for 18-22 minutes, until chicken reaches 165°F internally and vegetable edges develop deep golden-brown char.
- Meanwhile, warm tortillas by placing them directly on the lower oven rack during the last 3 minutes of cooking.
- Transfer the sheet pan from the oven and let rest undisturbed for 3 minutes to allow juices to redistribute.
- Assemble fajitas by dividing the mixture evenly among warm tortillas.
- Garnish each fajita with crumbled queso fresco, fresh cilantro leaves, and avocado slices.
That caramelized edge on the peppers provides delightful sweetness against the smoky paprika-rubbed chicken. The warm tortillas become pliable vessels for the vibrant filling, while the cool avocado slices offer creamy contrast. For a creative twist, try serving the mixture over crisp romaine lettuce for a satisfying fajita salad that maintains all the essential textures.
Rapid Garlic-Roasted Potatoes
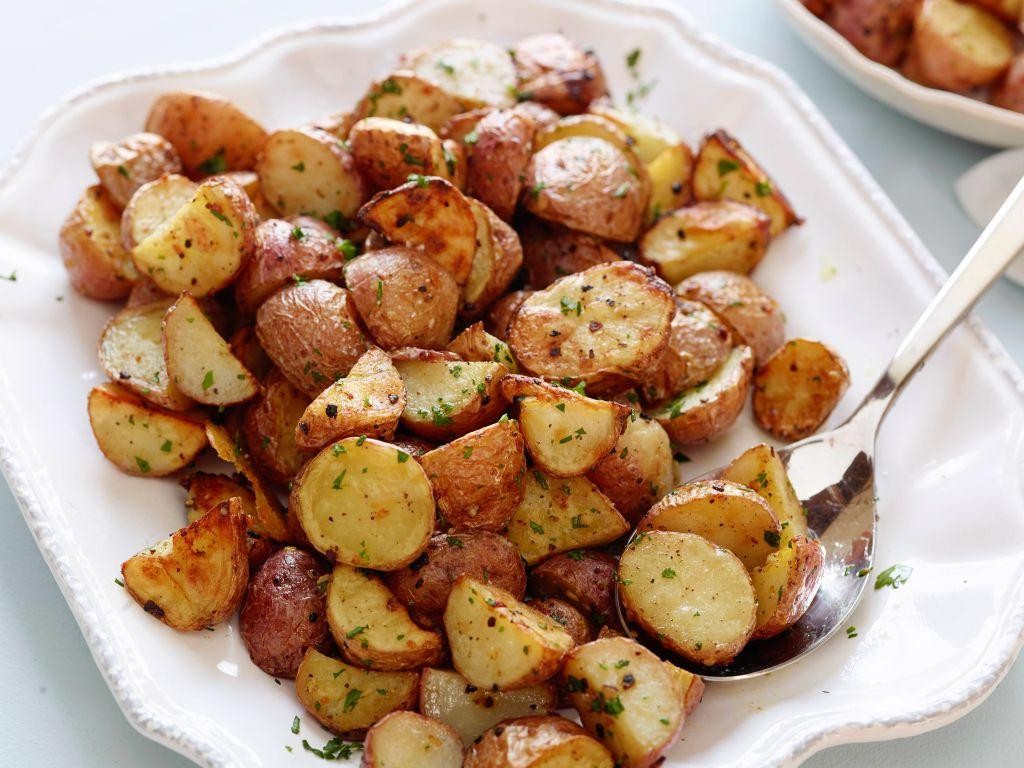
Sometimes the simplest preparations yield the most spectacular results, and these rapid garlic-roasted potatoes are proof—they transform humble spuds into crispy, golden perfection with minimal effort. Start by preheating your oven to 425°F to ensure a hot, even cooking environment from the moment the potatoes hit the pan.
2
servings10
minutes32
minutesIngredients
- 1 ½ pounds Yukon Gold potatoes, cut into 1-inch wedges
- 3 tablespoons clarified butter, melted
- 4 large garlic cloves, thinly sliced
- 1 teaspoon fine sea salt
- ½ teaspoon freshly cracked black pepper
- 2 tablespoons fresh rosemary leaves, finely chopped
Instructions
- Preheat your oven to 425°F and position a rack in the center for even heat distribution.
- Place the 1 ½ pounds of Yukon Gold potato wedges in a large mixing bowl.
- Drizzle the 3 tablespoons of melted clarified butter over the potatoes, tossing thoroughly to coat each wedge.
- Sprinkle the 1 teaspoon of fine sea salt and ½ teaspoon of freshly cracked black pepper evenly over the potatoes, tossing again to distribute the seasonings.
- Arrange the potatoes in a single layer on a rimmed baking sheet, ensuring they do not touch to promote crisping.
- Roast the potatoes for 20 minutes at 425°F, until the edges begin to turn light golden brown.
- Remove the baking sheet from the oven and scatter the 4 thinly sliced garlic cloves and 2 tablespoons of chopped fresh rosemary over the potatoes.
- Return the baking sheet to the oven and roast for an additional 10–12 minutes, until the potatoes are deeply golden and crisp on the exterior.
- Test for doneness by piercing a potato wedge with a fork; it should slide in easily with a tender interior.
Zesty and aromatic, these potatoes emerge with a crackling exterior that gives way to a fluffy, steam-kissed center. The thinly sliced garlic caramelizes into subtle sweetness, while the rosemary infuses each bite with earthy fragrance. For a vibrant twist, toss the finished potatoes with lemon zest and serve alongside grilled lamb chops or fold them into a breakfast hash with pasture-raised eggs.
Express Baked Ziti with Sausage and Cheese
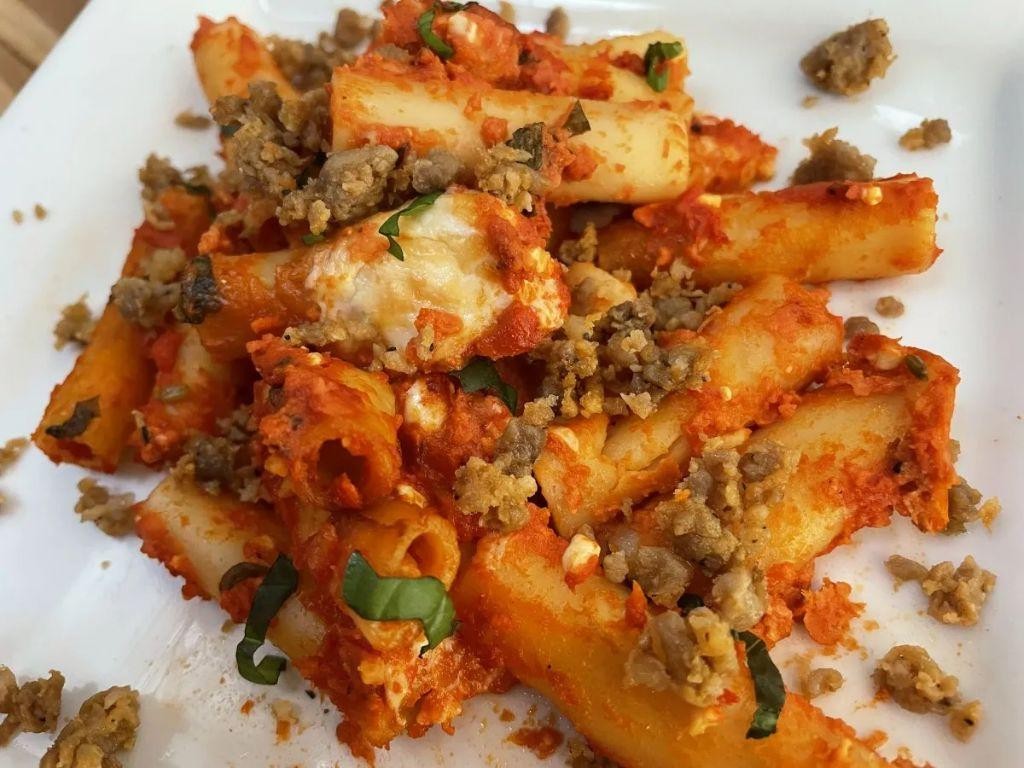
Zesty and satisfying, this express baked ziti transforms simple ingredients into a comforting masterpiece perfect for busy weeknights when you crave homemade Italian flavors without the lengthy preparation time.
6
servings15
minutes50
minutesIngredients
- 1 pound sweet Italian sausage, casings removed
- 2 tablespoons extra virgin olive oil
- 3 cloves garlic, finely minced
- 24 ounces high-quality marinara sauce
- 1 pound ziti pasta
- 15 ounces whole-milk ricotta cheese
- 8 ounces low-moisture mozzarella cheese, shredded
- 2 ounces Parmigiano-Reggiano cheese, freshly grated
- 1 large pasture-raised egg, lightly beaten
- ¼ cup fresh basil leaves, chiffonade-cut
- ½ teaspoon fine sea salt
- ¼ teaspoon freshly cracked black pepper
Instructions
- Preheat your oven to 375°F and position one rack in the center.
- Bring 4 quarts of heavily salted water to a rolling boil in a large stockpot.
- Heat extra virgin olive oil in a large skillet over medium-high heat until shimmering but not smoking.
- Add sweet Italian sausage, breaking it into small crumbles with a wooden spoon, and cook for 6-8 minutes until browned and cooked through.
- Stir in finely minced garlic and cook for 45 seconds until fragrant but not browned.
- Pour in marinara sauce, reduce heat to low, and simmer uncovered for 10 minutes to allow flavors to meld.
- Add ziti pasta to the boiling water and cook for 2 minutes less than package directions indicate for al dente texture.
- Drain pasta thoroughly but do not rinse, preserving the starch that helps the sauce adhere.
- In a medium bowl, combine whole-milk ricotta cheese, lightly beaten pasture-raised egg, fine sea salt, and freshly cracked black pepper, whisking until smooth.
- Fold half of the shredded low-moisture mozzarella and half of the freshly grated Parmigiano-Reggiano into the ricotta mixture.
- Combine the drained ziti with the sausage marinara sauce in the stockpot, tossing until every piece is coated.
- Transfer half of the pasta mixture to a 9×13-inch baking dish, spreading it into an even layer.
- Dollop the ricotta cheese mixture evenly over the pasta layer using a tablespoon.
- Top with remaining pasta mixture, spreading carefully to avoid disturbing the ricotta layer beneath.
- Sprinkle remaining mozzarella and Parmigiano-Reggiano cheeses evenly over the top surface.
- Bake on the center rack for 20-25 minutes until the cheese is golden and bubbly with slight browning at the edges.
- Remove from oven and let rest for 8 minutes to allow the layers to set properly before serving.
- Garnish with chiffonade-cut fresh basil leaves just before serving.
The finished ziti emerges with a beautifully crisp cheese crust giving way to tender pasta pockets and creamy ricotta layers beneath. Each bite delivers the robust sausage flavor mingled with the bright acidity of marinara, while the fresh basil provides an aromatic finish that cuts through the richness perfectly. For an elegant presentation, serve individual portions in shallow bowls with a drizzle of high-quality olive oil and extra basil scattered around the edges.
Instantaneous Herbed Pork Chops
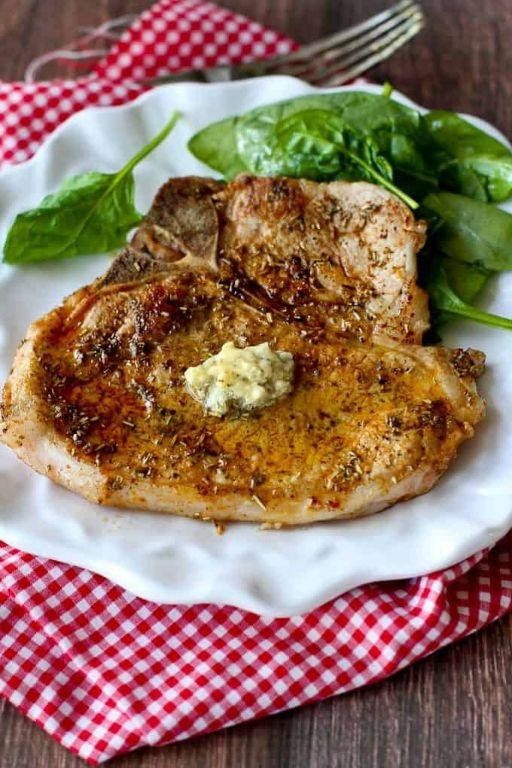
Versatile enough for weeknights yet elegant enough for company, these instantaneous herbed pork chops deliver restaurant-quality results with minimal effort. This method ensures perfectly cooked, juicy chops every time, making it an essential technique for any home cook’s repertoire.
5
servings10
minutes10
minutesIngredients
– 4 bone-in pork chops, 1-inch thick
– 2 tablespoons extra virgin olive oil
– 1 tablespoon clarified butter
– 2 teaspoons kosher salt
– 1 teaspoon freshly cracked black pepper
– 1 tablespoon fresh rosemary, finely minced
– 2 teaspoons fresh thyme leaves
– 3 garlic cloves, thinly sliced
– ¼ cup dry white wine
– ½ cup chicken stock, preferably homemade
– 1 tablespoon cold unsalted butter, cubed
Instructions
1. Pat pork chops completely dry with paper towels to ensure proper browning.
2. Season both sides of each chop evenly with kosher salt and freshly cracked black pepper.
3. Heat a large cast-iron skillet over medium-high heat until droplets of water sizzle and evaporate immediately.
4. Add extra virgin olive oil and clarified butter to the hot skillet, swirling to coat the surface.
5. Place pork chops in the skillet, leaving 1 inch of space between each for proper air circulation.
6. Sear without moving for 4 minutes until a deep golden-brown crust forms on the bottom.
7. Flip chops using tongs and cook for another 3 minutes on the second side.
8. Reduce heat to medium and add minced rosemary, thyme leaves, and thinly sliced garlic around the chops.
9. Cook for 30 seconds until fragrant, being careful not to burn the garlic.
10. Pour dry white wine into the skillet, scraping the bottom with a wooden spoon to deglaze.
11. Add chicken stock and bring to a simmer, then cook for 2 minutes to reduce slightly.
12. Transfer pork chops to a resting rack and let stand for 5 minutes to redistribute juices.
13. Whisk cold cubed butter into the pan sauce until emulsified and glossy.
14. Spoon the herbed pan sauce over the rested pork chops before serving.
Outstanding in both texture and flavor, these chops feature a crisp herb crust giving way to succulent, pink-centered meat. The pan sauce provides a bright, aromatic counterpoint that cuts through the richness beautifully. For a complete meal, serve alongside creamy polenta to soak up every drop of the flavorful jus, or slice and arrange over a bed of bitter greens for a sophisticated salad presentation.
Fast Baked Chicken Parmesan

Here’s a streamlined approach to creating a comforting Italian-American classic that delivers maximum flavor with minimal fuss. Having a reliable baked chicken parmesan recipe in your repertoire means you can whip up a satisfying, crowd-pleasing meal any night of the week. This method focuses on achieving a crispy, golden crust and perfectly melted cheese without the mess of deep-frying.
4
portions20
minutes26
minutesIngredients
- 1 ½ pounds boneless, skinless chicken breasts, pounded to ½-inch uniform thickness
- 1 cup all-purpose flour, for dredging
- 2 large pasture-raised eggs, lightly beaten
- 1 ½ cups panko breadcrumbs
- ½ cup finely grated Parmigiano-Reggiano cheese
- 1 teaspoon dried oregano
- ½ teaspoon garlic powder
- ½ teaspoon kosher salt
- ¼ teaspoon freshly ground black pepper
- 2 tablespoons extra-virgin olive oil
- 1 ½ cups high-quality marinara sauce
- 8 ounces low-moisture whole milk mozzarella, thinly sliced
- 2 tablespoons fresh basil leaves, chiffonade-cut
Instructions
- Preheat your conventional oven to 425°F and position a rack in the center.
- Place the pounded chicken breasts between two sheets of parchment paper to prevent tearing during preparation.
- Arrange three shallow bowls in an assembly line: one with flour, one with beaten eggs, and one with panko breadcrumbs mixed with Parmigiano-Reggiano, oregano, garlic powder, salt, and pepper.
- Dredge one chicken breast in flour, shaking off any excess to ensure a thin, even coating.
- Dip the floured chicken into the beaten eggs, allowing excess to drip back into the bowl.
- Press the chicken firmly into the breadcrumb mixture, ensuring complete coverage on all surfaces.
- Transfer the breaded chicken to a wire rack and repeat the process with remaining breasts.
- Heat olive oil in a large oven-safe skillet over medium-high heat until it shimmers, about 2 minutes.
- Carefully place breaded chicken in the hot skillet and cook for 3-4 minutes until the bottom develops a deep golden-brown crust.
- Flip each chicken breast using tongs and cook for another 3 minutes on the opposite side.
- Remove the skillet from heat and spoon marinara sauce evenly over each chicken breast.
- Arrange mozzarella slices in a single layer over the sauce-covered chicken.
- Transfer the skillet to the preheated oven and bake for 15-18 minutes until the cheese is bubbly and lightly spotted with brown.
- Remove the skillet from the oven and let the chicken rest for 5 minutes on a trivet to allow juices to redistribute.
- Sprinkle with fresh basil chiffonade just before serving.
You’ll notice the chicken emerges from the oven with a remarkably crisp exterior that holds its texture beneath the rich tomato sauce and molten cheese. The combination of nutty Parmigiano-Reggiano in the crust and creamy mozzarella topping creates a beautiful flavor harmony. For a restaurant-worthy presentation, serve each portion over al dente linguine with extra sauce and garnish with additional basil leaves.
Swift BBQ Chicken Pizza

On busy weeknights when time is precious but cravings demand satisfaction, this Swift BBQ Chicken Pizza delivers restaurant-quality results with minimal effort. Our methodical approach ensures even beginners can achieve that perfect balance of smoky, sweet, and savory flavors in under 30 minutes.
2
servings15
minutes14
minutesIngredients
- 1 pre-made pizza dough ball, room temperature
- ½ cup high-quality barbecue sauce, divided
- 1 cup shredded smoked Gouda cheese
- 1 cup cooked shredded rotisserie chicken
- ¼ small red onion, thinly sliced
- 2 tablespoons extra virgin olive oil
- 1 teaspoon smoked paprika
- ½ teaspoon garlic powder
- ¼ cup fresh cilantro leaves, for garnish
Instructions
- Preheat your oven to 475°F and place a pizza stone or baking sheet inside to heat for 15 minutes.
- Lightly flour your work surface and roll the pizza dough into a 12-inch circle using a rolling pin.
- Brush the entire dough surface with extra virgin olive oil using a pastry brush.
- Spread ¼ cup barbecue sauce evenly over the dough, leaving a ½-inch border around the edges.
- Sprinkle shredded smoked Gouda cheese uniformly over the sauce-covered area.
- Combine shredded rotisserie chicken with remaining ¼ cup barbecue sauce in a small bowl.
- Distribute the sauced chicken mixture evenly across the cheese layer.
- Scatter thinly sliced red onion over the chicken and cheese layers.
- Dust the entire pizza surface with smoked paprika and garlic powder.
- Carefully transfer the assembled pizza onto the preheated pizza stone using a pizza peel.
- Bake for 12-14 minutes until the crust is golden brown and cheese is bubbling.
- Remove from oven and let rest for 2 minutes before slicing.
- Garnish with fresh cilantro leaves just before serving.
Here you’ll find the crust achieves a satisfying crispness while maintaining a tender interior, complemented by the smoky Gouda melting into the tangy barbecue sauce. The shredded chicken stays remarkably juicy against the sharp bite of red onion, creating layers of texture in every bite. Consider serving alongside a crisp apple slaw or drizzling with spicy honey for an unexpected sweet heat contrast.
Efficient Oven-Baked Cod with Lemon Dill
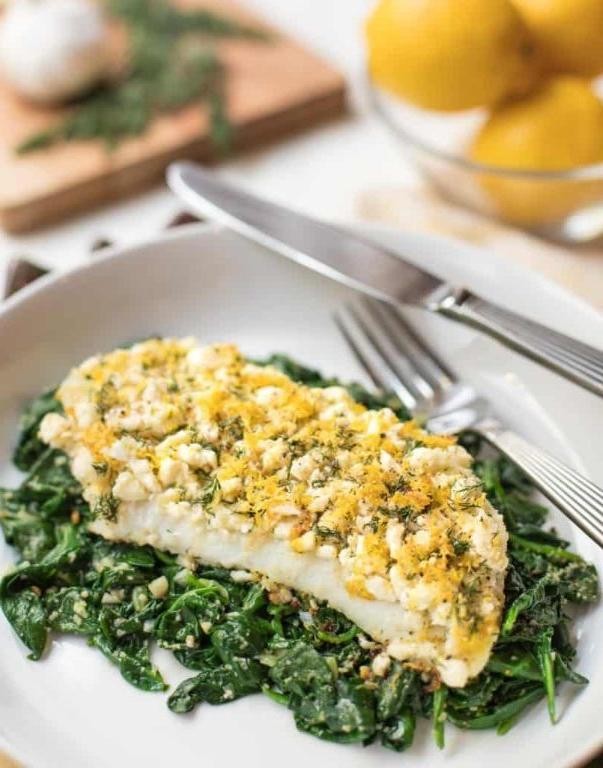
Getting perfectly cooked fish doesn’t require chef-level skills—just follow these precise steps for flaky, flavorful cod every time. Gather your ingredients and let’s create this simple yet sophisticated oven-baked cod that will become your new weeknight staple.
3
servings15
minutes14
minutesIngredients
- 1 ½ pounds fresh Atlantic cod fillets, skin removed
- 3 tablespoons clarified butter, melted
- 2 tablespoons freshly squeezed lemon juice
- 1 tablespoon extra virgin olive oil
- 2 teaspoons fresh dill fronds, finely chopped
- 1 teaspoon kosher salt
- ½ teaspoon freshly cracked black pepper
- ¼ teaspoon garlic powder
- 1 lemon, sliced into ¼-inch rounds
Instructions
- Preheat your oven to 400°F and position the rack in the center of the oven.
- Pat the cod fillets completely dry using paper towels to ensure proper browning.
- Brush a baking sheet with 1 tablespoon of extra virgin olive oil to prevent sticking.
- Arrange the cod fillets in a single layer on the prepared baking sheet, leaving 1 inch between each piece.
- Combine the melted clarified butter, freshly squeezed lemon juice, and remaining olive oil in a small bowl.
- Brush the butter-lemon mixture evenly over all surfaces of the cod fillets.
- Sprinkle the kosher salt, freshly cracked black pepper, and garlic powder evenly over the fillets.
- Distribute the finely chopped fresh dill fronds across the top of each fillet.
- Arrange the lemon slices in a single layer over the seasoned cod fillets.
- Place the baking sheet in the preheated oven and bake for 12-14 minutes until the internal temperature reaches 145°F.
- Remove the baking sheet from the oven when the fish flakes easily with a fork but remains moist.
- Let the cod rest for 3 minutes before serving to allow juices to redistribute.
Here’s what makes this dish special: the cod develops a delicate, flaky texture while the lemon-dill butter creates bright, herbaceous notes that permeate each bite. Serve it alongside roasted fingerling potatoes or over a bed of wild rice pilaf for a complete meal that feels restaurant-quality yet requires minimal effort.
Speedy Moroccan-Spiced Baked Chickpeas
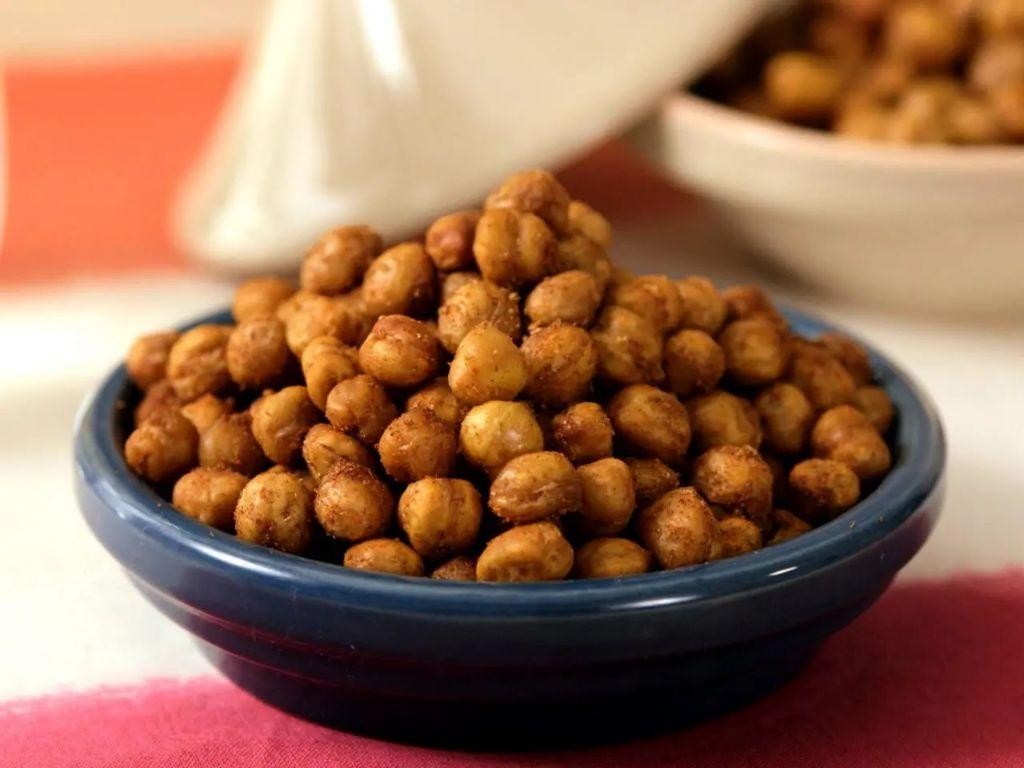
Developing a quick yet sophisticated snack requires strategic flavor layering, which these Moroccan-spiced baked chickpeas achieve through a carefully balanced spice blend and high-heat roasting. During preparation, you’ll notice how the chickpeas transform from soft legumes into crisp, protein-packed morsels with complex aromatic notes.
4
servings10
minutes30
minutesIngredients
- 2 (15-ounce) cans organic chickpeas, thoroughly drained and rinsed
- 2 tablespoons extra-virgin olive oil
- 1 tablespoon smoked paprika
- 2 teaspoons ground cumin
- 1 teaspoon ground coriander
- ½ teaspoon cayenne pepper
- 1 teaspoon fine sea salt
- ½ teaspoon freshly cracked black pepper
- 1 tablespoon freshly squeezed lemon juice
- 2 tablespoons chopped fresh cilantro leaves
Instructions
- Preheat your oven to 400°F and line a rimmed baking sheet with parchment paper.
- Pat the drained chickpeas completely dry using a clean kitchen towel, removing any loose skins that detach during drying.
- Transfer the dried chickpeas to a medium mixing bowl and drizzle with extra-virgin olive oil, tossing until evenly coated.
- Combine smoked paprika, ground cumin, ground coriander, cayenne pepper, fine sea salt, and freshly cracked black pepper in a small bowl.
- Sprinkle the spice mixture over the oiled chickpeas and toss vigorously until every chickpea is uniformly coated with spices.
- Spread the seasoned chickpeas in a single layer on your prepared baking sheet, ensuring they don’t overlap.
- Roast at 400°F for 25-30 minutes, shaking the pan halfway through cooking to promote even browning.
- Remove from oven when chickpeas are deeply golden and crisp, testing one chickpea to confirm it’s crunchy throughout.
- Immediately transfer the hot chickpeas to a clean bowl and drizzle with freshly squeezed lemon juice while still warm.
- Gently fold in chopped fresh cilantro leaves until evenly distributed.
Unbelievably crisp exteriors give way to tender interiors, creating perfect textural contrast against the warm, earthy spices with bright citrus notes. These chickpeas shine as a salad topping where their crunch complements soft greens, or serve them alongside yogurt dip for a dynamic appetizer that balances heat with cooling elements.
Quick-Roast Lemon Thyme Asparagus
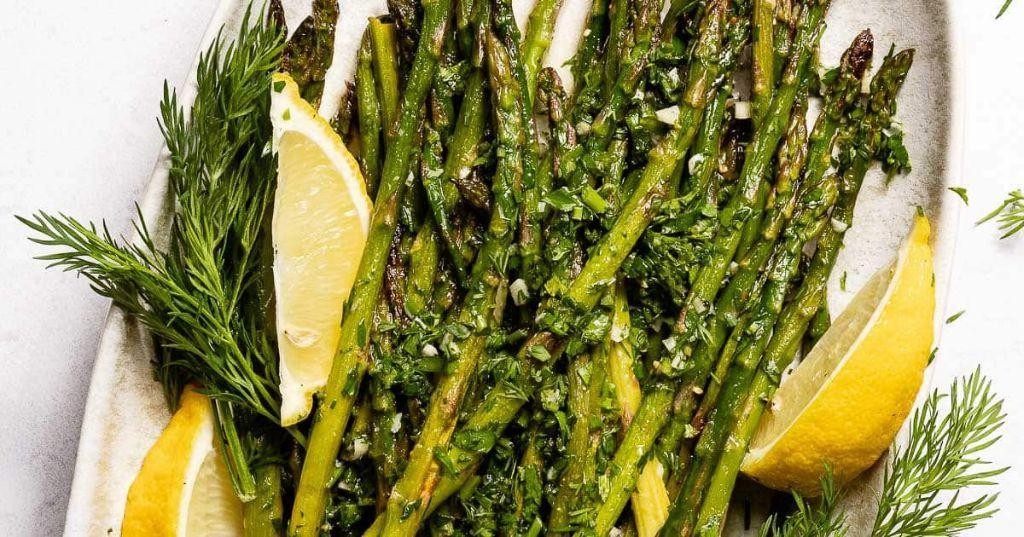
Baking vegetables properly transforms their texture and concentrates their natural sweetness, and this quick-roast method for asparagus delivers exceptional results with minimal effort. By combining high heat with precise timing, we’ll create tender-crisp spears with beautifully caramelized edges and bright herbal notes. Let’s walk through each step methodically to ensure perfect execution every time.
3
servings10
minutes14
minutesIngredients
- 1 pound fresh asparagus spears, woody ends trimmed
- 2 tablespoons extra virgin olive oil
- 1 tablespoon freshly squeezed lemon juice
- 1 teaspoon fresh thyme leaves, stripped from stems
- ½ teaspoon kosher salt
- ¼ teaspoon freshly cracked black pepper
- 2 tablespoons finely grated Parmigiano-Reggiano cheese
- 1 teaspoon lemon zest, finely grated
Instructions
- Preheat your oven to 425°F and position one rack in the upper third of the oven.
- Rinse 1 pound fresh asparagus spears under cold running water and pat completely dry with paper towels.
- Hold each asparagus spear at both ends and bend until the woody end snaps off naturally at the tender point.
- Arrange the trimmed asparagus spears in a single layer on a rimmed baking sheet.
- Drizzle 2 tablespoons extra virgin olive oil evenly over the asparagus spears.
- Sprinkle ½ teaspoon kosher salt and ¼ teaspoon freshly cracked black pepper uniformly across the asparagus.
- Using your hands, toss the asparagus spears thoroughly to coat each one completely with oil and seasonings.
- Spread the asparagus in a single layer with space between spears to ensure even roasting.
- Roast on the upper oven rack for 12-14 minutes until spears are tender when pierced with a fork and tips are lightly crisped.
- Remove the baking sheet from the oven and immediately drizzle 1 tablespoon freshly squeezed lemon juice over the hot asparagus.
- Sprinkle 1 teaspoon fresh thyme leaves evenly across the roasted asparagus spears.
- Garnish with 2 tablespoons finely grated Parmigiano-Reggiano cheese and 1 teaspoon lemon zest.
- Transfer the finished asparagus to a serving platter using tongs.
Creating this dish yields asparagus with a wonderful textural contrast between the crisp-tender stalks and slightly crunchy tips. The bright acidity from the lemon juice cuts through the richness of the olive oil while the thyme provides earthy undertones. Consider serving these spears alongside grilled salmon or folding them into a spring risotto for an elegant seasonal presentation.
Instant Oven-Baked Meatball Subs

Making these Instant Oven-Baked Meatball Subs transforms weeknight dinner into a comforting experience that feels both indulgent and effortless. My method ensures perfectly cooked meatballs and melty cheese every time, using straightforward techniques that build layers of flavor without complicated prep work.
2
sandwiches15
minutes32
minutesIngredients
- 1 pound 85% lean ground beef
- 1 large pasture-raised egg, lightly beaten
- ½ cup panko breadcrumbs
- ¼ cup whole milk
- 2 tablespoons extra virgin olive oil
- 1 teaspoon fine sea salt
- ½ teaspoon freshly cracked black pepper
- ½ teaspoon garlic powder
- ½ teaspoon dried oregano
- 24 ounces marinara sauce
- 4 sub rolls
- 8 slices provolone cheese
- 2 tablespoons unsalted butter, melted
- ¼ cup grated Parmigiano-Reggiano
Instructions
- Preheat your oven to 425°F and line a rimmed baking sheet with parchment paper.
- In a large mixing bowl, combine the panko breadcrumbs and whole milk, allowing them to soak for 2 minutes to create a panade that ensures tender meatballs.
- Add the ground beef, lightly beaten egg, sea salt, black pepper, garlic powder, and dried oregano to the breadcrumb mixture.
- Gently mix the ingredients with your hands until just combined, being careful not to overwork the meat, which can result in tough meatballs.
- Portion the mixture into 16 equal-sized meatballs, rolling them gently between your palms to form smooth spheres.
- Arrange the meatballs in a single layer on the prepared baking sheet, spacing them 1 inch apart for even browning.
- Drizzle the meatballs with extra virgin olive oil and bake at 425°F for 15 minutes, until the exteriors develop a golden-brown crust.
- Pour the marinara sauce over the partially cooked meatballs, coating them evenly.
- Return the baking sheet to the oven and continue baking for another 10 minutes, until the sauce is bubbling and the meatballs reach an internal temperature of 165°F.
- While the meatballs finish cooking, slice the sub rolls lengthwise without cutting completely through, creating a hinge.
- Brush the interior of each roll with melted unsalted butter and sprinkle with grated Parmigiano-Reggiano.
- Toast the prepared rolls in the oven for 3-4 minutes, until the edges are crisp and the cheese is lightly golden.
- Place 4 meatballs into each toasted sub roll, spooning extra sauce over the top.
- Layer 2 slices of provolone cheese over the meatballs in each sub.
- Return the assembled subs to the oven and bake for 3-4 minutes, until the cheese is fully melted and bubbly.
Creating these subs yields a wonderful contrast between the crisp, buttery roll exterior and the tender, juicy meatballs within. The provolone melts into a creamy blanket that complements the bright, herbaceous marinara sauce. Consider serving them with crisp dill pickle spears and potato chips for a satisfying textural balance that elevates this classic comfort food.
Rapid Balsamic Glazed Brussels Sprouts
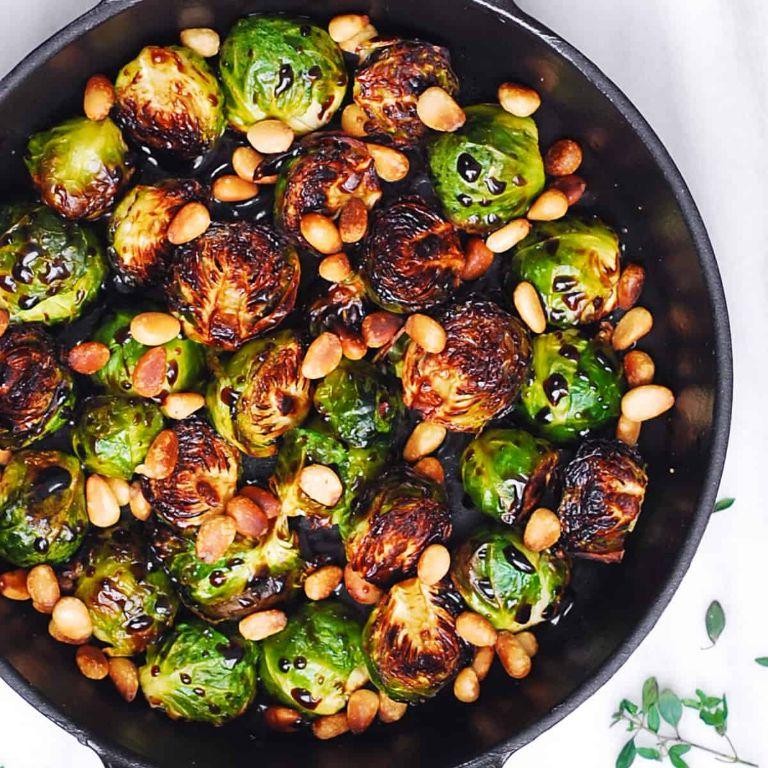
These rapid balsamic glazed Brussels sprouts transform the humble vegetable into a caramelized masterpiece with minimal effort. Trimmed Brussels sprouts halved lengthwise, 1 pound
Cold-pressed extra virgin olive oil, 2 tablespoons
Aged balsamic vinegar, 3 tablespoons
Raw wildflower honey, 1 tablespoon
Fine sea salt, 1 teaspoon
Freshly cracked black pepper, ½ teaspoon
Smoked paprika, ¼ teaspoon
Toasted pine nuts, 2 tablespoons
Fresh thyme leaves, 1 teaspoon
Instructions
1. Preheat your oven to 425°F and position a rack in the upper third.
2. Rinse 1 pound of Brussels sprouts under cold running water to remove any debris.
3. Pat the sprouts completely dry with a clean kitchen towel to ensure proper browning.
4. Trim the stem ends and remove any discolored outer leaves from each sprout.
5. Halve each Brussels sprout lengthwise through the core to create flat surfaces for caramelization.
6. In a large mixing bowl, whisk together 2 tablespoons of cold-pressed extra virgin olive oil, 3 tablespoons of aged balsamic vinegar, and 1 tablespoon of raw wildflower honey until emulsified.
7. Add 1 teaspoon of fine sea salt, ½ teaspoon of freshly cracked black pepper, and ¼ teaspoon of smoked paprika to the glaze mixture.
8. Toss the halved Brussels sprouts in the glaze mixture until each piece is thoroughly coated.
9. Arrange the sprouts in a single layer on a parchment-lined baking sheet, cut-side down for maximum browning.
10. Roast at 425°F for 18-20 minutes until the edges are deeply caramelized and the cores are fork-tender.
11. While roasting, toast 2 tablespoons of pine nuts in a dry skillet over medium heat for 3-4 minutes until golden and fragrant.
12. Remove the sprouts from the oven when they achieve a dark caramel color with crispy edges.
13. Transfer the roasted sprouts to a serving platter and immediately garnish with the toasted pine nuts and 1 teaspoon of fresh thyme leaves.
A perfect balance emerges between the sprouts’ caramelized sweetness and the balsamic’s acidic depth, creating crispy-edged morsels with tender centers. The toasted pine nuts add buttery crunch while the thyme provides aromatic freshness, making this dish equally stunning as a holiday side or elevated weeknight vegetable.
Conclusion
Many mouthwatering meals await in this collection of 23 fast oven recipes! Whether you’re short on time or simply craving something delicious, these dishes make weeknight cooking a breeze. I’d love to hear which recipes become your family favorites—drop a comment below and don’t forget to pin this article to your Pinterest boards for easy access to quick, satisfying meals!


