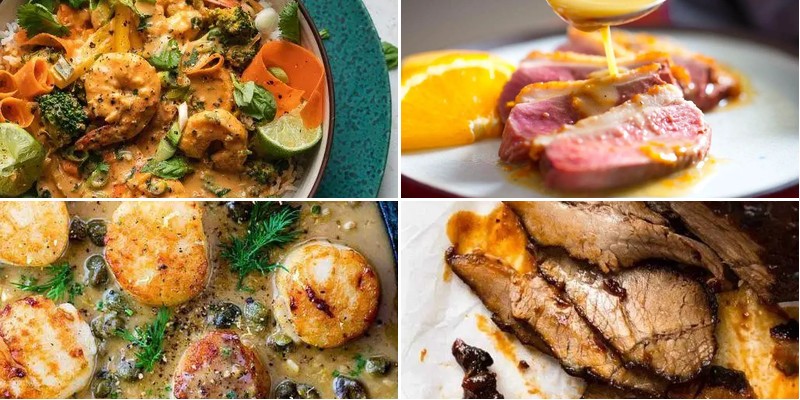
Gathering friends or family for a special meal? We’ve curated 19 show-stopping entree recipes that will wow your guests without stressing you out. From elegant dinner party dishes to impressive weekend feasts, these crowd-pleasers cover all tastes and occasions. Get ready to elevate your hosting game with these delicious, tried-and-true recipes that promise to make you the star of the kitchen!
Grilled Lemon Herb Chicken with Asparagus
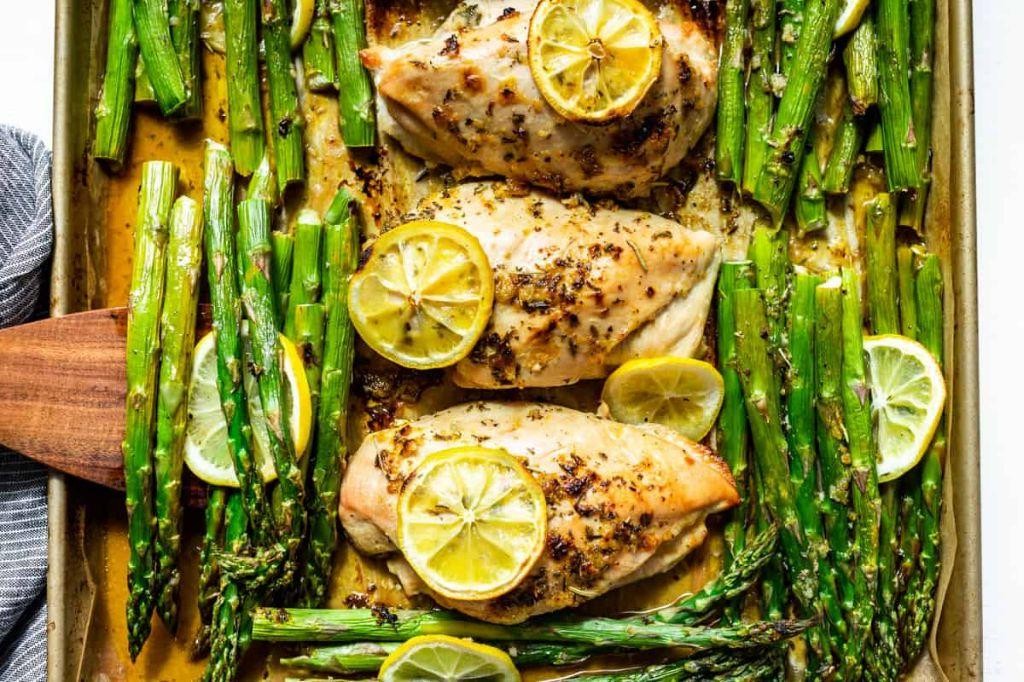
Backyard grilling season is here, and this lemon herb chicken with asparagus is about to become your new favorite. You get juicy, flavorful chicken and perfectly charred asparagus all on one sheet pan. It’s the kind of easy, impressive meal that makes weeknight dinners feel special.
5
servings15
minutes25
minutesIngredients
- 4 boneless, skinless chicken breasts
- 1 lb asparagus, trimmed
- 3 tbsp olive oil
- 2 tbsp fresh lemon juice
- 2 cloves garlic, minced
- 1 tsp dried oregano
- 1 tsp dried thyme
- 1/2 tsp salt
- 1/4 tsp black pepper
- 1 lemon, sliced
Instructions
- Preheat your oven to 400°F and line a large baking sheet with parchment paper.
- Pat the chicken breasts dry with paper towels to help them brown better.
- In a small bowl, whisk together olive oil, lemon juice, minced garlic, oregano, thyme, salt, and pepper.
- Place chicken breasts and asparagus on the prepared baking sheet in a single layer.
- Brush the lemon herb mixture evenly over both sides of the chicken and asparagus.
- Arrange lemon slices over the chicken breasts to infuse flavor while baking.
- Bake for 20-25 minutes until chicken reaches 165°F internal temperature and asparagus is tender-crisp.
- Let the chicken rest for 5 minutes before slicing to keep the juices locked in.
Unbelievably tender chicken with bright lemon notes pairs perfectly with the slightly crisp asparagus. The garlic and herbs create a savory crust that’s absolutely addictive. Serve it over quinoa or with crusty bread to soak up every bit of the delicious pan juices.
Stuffed Bell Peppers with Quinoa and Black Beans

Perfect for those busy weeknights when you want something healthy but don’t have hours to spend in the kitchen. You’ll love how these colorful bell peppers get stuffed with a hearty quinoa and black bean mixture that’s both satisfying and good for you. They’re basically a complete meal in one neat little package!
5
servings20
minutes52
minutesIngredients
- 4 large bell peppers
- 1 cup quinoa
- 2 cups vegetable broth
- 1 can (15 oz) black beans, rinsed and drained
- 1 cup corn kernels
- 1 small onion, diced
- 2 cloves garlic, minced
- 1 tbsp olive oil
- 1 tsp cumin
- 1/2 tsp chili powder
- 1/2 tsp salt
- 1/4 tsp black pepper
- 1 cup shredded Monterey Jack cheese
- 2 tbsp chopped fresh cilantro
Instructions
- Preheat your oven to 375°F and lightly grease a baking dish.
- Cut the tops off the bell peppers and remove all seeds and membranes.
- Rinse the quinoa under cold water in a fine-mesh strainer to remove any bitterness.
- Heat olive oil in a medium saucepan over medium heat until shimmering.
- Add diced onion and cook for 4-5 minutes until translucent and fragrant.
- Stir in minced garlic and cook for 30 seconds until golden but not browned.
- Add quinoa to the pan and toast for 2 minutes, stirring constantly.
- Pour in vegetable broth and bring to a rolling boil.
- Reduce heat to low, cover, and simmer for 15 minutes until liquid is absorbed.
- Remove quinoa from heat and let stand covered for 5 minutes to finish steaming.
- Fluff quinoa with a fork, then stir in black beans, corn, cumin, chili powder, salt, and pepper.
- Spoon the quinoa mixture evenly into the prepared bell peppers, packing it down gently.
- Place stuffed peppers in the greased baking dish and add 1/4 cup water to the bottom.
- Cover with foil and bake for 25 minutes until peppers are tender-crisp.
- Remove foil and sprinkle shredded cheese evenly over each pepper.
- Return to oven and bake uncovered for 10 minutes until cheese is melted and bubbly.
- Let peppers rest for 5 minutes before serving to allow filling to set.
- Sprinkle with fresh cilantro just before serving.
Just out of the oven, these peppers have the perfect contrast between the tender-crisp vegetable shell and the fluffy, protein-packed filling. The melted cheese creates a golden crust that gives way to the smoky, slightly spicy quinoa mixture inside. Try serving them with a dollop of cool sour cream or sliced avocado for extra creaminess that balances the spices beautifully.
Creamy Mushroom Risotto with Parmesan
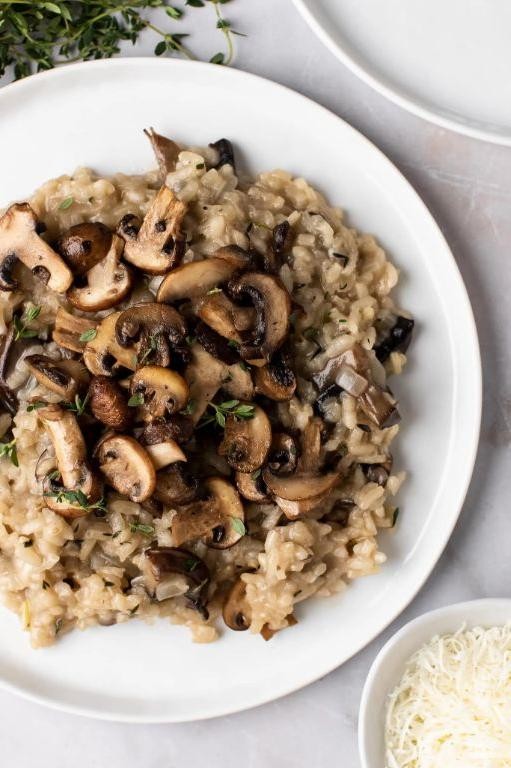
Comfort food doesn’t get much better than this creamy mushroom risotto. You’ll love how the earthy mushrooms pair with that rich, cheesy goodness, and the best part is it’s surprisingly simple to make at home. Let’s get cooking!
3
servings15
minutes50
minutesIngredients
- 2 tbsp olive oil
- 1 tbsp butter
- 1 medium yellow onion, diced
- 2 cloves garlic, minced
- 8 oz cremini mushrooms, sliced
- 1 1/2 cups Arborio rice
- 1/2 cup dry white wine
- 6 cups chicken broth, warmed
- 1/2 cup grated Parmesan cheese
- 2 tbsp fresh parsley, chopped
- 1/2 tsp salt
- 1/4 tsp black pepper
Instructions
- Heat olive oil and butter in a large skillet over medium heat until butter melts completely.
- Add diced onion and cook for 5 minutes, stirring occasionally, until translucent.
- Add minced garlic and cook for 1 minute until fragrant.
- Add sliced mushrooms and cook for 8 minutes, stirring occasionally, until browned and tender.
- Add Arborio rice and toast for 2 minutes, stirring constantly to coat each grain with oil.
- Pour in white wine and cook for 3 minutes, stirring continuously until liquid is mostly absorbed.
- Add 1 cup of warm chicken broth and cook, stirring frequently, until liquid is nearly absorbed (about 5-7 minutes).
- Continue adding broth 1 cup at a time, waiting until each addition is nearly absorbed before adding the next (this takes about 25-30 minutes total).
- Test rice for doneness – it should be tender but still slightly firm to the bite.
- Remove skillet from heat and stir in grated Parmesan cheese until melted and creamy.
- Stir in chopped parsley, salt, and black pepper until evenly distributed.
Let this risotto rest for 2 minutes before serving to allow the flavors to meld perfectly. The texture should be beautifully creamy with just the right amount of bite to the rice. For a restaurant-worthy presentation, top with extra Parmesan and a drizzle of truffle oil, or serve alongside grilled chicken for a complete meal.
Spicy Thai Red Curry with Shrimp

A warm, aromatic bowl of spicy Thai red curry with shrimp is exactly what you need when you’re craving something comforting yet exciting. You’ll love how quickly it comes together, and the bold flavors will have everyone asking for seconds. Let’s get cooking!
5
servings15
minutes15
minutesIngredients
– 1 lb raw shrimp, peeled and deveined
– 2 tbsp vegetable oil
– 1 medium yellow onion, thinly sliced
– 3 cloves garlic, minced
– 1 tbsp fresh ginger, grated
– 3 tbsp Thai red curry paste
– 1 (13.5 oz) can coconut milk
– 1 cup chicken broth
– 1 red bell pepper, sliced
– 1 tbsp fish sauce
– 1 tbsp brown sugar
– 1 tbsp lime juice
– 1/4 cup fresh basil leaves
– 1/4 cup fresh cilantro leaves
Instructions
1. Heat 2 tbsp vegetable oil in a large skillet or wok over medium-high heat until shimmering.
2. Add 1 thinly sliced yellow onion and cook for 4-5 minutes, stirring occasionally, until softened and lightly browned.
3. Stir in 3 minced garlic cloves and 1 tbsp grated ginger, cooking for 1 minute until fragrant (tip: don’t let the garlic burn).
4. Add 3 tbsp Thai red curry paste and cook for 1 minute, stirring constantly to toast the spices.
5. Pour in 1 can coconut milk and 1 cup chicken broth, stirring to combine with the curry paste.
6. Bring the mixture to a gentle simmer, then reduce heat to maintain a steady bubble.
7. Add 1 sliced red bell pepper and simmer for 5 minutes until slightly softened but still crisp.
8. Pat 1 lb raw shrimp dry with paper towels (tip: this helps them sear better).
9. Add the shrimp to the skillet and cook for 2-3 minutes until pink and opaque.
10. Stir in 1 tbsp fish sauce, 1 tbsp brown sugar, and 1 tbsp lime juice.
11. Remove from heat and fold in 1/4 cup fresh basil leaves and 1/4 cup fresh cilantro leaves (tip: adding herbs at the end preserves their fresh flavor).
Now you’ve got a restaurant-quality curry ready to enjoy! The creamy coconut milk balances the spicy kick beautifully, while the shrimp stay tender and juicy. Nothing beats serving this over jasmine rice to soak up every last drop of that incredible sauce.
Classic Beef Stroganoff with Egg Noodles
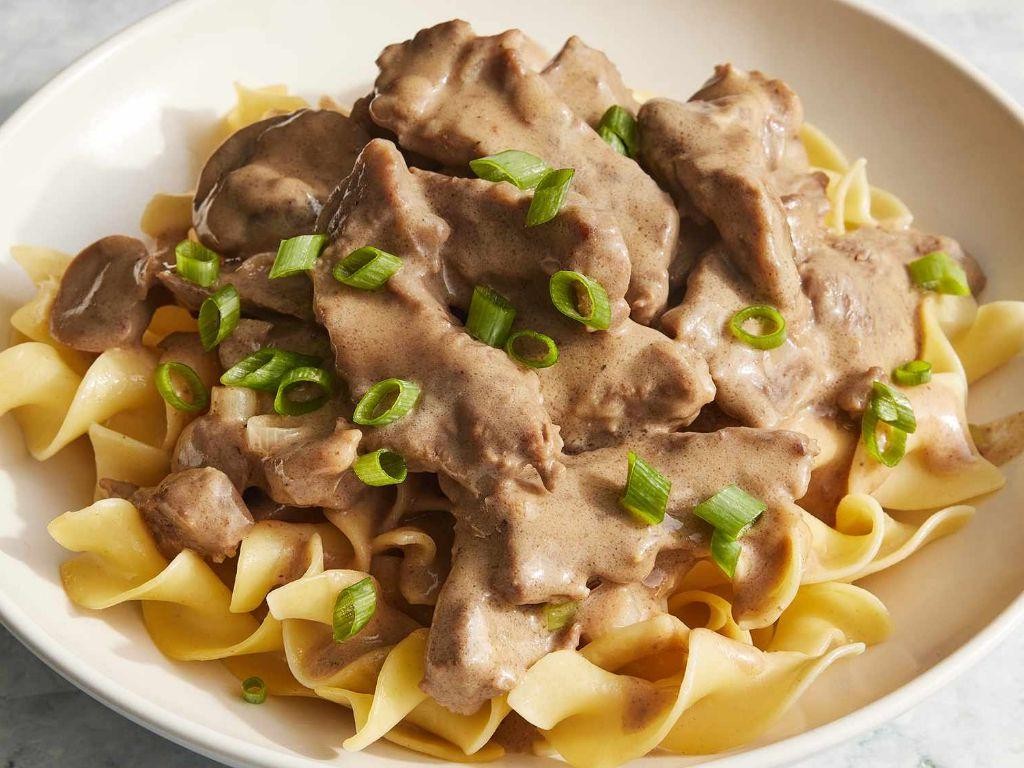
Ever have one of those days where you just need something comforting and delicious? This classic beef stroganoff with egg noodles is exactly what you’re craving. It’s creamy, savory, and comes together in under an hour.
5
servings15
minutes30
minutesIngredients
– 1 lb sirloin steak
– 8 oz egg noodles
– 1 yellow onion
– 8 oz cremini mushrooms
– 2 cloves garlic
– 3 tbsp butter
– 2 tbsp olive oil
– 1 cup beef broth
– 1 tbsp Worcestershire sauce
– 1 cup sour cream
– 2 tbsp all-purpose flour
– 1 tsp paprika
– 1/2 tsp salt
– 1/4 tsp black pepper
– 2 tbsp fresh parsley
Instructions
1. Slice the sirloin steak against the grain into 1/4-inch thick strips.
2. Season the beef strips with salt, black pepper, and paprika.
3. Bring a large pot of salted water to a boil for the egg noodles.
4. Heat 1 tablespoon of olive oil in a large skillet over medium-high heat.
5. Cook the beef strips in a single layer for 2 minutes per side until browned.
6. Remove the beef from the skillet and set aside on a plate.
7. Thinly slice the yellow onion and cremini mushrooms.
8. Add the remaining olive oil and 1 tablespoon of butter to the same skillet.
9. Cook the onions and mushrooms for 6-8 minutes until softened and golden brown.
10. Mince the garlic cloves and add to the skillet, cooking for 30 seconds until fragrant.
11. Sprinkle the flour over the vegetable mixture and stir for 1 minute to cook the raw flour taste out.
12. Gradually pour in the beef broth while stirring constantly to prevent lumps.
13. Add the Worcestershire sauce and bring the sauce to a simmer.
14. Cook the egg noodles in the boiling water for 7-8 minutes until al dente.
15. Return the beef and any accumulated juices to the skillet.
16. Simmer the stroganoff for 3-4 minutes until the beef is heated through.
17. Remove the skillet from heat and stir in the sour cream.
18. Drain the cooked egg noodles and toss with the remaining 2 tablespoons of butter.
19. Chop the fresh parsley for garnish.
20. Serve the stroganoff over the buttered egg noodles and garnish with parsley.
Just look at that creamy sauce clinging to every tender noodle and beef strip. The mushrooms add an earthy depth that balances perfectly with the tangy sour cream. Try serving it with a simple green salad or crusty bread to soak up every last bit of that delicious sauce.
Zesty Lemon Garlic Butter Salmon
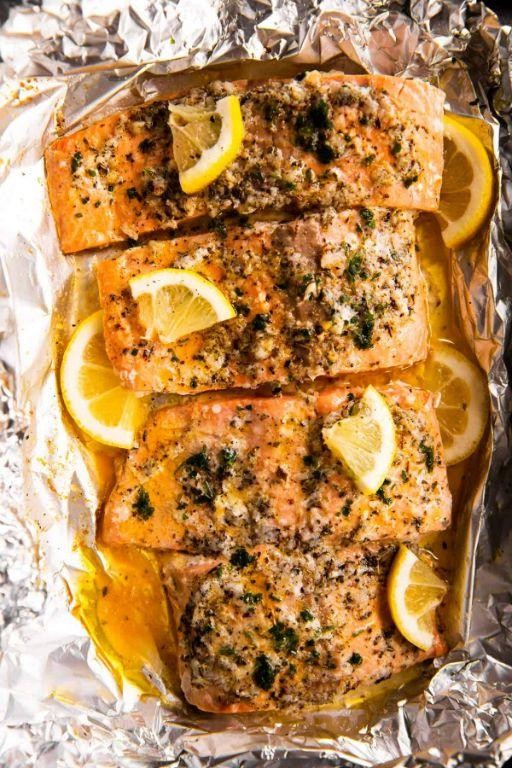
Ever have one of those days where you want something fancy but don’t want to spend hours in the kitchen? This zesty lemon garlic butter salmon is your answer. It’s quick, packed with flavor, and feels like a restaurant-quality meal without the fuss.
4
servings10
minutes13
minutesIngredients
– 4 (6 oz) salmon fillets
– 2 tbsp olive oil
– 4 tbsp unsalted butter
– 4 cloves garlic, minced
– 1 lemon, juiced
– 1 tsp lemon zest
– 1/4 tsp salt
– 1/4 tsp black pepper
– 2 tbsp fresh parsley, chopped
Instructions
1. Pat the salmon fillets dry with paper towels to ensure a crispy skin.
2. Season both sides of the salmon evenly with salt and black pepper.
3. Heat olive oil in a large skillet over medium-high heat until it shimmers.
4. Place salmon skin-side up in the skillet and cook for 4-5 minutes until a golden-brown crust forms.
5. Flip the salmon using a spatula and cook for another 3-4 minutes until the internal temperature reaches 145°F.
6. Remove salmon from the skillet and set aside on a plate.
7. Reduce heat to medium and melt butter in the same skillet.
8. Add minced garlic and sauté for 1 minute until fragrant but not browned.
9. Stir in lemon juice and lemon zest, scraping up any browned bits from the pan.
10. Return salmon to the skillet and spoon the lemon garlic butter sauce over the fillets.
11. Sprinkle with fresh parsley just before serving to maintain its bright color.
Nothing beats the buttery, flaky texture of this salmon paired with that bright lemon kick. The garlic adds just enough savory depth without overpowering the dish. Try serving it over a bed of quinoa or with roasted asparagus for a complete meal that’s as beautiful as it is delicious.
Savory Pork Tenderloin with Apples and Onions
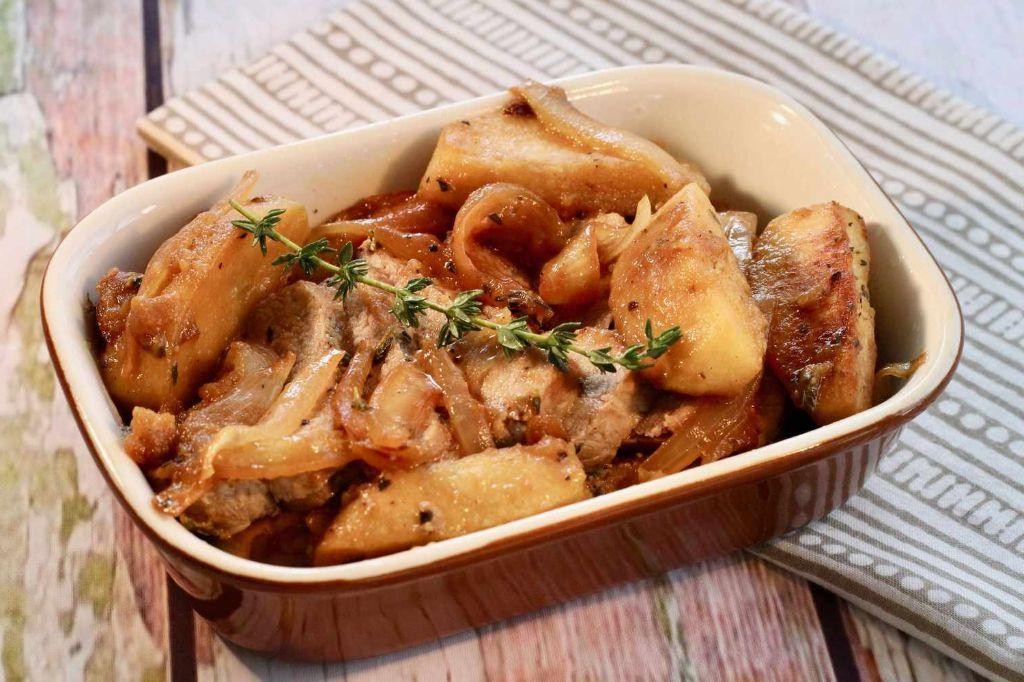
You know those cozy fall evenings that just beg for a comforting meal? Your kitchen will smell incredible as pork tenderloin roasts with sweet apples and savory onions. It’s the perfect one-pan dinner that feels fancy but comes together with minimal effort.
5
servings15
minutes38
minutesIngredients
- 1.5 lbs pork tenderloin
- 2 medium apples
- 1 large yellow onion
- 3 tbsp olive oil
- 2 tbsp apple cider vinegar
- 1 tsp dried thyme
- 1/2 tsp salt
- 1/4 tsp black pepper
- 1/2 cup chicken broth
Instructions
- Preheat your oven to 400°F.
- Pat the pork tenderloin completely dry with paper towels.
- Rub 1 tablespoon olive oil evenly over all sides of the pork.
- Sprinkle salt, pepper, and dried thyme over the entire surface of the pork.
- Heat 1 tablespoon olive oil in a large oven-safe skillet over medium-high heat for 2 minutes.
- Place the pork in the hot skillet and sear for 3 minutes without moving it.
- Flip the pork and sear the other side for another 3 minutes until golden brown.
- Transfer the pork to a clean plate while you prepare the vegetables.
- Slice the onion into 1/2-inch thick wedges.
- Core the apples and cut them into 1-inch chunks, leaving the skin on for texture.
- Add the remaining 1 tablespoon olive oil to the same skillet over medium heat.
- Cook the onion wedges for 4 minutes, stirring occasionally, until they begin to soften.
- Add the apple chunks to the skillet and cook for 3 more minutes.
- Pour in the apple cider vinegar and use a wooden spoon to scrape up any browned bits from the bottom of the pan.
- Return the seared pork tenderloin to the skillet, nestling it among the apples and onions.
- Pour the chicken broth around the pork, being careful not to pour it directly over the meat.
- Transfer the skillet to the preheated oven and roast for 18-22 minutes.
- Check the pork’s internal temperature with a meat thermometer—it should read 145°F in the thickest part.
- Remove the skillet from the oven and let the pork rest for 5 minutes before slicing.
During resting, the pork’s juices redistribute, making every slice incredibly tender. The apples become soft and caramelized while the onions turn sweet and jammy. Dish this over creamy mashed potatoes or alongside roasted Brussels sprouts for a complete autumn meal that will have everyone asking for seconds.
Vegetable Stir-Fry with Tofu and Ginger Soy Sauce
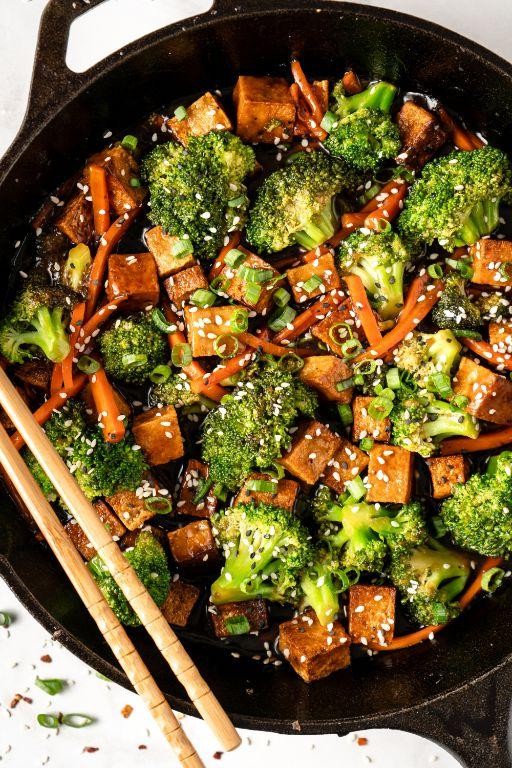
Sometimes you just need a quick, healthy dinner that doesn’t skimp on flavor. This vegetable stir-fry with tofu and ginger soy sauce is exactly that—it comes together in under 30 minutes and delivers a satisfying, protein-packed meal that feels both nourishing and delicious. You’ll love how the crispy tofu and fresh veggies soak up that savory ginger soy sauce.
4
servings15
minutes15
minutesIngredients
– 14 oz firm tofu
– 2 tbsp cornstarch
– 3 tbsp vegetable oil
– 1 tbsp minced ginger
– 2 cloves minced garlic
– 1 cup broccoli florets
– 1 sliced red bell pepper
– 1 sliced carrot
– 1/4 cup soy sauce
– 1 tbsp rice vinegar
– 1 tsp sesame oil
– 2 sliced green onions
Instructions
1. Press the tofu between paper towels for 15 minutes to remove excess water, which helps it crisp up better.
2. Cut the pressed tofu into 1-inch cubes.
3. Toss the tofu cubes with 2 tbsp cornstarch until evenly coated.
4. Heat 2 tbsp vegetable oil in a large skillet or wok over medium-high heat until shimmering.
5. Add the coated tofu and cook for 4-5 minutes per side until golden brown and crispy.
6. Remove the tofu from the skillet and set aside.
7. Add 1 tbsp vegetable oil to the same skillet.
8. Add 1 tbsp minced ginger and 2 cloves minced garlic, stirring for 30 seconds until fragrant.
9. Add 1 cup broccoli florets, 1 sliced red bell pepper, and 1 sliced carrot to the skillet.
10. Stir-fry the vegetables for 5-6 minutes until tender-crisp but still bright in color.
11. Pour in 1/4 cup soy sauce and 1 tbsp rice vinegar, stirring to coat the vegetables.
12. Return the cooked tofu to the skillet and toss everything together.
13. Drizzle 1 tsp sesame oil over the stir-fry and stir to combine.
14. Remove from heat and top with 2 sliced green onions.
Dig into this vibrant stir-fry right away—the tofu stays wonderfully crisp against the tender vegetables, while the ginger soy sauce adds a savory depth that’s both comforting and fresh. Try serving it over brown rice or quinoa for a complete meal, or wrap it in lettuce cups for a low-carb option that still feels satisfying.
Herb-Crusted Rack of Lamb with Mint Chimichurri
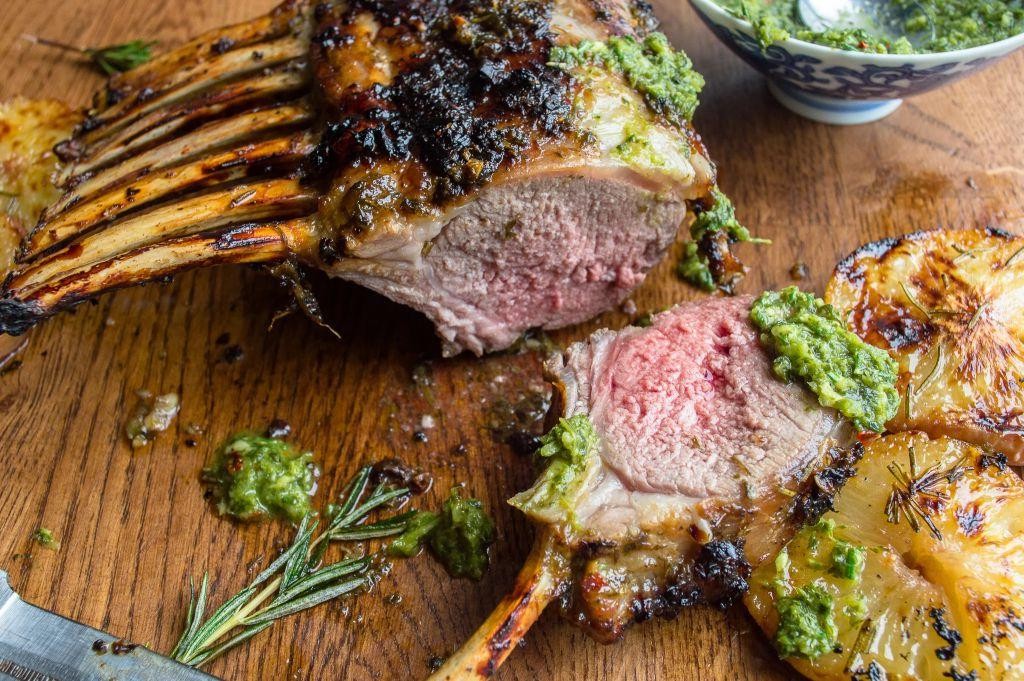
Okay, let’s be real—sometimes you want to impress without the stress. This herb-crusted rack of lamb with mint chimichurri looks fancy but comes together surprisingly easily. You’ll love how the savory crust pairs with that bright, herby sauce.
2
servings15
minutes25
minutesIngredients
- 1 rack of lamb (about 1.5 pounds)
- 2 tablespoons olive oil
- 1/4 cup breadcrumbs
- 2 tablespoons fresh parsley, chopped
- 1 tablespoon fresh rosemary, chopped
- 1 teaspoon garlic powder
- 1/2 teaspoon salt
- 1/4 teaspoon black pepper
- 1/2 cup fresh mint leaves
- 1/4 cup fresh cilantro
- 2 tablespoons red wine vinegar
- 1/4 cup olive oil
- 1 small shallot, minced
- 1/4 teaspoon red pepper flakes
Instructions
- Preheat your oven to 400°F and line a baking sheet with parchment paper.
- Pat the rack of lamb completely dry with paper towels to ensure a good sear.
- Rub 2 tablespoons of olive oil all over the lamb, coating it evenly.
- Mix the breadcrumbs, parsley, rosemary, garlic powder, salt, and black pepper in a small bowl.
- Press the herb mixture firmly onto the fatty side of the lamb rack, creating an even crust.
- Place the lamb crust-side up on the prepared baking sheet.
- Roast for 20-25 minutes, or until a meat thermometer inserted into the thickest part reads 135°F for medium-rare.
- While the lamb roasts, combine the mint, cilantro, red wine vinegar, 1/4 cup olive oil, shallot, and red pepper flakes in a food processor.
- Pulse the chimichurri ingredients until finely chopped but not pureed, about 10-12 pulses.
- Transfer the lamb to a cutting board and let it rest for 10 minutes—this keeps the juices inside when you slice.
- Slice between the bones to create individual chops.
- Serve the lamb chops drizzled with the mint chimichurri sauce.
Unbelievably tender and juicy inside with that crispy, fragrant herb crust, this lamb makes any dinner feel special. The mint chimichurri adds a fresh, zesty kick that cuts through the richness perfectly. Try serving it over creamy polenta or with roasted baby potatoes to soak up all those amazing juices.
Chicken Marsala with Sautéed Mushrooms
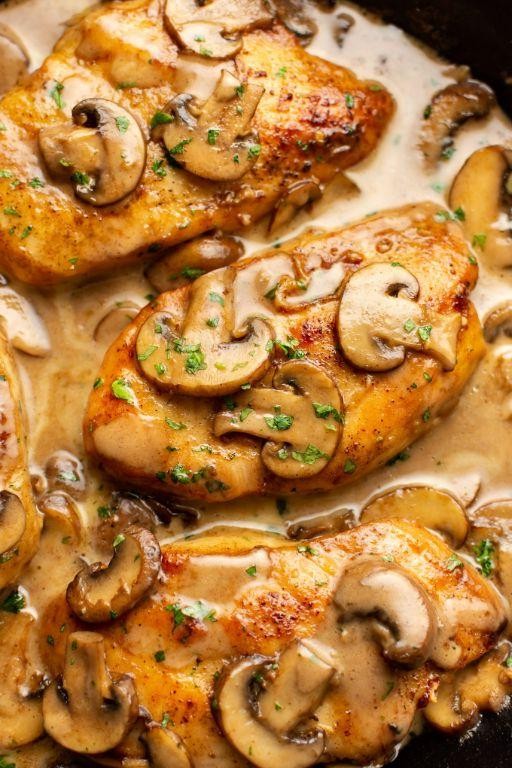
Just when you think chicken can’t get any better, along comes this cozy Italian classic. You’re going to love how the Marsala wine creates this incredible sauce that makes ordinary weeknight chicken feel downright fancy. It’s one of those dishes that looks impressive but is actually super approachable to make at home.
4
servings15
minutes25
minutesIngredients
– 4 boneless, skinless chicken breasts
– 1/2 cup all-purpose flour
– 1 tsp salt
– 1/2 tsp black pepper
– 2 tbsp olive oil
– 8 oz cremini mushrooms, sliced
– 1/2 cup Marsala wine
– 1/2 cup chicken broth
– 2 tbsp unsalted butter
– 2 tbsp fresh parsley, chopped
Instructions
1. Place each chicken breast between two sheets of plastic wrap and pound to 1/2-inch thickness using a meat mallet or rolling pin.
2. Combine flour, salt, and pepper in a shallow dish.
3. Dredge each chicken breast in the flour mixture, shaking off excess flour.
4. Heat olive oil in a large skillet over medium-high heat until shimmering.
5. Cook chicken for 5-6 minutes per side until golden brown and internal temperature reaches 165°F.
6. Transfer chicken to a plate and cover loosely with foil to keep warm.
7. Add sliced mushrooms to the same skillet and cook for 6-8 minutes until browned and tender.
8. Pour Marsala wine into the skillet, scraping up any browned bits from the bottom.
9. Add chicken broth and bring to a simmer, cooking for 3-4 minutes until slightly reduced.
10. Stir in butter until melted and sauce thickens slightly.
11. Return chicken to the skillet, spooning sauce over the top.
12. Sprinkle with fresh parsley before serving.
That rich Marsala sauce soaks into every bite of tender chicken, while the mushrooms add an earthy depth that balances the sweetness perfectly. Try serving it over creamy polenta instead of pasta for a comforting twist, or pair it with roasted asparagus to round out the meal. The velvety texture of the sauce makes this dish feel restaurant-worthy without any of the fuss.
Roasted Duck Breast with Orange Glaze
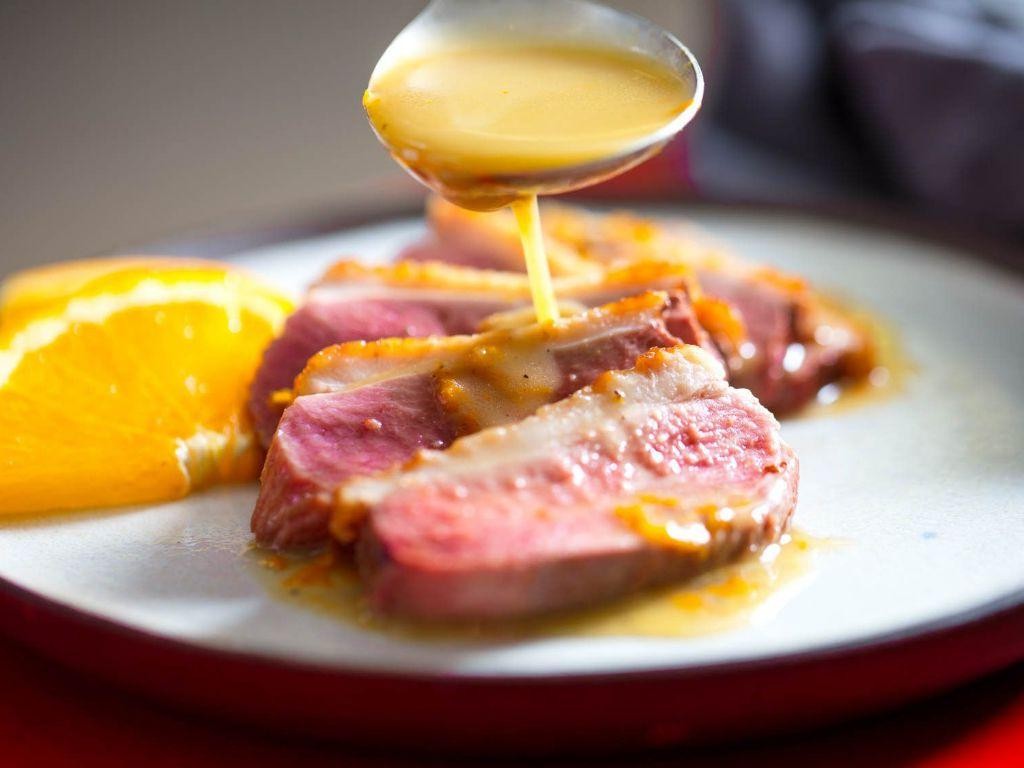
Let’s be real—sometimes you want to impress without the stress. Roasted duck breast with orange glaze is that perfect fancy-but-approachable dinner that feels luxurious but is totally doable on a weeknight. You get crispy skin, tender meat, and a sweet-tangy sauce that ties it all together.
2
portions10
minutes20
minutesIngredients
– 2 duck breasts
– 1 tsp salt
– 1/2 tsp black pepper
– 1 cup orange juice
– 1/4 cup honey
– 2 tbsp soy sauce
– 1 tbsp white vinegar
– 1 tsp cornstarch
– 1 tbsp water
Instructions
1. Pat the duck breasts dry with paper towels.
2. Score the skin in a crosshatch pattern, being careful not to cut into the meat.
3. Season both sides of the duck breasts evenly with salt and black pepper.
4. Place the duck breasts skin-side down in a cold, oven-safe skillet.
5. Turn the heat to medium and cook for 6-8 minutes until the skin is golden brown and crispy.
6. Flip the duck breasts and cook for 2 minutes on the other side.
7. Transfer the skillet to a preheated 400°F oven and roast for 8-10 minutes until the internal temperature reaches 135°F for medium-rare.
8. Remove the duck from the skillet and let it rest on a cutting board for 5 minutes.
9. While the duck rests, pour off all but 1 tablespoon of duck fat from the skillet.
10. Add orange juice, honey, soy sauce, and white vinegar to the skillet.
11. Bring the mixture to a simmer over medium heat, stirring constantly.
12. Whisk cornstarch and water together in a small bowl until smooth.
13. Slowly whisk the cornstarch mixture into the simmering sauce.
14. Cook for 1-2 minutes until the sauce thickens to a glaze consistency.
15. Slice the rested duck breasts against the grain into 1/2-inch thick pieces.
16. Arrange the sliced duck on plates and drizzle with the orange glaze.
And just like that, you’ve got a restaurant-worthy meal. The duck stays incredibly juicy inside with that signature crisp skin, while the orange glaze adds a bright, caramelized sweetness that cuts through the richness perfectly. Try serving it over creamy polenta or with roasted Brussels sprouts to make it a complete, impressive plate.
Teriyaki Glazed Grilled Tuna Steaks
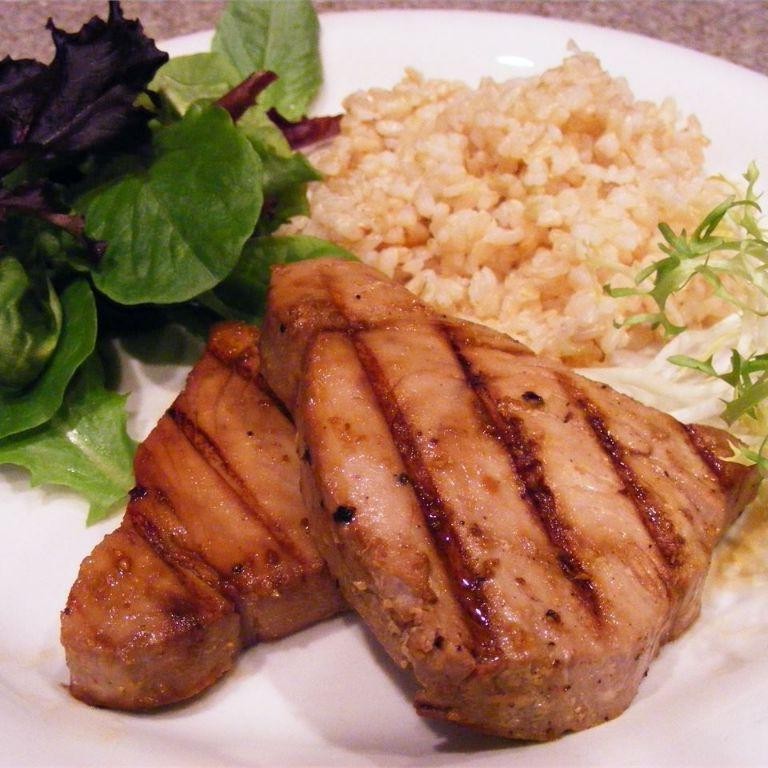
Gorgeous grilled tuna steaks with that sweet-savory teriyaki glaze are exactly what you need to elevate your weeknight dinner game. They come together surprisingly fast and deliver restaurant-quality flavor right from your own grill. You’ll love how the caramelized glaze pairs with the tender, flaky fish.
3
servings15
minutes6
minutesIngredients
– 4 tuna steaks (6 oz each, 1 inch thick)
– 1/2 cup soy sauce
– 1/4 cup brown sugar
– 2 tbsp mirin
– 1 tbsp rice vinegar
– 2 tsp grated fresh ginger
– 2 cloves garlic, minced
– 1 tbsp vegetable oil
– 2 tsp cornstarch
– 2 tbsp water
– 1 tbsp sesame seeds
– 2 green onions, thinly sliced
Instructions
1. Combine 1/2 cup soy sauce, 1/4 cup brown sugar, 2 tbsp mirin, 1 tbsp rice vinegar, 2 tsp grated fresh ginger, and 2 minced garlic cloves in a small saucepan.
2. Bring the mixture to a simmer over medium heat, stirring until the brown sugar dissolves completely.
3. Whisk together 2 tsp cornstarch and 2 tbsp water in a separate small bowl until smooth.
4. Slowly whisk the cornstarch mixture into the simmering sauce and cook for 2 minutes until thickened.
5. Remove the teriyaki glaze from heat and set aside half for serving.
6. Pat 4 tuna steaks completely dry with paper towels to ensure proper searing.
7. Brush both sides of each tuna steak with 1 tbsp vegetable oil and season lightly with salt.
8. Preheat your grill to high heat (450-500°F) and clean the grates thoroughly.
9. Place the tuna steaks on the hot grill and cook for 2 minutes without moving them.
10. Flip the tuna steaks and brush the cooked side generously with the reserved teriyaki glaze.
11. Cook for another 2 minutes for medium-rare, or 3 minutes for medium doneness.
12. Remove the tuna from the grill and immediately brush with more glaze from the serving portion.
13. Sprinkle 1 tbsp sesame seeds and 2 thinly sliced green onions over the glazed tuna steaks.
What makes this dish truly special is how the slightly crisp, caramelized exterior gives way to tender, pink-centered fish that flakes beautifully with your fork. The sweet-salty glaze creates this incredible sticky coating that clings to every bite. Try serving these steaks over a bed of coconut rice with quick-pickled cucumbers on the side for a complete meal that feels both elegant and completely approachable.
Eggplant Parmesan with Fresh Basil
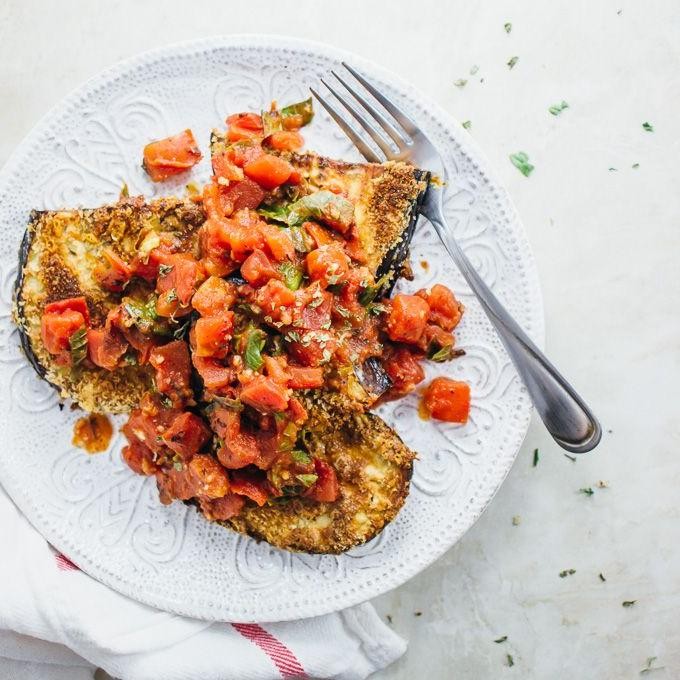
Now, if you’re craving that perfect comfort food with a fresh twist, you’ve got to try this eggplant parmesan. Nothing beats the crispy, golden eggplant layered with rich tomato sauce and melted cheese, all brightened up with fresh basil. It’s easier than you think to make at home, and the results are absolutely restaurant-worthy.
6
servings30
minutes40
minutesIngredients
– 2 large eggplants
– 1 cup all-purpose flour
– 3 large eggs
– 2 cups Italian-style breadcrumbs
– 1/2 cup grated Parmesan cheese
– 4 cups marinara sauce
– 2 cups shredded mozzarella cheese
– 1/4 cup fresh basil leaves
– 1/2 cup olive oil
– 1 tsp salt
– 1/2 tsp black pepper
Instructions
1. Preheat your oven to 375°F.
2. Slice the eggplants into 1/4-inch thick rounds.
3. Sprinkle the eggplant slices with salt and let them sit for 15 minutes to draw out excess moisture.
4. Pat the eggplant slices completely dry with paper towels.
5. Place the flour in a shallow bowl.
6. Beat the eggs in a separate shallow bowl.
7. Combine the breadcrumbs and Parmesan cheese in a third shallow bowl.
8. Heat 1/4 cup of olive oil in a large skillet over medium-high heat until it shimmers.
9. Dredge each eggplant slice first in flour, shaking off any excess.
10. Dip the floured eggplant into the beaten eggs, letting excess drip off.
11. Coat the eggplant thoroughly in the breadcrumb-Parmesan mixture.
12. Fry the breaded eggplant in the hot oil for 2-3 minutes per side until golden brown.
13. Transfer the fried eggplant to a paper towel-lined plate to drain excess oil.
14. Spread 1 cup of marinara sauce evenly in the bottom of a 9×13 inch baking dish.
15. Arrange a single layer of fried eggplant slices over the sauce.
16. Sprinkle 1/2 cup of mozzarella cheese over the eggplant layer.
17. Tear 1 tablespoon of fresh basil leaves and scatter them over the cheese.
18. Repeat the layers: sauce, eggplant, mozzarella, and basil until all ingredients are used, ending with mozzarella on top.
19. Bake uncovered for 25-30 minutes until the cheese is bubbly and lightly browned.
20. Let the eggplant parmesan rest for 10 minutes before serving to allow the layers to set.
My favorite thing about this dish is how the crispy eggplant holds up beautifully against the saucy, cheesy layers. The fresh basil adds a bright, aromatic note that cuts through the richness perfectly. Try serving it over spaghetti or with a simple green salad for a complete meal that’ll have everyone asking for seconds.
Garlic Butter Shrimp Scampi with Pasta
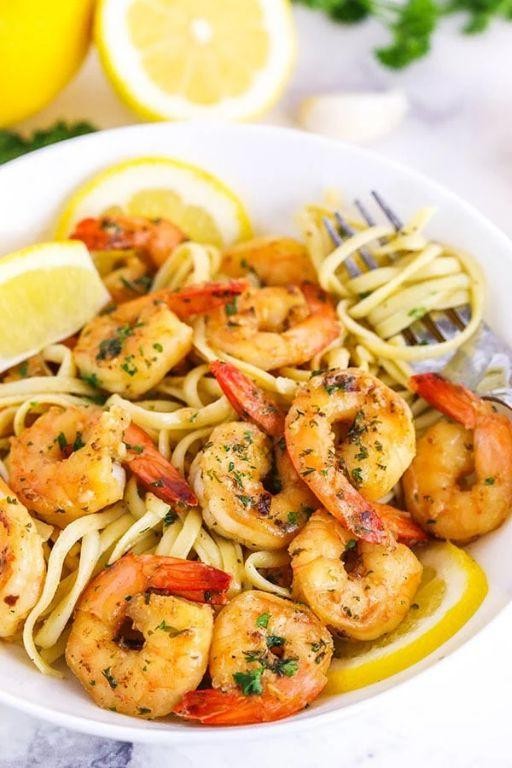
There’s nothing quite like the smell of garlic butter sizzling in your kitchen to make a Tuesday feel special. This garlic butter shrimp scampi comes together in under 30 minutes but tastes like you spent hours—perfect for those nights when you want something impressive without the fuss. You’ll love how the tender shrimp and al dente pasta soak up all that delicious garlicky sauce.
5
servings10
minutes20
minutesIngredients
– 1 lb large shrimp, peeled and deveined
– 8 oz linguine pasta
– 4 tbsp unsalted butter
– 4 cloves garlic, minced
– 1/2 cup dry white wine
– 1/4 cup fresh lemon juice
– 1/4 cup chopped fresh parsley
– 1/4 tsp red pepper flakes
– Salt to taste
– Black pepper to taste
Instructions
1. Bring a large pot of salted water to a rolling boil over high heat.
2. Add linguine to the boiling water and cook for 9-11 minutes until al dente, stirring occasionally to prevent sticking.
3. While pasta cooks, pat shrimp completely dry with paper towels—this ensures they’ll sear properly instead of steaming.
4. Season shrimp generously with salt and black pepper on both sides.
5. Melt butter in a large skillet over medium-high heat until foamy.
6. Add shrimp to the skillet in a single layer and cook for 2 minutes per side until pink and opaque.
7. Remove shrimp from skillet and set aside on a plate.
8. Reduce heat to medium and add minced garlic to the same skillet, cooking for 1 minute until fragrant but not browned.
9. Pour in white wine and lemon juice, scraping up any browned bits from the bottom of the pan.
10. Simmer the sauce for 3-4 minutes until reduced by half and slightly thickened.
11. Drain the cooked pasta, reserving 1/2 cup of pasta water.
12. Add the drained pasta directly to the skillet with the sauce.
13. Toss pasta with the sauce, adding reserved pasta water 2 tablespoons at a time until the sauce coats the pasta nicely.
14. Return the cooked shrimp to the skillet and toss to combine.
15. Stir in chopped parsley and red pepper flakes.
16. Remove from heat and serve immediately.
Let the creamy garlic butter sauce cling to every strand of pasta while the shrimp stay perfectly tender. The bright lemon cuts through the richness beautifully, making each bite feel both indulgent and fresh. Try serving it with crusty bread to soak up every last drop of that incredible sauce, or add a simple green salad for a complete meal that’ll have everyone asking for seconds.
Baked Ziti with Italian Sausage and Ricotta
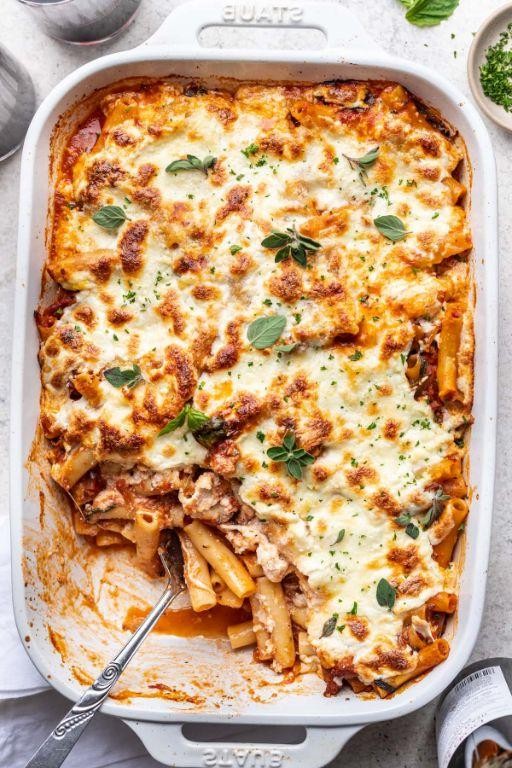
Kicking off comfort food season with this baked ziti is exactly what you need right now. You get layers of cheesy ricotta, savory Italian sausage, and tangy tomato sauce all baked together until bubbly and golden. It’s the kind of meal that makes your kitchen smell incredible and brings everyone to the table.
8
servings25
minutes74
minutesIngredients
– 1 pound Italian sausage
– 1 pound ziti pasta
– 1 tablespoon olive oil
– 1 medium yellow onion
– 3 cloves garlic
– 28 ounces crushed tomatoes
– 1 teaspoon dried oregano
– 1 teaspoon salt
– 1/2 teaspoon black pepper
– 15 ounces ricotta cheese
– 8 ounces mozzarella cheese
– 1/2 cup grated Parmesan cheese
– 1 large egg
– 1/4 cup fresh basil
Instructions
1. Preheat your oven to 375°F.
2. Bring a large pot of salted water to a rolling boil.
3. Add the ziti pasta and cook for 9 minutes until al dente.
4. Drain the pasta in a colander without rinsing to help the sauce cling better.
5. Heat olive oil in a large skillet over medium-high heat.
6. Remove Italian sausage from casings and cook for 6-8 minutes, breaking it into small crumbles with a wooden spoon.
7. Add diced yellow onion and cook for 4 minutes until translucent.
8. Stir in minced garlic and cook for 1 minute until fragrant.
9. Pour in crushed tomatoes, oregano, salt, and black pepper.
10. Simmer the sauce for 15 minutes, stirring occasionally.
11. In a separate bowl, combine ricotta cheese, 1/4 cup of Parmesan cheese, and the egg.
12. Chop fresh basil and mix it into the ricotta mixture.
13. Spread a thin layer of sauce on the bottom of a 9×13 inch baking dish.
14. Add half of the cooked ziti in an even layer.
15. Dollop half of the ricotta mixture over the pasta.
16. Sprinkle half of the shredded mozzarella cheese over the ricotta.
17. Repeat the layers with remaining pasta, ricotta, and mozzarella.
18. Top with the remaining sauce and sprinkle with remaining Parmesan cheese.
19. Cover the baking dish with aluminum foil and bake for 25 minutes.
20. Remove the foil and bake for another 15 minutes until the cheese is golden and bubbly.
21. Let the baked ziti rest for 10 minutes before serving to allow the layers to set.
That resting time gives you the perfect saucy-but-not-soupy texture where every bite holds together. The ricotta stays creamy against the hearty sausage, while the crispy cheese edges add that irresistible contrast. Try serving it with garlic bread for dipping into any extra sauce that pools at the edges of your plate.
Pan-Seared Scallops with Lemon Caper Sauce

Oh my goodness, you have to try this pan-seared scallops recipe. It’s one of those dishes that looks fancy but is actually super simple to make at home. You’ll be amazed at how quickly it comes together for a restaurant-quality meal.
5
servings10
minutes10
minutesIngredients
– 1 lb large sea scallops
– 2 tbsp olive oil
– 2 tbsp unsalted butter
– 2 cloves garlic, minced
– 1/4 cup dry white wine
– 2 tbsp fresh lemon juice
– 2 tbsp capers, drained
– 2 tbsp fresh parsley, chopped
– 1/4 tsp salt
– 1/4 tsp black pepper
Instructions
1. Pat the scallops completely dry with paper towels to ensure a good sear.
2. Season both sides of the scallops evenly with 1/4 tsp salt and 1/4 tsp black pepper.
3. Heat 2 tbsp olive oil in a large skillet over medium-high heat until shimmering, about 2 minutes.
4. Place scallops in the hot skillet without crowding them, leaving space between each one.
5. Cook scallops for 2-3 minutes without moving them until a golden-brown crust forms on the bottom.
6. Flip scallops carefully using tongs and cook for another 1-2 minutes until just opaque throughout.
7. Transfer scallops to a clean plate and set aside.
8. Reduce heat to medium and melt 2 tbsp unsalted butter in the same skillet.
9. Add 2 cloves minced garlic and cook for 30 seconds until fragrant but not browned.
10. Pour in 1/4 cup dry white wine to deglaze the pan, scraping up all the browned bits from the bottom.
11. Simmer the wine for 1-2 minutes until reduced by about half.
12. Stir in 2 tbsp fresh lemon juice and 2 tbsp drained capers.
13. Cook the sauce for 1 minute until slightly thickened.
14. Remove skillet from heat and stir in 2 tbsp chopped fresh parsley.
15. Return the cooked scallops to the skillet and spoon the lemon caper sauce over them.
Velvety scallops with that perfect sear pair beautifully with the bright, briny sauce. The capers add little bursts of salty flavor that cut through the richness. Try serving these over creamy polenta or with crusty bread to soak up every last drop of that amazing sauce.
Slow-Cooked Beef Brisket with BBQ Sauce
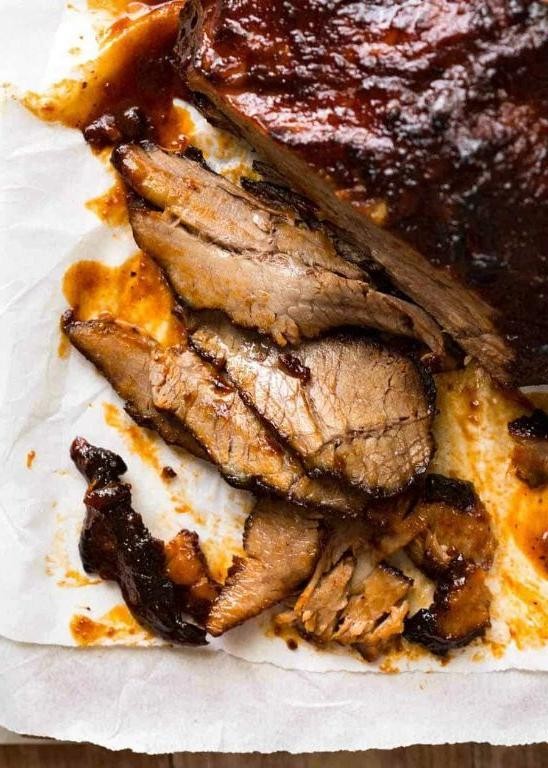
Ever find yourself craving that fall-apart tender beef that just melts in your mouth? You know, the kind that makes your whole house smell incredible for hours. This slow-cooked brisket with homemade BBQ sauce is exactly what you need for your next cozy dinner or weekend gathering.
8
servings15
minutes270
minutesIngredients
- 4 pounds beef brisket
- 2 tablespoons olive oil
- 1 tablespoon kosher salt
- 2 teaspoons black pepper
- 2 teaspoons garlic powder
- 1 teaspoon smoked paprika
- 1 cup ketchup
- 1/4 cup apple cider vinegar
- 2 tablespoons brown sugar
- 1 tablespoon Worcestershire sauce
- 1 teaspoon Dijon mustard
- 1/2 teaspoon onion powder
Instructions
- Pat the 4 pounds beef brisket completely dry with paper towels.
- Rub the brisket evenly with 2 tablespoons olive oil on all surfaces.
- Combine 1 tablespoon kosher salt, 2 teaspoons black pepper, 2 teaspoons garlic powder, and 1 teaspoon smoked paprika in a small bowl.
- Season the brisket generously with the spice mixture, covering all sides.
- Preheat your oven to 300°F.
- Place the seasoned brisket fat-side up in a large roasting pan.
- Cover the pan tightly with aluminum foil. Tip: A tight seal keeps the moisture in for maximum tenderness.
- Roast the brisket at 300°F for 4 hours.
- While the brisket cooks, whisk together 1 cup ketchup, 1/4 cup apple cider vinegar, 2 tablespoons brown sugar, 1 tablespoon Worcestershire sauce, 1 teaspoon Dijon mustard, and 1/2 teaspoon onion powder in a saucepan.
- Simmer the sauce over medium heat for 5 minutes, stirring occasionally.
- Remove the brisket from the oven after 4 hours and carefully uncover it.
- Brush half of the BBQ sauce evenly over the brisket. Tip: Save some sauce for serving so everyone can add extra if they want.
- Return the uncovered brisket to the oven and roast at 300°F for 30 more minutes.
- Check that the brisket reaches an internal temperature of 200°F using a meat thermometer. Tip: This temperature ensures the collagen breaks down completely for that perfect pull-apart texture.
- Transfer the brisket to a cutting board and let it rest for 15 minutes before slicing against the grain.
- Serve the sliced brisket with the remaining BBQ sauce on the side.
Here’s what makes this brisket special: the meat becomes incredibly tender with a beautiful bark from the slow roasting, while the tangy-sweet BBQ sauce caramelizes into a sticky glaze. Honestly, it’s fantastic piled high on soft buns for sandwiches or served alongside creamy coleslaw and cornbread for a complete Southern-style meal.
Conclusion
Zesty, impressive, and perfect for any occasion—these 19 entrees are your ticket to wowing guests with ease. We hope you found inspiration for your next dinner party! Give one (or a few!) a try, then drop a comment with your favorite. Loved this roundup? Share it on Pinterest to spread the delicious ideas. Happy cooking!


