Venturing into an elimination diet doesn’t mean bidding farewell to flavor! If you’re navigating food sensitivities, we’ve got your back with 35 delicious recipes designed for a happy, settled stomach. From cozy comfort foods to quick, satisfying dinners, this roundup proves that eating well for your health can still be an absolute delight. Let’s dive in and discover your new favorite meals.
Zucchini Noodles with Garlic Infused Olive Oil

Fragrant and fresh, zucchini noodles with garlic-infused olive oil offer a light yet satisfying dish that transforms humble vegetables into an elegant meal. This simple preparation highlights the natural sweetness of zucchini while the aromatic oil adds depth, making it perfect for a quick weeknight dinner or a sophisticated side. With minimal ingredients and maximum flavor, it’s a testament to how a few quality components can create something truly delightful.
Serving: 2 | Pre Time: 10 minutes | Cooking Time: 5 minutes
Ingredients
For the zucchini noodles:
– 2 medium zucchinis, spiralized into noodles (about 4 cups)
– 1/2 teaspoon kosher salt
For the garlic-infused olive oil:
– 1/4 cup extra-virgin olive oil
– 3 cloves garlic, thinly sliced
– 1/4 teaspoon red pepper flakes
For finishing:
– 1/4 cup grated Parmesan cheese
– 2 tablespoons chopped fresh parsley
– 1 tablespoon fresh lemon juice
Instructions
1. Place the zucchini noodles in a colander set over a bowl, sprinkle with 1/2 teaspoon kosher salt, and let sit for 10 minutes to draw out excess moisture, which prevents sogginess.
2. Pat the zucchini noodles dry thoroughly with paper towels to remove any remaining liquid.
3. Heat 1/4 cup extra-virgin olive oil in a large skillet over medium-low heat until shimmering, about 2 minutes.
4. Add 3 cloves of thinly sliced garlic and 1/4 teaspoon red pepper flakes to the skillet, cooking for 2–3 minutes until the garlic is golden and fragrant, being careful not to let it burn.
5. Increase the heat to medium-high and add the dried zucchini noodles to the skillet, tossing gently to coat in the oil.
6. Cook the zucchini noodles for 2–3 minutes, stirring occasionally, until they are just tender but still have a slight bite, avoiding overcooking to maintain texture.
7. Remove the skillet from the heat and stir in 1/4 cup grated Parmesan cheese, 2 tablespoons chopped fresh parsley, and 1 tablespoon fresh lemon juice until well combined.
8. Transfer the zucchini noodles to serving plates immediately. Just as the dish comes together, the warm, garlicky oil melds with the bright lemon and savory cheese, creating a silky coating that clings to each tender strand. For a creative twist, top with grilled shrimp or a sprinkle of toasted pine nuts to add crunch and richness, making it a versatile centerpiece for any occasion.
Coconut Milk Poached Chicken with Lemongrass
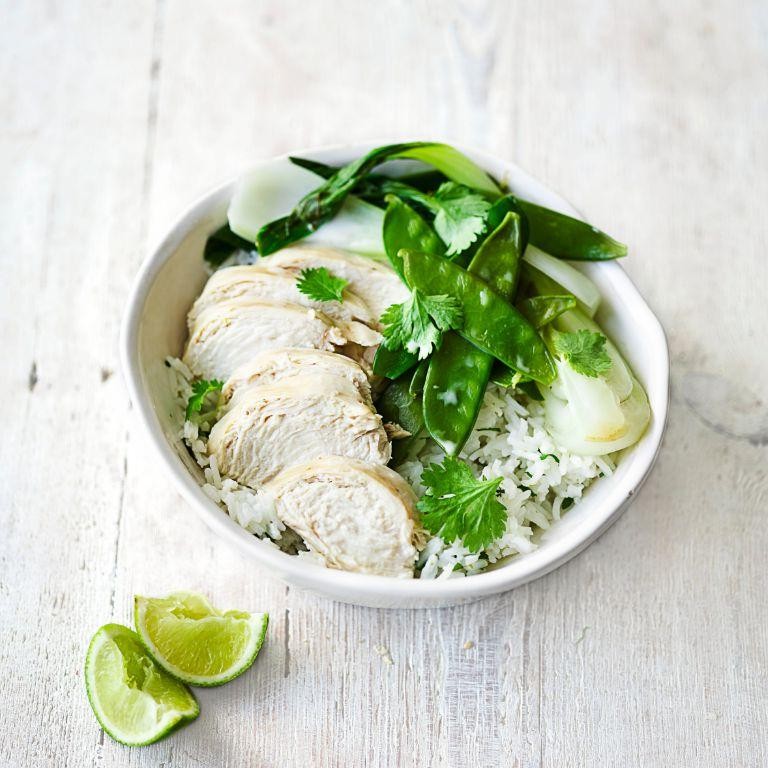
Radiantly aromatic and luxuriously creamy, this Coconut Milk Poached Chicken with Lemongrass transforms simple ingredients into an elegant, soul-warming meal. The gentle poaching method yields incredibly tender, juicy chicken infused with the bright, citrusy notes of lemongrass and the rich, velvety embrace of coconut milk. It’s a dish that feels both comforting and sophisticated, perfect for a quiet weeknight or a special gathering.
Serving: 4 | Pre Time: 15 minutes | Cooking Time: 30 minutes
Ingredients
For the Poaching Liquid:
– 4 cups (32 oz) full-fat coconut milk
– 2 stalks fresh lemongrass, trimmed and bruised
– 1-inch piece fresh ginger, peeled and thinly sliced
– 4 cloves garlic, smashed
– 1 tablespoon fish sauce
– 1 teaspoon kosher salt
For the Chicken and Garnish:
– 1.5 lbs boneless, skinless chicken breasts
– 1 lime, cut into wedges
– ¼ cup fresh cilantro leaves, chopped
– 1 red Thai chili, thinly sliced (optional)
Instructions
1. In a large Dutch oven or heavy-bottomed pot, combine the coconut milk, lemongrass, ginger, garlic, fish sauce, and salt.
2. Bring the mixture to a gentle simmer over medium heat, stirring occasionally, until it just begins to bubble—about 5 minutes. (Tip: Avoid boiling to prevent the coconut milk from separating.)
3. Carefully add the chicken breasts to the pot in a single layer, ensuring they are fully submerged.
4. Reduce the heat to low to maintain a bare simmer, with tiny bubbles occasionally breaking the surface.
5. Cover the pot and poach the chicken for 20–25 minutes, or until an instant-read thermometer inserted into the thickest part registers 165°F. (Tip: Poaching at a low temperature keeps the chicken exceptionally moist.)
6. Turn off the heat and let the chicken rest in the liquid, covered, for 5 minutes.
7. Using tongs, transfer the chicken to a cutting board and let it rest for 3 minutes before slicing it against the grain into ½-inch thick pieces.
8. Strain the poaching liquid through a fine-mesh sieve into a bowl, discarding the solids.
9. Return the strained liquid to the pot and simmer over medium heat for 3–5 minutes to reduce slightly and concentrate the flavors. (Tip: This reduced liquid makes a lush, flavorful sauce.)
10. Arrange the sliced chicken on a serving platter, spoon the warm sauce over the top, and garnish with lime wedges, cilantro, and chili if using.
Unbelievably tender, the chicken flakes apart with a fork, bathed in a silky, aromatic sauce that balances creamy coconut with zesty lemongrass. Serve it over jasmine rice to soak up every drop, or alongside steamed bok choy for a vibrant, complete meal that delights the senses with its layered, fragrant profile.
Quinoa and Roasted Vegetable Salad with Herb Dressing
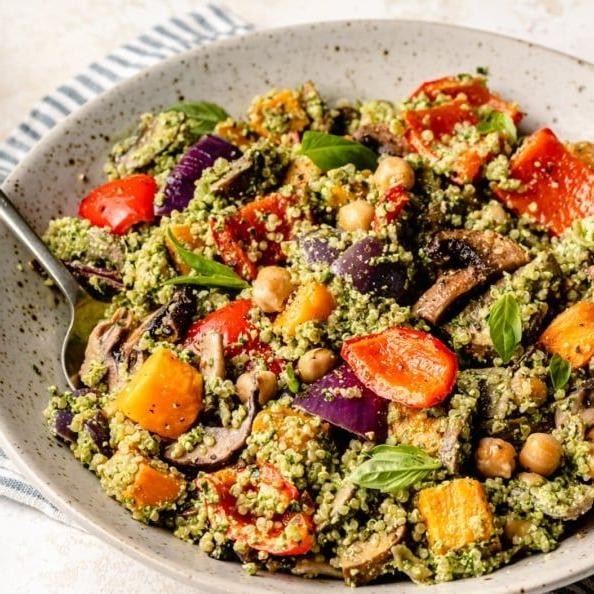
Radiant with autumnal hues and nourishing simplicity, this quinoa and roasted vegetable salad celebrates the season’s bounty through a harmonious blend of earthy grains and caramelized produce. Tossed with a vibrant herb dressing, it transforms humble ingredients into an elegant, satisfying meal that’s as visually stunning as it is delicious. Perfect for a light lunch or as a sophisticated side, this dish offers both vibrant flavor and wholesome nourishment in every bite.
Serving: 4 | Pre Time: 15 minutes | Cooking Time: 30 minutes
Ingredients
For the Roasted Vegetables:
– 1 large sweet potato, peeled and diced into 1/2-inch cubes
– 1 red bell pepper, seeded and cut into 1-inch pieces
– 1 yellow bell pepper, seeded and cut into 1-inch pieces
– 1 small red onion, cut into 1-inch wedges
– 2 tablespoons olive oil
– 1/2 teaspoon salt
– 1/4 teaspoon black pepper
For the Quinoa:
– 1 cup quinoa, rinsed under cold water
– 2 cups water
– 1/4 teaspoon salt
For the Herb Dressing:
– 1/4 cup olive oil
– 2 tablespoons fresh lemon juice
– 1 tablespoon red wine vinegar
– 1/4 cup finely chopped fresh parsley
– 2 tablespoons finely chopped fresh dill
– 1 small garlic clove, minced
– 1/2 teaspoon salt
– 1/4 teaspoon black pepper
Instructions
1. Preheat your oven to 425°F and line a large baking sheet with parchment paper.
2. In a large bowl, combine the diced sweet potato, red bell pepper, yellow bell pepper, and red onion wedges.
3. Drizzle the vegetables with 2 tablespoons of olive oil, then sprinkle with 1/2 teaspoon salt and 1/4 teaspoon black pepper; toss until evenly coated.
4. Spread the vegetables in a single layer on the prepared baking sheet, ensuring they aren’t crowded to allow for proper caramelization.
5. Roast the vegetables for 25-30 minutes, stirring halfway through, until they are tender and the edges are lightly browned.
6. While the vegetables roast, rinse 1 cup of quinoa under cold water in a fine-mesh strainer to remove its natural bitter coating.
7. In a medium saucepan, combine the rinsed quinoa, 2 cups of water, and 1/4 teaspoon salt; bring to a boil over high heat.
8. Reduce the heat to low, cover the saucepan, and simmer the quinoa for 15 minutes, or until all the water is absorbed and the grains are fluffy.
9. Remove the saucepan from the heat and let the quinoa sit, covered, for 5 minutes to steam; then fluff it with a fork to separate the grains.
10. In a small bowl, whisk together 1/4 cup olive oil, 2 tablespoons fresh lemon juice, and 1 tablespoon red wine vinegar until emulsified.
11. Stir in 1/4 cup finely chopped fresh parsley, 2 tablespoons finely chopped fresh dill, 1 minced garlic clove, 1/2 teaspoon salt, and 1/4 teaspoon black pepper.
12. In a large serving bowl, combine the roasted vegetables, cooked quinoa, and herb dressing; gently toss until everything is evenly coated.
Perfectly balanced, this salad offers a delightful contrast of textures—from the fluffy quinoa and tender vegetables to the bright, herbaceous dressing. The roasted sweet potatoes add a subtle sweetness that complements the savory peppers and onions, while the fresh herbs provide a burst of aromatic flavor. For a creative twist, serve it warm topped with crumbled feta cheese or alongside grilled chicken for a heartier meal.
Sweet Potato and Kale Soup with Ginger
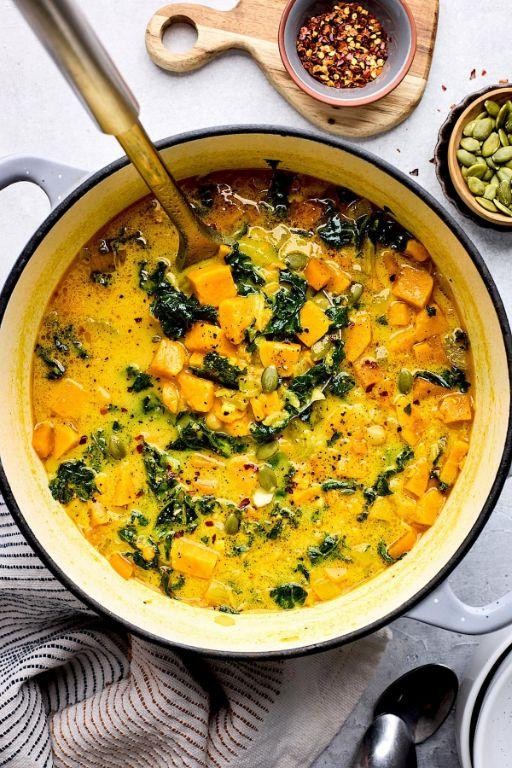
Beneath the crisp winter air, a bowl of Sweet Potato and Kale Soup with Ginger offers a vibrant, nourishing embrace, blending earthy sweetness with a gentle, warming spice that soothes from within. This simple yet elegant soup transforms humble ingredients into a velvety, comforting meal, perfect for cozy evenings or a wholesome lunch that feels both indulgent and revitalizing.
Serving: 4 | Pre Time: 15 minutes | Cooking Time: 30 minutes
Ingredients
For the Base:
– 2 tablespoons olive oil
– 1 medium yellow onion, finely chopped
– 3 cloves garlic, minced
– 1 tablespoon fresh ginger, grated
For the Soup:
– 2 large sweet potatoes (about 1.5 lbs), peeled and diced into 1-inch cubes
– 4 cups vegetable broth
– 1 teaspoon ground cumin
– 1/2 teaspoon smoked paprika
– 1/4 teaspoon ground black pepper
For Finishing:
– 4 cups kale, stems removed and leaves roughly chopped
– 1/2 cup full-fat coconut milk
– 1 tablespoon fresh lemon juice
Instructions
1. Heat 2 tablespoons olive oil in a large pot over medium heat until shimmering, about 2 minutes.
2. Add 1 finely chopped yellow onion and cook, stirring occasionally, until translucent and softened, 5-7 minutes.
3. Stir in 3 minced garlic cloves and 1 tablespoon grated ginger, cooking for 1 minute until fragrant to release their aromatic oils.
4. Add 2 diced sweet potatoes, 4 cups vegetable broth, 1 teaspoon ground cumin, 1/2 teaspoon smoked paprika, and 1/4 teaspoon ground black pepper, bringing to a boil.
5. Reduce heat to low, cover the pot, and simmer for 20-25 minutes until the sweet potatoes are fork-tender, checking at the 20-minute mark to avoid overcooking.
6. Carefully transfer the soup to a blender in batches, blending on high until completely smooth and velvety, about 1 minute per batch for a silky texture.
7. Return the blended soup to the pot over low heat, stirring in 4 cups chopped kale and cooking for 3-5 minutes until the kale is wilted but still vibrant green.
8. Remove the pot from heat and whisk in 1/2 cup coconut milk and 1 tablespoon lemon juice until fully incorporated, which adds a creamy richness and bright acidity.
9. Ladle the soup into bowls and serve immediately.
Hearty and smooth, this soup boasts a velvety consistency from the blended sweet potatoes, balanced by the tender bite of kale and a subtle kick from ginger. For a creative twist, garnish with a drizzle of coconut milk, toasted pumpkin seeds, or a sprinkle of red pepper flakes to enhance its warmth and visual appeal, making it as beautiful as it is delicious.
Grilled Salmon with Lime and Dill
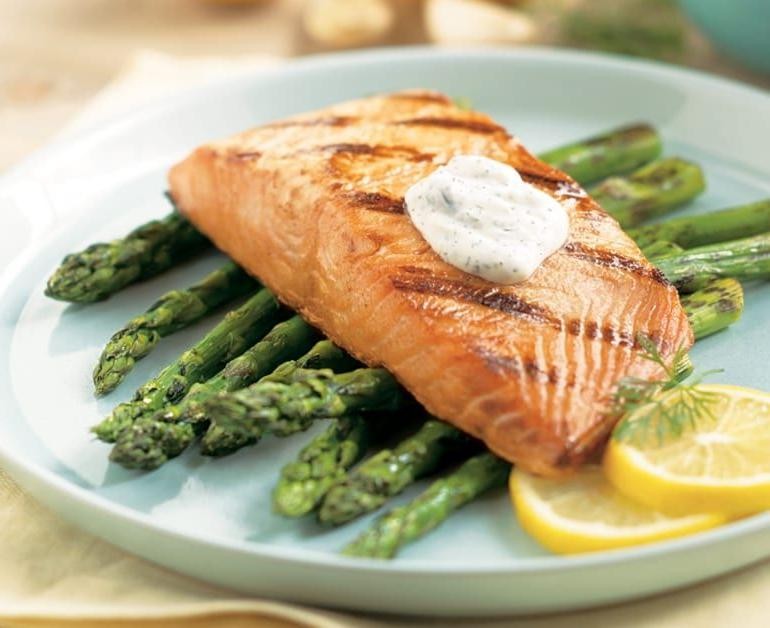
Warm, flaky salmon kissed by the smoky char of the grill meets the bright, herbaceous notes of fresh lime and dill in this effortlessly elegant dish. It’s a perfect centerpiece for a summer soirée or a quick, healthy weeknight dinner that feels anything but ordinary. This recipe transforms simple ingredients into a restaurant-worthy meal in under thirty minutes.
Serving: 4 | Pre Time: 10 minutes | Cooking Time: 12 minutes
Ingredients
For the Salmon:
– 4 (6-ounce) skin-on salmon fillets
– 2 tablespoons olive oil
– 1 teaspoon kosher salt
– ½ teaspoon freshly ground black pepper
For the Lime-Dill Sauce:
– ¼ cup fresh lime juice (from about 2 limes)
– ¼ cup chopped fresh dill
– 2 tablespoons extra-virgin olive oil
– 1 teaspoon honey
– ¼ teaspoon fine sea salt
Instructions
1. Preheat a gas or charcoal grill to medium-high heat (approximately 400°F).
2. Pat the 4 salmon fillets completely dry with paper towels to ensure a crisp sear.
3. Brush both sides of each fillet evenly with the 2 tablespoons of olive oil.
4. Season the flesh side of the fillets evenly with the 1 teaspoon of kosher salt and ½ teaspoon of black pepper.
5. Place the salmon fillets skin-side down on the preheated grill grates. Close the lid and grill for 6 minutes without moving them to develop a good crust.
6. Carefully flip each fillet using a thin, wide spatula. Grill for an additional 4 to 6 minutes with the lid closed, or until the internal temperature reaches 125°F for medium-rare or the flesh flakes easily with a fork.
7. While the salmon grills, prepare the sauce: in a small bowl, whisk together the ¼ cup lime juice, ¼ cup chopped dill, 2 tablespoons extra-virgin olive oil, 1 teaspoon honey, and ¼ teaspoon fine sea salt until fully combined.
8. Transfer the grilled salmon to a serving platter and let it rest for 3 minutes to allow the juices to redistribute.
9. Drizzle the prepared lime-dill sauce generously over the rested salmon fillets just before serving.
Succulent and perfectly charred, the salmon offers a beautiful contrast between the crisp skin and tender, moist interior. The vibrant sauce cuts through the richness with its citrusy zing and fresh herbal finish. For a stunning presentation, serve atop a bed of quinoa salad or with grilled asparagus, allowing the sauce to pool deliciously underneath.
Baked Apple with Cinnamon and Honey
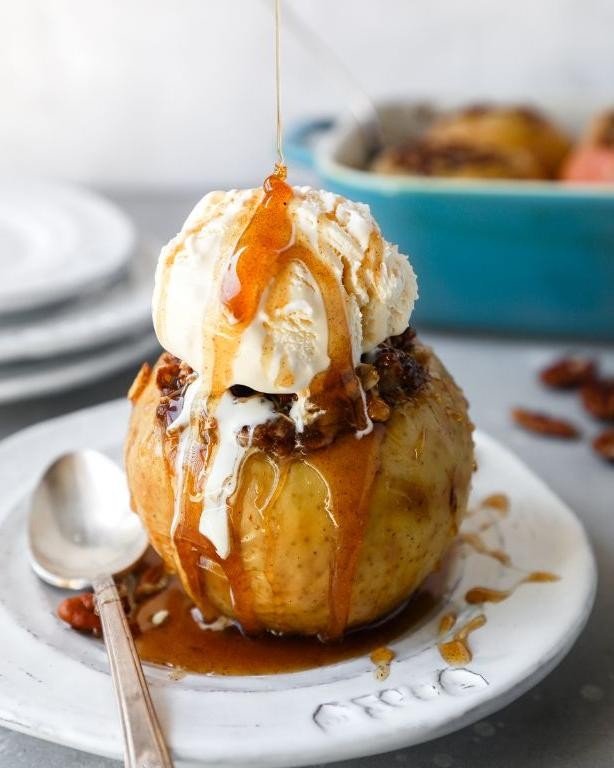
Heralding the cozy embrace of autumn, this Baked Apple with Cinnamon and Honey transforms a humble fruit into a warm, fragrant dessert that feels both nostalgic and sophisticated. With its tender, caramelized flesh and aromatic spices, it’s a simple yet elegant treat that fills your kitchen with the comforting scent of the season. Perfect for a quiet evening or a festive gathering, it requires minimal effort for maximum reward.
Serving: 4 | Pre Time: 10 minutes | Cooking Time: 30 minutes
Ingredients
For the apples:
– 4 large baking apples (such as Honeycrisp or Granny Smith), cored
– 1 tablespoon unsalted butter, melted
For the filling:
– ¼ cup honey
– 1 teaspoon ground cinnamon
– ¼ cup chopped walnuts (optional)
For baking:
– ½ cup water
Instructions
1. Preheat your oven to 375°F (190°C) to ensure even cooking from the start.
2. Place the cored apples upright in a baking dish just large enough to hold them snugly.
3. In a small bowl, whisk together the honey and ground cinnamon until fully combined.
4. Spoon the honey-cinnamon mixture evenly into the center of each apple, filling them about three-quarters full to prevent overflow during baking.
5. If using, sprinkle the chopped walnuts over the filling in each apple for added crunch.
6. Drizzle the melted butter over the tops of the apples to promote browning and enhance richness.
7. Pour the water into the bottom of the baking dish around the apples to create steam, which helps keep them moist and prevents sticking.
8. Bake the apples in the preheated oven for 25–30 minutes, or until the flesh is tender when pierced with a fork and the tops are golden.
9. Remove the baking dish from the oven and let the apples rest for 5 minutes to allow the flavors to meld and the filling to set slightly.
Kindly note that the baked apples emerge with a soft, yielding texture that contrasts delightfully with any crunchy walnuts, while the honey and cinnamon meld into a warm, syrupy glaze. For a creative twist, serve them warm with a scoop of vanilla ice cream or a dollop of whipped cream, allowing the cool creaminess to complement the spiced sweetness.
Chia Seed Pudding with Almond Milk
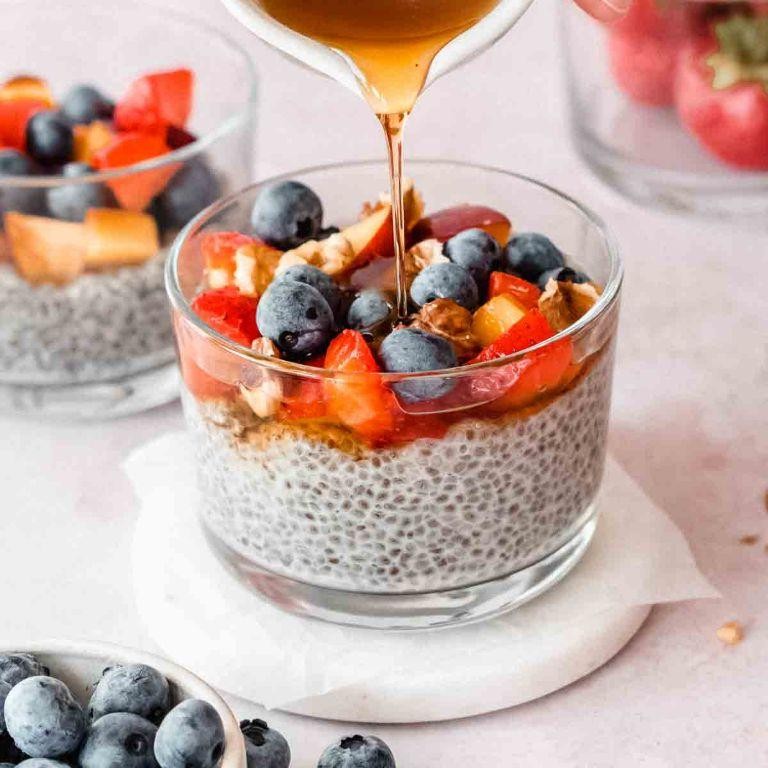
Savor a breakfast that marries simplicity with sophistication—chia seed pudding with almond milk offers a creamy, nutrient-dense canvas that can be tailored to your morning whims. This no-cook delight requires mere minutes of preparation, yet rewards you with a velvety texture and subtle nutty undertones that feel both indulgent and wholesome. Perfect for busy weekdays or leisurely brunches, it’s a versatile staple that invites endless customization with fresh fruits, spices, or a drizzle of honey.
Serving: 2 | Pre Time: 5 minutes | Cooking Time: 0 minutes
Ingredients
For the pudding base:
– 1/4 cup chia seeds
– 1 cup unsweetened almond milk
– 1 tbsp pure maple syrup
– 1/2 tsp pure vanilla extract
For optional toppings (choose one or more):
– 1/4 cup fresh berries (such as strawberries or blueberries)
– 1 tbsp sliced almonds
– 1 tsp honey
Instructions
1. In a medium mixing bowl, combine 1/4 cup chia seeds, 1 cup unsweetened almond milk, 1 tbsp pure maple syrup, and 1/2 tsp pure vanilla extract.
2. Whisk the mixture vigorously for 30 seconds until the ingredients are fully integrated and no clumps of chia seeds remain.
3. Cover the bowl tightly with plastic wrap or a lid to prevent a skin from forming on the surface.
4. Refrigerate the mixture for at least 4 hours or overnight, allowing the chia seeds to absorb the liquid and swell to a pudding-like consistency.
5. After chilling, stir the pudding thoroughly to break up any gel-like clusters and ensure a smooth, even texture throughout.
6. Divide the pudding evenly between two serving glasses or bowls using a spoon or spatula.
7. If using toppings, arrange 1/4 cup fresh berries, 1 tbsp sliced almonds, or a drizzle of 1 tsp honey over each portion just before serving.
8. Serve immediately, or store covered in the refrigerator for up to 3 days for a ready-to-eat treat.
This pudding yields a luxuriously thick, spoonable texture with a delicate nutty flavor from the almond milk, punctuated by the gentle sweetness of maple syrup. Try layering it with granola for added crunch or swirling in a spoonful of fruit compote to create a visually stunning parfait that delights both the palate and the eye.
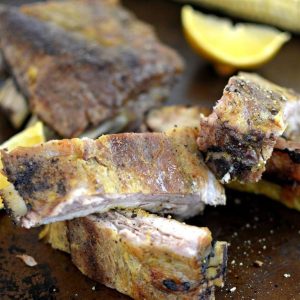
Herb-Crusted Pork Tenderloin with Steamed Broccoli

Tender, succulent pork tenderloin encased in a fragrant herb crust, paired with vibrant steamed broccoli, creates a harmonious weeknight dinner that feels both elegant and approachable. This dish transforms simple ingredients into a meal worthy of any occasion, with the aromatic crust locking in moisture while the broccoli provides a crisp, fresh counterpoint. It’s a testament to how a few thoughtful touches can elevate everyday cooking into something truly special.
Serving: 4 | Pre Time: 15 minutes | Cooking Time: 25 minutes
Ingredients
For the Herb Crust:
– 1 pork tenderloin (about 1.5 lbs)
– 1 tbsp olive oil
– 1/2 cup panko breadcrumbs
– 2 tbsp finely chopped fresh parsley
– 1 tbsp finely chopped fresh rosemary
– 1 tsp garlic powder
– 1/2 tsp kosher salt
– 1/4 tsp black pepper
For the Broccoli:
– 1 head broccoli, cut into florets
– 1/2 cup water
– 1 tbsp butter
– 1/4 tsp salt
Instructions
1. Preheat your oven to 400°F and line a baking sheet with parchment paper.
2. Pat the pork tenderloin completely dry with paper towels to ensure the crust adheres properly.
3. Rub the pork tenderloin all over with 1 tbsp olive oil.
4. In a small bowl, combine 1/2 cup panko breadcrumbs, 2 tbsp chopped parsley, 1 tbsp chopped rosemary, 1 tsp garlic powder, 1/2 tsp kosher salt, and 1/4 tsp black pepper.
5. Press the herb mixture firmly onto the entire surface of the pork tenderloin until evenly coated.
6. Place the coated pork on the prepared baking sheet and roast in the preheated oven for 20-25 minutes, or until an instant-read thermometer inserted into the thickest part reads 145°F.
7. While the pork roasts, place 1 head of broccoli florets in a large skillet with 1/2 cup water.
8. Cover the skillet and steam the broccoli over medium-high heat for 5-7 minutes, until bright green and tender-crisp.
9. Drain any remaining water from the skillet, then add 1 tbsp butter and 1/4 tsp salt to the broccoli, tossing to coat evenly.
10. Remove the pork from the oven and let it rest on a cutting board for 5 minutes to allow the juices to redistribute before slicing.
11. Slice the pork tenderloin into 1/2-inch thick medallions and serve immediately with the steamed broccoli.
Lusciously juicy pork slices reveal a golden, herb-flecked crust that crackles with each bite, while the steamed broccoli offers a tender-crisp texture and buttery finish. For a creative presentation, arrange the medallions over a bed of creamy polenta or alongside roasted fingerling potatoes to soak up the savory juices. This dish’s elegant simplicity makes it perfect for both casual dinners and impromptu gatherings, where its aromatic herbs and balanced flavors are sure to impress.
Banana Oatmeal Pancakes with Blueberry Compote
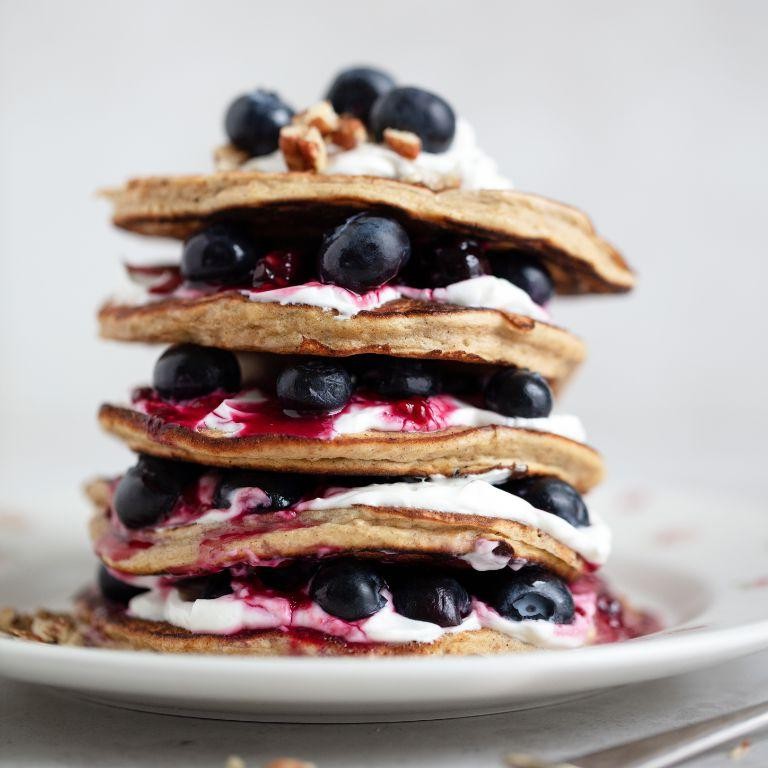
Delightfully wholesome yet undeniably indulgent, these banana oatmeal pancakes with blueberry compote offer a weekend breakfast that feels both nourishing and celebratory. The natural sweetness of ripe bananas melds with hearty oats, creating a tender, satisfying base, while a vibrant, warm blueberry compote adds a burst of tart, juicy flavor that elevates the entire dish to something truly special.
Serving: 4 | Pre Time: 10 minutes | Cooking Time: 20 minutes
Ingredients
For the Pancakes:
– 1 cup old-fashioned rolled oats
– 1 cup all-purpose flour
– 2 teaspoons baking powder
– 1/2 teaspoon baking soda
– 1/4 teaspoon salt
– 1 cup mashed very ripe banana (about 2 medium bananas)
– 1 1/4 cups buttermilk
– 1 large egg
– 2 tablespoons melted unsalted butter, cooled slightly
– 1 tablespoon granulated sugar
– 1 teaspoon pure vanilla extract
For the Blueberry Compote:
– 2 cups fresh or frozen blueberries
– 1/4 cup granulated sugar
– 2 tablespoons water
– 1 tablespoon fresh lemon juice
– 1/8 teaspoon salt
Instructions
1. In a blender, pulse the rolled oats until they resemble a coarse flour, about 30 seconds.
2. Transfer the oat flour to a large mixing bowl and whisk in the all-purpose flour, baking powder, baking soda, and salt until fully combined.
3. In a separate medium bowl, whisk together the mashed banana, buttermilk, egg, melted butter, sugar, and vanilla extract until smooth.
4. Pour the wet ingredients into the dry ingredients and gently fold with a spatula until just combined; a few small lumps are fine to prevent tough pancakes.
5. Let the batter rest for 5 minutes to allow the oats to hydrate and thicken slightly.
6. While the batter rests, combine the blueberries, sugar, water, lemon juice, and salt in a small saucepan over medium heat.
7. Cook the compote, stirring occasionally, until the blueberries burst and the sauce thickens to a syrupy consistency, about 8-10 minutes, then remove from heat.
8. Heat a large non-stick skillet or griddle over medium heat and lightly grease with butter or cooking spray.
9. For each pancake, pour 1/4 cup of batter onto the hot surface and cook until bubbles form on the surface and the edges look set, about 2-3 minutes.
10. Carefully flip each pancake and cook until the second side is golden brown and the center is cooked through, about 1-2 minutes more.
11. Serve the pancakes immediately, topped generously with the warm blueberry compote.
Soft, fluffy interiors with a subtly crisp edge give these pancakes a delightful texture, while the warm, jammy compote provides a bright, tangy contrast to their gentle sweetness. Serve them stacked high for a beautiful presentation, perhaps with an extra drizzle of maple syrup or a dollop of Greek yogurt for added richness.
Rice Flour Pancakes with Maple Syrup

Revered for their delicate texture and subtle nuttiness, rice flour pancakes offer a gluten-free twist on a classic breakfast favorite. Light and airy, these golden-brown discs become a canvas for the rich, amber sweetness of pure maple syrup, creating a harmonious balance of flavors that feels both comforting and refined.
Serving: 4 | Pre Time: 10 minutes | Cooking Time: 15 minutes
Ingredients
- For the batter:
- 1 ½ cups white rice flour
- 2 tablespoons granulated sugar
- 2 teaspoons baking powder
- ½ teaspoon fine sea salt
- 1 large egg
- 1 ¼ cups whole milk
- 2 tablespoons unsalted butter, melted and cooled slightly
- 1 teaspoon pure vanilla extract
- For cooking and serving:
- 2 tablespoons unsalted butter, for the skillet
- ½ cup pure maple syrup, warmed
Instructions
- In a large mixing bowl, whisk together 1 ½ cups white rice flour, 2 tablespoons granulated sugar, 2 teaspoons baking powder, and ½ teaspoon fine sea salt until thoroughly combined.
- In a separate medium bowl, lightly beat 1 large egg, then whisk in 1 ¼ cups whole milk, 2 tablespoons of melted unsalted butter, and 1 teaspoon pure vanilla extract until smooth.
- Pour the wet ingredients into the dry ingredients and whisk gently just until no large lumps remain; a few small lumps are acceptable to avoid overmixing, which can make the pancakes tough.
- Heat a large non-stick skillet or griddle over medium heat (approximately 350°F) and melt ½ tablespoon of the remaining unsalted butter, swirling to coat the surface evenly.
- For each pancake, pour ¼ cup of batter onto the hot skillet, spacing them about 2 inches apart to allow for spreading.
- Cook the pancakes for 2 to 3 minutes, or until the edges look set and bubbles form on the surface and begin to pop.
- Using a thin spatula, carefully flip each pancake and cook for an additional 1 to 2 minutes, until the second side is golden brown and the center springs back lightly when pressed.
- Transfer the cooked pancakes to a warm plate and cover loosely with foil; repeat the cooking process with the remaining batter, adding more butter to the skillet as needed to prevent sticking.
- In a small saucepan over low heat, gently warm ½ cup of pure maple syrup for 2 to 3 minutes, just until it becomes fluid and aromatic, being careful not to let it boil.
- Serve the pancakes immediately, drizzled generously with the warm maple syrup.
Finished with a glossy coat of syrup, these pancakes boast a tender, slightly chewy crumb that contrasts beautifully with their crisp, lacy edges. For a creative presentation, layer them with slices of ripe banana and a sprinkle of toasted pecans, or fold a spoonful of lemon zest into the batter to introduce a bright, citrusy note that cuts through the sweetness.
Lentil Stew with Carrots and Parsnips
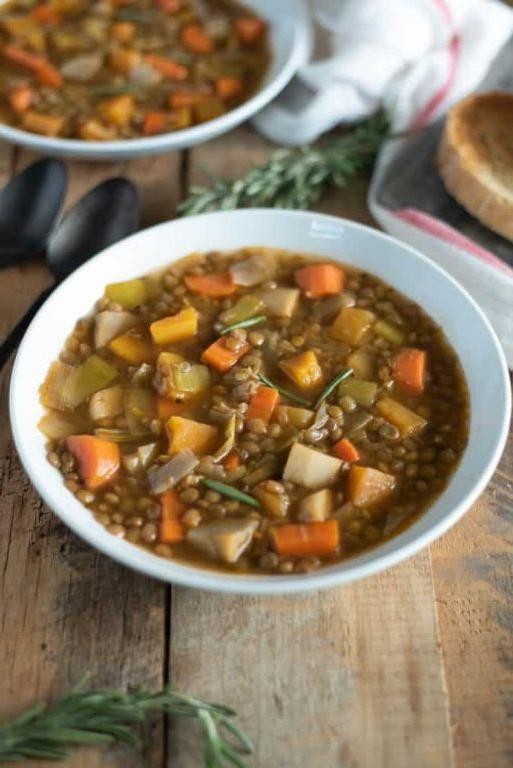
Venturing into the heart of winter comfort, this rustic lentil stew transforms humble root vegetables into a deeply satisfying, one-pot meal. Its rich, earthy broth and tender legumes offer a nourishing embrace on the coldest of days, proving that simplicity, when crafted with care, yields extraordinary flavor.
Serving: 6 | Pre Time: 15 minutes | Cooking Time: 45 minutes
Ingredients
For the Aromatics and Vegetables:
– 2 tablespoons olive oil
– 1 large yellow onion, finely diced
– 3 cloves garlic, minced
– 4 medium carrots, peeled and cut into ½-inch rounds
– 2 large parsnips, peeled and cut into ½-inch pieces
For the Stew Base:
– 1½ cups brown lentils, rinsed and drained
– 6 cups vegetable broth
– 1 (14.5-ounce) can diced tomatoes, undrained
– 2 teaspoons dried thyme
– 1 bay leaf
For Finishing:
– 1 tablespoon red wine vinegar
– ½ teaspoon freshly ground black pepper
– ½ cup chopped fresh parsley
Instructions
1. Heat the olive oil in a large Dutch oven or heavy-bottomed pot over medium heat for 1 minute.
2. Add the diced onion and cook, stirring occasionally, for 6–8 minutes until softened and translucent.
3. Stir in the minced garlic and cook for 1 minute until fragrant, being careful not to let it brown.
4. Add the carrot rounds and parsnip pieces to the pot. Cook, stirring every 2 minutes, for 5 minutes to lightly caramelize the edges.
5. Pour in the rinsed lentils, vegetable broth, diced tomatoes with their juices, dried thyme, and bay leaf. Stir to combine all ingredients.
6. Increase the heat to high and bring the stew to a rolling boil, which should take about 4–5 minutes.
7. Immediately reduce the heat to low, cover the pot with a lid, and simmer gently for 30 minutes. *Tip: A low simmer prevents the lentils from breaking apart and ensures even cooking.*
8. After 30 minutes, remove the lid. The lentils and vegetables should be tender. Simmer uncovered for an additional 10 minutes to allow the broth to reduce and thicken slightly. *Tip: The stew is ready when a carrot piece can be easily pierced with a fork but still holds its shape.*
9. Discard the bay leaf. Remove the pot from the heat.
10. Stir in the red wine vinegar, freshly ground black pepper, and chopped fresh parsley. *Tip: The vinegar brightens the deep flavors; add it off the heat to preserve its acidity.*
Delightfully hearty, each spoonful offers a velvety broth clinging to perfectly tender lentils and sweet, earthy root vegetables. For a creative presentation, ladle it into shallow bowls and garnish with an extra sprinkle of parsley and a drizzle of high-quality olive oil. This stew’s robust character makes it an ideal make-ahead meal, as the flavors meld and deepen beautifully overnight.
Beet and Avocado Salad with Balsamic Vinaigrette
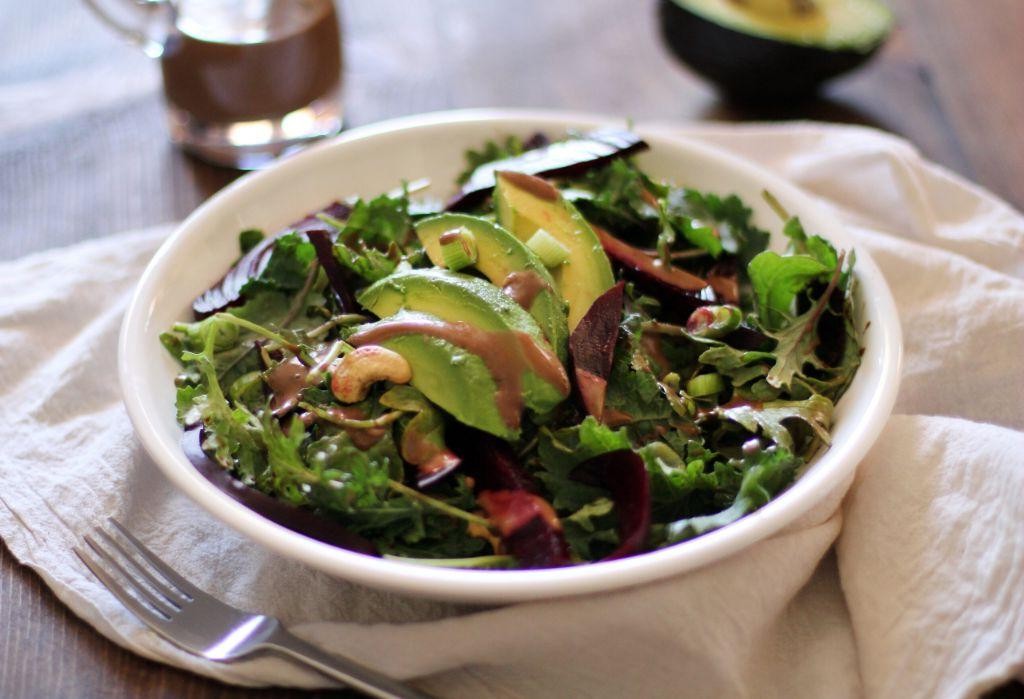
Zesty yet refined, this beet and avocado salad with balsamic vinaigrette transforms humble ingredients into a vibrant, elegant dish. Earthy roasted beets, creamy avocado, and peppery arugula are elevated by a tangy-sweet dressing, creating a stunning balance of flavors and textures. Perfect for a light lunch or as a sophisticated starter, it’s a celebration of freshness and simplicity.
Serving: 4 | Pre Time: 15 minutes | Cooking Time: 45 minutes
Ingredients
For the roasted beets:
– 3 medium beets (about 1 pound), peeled and cut into 1-inch cubes
– 1 tablespoon olive oil
– ½ teaspoon kosher salt
– ¼ teaspoon black pepper
For the salad assembly:
– 5 ounces baby arugula
– 2 ripe avocados, peeled, pitted, and sliced into ½-inch pieces
– ¼ cup crumbled goat cheese
– ¼ cup toasted walnuts, roughly chopped
For the balsamic vinaigrette:
– ¼ cup extra-virgin olive oil
– 2 tablespoons balsamic vinegar
– 1 teaspoon Dijon mustard
– 1 small garlic clove, minced
– ¼ teaspoon kosher salt
– ⅛ teaspoon black pepper
Instructions
1. Preheat your oven to 400°F and line a baking sheet with parchment paper.
2. In a medium bowl, toss the cubed beets with 1 tablespoon olive oil, ½ teaspoon salt, and ¼ teaspoon pepper until evenly coated.
3. Spread the beets in a single layer on the prepared baking sheet and roast for 40–45 minutes, stirring halfway through, until tender and slightly caramelized at the edges.
4. While the beets roast, prepare the vinaigrette: in a small bowl, whisk together ¼ cup olive oil, 2 tablespoons balsamic vinegar, 1 teaspoon Dijon mustard, 1 minced garlic clove, ¼ teaspoon salt, and ⅛ teaspoon pepper until emulsified.
5. Tip: For a smoother vinaigrette, combine all ingredients in a jar with a tight lid and shake vigorously for 30 seconds.
6. Once the beets are done, remove them from the oven and let them cool to room temperature for 10 minutes to prevent wilting the greens.
7. In a large salad bowl, arrange 5 ounces of baby arugula as the base.
8. Scatter the cooled roasted beets evenly over the arugula.
9. Gently place 2 sliced avocados on top, taking care not to mash them.
10. Tip: To keep avocado slices from browning, toss them lightly with a teaspoon of the prepared vinaigrette before adding to the salad.
11. Sprinkle ¼ cup crumbled goat cheese and ¼ cup toasted walnuts over the salad.
12. Drizzle the balsamic vinaigrette over the salad just before serving.
13. Tip: Dress the salad lightly at first, as you can always add more vinaigrette to taste, but overdressing can make the greens soggy.
14. Toss the salad gently with salad tongs or two large spoons to combine all ingredients without crushing the beets or avocados.
Lusciously creamy avocado contrasts with the tender, earthy beets, while the peppery arugula and crunchy walnuts add delightful texture. The tangy balsamic vinaigrette ties everything together with a sweet, acidic note that brightens each bite. For a creative twist, serve individual portions on chilled plates or top with grilled shrimp for a heartier meal.
Conclusion
Altogether, these 35 recipes prove that an elimination diet can be delicious and stress-free. We hope you find new favorites that make your sensitive stomach happy! Give a recipe a try, leave a comment below with your top pick, and don’t forget to share this helpful roundup on Pinterest for others to enjoy. Happy, healthy cooking!