Maybe you’re out of eggs, avoiding them for dietary reasons, or just feeling adventurous—whatever the case, you’ve come to the right place! We’ve gathered 30 incredibly versatile and delicious recipes that use clever egg substitutes, perfect for quick dinners, baking triumphs, and everyday comfort food. Get ready to be inspired and find your new favorite dish. Let’s dive in!
Vegan Scrambled Tofu Breakfast
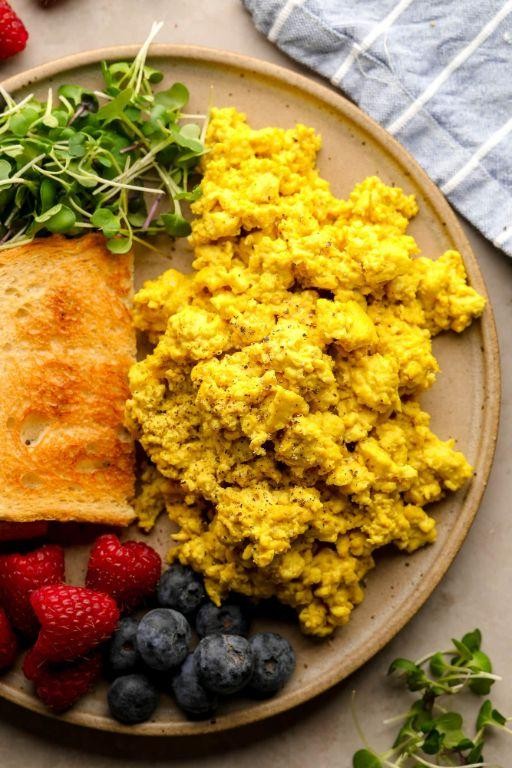
Remembering those quiet weekend mornings when the kitchen felt like a sanctuary, I’d often crave something warm and comforting that didn’t weigh me down. Really, this vegan scrambled tofu has become my go-to—a simple, savory scramble that feels both nourishing and indulgent, perfect for slow, reflective starts.
2
servings20
minutes12
minutesIngredients
– 1 block (14 oz) firm tofu
– 2 tbsp nutritional yeast
– 1 tbsp olive oil
– 1/2 tsp turmeric
– 1/4 tsp black salt (kala namak)
– 1/4 tsp garlic powder
– 1/4 tsp onion powder
– 1/8 tsp black pepper
– 2 tbsp unsweetened plant-based milk
– 1 tbsp tamari
Instructions
1. Press the tofu block for 15 minutes using a tofu press or by placing it between paper towels with a heavy pan on top to remove excess water.
2. Heat 1 tbsp olive oil in a non-stick skillet over medium heat until it shimmers lightly.
3. Crumble the pressed tofu directly into the skillet using your hands for a rustic, uneven texture.
4. Cook the crumbled tofu for 5 minutes, stirring occasionally, until it begins to firm up and release steam.
5. Sprinkle 2 tbsp nutritional yeast, 1/2 tsp turmeric, 1/4 tsp garlic powder, 1/4 tsp onion powder, 1/8 tsp black pepper, and 1/4 tsp black salt evenly over the tofu.
6. Stir continuously for 2 minutes to coat the tofu thoroughly and allow the spices to bloom.
7. Pour in 2 tbsp unsweetened plant-based milk and 1 tbsp tamari, then reduce heat to low.
8. Simmer for 3-4 minutes, stirring gently, until the liquid is absorbed and the tofu appears creamy but not wet.
9. Remove from heat and let rest for 1 minute to allow flavors to meld. Using black salt is key for an egg-like aroma, while pressing tofu ensures it doesn’t become watery. Stirring gently at the end helps maintain a fluffy texture without breaking the curds. Ultimately, the scramble emerges with a soft, curdy texture and a savory, umami-rich flavor from the tamari and nutritional yeast—try piling it onto toasted sourdough with avocado slices or folding it into warm tortillas with fresh salsa for a vibrant twist.
Chia Seed Pudding Delight
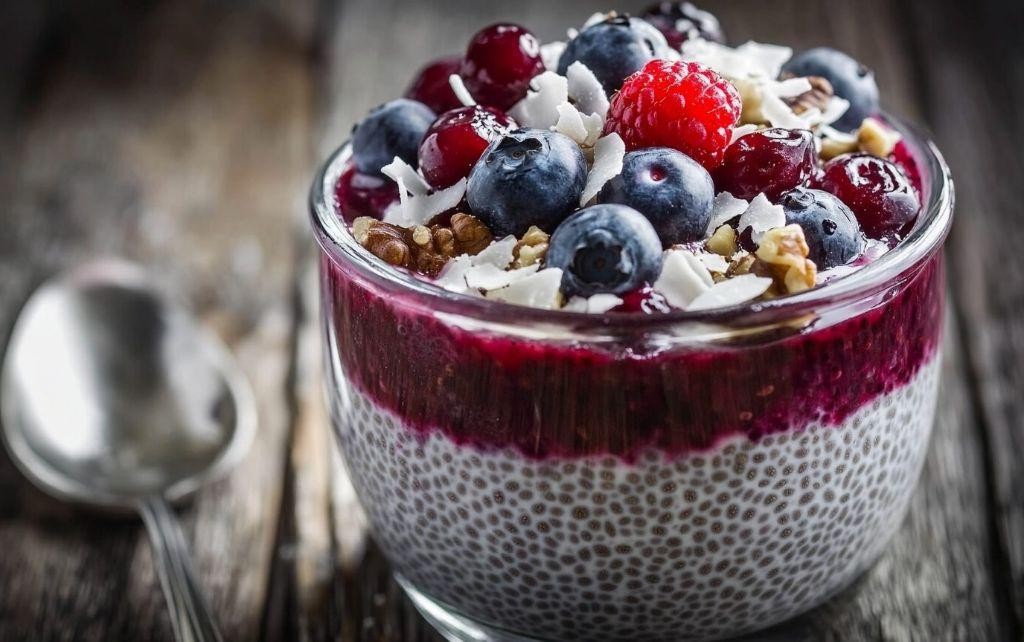
Perhaps it’s the quiet simplicity that draws me to this recipe, the way it asks for nothing more than patience and gentle stirring, creating something nourishing from the barest of ingredients while the world sleeps.
1
servings5
minutesIngredients
- 1/4 cup chia seeds
- 1 cup unsweetened almond milk
- 1 tbsp pure maple syrup
- 1/2 tsp vanilla extract
- Pinch of sea salt
Instructions
- Combine 1/4 cup chia seeds and 1 cup unsweetened almond milk in a medium glass jar with a tight-fitting lid.
- Add 1 tablespoon pure maple syrup, 1/2 teaspoon vanilla extract, and a pinch of sea salt to the jar.
- Secure the lid tightly and shake vigorously for 30 seconds until all ingredients are fully incorporated.
- Let the mixture rest for 5 minutes, then shake again for 15 seconds to break up any clumps that may have formed.
- Refrigerate the mixture for at least 4 hours or overnight until the pudding reaches a thick, spoonable consistency.
- Check the pudding after 4 hours; if it appears too thick, stir in additional almond milk 1 tablespoon at a time until desired consistency is reached.
Here, the transformation reveals a delicate tapioca-like texture with subtle sweetness that makes mornings feel intentional. I love serving it layered with fresh berries in a clear glass, watching the dark seeds create constellations against the pale pudding, or stirring in mashed banana for natural creaminess that needs no additional sweetener.
Flaxseed Muffin Extravaganza

Perhaps there’s something quietly comforting about measuring flour on a cloudy afternoon, the way the light falls across the counter as you begin. This recipe for flaxseed muffins feels like that kind of quiet moment, a simple act of baking that fills the kitchen with a warm, nutty aroma.
12
muffins15
minutes22
minutesIngredients
– 1 ½ cups all-purpose flour
– ½ cup ground flaxseed
– ¾ cup granulated sugar
– 2 teaspoons baking powder
– ½ teaspoon salt
– 1 cup milk
– ⅓ cup vegetable oil
– 1 large egg
– 1 teaspoon vanilla extract
Instructions
1. Preheat your oven to 375°F and line a 12-cup muffin tin with paper liners.
2. In a large bowl, whisk together 1 ½ cups all-purpose flour, ½ cup ground flaxseed, ¾ cup granulated sugar, 2 teaspoons baking powder, and ½ teaspoon salt until no streaks remain.
3. In a separate medium bowl, combine 1 cup milk, ⅓ cup vegetable oil, 1 large egg, and 1 teaspoon vanilla extract, whisking for 30 seconds until fully blended and slightly frothy.
4. Pour the wet ingredients into the dry ingredients and fold gently with a spatula until just combined, being careful not to overmix; a few lumps are fine to ensure tender muffins.
5. Divide the batter evenly among the 12 prepared muffin cups, filling each about two-thirds full.
6. Bake at 375°F for 18–22 minutes, or until the tops are golden and a toothpick inserted into the center of a muffin comes out clean.
7. Let the muffins cool in the pan for 5 minutes to set, then transfer them to a wire rack to cool completely, which prevents steaming and soggy bottoms.
Kindly rustic and subtly sweet, these muffins have a moist, tender crumb with the earthy depth of flaxseed. They’re perfect warm with a drizzle of honey or split and toasted with a pat of salted butter for a simple breakfast.
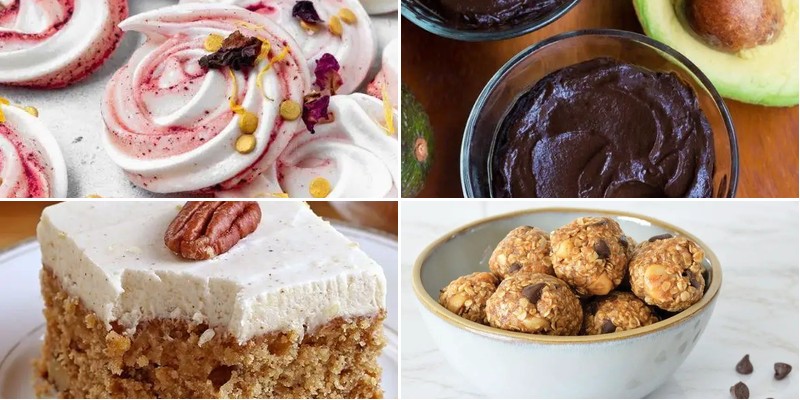
Aquafaba Meringue Cookies

Holding the bowl of cloudy chickpea liquid, I remember how something so humble could transform into these delicate, cloud-like cookies that dissolve on the tongue with just the right sweetness. There’s a quiet magic in watching stiff peaks form where there was once just liquid, a gentle alchemy that turns kitchen scraps into something beautiful. These cookies carry the whisper of traditional meringues but with a lighter footprint, both in ingredients and in conscience.
24
cookies20
minutes150
minutesIngredients
– ¾ cup aquafaba (liquid from canned chickpeas)
– ½ cup granulated sugar
– ¼ teaspoon cream of tartar
– ½ teaspoon vanilla extract
Instructions
1. Pour ¾ cup aquafaba into the completely clean and dry bowl of a stand mixer.
2. Add ¼ teaspoon cream of tartar to the aquafaba.
3. Using the whisk attachment, beat the mixture on medium speed for 2 minutes until frothy.
4. Gradually add ½ cup granulated sugar while continuing to beat on medium speed.
5. Increase mixer speed to high and beat for 10-12 minutes until stiff, glossy peaks form that hold their shape when the whisk is lifted.
6. Gently fold in ½ teaspoon vanilla extract until just incorporated, being careful not to deflate the meringue.
7. Preheat your oven to 200°F and line two baking sheets with parchment paper.
8. Use a piping bag with a star tip or two spoons to form 1½-inch mounds of meringue on the prepared baking sheets, spacing them 1 inch apart.
9. Place both baking sheets in the preheated oven and bake for 90 minutes.
10. Turn off the oven and let the cookies cool completely inside for at least 2 hours without opening the door.
11. Gently lift the cooled cookies from the parchment paper, checking that they release cleanly and feel dry to the touch.
12. Store the completely cooled cookies in an airtight container at room temperature. They feel like edible clouds with a satisfying crisp shell that gives way to a slightly chewy center, carrying the pure sweetness of vanilla. Try crumbling them over berry compote for a textural contrast, or sandwiching them with dark chocolate ganache for an elegant treat.
Banana Pancakes with Maple Syrup
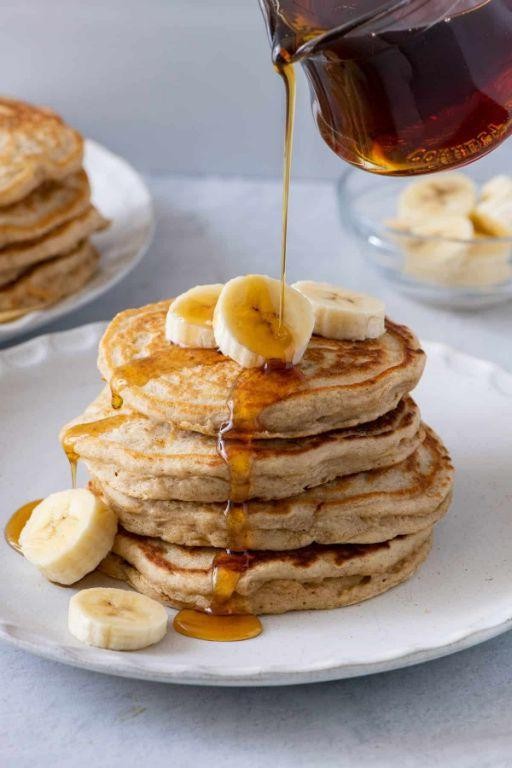
Zigzagging through my morning thoughts, I find myself craving something simple yet deeply comforting, the kind of food that feels like a slow, warm hug from the inside out. Banana pancakes with maple syrup are that quiet Sunday morning ritual, a gentle way to ease into the day when the world outside still feels soft around the edges. There’s a humble magic in transforming a few basic ingredients into something so nourishing and sweet.
3
servings10
minutes15
minutesIngredients
– 1 cup all-purpose flour
– 1 tbsp granulated sugar
– 2 tsp baking powder
– 1/4 tsp salt
– 1 cup milk
– 1 large egg
– 1 tbsp unsalted butter, melted
– 1 ripe banana, mashed
– 2 tbsp vegetable oil
– 1/4 cup maple syrup
Instructions
1. In a large bowl, whisk together 1 cup all-purpose flour, 1 tbsp granulated sugar, 2 tsp baking powder, and 1/4 tsp salt until fully combined.
2. In a separate medium bowl, whisk 1 cup milk, 1 large egg, and 1 tbsp melted unsalted butter until smooth.
3. Pour the wet ingredients into the dry ingredients and stir gently with a spatula until just incorporated; do not overmix to avoid tough pancakes.
4. Fold 1 mashed ripe banana into the batter until evenly distributed, leaving some small lumps for texture.
5. Heat a non-stick skillet or griddle over medium heat and add 1 tsp of the 2 tbsp vegetable oil, spreading it evenly.
6. Pour 1/4 cup of batter onto the skillet for each pancake, cooking until bubbles form on the surface and the edges look set, about 2-3 minutes.
7. Flip each pancake carefully with a spatula and cook for another 1-2 minutes until golden brown and cooked through.
8. Repeat steps 5-7 with the remaining batter, adding more of the 2 tbsp vegetable oil as needed to prevent sticking.
9. Warm 1/4 cup maple syrup in a small saucepan over low heat for 1-2 minutes, or microwave it in a heatproof bowl for 20-30 seconds until slightly thinned.
10. Serve the pancakes immediately, drizzled with the warmed maple syrup.
Remembering how the fluffy cakes soak up the syrup, each bite is a tender mix of sweet banana and earthy maple, with a golden crust that gives way to a soft, almost custardy interior. Try stacking them high with extra banana slices and a sprinkle of cinnamon for a cozy twist, or enjoy them straight from the pan while they’re still warm and comforting.
Applesauce Cinnamon Cake
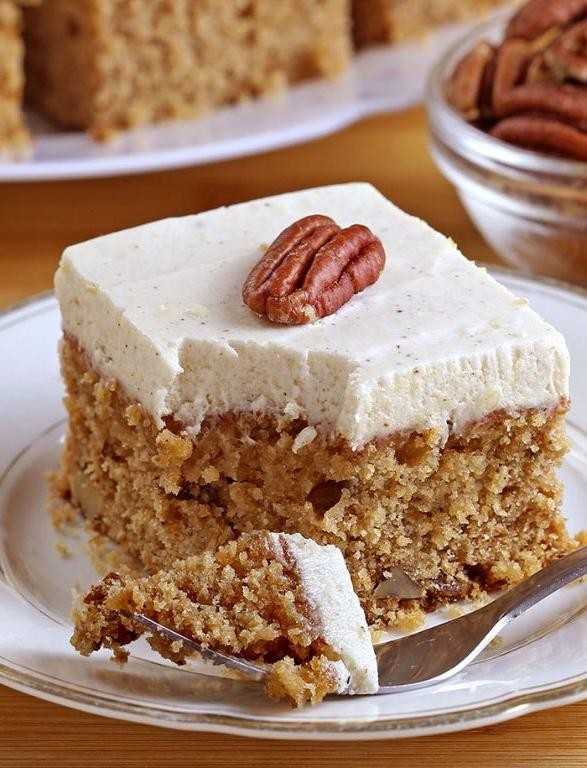
Lately, I’ve been craving the kind of dessert that feels like a warm hug, something simple and honest that fills the kitchen with the scent of autumn. This applesauce cinnamon cake is exactly that—a humble, tender crumb that speaks to quiet afternoons and the gentle art of baking for its own sake. It’s a recipe that asks for little and gives back so much comfort.
9
portions15
minutes35
minutesIngredients
– 1 ½ cups all-purpose flour
– 1 cup granulated sugar
– 1 tsp baking soda
– 1 tsp ground cinnamon
– ½ tsp salt
– 1 cup unsweetened applesauce
– ½ cup vegetable oil
– 2 large eggs
– 1 tsp vanilla extract
Instructions
1. Preheat your oven to 350°F and generously grease an 8×8-inch baking pan.
2. In a large mixing bowl, whisk together 1 ½ cups all-purpose flour, 1 cup granulated sugar, 1 tsp baking soda, 1 tsp ground cinnamon, and ½ tsp salt until no streaks remain.
3. In a separate bowl, combine 1 cup unsweetened applesauce, ½ cup vegetable oil, 2 large eggs, and 1 tsp vanilla extract, whisking until the mixture is smooth and fully emulsified.
4. Pour the wet ingredients into the dry ingredients and fold gently with a spatula until just combined, being careful not to overmix for a tender crumb.
5. Transfer the batter to the prepared pan and use a spatula to spread it evenly into the corners.
6. Bake at 350°F for 30–35 minutes, or until a toothpick inserted into the center comes out clean with no wet batter clinging to it.
7. Remove the cake from the oven and let it cool in the pan on a wire rack for 15 minutes to set the structure.
8. Run a knife around the edges of the pan to loosen the cake before inverting it onto the rack to cool completely.
Zesty with cinnamon and impossibly moist from the applesauce, this cake has a soft, springy texture that melts on the tongue. For a cozy twist, serve it warm with a dollop of whipped cream or crumble it over morning yogurt—it’s a versatile treat that feels both nostalgic and new.
Buttermilk Biscuit Surprise

Sometimes the simplest recipes hold the most delightful secrets, like these buttermilk biscuits that reveal a warm, melty center when you break them open. Sitting here with flour-dusted hands, I’m reminded how these humble ingredients transform into something magical. There’s comfort in the rhythm of folding and cutting, creating little pockets of joy for an ordinary afternoon.
6
biscuits20
minutes15
minutesIngredients
– 2 cups all-purpose flour
– 1 tbsp baking powder
– 1 tsp salt
– ½ cup cold unsalted butter
– ¾ cup cold buttermilk
– 4 oz cream cheese, chilled
– ¼ cup raspberry jam
Instructions
1. Preheat your oven to 425°F and line a baking sheet with parchment paper.
2. Whisk together 2 cups all-purpose flour, 1 tbsp baking powder, and 1 tsp salt in a large bowl.
3. Cut ½ cup cold unsalted butter into small cubes and add to the flour mixture.
4. Use a pastry cutter or two forks to work the butter into the flour until pea-sized crumbs form.
5. Pour ¾ cup cold buttermilk into the mixture and stir gently with a fork until just combined.
6. Turn the shaggy dough onto a lightly floured surface and knead 4-5 times until it holds together.
7. Pat the dough into a ½-inch thick rectangle using your hands.
8. Cut 4 oz chilled cream cheese into 12 small cubes and place them evenly across half of the dough rectangle.
9. Dollop ¼ cup raspberry jam between the cream cheese cubes.
10. Fold the empty half of the dough over the filling and press the edges firmly to seal.
11. Use a 2-inch round biscuit cutter to cut through both layers, creating 6 filled biscuits.
12. Arrange the biscuits on the prepared baking sheet, spacing them 2 inches apart.
13. Bake at 425°F for 14-16 minutes until golden brown with slightly risen tops.
14. Transfer the biscuits to a wire rack and let cool for 5 minutes before serving.
When you break these biscuits open, the steam releases a sweet-tangy aroma while the cream cheese creates silky ribbons through the flaky layers. The jam adds bright fruity notes that contrast beautifully with the rich, buttery crumb—perfect for splitting warm and drizzling with honey or serving alongside afternoon tea.
Silken Tofu Cheesecake
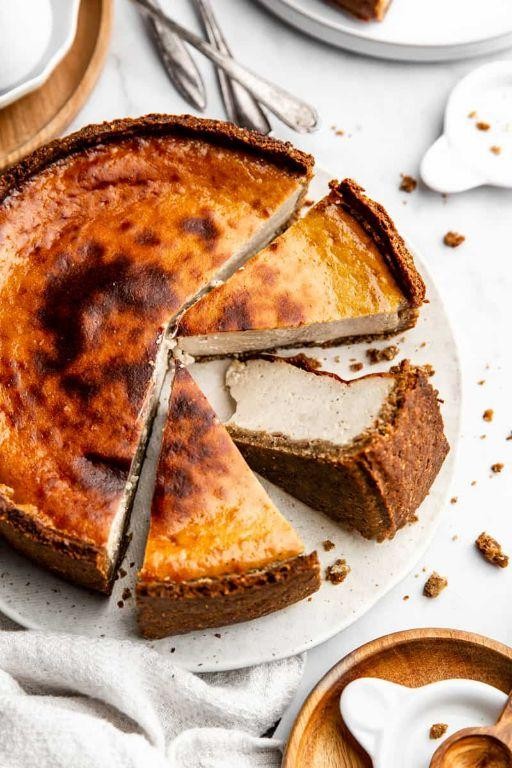
A quiet afternoon finds me contemplating the gentle art of transformation, how something as humble as silken tofu can become a dessert of such delicate elegance. This cheesecake whispers rather than shouts, its creamy texture and subtle sweetness offering comfort in every bite.
8
portions25
minutes45
minutesIngredients
– 16 ounces silken tofu
– 8 ounces cream cheese
– 1/2 cup granulated sugar
– 2 large eggs
– 1 teaspoon vanilla extract
– 1 tablespoon lemon juice
– 1 prepared graham cracker crust
– 1 cup fresh berries
Instructions
1. Preheat your oven to 325°F.
2. Drain the silken tofu thoroughly by placing it between paper towels and gently pressing to remove excess moisture.
3. Combine the silken tofu and cream cheese in a food processor.
4. Process the mixture for 2 minutes until completely smooth and no lumps remain.
5. Add the granulated sugar and process for another 30 seconds until fully incorporated.
6. Crack the eggs into a separate bowl to check for shell fragments.
7. Add the eggs to the food processor one at a time, processing for 15 seconds after each addition.
8. Pour in the vanilla extract and lemon juice.
9. Process the final mixture for 1 minute until everything is perfectly blended and airy.
10. Pour the filling into the prepared graham cracker crust, using a spatula to scrape the bowl clean.
11. Gently tap the pan on the counter 3-4 times to release any air bubbles.
12. Bake at 325°F for 45 minutes until the edges are set but the center still jiggles slightly when shaken.
13. Turn off the oven and prop the door open with a wooden spoon.
14. Let the cheesecake cool in the oven for 1 hour to prevent cracking.
15. Transfer the cheesecake to the refrigerator and chill for at least 4 hours until firm.
16. Wash and pat dry the fresh berries just before serving.
17. Arrange the berries over the chilled cheesecake in a decorative pattern.
18. Slice with a warm, clean knife for neat portions. During those quiet hours of chilling, the flavors deepen and meld into something truly special. Delicate as morning light, this cheesecake carries the subtle tang of cream cheese balanced by the purity of tofu, creating a dessert that feels both indulgent and light. Serve it with tea in the afternoon or as a graceful ending to a simple meal, letting its creamy texture melt slowly on the tongue.
Pumpkin Bread with Pecan Topping
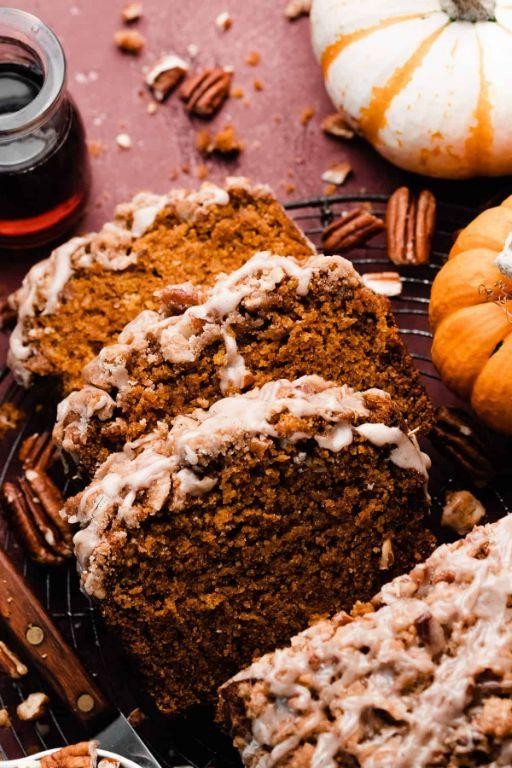
Zestful autumn afternoons call for baking that fills the kitchen with warmth and spice. This pumpkin bread, crowned with a buttery pecan topping, is the kind of simple, soul-soothing project that turns a quiet day into something special. It’s a humble loaf that carries the very essence of the season in every slice.
1
loaf15
minutes70
minutesIngredients
– 1 ¾ cups all-purpose flour
– 1 tsp baking soda
– ½ tsp salt
– 1 tsp ground cinnamon
– ½ tsp ground nutmeg
– ¼ tsp ground cloves
– 1 ½ cups granulated sugar
– ½ cup vegetable oil
– 2 large eggs
– 1 cup canned pumpkin puree
– ⅓ cup water
– ½ cup chopped pecans
– ¼ cup packed brown sugar
– 1 tbsp unsalted butter, melted
Instructions
1. Preheat your oven to 350°F and generously grease a 9×5-inch loaf pan.
2. In a medium bowl, whisk together 1 ¾ cups all-purpose flour, 1 tsp baking soda, ½ tsp salt, 1 tsp ground cinnamon, ½ tsp ground nutmeg, and ¼ tsp ground cloves until fully combined.
3. In a separate large bowl, whisk 1 ½ cups granulated sugar, ½ cup vegetable oil, and 2 large eggs until the mixture is smooth and pale yellow.
4. Stir in 1 cup canned pumpkin puree and ⅓ cup water until just incorporated into the wet ingredients.
5. Gently fold the dry flour mixture into the wet pumpkin mixture using a spatula, mixing only until no streaks of flour remain to avoid overmixing, which can make the bread tough.
6. In a small bowl, combine ½ cup chopped pecans, ¼ cup packed brown sugar, and 1 tbsp melted unsalted butter to create the pecan topping.
7. Pour the pumpkin batter into the prepared loaf pan and spread it evenly with the spatula.
8. Sprinkle the pecan topping mixture evenly over the entire surface of the batter.
9. Bake in the preheated 350°F oven for 60-70 minutes, or until a toothpick inserted into the center comes out completely clean with no wet batter clinging to it.
10. Let the bread cool in the pan on a wire rack for 15 minutes to allow the structure to set before removing.
11. Carefully run a knife around the edges and transfer the loaf from the pan to the wire rack to cool completely. When testing for doneness, if the top is browning too quickly while the center remains undercooked, tent the loaf loosely with aluminum foil for the remaining baking time.
What emerges is a bread with a tender, moist crumb that’s fragrant with spice, while the pecan topping adds a delightful crunch and caramel-like sweetness. For a cozy treat, serve a thick slice slightly warmed with a pat of softened butter melting into its nooks, or enjoy it as a simple afternoon snack with a cup of tea.
Sweet Potato Brownies

Beneath the quiet hum of the afternoon, I find myself craving something deeply comforting, something that feels like a warm embrace in dessert form. Sweet potato brownies have become my go-to for these moments, offering a rich, fudgy indulgence that feels both nourishing and decadent. They’re the kind of treat that turns an ordinary day into something softly special.
9
brownies15
minutes30
minutesIngredients
– 1 cup mashed sweet potato
– 1/2 cup almond butter
– 1/3 cup maple syrup
– 1/4 cup cocoa powder
– 1 teaspoon vanilla extract
– 1/2 teaspoon baking soda
– 1/4 teaspoon salt
– 1/2 cup dark chocolate chips
Instructions
1. Preheat your oven to 350°F and line an 8×8 inch baking pan with parchment paper.
2. In a large mixing bowl, combine 1 cup mashed sweet potato, 1/2 cup almond butter, and 1/3 cup maple syrup until smooth.
3. Add 1/4 cup cocoa powder, 1 teaspoon vanilla extract, 1/2 teaspoon baking soda, and 1/4 teaspoon salt to the wet ingredients, stirring until just combined.
4. Gently fold in 1/2 cup dark chocolate chips, being careful not to overmix the batter.
5. Spread the batter evenly into the prepared pan using a spatula.
6. Bake at 350°F for 25-30 minutes, or until the edges are set and the center springs back lightly when touched.
7. Allow the brownies to cool completely in the pan on a wire rack for at least 1 hour before slicing.
Even after cooling, these brownies retain an almost molten quality at the center, with the sweet potato lending a subtle earthiness that balances the deep chocolate notes. I love serving them slightly warmed with a dusting of flaky sea salt, or crumbled over vanilla bean ice cream for an effortless, elegant dessert.
Coconut Yogurt Parfait
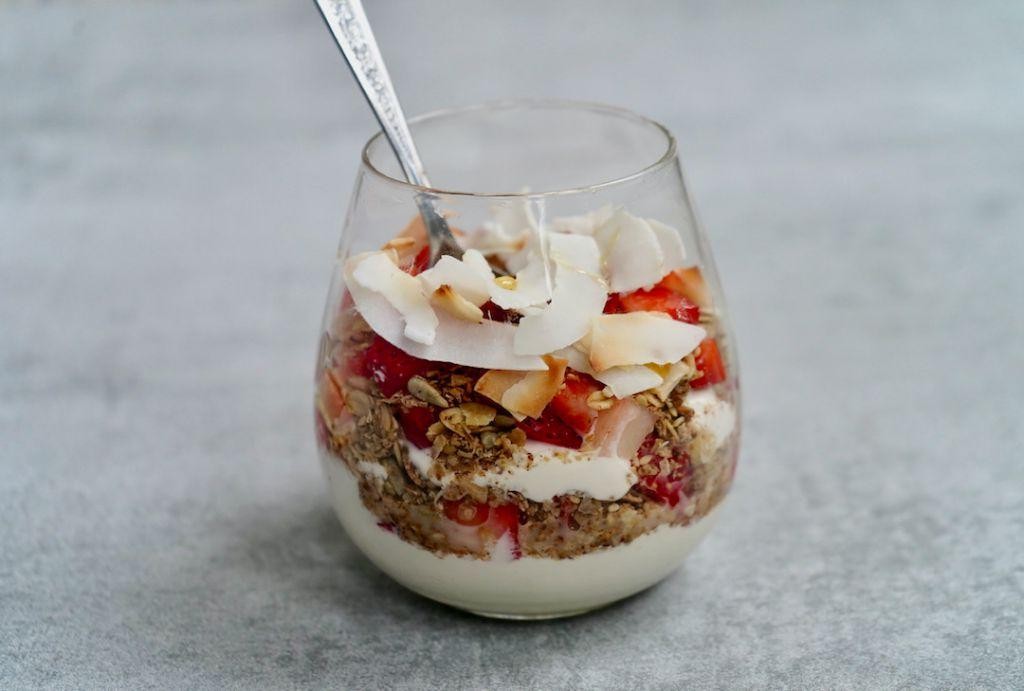
Under the soft morning light, I find myself reaching for simple comforts, the kind that require little effort but reward generously. This coconut yogurt parfait came to me during one of those quiet moments when the world outside felt too loud, and all I wanted was something cool, creamy, and gently sweet to steady myself. It’s become my go-to for breakfast or an afternoon pause, a layered reminder that tranquility can be built, one spoonful at a time.
1
parfait15
minutesIngredients
– 1 cup plain coconut yogurt
– 2 tbsp maple syrup
– 1/2 cup granola
– 1/2 cup mixed berries (fresh or frozen)
– 1 tbsp chia seeds
– 1 tsp vanilla extract
Instructions
1. In a small bowl, combine 1 cup plain coconut yogurt, 2 tbsp maple syrup, and 1 tsp vanilla extract, stirring gently until fully incorporated and smooth.
2. Allow the yogurt mixture to rest for 5 minutes to let the flavors meld, which helps reduce graininess and creates a creamier base.
3. If using frozen berries, thaw them at room temperature for 10 minutes until soft but not mushy; this prevents excess liquid from watering down the parfait layers.
4. Spoon 2 tablespoons of the yogurt mixture into the bottom of a serving glass or jar, spreading it evenly with the back of a spoon.
5. Sprinkle 2 tablespoons of granola over the yogurt layer, pressing lightly to create a stable foundation that adds crunch without collapsing.
6. Scatter 2 tablespoons of mixed berries over the granola, distributing them evenly to ensure each bite includes fruit.
7. Repeat the layering process—yogurt, granola, berries—until all ingredients are used, finishing with a yogurt layer on top.
8. Sprinkle 1 tbsp chia seeds over the final yogurt layer, which will absorb moisture and add a subtle gel-like texture as it sits.
9. Refrigerate the parfait for at least 20 minutes to chill thoroughly, allowing the layers to set and the chia seeds to soften.
10. Serve immediately, or cover and store in the refrigerator for up to 24 hours for a firmer, more integrated texture. Now, the parfait settles into something wonderfully textured—creamy yogurt giving way to crunchy granola and bursts of tart berries. Noticing how the chia seeds plump up overnight, I sometimes drizzle a thread of maple syrup over the top just before serving, letting it cascade down the sides like liquid amber.
Zucchini Bread with Walnuts

Kind of like finding an old photograph in a drawer, this recipe brings back the warmth of autumn afternoons and the simple comfort of home baking. The gentle spice of cinnamon mingles with the moist sweetness of shredded zucchini, while walnuts add their earthy crunch. It’s the sort of bread that fills the kitchen with a fragrance that feels like a soft, worn sweater.
1
loaf15
minutes60
minutesIngredients
– 2 cups all-purpose flour
– 1 tsp baking soda
– 1/2 tsp baking powder
– 1/2 tsp salt
– 1 tsp ground cinnamon
– 2 large eggs
– 1 cup granulated sugar
– 1/2 cup vegetable oil
– 1 tsp vanilla extract
– 1 1/2 cups shredded zucchini
– 1/2 cup chopped walnuts
Instructions
1. Preheat your oven to 350°F and grease a 9×5-inch loaf pan.
2. In a medium bowl, whisk together 2 cups all-purpose flour, 1 tsp baking soda, 1/2 tsp baking powder, 1/2 tsp salt, and 1 tsp ground cinnamon until no streaks remain.
3. In a large bowl, beat 2 large eggs with 1 cup granulated sugar until the mixture is pale and slightly thickened.
4. Slowly pour in 1/2 cup vegetable oil and 1 tsp vanilla extract while continuing to mix.
5. Gently fold in 1 1/2 cups shredded zucchini, squeezing out excess moisture first to prevent a soggy loaf.
6. Add the dry ingredients to the wet mixture, stirring just until combined; overmixing can make the bread tough.
7. Fold in 1/2 cup chopped walnuts, reserving a tablespoon for topping if desired.
8. Pour the batter into the prepared pan and smooth the top with a spatula.
9. Bake for 50–60 minutes, or until a toothpick inserted into the center comes out clean.
10. Cool the bread in the pan for 10 minutes, then transfer to a wire rack to cool completely.
Just out of the oven, this bread has a tender, cake-like crumb that melts with each bite, the walnuts offering a welcome contrast. Toasted slices with a smear of cream cheese or a drizzle of honey make it a cozy breakfast, while a warm slice alongside afternoon tea feels like a quiet moment of grace.
Avocado Chocolate Mousse
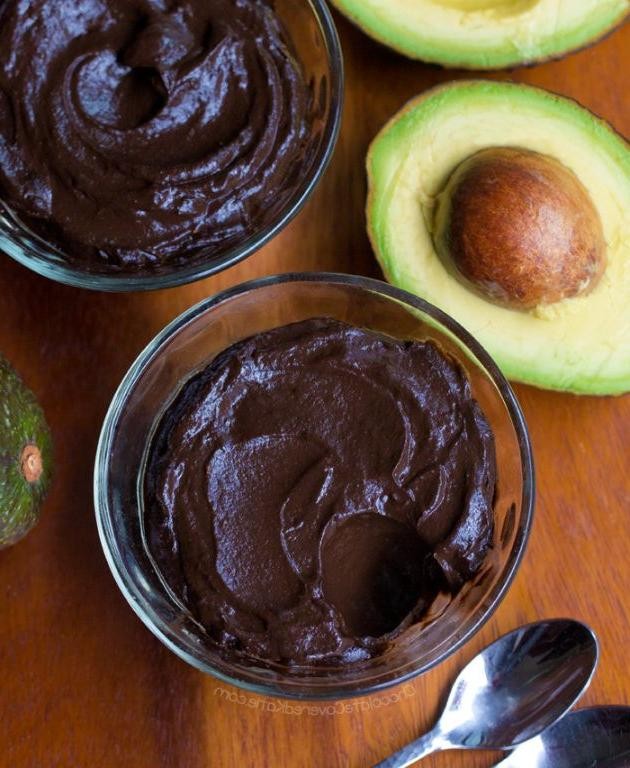
Kindness comes in unexpected forms, like this quiet moment with a bowl of something sweet that feels both indulgent and gentle. Sometimes the simplest combinations—ripe avocado, dark chocolate, a touch of maple—create the most comforting surprises. This mousse is one of those small joys, creamy and rich without heaviness, perfect for a slow afternoon or a quiet evening treat.
4
servings15
minutesIngredients
– 2 large ripe avocados
– 1/2 cup pure maple syrup
– 1/2 cup unsweetened cocoa powder
– 1/4 cup almond milk
– 1 tsp vanilla extract
– 1/4 tsp sea salt
Instructions
1. Cut the avocados in half, remove the pits, and scoop the flesh into a food processor or high-speed blender.
2. Add the maple syrup, cocoa powder, almond milk, vanilla extract, and sea salt to the food processor.
3. Blend the mixture on high speed for 60–90 seconds, stopping to scrape down the sides with a spatula once, until completely smooth and no green flecks remain.
4. Taste the mousse and adjust sweetness if desired by adding an extra tablespoon of maple syrup, blending for another 15 seconds to incorporate.
5. Transfer the mousse to a medium bowl, cover tightly with plastic wrap, and refrigerate for at least 2 hours or until chilled and set.
6. Spoon the chilled mousse into serving bowls or glasses just before serving.
A velvety texture emerges after chilling, with the avocado lending a silky richness that melts smoothly against the deep cocoa notes. For a playful twist, layer it in glasses with crushed toasted almonds or fresh raspberries, letting each spoonful balance earthy sweetness with a hint of brightness.
Almond Milk French Toast
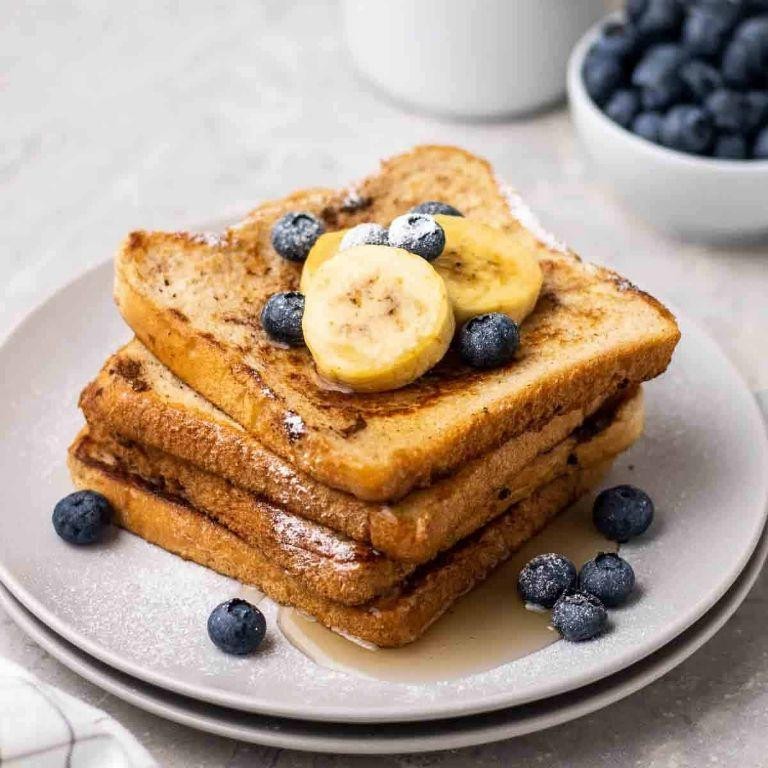
Mornings like this one call for something gentle, something that fills the kitchen with a quiet, sweet aroma and turns simple slices of bread into a soft, custardy comfort. It’s a small ritual, this making of French toast with almond milk, a way to slow down and savor the start of the day.
5
servings10
minutes24
minutesIngredients
– 1 cup unsweetened almond milk
– 2 large eggs
– 1 tbsp pure maple syrup
– 1 tsp vanilla extract
– 1/2 tsp ground cinnamon
– 1/4 tsp fine sea salt
– 4 slices thick-cut brioche bread
– 2 tbsp unsalted butter
– 1 tbsp avocado oil
Instructions
1. Crack 2 large eggs into a wide, shallow bowl.
2. Whisk the eggs vigorously for 30 seconds until they are fully blended and pale yellow.
3. Pour 1 cup of unsweetened almond milk into the bowl with the eggs.
4. Add 1 tablespoon of pure maple syrup, 1 teaspoon of vanilla extract, 1/2 teaspoon of ground cinnamon, and 1/4 teaspoon of fine sea salt to the bowl.
5. Whisk all ingredients together for 1 full minute until the mixture is completely smooth and uniform in color.
6. Let the custard mixture rest for 5 minutes to allow the cinnamon to fully hydrate and the flavors to meld.
7. Place a large non-stick skillet or griddle over medium-low heat.
8. Add 1 tablespoon of avocado oil and 1 tablespoon of unsalted butter to the preheating skillet.
9. Swirl the skillet to coat the entire cooking surface evenly with the fat as the butter melts.
10. Dip one slice of thick-cut brioche bread into the custard mixture, ensuring both sides are fully submerged.
11. Let the bread soak for 15 seconds on the first side, then flip it and soak for another 15 seconds on the second side. *Tip: Soaking for exactly 15 seconds per side prevents the bread from becoming too soggy while ensuring full flavor absorption.*
12. Lift the soaked bread from the bowl, allowing any excess custard to drip back into the bowl for about 3 seconds.
13. Carefully place the soaked bread slice into the preheated skillet.
14. Repeat the soaking process with the remaining 3 slices of brioche bread, working in batches if your skillet cannot accommodate all 4 slices at once without crowding.
15. Cook the first side for 3-4 minutes until the bottom develops a deep golden-brown crust that releases easily from the skillet. *Tip: Resist the urge to move the bread during the first 2 minutes of cooking—this allows a proper crust to form.*
16. Use a thin, flexible spatula to carefully flip each slice of French toast.
17. Cook the second side for another 3-4 minutes until it matches the first side in color and the center feels firm to the touch. *Tip: The French toast is ready when no liquid custard seeps out when you gently press the center with your spatula.*
18. Transfer the cooked French toast to a wire rack instead of a plate—this prevents the bottom from becoming soggy from trapped steam.
19. Repeat steps 10-18 with any remaining bread slices, adding the remaining 1 tablespoon of butter to the skillet if needed. Buttery slices emerge with a delicate crispness that gives way to a soft, almost pudding-like interior. Brightened by the subtle nuttiness of almond milk and warmth of cinnamon, they’re wonderful drizzled with extra maple syrup or topped with fresh berries for a pop of color and tartness.
Nutty Cashew Milk Waffles
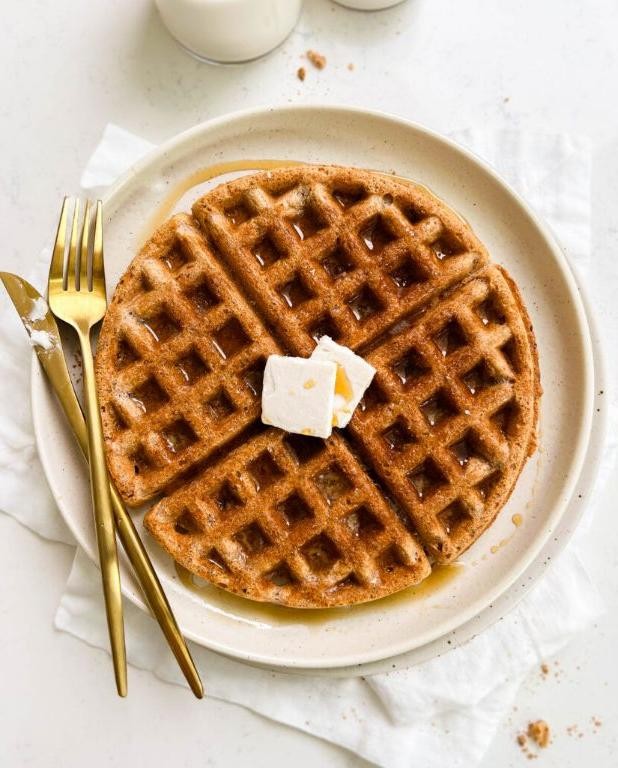
Mornings like these call for something gentle, something that fills the kitchen with a warm, nutty aroma and promises a slow, comforting start. These cashew milk waffles are my quiet ritual, a simple batter that transforms into golden, crisp-edged pillows perfect for a peaceful breakfast. They feel both nourishing and indulgent, a small act of care for yourself on a lazy day.
2
waffles10
minutes25
minutesIngredients
– 2 cups all-purpose flour
– 1/4 cup granulated sugar
– 1 tbsp baking powder
– 1/2 tsp salt
– 2 large eggs
– 1 3/4 cups unsweetened cashew milk
– 1/2 cup vegetable oil
– 1 tsp vanilla extract
Instructions
1. Preheat your waffle iron to 375°F, ensuring it’s fully heated for even cooking and crisp edges.
2. In a large mixing bowl, whisk together 2 cups all-purpose flour, 1/4 cup granulated sugar, 1 tbsp baking powder, and 1/2 tsp salt until no streaks of baking powder remain.
3. In a separate medium bowl, lightly beat 2 large eggs until uniform in color, about 30 seconds.
4. Pour 1 3/4 cups unsweetened cashew milk, 1/2 cup vegetable oil, and 1 tsp vanilla extract into the beaten eggs, whisking gently to combine without creating foam.
5. Tip: Pour the wet ingredients into the dry ingredients all at once, then fold with a spatula until just combined; a few small lumps are fine to avoid tough waffles.
6. Let the batter rest undisturbed for 5 minutes to allow the baking powder to activate, which gives the waffles a lighter texture.
7. Lightly grease the preheated waffle iron with oil or non-stick spray to prevent sticking.
8. Ladle about 3/4 cup of batter onto the center of the iron, spreading it slightly without overfilling.
9. Close the lid and cook for 4–5 minutes, or until the steam nearly stops and the waffle is deep golden brown with crisp edges.
10. Tip: Avoid opening the iron early, as this can cause the waffle to tear or cook unevenly.
11. Use a fork to gently lift the waffle onto a wire rack instead of a plate to keep the bottom from getting soggy.
12. Repeat with the remaining batter, regreasing the iron only if needed.
13. Tip: For extra crispness, place finished waffles in a 200°F oven on the wire rack until ready to serve.
Perhaps what I love most is the delicate crunch that gives way to a soft, airy center, with the cashew milk lending a subtle, creamy sweetness. Piled high with fresh berries and a drizzle of maple syrup, they feel like a hug in food form, perfect for sharing or savoring alone with a book.
Oatmeal Cookie Bliss
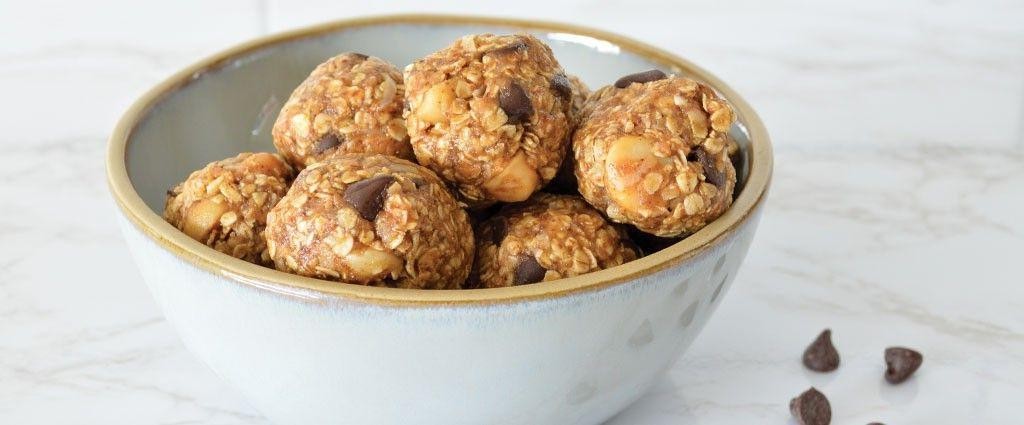
A quiet afternoon like this makes me think of simple comforts, the kind that fill the kitchen with a warm, spiced aroma and leave you feeling completely content. There’s something deeply soothing about the ritual of baking, especially when it leads to these soft, chewy oatmeal cookies.
24
cookies15
minutes12
minutesIngredients
– 1 cup unsalted butter, softened
– 1 cup brown sugar, packed
– 1/2 cup granulated sugar
– 2 large eggs
– 1 tsp vanilla extract
– 1 1/2 cups all-purpose flour
– 1 tsp baking soda
– 1 tsp ground cinnamon
– 1/2 tsp salt
– 3 cups old-fashioned rolled oats
– 1 cup raisins
Instructions
1. Preheat your oven to 350°F and line two baking sheets with parchment paper.
2. In a large bowl, use an electric mixer on medium speed to cream the softened butter, brown sugar, and granulated sugar together for 3 minutes, until the mixture is light and fluffy. (Tip: Properly creaming the butter and sugar is key for a soft, chewy texture.)
3. Add the eggs one at a time, beating well after each addition until fully incorporated.
4. Mix in the vanilla extract until just combined.
5. In a separate medium bowl, whisk together the all-purpose flour, baking soda, ground cinnamon, and salt.
6. Gradually add the dry flour mixture to the wet butter mixture, mixing on low speed until no streaks of flour remain.
7. Switch to a wooden spoon or spatula and fold in the old-fashioned rolled oats and raisins until evenly distributed. (Tip: Folding by hand prevents overmixing, which can make the cookies tough.)
8. Scoop 2-tablespoon portions of dough and roll them into balls, placing them 2 inches apart on the prepared baking sheets.
9. Gently flatten each dough ball slightly with the palm of your hand.
10. Bake for 10–12 minutes, until the edges are lightly golden but the centers still look slightly soft. (Tip: The cookies will continue to set as they cool, so pulling them out when the centers seem underdone ensures a perfectly chewy result.)
11. Let the cookies cool on the baking sheet for 5 minutes before transferring them to a wire rack to cool completely.
Delightfully chewy with a hint of cinnamon warmth, these cookies have a tender crumb that pairs wonderfully with a cold glass of milk. For a cozy twist, try crumbling one over a bowl of vanilla ice cream while it’s still slightly warm, letting the melty pockets of raisin and spice mingle with the cool creaminess.
Conclusion
Fantastic! This collection proves you don’t need eggs to create mouthwatering meals. Whether you’re baking, cooking, or just experimenting, these 30 versatile substitutes open up a world of delicious possibilities. We’d love to hear which recipes you try—drop a comment with your favorites and share this roundup on Pinterest to inspire fellow home cooks!


