
Ready to transform your hectic weeknights? We’ve gathered 24 fuss-free vegetarian dinners that come together in a flash—think vibrant bowls, cozy pastas, and satisfying skillet meals. Whether you’re craving something light and fresh or hearty and comforting, these recipes are designed to make your evenings deliciously simple. Dive in and discover your new go-to favorites!
Creamy Mushroom Stroganoff
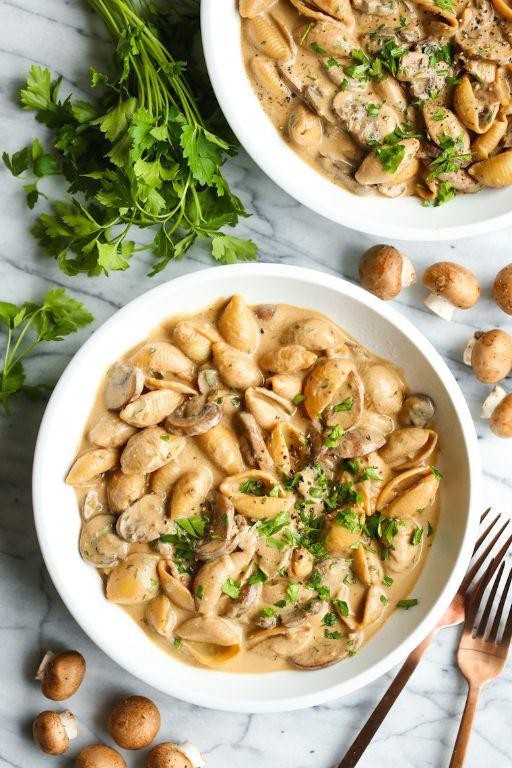
Dare we say this is the coziest, creamiest, most downright dreamy mushroom situation you’ll ever twirl around your fork? This stroganoff is basically a warm hug in a bowl, ready to rescue you from even the dreariest of days. Get ready to fall in love with fungi all over again!
4
servings15
minutes25
minutesIngredients
– 1 lb cremini mushrooms, sliced (or any mushroom mix you fancy)
– 8 oz wide egg noodles
– 1 medium yellow onion, diced
– 3 cloves garlic, minced
– 1 cup vegetable broth
– 1/2 cup sour cream
– 2 tbsp all-purpose flour
– 2 tbsp unsalted butter
– 1 tbsp olive oil
– 1 tsp smoked paprika
– 1/2 tsp dried thyme
– Salt and black pepper to taste
– Fresh parsley for garnish (optional but pretty)
Instructions
1. Bring a large pot of salted water to a rolling boil over high heat.
2. Add egg noodles and cook for 7-8 minutes until al dente, stirring occasionally to prevent sticking.
3. Drain noodles thoroughly and set aside, reserving 1/4 cup pasta water.
4. Heat olive oil and 1 tablespoon butter in a large skillet over medium-high heat until butter melts and sizzles.
5. Add sliced mushrooms in a single layer and cook undisturbed for 4 minutes to develop golden-brown color.
6. Flip mushrooms and cook another 3-4 minutes until evenly browned and tender.
7. Transfer mushrooms to a plate, leaving any liquid in the skillet.
8. Reduce heat to medium and add remaining tablespoon of butter to the same skillet.
9. Add diced onion and cook for 5 minutes until translucent and fragrant.
10. Stir in minced garlic and cook for 1 minute until aromatic but not browned.
11. Sprinkle flour over onion mixture and cook for 1 minute, stirring constantly to form a paste.
12. Gradually whisk in vegetable broth until smooth and no flour lumps remain.
13. Add smoked paprika, dried thyme, and season with salt and black pepper.
14. Simmer sauce for 3-4 minutes until slightly thickened, stirring frequently.
15. Return cooked mushrooms to the skillet and stir to coat in sauce.
16. Remove skillet from heat and let cool for 1 minute to prevent curdling.
17. Stir in sour cream until fully incorporated and creamy.
18. Add cooked egg noodles to the skillet and toss to coat in sauce, adding reserved pasta water if needed to loosen consistency.
Gloriously creamy with earthy mushroom notes and a hint of smokiness, this stroganoff delivers pure comfort in every bite. The tender noodles soak up that velvety sauce beautifully, making it perfect for curling up on the couch or impressing dinner guests with minimal effort. Try serving it over mashed potatoes for the ultimate carb-on-carb indulgence!
Zucchini Noodles with Pesto and Cherry Tomatoes
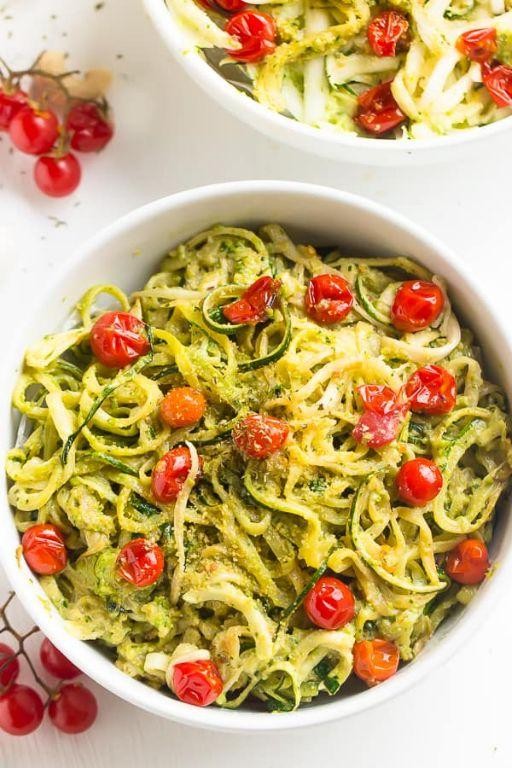
Just when you thought zucchini couldn’t get more exciting than hiding in your neighbor’s garden, we’re turning this humble squash into the star of your dinner table! Get ready to spiralize your way to veggie glory with a dish that’s basically summer on a plate. This zucchini noodle situation is so fresh and vibrant, it’ll make your taste buds do a happy dance.
4
servings15
minutes5
minutesIngredients
– 4 medium zucchini (about 2 lbs total), spiralized into noodles
– 2 cups fresh basil leaves, packed
– 1/2 cup grated Parmesan cheese
– 1/3 cup pine nuts
– 2 garlic cloves, peeled
– 1/2 cup extra virgin olive oil
– 1 pint cherry tomatoes, halved
– 1 tbsp lemon juice
– 1/2 tsp salt
– 1/4 tsp black pepper
Instructions
1. Combine basil leaves, Parmesan cheese, pine nuts, and garlic cloves in a food processor.
2. Pulse the mixture 5-7 times until ingredients are roughly chopped and combined.
3. With the food processor running on low speed, slowly drizzle in olive oil until the pesto becomes smooth and emulsified.
4. Add lemon juice, salt, and black pepper to the pesto, then pulse 2-3 times to incorporate.
5. Heat a large skillet over medium heat for 2 minutes until warm but not smoking hot.
6. Add zucchini noodles to the skillet and cook for 2-3 minutes, tossing frequently with tongs.
7. Remove the skillet from heat immediately when noodles are tender but still have some bite.
8. Transfer zucchini noodles to a large mixing bowl using tongs.
9. Add the prepared pesto to the warm zucchini noodles and toss thoroughly to coat every strand.
10. Gently fold in the halved cherry tomatoes until evenly distributed throughout the dish.
11. Divide the zucchini noodle mixture evenly among four serving plates.
Crisp-tender zucchini noodles provide the perfect vehicle for that vibrant pesto, while the burst cherry tomatoes add juicy sweetness that’ll make you forget this is actually healthy. Consider topping with grilled shrimp or chicken for protein-packed perfection, or serve alongside crusty bread to soak up every last drop of that glorious green sauce.
Chickpea and Spinach Curry

Mmm, get ready to ditch those takeout menus because this chickpea and spinach curry is about to become your new kitchen superstar—it’s so flavorful, even your spice-averse cousin might ask for seconds (no promises, though!).
3
servings15
minutes27
minutesIngredients
– 2 tablespoons olive oil (or any neutral oil)
– 1 medium yellow onion, diced
– 3 garlic cloves, minced
– 1 tablespoon grated fresh ginger
– 1 (15-ounce) can chickpeas, drained and rinsed
– 1 (14.5-ounce) can diced tomatoes
– 1 (13.5-ounce) can coconut milk
– 1 teaspoon ground cumin
– 1 teaspoon ground coriander
– 1/2 teaspoon turmeric
– 1/4 teaspoon cayenne pepper (adjust to taste)
– 5 ounces fresh spinach
– 1/2 teaspoon salt
– Cooked basmati rice, for serving
Instructions
1. Heat 2 tablespoons olive oil in a large skillet over medium heat until shimmering, about 1 minute.
2. Add 1 diced yellow onion and cook, stirring occasionally, until softened and translucent, about 5–7 minutes.
3. Stir in 3 minced garlic cloves and 1 tablespoon grated ginger, cooking for 1 minute until fragrant (tip: don’t let the garlic brown, or it’ll turn bitter!).
4. Add 1 teaspoon cumin, 1 teaspoon coriander, 1/2 teaspoon turmeric, and 1/4 teaspoon cayenne, toasting for 30 seconds to bloom the spices.
5. Pour in 1 can diced tomatoes with their juices, scraping up any browned bits from the skillet.
6. Stir in 1 can drained chickpeas and 1 can coconut milk, bringing the mixture to a gentle simmer.
7. Reduce heat to low, cover, and simmer for 15 minutes to meld flavors (tip: if it splatters, crack the lid slightly).
8. Uncover, add 5 ounces fresh spinach in handfuls, wilting each batch before adding more, about 3–4 minutes total.
9. Stir in 1/2 teaspoon salt, then taste and adjust seasoning if needed (tip: a squeeze of lime at the end brightens it up!).
10. Serve hot over cooked basmati rice.
Gloriously creamy and packed with earthy warmth, this curry hugs your taste buds with tender chickpeas and vibrant spinach. Try scooping it with warm naan or topping it with a dollop of yogurt for a cool contrast—it’s a cozy bowl of comfort that’s basically a hug in edible form.
Stuffed Bell Peppers with Quinoa and Black Beans

Unbelievably delicious and deceptively easy, these stuffed bell peppers are about to become your new weeknight hero—they’re basically edible rainbows filled with enough protein to power through even the most chaotic Tuesday. Who knew something so vibrant could be so satisfyingly filling?
4
portions20
minutes53
minutesIngredients
– 4 large bell peppers (any color, but mix them up for a rainbow effect)
– 1 cup quinoa, rinsed (this removes the bitter coating)
– 1 can (15 oz) black beans, drained and rinsed (or sub kidney beans for variety)
– 1 cup corn kernels (frozen works perfectly)
– 1 small yellow onion, diced (about 1 cup)
– 2 cloves garlic, minced (or 1 tsp pre-minced from a jar)
– 1 cup shredded Monterey Jack cheese (or pepper Jack for a kick)
– 1 tbsp olive oil (or any neutral oil like avocado)
– 1 tsp ground cumin
– 1/2 tsp chili powder (adjust to your spice preference)
– 1/2 tsp salt
– 1/4 tsp black pepper
– 1 cup vegetable broth (or water in a pinch)
Instructions
1. Preheat your oven to 375°F and lightly grease a baking dish just large enough to hold the peppers upright.
2. Slice the tops off the bell peppers and remove all seeds and membranes—this creates perfect little edible bowls.
3. Heat olive oil in a large skillet over medium heat until it shimmers, about 1 minute.
4. Add diced onion and cook for 4-5 minutes until translucent and fragrant.
5. Stir in minced garlic and cook for 30 seconds until golden but not browned—burnt garlic turns bitter.
6. Add rinsed quinoa to the skillet and toast for 2 minutes, stirring constantly until you smell a nutty aroma.
7. Pour in vegetable broth, then add black beans, corn, cumin, chili powder, salt, and pepper.
8. Bring the mixture to a boil, then reduce heat to low, cover, and simmer for 15 minutes until quinoa has absorbed all liquid.
9. Remove the skillet from heat and stir in 3/4 cup of the shredded cheese—reserve the rest for topping.
10. Spoon the quinoa mixture evenly into the hollowed bell peppers, packing it down gently.
11. Place peppers upright in the prepared baking dish and sprinkle remaining cheese over the tops.
12. Cover the dish with foil and bake at 375°F for 25 minutes.
13. Remove the foil and bake uncovered for another 10 minutes until cheese is bubbly and peppers are tender when pierced with a fork.
14. Let the peppers rest for 5 minutes before serving—they’ll be lava-hot inside!
A symphony of textures awaits—tender peppers give way to fluffy quinoa with just enough bite from the black beans. These beauties shine alongside a crisp green salad or topped with a dollop of cool sour cream for contrast, making them as versatile as they are vibrant.
Lentil and Vegetable Shepherd’s Pie

Ready to give your classic comfort food a seriously delicious glow-up? This Lentil and Vegetable Shepherd’s Pie swaps the traditional meat for protein-packed lentils and vibrant veggies, creating a cozy masterpiece that’ll have even the carnivores asking for seconds. It’s basically a warm hug in a baking dish—minus the awkward back patting.
6
servings25
minutes70
minutesIngredients
– 1 cup brown lentils, rinsed (they cook up nice and firm, not mushy)
– 2 tbsp olive oil (or any neutral oil you have on hand)
– 1 large onion, diced (yellow or white both work great)
– 2 carrots, peeled and diced (about 1 cup)
– 2 celery stalks, diced (adds that classic savory base)
– 3 cloves garlic, minced (because more garlic is always the answer)
– 1 tsp dried thyme (or 1 tbsp fresh if you’re feeling fancy)
– 1 cup frozen peas (no need to thaw—they’ll cook perfectly in the oven)
– 2 tbsp tomato paste (for that rich, umami depth)
– 4 cups vegetable broth (low-sodium lets you control the salt)
– 2 lbs russet potatoes, peeled and cubed (they make the fluffiest mash)
– 1/2 cup milk (whole milk gives the creamiest results, but any works)
– 4 tbsp unsalted butter (salted works too—just taste as you go)
– 1/2 tsp black pepper (freshly ground if you’ve got it)
Instructions
1. Preheat your oven to 400°F—this ensures it’s hot and ready when your filling is done.
2. Place the peeled, cubed potatoes in a large pot and cover with cold water by 1 inch.
3. Bring the pot to a boil over high heat, then reduce to a simmer and cook for 15–18 minutes until the potatoes are fork-tender.
4. While the potatoes cook, heat the olive oil in a large skillet over medium heat.
5. Add the diced onion, carrots, and celery and cook for 8–10 minutes, stirring occasionally, until the onions are translucent and the carrots have softened slightly.
6. Stir in the minced garlic and dried thyme and cook for 1 minute until fragrant—don’t let the garlic burn!
7. Add the rinsed lentils and tomato paste to the skillet, stirring to coat everything evenly.
8. Pour in the vegetable broth, bring to a boil, then reduce the heat and simmer uncovered for 25 minutes until the lentils are tender and most of the liquid is absorbed.
9. Stir in the frozen peas and black pepper and cook for 2 more minutes, then remove the skillet from the heat.
10. Drain the cooked potatoes thoroughly and return them to the hot pot to steam off excess moisture—this prevents watery mash.
11. Add the butter and milk to the potatoes and mash until smooth and creamy (lumps are okay if you’re into that rustic vibe).
12. Spread the lentil and vegetable filling evenly into a 9×13-inch baking dish.
13. Dollop the mashed potatoes over the filling and spread gently to cover completely, then rough up the surface with a fork for crispy peaks.
14. Bake at 400°F for 20–25 minutes until the filling is bubbly and the potato topping is golden brown in spots.
15. Let the shepherd’s pie rest for 10 minutes before serving—this helps the layers set so you get clean slices. Creamy, savory, and packed with plant-powered goodness, this pie delivers a satisfying texture contrast between the fluffy potatoes and hearty lentils. Serve it with a crisp green salad to cut through the richness, or go full comfort mode and enjoy it straight from the baking dish—we won’t judge!
Roasted Vegetable and Feta Tart
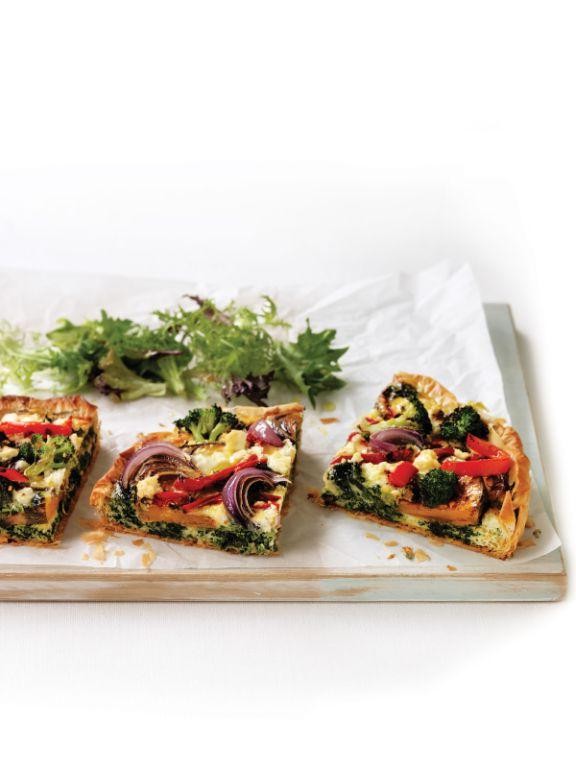
Ever have one of those days where your vegetable drawer looks more like a science experiment than dinner inspiration? Enter this roasted vegetable and feta tart—the culinary equivalent of a glow-up for those lonely peppers and zucchini. It’s basically a fancy pizza that decided to wear its Sunday best, complete with a flaky crust and enough cheesy goodness to make you forget you’re eating your veggies.
Ingredients
- 1 sheet frozen puff pastry, thawed (or homemade if you’re feeling extra ambitious)
- 2 cups mixed vegetables (bell peppers, zucchini, red onion), chopped into ½-inch pieces
- 2 tbsp olive oil (or any neutral oil for roasting)
- 1 tsp dried oregano
- ½ tsp garlic powder
- ½ tsp salt
- ¼ tsp black pepper
- 4 oz feta cheese, crumbled (block feta gives the best texture)
- 1 egg, lightly beaten (for that golden, glossy crust)
Instructions
- Preheat your oven to 400°F and line a baking sheet with parchment paper.
- Unfold the thawed puff pastry onto the prepared baking sheet, pricking it all over with a fork to prevent puffing—think of it as giving your crust a little acupuncture session.
- Toss the chopped vegetables with olive oil, oregano, garlic powder, salt, and pepper in a large bowl until evenly coated.
- Spread the seasoned vegetables in a single layer on the puff pastry, leaving a 1-inch border around the edges.
- Sprinkle the crumbled feta evenly over the vegetables, aiming for cheesy coverage in every bite.
- Fold the pastry edges over the filling, crimping lightly to create a rustic border.
- Brush the exposed pastry edges with the beaten egg for a shiny, golden finish.
- Bake for 25–30 minutes, until the crust is puffed and deeply golden and the vegetables are tender with lightly charred edges.
- Let the tart cool on the baking sheet for 5 minutes before slicing—patience rewards you with clean cuts!
Dig into this tart hot from the oven, where the flaky, buttery crust shatters against the tender, sweet-roasted veggies and salty feta. Serve it sliced into wedges for a brunch showstopper or pair it with a simple arugula salad for a dinner that’s effortlessly elegant.
Vegetable Stir-Fry with Tofu and Cashews
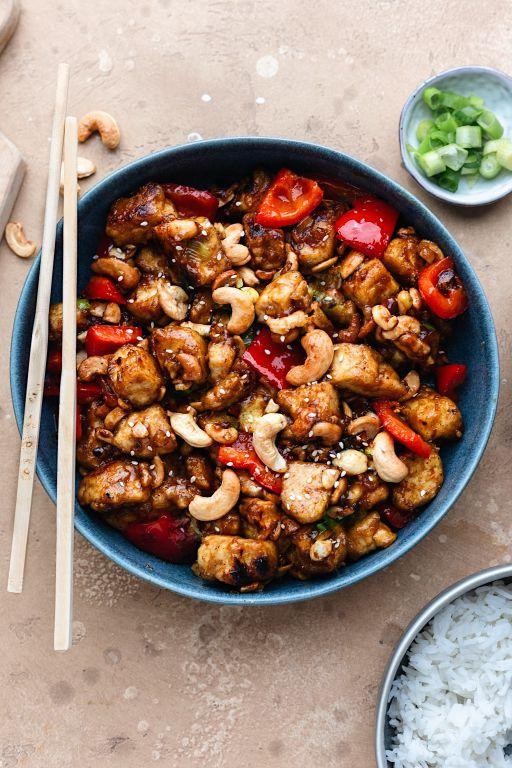
Get ready to transform your weeknight dinner from “meh” to magnificent with this veggie-packed stir-fry that’s faster than deciding what to watch on Netflix. Seriously, this dish is so vibrant and flavorful, even your picky eater might accidentally eat their vegetables. Tofu and cashews join the party for a protein-packed crunch that’ll make you feel like a kitchen wizard without the complicated spellwork.
Ingredients
- 1 block (14 oz) firm tofu, pressed and cubed (or extra-firm for crispier results)
- 2 tbsp cornstarch (for that golden, crispy tofu coating)
- 3 tbsp vegetable oil (or any neutral oil like avocado or canola)
- 1 cup raw cashews (toasted for maximum nutty flavor)
- 1 red bell pepper, sliced into thin strips (adds sweet crunch and color)
- 1 cup broccoli florets (fresh or frozen both work beautifully)
- 2 carrots, julienned (about 1 cup for sweet earthiness)
- 3 cloves garlic, minced (because more garlic is always the answer)
- 1 tbsp fresh ginger, grated (bottled works in a pinch but fresh is best)
- 1/4 cup soy sauce (or tamari for gluten-free option)
- 2 tbsp rice vinegar (adds that essential tangy brightness)
- 1 tbsp maple syrup (or honey for non-vegan version)
- 1 tsp sesame oil (just a drizzle for that signature aroma)
- 2 green onions, sliced (for fresh garnish and color pop)
Instructions
- Pat the pressed tofu completely dry with paper towels, then toss cubes with cornstarch until evenly coated—this creates the crispy exterior when fried.
- Heat 2 tablespoons of vegetable oil in a large skillet or wok over medium-high heat (375°F if using a thermometer) until shimmering but not smoking.
- Add tofu cubes in a single layer and cook for 3-4 minutes per side until golden brown and crispy, flipping carefully with tongs—don’t overcrowd the pan or they’ll steam instead of crisp.
- Transfer crispy tofu to a plate and set aside, then add remaining 1 tablespoon oil to the same skillet.
- Toast cashews in the hot oil for 1-2 minutes until lightly browned and fragrant, stirring constantly to prevent burning—they continue cooking after removal.
- Add bell pepper, broccoli, and carrots to the skillet and stir-fry for 4-5 minutes until vegetables are bright-colored and slightly tender but still crisp.
- Push vegetables to one side of the skillet and add garlic and ginger to the empty space, cooking for 30 seconds until fragrant but not browned.
- Combine soy sauce, rice vinegar, maple syrup, and sesame oil in a small bowl, then pour over vegetables and stir everything together.
- Return tofu and cashews to the skillet, tossing gently to coat with sauce and heat through for 1-2 minutes.
- Remove from heat and garnish with sliced green onions. Zesty, vibrant, and packed with contrasting textures, this stir-fry delivers crispy tofu against tender-crisp vegetables with that addictive sweet-salty sauce. Serve it over fluffy jasmine rice for the ultimate comfort bowl, or wrap it in lettuce cups for a low-carb crunch fest that’ll make your taste buds do a happy dance.
Eggplant Parmesan with Marinara Sauce

Ridiculously delicious and dangerously cheesy, this eggplant parmesan is the ultimate comfort food that’ll make you forget all about that sad desk salad. Seriously, who needs greens when you’ve got golden-brown eggplant slices swimming in marinara and buried under a blanket of melted mozzarella? Your taste buds are about to throw a party, and everyone’s invited.
Ingredients
- 2 large eggplants, sliced into 1/2-inch rounds (look for firm, shiny skins)
- 1 cup all-purpose flour (for that perfect crispy coating)
- 3 large eggs, beaten (they’re the glue that holds everything together)
- 2 cups Italian-seasoned breadcrumbs (or plain with 1 tbsp Italian seasoning mixed in)
- 1/2 cup olive oil (or any neutral oil with high smoke point)
- 3 cups marinara sauce (homemade or your favorite jarred brand)
- 2 cups shredded mozzarella cheese (the more, the merrier)
- 1/2 cup grated parmesan cheese (the salty, nutty superstar)
- 1 tsp salt (adjust to taste)
- 1/2 tsp black pepper (freshly ground if you’re fancy)
Instructions
- Sprinkle eggplant slices with salt and let them sweat for 30 minutes to draw out bitterness, then pat completely dry with paper towels.
- Set up your breading station with three shallow dishes: flour in the first, beaten eggs in the second, and breadcrumbs in the third.
- Dredge each eggplant slice in flour, shaking off excess—this creates a dry surface for the egg to stick to.
- Dip the floured eggplant into the beaten eggs, letting any excess drip back into the bowl.
- Coat thoroughly in breadcrumbs, pressing gently to help them adhere for maximum crunch.
- Heat olive oil in a large skillet over medium-high heat until it shimmers (about 350°F if you’re using a thermometer).
- Fry eggplant slices in batches for 2-3 minutes per side until golden brown and crispy, avoiding overcrowding the pan.
- Transfer fried eggplant to a paper towel-lined baking sheet to drain excess oil.
- Preheat your oven to 375°F and spread 1 cup of marinara sauce in the bottom of a 9×13-inch baking dish.
- Arrange a single layer of fried eggplant over the sauce, slightly overlapping if necessary.
- Top with half of the remaining marinara sauce, spreading it evenly with the back of a spoon.
- Sprinkle with 1 cup of mozzarella and 1/4 cup of parmesan cheese.
- Repeat layers with remaining eggplant, sauce, and cheeses.
- Bake for 25-30 minutes until the cheese is bubbly and golden brown with crispy edges.
- Let rest for 10 minutes before serving—this allows the layers to set for cleaner slices.
Oh my goodness, that first bite delivers the most satisfying crunch giving way to tender eggplant, all swaddled in tangy marinara and stretchy, gooey cheese. The salty parmesan cuts through the richness beautifully, making this dangerously addictive. Try serving it over spaghetti for the ultimate carb-loading experience, or stuff it into a crusty baguette for a next-level eggplant parm sandwich that’ll ruin all other sandwiches forever.
Butternut Squash and Sage Risotto

Huddle up, comfort food lovers! This butternut squash and sage risotto is about to become your autumn obsession—creamy, dreamy, and guaranteed to make your taste buds do a happy dance. Forget bland rice dishes; this one’s packed with cozy vibes and just enough sophistication to impress your in-laws (or at least your cat).
3
servings15
minutes55
minutesIngredients
– 1 medium butternut squash, peeled and cubed (about 3 cups)
– 2 tbsp olive oil (or any neutral oil)
– 1 small yellow onion, finely chopped
– 2 cloves garlic, minced
– 1 ½ cups Arborio rice
– ½ cup dry white wine (like Sauvignon Blanc, or sub with broth)
– 4 cups vegetable broth, kept warm
– ¼ cup grated Parmesan cheese
– 2 tbsp unsalted butter
– 8-10 fresh sage leaves
– Salt and black pepper to taste (start with ½ tsp salt)
Instructions
1. Preheat your oven to 400°F and line a baking sheet with parchment paper.
2. Toss the cubed butternut squash with 1 tablespoon of olive oil, ¼ teaspoon of salt, and a pinch of black pepper on the baking sheet.
3. Roast the squash for 25-30 minutes until tender and lightly caramelized at the edges.
4. Heat the remaining 1 tablespoon of olive oil in a large, heavy-bottomed pot or Dutch oven over medium heat.
5. Add the chopped onion and cook for 4-5 minutes, stirring occasionally, until translucent but not browned.
6. Stir in the minced garlic and cook for 1 minute until fragrant.
7. Add the Arborio rice to the pot and toast for 2 minutes, stirring constantly, until the grains look slightly translucent around the edges.
8. Pour in the white wine and cook, stirring, until the liquid is fully absorbed, about 2-3 minutes.
9. Tip: Warm broth helps the rice cook evenly—keep it simmering in a separate saucepan.
10. Add 1 cup of warm vegetable broth to the rice and stir continuously until absorbed.
11. Repeat adding broth in ½-cup increments, stirring after each addition until absorbed, for about 20-25 minutes total.
12. Tip: Risotto is ready when the rice is al dente—creamy with a slight bite—not mushy.
13. Gently fold in the roasted butternut squash, Parmesan cheese, and butter until combined.
14. In a small skillet, heat 1 teaspoon of olive oil over medium-high and fry the sage leaves for 30-45 seconds until crisp.
15. Tip: Fried sage adds crunch and flavor—crumble it over the risotto just before serving.
16. Season the risotto with additional salt and pepper if needed, then remove from heat.
Mmm, that creamy texture hugs each grain of rice like a warm blanket, while the sweet squash and earthy sage create a flavor party in your mouth. Serve it topped with extra Parmesan and those crispy sage leaves, or go wild and pair it with a simple arugula salad for a restaurant-worthy weeknight dinner.
Caprese Stuffed Portobello Mushrooms

C’mon, let’s be real—when was the last time a mushroom made you feel fancy? These Caprese Stuffed Portobello Mushrooms are here to change that, packing all the Italian vibes of your favorite salad into one seriously satisfying, fork-and-knife-worthy meal that’s basically a party in a fungi.
3
portions15
minutes25
minutesIngredients
– 4 large portobello mushroom caps, stems removed (look for ones with deep gills for maximum stuffing)
– 2 tbsp olive oil (or avocado oil for higher heat)
– 1/2 tsp garlic powder (fresh minced garlic works too, but powder distributes evenly)
– 1/4 tsp salt (fine sea salt preferred)
– 1/4 tsp black pepper (freshly cracked for best flavor)
– 1 cup cherry tomatoes, halved (colorful heirlooms add visual pop)
– 4 oz fresh mozzarella cheese, cubed (bocconcini or a block both work)
– 1/4 cup fresh basil leaves, chopped (reserve a few whole leaves for garnish)
– 1 tbsp balsamic glaze (or reduce balsamic vinegar yourself for a DIY touch)
Instructions
1. Preheat your oven to 400°F and line a baking sheet with parchment paper for easy cleanup.
2. Use a spoon to gently scrape out the dark gills from each portobello cap—this prevents bitterness and makes more room for filling.
3. Brush both sides of each mushroom cap evenly with olive oil, making sure to coat the edges to prevent drying.
4. Sprinkle the insides of the mushrooms with garlic powder, salt, and black pepper, rubbing lightly to adhere.
5. Place the mushrooms gill-side up on the prepared baking sheet and bake for 10 minutes—they’ll release liquid and soften slightly.
6. While mushrooms bake, combine halved cherry tomatoes, cubed mozzarella, and chopped basil in a medium bowl.
7. Remove mushrooms from the oven and carefully pat the insides dry with a paper towel to absorb excess moisture (this keeps your filling from getting soggy).
8. Divide the tomato-mozzarella mixture evenly among the mushroom caps, pressing gently to pack it in.
9. Return the stuffed mushrooms to the oven and bake for another 12–15 minutes, until the cheese is melted and bubbly and the mushroom edges are tender.
10. Drizzle with balsamic glaze just before serving for a sweet-tangy finish that balances the richness.
Brace yourself for a texture triumph—the meaty, juicy mushroom base cradles that gooey, melted mozzarella and burst-in-your-mouth tomatoes like a cozy edible hug. Serve these beauties alongside a crisp arugula salad for a light dinner, or slice them into wedges and pile onto toasted baguette slices for next-level bruschetta that’ll have everyone asking for the recipe.
Sweet Potato and Black Bean Tacos

Pump up your taco Tuesday with these flavor-packed sweet potato and black bean tacos that’ll make your taste buds do a happy dance—because who says vegetables can’t be the life of the party? These vibrant, meat-free marvels are so deliciously satisfying, even the most devoted carnivores will be begging for seconds. Get ready to transform humble ingredients into a fiesta-worthy feast that’s as fun to make as it is to devour!
8
tacos15
minutes25
minutesIngredients
– 2 medium sweet potatoes, peeled and diced into ½-inch cubes (about 3 cups)
– 1 tbsp olive oil (or any neutral oil)
– 1 tsp chili powder (adjust to taste for more kick)
– ½ tsp ground cumin
– ½ tsp smoked paprika
– ¼ tsp salt (plus more for seasoning)
– 1 (15 oz) can black beans, rinsed and drained
– 8 small corn tortillas
– ½ cup crumbled cotija cheese (or feta for a tangy twist)
– ¼ cup chopped fresh cilantro
– 1 lime, cut into wedges
– ¼ cup sour cream (or Greek yogurt for a lighter option)
Instructions
1. Preheat your oven to 400°F and line a baking sheet with parchment paper.
2. Toss the diced sweet potatoes with olive oil, chili powder, cumin, smoked paprika, and ¼ tsp salt until evenly coated.
3. Spread the sweet potatoes in a single layer on the prepared baking sheet.
4. Roast for 20–25 minutes, flipping halfway through, until the edges are crispy and a fork pierces them easily.
5. Tip: Don’t overcrowd the pan—this ensures they crisp up instead of steaming.
6. Warm the corn tortillas one at a time in a dry skillet over medium heat for 30 seconds per side, until pliable and lightly toasted.
7. Tip: Keep warmed tortillas wrapped in a clean kitchen towel to stay soft.
8. In a medium bowl, gently mix the roasted sweet potatoes with the rinsed black beans.
9. Assemble each taco by spooning the sweet potato–black bean mixture into the center of a warmed tortilla.
10. Top each taco evenly with crumbled cotija cheese and chopped cilantro.
11. Drizzle with sour cream and squeeze fresh lime juice over the top.
12. Tip: For extra zing, add a pinch of salt to the lime wedges before squeezing.
Seriously, the combo of tender sweet potatoes, creamy beans, and zesty toppings creates a texture party in your mouth. Serve these tacos with a side of spicy salsa or sliced avocado for a full-blown fiesta—they’re so good, you might just forget there’s no meat involved!
Spaghetti Aglio e Olio with Broccoli
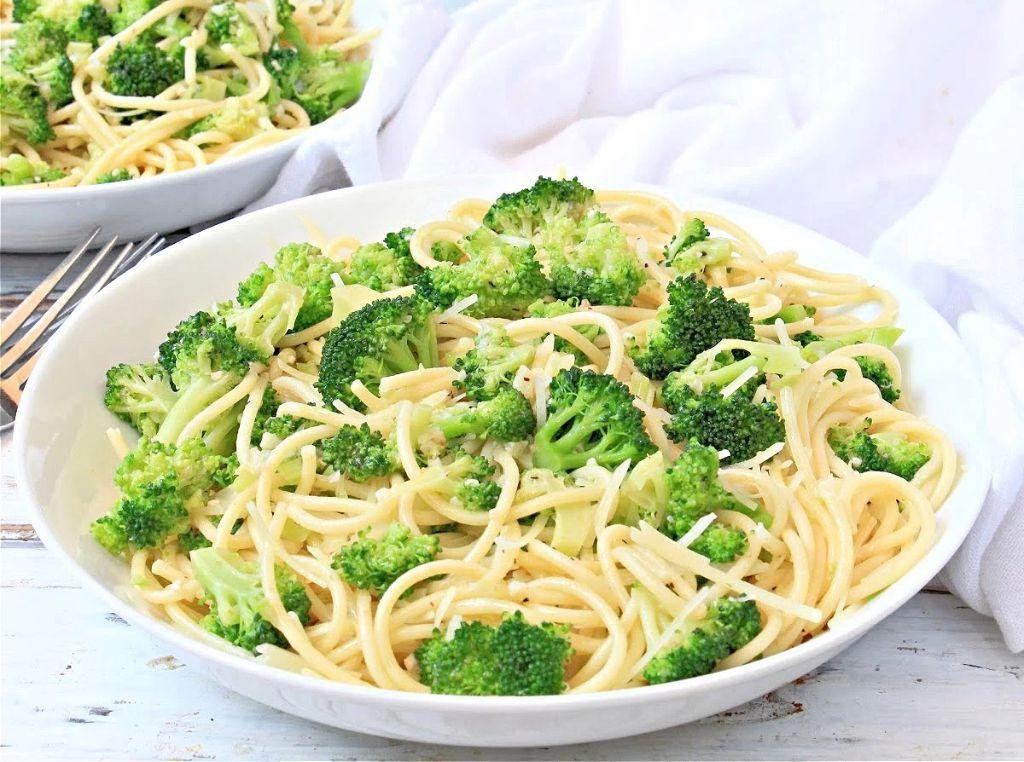
Kicking off our culinary adventure with a dish that proves simplicity is seriously sexy! Spaghetti Aglio e Olio gets a vibrant green makeover with broccoli, turning this Italian classic into a weeknight superhero that’s ready faster than you can say “al dente.” Let’s get cooking before your stomach stages a full-blown protest!
5
servings10
minutes13
minutesIngredients
- 8 oz spaghetti
- 4 cups broccoli florets (fresh works best for that crisp-tender bite)
- 4 cloves garlic, thinly sliced (more if you’re feeling brave)
- 1/3 cup extra virgin olive oil (the good stuff makes all the difference)
- 1/2 tsp red pepper flakes (adjust based on your heat tolerance)
- 1/4 cup reserved pasta water (don’t skip this—it’s magic for the sauce)
- Salt to taste (start with 1 tsp for the pasta water)
- Fresh parsley for garnish (optional but pretty)
Instructions
- Bring a large pot of salted water to a rolling boil over high heat.
- Add spaghetti and cook for 7 minutes, stirring occasionally to prevent sticking.
- Add broccoli florets directly to the pasta pot and continue cooking for 3 more minutes until pasta is al dente and broccoli is bright green and tender-crisp.
- Reserve 1/4 cup of pasta water before draining, then set pasta and broccoli aside.
- Heat olive oil in a large skillet over medium-low heat for 1 minute until shimmering but not smoking.
- Add garlic slices and cook for 1-2 minutes, stirring constantly until fragrant and lightly golden—watch closely to avoid burning!
- Stir in red pepper flakes and cook for 30 seconds to infuse the oil with spice.
- Add drained spaghetti and broccoli to the skillet, tossing to coat evenly with the garlic oil.
- Pour in reserved pasta water and toss vigorously for 1-2 minutes until the sauce emulsifies and clings to the pasta.
- Season with additional salt if needed and garnish with fresh parsley before serving immediately.
Now that glorious bowl of carb-loaded goodness is ready to devour! Notice how the silky olive oil clings to each strand of pasta while the broccoli adds a satisfying crunch? Serve it straight from the skillet with crusty bread for dipping, or top with a fried egg for the ultimate comfort food upgrade—because everything’s better with a runny yolk!
Thai Red Curry with Mixed Vegetables
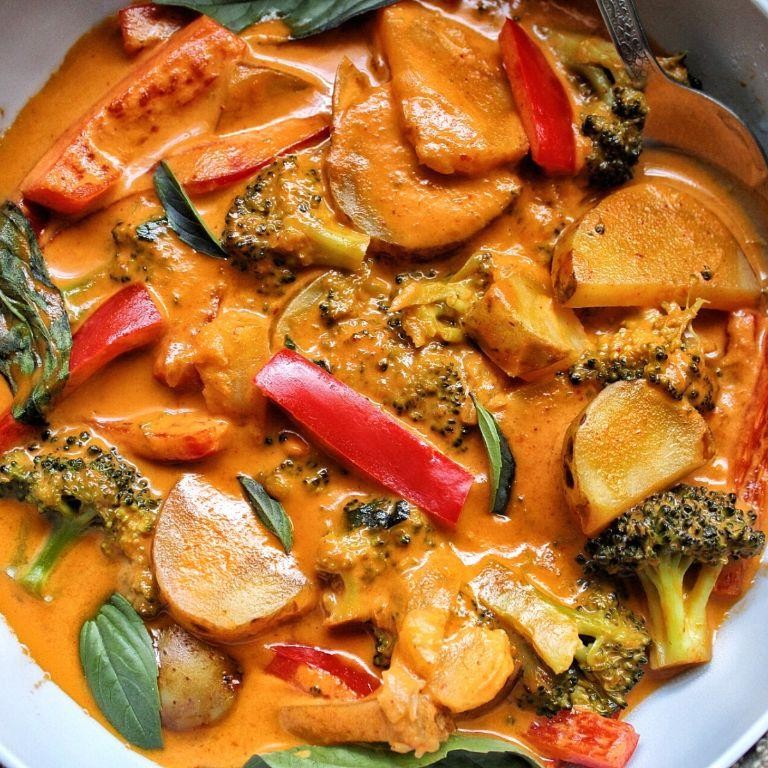
Let’s be real—your taste buds deserve a vacation from boring Tuesday dinners, and this Thai red curry is basically a flavor-packed trip to Bangkok without the jet lag. Get ready to transform your kitchen into the hottest new Thai restaurant in town, where even your pickiest eaters will be begging for seconds.
5
servings15
minutes15
minutesIngredients
– 1 tbsp vegetable oil (or any neutral oil)
– 2 tbsp Thai red curry paste (adjust for spice preference)
– 1 (13.5 oz) can coconut milk
– 1 cup vegetable broth
– 1 red bell pepper, sliced into thin strips
– 1 cup broccoli florets
– 1 medium carrot, thinly sliced
– 1 small zucchini, halved and sliced
– 1 tbsp brown sugar
– 1 tbsp soy sauce (or tamari for gluten-free)
– 1 tbsp lime juice (freshly squeezed preferred)
– ¼ cup fresh basil leaves (Thai basil if available)
Instructions
1. Heat vegetable oil in a large skillet or wok over medium heat until shimmering, about 1 minute.
2. Add Thai red curry paste and cook while stirring constantly for 1 minute until fragrant—this toasting step unlocks maximum flavor depth.
3. Pour in coconut milk and whisk vigorously to combine with the curry paste until smooth, scraping any bits from the pan bottom.
4. Add vegetable broth and bring the mixture to a gentle simmer, about 3-4 minutes.
5. Stir in red bell pepper, broccoli, and carrot—these harder veggies need extra time to become tender-crisp.
6. Simmer uncovered for 5 minutes, stirring occasionally.
7. Add zucchini and continue simmering for 3 more minutes until all vegetables are tender but still vibrant—don’t let them turn mushy!
8. Mix in brown sugar and soy sauce, stirring until fully dissolved, about 30 seconds.
9. Remove from heat and stir in lime juice—adding acid at the end preserves its bright, fresh flavor.
10. Tear basil leaves by hand and fold them gently into the curry just before serving. Vibrant, creamy, and packed with garden-fresh crunch, this curry delivers that perfect balance of spicy, sweet, and savory in every spoonful. Serve it over jasmine rice for the classic experience, or get wild by stuffing it into warm tortillas for a Thai-Mex fusion that’ll make your weeknight dinners anything but ordinary.
Spinach and Ricotta Stuffed Shells
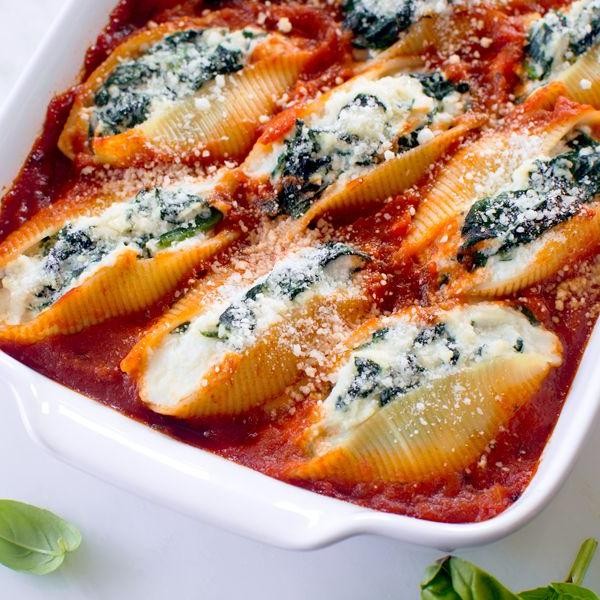
Kick that boring Tuesday dinner to the curb, because we’re diving fork-first into a cheesy, saucy, spinach-packed situation that’s basically a hug for your taste buds. These stuffed shells are the culinary equivalent of finding money in your pocket—unexpectedly delightful and guaranteed to make you smile.
6
servings25
minutes49
minutesIngredients
– 1 box (12 oz) jumbo pasta shells
– 2 cups whole milk ricotta cheese (don’t skimp—full-fat is flavor town)
– 1 large egg, lightly beaten (the glue that holds our cheesy dreams together)
– 10 oz frozen chopped spinach, thawed and squeezed dry (seriously, get all that water out)
– 1 cup shredded mozzarella cheese, divided
– 1/2 cup grated Parmesan cheese
– 1 tsp garlic powder
– 1/2 tsp salt
– 1/4 tsp black pepper
– 1 jar (24 oz) marinara sauce
– 2 tbsp olive oil (for greasing the baking dish)
Instructions
1. Preheat your oven to 375°F—get that heat party started.
2. Bring a large pot of salted water to a rolling boil and cook the jumbo shells for 9 minutes until al dente (they’ll finish cooking in the oven, so don’t overcook them now).
3. Drain the shells carefully and rinse with cool water to stop the cooking process—this prevents them from turning to mush.
4. In a large mixing bowl, combine the ricotta cheese, beaten egg, squeezed-dry spinach, 3/4 cup mozzarella, Parmesan, garlic powder, salt, and pepper until fully incorporated.
5. Lightly grease a 9×13 inch baking dish with olive oil, then spread 1 cup of marinara sauce evenly across the bottom.
6. Using a spoon or piping bag, fill each cooked shell with the ricotta-spinach mixture until generously stuffed but not bursting.
7. Arrange the stuffed shells in a single layer in the prepared baking dish.
8. Pour the remaining marinara sauce over the shells, making sure each one gets some saucy love.
9. Sprinkle the remaining 1/4 cup mozzarella cheese evenly over the top for that golden, bubbly finish.
10. Cover the dish tightly with aluminum foil and bake for 25 minutes at 375°F.
11. Remove the foil and bake uncovered for another 10-15 minutes until the cheese is melted and lightly browned.
12. Let the dish rest for 5 minutes before serving—this allows the filling to set and prevents lava-hot cheese burns.
The shells emerge tender yet firm enough to hold their cheesy cargo, with the ricotta filling staying miraculously creamy against the tangy marinara backdrop. Serve these beauties with garlic bread for maximum carb-loading joy, or pair with a crisp salad if you’re feeling virtuous (but let’s be real—you’re here for the cheese).
Avocado and Black Bean Quesadillas
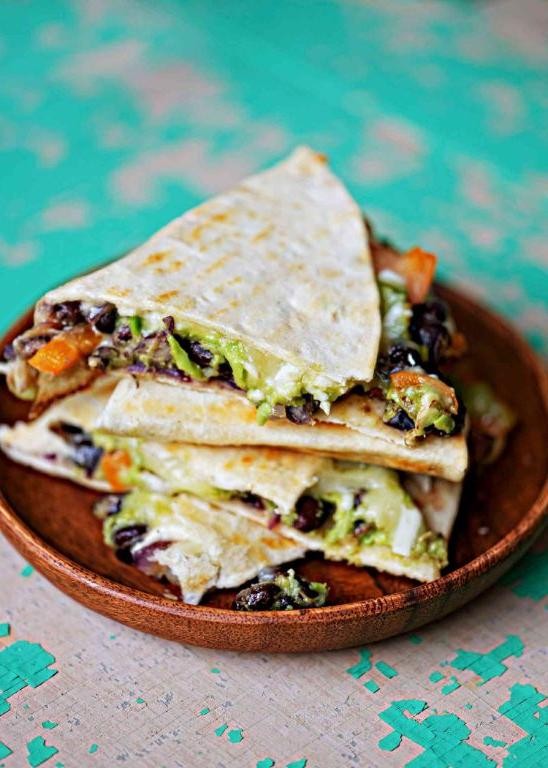
Oh, the humble quesadilla—usually a cheese-filled vehicle for your salsa-dipping dreams, but today we’re giving it a glow-up that even your avocado toast would envy. Get ready for a fiesta in your mouth that’s so satisfying, you’ll forget it’s actually good for you. Let’s turn that tortilla into a crispy, golden pocket of pure joy!
4
quesadillas10
minutes24
minutesIngredients
– 2 ripe avocados, pitted and mashed (look for slightly soft skin)
– 1 (15 oz) can black beans, drained and rinsed (or sub pinto beans for variety)
– 1 cup shredded Monterey Jack cheese (or a Mexican blend for extra meltiness)
– 4 large flour tortillas (8-inch size works best, or corn for gluten-free)
– 1 tbsp olive oil (or any neutral oil like canola)
– 1/2 tsp ground cumin (toasted cumin seeds crushed work too)
– 1/4 tsp chili powder (adjust to your heat preference)
– 1/4 tsp salt (fine sea salt or kosher both work)
– 1 lime, juiced (about 2 tbsp, fresh is key for zing)
Instructions
1. In a medium bowl, mash the avocados with a fork until mostly smooth but with some chunks for texture.
2. Stir the black beans, cumin, chili powder, salt, and lime juice into the mashed avocado until fully combined.
3. Heat a large non-stick skillet or griddle over medium heat (around 350°F if using an electric griddle).
4. Place one tortilla flat in the dry skillet and cook for 30 seconds to warm it, which makes it more pliable and less likely to tear.
5. Flip the tortilla and sprinkle 1/4 cup of shredded Monterey Jack cheese evenly over one half of the tortilla.
6. Spread one-quarter of the avocado-bean mixture (about 1/2 cup) over the cheese layer, leaving a 1/2-inch border around the edge.
7. Fold the bare half of the tortilla over the filling, pressing gently to seal.
8. Brush the top of the quesadilla lightly with olive oil using a pastry brush or spoon.
9. Cook for 2-3 minutes until the bottom is golden brown and crispy—lift an edge with a spatula to check.
10. Carefully flip the quesadilla using a wide spatula and cook for another 2-3 minutes until the second side is golden and the cheese is fully melted.
11. Transfer the cooked quesadilla to a cutting board and repeat steps 4-10 with the remaining tortillas and filling.
12. Let each quesadilla rest for 1 minute before slicing into wedges; this allows the filling to set so it doesn’t ooze out.
Who knew something so simple could deliver such a crunch? The creamy avocado mingles with the hearty beans and gooey cheese, creating a texture party in every bite. Serve these wedges with a dollop of Greek yogurt for tang or stack them high for a DIY quesadilla bar—because why should Tuesday night be boring?
Artichoke and Spinach Flatbread

Aren’t we all secretly hoping our Tuesday night dinner could moonlight as a fancy restaurant appetizer? This artichoke and spinach flatbread is here to make that dream deliciously achievable, proving that gourmet vibes and weeknight ease can absolutely coexist. Get ready to impress your taste buds (and maybe your Instagram followers) with minimal effort and maximum flavor payoff.
4
portions15
minutes25
minutesIngredients
- 1 pre-made pizza dough (or your favorite homemade recipe)
- 1 cup frozen spinach, thawed and squeezed dry (seriously, get all that water out!)
- 1 cup marinated artichoke hearts, chopped (the oil from the jar adds bonus flavor)
- 1 cup shredded mozzarella cheese (or an Italian blend for extra pizzazz)
- 1/2 cup grated Parmesan cheese (the freshly grated kind makes a difference)
- 1/2 cup ricotta cheese (full-fat for maximum creaminess)
- 2 tbsp olive oil (or use the artichoke marinade oil for extra flavor)
- 2 cloves garlic, minced (because everything’s better with garlic)
- 1/2 tsp red pepper flakes (adjust for your preferred spice level)
- 1/4 tsp salt (fine sea salt works beautifully)
- Fresh basil for garnish (optional but highly recommended)
Instructions
- Preheat your oven to 425°F and position a rack in the center for even cooking.
- Lightly flour your work surface and roll the pizza dough into a 12×10 inch rectangle about 1/4-inch thick.
- Transfer the dough to a parchment-lined baking sheet and brush the entire surface with 1 tablespoon of olive oil.
- Bake the naked dough for 8 minutes until it just starts to puff up but isn’t browned yet.
- While the crust pre-bakes, mix the squeezed spinach, chopped artichokes, minced garlic, red pepper flakes, and salt in a medium bowl.
- Remove the partially baked crust from the oven and spread the ricotta cheese evenly across the surface, leaving a 1/2-inch border around the edges.
- Sprinkle the spinach-artichoke mixture over the ricotta layer, distributing it evenly.
- Top with the shredded mozzarella cheese, then sprinkle the Parmesan over everything.
- Drizzle the remaining tablespoon of olive oil over the assembled flatbread.
- Return the flatbread to the oven and bake for 12-15 minutes until the cheese is bubbly and the crust edges are golden brown.
- Let the flatbread rest for 3 minutes before slicing to allow the cheese to set slightly.
- Garnish with fresh basil leaves if using, then slice into squares or rectangles.
Now that glorious flatbread is ready to devour! Notice how the crispy-edged crust provides the perfect sturdy base for that creamy, garlicky topping situation. Nothing beats tearing into those cheesy, artichoke-packed squares while they’re still warm enough to require slightly burned fingertips – it’s the sign of a truly successful dinner adventure.
Creamy Tomato Basil Soup with Grilled Cheese Croutons

Nostalgia just got a major glow-up, folks! This isn’t your grandma’s tomato soup—unless your grandma was a culinary genius who put grilled cheese croutons on everything. Get ready to dunk, slurp, and crunch your way to comfort food nirvana.
2
sandwiches10
minutes35
minutesIngredients
– 2 tbsp olive oil (or any neutral oil)
– 1 medium yellow onion, diced
– 2 cloves garlic, minced
– 1 (28 oz) can crushed tomatoes
– 1 cup vegetable broth
– 1/2 cup heavy cream
– 1/4 cup fresh basil, chopped
– 1 tsp sugar (balances tomato acidity)
– 4 slices thick white bread
– 2 tbsp butter, softened
– 1 cup shredded cheddar cheese
Instructions
1. Heat olive oil in a large pot over medium heat for 1 minute until shimmering.
2. Add diced onion and cook for 5-7 minutes until translucent, stirring occasionally.
3. Stir in minced garlic and cook for 1 minute until fragrant.
4. Pour in crushed tomatoes and vegetable broth, then bring to a simmer.
5. Reduce heat to low, cover, and simmer for 15 minutes to develop flavors.
6. Carefully transfer soup to a blender and blend until completely smooth.
7. Return blended soup to the pot over low heat.
8. Stir in heavy cream until fully incorporated.
9. Add chopped basil and sugar, then simmer for 2 more minutes.
10. Preheat a skillet or griddle over medium heat.
11. Butter one side of each bread slice.
12. Place bread butter-side down on the hot skillet.
13. Sprinkle cheddar cheese evenly over all four bread slices.
14. Cook for 3-4 minutes until bread is golden brown and cheese is melted.
15. Flip two bread slices onto the others to create two sandwiches.
16. Press sandwiches gently with a spatula and cook for 1 more minute.
17. Remove grilled cheese sandwiches from skillet and let cool for 2 minutes.
18. Cut sandwiches into 1-inch cubes using a sharp knife.
19. Ladle hot soup into bowls and top with grilled cheese croutons.
20. Serve immediately while croutons are still warm and slightly crisp.
What makes this dish truly magical is the textural symphony—velvety smooth soup meets those crispy, cheesy croutons that slowly soften as they soak up the tomato goodness. Try serving it in mugs for ultimate cozy vibes, or go full gourmet by drizzling with basil oil right before your first glorious dunk.
Conclusion
Gathering these 24 effortless vegetarian dinners means you’ll always have delicious, healthy meals ready for your busiest nights. We hope you find new family favorites among these recipes! Don’t forget to share which dishes you loved most in the comments below and pin this article to your Pinterest boards for easy reference.


