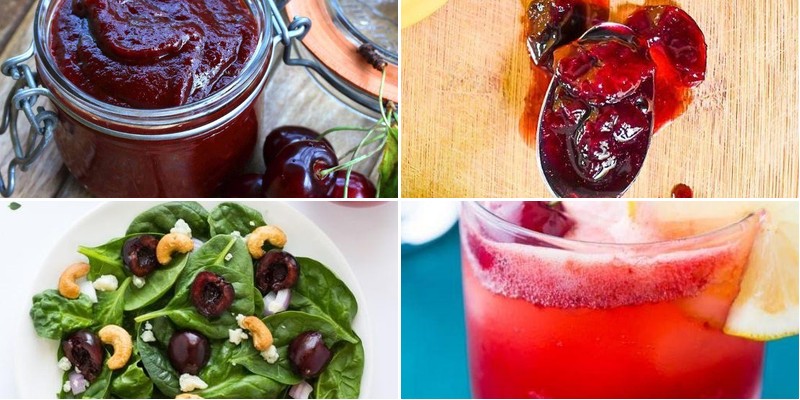
Looking for delicious ways to enjoy summer’s sweetest treasure? Fresh cherries are bursting with flavor right now, and we’ve gathered 18 delightful recipes that make the most of this seasonal favorite. From quick desserts to refreshing drinks, these easy creations will have you celebrating cherry season in style. Let’s dive into these irresistible treats that promise to make your summer meals unforgettable!
Cherry Almond Tart
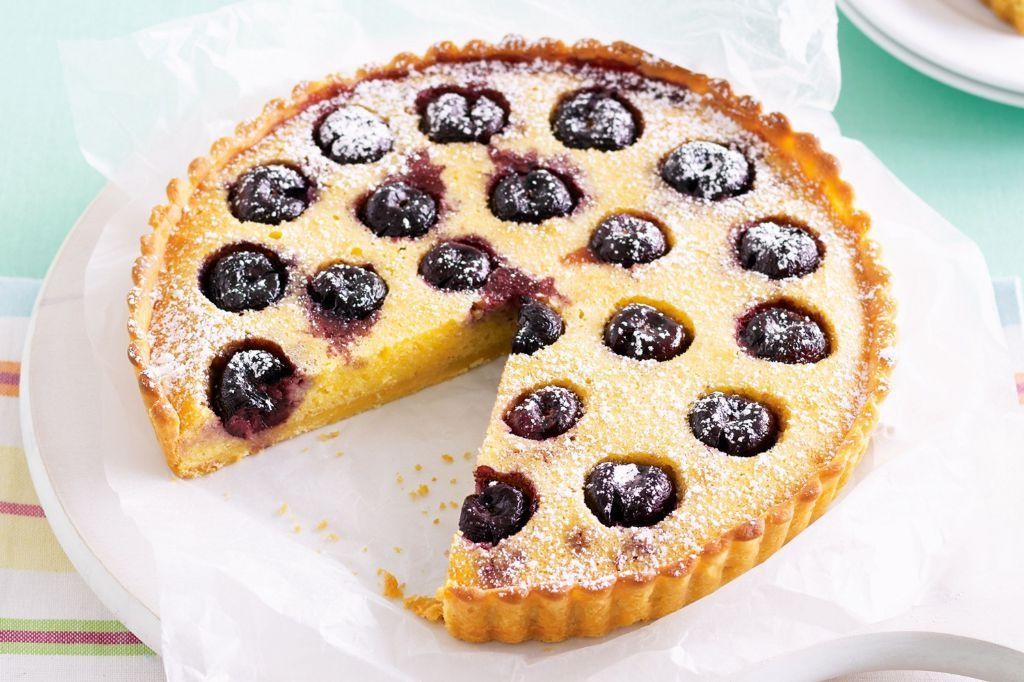
Sometimes the simplest desserts speak the loudest, like this cherry almond tart that came to me during a quiet afternoon when the rain tapped gently against the windowpane and the kitchen felt like the only place to be. Its buttery crust and sweet-tart filling have become my go-to when I need something that feels both elegant and comforting, a dessert that doesn’t demand perfection but always delivers warmth. I love how the almonds toast into a fragrant blanket over the cherries, creating a harmony that’s rustic yet refined.
8
portions25
minutes35
minutesIngredients
– 1 ½ cups all-purpose flour (I like to spoon and level it for accuracy)
– ½ cup unsalted butter, cold and cubed (keeping it cold ensures a flaky crust)
– ¼ cup granulated sugar
– 1 large egg, lightly beaten (room temperature helps it incorporate smoothly)
– 2 cups fresh cherries, pitted (frozen work too, but pat them dry if using)
– ⅓ cup almond flour (this adds a lovely nutty tenderness)
– ¼ cup sliced almonds
– 1 tsp almond extract (my secret for deepening the flavor)
– Pinch of salt
Instructions
1. Preheat your oven to 375°F (190°C) and lightly grease a 9-inch tart pan.
2. In a medium bowl, combine the all-purpose flour, granulated sugar, and salt.
3. Add the cold, cubed butter and use a pastry cutter or your fingers to work it in until the mixture resembles coarse crumbs.
4. Pour in the lightly beaten egg and mix just until a dough forms, being careful not to overwork it.
5. Press the dough evenly into the prepared tart pan, covering the bottom and sides, then chill it in the refrigerator for 15 minutes to prevent shrinking.
6. Arrange the pitted cherries in a single layer over the chilled crust.
7. Sprinkle the almond flour evenly over the cherries to absorb excess juice.
8. Drizzle the almond extract over the filling for a fragrant boost.
9. Scatter the sliced almonds on top for a crunchy finish.
10. Bake at 375°F for 30-35 minutes, or until the crust is golden and the filling is bubbly.
11. Let the tart cool completely on a wire rack before slicing to set properly.
Once cooled, the tart cuts into neat wedges with a crisp, buttery crust that gives way to the jammy cherries and toasty almonds. Offering it slightly warm with a dollop of whipped cream softens the edges, or serve it plain to let the fruit shine—either way, it’s a dessert that feels like a quiet celebration.
Fresh Cherry Clafoutis
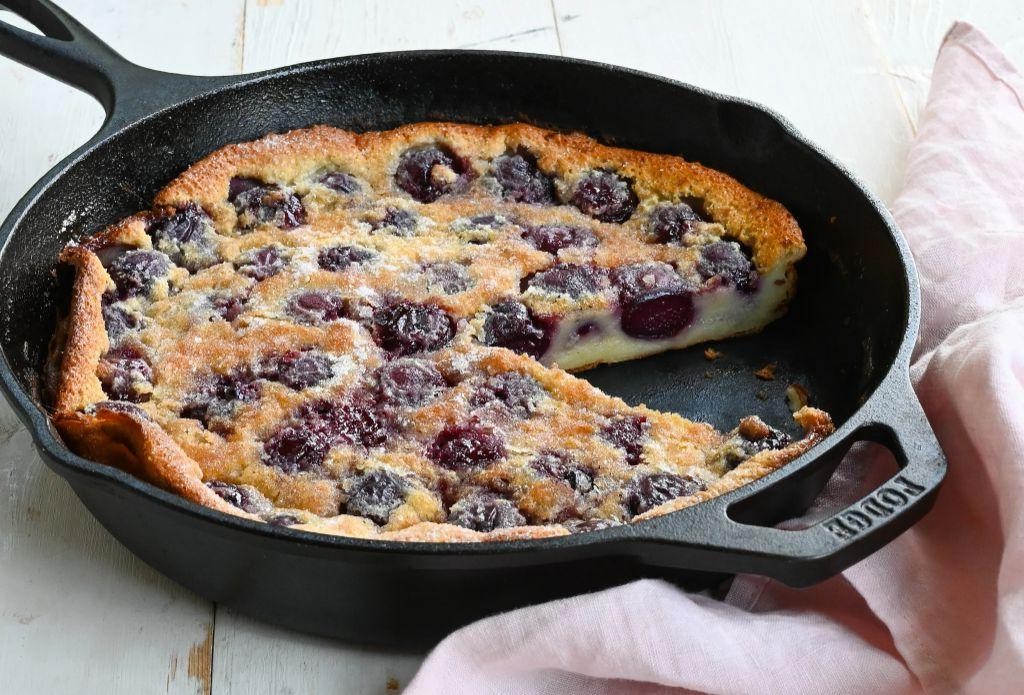
Years ago, I first tasted this rustic French dessert at a friend’s countryside home, the sweet cherries bursting with summer warmth against the creamy custard. Today, I find myself returning to this simple recipe whenever cherries are at their peak, a quiet ritual that fills the kitchen with the most comforting aroma. There’s something deeply satisfying about transforming humble ingredients into this elegant, yet unpretentious treat.
6
servings15
minutes40
minutesIngredients
– 1 pound fresh sweet cherries, pitted (I find leaving the stems on makes for a prettier presentation)
– 3 large eggs at room temperature (they incorporate much more smoothly into the batter)
– 1/2 cup granulated sugar plus 1 tablespoon for sprinkling
– 1/2 cup all-purpose flour (I sometimes use half whole wheat for a nuttier flavor)
– 1 cup whole milk (the richness really makes a difference here)
– 1 teaspoon pure vanilla extract (my grandmother’s homemade vanilla is my secret weapon)
– 1/4 teaspoon fine sea salt
– 2 tablespoons unsalted butter, melted and slightly cooled
– Powdered sugar for dusting (I prefer the snowy look it gives the finished clafoutis)
Instructions
1. Preheat your oven to 375°F and generously butter a 9-inch pie dish or cast-iron skillet.
2. Arrange the pitted cherries in a single layer across the bottom of the prepared baking dish.
3. In a medium mixing bowl, whisk the room temperature eggs until they become pale and frothy, about 2 minutes of vigorous whisking.
4. Gradually add the 1/2 cup granulated sugar while continuing to whisk, until the mixture thickens slightly.
5. Sift the flour directly into the egg mixture to prevent lumps, then whisk until just combined.
6. Slowly pour in the milk while whisking constantly to create a smooth, thin batter.
7. Add the vanilla extract, sea salt, and cooled melted butter, whisking until everything is fully incorporated.
8. Carefully pour the batter over the cherries in the baking dish, ensuring the cherries remain evenly distributed.
9. Sprinkle the remaining tablespoon of granulated sugar evenly over the top of the batter.
10. Bake for 35-40 minutes, or until the clafoutis is puffed, golden brown around the edges, and set in the center when gently jiggled.
11. Remove from the oven and let cool on a wire rack for at least 20 minutes before serving.
12. Dust generously with powdered sugar just before serving.
Something magical happens when the warm cherries release their juices into the delicate custard during baking. The texture is wonderfully complex—creamy yet firm, with bursts of fruity sweetness throughout. Serve it slightly warm with a dollop of crème fraîche or a scoop of vanilla bean ice cream for the perfect contrast to the tender baked fruit.
Cherry Balsamic Glazed Chicken
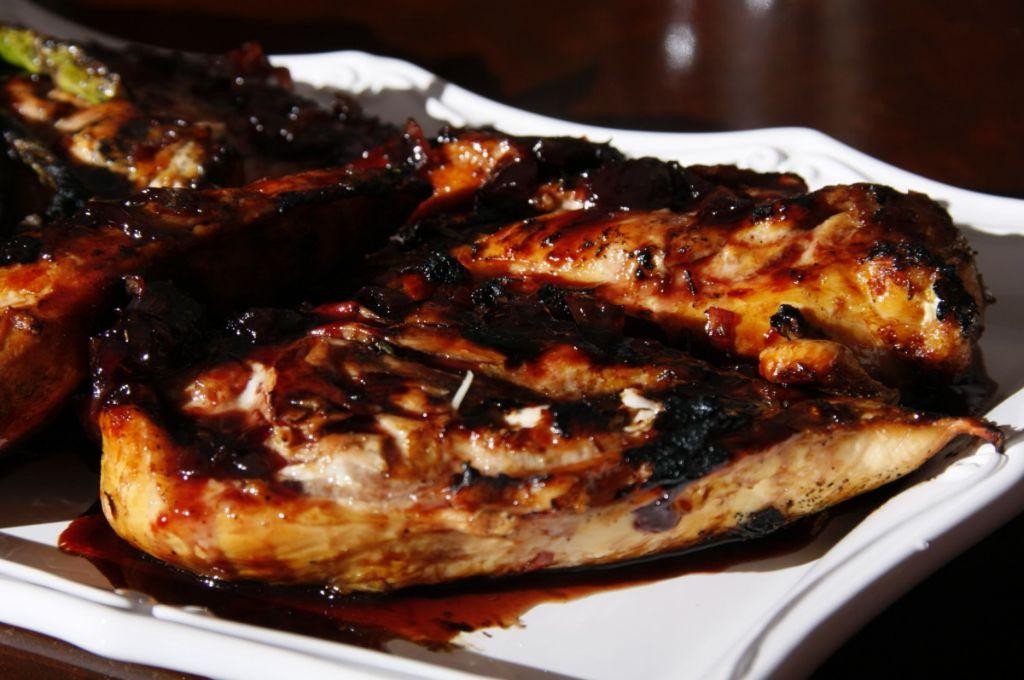
Wandering through the farmers market this morning, I found myself drawn to the deep crimson cherries, their glossy skins promising the perfect balance of sweet and tart for tonight’s dinner. There’s something quietly comforting about transforming simple ingredients into a meal that feels both elegant and deeply nourishing. This cherry balsamic glazed chicken has become my go-to when I need something that feels special without demanding too much energy.
3
servings15
minutes31
minutesIngredients
– 4 boneless, skinless chicken breasts (I like to pat them dry thoroughly for better browning)
– 1 cup fresh cherries, pitted (frozen work beautifully too if that’s what you have)
– 1/4 cup balsamic vinegar (the good stuff makes all the difference)
– 2 tablespoons honey (local if you can find it)
– 1 tablespoon extra virgin olive oil (my kitchen staple)
– 2 cloves garlic, minced (freshly minced releases more flavor)
– 1/2 teaspoon dried thyme (rubbed between fingers to awaken the oils)
– 1/4 teaspoon black pepper, freshly ground
– 1/2 teaspoon sea salt (I prefer coarse for better texture)
Instructions
1. Preheat your oven to 375°F and position the rack in the center.
2. Pat chicken breasts completely dry with paper towels.
3. Season both sides of chicken evenly with salt and black pepper.
4. Heat olive oil in a large oven-safe skillet over medium-high heat until shimmering.
5. Place chicken in the hot skillet and cook undisturbed for 5 minutes until golden brown.
6. Flip chicken and cook for 3 more minutes on the second side.
7. Remove chicken from skillet and set aside on a clean plate.
8. Reduce heat to medium and add minced garlic to the same skillet.
9. Cook garlic for 30 seconds until fragrant but not browned.
10. Add pitted cherries to the skillet and cook for 2 minutes until they begin to soften.
11. Pour in balsamic vinegar and honey, stirring to combine.
12. Simmer the sauce for 3 minutes until it thickens slightly and coats the back of a spoon.
13. Stir in dried thyme and return chicken to the skillet.
14. Spoon the cherry balsamic glaze over each chicken breast.
15. Transfer the skillet to the preheated oven and bake for 15 minutes.
16. Check internal temperature of chicken reaches 165°F using an instant-read thermometer.
17. Remove from oven and let chicken rest in the skillet for 5 minutes before serving.
The glaze forms a beautiful lacquered coating that crackles slightly when cut, revealing perfectly moist chicken beneath. I love serving this over creamy polenta where the sauce pools beautifully, or alongside roasted vegetables that catch the extra glaze. The sweet-tart cherries mellow into something deeply savory, creating a dish that feels both rustic and refined.
Easy Cherry Crisp
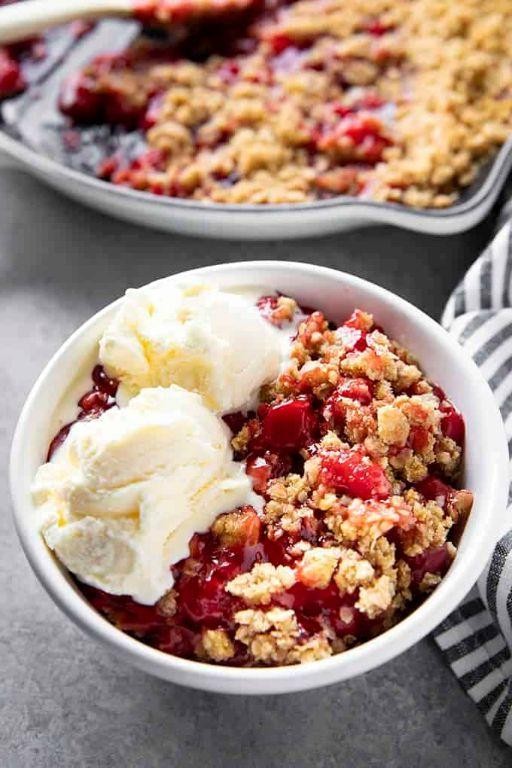
A quiet evening like this always makes me crave something simple and comforting, something that fills the kitchen with warmth and the sweet scent of memories. This easy cherry crisp is just that—a humble dessert that feels like a gentle hug, perfect for when you need a moment of quiet sweetness all to yourself.
6
servings15
minutes40
minutesIngredients
– 4 cups frozen sweet cherries (I find frozen work beautifully here, no need to thaw)
– 1/2 cup granulated sugar (I sometimes use a mix of white and brown for deeper flavor)
– 1 tablespoon cornstarch (this helps thicken the cherry juices just right)
– 1 cup old-fashioned rolled oats (the heartier texture is worth it)
– 1/2 cup all-purpose flour
– 1/2 cup packed light brown sugar (it gives the topping that lovely caramel note)
– 1/2 teaspoon ground cinnamon (a warm whisper, not too overpowering)
– 1/4 teaspoon salt (just a pinch to balance the sweetness)
– 1/2 cup unsalted butter, cold and cubed (I keep mine in the fridge until the last moment for a flakier crisp)
Instructions
1. Preheat your oven to 375°F and lightly grease an 8×8-inch baking dish.
2. In a medium bowl, combine the frozen sweet cherries, granulated sugar, and cornstarch until the cherries are evenly coated.
3. Tip: Let the cherry mixture sit for 5 minutes—this helps the sugar draw out some juices for a saucier base.
4. Pour the cherry mixture into the prepared baking dish, spreading it into an even layer.
5. In a separate bowl, mix the rolled oats, all-purpose flour, light brown sugar, cinnamon, and salt with a fork.
6. Add the cold, cubed unsalted butter to the oat mixture.
7. Use your fingertips to rub the butter into the dry ingredients until coarse crumbs form.
8. Tip: Work quickly to keep the butter cold, which creates a crispier topping as it bakes.
9. Sprinkle the oat topping evenly over the cherry layer, covering it completely.
10. Place the baking dish in the preheated oven and bake for 35–40 minutes.
11. Tip: Bake until the topping is golden brown and you see bubbly, thickened cherry juice around the edges.
12. Remove the crisp from the oven and let it cool on a wire rack for at least 15 minutes.
The warm, jammy cherries soften beneath that oat-strewn crust, each spoonful a mix of tart and sweet with a buttery crunch. Try it with a scoop of vanilla ice cream melting slowly into the crevices, or enjoy it plain the next morning—it’s just as lovely cold.
Fresh Cherry and Spinach Salad
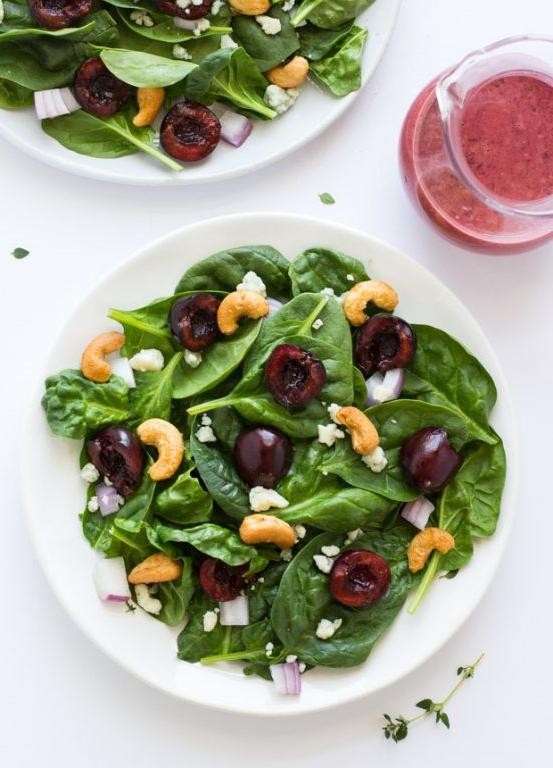
Perhaps it’s the gentle transition from summer to fall that makes me crave this particular combination—the way sweet cherries and earthy spinach create such a quiet harmony on the plate. I find myself making this salad whenever I need a moment of calm in the kitchen, the simple preparation becoming almost meditative as I work with each ingredient.
5
servings15
minutes4
minutesIngredients
- 6 cups fresh baby spinach leaves (I like to gently pat them dry after washing to keep the dressing from becoming watery)
- 2 cups fresh cherries, pitted (the deep burgundy ones are my favorite for their rich color)
- 1/2 cup crumbled goat cheese (I prefer the creamy, mild variety that melts just slightly)
- 1/4 cup chopped walnuts (toasting them first brings out their nutty sweetness)
- 3 tablespoons extra virgin olive oil (this is my everyday olive oil—fruity but not overpowering)
- 1 tablespoon honey (local wildflower honey adds the most delicate floral notes)
- 1 tablespoon fresh lemon juice (always squeezed right before using for the brightest flavor)
- 1/4 teaspoon sea salt (I use fine sea salt that dissolves easily into the dressing)
Instructions
- Place the walnuts in a dry skillet over medium heat and toast for 3-4 minutes, shaking the pan frequently, until they become fragrant and lightly golden.
- Transfer the toasted walnuts to a plate to cool completely, which prevents them from continuing to cook and become bitter.
- Wash the baby spinach leaves in cold water, then gently pat them dry between two clean kitchen towels.
- Place the dried spinach in a large mixing bowl, being careful not to crush the delicate leaves.
- Remove the stems from the cherries and use a cherry pitter to remove all pits.
- Slice each pitted cherry in half vertically and add them to the bowl with the spinach.
- In a small bowl, whisk together the extra virgin olive oil, honey, fresh lemon juice, and sea salt for exactly 30 seconds until the dressing becomes slightly emulsified.
- Pour the dressing over the spinach and cherries, then use salad tongs to gently toss everything together until evenly coated.
- Sprinkle the crumbled goat cheese and cooled toasted walnuts over the top of the salad.
- Serve immediately on individual plates or from the mixing bowl.
This salad offers the most wonderful contrast between the crisp spinach leaves and the juicy burst of cherries, while the creamy goat cheese creates little pockets of richness throughout. The toasted walnuts add a satisfying crunch that plays beautifully against the tender fruits and greens. Try serving it alongside grilled chicken or as a bright starter before a comforting soup—the sweet and savory elements make it wonderfully versatile.
Cherry Vanilla Smoothie
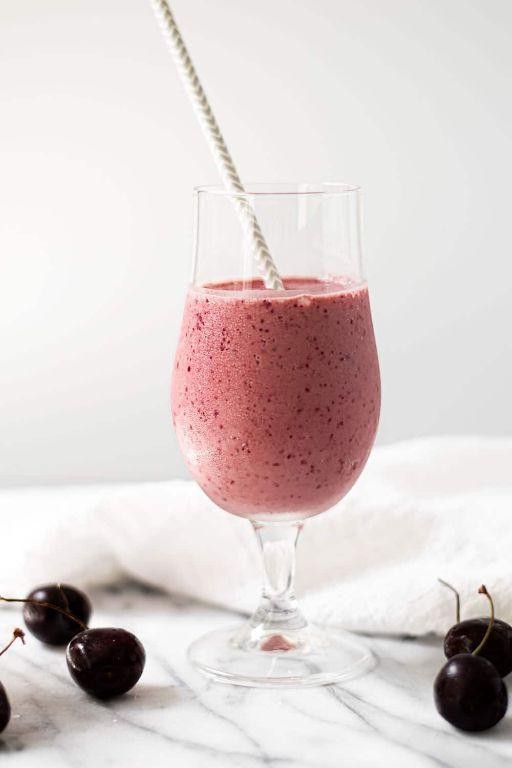
Holding this cool glass in my hands, I’m reminded how some of the simplest combinations can feel like small revelations. This cherry vanilla smoothie has become my quiet morning ritual, a gentle way to begin when the world still feels soft around the edges.
1
servings5
minutesIngredients
– 2 cups frozen dark sweet cherries (I find these hold their deep flavor better than fresh when frozen)
– 1 cup whole milk (the richness makes all the difference)
– 1/2 cup plain Greek yogurt (I prefer the thick texture over regular yogurt)
– 1 tablespoon pure maple syrup (the real stuff, never imitation)
– 1 teaspoon pure vanilla extract (splurge on the good quality here)
– 1/4 teaspoon almond extract (just a whisper makes the cherries sing)
Instructions
1. Measure 2 cups of frozen dark sweet cherries directly into your blender pitcher.
2. Pour 1 cup of whole milk over the frozen cherries to help them blend more smoothly.
3. Add 1/2 cup of plain Greek yogurt to the blender for creaminess and protein.
4. Drizzle in 1 tablespoon of pure maple syrup for natural sweetness.
5. Measure 1 teaspoon of pure vanilla extract into the mixture.
6. Add 1/4 teaspoon of almond extract to enhance the cherry flavor.
7. Secure the blender lid tightly and blend on high speed for 45-60 seconds until completely smooth.
8. Stop the blender and check consistency by tilting the pitcher—it should pour easily without chunks.
9. Pour immediately into a tall glass to enjoy at its coldest temperature.
Gently swirling the glass reveals that beautiful pale pink color that only comes from real cherries. The texture stays wonderfully thick and creamy for about ten minutes before it begins to thin, making it perfect for slow sipping. Sometimes I’ll sprinkle a few fresh cherry halves on top or serve it with a shortbread cookie for dipping—the vanilla notes pair beautifully with buttery cookies.
Cherry Oatmeal Muffins
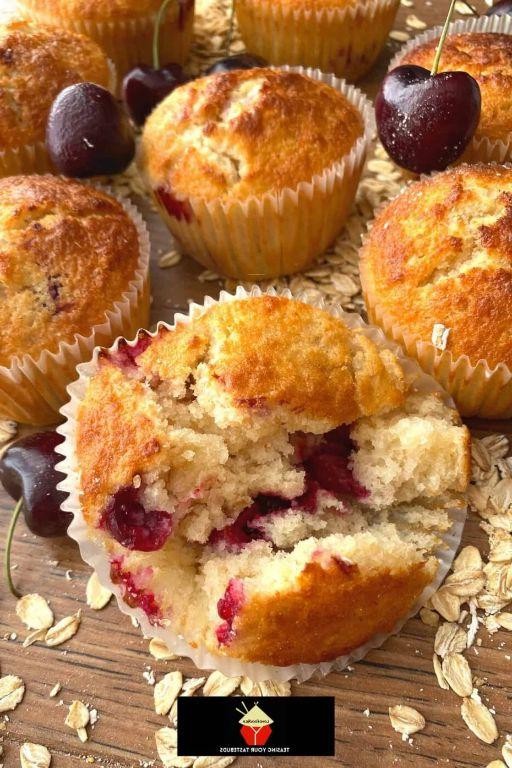
Years ago, on a misty autumn morning much like this one, I first stirred together these cherry oatmeal muffins while watching raindrops trace paths down my kitchen window. There’s something deeply comforting about the way the tart cherries bleed into the oat-flecked batter, creating little pockets of jewel-toned sweetness that promise to brighten even the grayest of days.
12
muffins15
minutes22
minutesIngredients
– 1 cup old-fashioned rolled oats (I love the hearty texture these provide)
– 1 cup all-purpose flour
– ½ cup brown sugar, packed (dark brown sugar adds wonderful molasses notes)
– 2 teaspoons baking powder
– ½ teaspoon salt
– 1 teaspoon cinnamon (freshly ground if you have it)
– 1 cup milk (whole milk creates the most tender crumb)
– 1 large egg, preferably at room temperature for better incorporation
– ¼ cup melted butter, cooled slightly
– 1 teaspoon vanilla extract
– 1 cup frozen cherries, roughly chopped (no need to thaw—they hold their shape better this way)
Instructions
1. Preheat your oven to 375°F and line a 12-cup muffin tin with paper liners.
2. In a large mixing bowl, combine the rolled oats, all-purpose flour, brown sugar, baking powder, salt, and cinnamon, whisking until evenly distributed.
3. In a separate medium bowl, whisk together the milk, room temperature egg, melted butter, and vanilla extract until fully emulsified.
4. Pour the wet ingredients into the dry ingredients and stir gently with a spatula until just combined—the batter will be slightly lumpy, and that’s perfect.
5. Gently fold in the frozen chopped cherries until evenly distributed throughout the batter.
6. Divide the batter evenly among the 12 prepared muffin cups, filling each about ⅔ full.
7. Bake at 375°F for 18-22 minutes, or until the tops spring back when lightly pressed and a toothpick inserted into the center comes out clean.
8. Let the muffins cool in the pan for 5 minutes before transferring them to a wire rack.
For that perfect domed top, I always make sure my baking powder is fresh—test it by dropping ½ teaspoon into hot water; if it bubbles vigorously, you’re good to go. When folding in the cherries, work quickly to prevent them from thawing and bleeding too much into the batter. And don’t skip the initial cooling time in the pan—those 5 minutes help the muffins set properly without becoming soggy.
Fresh from the oven, these muffins reveal a wonderfully tender crumb speckled with tart cherry jewels, while the oatmeal lends a satisfying heartiness that makes them feel both indulgent and wholesome. I love splitting one warm and watching the steam rise, then serving it with a pat of melting butter that pools in the cherry cavities. They’re equally wonderful the next day, when the flavors have settled into a deeper, more complex harmony that pairs beautifully with your morning coffee.
Savory Cherry Tomato Salad

Dusk settles softly outside my kitchen window, the fading light catching the crimson glow of cherry tomatoes scattered across my counter. There’s something quietly magical about transforming these humble orbs into a salad that feels both rustic and refined. This simple dish has become my go-to when I need something quick yet deeply satisfying.
2
servings15
minutesIngredients
– 2 cups cherry tomatoes, halved (I look for the sweetest ones I can find at the market)
– 1/4 cup extra virgin olive oil (my favorite bottle comes from a small California grove)
– 2 tablespoons red wine vinegar (a good splash adds just the right tang)
– 1 small shallot, minced (about 2 tablespoons – I love its milder bite compared to onion)
– 1/4 cup fresh basil leaves, torn (never chopped – tearing preserves those precious oils)
– 1/2 teaspoon sea salt (I prefer the flaky kind that dissolves evenly)
– 1/4 teaspoon freshly ground black pepper (fresh grinding makes all the difference)
Instructions
1. Wash 2 cups of cherry tomatoes under cool running water and pat them completely dry with a clean kitchen towel.
2. Cut each cherry tomato in half horizontally using a sharp paring knife, placing them in a medium mixing bowl as you work.
3. Mince 1 small shallot until you have approximately 2 tablespoons, adding it to the bowl with the tomatoes.
4. Measure 1/4 cup extra virgin olive oil and pour it over the tomato and shallot mixture.
5. Add 2 tablespoons red wine vinegar to the bowl, being careful not to splash.
6. Sprinkle 1/2 teaspoon sea salt evenly across the ingredients in the bowl.
7. Grind 1/4 teaspoon black pepper directly over the salad using a pepper mill.
8. Gently toss everything together with a large spoon until the tomatoes are evenly coated with the dressing.
9. Let the salad rest at room temperature for exactly 15 minutes to allow the flavors to meld together.
10. While the salad rests, tear 1/4 cup fresh basil leaves into small pieces with your fingers, avoiding bruising the delicate leaves.
11. After 15 minutes have passed, add the torn basil to the salad and give it one final gentle toss.
12. Transfer the finished salad to a serving bowl using a slotted spoon to leave excess dressing behind. Under the gentle dressing, the tomatoes release their sweet juices while maintaining their structural integrity. The shallot provides a subtle sharpness that balances the tomatoes’ natural sweetness beautifully. I sometimes serve this over toasted sourdough slices or alongside grilled chicken for a more substantial meal.
Cherry Chocolate Chip Cookies
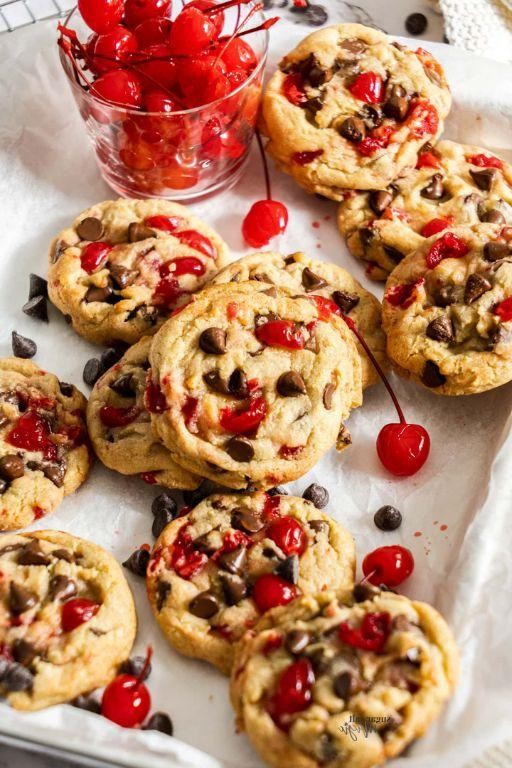
Lately, I’ve been craving something that bridges the gap between childhood nostalgia and grown-up indulgence, which is how these cherry chocolate chip cookies came to be—soft, chewy pockets of comfort with bursts of tart sweetness. There’s something quietly magical about how the cherries mingle with dark chocolate, creating a treat that feels both familiar and new. I often bake them on slow afternoons when the light slants just right through the kitchen window, filling the air with a warmth that lingers long after the last crumb is gone.
24
cookies15
minutes11
minutesIngredients
– 1 cup (2 sticks) unsalted butter, softened to room temperature—I find it creams more smoothly this way
– 3/4 cup granulated sugar, for that delicate crispness at the edges
– 3/4 cup packed light brown sugar, which adds a lovely molasses depth
– 2 large eggs, brought to room temperature to help the dough emulsify evenly
– 1 teaspoon pure vanilla extract, my favorite for its warm, floral notes
– 2 1/4 cups all-purpose flour, spooned and leveled to avoid dense cookies
– 1 teaspoon baking soda, for just the right lift
– 1/2 teaspoon fine sea salt, to balance the sweetness
– 1 cup dried tart cherries, roughly chopped so they distribute well
– 1 cup semi-sweet chocolate chips, because I love how they melt into gooey pockets
Instructions
1. Preheat your oven to 375°F (190°C) and line two baking sheets with parchment paper.
2. In a large bowl, use an electric mixer on medium speed to cream the softened butter, granulated sugar, and brown sugar together for 2–3 minutes, until the mixture is pale and fluffy.
3. Add the room-temperature eggs one at a time, beating well after each addition until fully incorporated.
4. Mix in the vanilla extract until just combined.
5. In a separate bowl, whisk together the all-purpose flour, baking soda, and fine sea salt.
6. Gradually add the dry ingredients to the wet mixture, mixing on low speed until no flour streaks remain—be careful not to overmix, as this can make the cookies tough.
7. Gently fold in the chopped dried cherries and semi-sweet chocolate chips with a spatula until evenly distributed.
8. Scoop rounded tablespoons of dough onto the prepared baking sheets, spacing them about 2 inches apart to allow for spreading.
9. Bake for 9–11 minutes, until the edges are lightly golden but the centers still look slightly soft—this keeps them chewy as they cool.
10. Let the cookies cool on the baking sheets for 5 minutes before transferring them to a wire rack to cool completely.
What makes these cookies special is their tender, cake-like crumb giving way to juicy cherries and melted chocolate, a combination that’s perfect with a glass of cold milk or crumbled over vanilla ice cream for a simple dessert.
Fresh Cherry Salsa
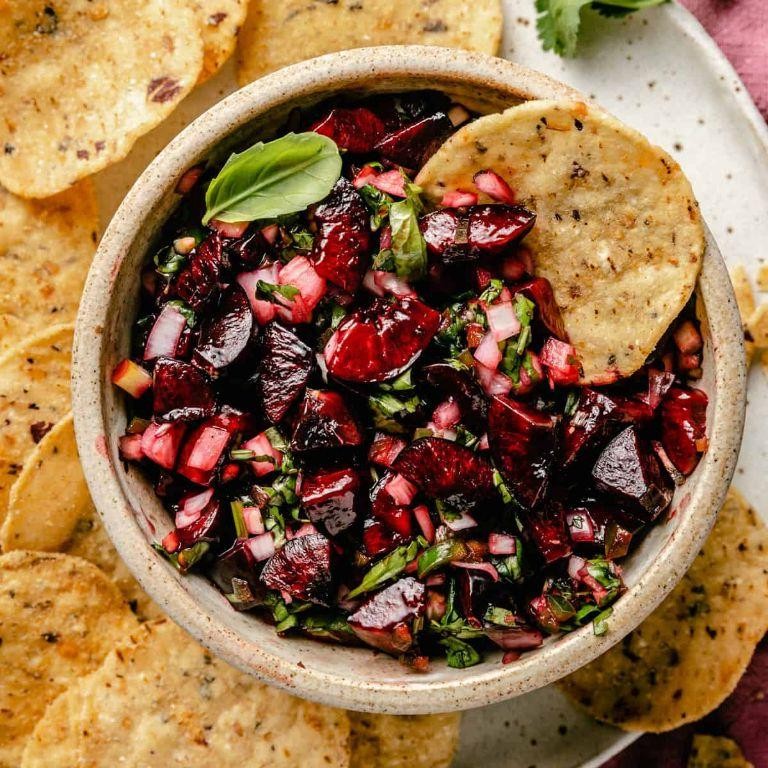
Lately, I’ve been craving the kind of food that feels like a quiet conversation with summer itself, something that captures fleeting moments of sweetness and spice in a single bowl. This fresh cherry salsa came to me during one of those slow afternoons when the kitchen counter was bathed in golden light, and I wanted to preserve that feeling in every bite. It’s a gentle reminder that the best recipes often emerge from stillness and a handful of ripe fruit.
4
servings20
minutesIngredients
– 2 cups fresh sweet cherries, pitted and finely chopped (I look for deep red ones—they hold their shape better when diced)
– 1/4 cup finely diced red onion (soaking it in ice water for 10 minutes first tames the sharpness, which I always do)
– 1 small jalapeño, seeds removed and minced (I wear gloves for this, as the oils can linger on your hands)
– 1/4 cup chopped fresh cilantro, packed lightly (if you’re not a cilantro fan, flat-leaf parsley works just as well)
– 2 tablespoons fresh lime juice, squeezed from about 1 lime (I roll the lime on the counter first to get the most juice out)
– 1 tablespoon extra virgin olive oil (my go-to for its fruity notes)
– 1/2 teaspoon fine sea salt (I avoid coarse salt here, as it doesn’t dissolve as easily)
– 1/4 teaspoon freshly ground black pepper
Instructions
1. Pit 2 cups of fresh sweet cherries using a cherry pitter or a small knife, then finely chop them into uniform pieces about 1/4-inch in size.
2. Place the chopped cherries in a medium mixing bowl, ensuring no pits remain.
3. Finely dice 1/4 cup of red onion, then submerge it in a bowl of ice water for exactly 10 minutes to reduce its pungency—this tip keeps the salsa balanced without overwhelming the cherries.
4. Drain the red onion thoroughly and add it to the bowl with the cherries.
5. Put on disposable gloves, then slice 1 small jalapeño in half lengthwise and scrape out the seeds and membranes with a spoon to control the heat level.
6. Mince the jalapeño into tiny pieces and add it to the mixing bowl.
7. Chop 1/4 cup of fresh cilantro leaves and tender stems, packing them lightly into the measuring cup, and add them to the bowl.
8. Squeeze 2 tablespoons of fresh lime juice directly over the ingredients to prevent browning and brighten the flavors.
9. Drizzle 1 tablespoon of extra virgin olive oil into the bowl, using a gentle, circular motion to coat everything evenly.
10. Sprinkle 1/2 teaspoon of fine sea salt and 1/4 teaspoon of freshly ground black pepper over the mixture.
11. Fold all ingredients together with a spatula for about 1 minute, until the salt dissolves and the cherries release a slight juice—this step melds the flavors without crushing the fruit.
12. Cover the bowl with plastic wrap and refrigerate for at least 30 minutes to allow the flavors to marry, which I find deepens the salsa’s complexity. Zesty and jewel-like, this salsa balances the cherries’ natural sweetness with a subtle heat that lingers softly on the palate. Serve it chilled over grilled fish or as a vibrant topping for tacos, letting the textures—crisp onions, tender cherries—create a dance of contrasts in every spoonful.
Cherry BBQ Sauce

Holding this jar of deep crimson sauce, I remember how summer cherries transform into something entirely different when simmered slowly with smoke and spice—this recipe captures that quiet alchemy, turning sweet fruit into a complex, tangy companion for grilling season. There’s something meditative about watching the bubbles form and pop, the way the kitchen fills with that sweet-smoky aroma that lingers in memory long after the meal is finished. Making cherry barbecue sauce feels like preserving summer’s fleeting joy in a form that can warm even the coldest winter evenings.
1
jar10
minutes45
minutesIngredients
– 2 cups fresh cherries, pitted (I love using Bing cherries for their deep sweetness, though frozen work beautifully too)
– 1 cup ketchup (the classic American kind with its familiar tang)
– 1/2 cup apple cider vinegar (the good stuff with the “mother” still in it)
– 1/4 cup brown sugar, packed (dark brown for that molasses depth)
– 2 tablespoons Worcestershire sauce (Lea & Perrins has been my kitchen staple for years)
– 1 tablespoon smoked paprika (this is where the magic happens—don’t skip the smoked variety)
– 1 teaspoon garlic powder (I keep mine in a little jar by the stove)
– 1/2 teaspoon black pepper, freshly ground (the fragrance is worth the extra effort)
– 1/4 teaspoon cayenne pepper (just enough to whisper, not shout)
Instructions
1. Combine all ingredients in a medium saucepan over medium heat.
2. Bring the mixture to a gentle bubble, watching for those first signs of simmer around the edges.
3. Reduce heat to low immediately once bubbling begins.
4. Simmer uncovered for 45 minutes, stirring every 10 minutes to prevent sticking—this slow cooking develops deeper flavors.
5. Check consistency at 30 minutes; the sauce should coat the back of a spoon without running off quickly.
6. Remove from heat when the sauce has thickened to your preferred texture.
7. Cool completely in the pan for about 1 hour before transferring.
8. Pour the cooled sauce into a clean glass jar or airtight container.
9. Refrigerate for at least 4 hours before using—this resting time allows the flavors to fully marry. Letting the finished sauce rest overnight actually improves the flavor balance, as the spices mellow and the cherry sweetness becomes more pronounced. The gentle simmering is key—too high heat can cause the sugar to scorch and create bitter notes. Always cool completely before storing to prevent condensation from watering down your beautiful sauce.
Ladled over smoked pork shoulder or brushed onto chicken during the last minutes of grilling, this sauce creates a glossy, sticky glaze that caramelizes beautifully. The texture is luxuriously thick with occasional flecks of cherry skin, while the flavor balances sweet fruit with smoky undertones and just enough heat to keep things interesting. I’ve even stirred a spoonful into salad dressings or used it as a dipping sauce for sweet potato fries—it’s surprisingly versatile beyond traditional barbecue.
Cherry Lemonade Fizz
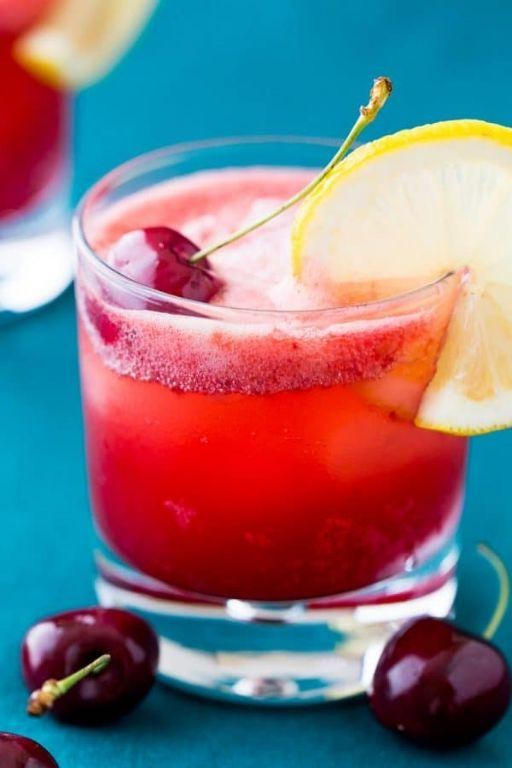
Often, the simplest summer pleasures arrive unannounced, like the memory of childhood lemonade stands that inspired this effervescent drink. On afternoons when the heat lingers heavy and sweet, I find myself craving this cherry lemonade fizz—a gentle blend of tart and fruity that feels like a quiet celebration.
2
glasses15
minutesIngredients
- 1 cup fresh cherries, pitted (I like to use dark sweet cherries for their deep flavor)
- 1/2 cup freshly squeezed lemon juice (about 3–4 lemons, rolled first to release more juice)
- 1/4 cup granulated sugar (adjust slightly if your cherries are very sweet)
- 2 cups cold sparkling water (chilled beforehand for extra fizz)
- Ice cubes (I prefer large cubes—they melt slower and keep the drink crisp)
- Fresh mint leaves for garnish (a few sprigs from my windowsill herb garden)
Instructions
- Combine the pitted cherries, lemon juice, and sugar in a blender.
- Blend on high speed for 30 seconds, or until the mixture is completely smooth and no cherry chunks remain.
- Strain the cherry-lemon mixture through a fine-mesh sieve into a pitcher, pressing gently with a spoon to extract all the liquid—discard any solids.
- Tip: For a clearer drink, avoid pressing too hard, which can cloud the liquid.
- Pour the sparkling water slowly into the pitcher with the cherry-lemon base.
- Stir gently just once or twice to combine—overmixing will flatten the bubbles.
- Fill two tall glasses halfway with ice cubes.
- Divide the cherry lemonade evenly between the glasses.
- Tip: Chill the glasses in the freezer for 10 minutes beforehand to keep the drink colder longer.
- Garnish each glass with 2–3 fresh mint leaves.
- Tip: Lightly clap the mint between your palms before adding to release its aroma.
Delicate bubbles lift the sweet-tart cherry essence, while the mint adds a whisper of freshness. Serve it in mason jars with striped paper straws for a nostalgic touch, or float a few extra cherries in the glass for a pretty, edible garnish.
Cherry Vanilla Ice Cream
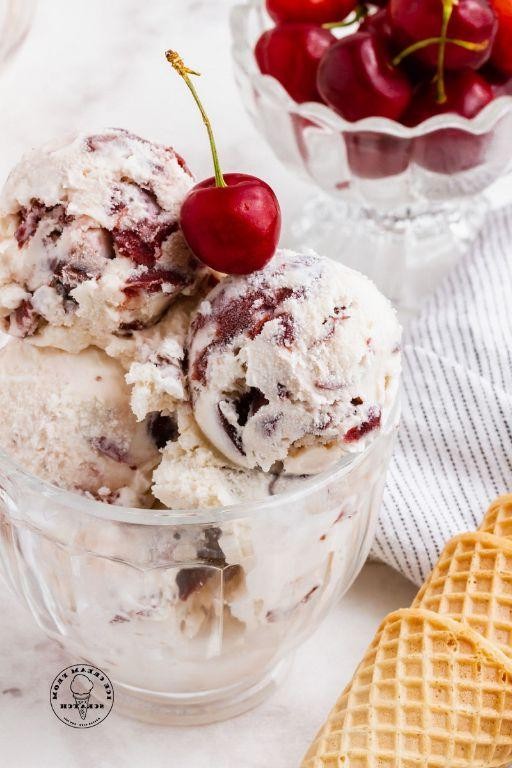
Evenings like this, when the light fades slowly and the air carries that first crisp hint of autumn, my thoughts drift to the gentle sweetness of summer preserved—a quiet indulgence to ease the changing seasons. This cherry vanilla ice cream feels like capturing those last warm days in a creamy, dreamy form, a simple luxury to savor slowly.
8
servings15
minutesIngredients
– 2 cups heavy cream, cold from the fridge for the best whip
– 1 cup whole milk, I find the richness balances the fruit so well
– 3/4 cup granulated sugar, just enough to sweeten without overpowering the cherries
– 1 tablespoon pure vanilla extract, my secret is a splash extra for that warm, floral note
– 1 1/2 cups fresh sweet cherries, pitted and roughly chopped—I love the deep red ones for their bold color
– 1/4 teaspoon fine sea salt, a tiny pinch to make all the flavors sing
Instructions
1. Combine the heavy cream, whole milk, granulated sugar, pure vanilla extract, and fine sea salt in a large mixing bowl.
2. Whisk the mixture vigorously for about 2 minutes, until the sugar is fully dissolved and the liquid looks smooth.
3. Gently fold in the pitted and roughly chopped fresh sweet cherries with a spatula, distributing them evenly without crushing.
4. Pour the entire mixture into your ice cream maker’s frozen bowl, ensuring it’s no more than two-thirds full to allow for expansion.
5. Churn the ice cream according to your machine’s instructions, typically 20-25 minutes, until it thickens to a soft-serve consistency. Tip: If the bowl wasn’t frozen solid, the ice cream won’t set properly—I always freeze mine overnight.
6. Transfer the churned ice cream to a lidded, freezer-safe container, smoothing the top with your spatula.
7. Press a piece of parchment paper directly onto the surface of the ice cream to prevent ice crystals from forming.
8. Seal the container tightly and freeze for at least 4 hours, or until firm. Tip: For the creamiest texture, let it freeze undisturbed—avoid opening the freezer frequently.
9. Before serving, remove the ice cream from the freezer and let it sit at room temperature for 5-10 minutes to soften slightly for easy scooping. Tip: Dipping your scoop in warm water between servings helps create beautiful, rounded scoops.
Creamy and studded with bursts of tart-sweet cherry, this ice cream melts on the tongue with a velvety richness that feels like a quiet celebration. I love serving it in small ceramic bowls, perhaps with a drizzle of dark chocolate or alongside a buttery shortbread cookie for contrast, letting each spoonful linger as the evening settles in.
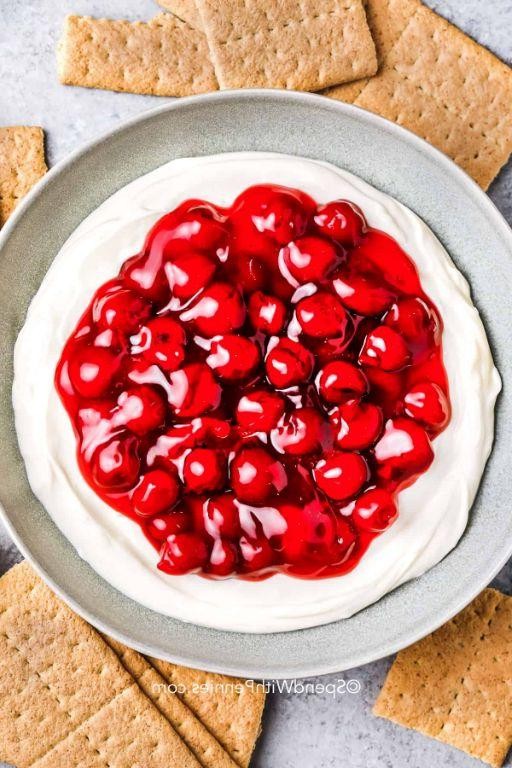
Easy Cherry Cheesecake Dip
Falling into autumn evenings always makes me crave something sweet yet simple, something that feels like a warm hug after a long day. This cherry cheesecake dip came to me during one of those quiet moments when the kitchen felt like the most comforting place to be. It’s the kind of effortless treat that turns ordinary moments into little celebrations, perfect for sharing or savoring alone.
1
dish20
minutesIngredients
- 8 ounces cream cheese, softened (I always let mine sit out for about an hour—it blends so much smoother that way)
- 1/2 cup powdered sugar, sifted (sifting prevents those little lumps that can sneak in)
- 1 teaspoon vanilla extract (pure vanilla is my favorite for that warm, fragrant note)
- 1 cup cold heavy whipping cream (chilled cream whips up lighter and holds its shape beautifully)
- 1 (21-ounce) can cherry pie filling (I look for one with plump, dark cherries—they add such a lovely contrast)
- Graham crackers, for serving (the classic choice, but sometimes I use shortbread cookies for a buttery twist)
Instructions
- Place the softened cream cheese in a large mixing bowl and beat it with an electric mixer on medium speed for 1 minute, until it’s completely smooth and free of lumps.
- Add the sifted powdered sugar and vanilla extract to the cream cheese, then beat on low speed for 30 seconds to combine, scraping down the sides of the bowl with a spatula to ensure everything is incorporated evenly.
- Pour the cold heavy whipping cream into a separate, clean bowl and whip it on high speed for 2–3 minutes, until stiff peaks form that hold their shape when the beaters are lifted.
- Gently fold the whipped cream into the cream cheese mixture using a spatula, using broad, sweeping motions to keep the mixture light and airy—overmixing can deflate it.
- Spread the cherry pie filling evenly over the bottom of a serving dish, creating a smooth layer about 1/4 inch thick.
- Spoon the cream cheese mixture over the cherry layer, spreading it gently to cover the cherries completely without mixing them in.
- Cover the dish with plastic wrap and refrigerate the dip for at least 2 hours, or until it’s chilled through and the flavors have melded together.
- Serve the dip chilled alongside graham crackers for dipping, arranging them around the bowl for easy access.
Moments like these remind me how simple ingredients can create something truly special. The dip is luxuriously creamy with a subtle tang from the cream cheese, while the cherries add a sweet, jammy burst that pairs perfectly with the crisp graham crackers. For a fun twist, try layering it in individual jars or swapping the cherries for blueberry pie filling—it’s just as delightful.
Fresh Cherry Jam
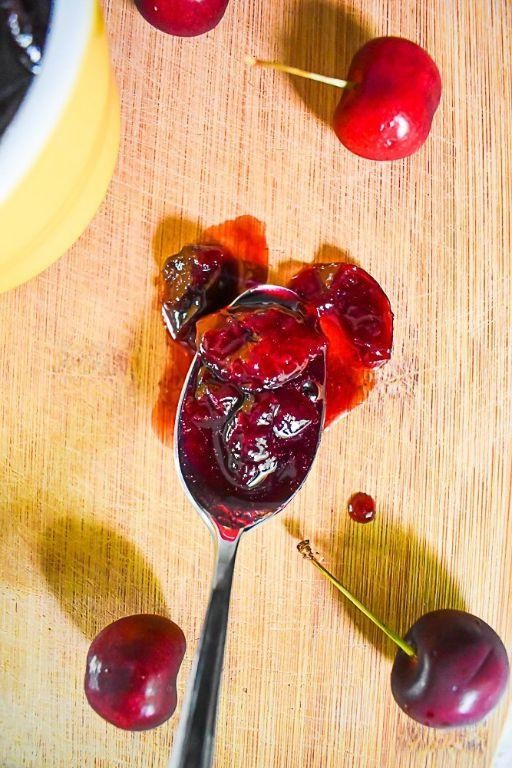
Just yesterday, I found myself with a basket of cherries that needed purpose, their deep red skins catching the afternoon light in my quiet kitchen. There’s something meditative about transforming summer’s fleeting bounty into something that lasts, each cherry carrying the memory of warm afternoons and gentle breezes through this simple alchemy.
4
jars15
minutes35
minutesIngredients
– 4 cups fresh sweet cherries, pitted (I love leaving a few whole ones for texture surprises)
– 1 cup granulated sugar (I sometimes reduce this to ¾ cup if the cherries are particularly sweet)
– 2 tablespoons fresh lemon juice (always fresh-squeezed for that bright acidity)
– 1 teaspoon vanilla extract (the real stuff makes all the difference)
– ¼ teaspoon almond extract (my secret for enhancing the cherry flavor)
Instructions
1. Place pitted cherries in a heavy-bottomed saucepan over medium heat.
2. Cook cherries for 8-10 minutes, stirring occasionally with a wooden spoon until they release their juices and become tender.
3. Add sugar and stir continuously for 2 minutes until completely dissolved.
4. Stir in lemon juice, vanilla extract, and almond extract until well combined.
5. Increase heat to medium-high and bring mixture to a rolling boil that cannot be stirred down.
6. Maintain boil for 15-18 minutes, stirring frequently to prevent sticking, until mixture thickens and reaches 220°F on a candy thermometer.
7. Test doneness by placing a small spoonful on a chilled plate – it should wrinkle when pushed with your finger and not run back together.
8. Remove saucepan from heat and let jam rest for 5 minutes, skimming off any foam that rises to the surface.
9. Ladle hot jam into sterilized jars, leaving ¼-inch headspace, and process in water bath for 10 minutes if canning.
Gently spooned over morning toast, this jam carries the essence of summer cherries in every glossy spoonful. The texture spreads like velvet with occasional bursts of whole fruit, while the almond extract deepens the cherry flavor in a way that makes ordinary breakfasts feel like small celebrations.
Cherry Basil Bruschetta

Cherry Basil Bruschetta
Creating this cherry basil bruschetta feels like capturing summer in a single bite, the sweet-tart cherries mingling with fragrant basil in a way that always makes me pause and appreciate the simple joys of seasonal cooking. I love how the colors deepen as the ingredients rest together, transforming ordinary bread into something truly special.
1
baguette20
minutes10
minutesIngredients
– 1 French baguette, sliced diagonally into ½-inch thick pieces (I look for one with a crisp crust that will hold up to topping)
– 1 cup fresh cherries, pitted and roughly chopped (I prefer Bing cherries for their deep sweetness)
– ¼ cup fresh basil leaves, thinly sliced (tearing them gently by hand releases more fragrance)
– 2 tablespoons extra virgin olive oil (my go-to for its fruity notes)
– 1 tablespoon balsamic vinegar (aged varieties add wonderful complexity)
– 4 ounces fresh mozzarella cheese, sliced ¼-inch thick (room temperature slices melt more evenly)
– ¼ teaspoon sea salt (I use flaky salt for its delicate crunch)
Instructions
1. Preheat your oven to 375°F.
2. Arrange the baguette slices in a single layer on a baking sheet.
3. Brush each slice lightly with 1 tablespoon of olive oil using a pastry brush.
4. Bake the bread for 8-10 minutes until the edges turn golden brown and the surface feels crisp to the touch.
5. Remove the toasted bread from the oven and let it cool on the baking sheet for 5 minutes.
6. While the bread cools, combine the chopped cherries, sliced basil, remaining olive oil, balsamic vinegar, and sea salt in a medium bowl.
7. Gently stir the cherry mixture with a rubber spatula until all ingredients are evenly coated.
8. Let the cherry mixture rest at room temperature for 15 minutes to allow the flavors to meld.
9. Place one slice of mozzarella on each piece of toasted bread.
10. Spoon approximately 2 tablespoons of the cherry mixture over each mozzarella-topped bread slice.
11. Serve immediately while the bread retains its crisp texture.
Now the finished bruschetta offers this wonderful contrast between the crisp bread and juicy cherry topping, with the creamy mozzarella creating a smooth bridge between textures. Nothing compares to that moment when the sweet cherries burst against the savory backdrop, making these perfect for serving on a wooden board during golden hour when the light makes everything glow.
Cherry Honey Bread
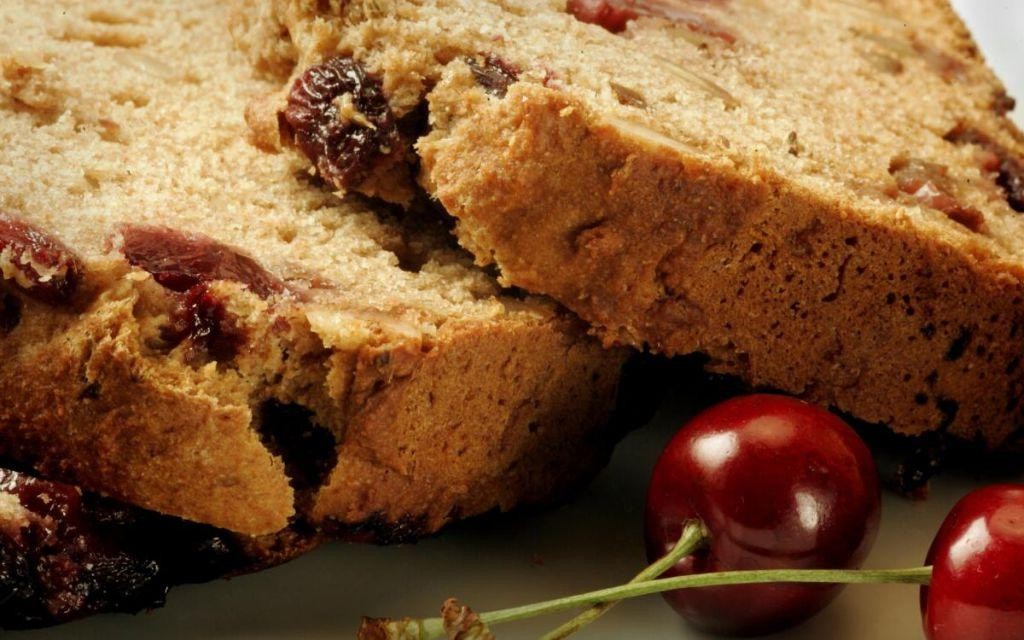
Remembering how my grandmother’s kitchen smelled on autumn afternoons, I find myself drawn to recipes that carry that same warmth—like this cherry honey bread, which feels like a quiet embrace in loaf form. It’s a simple, forgiving bake that fills the house with the scent of sweet fruit and golden honey, perfect for slow mornings or shared over tea.
1
loaf15
minutes55
minutesIngredients
- 2 cups all-purpose flour—I always sift mine first for a lighter crumb
- 1/2 cup honey, preferably local and raw for that floral depth
- 1 cup fresh cherries, pitted and halved (frozen work too, just thaw and pat dry)
- 2 large eggs, brought to room temperature to help them incorporate smoothly
- 1/2 cup whole milk, warmed slightly to encourage rising
- 1/4 cup unsalted butter, melted and cooled—I use European-style for richness
- 1 tsp baking powder
- 1/2 tsp baking soda
- Pinch of salt, just enough to balance the sweetness
Instructions
- Preheat your oven to 350°F and generously grease a 9×5-inch loaf pan with butter or non-stick spray.
- In a large bowl, whisk together the sifted flour, baking powder, baking soda, and salt until no streaks remain.
- In a separate bowl, combine the room-temperature eggs, honey, warmed milk, and cooled melted butter, whisking for about 1 minute until the mixture is smooth and slightly frothy.
- Tip: Pour the wet ingredients into the dry all at once, and fold gently with a spatula—just until the flour disappears, to avoid a tough loaf.
- Gently fold in the pitted, halved cherries, distributing them evenly without overmixing.
- Pour the batter into the prepared loaf pan and use a spatula to spread it evenly into the corners.
- Bake on the center rack for 50–55 minutes, or until a toothpick inserted into the center comes out clean with no wet batter.
- Tip: If the top browns too quickly, tent it loosely with foil after 30 minutes to prevent burning.
- Remove the pan from the oven and let the bread cool in the pan for 10 minutes—this helps it set without sticking.
- Transfer the loaf to a wire rack to cool completely, about 1 hour, before slicing.
- Tip: For neat slices, use a serrated knife and gentle sawing motions once the bread is fully cooled.
Let this bread cool fully to appreciate its tender, moist crumb, dotted with juicy cherries that burst with each bite. The honey lends a subtle sweetness that isn’t overpowering, making it lovely toasted with a dab of butter or served alongside sharp cheese for contrast.
Conclusion
Cherries truly shine in these 18 easy recipes, making summer cooking a breeze. From sweet desserts to savory dishes, there’s something for everyone to enjoy. We hope you find a new favorite—give one a try and let us know which you love most in the comments! Don’t forget to share this roundup on Pinterest so others can discover these delightful cherry creations too.


