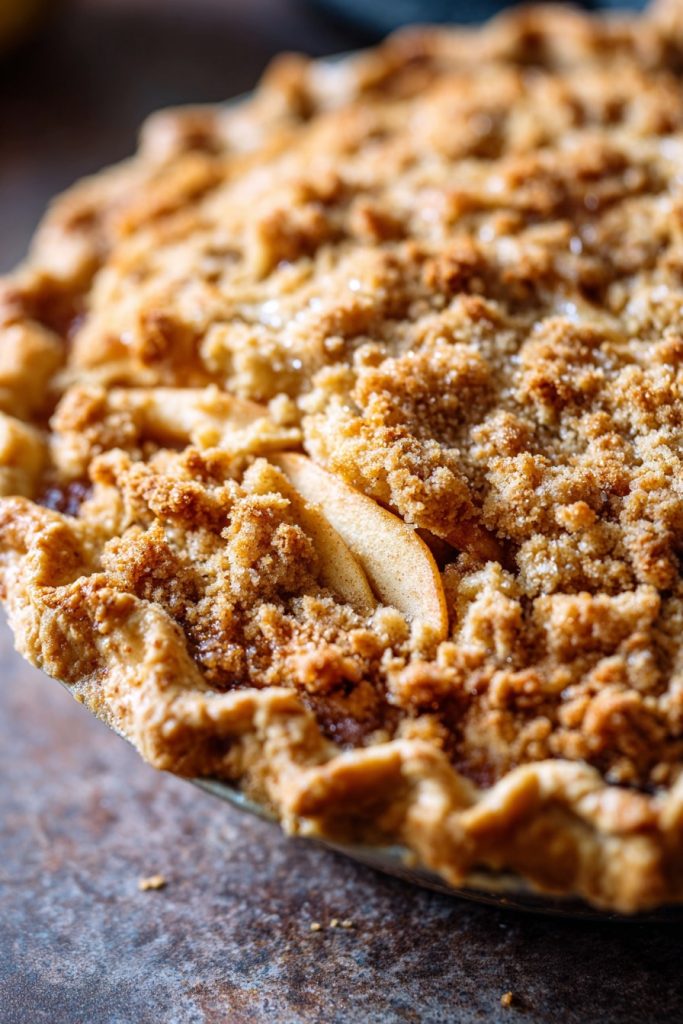
Make way for the most incredible, show-stopping, crowd-pleasing dessert that will have everyone begging for seconds! This isn’t just any apple pie, folks—this is the legendary Dutch apple pie with that magical crumb topping that transforms ordinary apples into pure dessert perfection. My mouth is watering just thinking about that buttery, cinnamon-kissed crumble melting into tender, sweet-tart apples nestled in a flaky, golden crust. Get ready to become the hero of every potluck, holiday gathering, and family dinner with this absolute masterpiece!
Why This Recipe Works
- The genius crumb topping eliminates the stress of traditional lattice work while delivering incredible texture contrast between the crunchy streusel and tender apples
- Using a combination of sweet and tart apples creates the perfect balance of flavors that will make your taste buds dance with excitement
- The pre-made pie crust shortcut means you get all the homemade taste without the fuss of making dough from scratch
- Baking at precisely 375°F ensures the filling bubbles to perfection while the topping achieves that gorgeous golden-brown crunch
- The cornstarch thickener guarantees your slices hold together beautifully without any soupy mess
Ingredients
- 1 (9-inch) refrigerated pie crust, thawed if frozen
- 6 cups peeled and sliced mixed apples (about 6 medium apples)
- 1/2 cup granulated sugar
- 1/4 cup packed light brown sugar
- 2 tablespoons all-purpose flour
- 1 tablespoon cornstarch
- 1 1/2 teaspoons ground cinnamon
- 1/4 teaspoon ground nutmeg
- 1/4 teaspoon salt
- 1 tablespoon fresh lemon juice
- 1 teaspoon vanilla extract
- 1 cup all-purpose flour
- 1/2 cup packed light brown sugar
- 1/2 cup granulated sugar
- 1/2 cup cold unsalted butter, cubed
- 1/2 teaspoon ground cinnamon
Equipment Needed
- 9-inch pie plate
- Large mixing bowls (2)
- Measuring cups and spoons
- Pastry brush
- Peeler and sharp knife
- Rubber spatula
- Wire rack
- Oven thermometer
Instructions
Prepare Your Pie Crust and Apple Filling
Get ready for the most exciting part—transforming that simple pie crust into your dessert canvas! Unroll your refrigerated pie crust and gently press it into your 9-inch pie plate, making sure it’s snug against the bottom and sides. Use your fingers to crimp the edges beautifully—get creative with fork marks or fancy fluted patterns! Now for the star players: those glorious apples! Peel and slice about 6 medium apples into 1/4-inch thick slices—I love using a mix of Granny Smith for tartness and Honeycrisp for sweetness. In your large mixing bowl, combine 1/2 cup granulated sugar, 1/4 cup packed light brown sugar, 2 tablespoons all-purpose flour, 1 tablespoon cornstarch, 1 1/2 teaspoons ground cinnamon, 1/4 teaspoon ground nutmeg, and 1/4 teaspoon salt. Toss your beautiful apple slices with this magical spice mixture until every single piece is coated in cinnamon-sugar heaven! Add 1 tablespoon fresh lemon juice and 1 teaspoon vanilla extract for that extra flavor boost that will make your filling absolutely irresistible. Pro tip: Let the coated apples sit for 10 minutes to release their natural juices—this creates the most incredible syrupy base!
Create That Legendary Crumb Topping
Assemble Your Masterpiece and Preheat
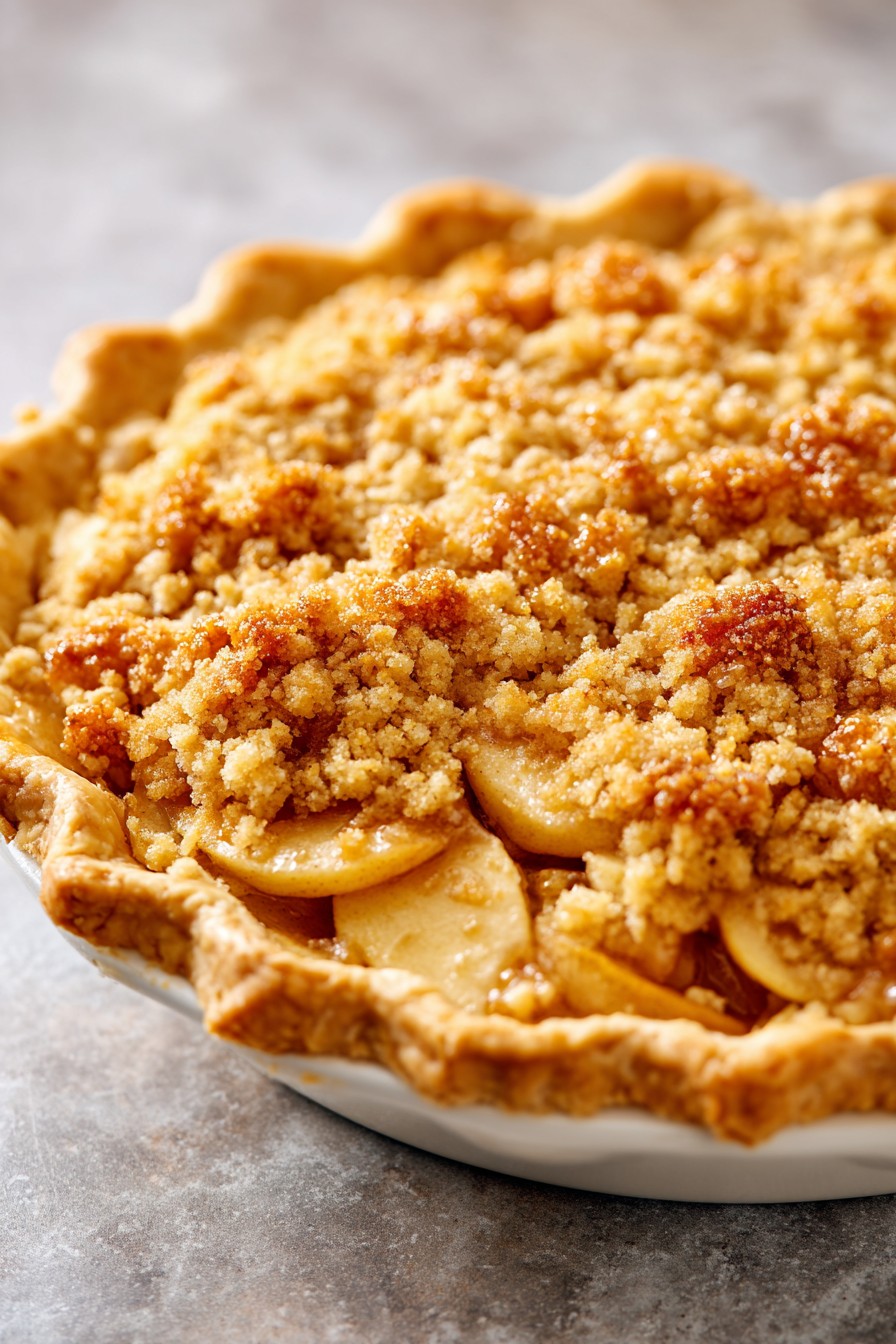
The assembly line is where the magic really happens—this is where your pie transforms from ingredients to edible art! Take your prepared pie crust and pour in that magnificent apple filling, making sure to scrape every last bit of that delicious spiced syrup from the bowl. Use your hands to arrange the apples in an even layer, slightly mounding them in the center since they’ll shrink during baking. Now generously sprinkle that incredible crumb topping over the apples, covering every inch with that buttery goodness—don’t be shy, pile it on! Gently press the topping down just enough to help it adhere to the apples without compacting it too much. Place your assembled masterpiece on a baking sheet to catch any potential drips—trust me, you’ll thank me later when cleanup is a breeze! Now preheat your oven to 375°F and let it fully come to temperature—this ensures even baking from the moment your pie enters the oven. Pro tip: Use an oven thermometer to verify your oven’s accuracy for perfect results every single time!
Bake to Golden Perfection
Here comes the most exciting part—watching your creation transform into golden-brown perfection! Carefully place your pie on the center rack of your preheated 375°F oven and set your timer for 45 minutes. After the initial bake time, rotate the pie 180 degrees to ensure even browning—ovens often have hot spots that can cause uneven cooking. Continue baking for another 15-25 minutes, watching closely for that magical moment when the crumb topping turns a deep golden brown and the filling is bubbling vigorously around the edges. The total baking time should be between 60-70 minutes, but trust your eyes more than the timer! You’ll know it’s done when the topping is crisp and beautifully colored, the apples are tender when pierced with a knife through the center, and those gorgeous caramel-colored bubbles are dancing around the crust edges. The aroma filling your kitchen will be absolutely intoxicating—get ready for compliments from neighbors who can smell this heavenly creation!
Cool and Serve Like a Pro
Patience is the final secret ingredient, my friends—this cooling step is crucial for picture-perfect slices! Using oven mitts, carefully transfer your gorgeous golden-brown pie from the oven to a wire cooling rack. Let it cool completely for at least 3-4 hours—I know it’s tempting to dive right in, but this waiting period allows the filling to set up properly so you get clean, beautiful slices instead of a soupy mess. The cornstarch in the filling needs this time to work its thickening magic as the pie cools to room temperature. If you absolutely can’t wait, you can serve it warm after about 1 hour of cooling, but be prepared for a slightly looser filling. For the ultimate experience, serve each magnificent slice with a scoop of vanilla ice cream that slowly melts into the warm crumb topping—it’s pure dessert nirvana! Pro tip: Use a sharp knife dipped in hot water for perfectly clean slices every time!
Tips and Tricks
Let me share some next-level secrets that will take your Dutch apple pie from great to absolutely legendary! First up—apple selection is everything! While I love the Granny Smith and Honeycrisp combo, don’t be afraid to experiment with other varieties. Fuji apples bring incredible sweetness, Braeburn holds its shape beautifully, and Jonagold offers the perfect balance of sweet and tart. The key is using firm apples that won’t turn to mush during baking. When preparing your apples, make sure your slices are uniformly 1/4-inch thick—this ensures even cooking throughout the pie. Too thin and they’ll disappear; too thick and they might not cook through properly.
Now let’s talk about that crumb topping—the heart and soul of Dutch apple pie! The temperature of your butter is absolutely crucial for achieving that perfect crunchy texture. Your butter should be cold straight from the refrigerator, not room temperature. If your kitchen is warm, consider chilling your bowl and ingredients for 15 minutes before making the topping. When cutting in the butter, work quickly with your fingers or a pastry cutter until you have a mixture that looks like coarse sand with some pea-sized butter chunks remaining. Those butter pieces are what create those delightful crispy bits in the finished topping! If the mixture starts feeling warm at any point, pop it in the refrigerator for 10 minutes before continuing.
For the most spectacular presentation, consider brushing your pie crust edges with an egg wash (1 egg beaten with 1 tablespoon water) before adding the filling. This creates that beautiful golden shine that makes your pie look professionally baked. When arranging your apple filling, don’t just dump it in—take the time to create an attractive pattern by arranging the slices in concentric circles or slightly overlapping layers. This extra attention to detail makes each slice absolutely picture-perfect. If you notice your crumb topping browning too quickly during baking, simply tent the pie loosely with aluminum foil for the remaining baking time. And remember—the filling will continue to thicken as it cools, so resist the urge to judge doneness by how liquid the center appears while hot!
Recipe Variations
- Caramel Apple Dream: Drizzle 1/2 cup of warm caramel sauce over the apple filling before adding the crumb topping for an extra layer of gooey, buttery sweetness that will make this pie absolutely irresistible. The caramel melds with the apple juices during baking to create the most incredible sauce that pairs perfectly with the crunchy topping. Serve with extra caramel sauce and a sprinkle of sea salt for the ultimate sweet-salty experience that will have everyone reaching for seconds!
- Nutty Crumble Sensation: Add 1/2 cup of chopped pecans or walnuts to your crumb topping mixture for incredible texture and nutty flavor that takes this classic to new heights. The nuts toast beautifully during baking, releasing their oils and creating an aromatic, crunchy topping that provides the perfect contrast to the tender apples. You could also try toasted almonds or even pepitas for a unique twist that will surprise and delight your guests with every delicious bite!
- Spiced Pear Alternative: Replace half the apples with firm, ripe pears and add 1/4 teaspoon cardamom to the spice mixture for an elegant autumn variation that smells absolutely heavenly while baking. Pears bring a delicate sweetness and slightly different texture that complements apples beautifully, while the cardamom adds a warm, aromatic note that makes this version feel extra special and sophisticated for holiday gatherings!
- Berry Apple Fusion: Mix in 1 cup of fresh or frozen berries (blueberries, raspberries, or blackberries) with your apple filling for a burst of color and tartness that cuts through the sweetness perfectly. The berries release their vibrant juices during baking, creating beautiful purple and red streaks throughout the filling that make each slice look like a work of art. The combination of apples and berries creates complex flavor layers that will keep people guessing what makes your pie so extraordinary!
Frequently Asked Questions
Can I make this pie ahead of time?
Absolutely, and it’s actually one of the things that makes this recipe so fantastic for entertaining! You can assemble the entire pie up to 24 hours in advance—just prepare everything according to the instructions, then cover tightly with plastic wrap and refrigerate until you’re ready to bake. The cold temperature actually helps the crust stay flaky and prevents the butter in the topping from melting prematurely. When you’re ready to bake, you might need to add 5-10 minutes to the baking time since you’re starting with a cold pie. Alternatively, you can bake the pie completely 1-2 days ahead, let it cool completely, then store covered at room temperature. The flavors actually deepen and improve overnight, making it even more delicious the next day!
What’s the difference between Dutch apple pie and regular apple pie?
How do I prevent a soggy bottom crust?
This is the million-dollar question for pie makers everywhere, and I’ve got the secrets to that perfectly crisp bottom crust! First, make sure your oven is fully preheated to 375°F before baking—a hot oven immediately sets the crust. Second, place your pie plate on a preheated baking sheet—the direct heat from below helps cook the bottom crust more effectively. Third, the cornstarch in our filling acts as a thickener that absorbs excess liquid from the apples, preventing it from soaking into the crust. Finally, don’t skip the step of letting the coated apples sit for 10 minutes—this allows them to release some juice before baking. If you’re still concerned, you can brush the bottom crust with a thin layer of beaten egg white before adding the filling—this creates a moisture barrier!
Can I use frozen apples for this recipe?
You absolutely can use frozen apples, but there are a few important adjustments you’ll need to make for perfect results! If using frozen apple slices, do not thaw them before using—this prevents them from becoming mushy. You’ll need to increase the cornstarch in the filling to 2 tablespoons instead of 1 tablespoon because frozen apples release more liquid during baking. Also, expect to add 10-15 minutes to your baking time since you’re starting with frozen fruit. The texture might be slightly softer than fresh apples, but the flavor will still be fantastic. This is a great option when apples aren’t in season or when you want to use apples you’ve preserved from autumn harvests!
Summary
This incredible Dutch apple pie delivers maximum flavor with minimum fuss, featuring a spiced apple filling and legendary crumb topping that creates the perfect textural contrast in every single bite. The combination of sweet and tart apples, warm cinnamon spices, and that buttery streusel topping will make you the star of every gathering. Perfect for beginners and pie pros alike, this recipe guarantees stunning results that taste like you spent all day in the kitchen!
Easy Dutch Apple Pie
6
servings25
minutes65
minutesIngredients
Instructions
- 1 Preheat oven to 375°F. Press pie crust into 9-inch pie plate and crimp edges.
- 2 In large bowl, combine apples with sugars, flour, cornstarch, spices, lemon juice, and vanilla. Let sit 10 minutes.
- 3 For crumb topping, mix flour, sugars, and cinnamon. Cut in cold butter until coarse crumbs form.
- 4 Pour apple filling into crust. Sprinkle crumb topping evenly over apples.
- 5 Bake 60-70 minutes until topping is golden and filling bubbles. Cool completely before serving.