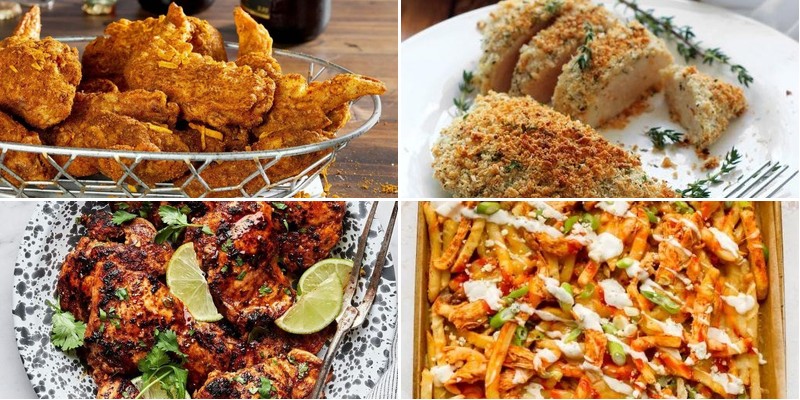
Hey there, busy home cooks! Have you ever found yourself staring at that package of chicken in the fridge, wondering how to turn it into something deliciously crispy and satisfying without spending hours in the kitchen? We’ve all been there, craving that perfect golden-brown crunch for a quick weeknight dinner. Get ready to discover 34 mouthwatering chicken fry recipes that will transform your meal routine and have everyone asking for seconds!
Simple Garlic Butter Fried Chicken
Nothing beats that satisfying sizzle when chicken hits a hot pan, especially when it’s coated in garlicky, buttery goodness. I first made this simple garlic butter fried chicken during a busy weeknight when I needed something quick but felt like comfort food, and now it’s my go-to when I’m craving crispy, flavorful chicken without the fuss.
2
servings10
minutes18
minutesIngredients
- 2 boneless, skinless chicken breasts
- A good glug of olive oil, about 2 tablespoons
- 4 tablespoons of salted butter
- 3 cloves of garlic, minced
- A couple of tablespoons of all-purpose flour
- A generous pinch of salt and black pepper
- A splash of chicken broth, roughly ¼ cup
- A handful of fresh parsley, chopped
Instructions
- Pat the chicken breasts dry with paper towels, then season both sides evenly with salt and pepper.
- Dredge each chicken breast lightly in all-purpose flour, shaking off any excess—this helps create a light crust without being too heavy.
- Heat olive oil in a large skillet over medium-high heat until it shimmers, about 2 minutes.
- Place the chicken in the skillet and cook for 5–7 minutes per side, until golden brown and the internal temperature reaches 165°F on a meat thermometer.
- Remove the chicken from the skillet and set it aside on a plate.
- Reduce the heat to medium and add salted butter to the same skillet, letting it melt and bubble slightly.
- Stir in minced garlic and cook for 1 minute until fragrant but not browned—be careful not to burn it, as bitter garlic can ruin the sauce.
- Pour in chicken broth, scraping up any browned bits from the bottom of the pan with a wooden spoon to incorporate all that flavor.
- Simmer the sauce for 2–3 minutes until it thickens slightly, then stir in chopped parsley.
- Return the chicken to the skillet, spooning the garlic butter sauce over it to coat evenly, and heat for 1 minute to warm through.
Dig into this chicken and you’ll love how the crispy exterior gives way to juicy, tender meat, all soaked in that rich, garlicky butter sauce. I love serving it over mashed potatoes to soak up every last drop, or slicing it thin for a next-day salad that feels anything but boring.
Crispy Lemon Pepper Chicken Thighs
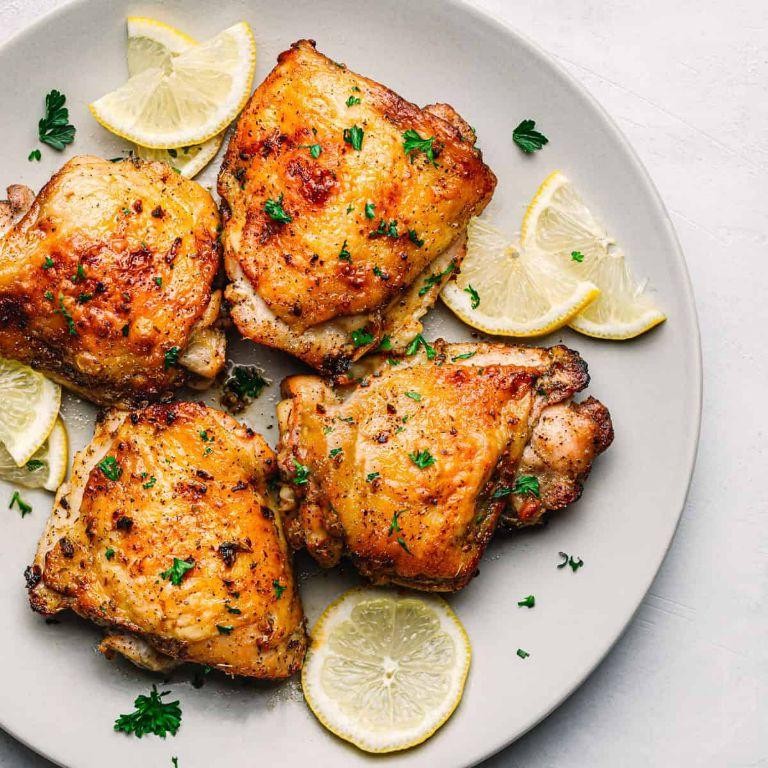
There’s something about the zing of lemon and the kick of black pepper that just screams comfort food to me—especially on busy weeknights when I need dinner on the table fast. I’ve been making these Crispy Lemon Pepper Chicken Thighs for years, and they never disappoint, whether I’m cooking for my family or impressing last-minute guests. Trust me, once you try this method, you’ll wonder how you ever settled for bland chicken.
3
servings20
minutes33
minutesIngredients
- 4 bone-in, skin-on chicken thighs
- 2 tablespoons of olive oil
- 1 lemon, juiced and zested
- 1 tablespoon of freshly cracked black pepper
- 1 teaspoon of garlic powder
- A generous pinch of kosher salt
Instructions
- Pat the chicken thighs completely dry with paper towels—this is my secret for extra crispy skin!
- In a small bowl, mix the olive oil, lemon juice, lemon zest, black pepper, garlic powder, and kosher salt until well combined.
- Rub the mixture evenly all over the chicken thighs, making sure to get under the skin for maximum flavor.
- Let the chicken sit at room temperature for 15 minutes to allow the seasoning to penetrate.
- Preheat your oven to 400°F and place a cast-iron skillet inside to heat up for 10 minutes.
- Carefully remove the hot skillet and arrange the chicken thighs skin-side down.
- Cook on the stovetop over medium-high heat for 6–8 minutes, until the skin is golden brown and releases easily from the pan.
- Flip the chicken thighs and transfer the skillet to the preheated oven.
- Bake for 20–25 minutes, until the internal temperature reaches 165°F when checked with a meat thermometer.
- Let the chicken rest for 5 minutes before serving to keep the juices locked in.
Deliciously crispy on the outside and incredibly juicy inside, these thighs have a bright, peppery punch that pairs perfectly with roasted veggies or a simple arugula salad. I love shredding the leftovers into tacos the next day—the lemon pepper flavor just gets better overnight!
Homestyle Southern Fried Chicken
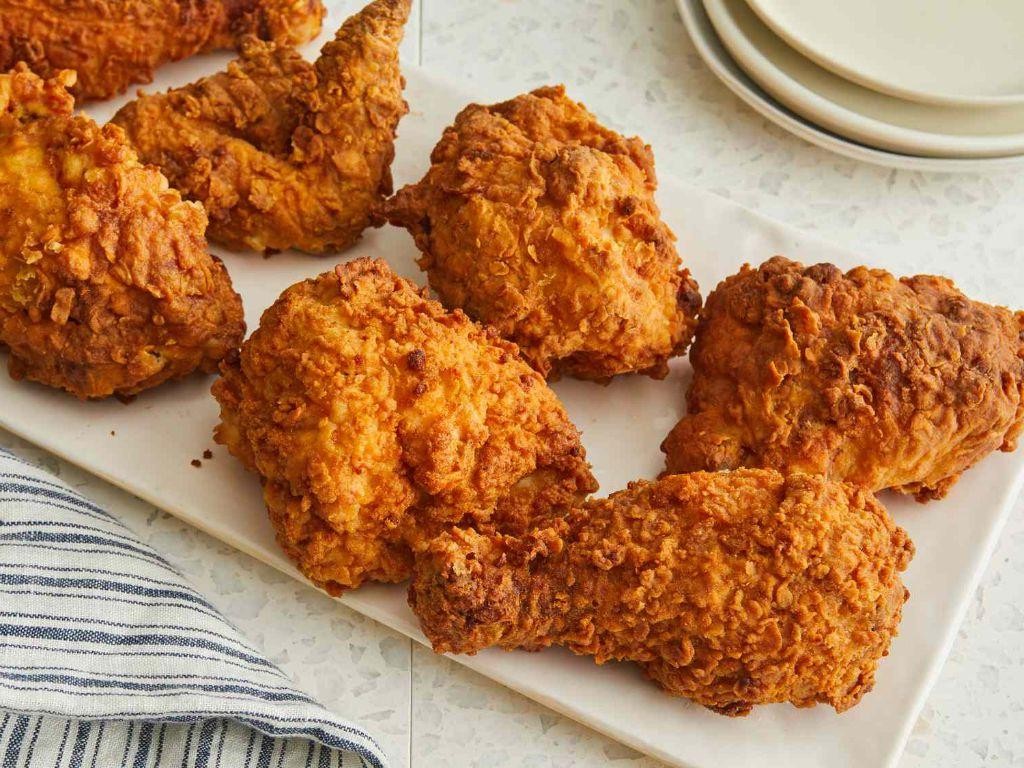
Zesty, crispy, and utterly comforting—this homestyle Southern fried chicken recipe is one I turn to whenever I need a taste of nostalgia. I learned it from my grandmother, who always said the secret was in the buttermilk soak, and after years of tweaking, I’ve nailed down my version that’s perfect for Sunday dinners or game-day feasts.
4
portions250
minutes60
minutesIngredients
– A couple of pounds of chicken pieces (I use thighs and drumsticks for juiciness)
– 2 cups of buttermilk
– A splash of hot sauce (about a tablespoon)
– 2 cups of all-purpose flour
– A generous tablespoon of paprika
– A teaspoon of garlic powder
– A teaspoon of onion powder
– A pinch of salt and black pepper (about a teaspoon each)
– Enough vegetable oil to fill a large skillet about 1½ inches deep
Instructions
1. In a large bowl, combine the chicken pieces, buttermilk, and hot sauce, making sure each piece is fully coated.
2. Cover the bowl and refrigerate for at least 4 hours or overnight to tenderize the chicken—this step is key for juicy results.
3. In a separate shallow dish, whisk together the flour, paprika, garlic powder, onion powder, salt, and black pepper until evenly mixed.
4. Remove each chicken piece from the buttermilk, letting excess drip off, then dredge it thoroughly in the flour mixture, pressing gently to adhere.
5. Place the coated chicken on a wire rack and let it rest for 10 minutes to help the coating stick better during frying.
6. Pour vegetable oil into a large, heavy skillet until it’s about 1½ inches deep and heat it over medium-high heat to 350°F, checking with a thermometer.
7. Carefully add 3-4 chicken pieces to the hot oil, skin-side down, without overcrowding the skillet.
8. Fry for 12-15 minutes, flipping halfway through, until the crust is golden brown and an internal thermometer reads 165°F.
9. Transfer the fried chicken to a clean wire rack set over a baking sheet to drain excess oil—this keeps it crispy instead of soggy.
10. Repeat steps 7-9 with the remaining chicken, allowing the oil to return to 350°F between batches.
Tender and juicy inside with a shatteringly crisp crust, this fried chicken pairs wonderfully with creamy mashed potatoes or tucked into a biscuit for a Southern-style sandwich. Leftovers? They’re just as good cold the next day, straight from the fridge.
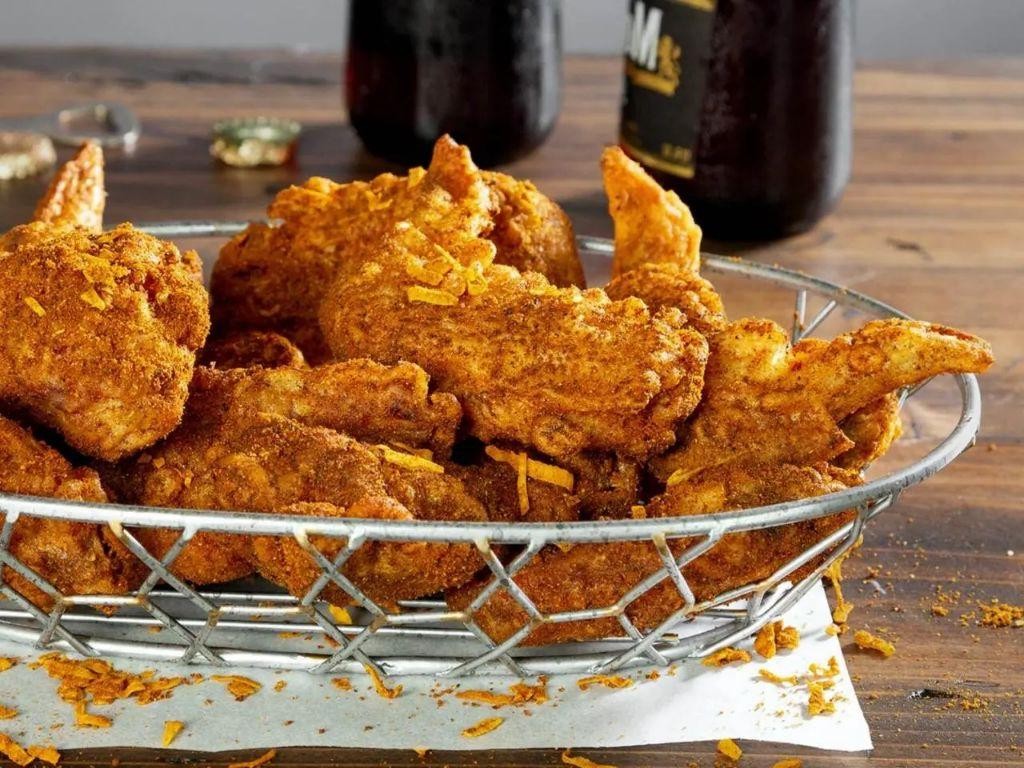
Spicy Cajun Fried Chicken Tenders
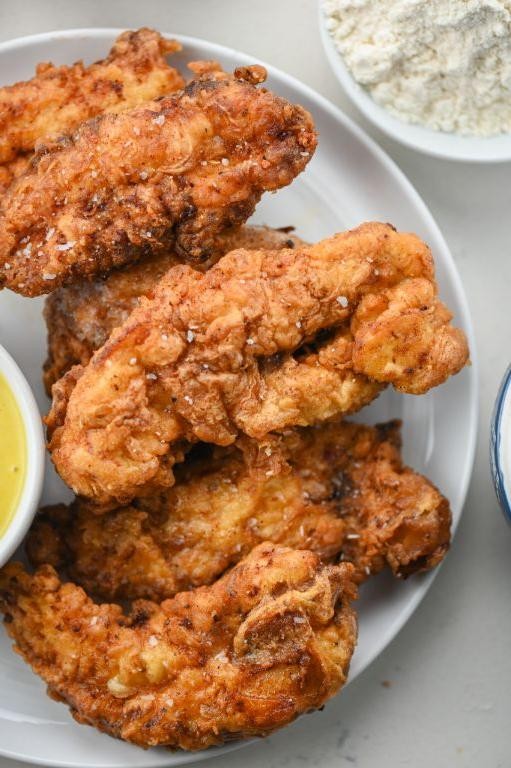
My kitchen always smells like a Louisiana festival whenever I whip up these spicy Cajun fried chicken tenders—they’re my go-to comfort food when I’m craving something with serious kick but don’t want to spend hours cooking. Honestly, I started making these after a trip to New Orleans where I had the most incredible fried chicken from a tiny corner spot, and I’ve been tweaking this recipe ever since to get that perfect balance of heat and crunch.
5
portions35
minutes25
minutesIngredients
- About 1 pound of chicken tenders
- A good splash of buttermilk, around 1 cup
- A couple of tablespoons of your favorite hot sauce
- 1 cup of all-purpose flour
- 2 tablespoons of Cajun seasoning
- 1 teaspoon of garlic powder
- 1 teaspoon of paprika
- A pinch of salt
- Enough vegetable oil to fill a heavy pot about 2 inches deep
Instructions
- Place the chicken tenders in a medium bowl.
- Pour the buttermilk and hot sauce over the chicken, making sure each piece is fully coated.
- Cover the bowl and refrigerate for at least 30 minutes—this helps tenderize the chicken and lets the flavors soak in.
- In a separate shallow dish, whisk together the flour, Cajun seasoning, garlic powder, paprika, and salt until well combined.
- Remove each chicken tender from the buttermilk mixture, letting any excess drip off.
- Dredge the chicken in the flour mixture, pressing gently to ensure an even coating on all sides.
- Place the coated tenders on a wire rack and let them sit for 5 minutes—this helps the coating stick better during frying.
- Heat the vegetable oil in a heavy-bottomed pot or Dutch oven over medium-high heat until it reaches 350°F on a kitchen thermometer.
- Carefully lower 3-4 chicken tenders into the hot oil using tongs, avoiding overcrowding.
- Fry for 4-5 minutes, flipping halfway through, until the coating is golden brown and crispy.
- Check that the internal temperature of the chicken reaches 165°F using a meat thermometer to ensure it’s fully cooked.
- Transfer the fried tenders to a paper towel-lined plate to drain any excess oil.
- Repeat with the remaining chicken tenders, allowing the oil to return to 350°F between batches.
Seriously, the crunch on these is unreal—each bite gives way to juicy, perfectly spiced chicken that’s got just enough heat to keep you reaching for more. I love serving them stacked high with a side of cool ranch dip or tucked into soft slider buns with pickles for a fun twist on classic fried chicken sandwiches.
Honey Mustard Glazed Fried Chicken
Every time I make this honey mustard glazed fried chicken, it takes me right back to that summer cookout at my cousin’s backyard where I first tasted something similar. I’ve tweaked the recipe over the years to get that perfect balance of sweet and tangy that my family now begs me to make every Sunday. Honestly, there’s nothing quite like the sound of chicken sizzling in hot oil while that sweet glaze bubbles away on the stove.
3
portions15
minutes30
minutesIngredients
– About 2 pounds of chicken thighs (bone-in, skin-on for maximum flavor)
– A good sprinkle of salt and black pepper
– 1 cup of all-purpose flour
– 2 large eggs
– A splash of whole milk
– Enough vegetable oil to fill your Dutch oven about 2 inches deep
– 1/2 cup of Dijon mustard
– 1/4 cup of honey
– A couple of tablespoons of apple cider vinegar
– 1 teaspoon of garlic powder
Instructions
1. Pat the chicken thighs completely dry with paper towels—this is crucial for crispy skin!
2. Season both sides of the chicken generously with salt and black pepper.
3. Whisk the eggs and milk together in a shallow bowl until fully combined.
4. Place the flour in a separate shallow bowl.
5. Heat vegetable oil in a heavy Dutch oven to 350°F, using a thermometer to check.
6. Dip each chicken thigh first in the egg mixture, letting excess drip off.
7. Dredge the chicken thoroughly in the flour, pressing to adhere the coating.
8. Carefully place 2-3 chicken thighs in the hot oil using tongs, skin-side down.
9. Fry for 12-14 minutes until golden brown, then flip and fry another 10-12 minutes.
10. Check internal temperature reaches 165°F with an instant-read thermometer.
11. Transfer fried chicken to a wire rack set over a baking sheet to drain.
12. Whisk Dijon mustard, honey, apple cider vinegar, and garlic powder in a small saucepan.
13. Simmer the glaze over medium heat for 3-4 minutes until slightly thickened.
14. Brush the warm glaze generously over the hot fried chicken using a pastry brush.
15. Let the glazed chicken rest for 5 minutes before serving. Absolutely incredible how that sticky-sweet glaze contrasts with the ultra-crispy, salty crust—it’s that perfect sweet-and-savory combo we all crave. I love serving this piled high on a platter with pickles to cut through the richness, or chopped over a crisp green salad for a next-day lunch that feels anything but leftover.
Parmesan Herb Crusted Chicken Breasts
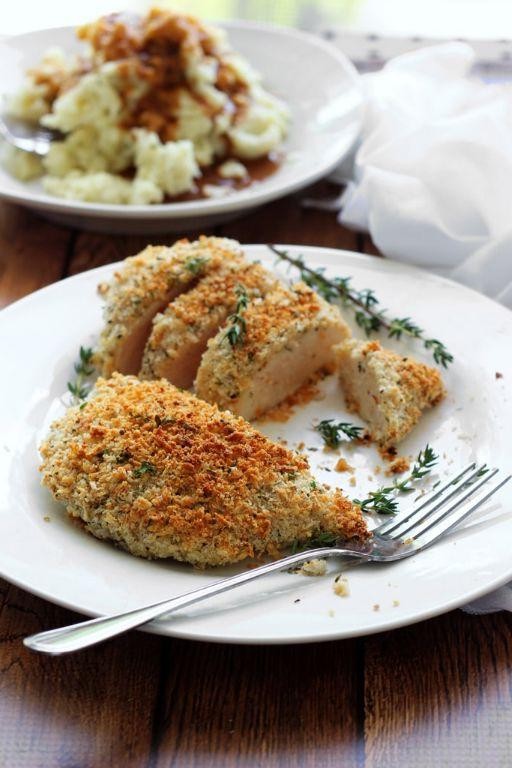
Nothing beats that moment when you cut into a perfectly cooked chicken breast and hear that satisfying crunch. I first discovered this recipe during a busy weeknight when I needed something impressive but didn’t want to spend hours in the kitchen – now it’s my go-to for last-minute dinner parties or when I’m craving something comforting. The combination of crispy parmesan and fragrant herbs always makes my kitchen smell incredible.
3
servings15
minutes22
minutesIngredients
– 4 boneless, skinless chicken breasts (about 1.5 pounds total)
– 1 cup of panko breadcrumbs
– 1/2 cup of freshly grated parmesan cheese
– 2 tablespoons of chopped fresh parsley
– 1 tablespoon of dried Italian seasoning
– 2 large eggs
– A couple of tablespoons of olive oil
– A good pinch of salt and black pepper
– 1/2 cup of all-purpose flour
Instructions
1. Preheat your oven to 400°F and line a baking sheet with parchment paper.
2. Pat the chicken breasts completely dry with paper towels – this helps the coating stick better.
3. Season both sides of each chicken breast generously with salt and pepper.
4. Set up three shallow bowls: put flour in the first bowl, beaten eggs in the second, and mix panko, parmesan, parsley, and Italian seasoning in the third.
5. Dredge each chicken breast in flour, shaking off any excess.
6. Dip the floured chicken into the beaten eggs, letting any extra drip off.
7. Press the chicken firmly into the breadcrumb mixture, making sure it’s completely coated on both sides.
8. Heat olive oil in a large oven-safe skillet over medium-high heat until it shimmers.
9. Carefully place the coated chicken breasts in the hot skillet and cook for 3-4 minutes until the bottom is golden brown.
10. Flip each chicken breast and immediately transfer the skillet to the preheated oven.
11. Bake for 15-18 minutes until the internal temperature reaches 165°F on an instant-read thermometer.
12. Remove from oven and let rest for 5 minutes before slicing.
Vibrantly golden and incredibly crispy, this chicken delivers that perfect crunch with every bite while staying wonderfully juicy inside. I love serving it sliced over a bed of lemon-dressed arugula or alongside roasted vegetables for a complete meal that always impresses my dinner guests.
Buttermilk Marinated Chicken Drumsticks
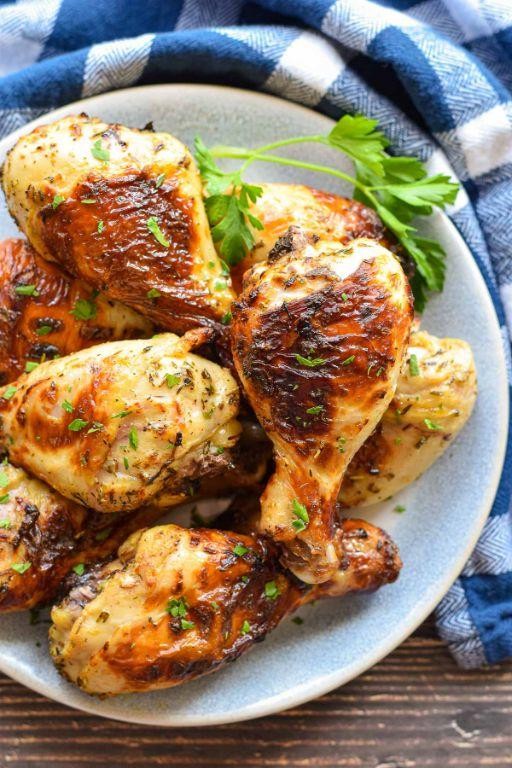
Buttermilk Marinated Chicken Drumsticks
Baking these buttermilk marinated chicken drumsticks always reminds me of summer cookouts at my grandma’s house—she swore by buttermilk for the juiciest chicken, and after years of testing, I’m convinced she was right. There’s something magical about how that tangy marinade tenderizes the meat while keeping it incredibly moist, making these drumsticks a foolproof crowd-pleaser.
2
servings10
minutes40
minutesIngredients
- 2 pounds of chicken drumsticks
- 2 cups of buttermilk
- 3 cloves of garlic, minced
- 1 tablespoon of smoked paprika
- 1 teaspoon of onion powder
- 1/2 teaspoon of black pepper
- 1 tablespoon of olive oil
- 1/2 teaspoon of salt
Instructions
- Place the chicken drumsticks in a large resealable plastic bag or bowl.
- Pour the buttermilk over the chicken, ensuring each piece is fully coated.
- Add the minced garlic, smoked paprika, onion powder, black pepper, and salt to the bag, then seal it and massage gently to mix everything evenly. Tip: Marinate for at least 4 hours or overnight in the fridge for maximum flavor and tenderness—the acids in buttermilk break down proteins, resulting in juicier meat.
- Preheat your oven to 400°F and line a baking sheet with parchment paper or foil for easy cleanup.
- Remove the chicken from the marinade, letting excess buttermilk drip off, and arrange the drumsticks in a single layer on the prepared baking sheet.
- Drizzle the olive oil over the drumsticks and rub it in lightly to help with browning. Tip: For extra crispiness, space the drumsticks about an inch apart so heat circulates evenly.
- Bake for 35–40 minutes, flipping the drumsticks halfway through, until the skin is golden brown and the internal temperature reaches 165°F when checked with a meat thermometer. Tip: Avoid overcrowding the pan to prevent steaming instead of roasting.
- Let the chicken rest for 5 minutes before serving to allow juices to redistribute.
Succulent and bursting with savory notes from the garlic and paprika, these drumsticks have a tender, fall-off-the-bone texture with a subtly tangy finish. Serve them alongside a crisp coleslaw or over a bed of creamy mashed potatoes for a comforting meal that’ll have everyone asking for seconds.
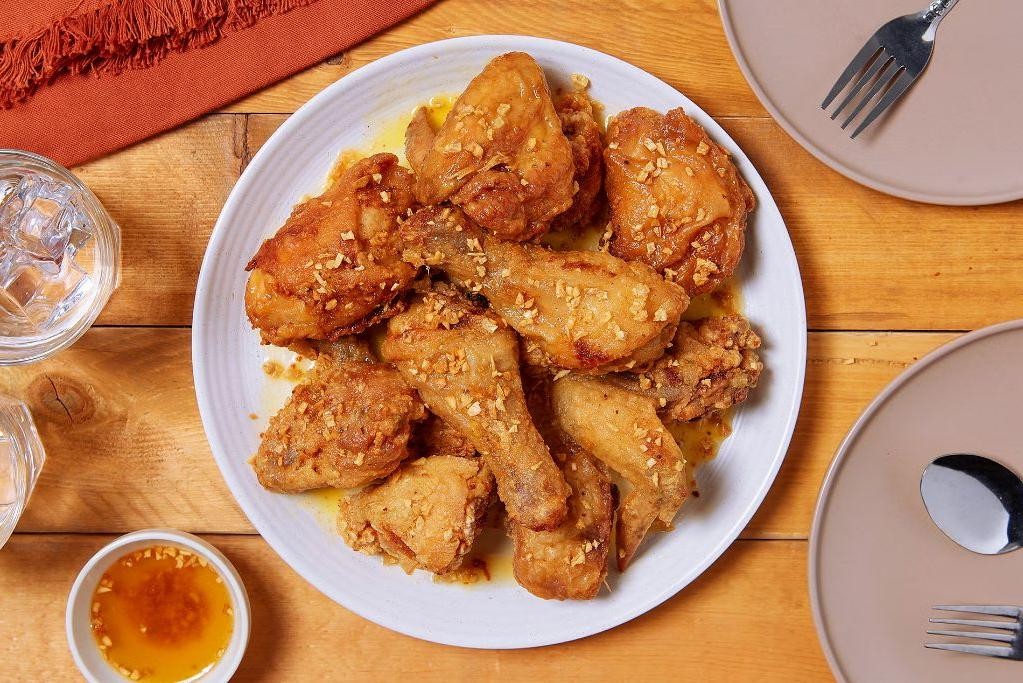
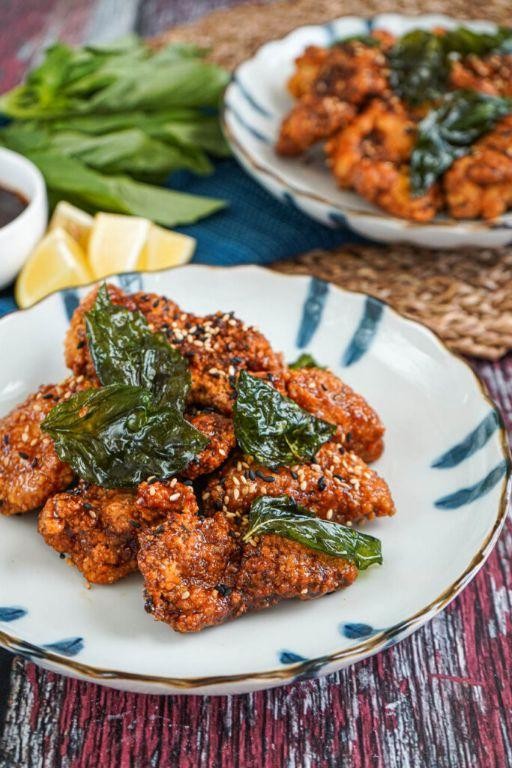
Asian-Style Soy Sauce Fried Chicken
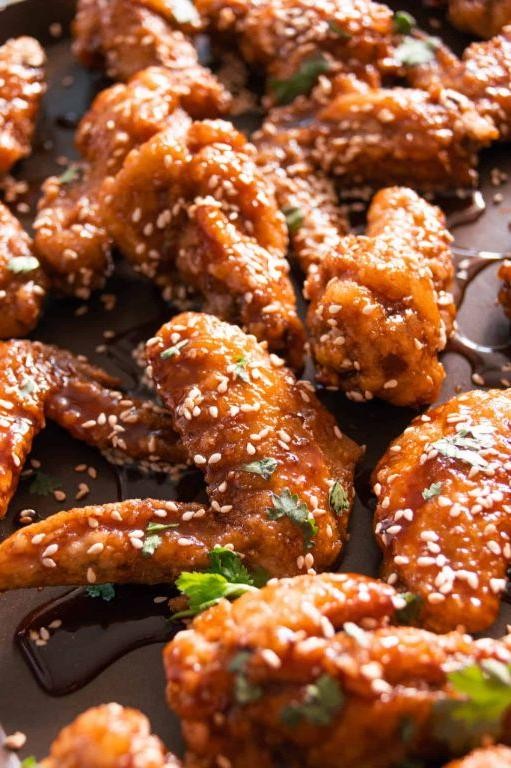
Oh my goodness, you guys—this Asian-style soy sauce fried chicken is the crispy, savory, umami-packed dish I’ve been craving all week! I first tried a version like this at a tiny food stall during a trip to Chinatown, and I’ve been tweaking the recipe at home ever since. Trust me, it’s way easier to make than you’d think, and it’s become my go-to for impressing friends on game day.
2
servings40
minutes21
minutesIngredients
– About 1.5 pounds of boneless, skinless chicken thighs, cut into bite-sized chunks
– A generous 1/4 cup of soy sauce
– A couple of tablespoons of minced garlic
– A splash of rice vinegar
– A good glug of sesame oil
– A pinch of white sugar
– A cup or so of all-purpose flour
– Enough vegetable oil to fill your skillet about 1 inch deep
– Some chopped green onions for garnish
Instructions
1. In a large bowl, combine the soy sauce, minced garlic, rice vinegar, sesame oil, and white sugar, then add the chicken chunks and toss to coat evenly.
2. Let the chicken marinate in the refrigerator for at least 30 minutes—this helps the flavors really sink in (tip: if you have time, marinate it for up to 2 hours for even more depth).
3. Pour the vegetable oil into a heavy skillet and heat it over medium-high heat until it reaches 350°F on a kitchen thermometer.
4. While the oil heats, place the all-purpose flour in a shallow dish and dredge each marinated chicken piece, shaking off any excess flour.
5. Carefully add the coated chicken pieces to the hot oil in a single layer, working in batches to avoid overcrowding the skillet.
6. Fry the chicken for 5–7 minutes, flipping halfway through, until the exterior is golden brown and crispy.
7. Use a slotted spoon to transfer the fried chicken to a paper towel-lined plate to drain any excess oil (tip: this keeps it from getting greasy).
8. Check that the internal temperature of the chicken reaches 165°F with a meat thermometer to ensure it’s fully cooked and safe to eat.
9. Repeat the dredging and frying process with any remaining chicken batches, reheating the oil to 350°F between batches for consistent crispiness.
10. Sprinkle the chopped green onions over the fried chicken just before serving for a fresh, colorful finish (tip: serve it immediately to maintain that perfect crunch).
Absolutely irresistible—the chicken comes out with a shatteringly crisp coating that gives way to juicy, flavorful meat inside. I love pairing it with steamed jasmine rice and a simple cucumber salad to balance the richness, or even piling it into lettuce wraps for a fun, hands-on meal that always disappears fast.
Coconut-Curry Fried Chicken Wings
Sometimes you just need a little tropical escape in your dinner, and these coconut-curry fried chicken wings are my go-to for turning a regular Wednesday into a mini-vacation. I first made these during a rainy weekend when I was craving something crispy, spicy, and totally comforting—they’ve been in my rotation ever since.
4
servings15
minutes48
minutesIngredients
– 2 pounds of chicken wings, split into drumettes and flats
– 1 cup of all-purpose flour
– 1/2 cup of cornstarch
– 1 tablespoon of yellow curry powder
– 1 teaspoon of garlic powder
– 1/2 teaspoon of cayenne pepper
– 1 cup of buttermilk
– 1/2 cup of unsweetened shredded coconut
– A big pinch of salt and black pepper
– Enough vegetable oil to fill a heavy pot about 3 inches deep
– A squeeze of fresh lime juice for serving
Instructions
1. Pat the chicken wings completely dry with paper towels—this helps them get extra crispy when frying. 2. In a large bowl, whisk together the flour, cornstarch, curry powder, garlic powder, cayenne, salt, and pepper. 3. Pour the buttermilk into a separate shallow dish. 4. Dip each wing into the buttermilk, letting any excess drip off. 5. Dredge the wing in the flour mixture, pressing gently to make sure it’s evenly coated. 6. Place the coated wings on a wire rack and let them sit for 10 minutes—this helps the coating stick better during frying. 7. Heat the vegetable oil in a heavy-bottomed pot or Dutch oven over medium-high heat until it reaches 350°F on a deep-fry thermometer. 8. Carefully add 4-5 wings to the hot oil, making sure not to overcrowd the pot. 9. Fry the wings for 10-12 minutes, turning them occasionally with tongs, until they’re golden brown and crispy. 10. Use a slotted spoon to transfer the wings to a paper towel-lined plate to drain. 11. Repeat steps 8-10 with the remaining wings, letting the oil return to 350°F between batches. 12. While the wings are still hot, sprinkle them with the shredded coconut and a squeeze of fresh lime juice. These wings come out with the most satisfying crunch, thanks to that double-dip in buttermilk and flour, and the coconut adds a subtle sweetness that balances the warm curry spice. Try serving them with a cool cucumber salad or just eat them straight from the plate—I won’t judge!
Sriracha-Mayo Fried Chicken Sliders
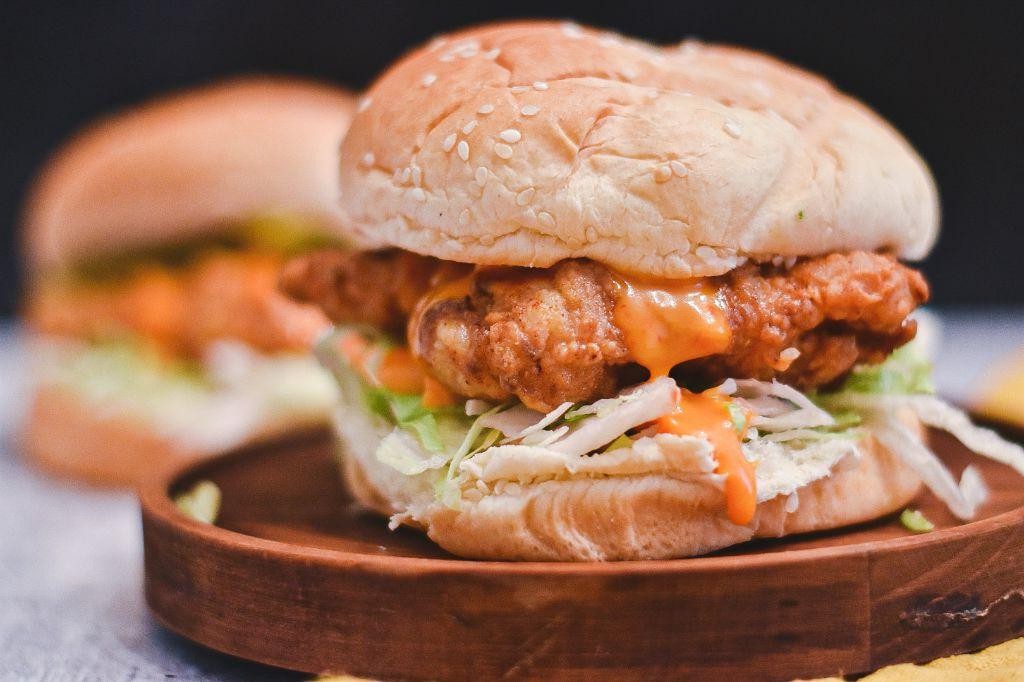
Nothing beats that satisfying crunch when you bite into perfectly fried chicken, especially when it’s packed with that addictive sriracha-mayo kick. I first made these sliders for a game day gathering last fall, and now my friends request them every time we get together. There’s something magical about how the spicy creaminess complements the crispy chicken.
6
sandwiches20
minutes12
minutesIngredients
- About 1 pound of chicken thighs, cut into slider-sized pieces
- A generous 1/2 cup of all-purpose flour
- 2 large eggs, beaten until smooth
- A good glug of vegetable oil for frying (enough to reach about 1 inch up your pan)
- 1/4 cup of mayonnaise
- A couple of tablespoons of sriracha sauce
- A splash of buttermilk (about 1/4 cup)
- A pinch of garlic powder
- 6 small slider buns
Instructions
- Cut 1 pound of chicken thighs into pieces that will fit nicely on your slider buns.
- In one bowl, mix 1/2 cup flour with a pinch of garlic powder.
- In another bowl, whisk together 2 beaten eggs, 1/4 cup buttermilk, 1/4 cup mayonnaise, and 2 tablespoons sriracha until fully combined. Tip: Let the chicken marinate in this mixture for 15 minutes for maximum flavor penetration.
- Heat vegetable oil in a heavy-bottomed skillet until it reaches 350°F on a thermometer.
- Take each chicken piece from the marinade and dredge thoroughly in the flour mixture, pressing to adhere. Tip: Use one hand for wet ingredients and one for dry to avoid clumpy fingers.
- Carefully place coated chicken pieces into the hot oil without crowding the pan.
- Fry for 5-6 minutes until the bottom is golden brown and crispy.
- Flip each piece and fry another 5-6 minutes until internal temperature reaches 165°F. Tip: Maintain oil temperature around 350°F—if it drops too low, the chicken will absorb more oil.
- Remove chicken with tongs and drain on a wire rack over paper towels.
- Lightly toast your slider buns while the chicken rests for 2 minutes.
- Assemble sliders by placing fried chicken on bottom buns and topping with bun tops.
Unbelievably crunchy on the outside while staying incredibly juicy inside, these sliders deliver that perfect heat-to-cream ratio that makes you reach for another. The sriracha-mayo marinade creates this gorgeous reddish crust that’s visually stunning against the golden bun. Try serving them with pickle spears and extra sriracha-mayo for dipping—they disappear faster than you can say “game day.”
Maple-Bourbon Glazed Fried Chicken

Growing up in the South, I learned early that fried chicken isn’t just food—it’s a love language. My grandmother’s secret was always in the glaze, and after years of tweaking, I’ve landed on this maple-bourbon version that makes even my picky nephew ask for seconds. Honestly, the way the sweet glaze crackles against that salty crust? Pure magic.
5
portions15
minutes20
minutesIngredients
– 2 cups of all-purpose flour
– 1 tablespoon of smoked paprika
– A good pinch of kosher salt and black pepper
– 2 large eggs
– A splash of buttermilk
– 4 chicken thighs with skin on
– Enough vegetable oil to fill your pot about 2 inches deep
– 1/2 cup of pure maple syrup
– 2 tablespoons of bourbon
– 1 tablespoon of unsalted butter
Instructions
1. In a large bowl, whisk together 2 cups of all-purpose flour, 1 tablespoon of smoked paprika, and a good pinch of kosher salt and black pepper until fully combined.
2. In a separate bowl, beat 2 large eggs with a splash of buttermilk until smooth.
3. Pat 4 chicken thighs completely dry with paper towels to ensure crispy skin.
4. Dredge each chicken thigh first in the flour mixture, then dip it into the egg mixture, and finally coat it again in the flour mixture, pressing gently to adhere.
5. Pour enough vegetable oil into a heavy-bottomed pot to reach 2 inches deep and heat it to 350°F on a candy thermometer.
6. Carefully place the coated chicken thighs into the hot oil using tongs, frying in batches if needed to avoid crowding.
7. Fry the chicken for 12-14 minutes, flipping halfway through, until the internal temperature reaches 165°F and the crust is golden brown.
8. Transfer the fried chicken to a wire rack set over a baking sheet to drain excess oil.
9. In a small saucepan over medium heat, combine 1/2 cup of pure maple syrup, 2 tablespoons of bourbon, and 1 tablespoon of unsalted butter.
10. Simmer the glaze for 3-4 minutes, stirring constantly, until it thickens slightly and coats the back of a spoon.
11. Brush the warm maple-bourbon glaze generously over the hot fried chicken right before serving.
12. Let the glazed chicken rest for 5 minutes to allow the flavors to meld.
Oh, that first bite—the crackle of the sweet-salty crust gives way to impossibly juicy meat that practically falls off the bone. I love serving this piled high on a platter with pickles to cut through the richness, or chopped over waffles for the ultimate sweet-savory brunch. Leftovers? They never last, but if they did, they’d make killer chicken sandwiches the next day.
Lemon Ginger Fried Chicken Nuggets

Last week, I was craving something crispy and comforting but wanted to cut through the richness with a bright, zesty kick. That’s when I whipped up these lemon ginger fried chicken nuggets—they’re like a sunny day in every bite, and my family couldn’t stop sneaking them straight from the baking sheet!
2
servings35
minutes20
minutesIngredients
– 1 pound of boneless, skinless chicken breasts, cut into bite-sized nuggets
– 1 cup of all-purpose flour
– 2 large eggs, lightly beaten
– A generous splash of buttermilk (about ½ cup)
– The zest and juice of 1 fresh lemon
– A couple of tablespoons of freshly grated ginger
– 1 teaspoon of garlic powder
– A pinch of salt and black pepper
– Enough vegetable oil to fill a heavy-bottomed pot about 2 inches deep (for frying at 350°F)
– Your favorite dipping sauce, like honey mustard or ranch
Instructions
1. In a medium bowl, whisk together the buttermilk, lemon juice, lemon zest, grated ginger, garlic powder, salt, and black pepper until well combined. 2. Add the chicken nuggets to the buttermilk mixture, ensuring each piece is fully coated, and let them marinate in the refrigerator for at least 30 minutes to tenderize the chicken and infuse flavor. 3. Pour the flour into a shallow dish and set it aside next to the beaten eggs in another shallow dish. 4. Heat the vegetable oil in a heavy-bottomed pot over medium-high heat until it reaches 350°F, using a candy thermometer to check the temperature for even frying. 5. Remove a chicken nugget from the marinade, allowing any excess to drip off, then dip it into the beaten eggs to coat completely. 6. Transfer the egg-coated nugget to the flour dish, pressing gently to ensure an even, light coating on all sides. 7. Carefully place the coated nugget into the hot oil, repeating steps 5–6 with the remaining nuggets in small batches to avoid overcrowding the pot. 8. Fry the nuggets for 4–5 minutes, turning them occasionally with tongs, until they turn golden brown and reach an internal temperature of 165°F when checked with a meat thermometer. 9. Use a slotted spoon to remove the fried nuggets from the oil and transfer them to a wire rack set over a baking sheet to drain excess oil and keep them crispy. 10. Repeat the frying process with the remaining batches until all nuggets are cooked. They’re golden, crunchy, and bursting with zesty lemon and warm ginger notes. Try serving them over a bed of greens with a drizzle of extra lemon juice for a fresh twist, or pack them in a lunchbox—they stay surprisingly crisp!
Classic Italian-Seasoned Fried Chicken

Very few things beat the crispy, herby perfection of fried chicken, especially when it’s got that classic Italian seasoning twist. I first tried this version at a friend’s backyard BBQ last summer, and I’ve been tweaking it ever since—it’s become my go-to for game day or a cozy Friday night. Trust me, once you get that golden crust and juicy interior, you’ll understand why it’s a staple in my kitchen.
2
portions15
minutes27
minutesIngredients
– 2 cups of all-purpose flour
– A generous tablespoon of Italian seasoning
– A couple of teaspoons of garlic powder
– A good pinch of salt and black pepper
– 2 large eggs
– A splash of milk
– About 4 chicken thighs, bone-in and skin-on
– Enough vegetable oil to fill your skillet about 1 ½ inches deep
Instructions
1. In a large bowl, combine the all-purpose flour, Italian seasoning, garlic powder, salt, and black pepper, mixing until all the spices are evenly distributed.
2. In a separate shallow dish, whisk together the 2 large eggs and a splash of milk until fully blended.
3. Pat the 4 chicken thighs dry with paper towels to help the coating stick better—this is my secret for extra crispiness.
4. Dip each chicken thigh first into the egg mixture, making sure it’s fully coated.
5. Immediately transfer the chicken to the flour mixture, pressing firmly to coat all sides evenly and shaking off any excess.
6. Heat the vegetable oil in a heavy skillet over medium-high heat until it reaches 350°F, using a thermometer to avoid under or overcooking.
7. Carefully place the coated chicken thighs into the hot oil, skin-side down, without crowding the pan to maintain the temperature.
8. Fry for about 12–15 minutes, then flip and cook for another 10–12 minutes until the internal temperature hits 165°F and the crust is deep golden brown.
9. Remove the chicken and let it drain on a wire rack instead of paper towels—this keeps the bottom from getting soggy.
Absolutely irresistible with that crackly, herb-infused crust giving way to tender, juicy meat inside. I love serving it sliced over a fresh arugula salad or with a side of creamy polenta to soak up all those delicious flavors.
Buffalo Ranch Chicken Fries
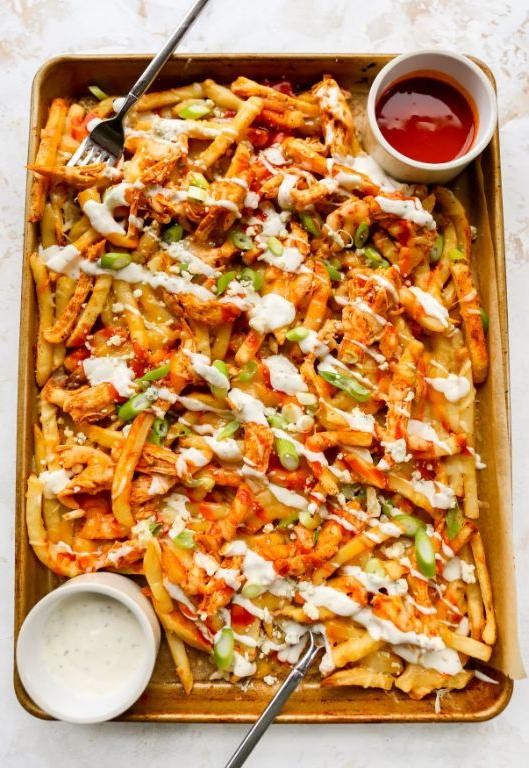
Tuesdays are my cheat day, and I’ve been perfecting this recipe for those nights when I want something indulgent but don’t want to spend hours in the kitchen. There’s something magical about the combination of buffalo sauce and ranch that just hits all the right spots for me and my game-watching crew.
4
portions15
minutes8
minutesIngredients
– 1 pound of chicken breast, cut into fry-sized strips
– 1 cup of all-purpose flour
– 2 large eggs, beaten until frothy
– 1 cup of panko breadcrumbs
– ½ cup of buffalo sauce (I like the medium heat kind)
– ¼ cup of ranch dressing
– A couple of tablespoons of vegetable oil for frying
– A good pinch of salt and black pepper
Instructions
1. Cut 1 pound of chicken breast into uniform strips about ½-inch thick and 3-4 inches long.
2. Season the chicken strips generously with salt and black pepper on all sides.
3. Place 1 cup of all-purpose flour in a shallow bowl.
4. Pour 2 beaten eggs into a second shallow bowl.
5. Spread 1 cup of panko breadcrumbs in a third shallow bowl.
6. Dredge each chicken strip first in flour, shaking off any excess.
7. Dip the floured chicken into the beaten eggs, letting any extra drip off.
8. Press the chicken firmly into the panko breadcrumbs until fully coated on all sides.
9. Heat 2 tablespoons of vegetable oil in a large skillet over medium-high heat until it shimmers (about 350°F).
10. Carefully place breaded chicken strips in the hot oil without overcrowding the pan.
11. Fry for 3-4 minutes per side until golden brown and crispy.
12. Use a meat thermometer to check that the internal temperature reaches 165°F.
13. Transfer the cooked chicken fries to a paper towel-lined plate to drain excess oil.
14. Drizzle ½ cup of buffalo sauce evenly over the hot chicken fries.
15. Serve immediately with ¼ cup of ranch dressing for dipping.
Let me tell you, the contrast between that crispy panko crust and the tender chicken inside is absolutely addictive. The buffalo sauce gives just the right amount of tangy heat that gets perfectly cooled down by the creamy ranch dressing. I love serving these with extra celery sticks and carrot sticks for that classic buffalo wing experience, but they’re also fantastic stuffed into soft slider buns for the ultimate game day sandwich.
Zesty Lime and Cilantro Fried Chicken
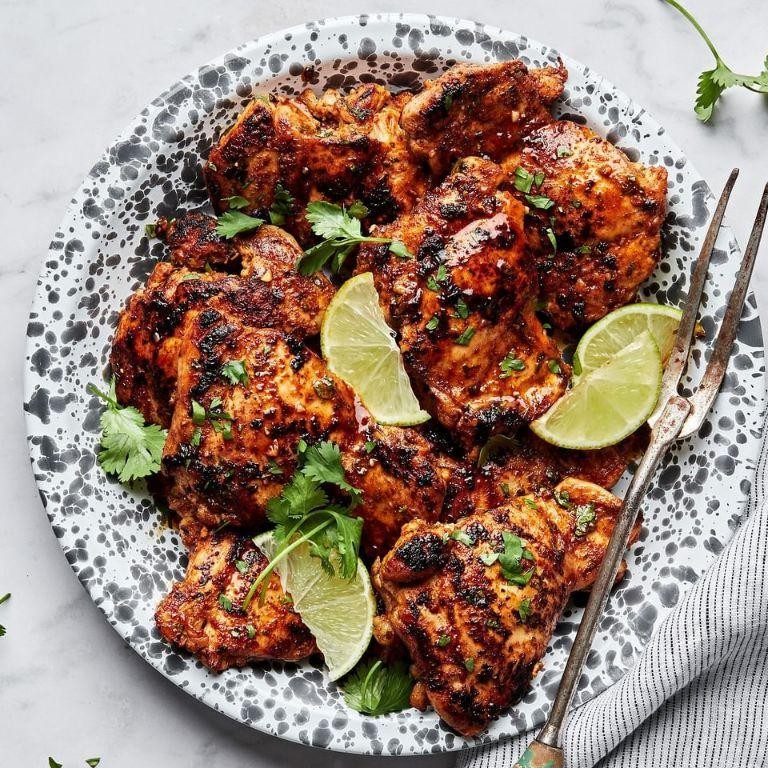
My kitchen smelled like a tropical vacation gone wonderfully wrong last Tuesday when I first tested this zesty lime and cilantro fried chicken. Honestly, I was just tired of the same old buttermilk soak and decided to raid my herb garden for inspiration—and wow, did those bright flavors transform ordinary chicken into something truly special.
4
portions20
minutes15
minutesIngredients
– 2 pounds of chicken thighs (bone-in, skin-on for maximum juiciness)
– 1 cup of buttermilk
– A generous handful of fresh cilantro, roughly chopped
– Juice and zest from 2 juicy limes
– 2 cloves of garlic, minced
– 1 teaspoon of smoked paprika
– 1 cup of all-purpose flour
– 1 tablespoon of cornstarch (my secret for extra crispiness)
– A big pinch of salt and a few cracks of black pepper
– Enough vegetable oil to fill your heavy-bottomed pot about 2 inches deep
Instructions
1. In a large bowl, whisk together the buttermilk, chopped cilantro, lime juice, lime zest, minced garlic, smoked paprika, salt, and black pepper until fully combined.
2. Add the chicken thighs to the marinade, ensuring each piece is fully coated, then cover the bowl and refrigerate for at least 4 hours (or overnight for deeper flavor penetration—tip: the acid in the lime tenderizes the chicken beautifully).
3. In a separate shallow dish, combine the all-purpose flour and cornstarch, mixing thoroughly with a fork to eliminate any lumps.
4. Remove one chicken thigh from the marinade, allowing excess liquid to drip off, then dredge it completely in the flour mixture, pressing gently to adhere the coating.
5. Repeat the dredging process with all remaining chicken thighs, placing them on a wire rack as you work to prevent the coating from getting soggy.
6. Pour vegetable oil into a heavy-bottomed pot or Dutch oven until it reaches a depth of 2 inches, then attach a deep-fry thermometer to the side.
7. Heat the oil over medium-high heat until the thermometer reads 350°F (tip: maintaining this temperature is key—if it’s too low, the chicken greases; too high, it burns outside before cooking through).
8. Carefully place 2-3 chicken thighs into the hot oil using tongs, avoiding overcrowding to ensure even cooking and crispiness.
9. Fry the chicken for 12-15 minutes, flipping halfway through, until the exterior is golden brown and an instant-read thermometer inserted into the thickest part reads 165°F.
10. Transfer the fried chicken to a clean wire rack set over a baking sheet (tip: this keeps the bottom crispy instead of steaming on a paper towel).
11. Let the chicken rest for 5 minutes before serving to allow the juices to redistribute.
Vibrantly crispy on the outside and incredibly juicy inside, this chicken packs a tangy punch from the lime that cuts through the richness perfectly. I love serving it alongside coconut rice and a simple cabbage slaw for a full tropical meal, or chopping it over a salad for a next-day lunch upgrade—the cilantro-lime marinade makes even leftovers something to look forward to.
Conclusion
More than just recipes, this collection offers endless inspiration for quick, satisfying meals that will become family favorites. We hope you’ve found some new go-to dishes to try! Don’t forget to leave a comment telling us which recipe you loved most, and please share this roundup on Pinterest to help other home cooks discover these delicious ideas.


