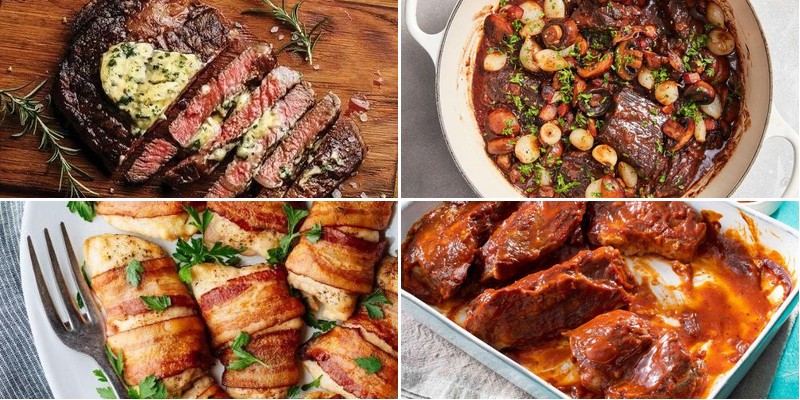
You’re about to discover some of the most satisfying meat-focused meals that come together with minimal effort. Whether you’re craving quick weeknight dinners, hearty comfort food, or impressive dishes for guests, this collection of 29 carnivore recipes has you covered. Get ready to fire up your stove and dive into these deliciously simple creations that celebrate the pure joy of meat!
Grilled Ribeye with Garlic Butter
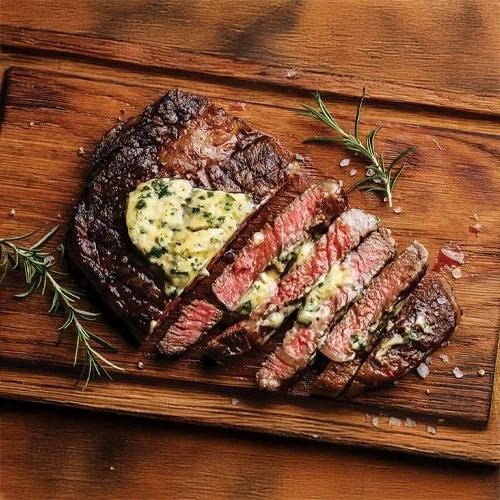
Glistening with savory juices and kissed by the flame, a perfectly grilled ribeye represents the pinnacle of backyard culinary artistry, where marbled richness meets smoky char in a symphony of flavors that transforms simple ingredients into an extraordinary dining experience. This classic preparation elevates the humble steak through careful technique and a luxurious garlic butter finish that melts into every tender bite, creating a dish worthy of both casual weeknight dinners and celebratory gatherings alike.
2
servings35
minutes15
minutesIngredients
– 2 (1.5-inch thick) ribeye steaks
– 2 tbsp olive oil
– 1 tsp kosher salt
– 1/2 tsp black pepper
– 4 tbsp unsalted butter
– 3 garlic cloves, minced
– 1 tbsp fresh parsley, chopped
Instructions
1. Remove steaks from refrigerator 30 minutes before cooking to bring them to room temperature.
2. Pat steaks completely dry with paper towels to ensure proper searing.
3. Brush both sides of steaks evenly with 2 tablespoons olive oil.
4. Season both sides generously with 1 teaspoon kosher salt and 1/2 teaspoon black pepper, pressing seasoning into the meat.
5. Preheat grill to high heat, approximately 450°F, and clean grates thoroughly.
6. Place steaks on the hottest part of the grill and cook undisturbed for 4-5 minutes to develop a deep crust.
7. Flip steaks using tongs (never a fork) to prevent juice loss and cook for another 4-5 minutes.
8. Check internal temperature with an instant-read thermometer inserted into the thickest part of the steak.
9. Continue cooking until thermometer reads 130°F for medium-rare or 140°F for medium doneness.
10. Transfer steaks to a cutting board and let rest for 8-10 minutes to allow juices to redistribute.
11. While steaks rest, melt 4 tablespoons unsalted butter in a small saucepan over low heat.
12. Add 3 minced garlic cloves and cook for 1-2 minutes until fragrant but not browned.
13. Stir in 1 tablespoon chopped fresh parsley and remove from heat.
14. Spoon the warm garlic butter generously over the rested steaks before serving.
Velvety and rich with deeply caramelized edges giving way to a rosy, juicy interior, this grilled ribeye achieves perfect harmony between the steak’s natural beefiness and the aromatic garlic butter that pools in every crevice. Consider slicing against the grain and serving over creamy polenta to catch the flavorful butter sauce, or pair with roasted asparagus for a complete meal that highlights the steak’s luxurious texture and complex flavor profile.
Simple Lamb Chops with Herb Marinade
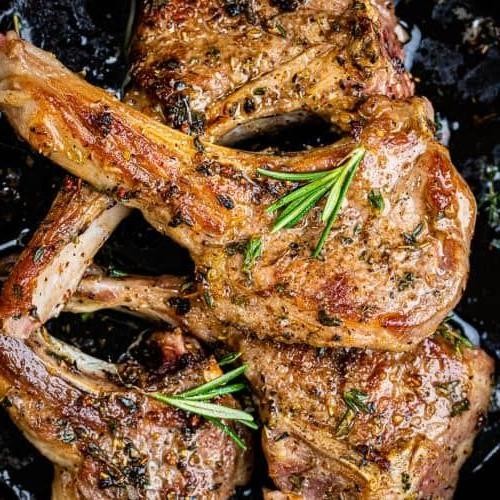
Understated yet sophisticated, these lamb chops elevate weeknight dining with minimal effort and maximum flavor. The herbaceous marinade creates a beautiful crust while keeping the meat incredibly tender and juicy. Perfect for both intimate dinners and impressive entertaining, this recipe delivers restaurant-quality results with home kitchen simplicity.
5
servings15
minutes16
minutesIngredients
– 8 lamb chops (1-inch thick)
– 1/4 cup olive oil
– 3 tbsp fresh rosemary (chopped)
– 2 tbsp fresh thyme leaves
– 4 garlic cloves (minced)
– 1 tbsp lemon juice
– 1 tsp kosher salt
– 1/2 tsp black pepper
– 1/4 tsp red pepper flakes
Instructions
1. Combine 1/4 cup olive oil, 3 tbsp chopped rosemary, 2 tbsp thyme leaves, 4 minced garlic cloves, 1 tbsp lemon juice, 1 tsp kosher salt, 1/2 tsp black pepper, and 1/4 tsp red pepper flakes in a large bowl.
2. Place 8 lamb chops in the marinade, turning to coat all surfaces completely.
3. Cover the bowl with plastic wrap and refrigerate for exactly 2 hours to allow flavors to penetrate the meat.
4. Remove lamb chops from refrigerator 30 minutes before cooking to reach room temperature for even cooking.
5. Preheat a cast-iron skillet over medium-high heat until a drop of water sizzles immediately.
6. Place lamb chops in the hot skillet without crowding, cooking in batches if necessary.
7. Sear for 3-4 minutes until a deep golden-brown crust forms on the bottom.
8. Flip chops using tongs and cook for another 3-4 minutes for medium-rare (internal temperature of 135°F).
9. Transfer chops to a clean cutting board and let rest for 5 minutes to redistribute juices.
10. Serve immediately while hot.
What makes these lamb chops truly exceptional is the contrast between the crisp, herb-encrusted exterior and the rosy, tender interior. The garlic and lemon brighten the rich lamb flavor beautifully, while the red pepper flakes provide just enough warmth to complement without overwhelming. Consider serving over creamy polenta or alongside roasted root vegetables to create a complete, elegant meal that feels both rustic and refined.
Easy Beef Tenderloin with Mushroom Sauce
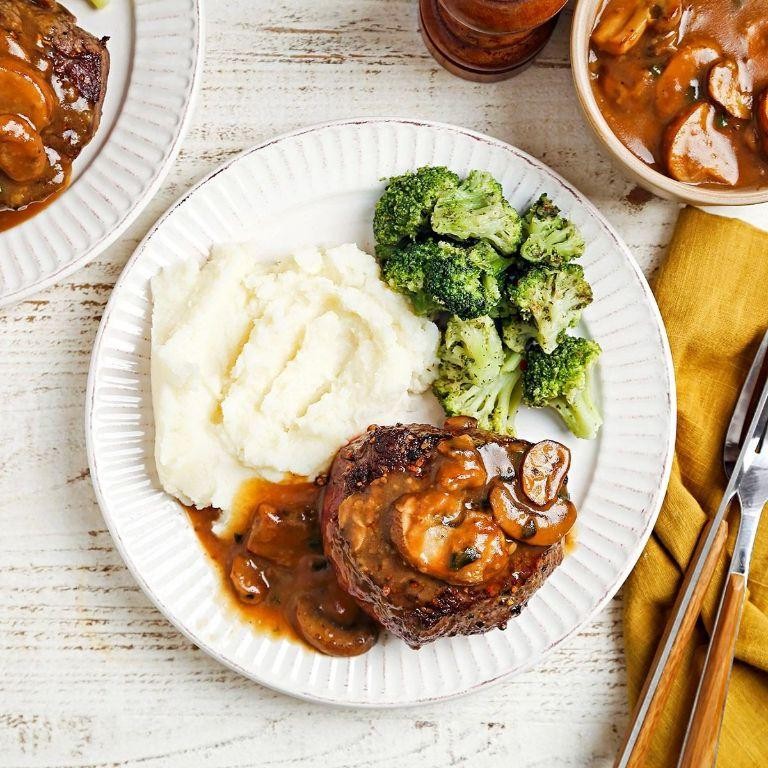
Glistening with rich, savory appeal, this beef tenderloin with mushroom sauce transforms an elegant cut into an approachable masterpiece. Perfect for both weeknight dinners and special occasions, the tender filet pairs beautifully with earthy mushrooms in a luxurious pan sauce. Each element comes together with minimal effort for maximum sophistication.
2
servings15
minutes40
minutesIngredients
– 1.5 lbs beef tenderloin
– 1 tsp kosher salt
– 1/2 tsp black pepper
– 2 tbsp olive oil
– 8 oz cremini mushrooms, sliced
– 2 cloves garlic, minced
– 1/2 cup dry red wine
– 1 cup beef broth
– 2 tbsp unsalted butter
– 1 tbsp fresh thyme leaves
– 1/4 cup heavy cream
Instructions
1. Pat the beef tenderloin completely dry with paper towels and season all sides evenly with kosher salt and black pepper.
2. Heat olive oil in a large skillet over medium-high heat until shimmering, about 2 minutes.
3. Sear the tenderloin for 4-5 minutes per side until a deep brown crust forms, using tongs to rotate for even coloring.
4. Transfer the beef to a baking sheet and roast in a 400°F oven for 15-18 minutes until the internal temperature reaches 135°F for medium-rare.
5. While the beef rests, add sliced mushrooms to the same skillet and cook for 6-8 minutes until golden brown and their liquid has evaporated.
6. Stir in minced garlic and cook for 30 seconds until fragrant, being careful not to burn it.
7. Pour in dry red wine, scraping up any browned bits from the pan bottom, and simmer until reduced by half, about 3 minutes.
8. Add beef broth and fresh thyme leaves, then simmer for 5 minutes until the liquid thickens slightly.
9. Whisk in heavy cream and unsalted butter until the sauce becomes glossy and coats the back of a spoon.
10. Slice the rested beef against the grain into 1-inch thick medallions and arrange on plates.
11. Spoon the warm mushroom sauce generously over the sliced tenderloin.
Velvety slices of beef yield effortlessly to the knife, revealing a perfectly pink interior that contrasts with the earthy mushroom sauce. The creamy sauce clings to each tender bite, while the thyme adds an aromatic freshness that elevates the entire dish. For an elegant presentation, serve alongside roasted fingerling potatoes and sautéed greens to complement the rich flavors.
Quick Pork Belly with Crispy Skin
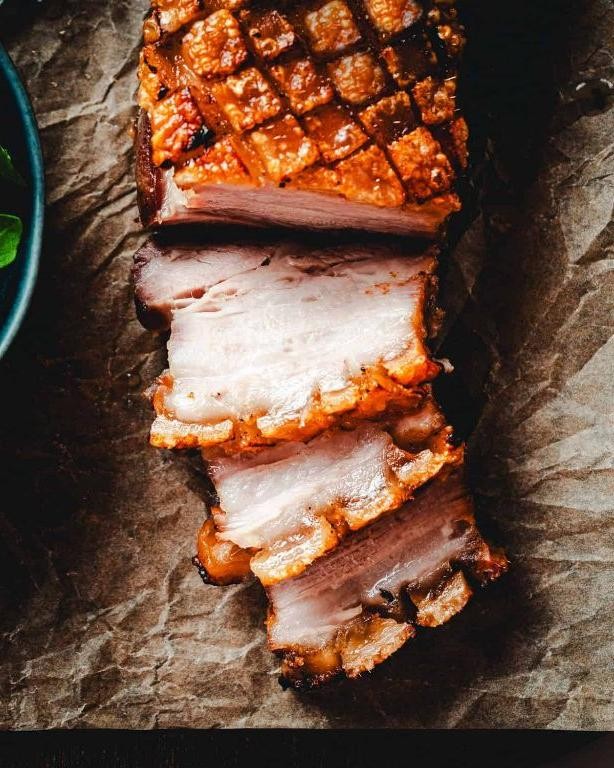
Beneath its humble appearance lies a cut of pork that transforms into something truly extraordinary when handled with care. Quick Pork Belly with Crispy Skin delivers that sought-after contrast of meltingly tender fat and shatteringly crisp skin in a fraction of the traditional time. This approachable method yields restaurant-quality results perfect for an impressive weeknight dinner.
5
portions15
minutes77
minutesIngredients
– 1.5 pounds pork belly, skin-on
– 2 tablespoons olive oil
– 1 teaspoon kosher salt
– 1/2 teaspoon black pepper
– 1 teaspoon smoked paprika
– 2 cloves garlic, minced
– 1 tablespoon apple cider vinegar
Instructions
1. Pat the pork belly completely dry with paper towels, paying special attention to the skin surface.
2. Score the pork skin in a crosshatch pattern with a sharp knife, cutting about 1/4 inch deep without reaching the meat layer.
3. Rub the apple cider vinegar evenly over the scored skin and let it air-dry for 10 minutes.
4. Combine olive oil, kosher salt, black pepper, smoked paprika, and minced garlic in a small bowl to create a seasoning paste.
5. Rub the seasoning paste thoroughly over all sides of the pork belly except the skin.
6. Place the pork belly skin-side up on a wire rack set inside a baking sheet, ensuring air can circulate around all sides.
7. Preheat your oven to 450°F and roast the pork belly for 30 minutes to initiate the crisping process.
8. Reduce the oven temperature to 350°F and continue roasting for 45 minutes.
9. Check for doneness by inserting an instant-read thermometer into the thickest part of the meat; it should register 165°F.
10. For extra-crispy skin, switch your oven to broil and broil the pork belly for 2-3 minutes, watching carefully to prevent burning.
11. Remove from oven and let the pork belly rest on the wire rack for 10 minutes before slicing.
12. Slice the pork belly against the grain into 1/2-inch thick pieces using a sharp chef’s knife.
Perfectly executed, this pork belly offers an irresistible textural symphony—the crackling skin gives way to succulent, well-seasoned meat beneath. Consider serving it sliced over creamy polenta to catch the rendered juices, or chopped into a vibrant rice bowl with quick-pickled vegetables for contrasting brightness.
Juicy Bacon-Wrapped Chicken Thighs

Radiating with savory sophistication, these bacon-wrapped chicken thighs transform humble ingredients into an extraordinary centerpiece. The marriage of crispy, salty bacon enveloping succulent dark meat creates a dish that feels simultaneously rustic and refined. Perfect for both weeknight dinners and entertaining guests, this recipe delivers impressive flavor with surprisingly simple preparation.
8
portions15
minutes40
minutesIngredients
– 8 bone-in, skin-on chicken thighs
– 8 slices thick-cut bacon
– 2 tablespoons olive oil
– 1 teaspoon kosher salt
– 1/2 teaspoon black pepper
– 1 teaspoon smoked paprika
– 2 cloves garlic, minced
– 1 tablespoon fresh thyme leaves
Instructions
1. Preheat your oven to 400°F and line a rimmed baking sheet with parchment paper.
2. Pat chicken thighs completely dry with paper towels to ensure crispy skin.
3. In a small bowl, combine olive oil, kosher salt, black pepper, smoked paprika, minced garlic, and fresh thyme leaves.
4. Rub the seasoning mixture evenly over all surfaces of each chicken thigh.
5. Wrap one slice of bacon around each seasoned chicken thigh, tucking the ends underneath to secure.
6. Arrange the bacon-wrapped thighs evenly spaced on the prepared baking sheet, making sure they don’t touch for proper air circulation.
7. Bake at 400°F for 35-40 minutes until the bacon is crispy and the chicken reaches an internal temperature of 165°F.
8. For extra crispiness, switch your oven to broil for the final 2-3 minutes, watching carefully to prevent burning.
9. Remove from oven and let rest for 5 minutes before serving to allow juices to redistribute.
Golden and glistening straight from the oven, these thighs offer the perfect textural contrast between crackling bacon and moist, tender chicken. The smoky paprika and fresh thyme infuse each bite with aromatic depth that pairs beautifully with roasted vegetables or creamy polenta. Consider serving them atop a bed of arugula dressed with lemon vinaigrette to cut through the richness for a complete meal.
Effortless Ground Beef Stir-Fry
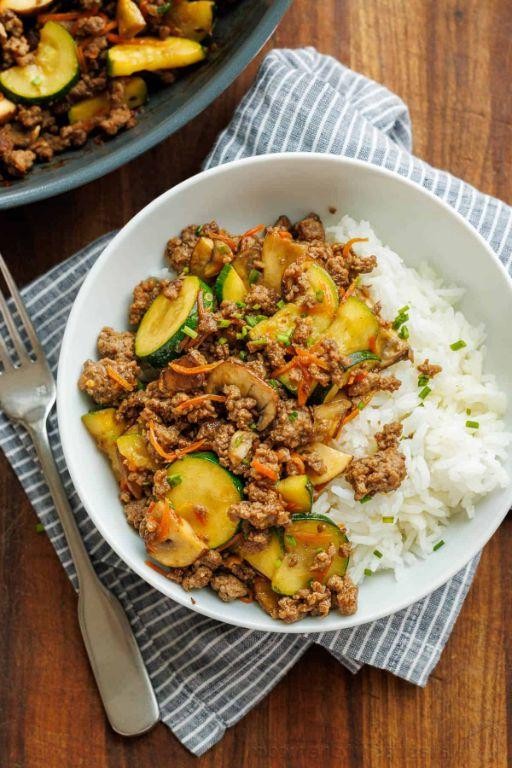
Delightfully simple yet sophisticated, this ground beef stir-fry transforms humble ingredients into a weeknight masterpiece that marries savory depth with vibrant freshness. Developed for the time-pressed home cook who refuses to compromise on flavor, this dish delivers restaurant-quality results with minimal effort.
2
servings15
minutes20
minutesIngredients
- 1 lb ground beef (80/20 blend)
- 2 tbsp vegetable oil
- 1 medium yellow onion, thinly sliced
- 3 cloves garlic, minced
- 1 tbsp fresh ginger, grated
- 1 red bell pepper, julienned
- 1 cup broccoli florets
- 3 tbsp soy sauce
- 1 tbsp rice vinegar
- 1 tsp sesame oil
- 2 tsp cornstarch
- 1/4 cup water
- 2 cups cooked jasmine rice
- 2 green onions, sliced
- 1 tbsp sesame seeds
Instructions
- Heat 2 tablespoons vegetable oil in a large wok or skillet over medium-high heat until shimmering, about 2 minutes.
- Add 1 pound ground beef, breaking it apart with a wooden spoon, and cook until no pink remains, 5-7 minutes.
- Transfer cooked beef to a plate using a slotted spoon, leaving 1 tablespoon of drippings in the pan.
- Add thinly sliced yellow onion to the hot drippings and cook until translucent, about 3 minutes, stirring frequently.
- Stir in minced garlic and grated ginger, cooking until fragrant, 30 seconds exactly to prevent burning.
- Add julienned red bell pepper and broccoli florets, stir-frying until peppers soften and broccoli turns bright green, 3-4 minutes.
- Return cooked beef to the pan, combining thoroughly with vegetables.
- In a small bowl, whisk together 3 tablespoons soy sauce, 1 tablespoon rice vinegar, 1 teaspoon sesame oil, 2 teaspoons cornstarch, and 1/4 cup water until smooth.
- Pour sauce mixture over beef and vegetables, stirring continuously until sauce thickens and coats everything evenly, about 2 minutes.
- Divide 2 cups cooked jasmine rice between serving bowls and top generously with stir-fry mixture.
- Garnish with sliced green onions and sesame seeds before serving immediately.
Succulent ground beef melds beautifully with crisp-tender vegetables in a glossy, umami-rich sauce that clings perfectly to each grain of rice. The subtle nuttiness from toasted sesame oil complements the savory depth of soy, while fresh ginger provides a bright, aromatic lift. For an elegant presentation, serve in lettuce cups or alongside a crisp Asian slaw to add contrasting texture and freshness.
Peppercorn-Crusted Pork Shoulder
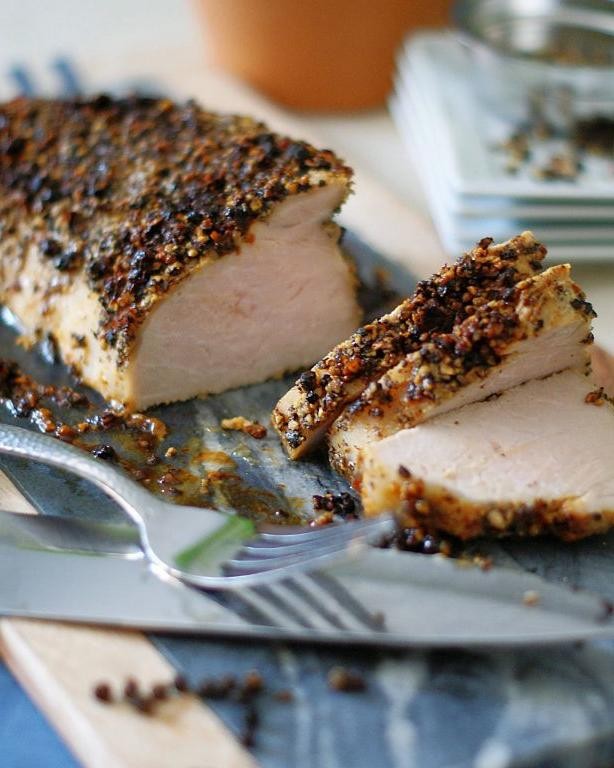
Tender, slow-roasted pork shoulder encased in a bold peppercorn crust transforms humble ingredients into a centerpiece worthy of any gathering. This recipe coaxes incredible depth from the aromatic spice blend, creating a dish that’s both rustic and refined. With patience and careful attention, you’ll achieve a succulent interior and a crackling, fragrant exterior that sings with flavor.
8
servings20
minutes300
minutesIngredients
– 4 lb pork shoulder
– 3 tbsp black peppercorns
– 2 tbsp kosher salt
– 1 tbsp coriander seeds
– 2 tbsp olive oil
– 1 cup chicken broth
– 4 cloves garlic
– 2 sprigs fresh rosemary
Instructions
1. Preheat your oven to 325°F and position a rack in the lower third of the oven.
2. Pat the 4 lb pork shoulder completely dry with paper towels to ensure proper browning.
3. Crush 3 tbsp black peppercorns and 1 tbsp coriander seeds using a spice grinder or mortar and pestle until coarsely ground.
4. Combine the crushed spices with 2 tbsp kosher salt in a small bowl.
5. Rub 2 tbsp olive oil evenly over the entire surface of the pork shoulder.
6. Press the spice mixture firmly onto all sides of the pork, creating an even crust.
7. Place the seasoned pork shoulder in a large roasting pan, fat side up.
8. Roast uncovered for 3 hours at 325°F until the internal temperature reaches 160°F.
9. Crush 4 cloves garlic and add to the pan along with 2 sprigs fresh rosemary and 1 cup chicken broth.
10. Continue roasting for another 1-2 hours until the internal temperature reaches 195°F and the meat pulls apart easily with forks.
11. Transfer the pork to a cutting board and let rest for 30 minutes before shredding or slicing.
12. Skim excess fat from the pan juices and serve alongside the pork. Velvety and rich, the pork shoulder yields to gentle pressure, its fibers saturated with rendered fat and aromatic spices. Serve shredded over creamy polenta to catch every drop of the pan juices, or slice thickly for sandwiches that elevate the humble lunch to something extraordinary.
Succulent Roast Duck with Lemon Glaze
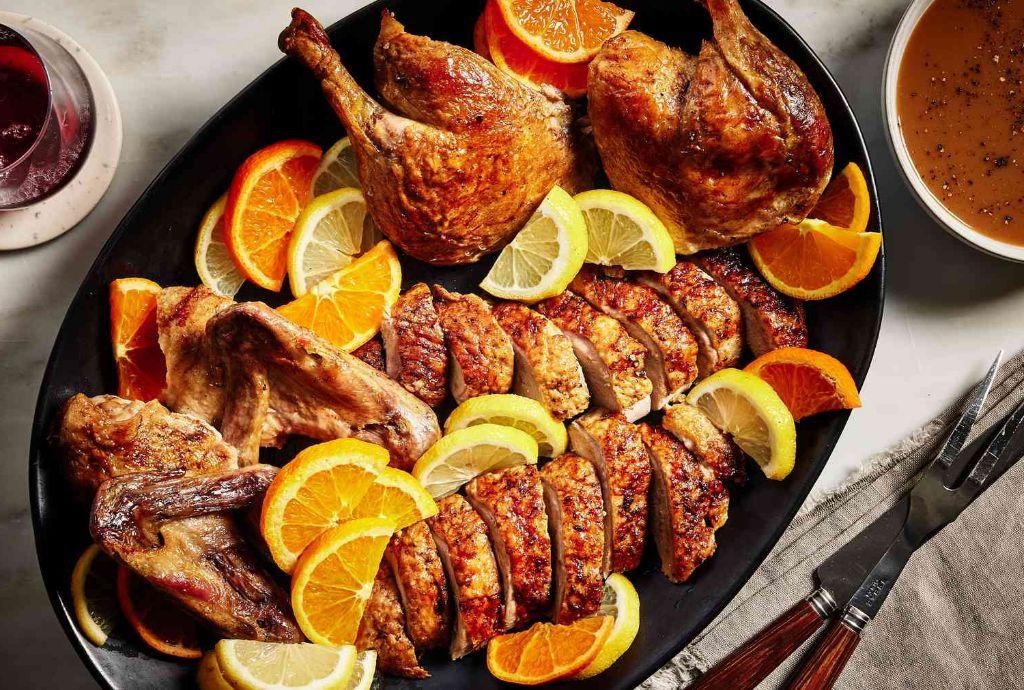
Oven-roasted to perfection, this succulent duck emerges with crackling crisp skin and tender, juicy meat that practically falls from the bone. The bright lemon glaze adds a sophisticated citrus note that cuts through the richness, creating a harmonious balance of flavors. This elegant centerpiece transforms any dinner into a special occasion worthy of celebration.
3
servings15
minutes135
minutesIngredients
– 1 whole duck (5-6 lbs)
– 2 tbsp olive oil
– 1 tsp kosher salt
– 1/2 tsp black pepper
– 2 lemons
– 1/4 cup honey
– 2 tbsp soy sauce
– 1 tsp fresh thyme leaves
– 1 cup chicken broth
Instructions
1. Preheat your oven to 350°F and position the rack in the center.
2. Pat the duck completely dry inside and out with paper towels to ensure crisp skin.
3. Rub the duck evenly with olive oil, then season thoroughly with kosher salt and black pepper.
4. Place the duck breast-side up on a rack in a roasting pan.
5. Roast at 350°F for 1 hour to render the fat and begin cooking.
6. While the duck roasts, zest and juice both lemons into a small saucepan.
7. Add honey, soy sauce, and fresh thyme leaves to the saucepan.
8. Bring the glaze mixture to a simmer over medium heat, stirring constantly for 3 minutes until slightly thickened.
9. After 1 hour of roasting, carefully remove the duck from the oven and brush generously with the lemon glaze.
10. Return the duck to the oven and increase temperature to 400°F.
11. Continue roasting for 30-45 minutes, brushing with remaining glaze every 15 minutes.
12. Check for doneness when the skin is deep golden brown and crispy, and the internal temperature reaches 165°F in the thickest part of the thigh.
13. Transfer the duck to a cutting board and let rest for 15 minutes to redistribute juices.
14. While the duck rests, pour chicken broth into the roasting pan and scrape up all the browned bits.
15. Simmer the pan juices for 5 minutes to create a simple au jus.
16. Carve the duck and serve immediately with the pan juices.
Glazed to a beautiful mahogany sheen, the skin shatters with each bite while the meat remains remarkably moist and flavorful. The lemon notes provide a refreshing counterpoint to the rich duck, making this dish particularly stunning when served alongside roasted root vegetables or a simple arugula salad to complement its sophisticated profile.
Seared Venison Medallions with Red Wine Reduction
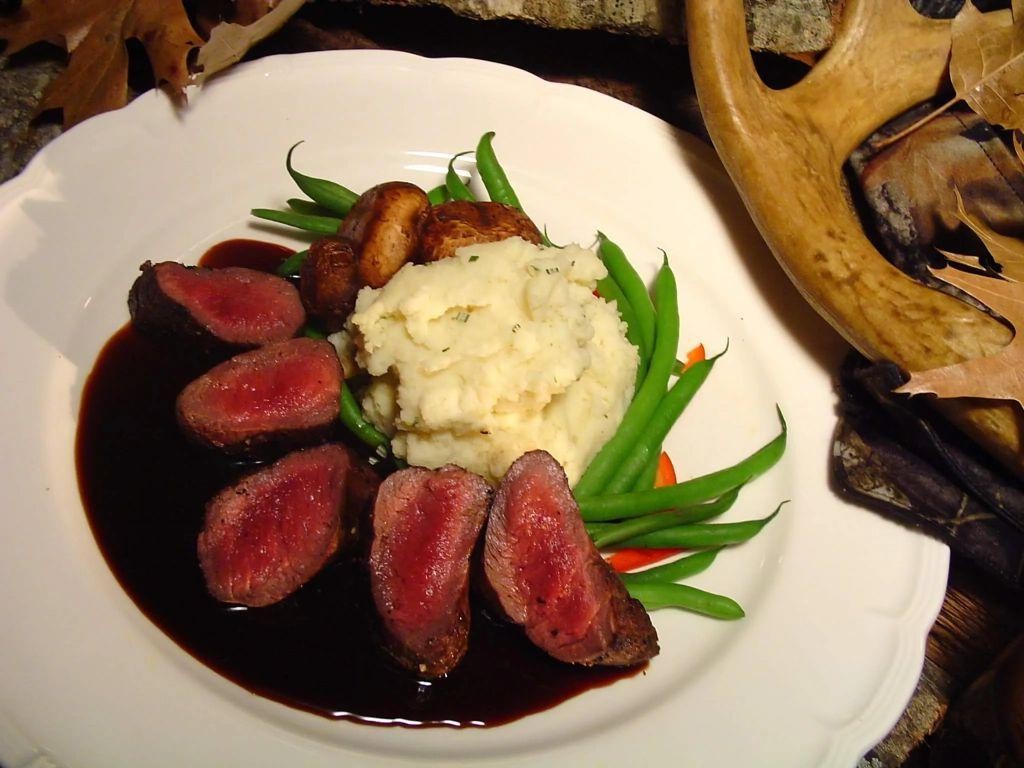
Venturing into the realm of sophisticated game dishes, seared venison medallions with red wine reduction offers an exquisite dining experience that balances rich, earthy flavors with elegant preparation. This recipe transforms lean venison loin into tender, perfectly cooked medallions, complemented by a deeply flavorful sauce that enhances without overwhelming. With careful attention to temperature and technique, you can create a restaurant-quality dish that impresses both visually and gastronomically.
5
portions10
minutes25
minutesIngredients
– 1.5 lbs venison loin
– 2 tbsp olive oil
– 1 tbsp unsalted butter
– 1/2 cup dry red wine
– 1/2 cup beef broth
– 1 shallot, minced
– 2 garlic cloves, minced
– 1 tsp fresh thyme leaves
– 1/2 tsp black pepper
– 1/2 tsp kosher salt
Instructions
1. Pat the venison loin completely dry with paper towels and season all sides evenly with kosher salt and black pepper.
2. Heat olive oil in a heavy-bottomed skillet over medium-high heat until it shimmers, about 2 minutes.
3. Carefully place the venison loin in the hot skillet and sear for 3-4 minutes per side until a deep brown crust forms.
4. Reduce heat to medium and continue cooking, turning occasionally, until the internal temperature reaches 130°F for medium-rare, about 8-10 minutes total.
5. Transfer the venison to a cutting board, tent loosely with foil, and let rest for exactly 8 minutes to allow juices to redistribute.
6. While the venison rests, add minced shallot to the same skillet and cook over medium heat until translucent, about 2 minutes.
7. Add minced garlic and cook for 30 seconds until fragrant but not browned.
8. Pour in dry red wine, scraping the bottom of the skillet to incorporate all browned bits.
9. Simmer the wine until reduced by half, about 3-4 minutes, stirring occasionally.
10. Add beef broth and fresh thyme leaves, then continue simmering until the sauce coats the back of a spoon, about 4-5 minutes.
11. Remove the skillet from heat and whisk in unsalted butter until the sauce becomes glossy and slightly thickened.
12. Slice the rested venison into 1-inch thick medallions against the grain.
13. Arrange the medallions on warmed plates and spoon the red wine reduction over the top.
What emerges is a dish of remarkable textural contrast—the firm yet yielding venison gives way to a silky, complex sauce that marries fruitiness from the wine with savory depth. The lean meat remains exceptionally moist when sliced against the grain, while the reduction provides a glossy finish that elevates each bite. Consider serving these medallions alongside roasted root vegetables or a creamy potato gratin to complement the robust flavors.
Savory Baked Salmon with Fennel
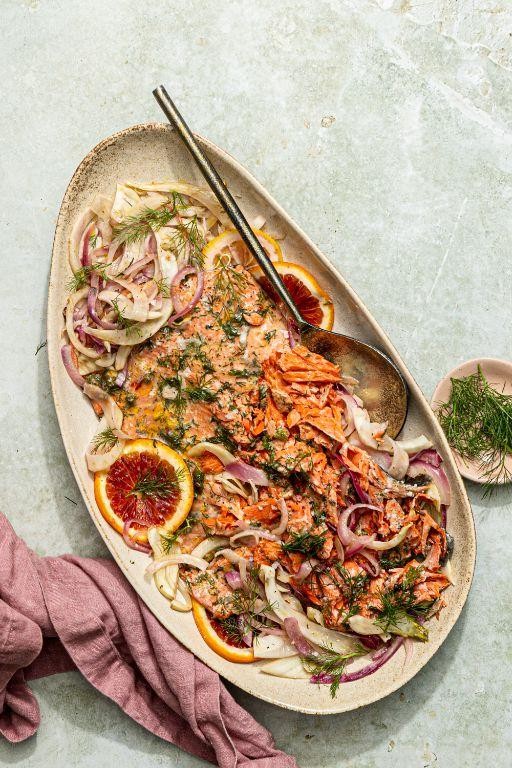
Crafted with precision and elegance, this savory baked salmon with fennel transforms simple ingredients into a sophisticated dinner centerpiece. The aromatic fennel caramelizes beautifully beneath the salmon, creating a harmonious balance of flavors that will impress even the most discerning palates. Each bite offers a delightful interplay of textures and tastes that elevates weeknight dining to restaurant-quality excellence.
4
servings15
minutes27
minutesIngredients
– 4 (6-ounce) salmon fillets
– 2 medium fennel bulbs
– 3 tablespoons olive oil
– 2 cloves garlic
– 1 lemon
– 1 teaspoon kosher salt
– 1/2 teaspoon black pepper
– 1/4 cup fresh dill
Instructions
1. Preheat your oven to 400°F and position the rack in the center of the oven for even heating.
2. Trim the fennel bulbs, remove the tough core, and slice them into 1/4-inch thick wedges.
3. Mince the garlic cloves finely to ensure even distribution of flavor throughout the dish.
4. In a large baking dish, toss the fennel wedges with 2 tablespoons of olive oil, half the minced garlic, 1/2 teaspoon salt, and 1/4 teaspoon pepper.
5. Arrange the fennel in a single layer to promote even caramelization and roast for 15 minutes until slightly softened.
6. Pat the salmon fillets completely dry with paper towels to ensure proper searing and prevent steaming.
7. Rub the salmon with the remaining 1 tablespoon olive oil, then season both sides with the remaining salt and pepper.
8. Place the salmon fillets skin-side down directly on top of the partially roasted fennel.
9. Sprinkle the remaining minced garlic over the salmon fillets for an aromatic crust.
10. Thinly slice the lemon and arrange 2 slices over each salmon fillet to infuse citrus flavor during baking.
11. Bake for 12-15 minutes until the salmon reaches an internal temperature of 125°F for medium-rare or 135°F for medium.
12. Chop the fresh dill and sprinkle it over the finished dish just before serving to preserve its delicate flavor.
13. Serve immediately while the salmon is flaky and the fennel is tender-crisp. Succulent and perfectly cooked, the salmon flakes apart with gentle pressure while the roasted fennel provides a sweet, licorice-kissed foundation. The bright lemon and fresh dill cut through the richness, creating a dish that pairs beautifully with roasted potatoes or a simple arugula salad for a complete meal.
Simple BBQ Ribs with Homemade Sauce
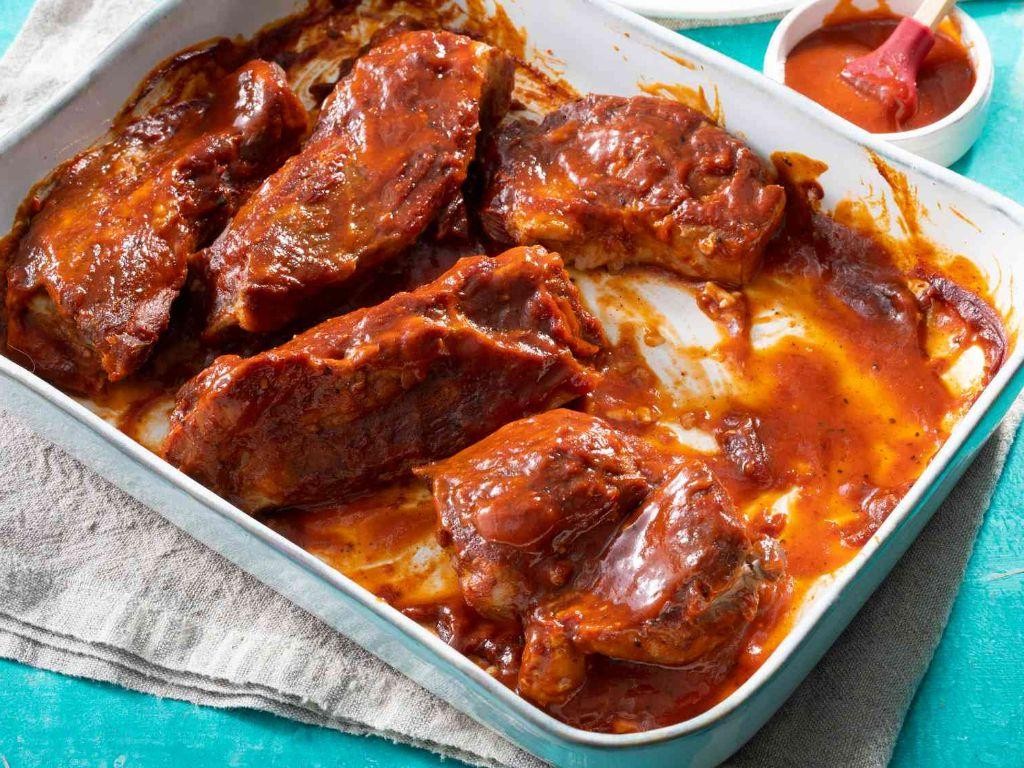
Warm, smoky aromas wafting from the grill signal the arrival of these perfectly glazed pork ribs, where tender meat falls effortlessly from the bone beneath a lacquered coat of homemade barbecue sauce. Each bite delivers a harmonious balance of sweet, tangy, and savory notes, making this dish an instant crowd-pleaser for any summer gathering. Mastering these simple yet impressive ribs requires just a few quality ingredients and patience as they slowly transform into barbecue perfection.
2
racks20
minutes175
minutesIngredients
– 2 racks pork ribs
– 1/4 cup brown sugar
– 2 tbsp paprika
– 1 tbsp garlic powder
– 1 tbsp onion powder
– 2 tsp black pepper
– 1 tsp salt
– 1 cup ketchup
– 1/4 cup apple cider vinegar
– 2 tbsp Worcestershire sauce
– 2 tbsp honey
– 1 tbsp Dijon mustard
Instructions
1. Preheat your oven to 275°F and line a baking sheet with aluminum foil.
2. Remove the membrane from the bone side of each rack of ribs using a knife to lift and paper towels for grip.
3. Combine 1/4 cup brown sugar, 2 tbsp paprika, 1 tbsp garlic powder, 1 tbsp onion powder, 2 tsp black pepper, and 1 tsp salt in a small bowl.
4. Rub the spice mixture evenly over both sides of the ribs, pressing gently to adhere.
5. Place the ribs bone-side down on the prepared baking sheet and cover tightly with foil.
6. Bake at 275°F for 2.5 hours until the meat is tender but not falling off the bone.
7. While the ribs bake, combine 1 cup ketchup, 1/4 cup apple cider vinegar, 2 tbsp Worcestershire sauce, 2 tbsp honey, and 1 tbsp Dijon mustard in a saucepan.
8. Simmer the sauce over medium heat for 10 minutes, stirring occasionally, until slightly thickened.
9. Remove the ribs from the oven and carefully drain any accumulated liquid from the baking sheet.
10. Brush both sides of the ribs generously with the prepared barbecue sauce.
11. Increase oven temperature to 400°F and return the uncovered ribs to the oven.
12. Bake for 15 minutes until the sauce is caramelized and sticky.
13. Let the ribs rest for 10 minutes before slicing between the bones.
A remarkable tenderness characterizes these ribs, with the meat pulling cleanly from the bone while maintaining its juicy integrity. The glossy sauce creates a slightly crisp exterior that gives way to layers of smoky sweetness against the savory spice rub. For an elevated presentation, serve the sliced ribs over creamy polenta with grilled corn, allowing the sauce to mingle with the other components on the plate.
Hearty Meatball Casserole with Cheese
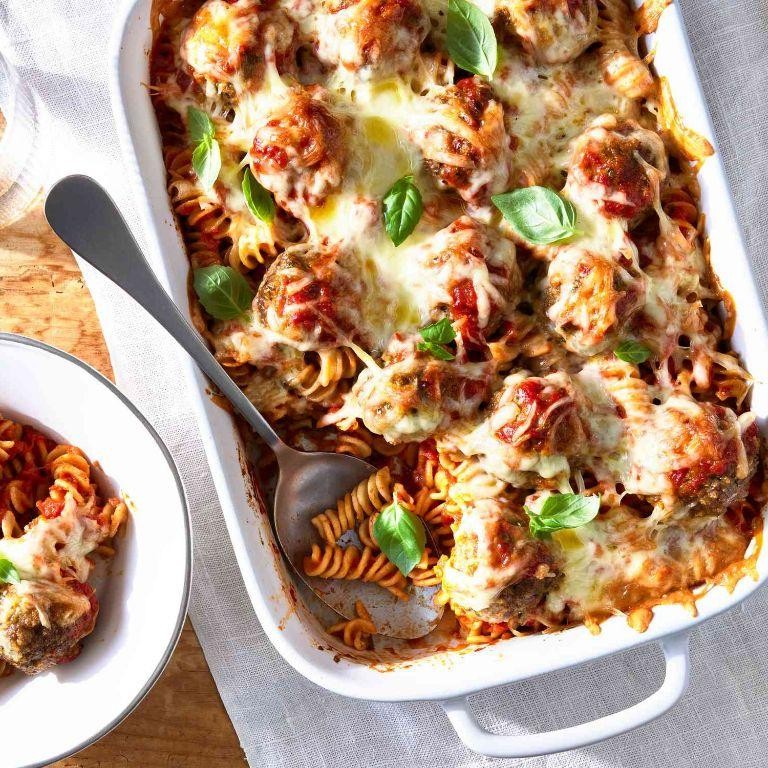
Fusing the comforting embrace of Italian-American cuisine with elegant preparation, this meatball casserole transforms humble ingredients into a showstopping centerpiece. Perfectly seasoned meatballs nestle between layers of rich tomato sauce and molten cheese, creating a dish that satisfies both sophisticated palates and hearty appetites. Each spoonful delivers the harmonious balance of savory, sweet, and creamy textures that makes this casserole unforgettable.
6
servings25
minutes45
minutesIngredients
– 1 pound ground beef
– 1/2 cup breadcrumbs
– 1/4 cup grated Parmesan cheese
– 1 large egg
– 2 cloves garlic, minced
– 1 teaspoon dried oregano
– 1/2 teaspoon salt
– 1/4 teaspoon black pepper
– 2 tablespoons olive oil
– 24 ounces marinara sauce
– 8 ounces mozzarella cheese, shredded
– 1/4 cup fresh basil, chopped
Instructions
1. Preheat your oven to 375°F and lightly grease a 9×13-inch baking dish.
2. Combine 1 pound ground beef, 1/2 cup breadcrumbs, 1/4 cup grated Parmesan cheese, 1 large egg, 2 cloves minced garlic, 1 teaspoon dried oregano, 1/2 teaspoon salt, and 1/4 teaspoon black pepper in a large mixing bowl.
3. Gently mix the ingredients with your hands until just combined, being careful not to overwork the meat.
4. Form the mixture into 1-inch meatballs, rolling them gently between your palms to create uniform shapes.
5. Heat 2 tablespoons olive oil in a large skillet over medium-high heat until shimmering.
6. Brown the meatballs in batches, turning them every 2-3 minutes until all sides develop a golden-brown crust.
7. Pour 1 cup of the 24 ounces marinara sauce into the prepared baking dish, spreading it evenly across the bottom.
8. Arrange the browned meatballs in a single layer over the sauce in the baking dish.
9. Pour the remaining marinara sauce evenly over the meatballs, ensuring each one is covered.
10. Sprinkle 8 ounces shredded mozzarella cheese uniformly over the entire surface of the casserole.
11. Cover the dish with aluminum foil and bake at 375°F for 25 minutes.
12. Remove the foil and continue baking for another 10-15 minutes until the cheese is bubbly and lightly golden around the edges.
13. Remove the casserole from the oven and let it rest for 5 minutes to allow the sauce to thicken.
14. Sprinkle 1/4 cup chopped fresh basil over the top just before serving.
Juxtaposing textures create the magic here—tender meatballs contrast with the crisp cheese topping while the vibrant basil cuts through the richness. Serve this casserole family-style with crusty garlic bread to soak up every bit of the savory sauce, or portion it over creamy polenta for an elegant twist that elevates the entire experience.
Classic Carnivore Breakfast Sausage
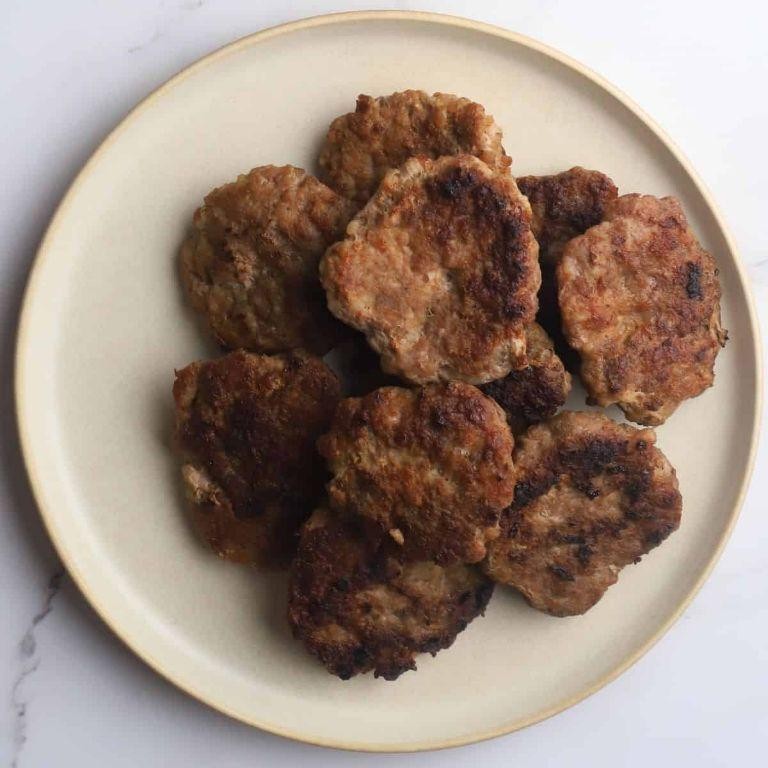
While many breakfast options come and go with fleeting trends, there remains something profoundly satisfying about crafting your own breakfast sausage from scratch. This classic carnivore version elevates the humble morning patty into a culinary experience worthy of any brunch gathering. The careful balance of spices and quality pork creates a symphony of flavors that will make you question why you ever settled for store-bought varieties.
8
portions10
minutes10
minutesIngredients
- 1 pound ground pork
- 1 teaspoon kosher salt
- 1/2 teaspoon black pepper
- 1/2 teaspoon dried sage
- 1/4 teaspoon dried thyme
- 1/4 teaspoon red pepper flakes
- 1/8 teaspoon ground nutmeg
- 2 tablespoons olive oil
Instructions
- Combine 1 pound ground pork, 1 teaspoon kosher salt, 1/2 teaspoon black pepper, 1/2 teaspoon dried sage, 1/4 teaspoon dried thyme, 1/4 teaspoon red pepper flakes, and 1/8 teaspoon ground nutmeg in a medium mixing bowl.
- Mix the ingredients thoroughly with your hands for 2 minutes until the spices are evenly distributed throughout the pork.
- Divide the sausage mixture into 8 equal portions using a kitchen scale for consistent sizing.
- Shape each portion into 1/2-inch thick patties, pressing gently to form even discs without overworking the meat.
- Heat 2 tablespoons olive oil in a large skillet over medium heat until it shimmers, about 2 minutes.
- Place the sausage patties in the skillet without crowding, leaving 1 inch between each patty for proper browning.
- Cook the patties for 4-5 minutes until the bottoms develop a deep golden-brown crust.
- Flip each patty carefully using a spatula and cook for another 4-5 minutes until the internal temperature reaches 160°F on an instant-read thermometer.
- Transfer the cooked sausages to a paper towel-lined plate to drain excess oil for 1 minute before serving.
You’ll find these sausages boast a wonderfully coarse texture that yields to a juicy interior with each bite. The sage and thyme create an aromatic backbone, while the subtle heat from red pepper flakes adds complexity that lingers pleasantly on the palate. Consider serving them alongside creamy scrambled eggs or crumbling them over a breakfast pizza for an unexpected twist that will become your new weekend tradition.
Tender Ham Steaks with Pineapple
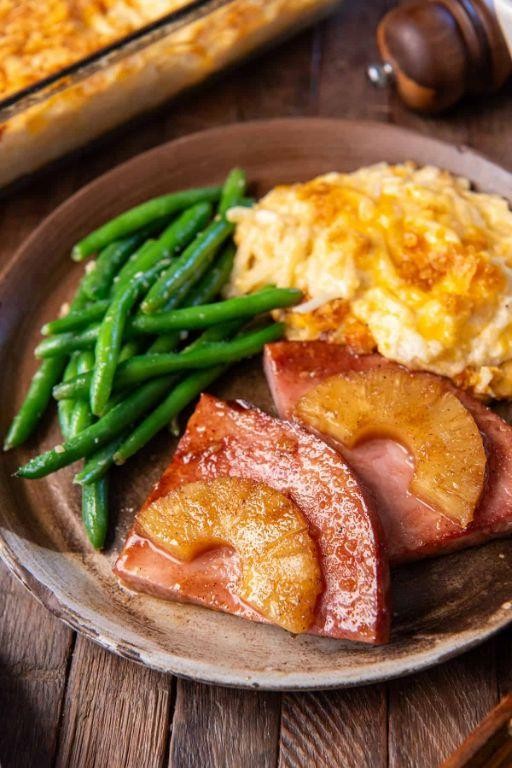
Oozing with sweet and savory perfection, this elegant preparation transforms humble ham steaks into a sophisticated centerpiece. The caramelized pineapple creates a glossy glaze that beautifully complements the salty richness of the pork. This dish offers restaurant-quality appeal with surprisingly simple execution.
2
servings10
minutes17
minutesIngredients
– 2 (8-ounce) ham steaks, 1-inch thick
– 1 fresh pineapple, peeled and cored
– 2 tablespoons unsalted butter
– 2 tablespoons brown sugar
– 1 tablespoon olive oil
– 1/4 teaspoon black pepper
– 1/4 teaspoon smoked paprika
Instructions
1. Cut the pineapple into 1/2-inch thick rings, then pat them dry with paper towels to ensure proper caramelization.
2. Heat olive oil in a large skillet over medium-high heat until it shimmers, about 2 minutes.
3. Season both sides of the ham steaks evenly with black pepper and smoked paprika.
4. Place ham steaks in the hot skillet and cook for 4 minutes without moving to develop a golden-brown crust.
5. Flip the ham steaks using tongs and cook for another 4 minutes until heated through.
6. Transfer ham steaks to a warm plate and tent with foil to retain moisture.
7. Reduce heat to medium and add butter to the same skillet, swirling until melted and foamy.
8. Arrange pineapple rings in a single layer and sprinkle with brown sugar.
9. Cook pineapple for 3 minutes per side until deeply caramelized and golden.
10. Return ham steaks to the skillet, spooning the pineapple glaze over them to coat evenly.
11. Simmer together for 1 minute to allow flavors to meld.
12. Remove from heat and let rest for 2 minutes before serving.
Nothing compares to the textural harmony of juicy pineapple against the firm, savory ham. The caramelized edges provide a subtle crunch that gives way to tender, sweet interior. Consider serving over coconut rice or alongside roasted sweet potatoes for a complete tropical-inspired meal that delights both the palate and the eye.
Flavorful Chicken Liver Pâté

Meticulously crafted and surprisingly elegant, this chicken liver pâté transforms humble ingredients into a luxurious spread worthy of any gathering. Its velvety texture and rich, nuanced flavor profile make it an impressive yet approachable addition to your culinary repertoire. With just a few simple techniques, you can create this restaurant-quality delicacy in your own kitchen.
8
servings15
minutes10
minutesIngredients
– 1 lb chicken livers
– 1/2 cup unsalted butter
– 1/4 cup heavy cream
– 1/4 cup brandy
– 1 medium shallot
– 2 cloves garlic
– 1 tbsp fresh thyme leaves
– 1/2 tsp kosher salt
– 1/4 tsp black pepper
– 1/4 tsp ground nutmeg
Instructions
1. Rinse 1 lb chicken livers under cold running water and pat completely dry with paper towels.
2. Trim away any visible connective tissue or green spots from the livers using kitchen shears.
3. Melt 2 tablespoons of the butter in a large skillet over medium heat.
4. Finely chop 1 medium shallot and add to the skillet, cooking for 3 minutes until translucent.
5. Mince 2 cloves garlic and add to the skillet along with 1 tbsp fresh thyme leaves, cooking for 1 minute until fragrant.
6. Increase heat to medium-high and add the prepared chicken livers to the skillet.
7. Cook the livers for 4 minutes, turning once, until browned on both sides but still slightly pink in the center.
8. Pour 1/4 cup brandy into the skillet and carefully ignite with a long match to flambé, shaking the pan until flames subside.
9. Transfer the entire contents of the skillet to a food processor and let cool for 10 minutes.
10. Add 1/4 cup heavy cream, 1/2 tsp kosher salt, 1/4 tsp black pepper, and 1/4 tsp ground nutmeg to the food processor.
11. Process the mixture for 2 minutes until completely smooth, scraping down the sides once.
12. Cut the remaining 6 tablespoons of butter into small cubes and add to the processor while running.
13. Continue processing for 1 additional minute until the butter is fully incorporated and the pâté is silky.
14. Spoon the pâté into a 2-cup terrine or ramekin and smooth the surface with a spatula.
15. Cover the surface directly with plastic wrap to prevent oxidation and refrigerate for at least 4 hours.
Silken and sophisticated, this pâté achieves a remarkably smooth consistency that spreads effortlessly on toasted baguette slices. The brandy adds subtle warmth while the thyme and nutmeg provide aromatic complexity that lingers pleasantly. For an elegant presentation, serve chilled with cornichons, Dijon mustard, and a glass of crisp Sauternes to complement the rich flavors.
Herb-Crusted Rack of Lamb
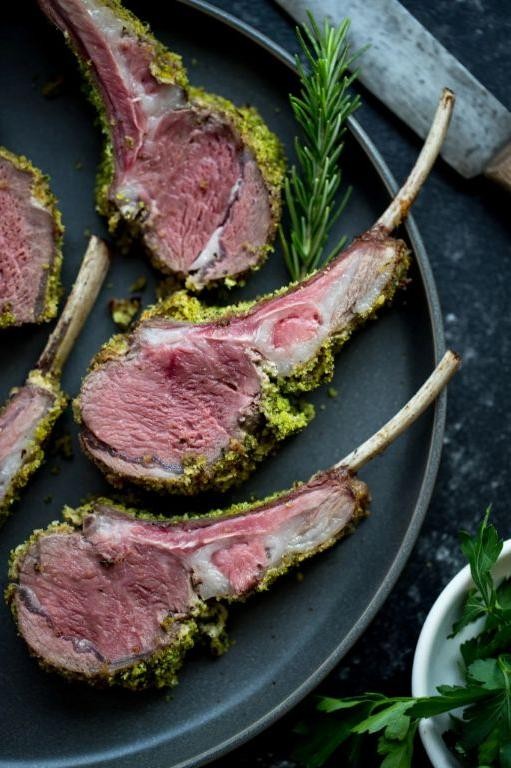
Sublime and sophisticated, a perfectly prepared herb-crusted rack of lamb elevates any dinner occasion from ordinary to extraordinary. The aromatic blend of fresh herbs creates a fragrant crust that seals in the lamb’s natural juices, while the tender pink interior promises a melt-in-your-mouth experience. This classic centerpiece balances rustic elegance with refined flavor, making it ideal for both intimate gatherings and celebratory feasts.
4
servings15
minutes28
minutesIngredients
– 1 rack of lamb (about 1.5 pounds)
– 2 tablespoons olive oil
– 3 cloves garlic, minced
– 2 tablespoons fresh rosemary, finely chopped
– 2 tablespoons fresh thyme, finely chopped
– 1/4 cup breadcrumbs
– 1 teaspoon salt
– 1/2 teaspoon black pepper
Instructions
1. Preheat your oven to 400°F and position the rack in the center of the oven for even heating.
2. Pat the rack of lamb completely dry with paper towels to ensure proper browning.
3. Score the fat cap in a crosshatch pattern, cutting about 1/4 inch deep to help render the fat.
4. Season all sides of the lamb evenly with salt and pepper, pressing gently to adhere.
5. Heat olive oil in a large oven-safe skillet over medium-high heat until shimmering.
6. Sear the lamb fat-side down for 3 minutes until golden brown and crispy.
7. Turn the lamb and sear the other sides for 2 minutes each to develop a crust.
8. Remove the lamb from the skillet and let it rest on a plate for 5 minutes.
9. Combine minced garlic, chopped rosemary, chopped thyme, and breadcrumbs in a small bowl.
10. Press the herb mixture firmly onto the fat side of the lamb, creating an even layer.
11. Return the lamb to the skillet herb-side up and transfer to the preheated oven.
12. Roast for 15-18 minutes until the internal temperature reaches 130°F for medium-rare.
13. Remove the lamb from the oven and let it rest on a cutting board for 10 minutes before carving.
14. Carve between the bones into individual chops for serving.
Perfectly rested lamb reveals a juicy pink interior that contrasts beautifully with the crisp, aromatic herb crust. The garlic-infused herbs permeate each bite while the rendered fat creates an irresistible savory depth. Present these elegant chops alongside roasted root vegetables or a minted pea purée for a visually stunning plate that celebrates spring’s finest flavors.
Rich Beef Bourguignon
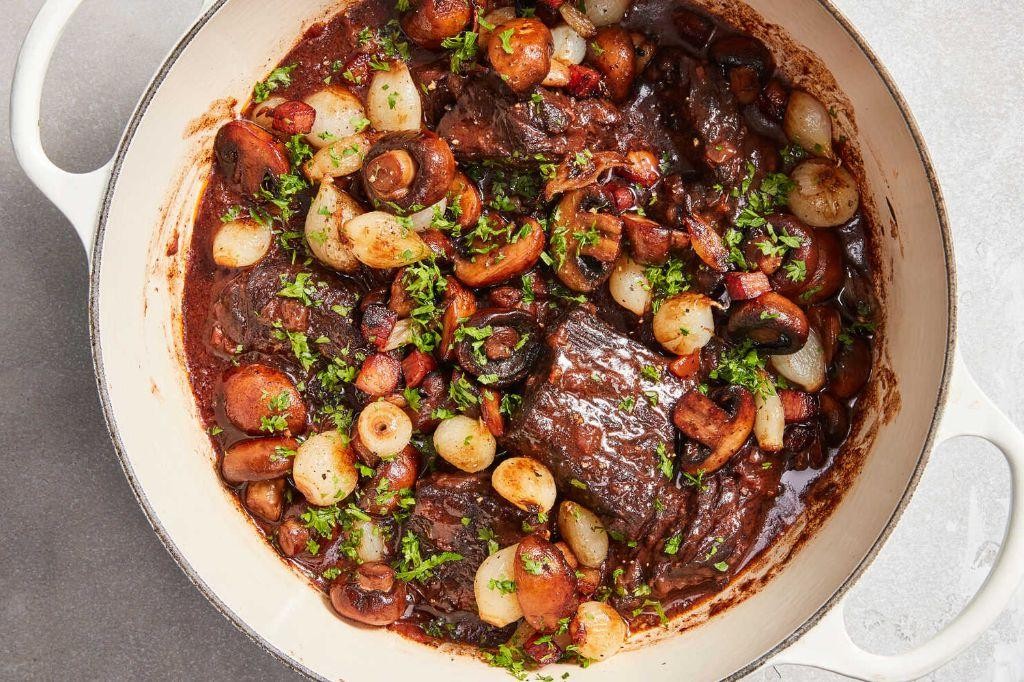
Meticulously crafted and deeply comforting, this Rich Beef Bourguignon transforms humble ingredients into an extraordinary culinary experience. Meltingly tender beef bathed in a velvety red wine sauce creates a dish that feels both rustic and refined, perfect for special occasions or when you simply crave something extraordinary. The slow simmering process coaxes out incredible depth of flavor, making every bite worth the patience.
6
servings25
minutes210
minutesIngredients
– 3 lbs beef chuck, cut into 2-inch cubes
– 6 slices thick-cut bacon, chopped
– 1 large yellow onion, diced
– 2 medium carrots, sliced
– 8 oz cremini mushrooms, quartered
– 3 cloves garlic, minced
– 2 tbsp tomato paste
– 3 cups dry red wine
– 2 cups beef broth
– 2 tbsp all-purpose flour
– 3 sprigs fresh thyme
– 2 bay leaves
– 3 tbsp olive oil
– 1 tsp kosher salt
– 1/2 tsp black pepper
– 2 tbsp chopped fresh parsley
Instructions
1. Preheat your oven to 325°F and pat the beef cubes completely dry with paper towels.
2. Season the beef evenly with kosher salt and black pepper on all sides.
3. Heat 2 tablespoons of olive oil in a large Dutch oven over medium-high heat until shimmering.
4. Working in batches, sear the beef cubes for 3-4 minutes per side until deeply browned, transferring to a plate.
5. Add the chopped bacon to the pot and cook for 6-8 minutes until crispy, then remove with a slotted spoon.
6. Add the diced onion and sliced carrots to the bacon fat, sautéing for 5-7 minutes until softened.
7. Stir in the minced garlic and cook for 1 minute until fragrant.
8. Add the tomato paste and cook for 2 minutes, stirring constantly to deepen its flavor.
9. Sprinkle the flour over the vegetables and cook for 1 minute while stirring continuously.
10. Pour in the red wine, scraping up all the browned bits from the bottom of the pot.
11. Add the beef broth, thyme sprigs, and bay leaves, then return the seared beef and bacon to the pot.
12. Bring the mixture to a gentle simmer, then cover and transfer to the preheated oven.
13. Braise for 2 1/2 hours until the beef is fork-tender.
14. Meanwhile, heat the remaining 1 tablespoon of olive oil in a skillet over medium-high heat.
15. Sauté the quartered mushrooms for 6-8 minutes until golden brown and their liquid has evaporated.
16. Remove the Dutch oven from the oven and stir in the sautéed mushrooms.
17. Simmer uncovered on the stovetop for 15 minutes to thicken the sauce to a glossy consistency.
18. Discard the thyme stems and bay leaves, then stir in the chopped parsley.
Rich with complex flavors, the finished bourguignon features beef that falls apart at the slightest pressure, suspended in a glossy, wine-dark sauce. The mushrooms add an earthy counterpoint to the sweet carrots and savory bacon, creating layers of texture in every spoonful. For an elegant presentation, serve over creamy polenta or buttery egg noodles to catch every drop of the magnificent sauce.
Conclusion
Variety truly is the spice of life with these 29 delicious carnivore recipes! From quick weeknight dinners to impressive weekend feasts, there’s something here for every meat lover. We’d love to hear which recipes become your new favorites—drop us a comment below and don’t forget to share this meaty roundup on Pinterest for fellow foodies to enjoy!


