
Diving into baking doesn’t have to be intimidating! Whether you’re craving warm cookies, fluffy muffins, or simple breads, these beginner-friendly recipes are your ticket to homemade goodness. With easy-to-follow instructions and common ingredients, you’ll be whipping up delicious treats in no time. Ready to fill your kitchen with amazing aromas? Let’s explore these 21 foolproof baked goods that promise success from the very first batch!
Fluffy Banana Muffins
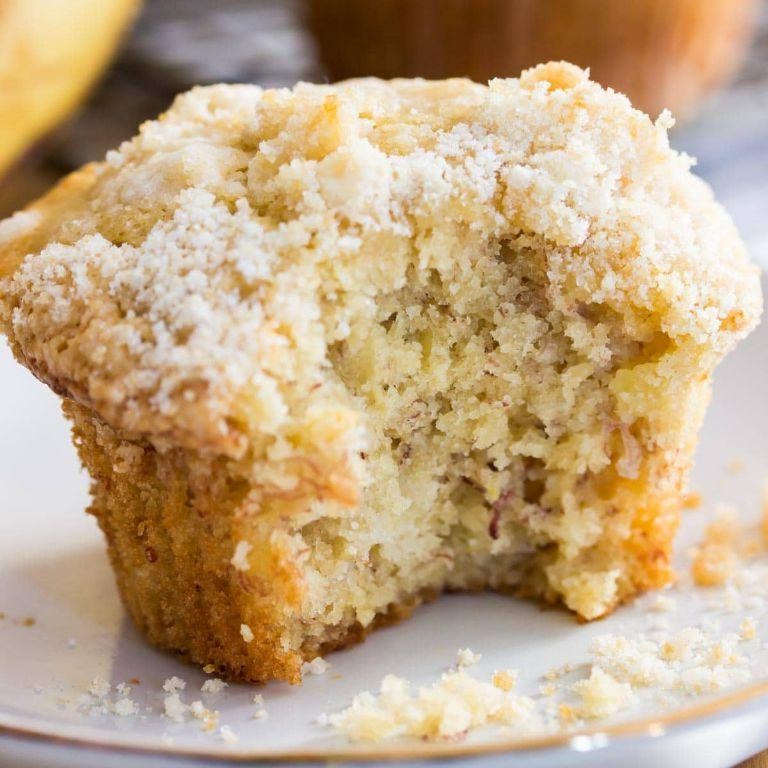
Nothing beats the comforting aroma of freshly baked banana muffins filling your kitchen. Now that you have those overripe bananas sitting on your counter, let’s transform them into perfectly fluffy treats using this straightforward method. Follow each step carefully for bakery-quality results right from your own oven.
12
muffins15
minutes20
minutesIngredients
– 2 cups all-purpose flour
– 1 teaspoon baking soda
– 1/2 teaspoon salt
– 1/2 cup unsalted butter
– 3/4 cup granulated sugar
– 2 large eggs
– 1/3 cup whole milk
– 1 teaspoon vanilla extract
– 3 medium ripe bananas
Instructions
1. Preheat your oven to 375°F and line a 12-cup muffin tin with paper liners.
2. Whisk together 2 cups all-purpose flour, 1 teaspoon baking soda, and 1/2 teaspoon salt in a medium bowl.
3. Cream 1/2 cup softened unsalted butter and 3/4 cup granulated sugar in a large bowl using an electric mixer on medium speed for 2 minutes until light and fluffy.
4. Beat in 2 large eggs one at a time, mixing for 30 seconds after each addition until fully incorporated.
5. Mash 3 medium ripe bananas with a fork in a separate bowl until only small lumps remain.
6. Stir the mashed bananas, 1/3 cup whole milk, and 1 teaspoon vanilla extract into the butter mixture until just combined.
7. Gently fold the dry ingredients into the wet ingredients using a spatula, making exactly 12 strokes to avoid overmixing.
8. Divide the batter evenly among the 12 prepared muffin cups, filling each about 3/4 full.
9. Bake at 375°F for 18-22 minutes until the tops spring back when lightly pressed and a toothpick inserted comes out clean.
10. Cool the muffins in the pan for 5 minutes before transferring to a wire rack.
Moist, tender crumbs and sweet banana flavor make these muffins irresistible straight from the oven. The gentle domed tops crack beautifully, revealing a soft interior that pairs wonderfully with your morning coffee. For an extra treat, split one warm and spread with cream cheese or nut butter for added richness.
Quick Cinnamon Rolls
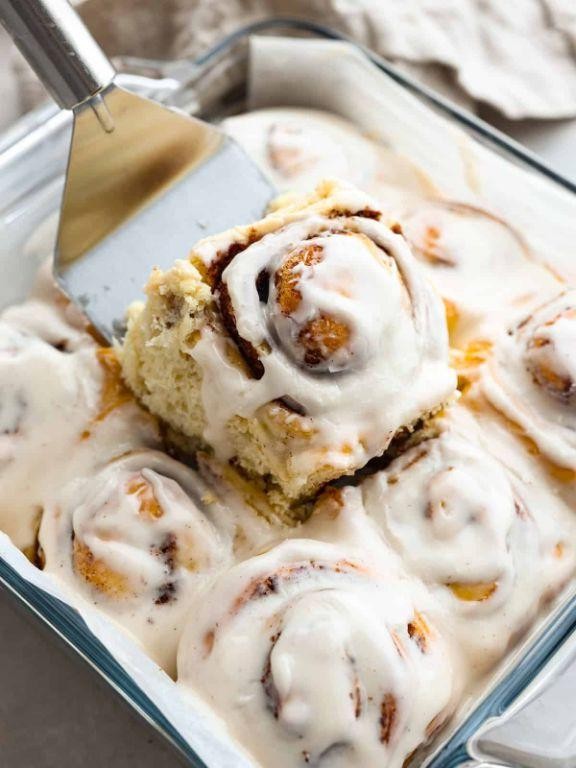
Oven-warm cinnamon rolls straight from your kitchen are easier than you think, even for first-time bakers. Our quick method skips the lengthy yeast rise for a dough that comes together in minutes. Follow these precise steps for perfectly swirled, gooey-centered rolls every time.
8
rolls20
minutes25
minutesIngredients
– 2 cups all-purpose flour
– 1/4 cup granulated sugar
– 2 tsp baking powder
– 1/2 tsp salt
– 3/4 cup whole milk
– 1/4 cup unsalted butter, melted
– 1/4 cup light brown sugar
– 1 tbsp ground cinnamon
– 2 tbsp softened butter
– 1 cup powdered sugar
– 2 tbsp milk
Instructions
1. Preheat your oven to 375°F and grease an 8-inch round baking pan.
2. Whisk 2 cups all-purpose flour, 1/4 cup granulated sugar, 2 tsp baking powder, and 1/2 tsp salt in a large bowl.
3. Pour 3/4 cup whole milk and 1/4 cup melted unsalted butter into the dry ingredients.
4. Stir with a wooden spoon until a shaggy dough forms, being careful not to overmix.
5. Turn the dough onto a lightly floured surface and knead gently 4-5 times until smooth.
6. Roll the dough into a 10×12-inch rectangle using a rolling pin.
7. Spread 2 tbsp softened butter evenly over the entire surface of the dough.
8. Combine 1/4 cup light brown sugar and 1 tbsp ground cinnamon in a small bowl.
9. Sprinkle the cinnamon-sugar mixture evenly over the buttered dough.
10. Starting from the long edge, tightly roll the dough into a log, pinching the seam to seal.
11. Use a sharp knife to slice the log into 8 equal pieces, wiping the blade between cuts for clean slices.
12. Arrange the rolls cut-side up in the prepared pan, leaving space between them for expansion.
13. Bake at 375°F for 20-25 minutes until golden brown and a toothpick inserted comes out clean.
14. While rolls bake, whisk 1 cup powdered sugar with 2 tbsp milk until smooth for the glaze.
15. Remove rolls from oven and cool in the pan for 5 minutes before drizzling with glaze.
16. Serve warm. What makes these cinnamon rolls special is their tender, cake-like texture that contrasts beautifully with the crisp sugary edges. The warm cinnamon filling caramelizes during baking, creating pockets of gooey sweetness throughout. For an extra treat, try serving them with a scoop of vanilla ice cream or alongside your morning coffee.
Simple Chocolate Chip Cookies
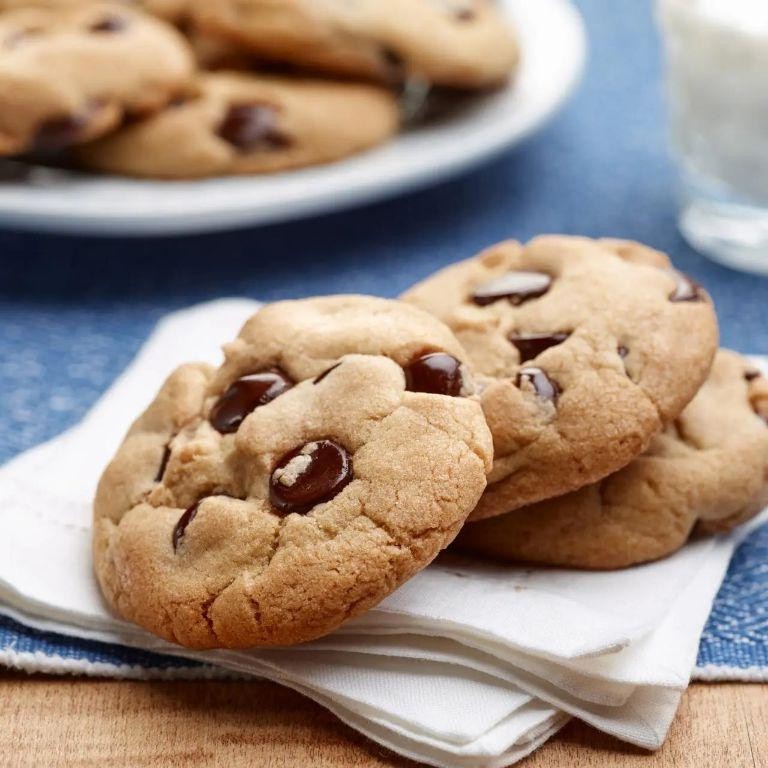
Many home bakers find themselves craving that perfect chocolate chip cookie—crisp edges with a soft, chewy center that melts in your mouth. Mastering this classic treat requires precise measurements and technique, but the rewarding results are well worth the careful attention to detail. Let’s walk through each step together to create cookies that will become your new go-to recipe.
24
cookies15
minutes11
minutesIngredients
– 2 ¼ cups all-purpose flour
– 1 tsp baking soda
– 1 tsp salt
– 1 cup unsalted butter, softened
– ¾ cup granulated sugar
– ¾ cup packed brown sugar
– 2 large eggs
– 2 tsp vanilla extract
– 2 cups semi-sweet chocolate chips
Instructions
1. Preheat your oven to 375°F and line two baking sheets with parchment paper.
2. Whisk together the flour, baking soda, and salt in a medium bowl until fully combined.
3. Cream the softened butter, granulated sugar, and brown sugar in a large mixing bowl for exactly 2 minutes until light and fluffy.
4. Beat in the eggs one at a time, ensuring each is fully incorporated before adding the next.
5. Mix in the vanilla extract until just combined with the wet ingredients.
6. Gradually add the flour mixture to the wet ingredients, mixing on low speed until no dry streaks remain.
7. Fold in the chocolate chips using a spatula until evenly distributed throughout the dough.
8. Scoop rounded tablespoons of dough onto prepared baking sheets, spacing them 2 inches apart.
9. Bake for 9-11 minutes until the edges are golden brown but centers still appear slightly underdone.
10. Cool cookies on baking sheets for 5 minutes before transferring to a wire rack.
Every baker will appreciate how these cookies achieve that ideal balance—crisp caramelized edges giving way to a soft, buttery interior studded with melted chocolate pockets. Try serving them warm with a sprinkle of sea salt for a sophisticated twist, or sandwich a scoop of vanilla ice cream between two cookies for an irresistible dessert.
Buttery Scones with Jam
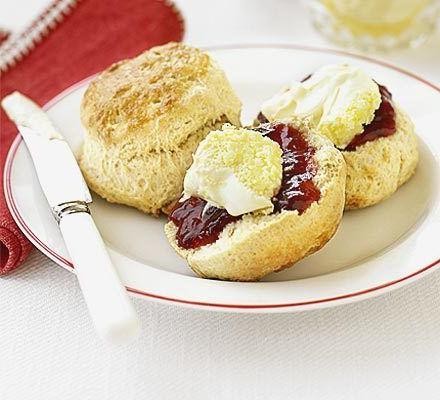
Yielding to that craving for something warm and comforting? These buttery scones with jam are exactly what you need—simple enough for beginners yet impressive enough for any breakfast table. Let’s walk through each step together to create flaky, golden scones that practically beg for a dollop of sweet jam.
8
scones15
minutes18
minutesIngredients
– 2 cups all-purpose flour
– 1/4 cup granulated sugar
– 1 tbsp baking powder
– 1/2 tsp salt
– 1/2 cup cold unsalted butter
– 2/3 cup cold heavy cream
– 1 large egg
– 1/2 cup jam
Instructions
1. Preheat your oven to 400°F and line a baking sheet with parchment paper.
2. Whisk together 2 cups all-purpose flour, 1/4 cup granulated sugar, 1 tablespoon baking powder, and 1/2 teaspoon salt in a large bowl.
3. Cut 1/2 cup cold unsalted butter into small cubes and add to the dry ingredients.
4. Use a pastry cutter or your fingertips to work the butter into the flour mixture until it resembles coarse crumbs with some pea-sized butter pieces remaining—this creates flaky layers.
5. In a separate bowl, whisk 2/3 cup cold heavy cream with 1 large egg until fully combined.
6. Pour the wet ingredients into the flour mixture and stir with a fork until a shaggy dough forms.
7. Turn the dough onto a lightly floured surface and gently knead it 3-4 times just until it holds together.
8. Pat the dough into a 1-inch thick circle and use a sharp knife to cut it into 8 wedges.
9. Place the wedges 2 inches apart on the prepared baking sheet.
10. Bake at 400°F for 15-18 minutes until the scones are golden brown on top and sound hollow when tapped on the bottom.
11. Transfer the scones to a wire rack and let them cool for 10 minutes.
12. Spoon 1/2 cup jam over the warm scones, spreading it evenly across the tops.
Melt-in-your-mouth tender with a delicate crumb, these scones offer the perfect balance of rich butteriness against the bright fruitiness of the jam. For an extra treat, split them warm and add a pat of butter before the jam—the contrast of temperatures makes each bite truly memorable.
Easy Lemon Loaf Cake
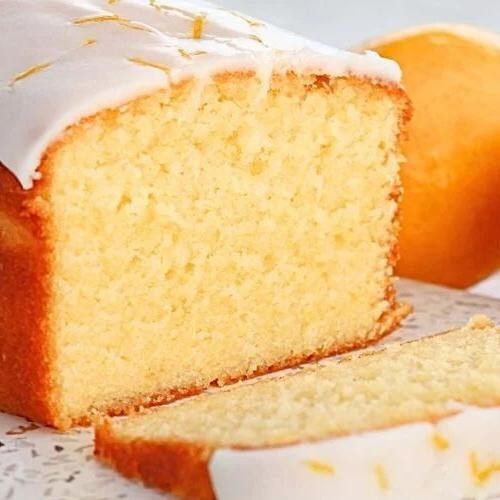
Let’s create a moist, tender lemon loaf cake that’s perfect for beginners. Learning to bake this simple treat will give you confidence in the kitchen with its straightforward method and bright, sunny flavor. Follow each step carefully for bakery-quality results at home.
8
servings15
minutes50
minutesIngredients
– 1 ½ cups all-purpose flour
– 1 cup granulated sugar
– ½ cup unsalted butter, softened
– 2 large eggs
– ½ cup whole milk
– ¼ cup fresh lemon juice
– 1 tablespoon lemon zest
– 2 teaspoons baking powder
– ½ teaspoon salt
Instructions
1. Preheat your oven to 350°F and grease a 9×5-inch loaf pan thoroughly.
2. Combine 1 ½ cups all-purpose flour, 2 teaspoons baking powder, and ½ teaspoon salt in a medium bowl.
3. In a separate large bowl, beat ½ cup softened unsalted butter and 1 cup granulated sugar together for 3 minutes until light and fluffy.
4. Add 2 large eggs one at a time, beating well after each addition until fully incorporated.
5. Mix in ¼ cup fresh lemon juice and 1 tablespoon lemon zest until just combined.
6. Alternate adding the dry ingredients and ½ cup whole milk to the butter mixture, beginning and ending with dry ingredients.
7. Pour the batter into your prepared loaf pan and smooth the top with a spatula.
8. Bake at 350°F for 45-50 minutes until a toothpick inserted in the center comes out clean.
9. Cool the cake in the pan for 15 minutes before transferring to a wire rack.
10. Allow the cake to cool completely before slicing for clean cuts.
Ultra-moist with a tight, tender crumb, this lemon loaf delivers bright citrus flavor in every bite. The subtle tang from fresh lemon juice balances the sweetness perfectly, making it ideal for afternoon tea or as a light dessert. Try serving thick slices toasted with a pat of butter for a warm, comforting treat that highlights the lemon’s vibrant notes.
Classic Blueberry Muffins
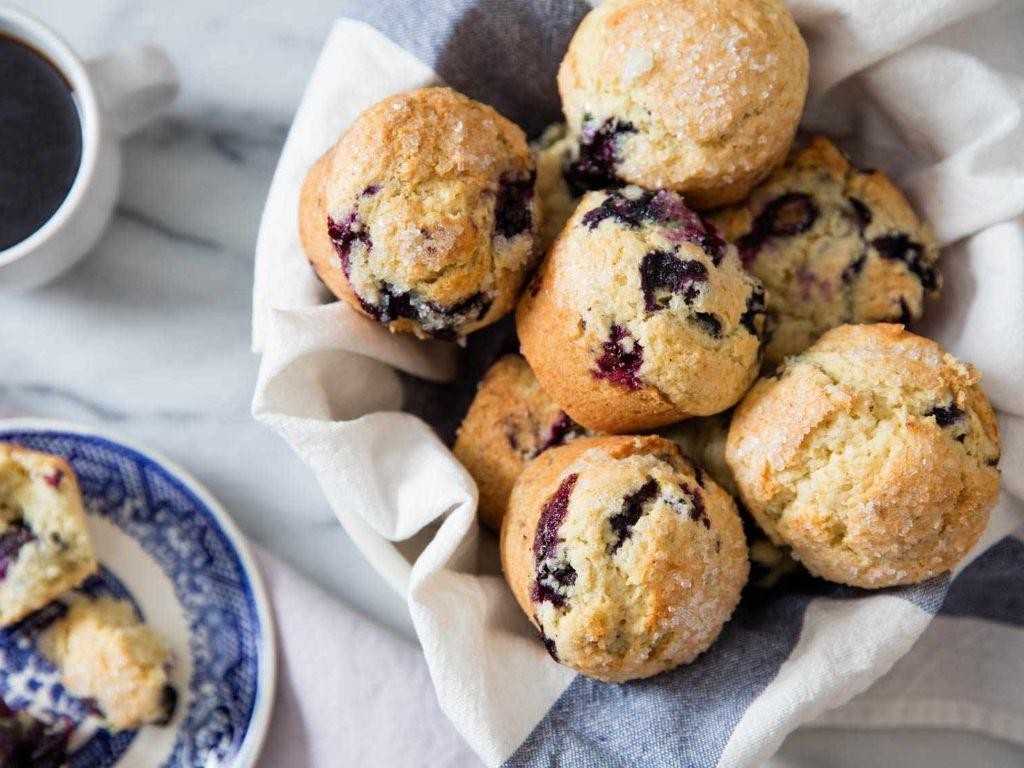
Baking perfect blueberry muffins requires just a few simple techniques to achieve that tender crumb and burst of berry flavor. Begin by preheating your oven to 375°F and lining a 12-cup muffin tin with paper liners to ensure easy removal after baking. This foundational preparation sets you up for success with minimal cleanup.
12
muffins15
minutes25
minutesIngredients
– 2 cups all-purpose flour
– 1 cup granulated sugar
– 2 tsp baking powder
– 1/2 tsp salt
– 1 cup milk
– 1/2 cup unsalted butter
– 1 large egg
– 1 tsp vanilla extract
– 1 1/2 cups fresh blueberries
Instructions
1. Preheat your oven to 375°F and line a 12-cup muffin tin with paper liners.
2. Melt 1/2 cup unsalted butter in a microwave-safe bowl for 45 seconds, then cool for 5 minutes.
3. Whisk 2 cups all-purpose flour, 1 cup granulated sugar, 2 tsp baking powder, and 1/2 tsp salt in a large bowl until fully combined.
4. Toss 1 1/2 cups fresh blueberries with 2 tbsp of the flour mixture to prevent sinking during baking.
5. Combine 1 cup milk, the cooled melted butter, 1 large egg, and 1 tsp vanilla extract in a separate medium bowl.
6. Pour the wet ingredients into the dry ingredients and stir with a spatula until just combined, being careful not to overmix.
7. Gently fold in the flour-coated blueberries until evenly distributed throughout the batter.
8. Divide the batter evenly among the 12 muffin cups, filling each about 2/3 full.
9. Bake at 375°F for 20-25 minutes until the tops spring back when lightly pressed and a toothpick inserted comes out clean.
10. Cool the muffins in the pan for 5 minutes before transferring to a wire rack.
Moist and tender with pockets of juicy berries, these muffins develop a beautiful golden dome when baked properly. For an extra treat, split them warm and spread with honey butter, or enjoy them alongside your morning coffee for a truly comforting breakfast experience.
Chewy Brownies
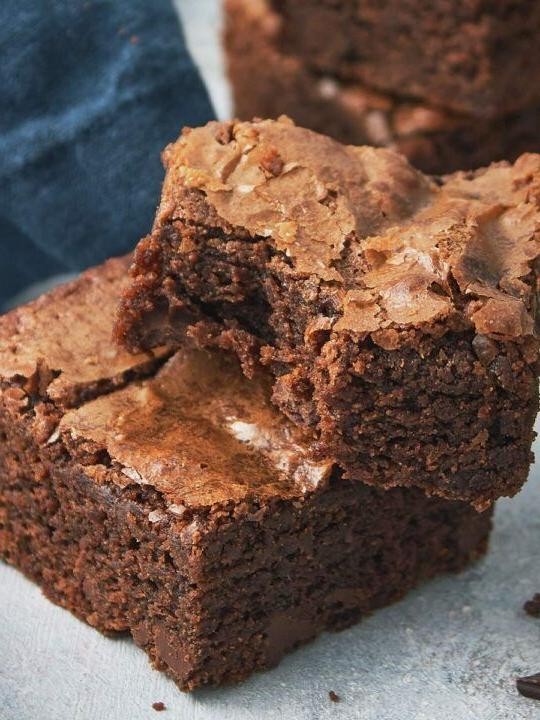
Zesty chocolate cravings call for something special, and these chewy brownies deliver that perfect fudgy texture with crisp edges. Let’s walk through each step methodically to ensure your brownies turn out rich, dense, and irresistibly chewy every single time.
12
brownies15
minutes30
minutesIngredients
– 1 cup unsalted butter
– 2 cups granulated sugar
– 4 large eggs
– 1 tsp vanilla extract
– ¾ cup unsweetened cocoa powder
– 1 cup all-purpose flour
– ½ tsp salt
– 1 cup semisweet chocolate chips
Instructions
1. Preheat your oven to 350°F and line a 9×13-inch baking pan with parchment paper.
2. Melt 1 cup unsalted butter in a medium saucepan over low heat, stirring constantly until fully liquid.
3. Remove the saucepan from heat and whisk in 2 cups granulated sugar until the mixture is smooth and glossy.
4. Add 4 large eggs one at a time, whisking thoroughly after each addition to incorporate air for a lighter crumb.
5. Stir in 1 tsp vanilla extract until evenly distributed throughout the batter.
6. Sift ¾ cup unsweetened cocoa powder, 1 cup all-purpose flour, and ½ tsp salt directly into the wet ingredients to prevent lumps.
7. Fold the dry ingredients into the wet mixture using a spatula until just combined; avoid overmixing to keep the brownies tender.
8. Gently fold in 1 cup semisweet chocolate chips, reserving a handful to sprinkle on top before baking.
9. Spread the batter evenly into the prepared pan, using the spatula to smooth the surface.
10. Bake at 350°F for 25–30 minutes, until the edges are set and a toothpick inserted 1 inch from the edge comes out with moist crumbs (not wet batter).
11. Cool the brownies completely in the pan on a wire rack for at least 1 hour before slicing.
Best enjoyed slightly warm, these brownies boast a crackly top and fudgy center that melts with each bite. For a decadent twist, serve them à la mode with vanilla ice cream or crumble over yogurt for a breakfast treat.
Moist Carrot Cake
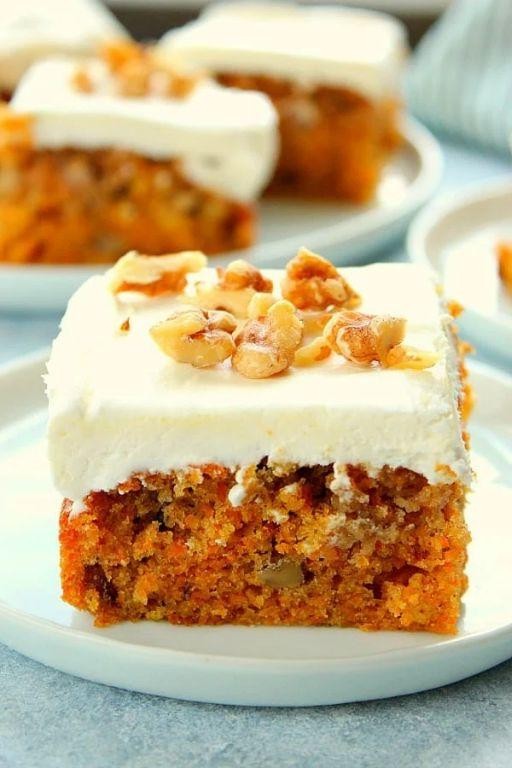
Diving into the world of baking, this moist carrot cake recipe breaks down each step methodically so even first-time bakers can achieve perfect results. We’ll walk through measuring, mixing, and baking techniques that ensure a tender, flavorful cake every single time. Follow these instructions precisely for a dessert that will become your new favorite.
2
layers30
minutes35
minutesIngredients
– 2 cups all-purpose flour
– 2 teaspoons baking soda
– 1 teaspoon salt
– 2 teaspoons ground cinnamon
– 4 large eggs
– 1 1/4 cups vegetable oil
– 2 cups granulated sugar
– 2 teaspoons vanilla extract
– 3 cups grated carrots
– 1 cup chopped walnuts
– 8 ounces cream cheese
– 1/2 cup unsalted butter
– 4 cups powdered sugar
Instructions
1. Preheat your oven to 350°F and grease two 9-inch round cake pans.
2. Whisk together 2 cups all-purpose flour, 2 teaspoons baking soda, 1 teaspoon salt, and 2 teaspoons ground cinnamon in a medium bowl.
3. In a separate large bowl, beat 4 large eggs with an electric mixer on medium speed for 1 minute until frothy.
4. Gradually add 1 1/4 cups vegetable oil to the eggs while continuing to mix.
5. Incorporate 2 cups granulated sugar into the wet ingredients, mixing for 2 minutes until fully combined.
6. Stir in 2 teaspoons vanilla extract until evenly distributed.
7. Gradually add the dry flour mixture to the wet ingredients, mixing on low speed just until no white streaks remain.
8. Fold in 3 cups grated carrots and 1 cup chopped walnuts using a spatula.
9. Divide the batter evenly between the prepared pans and smooth the tops with your spatula.
10. Bake at 350°F for 30-35 minutes until a toothpick inserted in the center comes out clean.
11. Cool the cakes in their pans on a wire rack for 15 minutes before removing.
12. Beat 8 ounces cream cheese and 1/2 cup unsalted butter together with an electric mixer until smooth.
13. Gradually add 4 cups powdered sugar to the cream cheese mixture, beating until fluffy.
14. Spread the frosting between the cooled cake layers and over the top and sides.
Nothing beats the contrast between the cake’s moist, spice-infused crumb and the tangy cream cheese frosting. The walnuts provide satisfying crunch in every bite, while the carrots keep the texture incredibly tender. For a creative twist, try serving individual slices with a drizzle of caramel sauce and toasted coconut flakes for extra texture and flavor.
Basic White Bread Loaf
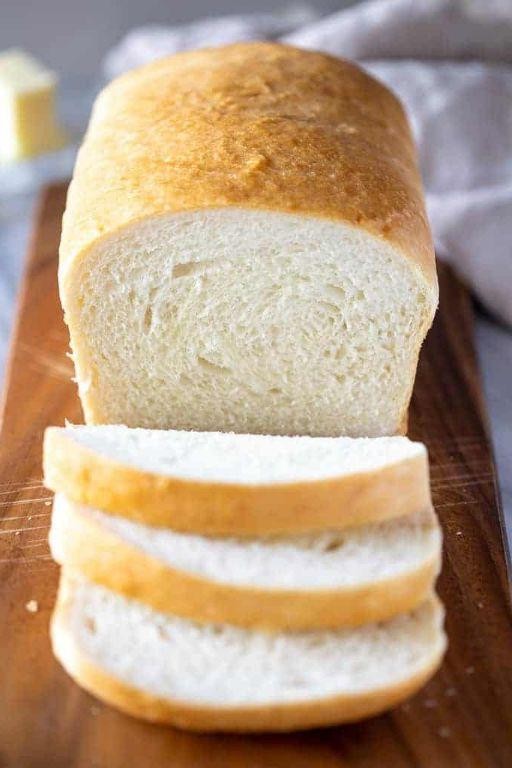
Very few things compare to the satisfaction of pulling a freshly baked loaf of bread from your own oven. This basic white bread recipe provides a straightforward method for beginners to achieve bakery-quality results at home. Let’s walk through each step carefully to ensure your first loaf turns out perfectly.
1
loaf45
minutes35
minutesIngredients
– 3 ½ cups all-purpose flour
– 1 ¼ cups warm water (110°F)
– 2 ¼ tsp active dry yeast
– 2 tbsp granulated sugar
– 1 ½ tsp salt
– 2 tbsp unsalted butter
Instructions
1. Combine 1 ¼ cups warm water (110°F), 2 ¼ tsp active dry yeast, and 2 tbsp granulated sugar in a large mixing bowl.
2. Let the mixture stand for 5-7 minutes until it becomes foamy, indicating the yeast is active.
3. Add 1 ½ tsp salt and 2 tbsp melted unsalted butter to the yeast mixture.
4. Gradually incorporate 3 ½ cups all-purpose flour, mixing with a wooden spoon until a shaggy dough forms.
5. Turn the dough onto a lightly floured surface and knead for 8-10 minutes until smooth and elastic.
6. Place the kneaded dough in a lightly oiled bowl, turning to coat all surfaces.
7. Cover the bowl with a damp kitchen towel and let rise in a warm place for 1-1.5 hours until doubled in size.
8. Punch down the risen dough to release air bubbles.
9. Shape the dough into a loaf and place in a greased 9×5-inch loaf pan.
10. Cover the pan and let the dough rise for 45-60 minutes until it crowns about 1 inch above the pan rim.
11. Preheat your oven to 375°F during the final 15 minutes of the second rise.
12. Bake the loaf for 30-35 minutes until the crust is deep golden brown and sounds hollow when tapped.
13. Immediately remove the bread from the pan and transfer to a wire rack.
14. Let the bread cool completely for 2-3 hours before slicing.
Nothing beats the tender crumb and crisp crust of homemade bread straight from your kitchen. The subtle sweetness from the sugar balances beautifully with the buttery notes, making this loaf perfect for sandwiches or simply toasted with jam. Consider slicing thick pieces for French toast or using day-old bread for exceptional bread pudding.
Rich Red Velvet Cupcakes

Baking perfect red velvet cupcakes requires precision and patience, but the stunning crimson results with their signature tangy flavor are absolutely worth the effort. This classic American treat combines subtle cocoa notes with buttermilk’s acidity for a uniquely tender crumb that pairs beautifully with cream cheese frosting. Follow these methodical steps to create bakery-worthy cupcakes that will impress at any gathering.
12
cupcakes20
minutes22
minutesIngredients
– 1 1/4 cups all-purpose flour
– 1/4 cup unsweetened cocoa powder
– 1/2 teaspoon baking soda
– 1/4 teaspoon salt
– 1/2 cup unsalted butter
– 3/4 cup granulated sugar
– 2 large eggs
– 1 teaspoon vanilla extract
– 1/2 cup buttermilk
– 1 tablespoon red food coloring
– 1 teaspoon white vinegar
– 8 ounces cream cheese
– 1/4 cup unsalted butter
– 2 cups powdered sugar
– 1 teaspoon vanilla extract
Instructions
1. Preheat your oven to 350°F and line a 12-cup muffin tin with paper liners.
2. Whisk together 1 1/4 cups all-purpose flour, 1/4 cup cocoa powder, 1/2 teaspoon baking soda, and 1/4 teaspoon salt in a medium bowl.
3. Cream 1/2 cup unsalted butter and 3/4 cup granulated sugar in a large bowl using an electric mixer on medium speed for 3 minutes until light and fluffy.
4. Beat in 2 large eggs one at a time, scraping the bowl between additions to ensure thorough incorporation.
5. Mix in 1 teaspoon vanilla extract until just combined.
6. Combine 1/2 cup buttermilk with 1 tablespoon red food coloring in a small measuring cup.
7. Alternate adding the flour mixture and buttermilk mixture to the butter mixture, beginning and ending with flour, mixing on low speed after each addition.
8. Stir in 1 teaspoon white vinegar until the batter shows no streaks.
9. Divide the batter evenly among the 12 prepared muffin cups, filling each about two-thirds full.
10. Bake at 350°F for 18-22 minutes until a toothpick inserted in the center comes out clean.
11. Cool the cupcakes in the pan for 5 minutes before transferring to a wire rack to cool completely.
12. Beat 8 ounces cream cheese and 1/4 cup unsalted butter together in a clean bowl until smooth and creamy.
13. Gradually add 2 cups powdered sugar while mixing on low speed to prevent a sugar cloud.
14. Mix in 1 teaspoon vanilla extract until the frosting is uniformly smooth.
15. Frost the completely cooled cupcakes using a piping bag or offset spatula.
Here’s why these cupcakes stand out: the vinegar reacts with the baking soda to create an exceptionally light texture, while the buttermilk provides the characteristic tang that balances the sweetness. For an elegant presentation, garnish with red velvet crumbs or white chocolate shavings before serving.
Wholesome Oatmeal Cookies
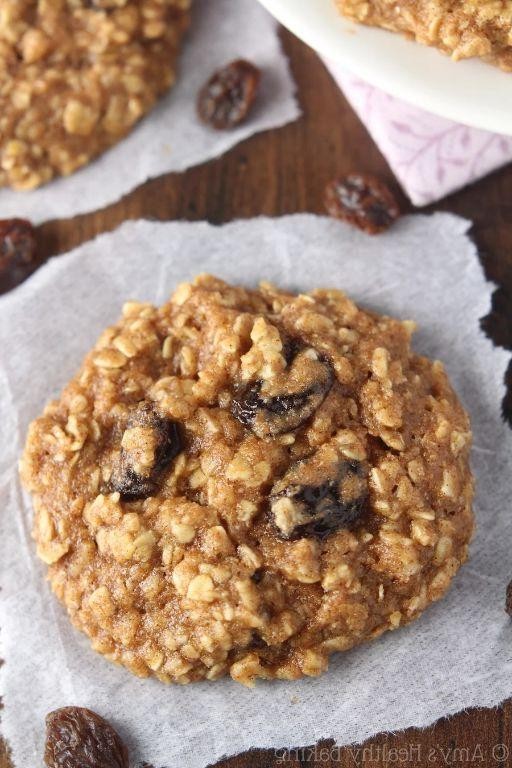
Every baker needs a reliable oatmeal cookie recipe in their arsenal—one that yields perfectly chewy centers with crisp edges. Especially during these cooler months, nothing beats the comforting aroma of warm oats and cinnamon filling your kitchen. Let’s walk through this simple, wholesome version step by step, so you can enjoy homemade cookies with confidence.
24
cookies15
minutes12
minutesIngredients
– 1 cup unsalted butter
– 1 cup brown sugar
– 1/2 cup granulated sugar
– 2 large eggs
– 1 tsp vanilla extract
– 1 1/2 cups all-purpose flour
– 1 tsp baking soda
– 1/2 tsp salt
– 1 tsp ground cinnamon
– 3 cups old-fashioned rolled oats
Instructions
1. Preheat your oven to 350°F and line two baking sheets with parchment paper.
2. In a large bowl, cream together 1 cup unsalted butter, 1 cup brown sugar, and 1/2 cup granulated sugar using an electric mixer on medium speed for 2 minutes, until light and fluffy.
3. Add 2 large eggs one at a time, mixing thoroughly after each addition to fully incorporate.
4. Stir in 1 tsp vanilla extract until just combined.
5. In a separate bowl, whisk together 1 1/2 cups all-purpose flour, 1 tsp baking soda, 1/2 tsp salt, and 1 tsp ground cinnamon to ensure even distribution.
6. Gradually add the dry ingredients to the wet mixture, mixing on low speed until no flour streaks remain.
7. Fold in 3 cups old-fashioned rolled oats with a spatula until evenly distributed throughout the dough.
8. Scoop 2-tablespoon portions of dough and roll into balls, placing them 2 inches apart on the prepared baking sheets.
9. Flatten each ball slightly with your palm to about 1/2-inch thickness for even baking.
10. Bake for 10–12 minutes, until the edges are golden brown but the centers still appear slightly soft.
11. Let the cookies cool on the baking sheet for 5 minutes before transferring to a wire rack to cool completely. Keep these cookies chewy by not overbaking them—they’ll firm up as they cool. Knead any add-ins like raisins or chocolate chips gently into the dough if desired, and always use room-temperature butter for optimal creaming. Knowing you’ve created these wholesome oatmeal cookies from scratch is rewarding, especially when you bite into their soft, chewy texture with hints of warm cinnamon. They’re perfect with a glass of cold milk or crumbled over vanilla ice cream for a simple dessert upgrade.
Fresh Apple Crumble

Baking a perfect apple crumble requires just the right balance of sweet, tart fruit and buttery topping. By following these methodical steps, you’ll create a dessert that fills your kitchen with the comforting aroma of cinnamon and baked apples. Let’s begin with preparing our ingredients and equipment.
6
servings20
minutes40
minutesIngredients
– 6 cups peeled and sliced Granny Smith apples
– 1/2 cup granulated sugar
– 1 tablespoon lemon juice
– 1 teaspoon ground cinnamon
– 1 cup all-purpose flour
– 1/2 cup packed brown sugar
– 1/2 cup cold unsalted butter, cubed
– 1/2 teaspoon salt
Instructions
1. Preheat your oven to 375°F and grease an 8×8 inch baking dish.
2. Peel 6 medium Granny Smith apples, then slice them into 1/4-inch thick pieces.
3. In a large bowl, combine the sliced apples with 1/2 cup granulated sugar, 1 tablespoon lemon juice, and 1 teaspoon ground cinnamon.
4. Toss the apple mixture until every slice is evenly coated with the sugar and cinnamon.
5. Transfer the coated apples to the prepared baking dish, spreading them in an even layer.
6. In a separate medium bowl, combine 1 cup all-purpose flour, 1/2 cup packed brown sugar, and 1/2 teaspoon salt.
7. Add 1/2 cup cold cubed butter to the flour mixture.
8. Use your fingertips to work the butter into the dry ingredients until the mixture resembles coarse crumbs with some pea-sized butter pieces remaining.
9. Sprinkle the crumble topping evenly over the apples in the baking dish.
10. Place the baking dish in the preheated oven and bake for 35-40 minutes.
11. Check for doneness by looking for golden brown topping and bubbling apple juices around the edges.
12. Remove from oven and let rest for 15 minutes before serving.
Keeping the butter cold ensures your topping stays crisp rather than becoming greasy. The contrast between the soft, cinnamon-spiced apples and the crunchy, buttery topping makes this dessert truly special. Try serving it warm with a scoop of vanilla ice cream for the perfect temperature and texture combination.
Conclusion
Overall, these 21 beginner-friendly baked goods prove that delicious treats are within everyone’s reach! We hope you’ll try a few recipes, leave a comment sharing your favorites, and pin this article on Pinterest to inspire fellow home bakers. Happy baking!


