Got a packed schedule but still want a satisfying midday meal? You’re in the right spot! We’ve gathered 31 simple, easy, and fast lunch recipes perfect for those busy days when time is tight but hunger is real. From quick wraps to speedy salads, these ideas will keep you fueled without the fuss. Dive in and discover your new go-to lunches!
Quick Chicken Caesar Wraps

Finally, after a long day of chasing deadlines and running errands, I found myself craving something satisfying yet simple—enter these Quick Chicken Caesar Wraps, my go-to solution for busy weeknights when takeout feels tempting but homemade wins. I love how they come together with minimal fuss, using pantry staples I always have on hand, and they’re perfect for customizing with whatever veggies are lurking in the fridge. Honestly, these wraps have saved me more times than I can count, especially when my family’s hunger strikes unexpectedly!
Serving: 4 | Pre Time: 15 minutes | Cooking Time: 10 minutes
Ingredients
– 1 lb boneless, skinless chicken breasts, sliced into thin strips—I find this helps them cook evenly and quickly, a trick I picked up from my mom.
– 2 tbsp extra virgin olive oil, my go-to for its mild flavor that doesn’t overpower the dish.
– 1 tsp garlic powder, because I always keep it handy for an instant flavor boost without mincing fresh garlic.
– 1/2 tsp black pepper, freshly ground if possible for that extra zing.
– 1/2 cup Caesar dressing, store-bought or homemade; I often use a creamy version for richness.
– 4 large flour tortillas, warmed slightly to make them pliable and prevent tearing.
– 2 cups romaine lettuce, chopped into bite-sized pieces—crisp and fresh is key here.
– 1/2 cup grated Parmesan cheese, and I’ll admit I sometimes sprinkle a little extra because who doesn’t love cheese?
– 1/4 cup croutons, lightly crushed for a satisfying crunch that mimics the classic salad.
Instructions
1. Heat the extra virgin olive oil in a large skillet over medium-high heat until it shimmers, about 2 minutes—this ensures the chicken sears nicely without sticking.
2. Add the chicken strips to the skillet in a single layer, sprinkling evenly with garlic powder and black pepper as they cook.
3. Cook the chicken for 5–7 minutes, flipping halfway through, until it reaches an internal temperature of 165°F and turns golden brown with no pink spots; I use a meat thermometer to avoid overcooking, which keeps it juicy.
4. Remove the skillet from heat and let the chicken rest for 2 minutes to allow the juices to redistribute, then transfer it to a bowl.
5. Toss the cooked chicken with Caesar dressing until well-coated, using just enough to coat without making it soggy—this tip helps balance flavors without overwhelming the wrap.
6. Warm the flour tortillas in a dry skillet over low heat for 20–30 seconds per side until soft and flexible, or microwave them wrapped in a damp paper towel for 15 seconds to prevent drying out.
7. Lay each tortilla flat and layer evenly with romaine lettuce, starting from the center and leaving a border for folding.
8. Top the lettuce with the dressed chicken, spreading it out to cover the lettuce base evenly.
9. Sprinkle grated Parmesan cheese and crushed croutons over the chicken, distributing them for consistent texture in every bite.
10. Fold the sides of each tortilla inward, then roll tightly from the bottom to enclose the filling, pressing gently to secure—rolling while warm makes this easier and prevents cracks.
11. Serve immediately or wrap in parchment paper for on-the-go meals. Sometimes, I slice them in half diagonally for a prettier presentation that shows off the layers.
So, these wraps deliver a delightful mix of tender chicken, creamy dressing, and crisp lettuce, with the croutons adding a fun crunch that reminds me of a deconstructed Caesar salad. They’re versatile enough to pack for lunches or serve with a side of sweet potato fries for a cozy dinner, and I’ve even swapped in grilled shrimp for a seafood twist that my friends rave about!
15-Minute Veggie Stir Fry

Sometimes after a long day, I crave something vibrant, healthy, and lightning-fast—this 15-minute veggie stir fry is my ultimate weeknight hero. It’s the perfect way to use up whatever’s in the crisper drawer, and I love how the colors just pop in the pan, making dinner feel special even when time is tight.
Serving: 4 | Pre Time: 8 minutes | Cooking Time: 7 minutes
Ingredients
– 2 tbsp toasted sesame oil (my go-to for its rich, nutty flavor)
– 1 tbsp avocado oil (it has a high smoke point, perfect for stir-frying)
– 3 cloves garlic, minced (I always keep a jar of pre-minced in the fridge for speed)
– 1 tbsp fresh ginger, grated (a microplane makes this so easy—no peeling needed!)
– 1 red bell pepper, thinly sliced (I love the sweet crunch)
– 1 medium zucchini, halved and sliced into half-moons
– 1 cup broccoli florets (fresh from the farmer’s market when I can)
– 1 cup snap peas, ends trimmed
– 3 tbsp low-sodium soy sauce
– 1 tbsp rice vinegar
– 1 tsp honey (a local wildflower honey adds a lovely floral note)
– 1 tsp cornstarch
– ¼ cup water
– 2 green onions, thinly sliced (for a fresh finish)
– 1 tbsp sesame seeds (toasted if you have an extra minute)
Instructions
1. In a small bowl, whisk together 3 tbsp low-sodium soy sauce, 1 tbsp rice vinegar, 1 tsp honey, 1 tsp cornstarch, and ¼ cup water until smooth to create your sauce—this prevents clumping later.
2. Heat a large wok or skillet over medium-high heat for 1 full minute until very hot; add 1 tbsp avocado oil and swirl to coat.
3. Add 3 cloves minced garlic and 1 tbsp grated ginger; stir-fry for 30 seconds until fragrant but not browned.
4. Add 1 sliced red bell pepper, 1 sliced zucchini, 1 cup broccoli florets, and 1 cup snap peas; stir-fry for 4-5 minutes, tossing constantly, until veggies are crisp-tender and bright in color.
5. Push the veggies to the sides of the pan, creating a well in the center.
6. Pour the prepared sauce into the center well; let it bubble and thicken for 30-45 seconds, stirring gently.
7. Toss the veggies with the thickened sauce until everything is evenly coated and glossy.
8. Remove from heat; drizzle with 2 tbsp toasted sesame oil and sprinkle with 2 sliced green onions and 1 tbsp sesame seeds.
9. Serve immediately while hot.
Kick back and enjoy that perfect balance of crisp-tender veggies coated in a savory-sweet glaze. The sesame oil adds a deep, toasty aroma that makes this dish feel restaurant-worthy. For a fun twist, I love serving it over cauliflower rice or stuffing it into warm tortillas for quick veggie wraps.
Speedy Black Bean Tacos

Kicking off a busy weeknight, I’m always on the hunt for a dinner that’s both lightning-fast and satisfying—these Speedy Black Bean Tacos are my go-to lifesaver. I first threw them together during a frantic evening when my kids were clamoring for food, and now they’re a staple that even my pickiest eater devours. Let’s dive into this no-fuss recipe that’s perfect for when time is tight but flavor can’t be compromised.
Serving: 4 | Pre Time: 10 minutes | Cooking Time: 15 minutes
Ingredients
– 1 tablespoon extra virgin olive oil (my go-to for a light, fruity base)
– 1 small yellow onion, diced (I like it finely chopped so it melts into the beans)
– 2 cloves garlic, minced (fresh is best here for that punchy aroma)
– 1 (15-ounce) can black beans, drained and rinsed (I always give them a good rinse to reduce sodium)
– 1 teaspoon ground cumin (toasted cumin seeds ground at home add an extra depth, but store-bought works great too)
– 1/2 teaspoon chili powder (adjust based on your heat preference—I use a mild one for the family)
– 1/4 teaspoon salt (I start with this and adjust later to avoid over-salting)
– 8 small corn tortillas (warmed tortillas are key—they don’t crack when folded)
– 1/2 cup shredded Monterey Jack cheese (melty and mild, it’s my favorite for tacos)
– 1/4 cup fresh cilantro, chopped (I add it at the end for a bright, herby kick)
– 1 lime, cut into wedges (a squeeze of lime juice right before serving elevates everything)
Instructions
1. Heat 1 tablespoon extra virgin olive oil in a large skillet over medium heat until it shimmers, about 1 minute.
2. Add 1 small diced yellow onion and cook, stirring occasionally, until softened and translucent, about 5 minutes.
3. Stir in 2 cloves minced garlic and cook for 30 seconds until fragrant, being careful not to let it burn.
4. Tip in 1 can drained and rinsed black beans, 1 teaspoon ground cumin, 1/2 teaspoon chili powder, and 1/4 teaspoon salt, mixing well to coat the beans.
5. Cook the bean mixture for 5 minutes, mashing about half the beans with the back of a spoon to create a creamy texture—this helps them hold together in the tacos.
6. While the beans cook, warm 8 small corn tortillas in a dry skillet over medium heat for 30 seconds per side until pliable, or wrap them in a damp paper towel and microwave for 20 seconds.
7. Spoon the black bean mixture evenly onto the warmed tortillas, then top each with 1 tablespoon shredded Monterey Jack cheese.
8. Fold the tacos and return them to the skillet over medium-low heat, cooking for 2 minutes per side until the cheese melts and the tortillas are lightly crisped.
9. Remove the tacos from the skillet and garnish with 1/4 cup chopped fresh cilantro and lime wedges for squeezing.
Yielding a delightful crunch from the tortillas against the creamy, spiced beans, these tacos burst with savory warmth and a zesty lime finish. I love serving them with a side of quick-pickled onions or avocado slices for extra freshness—they’re so versatile, you can customize them to your heart’s content on even the busiest evenings.
Easy Tuna Salad Sandwiches
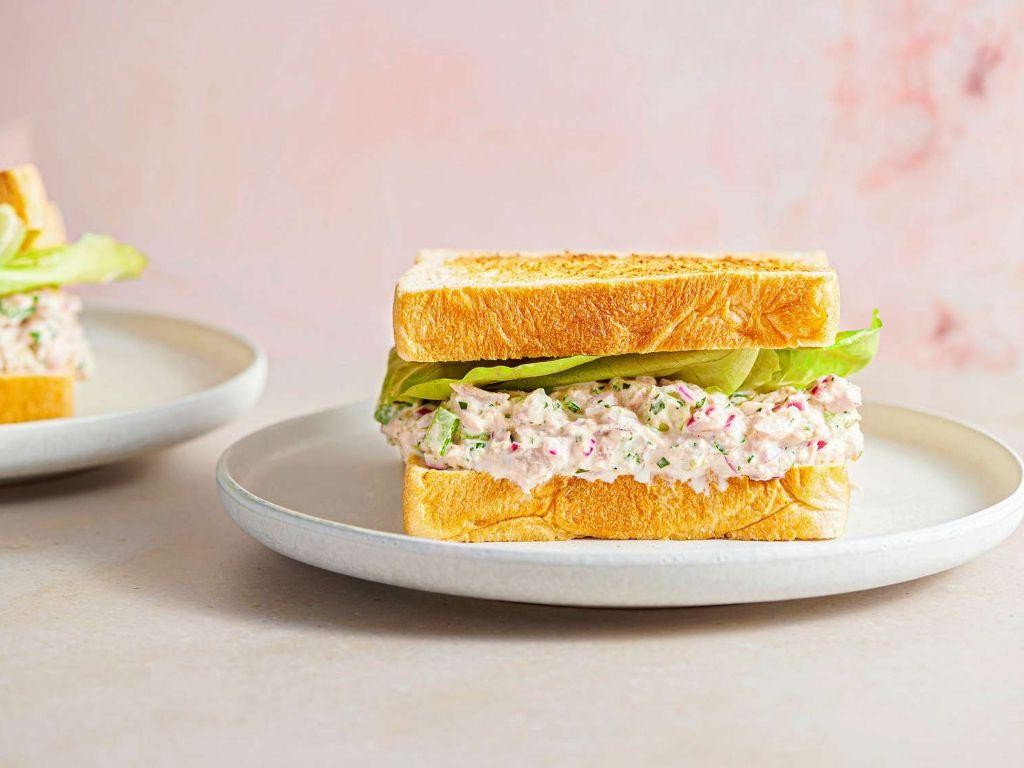
Back when I was a broke college student, tuna salad sandwiches were my go-to lunch—cheap, filling, and surprisingly satisfying. These days, I still whip up this easy version when I need a quick meal that doesn’t skimp on flavor, and it always brings back those cozy dorm-room memories. It’s the perfect blend of creamy, crunchy, and savory, ready in just minutes.
Serving: 4 | Pre Time: 10 minutes | Cooking Time: 0 minutes
Ingredients
– 2 (5-ounce) cans of solid white tuna in water, drained well (I squeeze out excess liquid with a fork for a less soggy salad)
– 1/2 cup mayonnaise (I use full-fat for creaminess, but light works too)
– 1/4 cup finely diced red onion (soak in cold water for 5 minutes first to mellow the sharpness—a game-changer!)
– 1/4 cup finely chopped celery (for that essential crunch)
– 1 tablespoon fresh lemon juice (bottled is fine in a pinch, but fresh brightens it up)
– 1/2 teaspoon Dijon mustard (my secret for a tangy kick)
– 1/4 teaspoon garlic powder (skip if you’re not a garlic fan, but I love the depth)
– 1/4 teaspoon black pepper (freshly ground if you have it)
– 8 slices of whole wheat bread (or your favorite—sourdough is delicious here)
– 4 large lettuce leaves (I like crisp romaine for texture)
Instructions
1. Drain the 2 cans of tuna thoroughly in a colander, then transfer the tuna to a medium mixing bowl.
2. Use a fork to flake the tuna into small, even pieces, breaking up any large chunks.
3. Add the 1/2 cup mayonnaise, 1/4 cup diced red onion, 1/4 cup chopped celery, 1 tablespoon lemon juice, 1/2 teaspoon Dijon mustard, 1/4 teaspoon garlic powder, and 1/4 teaspoon black pepper to the bowl with the tuna.
4. Gently fold all ingredients together with a spatula until fully combined and creamy, being careful not to overmix—this keeps the texture light. Tip: If the salad seems dry, add more mayonnaise 1 tablespoon at a time until it reaches your desired consistency.
5. Toast the 8 slices of whole wheat bread in a toaster or toaster oven until golden brown and crisp, about 2-3 minutes depending on your appliance. Tip: Lightly toasting the bread prevents it from getting soggy when you assemble the sandwiches.
6. Lay out the toasted bread slices on a clean surface and place 1 lettuce leaf on each of 4 slices.
7. Divide the tuna salad evenly among the 4 lettuce-topped bread slices, spreading it out with a spoon or knife. Tip: For neat sandwiches, spread the tuna salad evenly to the edges to avoid messy spills.
8. Top each with the remaining 4 bread slices to form sandwiches, pressing down gently.
9. Cut each sandwich in half diagonally with a sharp knife for easier serving.
Enjoy these sandwiches immediately for the best texture—the creamy tuna pairs perfectly with the crisp lettuce and toasted bread. Every bite delivers a satisfying mix of savory tuna, tangy mayo, and fresh crunch. For a fun twist, try serving them open-faced on toasted bagels or with a side of pickles for extra zing.
5-Minute Caprese Salad
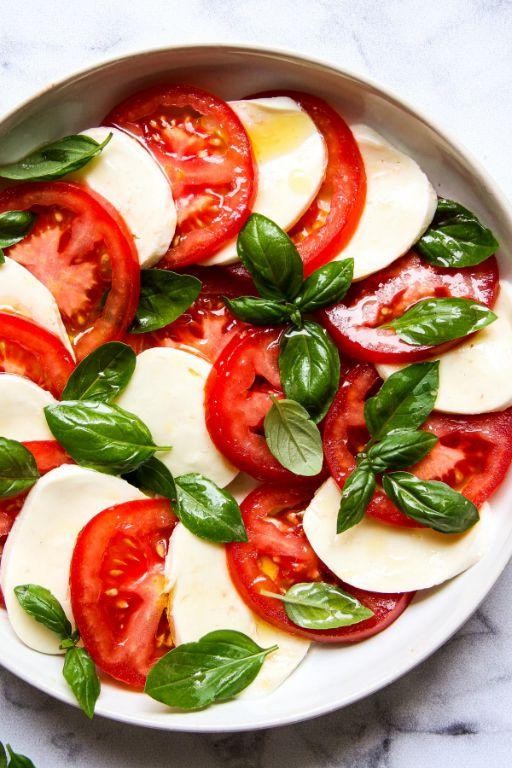
Now, I’m all about quick, fresh meals that feel special without the fuss—especially during busy weeknights. This 5-Minute Caprese Salad is my go-to when I want something vibrant and satisfying in a flash, and it always reminds me of summer lunches on my tiny apartment balcony.
Serving: 2 | Pre Time: 5 minutes | Cooking Time: 0 minutes
Ingredients
– 2 large ripe tomatoes, sliced ¼-inch thick (I look for ones that feel heavy for their size—they’re juicier!)
– 8 ounces fresh mozzarella cheese, sliced ¼-inch thick (the soft, creamy kind from the deli section is my favorite)
– ¼ cup fresh basil leaves, roughly torn (I grow a small pot on my windowsill for this exact purpose)
– 2 tablespoons extra virgin olive oil (my go-to for its fruity flavor)
– 1 tablespoon balsamic glaze (I keep a bottle in the fridge—it’s thicker and sweeter than vinegar)
– ½ teaspoon flaky sea salt (like Maldon—it adds a nice crunch)
– ¼ teaspoon freshly ground black pepper (I grind it right over the salad for maximum aroma)
Instructions
1. Arrange the tomato slices and mozzarella slices alternately on a serving platter in a single layer, overlapping them slightly for a pretty presentation.
2. Scatter the torn basil leaves evenly over the tomatoes and mozzarella.
3. Drizzle the extra virgin olive oil over the entire salad in a slow, steady stream to coat the ingredients lightly.
4. Drizzle the balsamic glaze in a zigzag pattern across the salad for a decorative touch and balanced sweetness.
5. Sprinkle the flaky sea salt and freshly ground black pepper evenly over the top just before serving to keep the textures crisp.
You’ll love the creamy mozzarella against the juicy tomatoes, with the basil adding a fresh, herbal pop. Try serving it on toasted baguette slices for an easy appetizer, or toss it with a handful of arugula to make it a heartier side—it’s endlessly adaptable!
Rapid Avocado Toast with Egg

Kicking off a busy morning doesn’t have to mean skipping a satisfying breakfast. I’ve perfected this Rapid Avocado Toast with Egg for those days when time is tight but a good meal is non-negotiable. It’s my go-to when I’m rushing out the door but still want something that feels a bit special.
Serving: 1 | Pre Time: 5 minutes | Cooking Time: 5 minutes
Ingredients
– 1 slice of hearty sourdough bread (I find it holds up best to the toppings without getting soggy)
– 1/2 ripe avocado (look for one that yields slightly to gentle pressure)
– 1 large egg (I prefer room temperature eggs here—they cook more evenly)
– 1 tbsp extra virgin olive oil (it’s my go-to for its fruity flavor)
– 1/4 tsp flaky sea salt (Maldon is my favorite for that perfect crunch)
– 1/4 tsp freshly cracked black pepper
– 1 tsp fresh lemon juice (a squeeze brightens everything up)
– 1 tbsp crumbled feta cheese (optional, but I love the salty tang)
Instructions
1. Place a small non-stick skillet over medium heat and add 1 tbsp of extra virgin olive oil.
2. While the oil heats for about 1 minute, toast 1 slice of hearty sourdough bread in a toaster until golden and crisp.
3. Crack 1 large room-temperature egg directly into the skillet with the heated oil.
4. Cook the egg for 2-3 minutes until the white is fully set and the edges are lightly browned, but the yolk remains runny—this is my tip for the perfect sunny-side-up.
5. While the egg cooks, slice 1/2 ripe avocado in half, remove the pit, and scoop the flesh into a small bowl.
6. Mash the avocado with a fork until mostly smooth but with some small chunks for texture.
7. Stir 1 tsp of fresh lemon juice, 1/4 tsp of flaky sea salt, and 1/4 tsp of freshly cracked black pepper into the mashed avocado.
8. Spread the seasoned avocado mixture evenly onto the toasted sourdough bread.
9. Once the egg is cooked, use a spatula to carefully transfer it from the skillet onto the avocado toast.
10. If using, sprinkle 1 tbsp of crumbled feta cheese over the top of the egg for an extra layer of flavor—another tip: the warmth slightly melts the feta, which is delightful.
11. Serve immediately. My final tip: eat this right away while the toast is crisp and the egg yolk is warm and runny.
Unbelievably creamy avocado meets the rich, oozing yolk in every bite, with the sourdough providing a sturdy, tangy base. The lemon juice cuts through the richness perfectly, and if you added the feta, it offers little salty bursts. For a creative twist, I sometimes top it with a sprinkle of red pepper flakes or a drizzle of hot honey for a sweet heat.
No-Cook Mediterranean Quinoa Bowl

Let’s be real—some days, you just don’t want to turn on the stove. That’s exactly why I’m obsessed with this No-Cook Mediterranean Quinoa Bowl. It’s my go-to when I need something fresh, filling, and fuss-free in under 20 minutes.
Serving: 2 | Pre Time: 15 minutes | Cooking Time: 0 minutes
Ingredients
- 2 cups cooked quinoa (I always keep a batch in the fridge—it’s a lifesaver!)
- 1 cup cherry tomatoes, halved (the sweeter, the better)
- 1 medium cucumber, diced (I leave the skin on for extra crunch)
- 1/2 cup Kalamata olives, pitted and sliced (they add that perfect salty bite)
- 1/4 cup red onion, finely chopped (soak in cold water for 5 minutes if you want to mellow the sharpness)
- 1/4 cup crumbled feta cheese (I use full-fat for creaminess)
- 2 tbsp extra virgin olive oil (my go-to for dressings)
- 1 tbsp fresh lemon juice (freshly squeezed makes all the difference)
- 1 tsp dried oregano
- 1/4 tsp salt
- 1/4 tsp black pepper
Instructions
- Place the 2 cups of cooked quinoa in a large mixing bowl.
- Add the 1 cup of halved cherry tomatoes, 1 diced cucumber, 1/2 cup of sliced Kalamata olives, and 1/4 cup of chopped red onion to the bowl. Tip: If you soaked the red onion, drain it thoroughly before adding to avoid extra moisture.
- In a small bowl, whisk together the 2 tbsp of extra virgin olive oil, 1 tbsp of fresh lemon juice, 1 tsp of dried oregano, 1/4 tsp of salt, and 1/4 tsp of black pepper until well combined. Tip: Whisk for about 30 seconds to emulsify the dressing slightly for better coating.
- Pour the dressing over the quinoa and vegetable mixture in the large bowl.
- Gently toss everything together until evenly coated, using a large spoon or spatula. Tip: Fold gently to keep the ingredients intact and avoid mashing the quinoa.
- Sprinkle the 1/4 cup of crumbled feta cheese over the top of the bowl.
Refreshingly light yet satisfying, this bowl bursts with tangy lemon and briny olives against the fluffy quinoa. I love scooping it into lettuce cups for a handheld meal or topping it with grilled chicken for extra protein on busier days.
Instant Pita Bread Pizzas

Busy weeknights call for clever shortcuts, and my Instant Pita Bread Pizzas are the ultimate lifesaver. I started making these years ago when my kids demanded pizza but I had zero time for dough, and now they’re a family favorite that comes together in a flash. Honestly, it’s the easiest way to get a crispy, customizable pizza on the table without any fuss.
Serving: 4 | Pre Time: 10 minutes | Cooking Time: 12 minutes
Ingredients
– 4 whole wheat pita bread rounds (I love the slight nuttiness they add, but plain white pita works great too)
– 1 cup of your favorite pizza sauce (I always have a jar of Rao’s Homemade in the pantry for its rich flavor)
– 2 cups shredded low-moisture part-skim mozzarella cheese (this melts beautifully without getting greasy)
– 1/2 cup sliced pepperoni (the classic choice in my house, but feel free to swap it out)
– 2 tbsp extra virgin olive oil (my go-to for a light, fruity finish)
– 1 tsp dried oregano (a pinch really wakes up the sauce)
– 1/4 tsp red pepper flakes (optional, but I add them for a subtle kick)
Instructions
1. Preheat your oven to 425°F and line a large baking sheet with parchment paper.
2. Place the 4 pita bread rounds on the prepared baking sheet in a single layer.
3. Brush the top of each pita round lightly with the 2 tbsp of extra virgin olive oil using a pastry brush—this helps them crisp up in the oven.
4. Spoon 1/4 cup of the 1 cup of pizza sauce evenly onto the center of each pita round, spreading it out gently with the back of the spoon, leaving a small border around the edges to prevent overflow.
5. Sprinkle 1/2 cup of the 2 cups of shredded mozzarella cheese over the sauce on each pita round, covering it completely.
6. Arrange the 1/2 cup of sliced pepperoni evenly on top of the cheese on each pita round.
7. Sprinkle 1/4 tsp of the 1 tsp of dried oregano and a pinch of the 1/4 tsp of red pepper flakes (if using) over each pizza for added flavor.
8. Bake in the preheated oven at 425°F for 10–12 minutes, or until the cheese is fully melted and bubbly and the pita edges are golden brown and crisp.
9. Remove the baking sheet from the oven using oven mitts and let the pizzas cool on the sheet for 2–3 minutes before slicing—this allows the cheese to set slightly for easier handling.
10. Slice each pita pizza into quarters with a sharp knife or pizza cutter and serve immediately.
Gorgeously crisp with a chewy center, these pizzas deliver that satisfying crunch we all crave. The melty mozzarella and zesty sauce pair perfectly with the hearty pita base, making them ideal for a quick dinner or fun appetizer. Try drizzling them with a bit of hot honey or serving alongside a simple green salad for a complete meal that everyone will devour.
Effortless BLT Sandwich
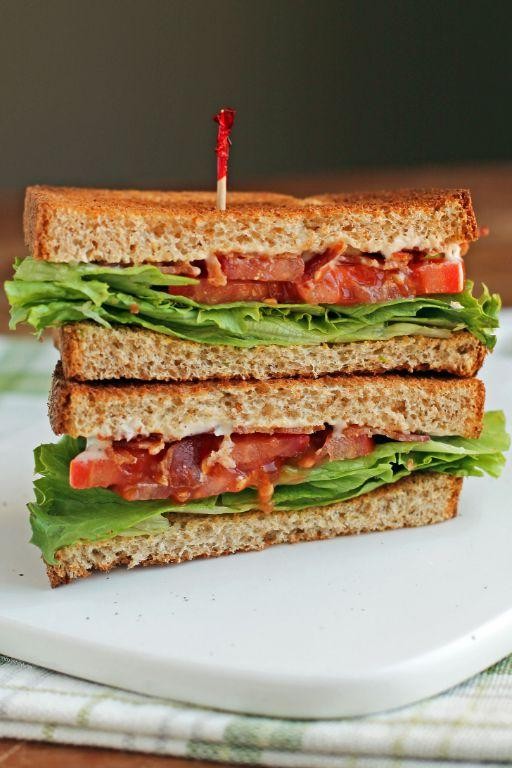
Every now and then, I crave a classic sandwich that’s both comforting and incredibly simple to throw together—like this Effortless BLT. It’s my go-to when I’m short on time but still want something satisfying, and I love how the crisp bacon plays against the juicy tomatoes and cool lettuce. Honestly, it’s the kind of meal that reminds me of lazy summer afternoons at my grandma’s house, where she’d always have the ingredients ready for a quick lunch.
Serving: 1 | Pre Time: 5 minutes | Cooking Time: 10 minutes
Ingredients
– 4 slices of thick-cut bacon (I always grab the applewood-smoked kind for a hint of sweetness)
– 2 slices of sourdough bread (toasted until golden—it holds up better than white bread)
– 2 tablespoons of mayonnaise (I’m a Duke’s mayo fan for its tangy kick)
– 2 large lettuce leaves, like romaine or iceberg (rinsed and patted dry to avoid soggy bread)
– 1 medium tomato, sliced about ¼-inch thick (I pick ripe heirlooms from my garden when in season)
– A pinch of salt and black pepper (freshly ground pepper makes all the difference)
Instructions
1. Preheat a large skillet over medium heat, around 350°F, to cook the bacon evenly without burning.
2. Place the 4 slices of thick-cut bacon in the skillet in a single layer, cooking for 4–5 minutes per side until crispy and browned.
3. Tip: Drain the cooked bacon on a paper towel-lined plate to remove excess grease, which keeps the sandwich from getting too oily.
4. While the bacon cooks, toast the 2 slices of sourdough bread in a toaster or oven until golden brown, about 2–3 minutes.
5. Spread 1 tablespoon of mayonnaise evenly on each slice of toasted sourdough bread.
6. Layer the 2 large lettuce leaves on one slice of bread, followed by the sliced tomato.
7. Sprinkle a pinch of salt and black pepper over the tomato slices to enhance their natural flavor.
8. Tip: Arrange the tomato slices in a single layer to prevent the sandwich from becoming messy when you bite into it.
9. Place the 4 slices of cooked bacon on top of the tomato in an even layer.
10. Top with the second slice of mayonnaise-coated bread, pressing down gently to secure the layers.
11. Tip: Use a sharp knife to cut the sandwich diagonally—it makes for easier handling and a prettier presentation.
12. Serve immediately while the bacon is still warm and the bread is crisp.
Just savor that first bite where the crunch of the bacon meets the juicy tomato and cool lettuce—it’s a textural dream! I sometimes add a drizzle of hot sauce for a spicy kick or serve it with a side of pickles for extra tang. This sandwich is perfect for a quick lunch or a casual picnic, and it always brings back those cozy memories.
Fast Greek Yogurt Parfait

Venturing into the kitchen doesn’t always require a grand plan—sometimes, the most satisfying treats are the ones you can whip up in a flash. That’s exactly what I love about this Fast Greek Yogurt Parfait; it’s my go-to when I need a quick, protein-packed snack or a light breakfast that feels indulgent without the fuss. I first started making these during busy work-from-home mornings, and now it’s a staple in my fridge for whenever a sweet craving hits.
Serving: 1 | Pre Time: 5 minutes | Cooking Time: 0 minutes
Ingredients
– 1 cup plain Greek yogurt (I always use full-fat for that extra creamy texture—it makes all the difference!)- 2 tbsp honey (local honey is my favorite for its subtle floral notes)- 1/2 cup mixed berries, fresh or frozen (I keep a bag of frozen mixed berries on hand for convenience)- 1/4 cup granola (I prefer a low-sugar, crunchy variety to add a nice contrast)
Instructions
1. Gather all your ingredients: the plain Greek yogurt, honey, mixed berries, and granola. Tip: Let the yogurt sit at room temperature for a few minutes if it’s straight from the fridge—it’ll blend more smoothly with the honey.2. In a small bowl, combine the 1 cup of plain Greek yogurt with the 2 tbsp of honey. Stir vigorously for about 30 seconds until the honey is fully incorporated and the mixture is smooth.3. Take a serving glass or jar and spoon half of the yogurt-honey mixture into the bottom, creating an even layer.4. Add a layer of 1/4 cup of the mixed berries on top of the yogurt. Tip: If using frozen berries, thaw them slightly first to prevent the parfait from getting too watery.5. Sprinkle 2 tbsp of the granola over the berry layer to add crunch.6. Repeat the layers by adding the remaining yogurt-honey mixture, followed by the other 1/4 cup of mixed berries.7. Top the parfait with the remaining 2 tbsp of granola. Tip: For extra freshness, add the granola just before serving to keep it crisp.8. Serve immediately or refrigerate for up to an hour if prepping ahead.
Nothing beats the creamy tang of the yogurt paired with the sweet burst of berries and the satisfying crunch of granola. I often enjoy this parfait as a quick breakfast or an afternoon pick-me-up, and for a fun twist, try layering it in a mason jar for a portable treat—it’s as delightful to look at as it is to eat!
Microwave Mug Omelet

Gosh, sometimes weekday mornings feel like a race against the clock, don’t they? I’ve been there, scrambling for a protein-packed breakfast that doesn’t require a full kitchen cleanup. That’s why this Microwave Mug Omelet has become my secret weapon—it’s my go-to when I need something satisfying in under five minutes, and it always reminds me of those lazy Sunday brunches, just much faster.
Serving: 1 | Pre Time: 2 minutes | Cooking Time: 1-2 minutes
Ingredients
– 2 large eggs (I prefer room temp eggs here—they mix more evenly and cook better, but straight from the fridge works in a pinch)
– 2 tablespoons whole milk (a splash of cream works too for extra richness, but milk keeps it light)
– 1 tablespoon shredded cheddar cheese (sharp cheddar is my favorite for that tangy kick)
– 1 tablespoon diced bell pepper (I often use red for a sweet crunch, but any color you have on hand is fine)
– 1 tablespoon diced onion (white or yellow, whatever’s in my pantry)
– 1 teaspoon extra virgin olive oil (my go-to for a hint of fruitiness)
– Pinch of salt and black pepper (I’m generous with the pepper for a little spice)
Instructions
1. Crack 2 large eggs into a microwave-safe mug that holds at least 12 ounces.
2. Add 2 tablespoons of whole milk to the mug with the eggs.
3. Use a fork to vigorously whisk the eggs and milk together for about 30 seconds until fully combined and slightly frothy—this incorporates air for a fluffier texture (tip: whisking well prevents rubberiness).
4. Stir in 1 tablespoon of shredded cheddar cheese, 1 tablespoon of diced bell pepper, and 1 tablespoon of diced onion.
5. Drizzle 1 teaspoon of extra virgin olive oil over the mixture and add a pinch of salt and black pepper, then stir gently to distribute everything evenly.
6. Place the mug in the microwave and cook on high power for 1 minute.
7. After 1 minute, check the omelet—it should look mostly set but might be slightly wet on top; if needed, cook in additional 15-second intervals, up to 30 seconds more, until fully set and no liquid egg remains (tip: avoid overcooking to keep it tender).
8. Carefully remove the mug from the microwave using an oven mitt, as it will be hot—let it sit for 30 seconds to finish cooking from residual heat (tip: this resting step helps the omelet firm up without drying out).
9. Run a butter knife around the edges of the mug to loosen the omelet, then tip it onto a plate or eat directly from the mug.
Really, this omelet turns out surprisingly fluffy with a tender, moist center that’s packed with savory cheese and crisp veggies. I love how the edges get just slightly firm, giving it a delightful texture contrast. For a fun twist, top it with a dollop of salsa or avocado slices, or crumble some cooked bacon over the top—it’s endlessly customizable based on what’s in your fridge!
Hasty Thai Peanut Noodles

Busy weeknights call for quick, satisfying meals, and these Hasty Thai Peanut Noodles have become my go-to solution when I’m craving something flavorful without spending hours in the kitchen. I first whipped this up during a chaotic Tuesday after work when my pantry was looking sparse, and now it’s a regular in my rotation—it’s that good!
Serving: 4 | Pre Time: 10 minutes | Cooking Time: 15 minutes
Ingredients
– 8 ounces of dried rice noodles (I love the thin ones for this—they soak up the sauce beautifully)
– 1 tablespoon of vegetable oil (my trusty bottle is always on the counter)
– 1 pound of boneless, skinless chicken breast, thinly sliced (I sometimes swap in tofu for a veggie version)
– 3 cloves of garlic, minced (fresh is key here—I keep a jar in the fridge for convenience)
– 1/2 cup of creamy peanut butter (I prefer the natural kind, stirred well)
– 1/4 cup of soy sauce (low-sodium is my go-to to control saltiness)
– 2 tablespoons of honey (local honey adds a lovely floral note)
– 1 tablespoon of rice vinegar (it balances the richness perfectly)
– 1/4 teaspoon of red pepper flakes (adjust to your heat preference—I like a mild kick)
– 1/4 cup of water (to thin the sauce as needed)
– 2 green onions, thinly sliced (for a fresh garnish I always have on hand)
– 1/4 cup of chopped peanuts (for that extra crunch I adore)
Instructions
1. Place the dried rice noodles in a large bowl and cover them with hot water from the tap, letting them soak for 8–10 minutes until tender but still slightly firm, then drain and set aside—this prevents them from overcooking later.
2. Heat the vegetable oil in a large skillet or wok over medium-high heat until it shimmers, about 1 minute.
3. Add the thinly sliced chicken breast to the skillet and cook for 5–7 minutes, stirring occasionally, until the pieces are no longer pink and have a light golden color on the edges.
4. Stir in the minced garlic and cook for 1 minute until fragrant, being careful not to let it burn—this builds a flavorful base.
5. In a small bowl, whisk together the creamy peanut butter, soy sauce, honey, rice vinegar, red pepper flakes, and water until smooth and well combined.
6. Pour the peanut sauce mixture into the skillet with the chicken and garlic, reducing the heat to medium-low.
7. Simmer the sauce for 2–3 minutes, stirring constantly, until it thickens slightly and coats the back of a spoon—this ensures it clings to the noodles nicely.
8. Add the drained rice noodles to the skillet and toss everything together for 1–2 minutes until the noodles are evenly coated and heated through.
9. Remove the skillet from the heat and garnish with the thinly sliced green onions and chopped peanuts.
The noodles come out with a silky, clingy sauce that’s both nutty and subtly sweet, while the chicken stays tender and juicy. I love serving this straight from the skillet with extra peanuts on top for crunch, and it’s even better the next day as leftovers—if there are any!
Simple Grilled Cheese with Tomato

Finally, after a long day of chasing deadlines and answering emails, I find myself craving the ultimate comfort food—something simple, warm, and nostalgic. That’s when I turn to my go-to grilled cheese with tomato, a dish that reminds me of rainy afternoons at my grandma’s house, where the smell of buttery toast filled her cozy kitchen. It’s the perfect quick fix that always hits the spot, no matter the season.
Serving: 1 | Pre Time: 5 minutes | Cooking Time: 10 minutes
Ingredients
– 2 slices of sourdough bread (I love the tangy flavor and sturdy texture—it holds up beautifully to grilling)
– 2 tablespoons unsalted butter, softened (I always keep mine at room temp for easy spreading)
– 2 slices of sharp cheddar cheese (about 2 ounces total; I prefer the bold, melty quality of sharp varieties)
– 1 small tomato, thinly sliced (I grab a ripe Roma tomato from my garden when possible for that fresh, juicy bite)
Instructions
1. Place a medium skillet on the stove over medium-low heat to preheat for 2 minutes, ensuring even cooking without burning.
2. Spread 1 tablespoon of softened unsalted butter evenly on one side of each slice of sourdough bread, covering the entire surface for a golden crust.
3. Lay one slice of sourdough bread, buttered-side down, in the preheated skillet.
4. Place 2 slices of sharp cheddar cheese on top of the bread in the skillet, arranging them to cover the surface evenly for consistent melting.
5. Arrange thinly sliced tomato pieces over the cheese, spreading them out to avoid soggy spots.
6. Top with the second slice of sourdough bread, buttered-side facing up.
7. Cook the sandwich for 3-4 minutes, pressing down gently with a spatula, until the bottom is golden brown and crispy.
8. Carefully flip the sandwich using the spatula, cooking for another 3-4 minutes until the second side is golden brown and the cheese is fully melted, bubbling slightly at the edges.
9. Remove the sandwich from the skillet and let it rest on a cutting board for 1 minute to set the cheese and prevent burns.
10. Slice the grilled cheese diagonally with a sharp knife for easier handling and presentation.
Looking at that gooey, melted cheese oozing out with each bite, paired with the juicy tomato that adds a bright, acidic contrast, makes this simple dish feel like a gourmet treat. I sometimes serve it with a side of pickles or a light salad for a complete meal, but honestly, it’s perfect on its own—crispy, comforting, and utterly satisfying.
Conclusion
Delicious, quick lunches are within reach! This roundup proves that busy days don’t mean boring meals. We hope these 31 simple recipes inspire your kitchen. Give one a try this week, and let us know your favorite in the comments below. If you found this helpful, please share it on Pinterest to help other busy cooks!